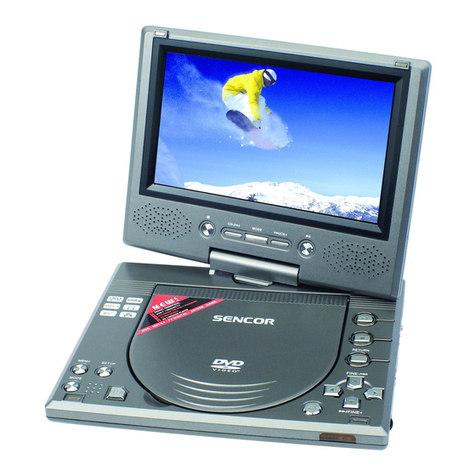
Sencor SPV 8012M4 User manual

SPV 8012M4
SPV 8013M4
PORTABLE DVD PLAYER
PŘENOSNÝ DVD PŘEHRÁVAČ
PRENOSNÝ DVD PREHRÁVAČ
HORDOZHATÓ DVD LEJÁTSZÓ
PRZENOŚNY ODTWARZACZ DVD
ПОРТАТИВНЫЙ DVD ПЛЕЕР
EN CZ SK HU PL RU
INSTRUCTION MANUAL
NÁVOD K OBSLUZE
NÁVOD NA OBSLUHU
FELHASZNÁLÓI KÉZIKÖNYV
INSTRUKCJA OBSŁUGI
РУКОВОДСТВО ПОЛЬЗОВАТЕЛЯ

English
2
CONTENTS
1. Important safety conditions............................................................................................................................................... 3
2. Description of the device................................................................................................................................................... 7
3. Remote control ................................................................................................................................................................... 9
4. Basic controls....................................................................................................................................................................11
4.1. Turning the device on and off ......................................................................................................................................11
4.2. Playing DVD discs .......................................................................................................................................................11
4.3. Playback from USB devices ........................................................................................................................................11
4.4. Playback from card readers........................................................................................................................................ 12
4.5. Audio/Video output...................................................................................................................................................... 12
4.6. Using multimedia functions......................................................................................................................................... 12
5. System setup .................................................................................................................................................................... 14
5.1. System setup .............................................................................................................................................................. 14
5.2. Basic functions............................................................................................................................................................ 15
6. DVB-T reception................................................................................................................................................................ 16
6.1. Setting up the DTV channel search............................................................................................................................ 16
6.2. Menu program ............................................................................................................................................................ 16
6.3. Editing programs ........................................................................................................................................................ 17
6.4. Parental lock............................................................................................................................................................... 18
6.5. Setting up digital audio ............................................................................................................................................... 19
6.6. Setting up video output............................................................................................................................................... 19
6.7. USB multimedia function ............................................................................................................................................ 19
7. Troubleshooting................................................................................................................................................................ 23
8. Technical specifications .................................................................................................................................................. 24

English
3
1. Important safety conditions
If you want to use this product correctly, carefully read this user's manual and store it for future reference. If you give (sell) the
device to somebody, please also include all the documentation together with this device, including this user's manual.
This symbol indicates that there is dangerous voltage inside this device, which presents a risk of injury by
electrical shock.
This symbol indicates important operating or repair instructions in the device's documentation.
General safety instructions
• Read this user's manual. Follow the instructions contained in this user's manual.
• Heed all warnings.
• Adhere to all instructions.
• Use only accessories determined by the manufacturer.
• An open flame must not be placed on the device, e.g. burning candle.
• Use the device in a temperate climate zone.
• Neither the manufacturer nor the vendor of the device under no condition takes responsibility for any direct or indirect
damages caused by not adhering to instructions for installation, set-up, use, repair or cleaning of this device as described
in this user's manual.
• Protect the device against being knocked, dropped, hit, shaken and against vibrations, humidity and dust.
• Before allowing children to use the device, they must be appropriately to their age, informed about the correct and safe
use of the player.
Installation, operation
• Install the device according to the instructions in the user's manual.
• Leave free space on all sides of the device, necessary for proper air circulation. This removes the heat created during
operation. Covering the ventilation openings of the device's case creates a risk of overheating or damaging the device. It
is necessary to ensure that the ventilation openings are not blocked, e.g. by a newspaper, table cloth, curtain, etc. Follow
the installation instructions in the user's manual.
• Do not install the device in direct sunlight or near sources of heat, such as heaters, heat exchangers, stoves or other
appliances (including amplifiers) producing heat. High temperatures significantly reduce the lifetime of electronic
components in the device. Do not use or leave the device in the vicinity of an open fire.
• The device must not be exposed to dripping or running water and objects filled with water must not be placed on it, e.g.
vases. Protect the device against rain, spray or contact with any other liquid, do not leave or install the device outdoors.
Do not use the device outdoors. Not adhering to these instructions creates a risk of electrical shock or fire hazard.
• Do not use this device near water.
• Do not try to circumvent the polarised power plug safety feature. If the power plug cannot be inserted into your power
socket, contact a qualified electrician to replace the old type of power socket.
• Before connecting the device into a power socket, check that the voltage in your power socket corresponds to the voltage
on the rating label of the device or on its power adapter.
• Make sure that the power cord is not stepped on or compressed, particularly near the power plug, power socket and at
the point where it exits the device or the adapter. The power plug (adapter) is used as a disconnection device and must
be easily accessible.
• Remember to always disconnect the power plug (adapter) from the power socket before disconnecting the power cable
from the rear side of the device.
• Disconnect the device from the power socket during storms or if you will not be using it for a longer time.
• Avoid moving the device from a cold environment to a warm one or vice versa, or when using the device in a very humid
environment. Air humidity may condense on some components inside the case of the device and the device may stop
working temporarily. If this occurs leave the device in a warm and well ventilated place and wait 1 – 2 hours until the
moisture evaporates and the device can once more be used as usual. Take care especially during the first use of the
player immediately after its purchase during a cold season.
• To recharge the battery pack that is integrated into the device, place the device in a well ventilated place and at
a sufficient distance from easily flammable materials.
• Neither the manufacturer nor the vendor of the device under no condition takes responsibility for any direct or indirect
damages caused by not adhering to instructions for installation, setup, use, repair or cleaning of this device as described
in this user's manual.
• Protect the device against being knocked, dropped, hit, shaken and against vibrations, humidity and dust.

English
4
Repairs and maintenance
• To prevent risk of injury through electric shock or the creation of a fire, do not take the device out of the case - there are
no parts inside the case repairable or adjustable by the user without relevant equipment and qualifications. Should the
device require adjustment or repair, contact a professional service centre.
•
In the case of any unusual events occurring during the use of the device, e.g. if there is a distinct smell of burning insulation or
smoke comes out of the device, immediately turn off the device, disconnect the device from the power source and do not use
the device until you have received the results of the inspection performed by the employees of the professional service centre.
• Have all repairs carried out by qualified personnel. Repairs are necessary if the device has been damaged in any way,
for example if the power cord is damaged, liquid was poured on the device, foreign objects have entered the device, the
device has been exposed to rain or moisture, if the device is not working as usual or if it has fallen.
• Before cleaning, carrying, taking discs out of the device or other maintenance, disconnect the plug (adapter) from the
power socket.
• Clean the device only with a dry cloth.
• For cleaning do not use petrol, thinners or any other solvents or use any abrasive cleaning agents, steel wool or any
sponges with steel wool.
Remote control and batteries
•
Do not expose the remote control or the batteries to direct sunlight or sources of heat, such as heaters, heat exchangers,
stoves or other appliances (including amplifiers) that produce heat. Do not use or leave the device in the vicinity of an open fire.
• Neither the remote control nor the batteries may be exposed to dripping or running water and objects filled with water
must not be placed on them, e.g. vases. Protect against exposure to rain, spraying or pouring of any kind of liquid. Do not
use outdoors. Not following these instructions creates a danger of damage to the remote control or the battery.
• Do not use this device near water.
• It is necessary to pay attention to the environmental impact aspects of battery disposal.
• The incorrect use of batteries may cause the leakage of the electrolyte and corrosion. To ensure that the remote control
works correctly, proceed according to the instructions below:
‒Do not insert the batteries in the wrong polarity orientation.
‒Do not charge, heat, open or short circuit the batteries.
‒Do not throw batteries into a fire.
‒Do not leave discharged batteries in the remote control.
‒Do not combine various types of batteries or new and old batteries.
‒If you will not be using the remote control for a longer period of time, remove the batteries to prevent potential
damage caused by a subsequent battery leakage.
‒If the remote control is not working correctly or its operational range is reduced, change all batteries for new ones.
‒If electrolyte leaks out from the batteries, have the remote control cleaned at an authorised service centre.
Attention: To prevent a fire hazard or injury by electrical shock, do not expose this device to rain or humidity.
Attention: Batteries must not be exposed to excessive heat, for example sunlight, fire, etc.
Supplement to the LCD TV user's manual
Measures to take when a static image is displayed; red/blue/green pixels on the screen
A static image can permanently damage the display part of the television
•Do not leave a static image on the LCD screen for
longer than 2 hours, because this could damage the
screen. This type of damage is known as "screen
burn-in".
•Similar damage to the LCD screen can be caused by
a statically located TV channel logo.
•Watching television in 4:3, 16:9 formats or similar (formats not covering the entire area of the screen) for a long time may
leave marks on the right or left side, or possibly in the middle of the picture as a result of the differences in light emission.
Similar damage may also occur when watching a DVD or playing games.
•The display of a static image from video games or computers for an extended period of time may cause a partial effect of
a "persistent image". To prevent this effect from occurring, lower the brightness and contrast when displaying a static picture.
•Damage to the screen resulting from the above mentioned causes is not covered by the warranty!
Red/blue/green/black pixels may appear on the screen
•This is a characteristic feature of liquid crystal displays and does not represent a problem. LCD screens are
manufactured using a very precise technology in order to achieve a very fine picture resolution. From time to time several
inactive pixels may appear on the screen as a permanently red, blue, green or black pixel (up to 0.001% of the total
number of pixels on the screen). This does not in any way affect the features and performance of your television.
Notes on the USB connector:
USB flash drives must be inserted into the device directly. To prevent data transmission failure or its interference do not use USB
English
5
extension cables. Electrostatic discharges may cause the device to malfunction. In such an event the user must restart the device.
Before using a USB flash drive test its ability to communicate with the device and its data reading and writing speed.
To achieve maximum reading speed we recommend that you keep disc space defragmented. Use the FAT32 file system,
a single partition, without protection. If reading and writing on the USB flash disk is not continuous, undesirable effects may
occur such as partial image loss (distortions/checkering effects) or complete image loss, audio defects, and in extreme
cases the operation will be stopped. Unexpected behaviour of the connected flash drive, or the presence of viruses or other
damaging software may cause the functions of the device to stop working, necessitating a restart.
The USB connector is the standard type and is not able to power a USB device with a high power usage (e.g. hard disk drives
HDD). Use devices with independent power supplies and power them from their own power supplies.
The device was designed to achieve maximum compatibility with flash drives. With respect to the variety of devices on the
market it is not possible to guarantee compatibility with every USB device. In the event of difficulties try formatting the flash
drive directly in the appliance. If problems persist, use a different flash drive.
Due to the wide range of SD/MMC/MS cards / USB devices available on the market it is not possible to guarantee the
compatibility of the device with all SD/MMC/MS cards / USB devices.
This product is equipped with copyright protection technology, which is protected by USA patents and other
intellectual property laws of ROVI. Reverse engineering and disassembly are forbidden.
Notes about discs
Handling discs
• Do not touch the surface of the disc where there is no label and where the recording is stored. When handling the disc,
hold it by its edges, or by the edge and the centre disc opening. Do not stick labels on to the discs - to label a disc use
soft tip markers specially designed for this purpose, mark the side of the disc with the label.
•
After playback return the disc into its cover, where it is protected against scratching. Do not leave discs in direct sunlight or
near a heat source, do not leave discs in closed motor vehicles parked in direct sunlight. Risk of deformation of the disc.
Cleaning discs
• Fingerprints and dust affect the quality of the image while playing the recording from the disc. To remove this before
playing the disc, clean with a soft lint-free cloth. When cleaning a disc proceed from the centre of the disc directly towards
the edge (not using circular motion).
•
For cleaning, do not use anti-static sprays for vinyl records, petrol, spirits or other solvents or thinners
.
This information informs the user that the player can playback DVD-RW recordings in VR format (Video
Recording).
Notes:
1 Depending on the recording media, recording method (used PC program used for the disc recording) and its finalisation,
it is possible that it will not be possible to play some CD-R or DVD+/-RW/R discs.
2. Do not stick any stickers or labels on either side of the disc (the side with the printed label or the side with the recording).
3.
Use the player to play only circular discs - when playing irregular shaped discs there is a risk of damaging the disc or the player.
4. Some DVD and Video CD playback operations may be intentionally programmed by the producer of the software. This
device plays DVD and Video CD discs according to the disc contents created by the producer of the software and so
some playback functions may not be available, or conversely there may be additional functions available.

English
6
Supported discs
Disc type Marking Contents Size Playback time
DVD DVD Audio + video (moving
pictures)
12CM
About 2 hours
(SS-SL: single sided or single layer discs)
About 4 hours
(DS-SL: double sided or double layer discs)
8CM
About 80 minutes
(SS-SL: double sided or double layer discs)
About 160 minutes
(DS-SL: double sided or double layer discs)
SuperVCD SuperVCD Audio + video (moving
pictures) 12CM About 74 minutes
VCD VCD1.0/2.0 Audio+video (moving
pictures) 8CM About 20 minutes
CD CD Audio 12CM
8CM
About 74 minutes
About 20 minutes
MP3 MP3 Audio 12CM About 74 minutes
Note:
Due to the wide range of DVD, VCD, Super VCD discs available, the playback time here provided may differ from the actual
playback times.
Made under a licence from Dolby Laboratories, Inc. "Dolby", "Pro Logic" and the double D icon are registered trademarks of
Dolby Laboratories, Inc.
Region code
This player is intended for playing DVD video designated by the code for region 2 or ALL (discs designated in
this way can be played by all DVD players). You can find the region code of the disc on its label, the region code
of the player is located on its rear or under side. After inserting a DVD with a different than the above mentioned
region code into the player a message will appear on the screen "Check region Code" and the playback of the
DVD will be rejected.
Serial number of the device
The serial number of the device is unique and unequivocally identifies your device.
Enter the serial number of your device together with other details necessary for the definite identification of your device below.
Serial number: ________________________________________________________________________________________
Date of purchase: _____________________________________________________________________________________

English
7
2. Description of the device
Model SPV 8012M4
1. LCD display
2. Disc drive
3. OPEN disc drive button
4. SOURCE button
5. STOP button
6. Play / pause button
7. Previous/up/CH+ button
8. SETUP button
9. Left / fast rewind button
10. Right / fast forward button
11. OK button
12. MENU button
13. Next/down/CH- button
14. Increase volume VOL+ button
15. MUTE button
16. Decrease volume VOL- button
17. USB socket
18. SD/MMC card slot
19. PHONE jack for connecting headphones
20. AV OUT output jack
21. AV IN input jack
22. Main switch
23. DC IN power supply jack
24. ANT jack for connecting an additional antenna
25. GAME1, GAME2 slot for connecting game control
devices
Note:
When the power supply indicator light is lit green, the device is in operation. When it is lit red, the device is in stand-by mode.
When the indicator light is flashing red, the battery is recharging. When it is lit red, the battery is recharged.

English
8
Model SPV 8013M4
1. LCD display
2. Disc drive
3. OPEN slide button for opening the disc drive
4. MENU button
5. SETUP button
6. MUTE button
7. OK button
8. Previous /up/CH+ button
9. Fast rewind button
10. Fast forward button
11. Next/down/CH- button
12. Play / pause button
13. STOP button
14. Decrease volume VOL- button
15. SOURCE button
16. Increase volume VOL+ button
17. USB socket
18. SD/MMC card slot
19. PHONE jack for connecting headphones
20. AV OUT output jack
21. AV IN input jack
22. Main switch
23. DC IN power supply jack
24. ANT jack for connecting an additional antenna
25. GAME1, GAME2 slot for connecting game control
devices
Note:
When the power supply indicator light is lit green, the device is in operation. When it is lit red, the device is in stand-by mode.
When the indicator light is flashing red, the battery is recharging. When it is lit red, the battery is recharged.

English
9
3. Remote control
1. TV/Radio / Menu/PBC button
2. PVR List button
3. Source button (Source)
4. Left, right, up/CH-, down/CH- button
5. Enter/OK Button (Confirmation)
6. Mute button (Mute the sound)
7. Numerical buttons
8. Title/TTX (Title/teletext) button
9. Return (Return) button
10. Sub-Title (subtitles) button
11. Audio (Sound) button
12. STEP (Stepping) button
13. Slow (Slow playback) button
14. EPG / Pro-gram button
15. OSD / Info button
16. Play/pause, TMS button
17. Setup Button (Settings)
18. Stop / Exit (Exit) button
19. Next button
20. Zoom (zoom) button
21. Previous button
22. Fast forward button
23. Fast rewind button
24. Angle / PVR (Angle / PVR) button
25. Go To (Skip to) button
26. Clear / Recall (Clear/Recall) button
27. FAV (Favourites) button
28. VOL + button
29. VOL – button
30. A-B button
31. Repeat (Repeated playback) button

English
10
Using the remote control
To control the device using the remote control, point the remote control at the device and then press the button with the
required function. The effective range of the remote control is up to about 5 meters with a maximum deviation of +/- 30° from
the perpendicular direction to the reception sensor of the remote control on the front side of the device. The falling capacity of
the batteries gradually reduces the remote control range.
• There must be no solid obstacles in the area between the remote control and the device when the remote control is being
used.
• During standard use the lifetime of batteries in the remote control is about 1 year. When the effective range of the remote
control is substantially reduced or when there are problems with its use, change both the batteries in the remote control.
• If you will not be using the remote control for a longer period of time, take out both batteries - in this way you will prevent
potential damage caused by their leakage.
The batteries must not be exposed to excessive heat, such as direct sun light, fire, etc.
The incorrect use of batteries may cause the leakage of the electrolyte and corrosion. To ensure that the remote control works
correctly, proceed according to the instructions below:
- Do not insert the batteries in the wrong polarity orientation.
- Do not charge, heat, open or short circuit the batteries.
Do not throw batteries into a fire.
- Do not leave discharged batteries in the remote control.
- Do not combine various types of batteries or new and old batteries.
- If you will not be using the remote control for a longer period of time, remove the batteries to prevent potential damage
caused by a subsequent battery leakage.
- If the remote control is not working correctly or its operational range is reduced, change all batteries for new ones.
- If electrolyte leaks out from the batteries, have the remote control cleaned at an authorised service centre.
Note:
Remove the batteries if you will be storing the device or not using it for an extended period of time.

English
11
4. Basic controls
4.1. Turning the device on and off
4.1.1. Turning on the device
Connect the power adapter plug to a power socket, insert the connector into the power supply jack of the device and move the
main switch to the ON position. The device will turn on and the DVD logo will appear.
4.1.2. Turning off the device
Move the main switch to the OFF position and the device will turn off.
4.1.3. Recharging the battery
Connect the power adapter plug to a power socket, insert the connector into the power supply jack of the device and the
built-in battery will be recharged. During the recharging process the recharging indicator light will be lit red. A flashing battery
pack recharge symbol will appear in the bottom right hand corner of the display. The indicator light will turn off as soon as the
battery is recharged.
Note:
There are two methods for recharging the device:
1. Recharging in the off state. Recharging is faster when the device is turned off (about 2 – 3 hours).
2. Recharging in the on state. Recharging is slower when the device is turned on (about 6 – 8 hours).
Note:
You can use the device even without the power adapter. In such a case the recharging indicator light will not be lit.
Nevertheless, it is necessary to regularly check the power level of the battery. When it is almost flat, the device will turn off
automatically and you will not be able to turn it on again. If this happens, connect the power cord plug to a power socket,
insert the connector into the power supply jack of the device and you will again be able to turn on the device and use it.
4.2. Playing DVD discs
1. Turn on the device as described above. Depending on the model, either press the OPEN button or slide the OPEN
button in the direction of the arrow. Insert an appropriate disc into the disc drive. If another disc is already inserted
inside the player, take it out and only then insert the appropriate disc.
2. Check that the disc is properly seated. Close the cover.
Note:
Before first use remove the protective foil and transport lock of the DVD mechanism.
Check that you have chosen the DVD disc playback mode.
4.3. Playback from USB devices
1. In the DVD mode, insert a USB disk into the USB slot on the side of the device.
2. If no disc is inserted, the system will automatically read the USB device and start playback from the first file (as
a rule, an MP3). To select the file type, press TITLE and then select left/right the type.
3. If a disc is inserted inside the device, the system will automatically start playing the disc. So you need to press
the USB/CARD/DISC button, select the USB function and confirm. The device will switch to USB mode and start
playback from the first file (as a rule, an MP3).
4. Press the RETURN button to return to a file in the directory. Use the direction buttons to select the file you wish to
play.
Note:
Check that the disc drive is closed.
Insert USB devices in the correct direction. Do not use brute force as this could damage or destroy the USB and the device.
Via USB you will be able to playback the following files: MP4, MP3, JPG or VCD.
The device supports 4 selected file formats, including music, video (AVI, DivX, Xvid), games and images.

English
12
4.4. Playback from card readers
1. While in DVD mode, insert an appropriate SD / MMC card into the SD / MMC card slot.
2. If no disc is inserted, the system will automatically read the inserted card and start playback from the first file (as
a rule, an MP3). To select the file type, press TITLE and then select left/right the type.
3. If a disc is inserted inside the device, the system will automatically start playing the disc. So you need to press the
USB/CARD/DISC button, select the CARD function and confirm. The device will switch to card reader mode and
start playback from the first file (as a rule, an MP3).
4. Press the RETURN button to return to a file in the directory. Use the direction buttons to select the file you wish to
play.
Note:
Check that the disc drive is closed.
Insert the card in the correct direction. Never the other way around. Do not use brute force as this could damage or destroy
the SD/MMC cards and the device.
Via CARD you will be able to playback the following file types: MP4, MP3, JPG or VCD.
The device supports 4 selected file formats, including music, video (AVI, DivX, Xvid), games and images.
4.5. Audio/Video output
You can connect the device to a TV via an AV cable.
Connection:
White = Left audio
Red = Right audio
Yellow = Video
AV output A/V device
4.6. Using multimedia functions
4.6.1. Selecting a channel
On multi-channel CD or VCD discs press the AUDIO button and select the left channel, right channel or stereo.
4.6.2. Fast playback
Use the fast forward / fast rewind buttons to search for the desired content on the disc.
Each time the button is pressed the speed will change as follows:
2 X →4 X →8 X →20 X
Each time the button is pressed the speed will change as follows:
2 X →4 X →8 X →20 X
Press the play / pause button to resume normal playback.
4.6.3. Repeat playback
You can repeatedly playback a selected A/V file, track or everything. Select one of the following repeat playback modes:
Playback single track: press the REPEAT button repeatedly until "single repeat" appears on the display. The appropriate track
will be played repeatedly.
Repeat one group: press the REPEAT button repeatedly until "repeat disc" appears on the display. The whole group (disc or
directory) will be played back.
Cancelling repeat playback: press the REPEAT button repeatedly until the display is empty.

English
13
4.6.4. Closing a MENU
Press the MENU button to close a menu. Press again to show it again.
4.6.5. Slow-motion playback
During normal playback press the SLOW button on the remote control to enter the slow-motion playback mode. Each time the
button is pressed the mode will change as follows:
1/2 →1/3 →1/4 →1/5 →1/6 →1/7 →normal playback
4.6.6. Searching for music / time
When a disc is inserted, press the GOTO button and use the direction buttons to select one of the following options:
1. Title: show the current title, playback of the selected title number
2. Section: show between sections; playback of the selected chapter number
3. Time: show current playback time, go to the selected time
After selecting an option, press the ENTER button to confirm and exit the menu.
4.6.7 ZOOM function
You will be able to increase or decrease the size of the image on the screen.
During playback press the b button and repeatedly press the ZOOM button to select the appropriate mode.
Zoom 2 →Zoom 3 →Zoom 4 →Zoom 1/2 →Zoom 1/3 →Zoom 1/4 →normal display
4.6.8. Display
Press the INFO button to show information about the disc being played, such as: topics or chapter times. The information
shown depends on the data stored on the inserted disc.
4.6.9. Programmed playback
Press the PROGRAM button to enter the programmed playback menu. Here you will be able to select your own disc playback
sequence.
After finishing, press the play/pause button or the ENTER button and the device will start playback according to the set
sequence.
If you want to cancel programmed playback, enter the programmed playback menu and select Cancel (Cancel). Press the
confirmation button or press the STOP button twice.

English
14
5. System settings
Press the SETUP button to enter the settings menu. After completing setup, press the SETUP button to return to the previous
menu.
Use the left / right buttons to navigate / select in a menu.
The up / down buttons are used to move up / down and to go to a selected item.
Press the ENTER/OK button to confirm.
5.1. System settings
Language settings (Language)
Select a language for the OSD: English, Czech, Slovak and others.
OSD display duration (OSD duration)
5.1.1. Aspect ratio
Select the relevant side aspect ratio for the content being played back.
4:3 panorama – a wide-angle picture will be shown on the entire screen but certain parts may automatically be removed.
4:3 mail – a wide-angle picture will be shown on the entire screen but in the top and bottom parts of the screen there will be
black stripes.
16:9 wide-angle – a wide-angle picture will be shown on the entire screen without limitations.
Reset: Restore factory settings.
5.1.2. Picture
Picture mode: Standard (Standard), Vivid (Vivid), User (User).
Brightness
Contrast
Saturation
Sharpness
Hue
5.1.3. Player settings
TV system: NTSC, PAL and AUTO (automatic).
Reset
Screensaver
Password
Rating
1. KID SAFE
2. G
3. PG
4. PG13
5. PG-R
6. R
7. NC-17
8. ADULT (adult, without restrictions)
Mixing (AUDIO output): select from: LT/RT, STEREO, VSS.

English
15
5.2. Basic functions
Check that the antenna and the power supply are correctly connected.
5.2.1. Selecting a source
Turn on the device and press the SOURCE button on the remote control. Use the up/down buttons to select a source and
press the ENTER or OK button to confirm.
5.2.2. Display
Press the DISPLAY button to show information about the current signal source.
5.2.3. MUTE button
Press the MUTE button in any mode to immediately silence the system. Press again to renew the initial volume.
5.2.4. Numerical buttons
Select a TV channel or music file.
5.2.5. Setting the volume
Set the volume using the VOL+/- buttons.
5.2.6. Changing channels
In the TV reception mode use the CH+/- buttons to change between channels.
5.2.7. Game function
Insert a disc with games and connect a joystick. Select the appropriate game.

English
16
6. DVB-T reception
6.1. Setting up the DTV channel search
Set the country of installation before the channel search.
Press the SOURCE button and select the DTV mode.
1. Press the SETUP button to make a selection from the following menu:
2. Use the up / down buttons to select the automatic search or manual search.
Note:
In the automatic search mode, press the MENU button to skip to the next frequency. Press the EXIT button to exit the search
menu.
6.2. Program menu
1. Press the SETUP button to display the following menu:

English
17
2. Select EPG or press the EPG button on the remote control to go directly to the EPG menu.
Note:
The EPG menu shows a 7-day TV program. The provided EPG information is the responsibility of the broadcaster of the given
channel.
3. In the EPG menu, press the OK button and select "view and recording" (see picture above).
4. To playback the recording made using the PVR function, press the SETUP button and select the USB menu. Enter
the item Multimedia and then select PVR.
6.3. Program edit
1. Press the SETUP button on the remote control and select the OSD menu:

English
18
2. Select the option program edit and enter the menu. Use the left/right buttons to switch between the TV and radio
mode. According to the displayed symbols, set the function film / skip / lock / delete / favourites / rename.
3. Enter the program edit menu and press the RECALL button to rename the title. Press the ENTER/OK button to
confirm and return.
4. Enter the program edit menu and set the channel lock. This channel will be blocked and a valid password will be
required to view it.
6.4. Parental Guidance
Press the SETUP button on the remote control and select the System menu. Here, select parental guidance and set the
rating.

English
19
6.5. Digital audio settings
Press the SETUP button on the remote control and select the Options item and then Digital audio. Use the left/right buttons on
the remote control to switch between PCM / RAW / off.
Note:
PCM mode: all audio outputs going through the loudspeakers or SPDIF are in PCM format
RAW mode: only AC3 and DTS output formats will go to SPDIF.
Off mode – audio output will only go through the loudspeakers, no audio will go to SPDIF.
6.6. Setting up video output
Press the SETUP button on the remote control and select Picture. Here you can setup the side aspect ratio, resolution, TV
format, video output.
Note:
Video output can only be switched for a SCART connection to an external TV.
6.7. USB multimedia function
1. Press the SETUP button on the remote control and select the Multimedia and A/V source:

English
20
2.
Select USB and enter the photo menu (Photo) to set the slide time, slide mode and the side aspect ratio.
3. Select USB and enter the movie menu (Movie) and then set the subtitle font, background and font colour.
4. Select USB and enter the PVR menu. Here, check information about the storage location, set the timeshift size or
format the storage device.
This manual suits for next models
1
Table of contents
Other Sencor Portable DVD Player manuals

Sencor
Sencor SPV 2717 User manual

Sencor
Sencor SPV 7722M4 User manual

Sencor
Sencor SPV 7910T User manual

Sencor
Sencor SPV 7767DUAL User manual

Sencor
Sencor SPV 7707T User manual

Sencor
Sencor SPV 2918 User manual

Sencor
Sencor SPV 2720 User manual

Sencor
Sencor SPV 7912T User manual

Sencor
Sencor SPV 7766TD User manual

Sencor
Sencor SPV 7768TD User manual