SENKO SENel User manual


SENel—Electric Boiler 2
Dear customer, thank you for choosing a SENKO electrical boiler !
This product was designed and manufactured to its minutest details in
order to fulfill your every need for functionality and safety.
This Instruction manual will teach you to operate your cooker properly,
so please read the manual carefully before using the cooker.
Senko management

SENel—Electric Boiler 3
Table of contents
1.
CAUTION AND SAFETY
.........................................................................................................................4
2. TECHNICAL FEATURES .......................................................................................................................5
2.1. EXTERIOR DIMENSIONS IN mm ....................................................................................................5
3. SET UP....................................................................................................................................................6
3.1. ASSEMBLY .......................................................................................................................................6
3.1.1 ASSEMBLY REQUIREMENTS ................................................................................................... 6
3.2 SET UP PROCEDURE .......................................................................................................................6
3.3 PLUGINS ............................................................................................................................................7
3.3.1 INPUT AND OUTPUT HEATING PLUGIN.................................................................................. 7
3.3.2 SAFETY VALVE PLUGIN ........................................................................................................... 7
3.3.3 CONNCETING THE MAINS CABLE .......................................................................................... 8
3.3.4 GROUND PLUGIN....................................................................................................................... 8
3.3.5 MAIN BOLIER COMPONENTS .................................................................................................. 9
3.3.6 SINGLE PHASE NETWORK PLUGIN........................................................................................ 9
4. PRODUCT HANDLING.........................................................................................................................10
4.1. USER INTERFACE .........................................................................................................................10
4.1.1 MAIN MENU............................................................................................................................... 11
4.1.2 PARAMETER CHANGE............................................................................................................ 11
4.1.3 DAY/ HOUR CHANGE .............................................................................................................. 11
4.1.4 PUMP START TEMPERATURE SETUP .................................................................................. 12
4.1.5 PARAMETER CHANGE CODE INPUT .................................................................................... 12
4.1.6 PARAMETER CHANGE............................................................................................................ 12
4.1.7 HEATING SECTION CONTROL ............................................................................................... 12
4.1.8 SYSTEM OPERATION MODE CHANGE ................................................................................. 13
4.2 PRODUCT OPERATION..................................................................................................................15
4.2.1 CLOSET-LIKE SHEETING........................................................................................................ 15
4.2.2 START UP REQUIREMENTS ................................................................................................... 15
4.2.3 STARTING UP THE PRODUCT................................................................................................ 15
4.2.4 INITIAL HEATING TEMPERATURE SETUP ........................................................................... 16
4.2.5 PRESSURE CHECK.................................................................................................................. 16
5.
TROUBLESHOOTING
...........................................................................................................................
17
6.
MAINTAINANCE
....................................................................................................................................
17
7.
FREEZING PROTECTION
.....................................................................................................................
18
8.
ADVANCED FEATURES
.......................................................................................................................
18
8.1 SYSTEM POWER MANAGEMENT..................................................................................................18
8.2 SANITARY PREPARATION DEVICES ............................................................................................18
8.3 ADJUSTING HEATING/ SANITARY WATER MODES ...................................................................20
8.4 WIFI CONTROL....................................................................................................... 27
WARRANTY .................................................................................................................. 38

SENel—Electric Boiler 4
1. CAUTION AND SAFETY
SENKO electric boiler is designed in accordance to all EN 60335-1 safety regulations.
Great care has been put into designing every component keeping the customer and
the worker safe from potential harm.
Ourusage, READ the instruction manual THOROUGHLY.
Before making any action, DISCONNECT the boiler from all electrical outlets.
Pay special attention to the electrical components, especially to bare wiring
which must NOT exposed in order to eliminate direct contact
Do NOT remove, bypass or block safety devices
Do NOT modify safety devices
DO NOT remove, destroy or remove seals on components
Do NOT make modications to: product water and electrical outlets,
Safety valves Output valves
1 ) 2) 3)
For safe and opmal operaon of the device, the following devices
are required, which must be provided and installed by an authorized
service technician.
1 - magnec heang circuit (impurity)
2 and 3 - placed at the inlet of cold water into the boiler, thus preven-
ng the entry of stone and other impuries into the heang circuit as
well as the domesc hot water circuit
1 - magnec lter
2 - stone braker
3 - sanitary water lter

SENel—Electric Boiler 5
2. TECHNICAL FEATURES
Power
(kW) Current (A) Min heater
crossecon (mm2)Fuse type Fid switch
type
Fuse current
[A]
68,7 10 5 x 2,5 B10-3p 25/0,03
913,1 16 5 x 2,5 B16-3p 25/0,03
12 17,5 25 5 x 4 B25-3p 25/0,03
15 21,7 5 x 4 b25 3p 25/0,0325
18 26,1 5 x 4 b32 3p 32/0,0332
22,5 32,6 5 x 6 c40 3p 40/0,0340
24 34,7 5 x 6 c40 3p 40/0,0340
30 43,4 5 x 10 c50 3p 63/0,0350
In case of non-existent or non-instaled safety equipment, HIGH RISK of explosion
which can cause serious injury or death
NEVER maintain or repair the product by yourself, contact the SENKO service
center
In case of freezing, make sure the system stays operational. If you do not
want the system operational, contact the SENKO service center to empty the
system
Regularly monitor the system pressure
In case of non-existent or non-instaled safety equipment, HIGH RISK of
explosion which can cause serious injury or death
NEVER maintain or repair the product by yourself, contact the SENKO service
center
In case of freezing, make sure the system stays operational. If you do not
want the system operational, contact the SENKO service center to empty the
system
Regularly monitor the system pressure

SENel—Electric Boiler 6
3. SETUP
A xed setup has to be used in order to set the device in operation with the ability to
cut o power from the device. This can be achieved with an automatic safety fuse or
switch or any other method in accordance with local safety regulations.
If the boiler is not operational during the winter, there is a risk of freezing. In that
case, ll the system with a special ant-freeze liquid for central heating systems
Recommended system pressure is 1,5 bar and the maximum pressure is 2 bar.
2.1. EXTERIOR DIMENSIONS IN mm
Expansion chamber vollume [L] 6
Max chamber operating pressure
[bar] 3
Factory overpressure [bar] 1
Max central heating height [m] 4
Expansion chamber eective capacity
[L] 3
Max heating system pressure [bar] 3

SENel—Electric Boiler 7
3.1.1. Assembly requirements
3.2. SETUP PROCEDURE
3.3. PLUGINS
The bolier is considered a high-power device and thus has to use xed electrical
installations. By using xed electrical installations, a method to cut power from the
device has to be available. This can be achieved with an automatic safety fuse or
switch or any other method in accordance with local safety regulations.
3.3.1. Input and output heating plugin
3.1. ASSEMBLY
The selected location has to ensure enough space for boiler maintainance and
minimal air ow. The boiler can be set up in any room in accordance to local laws and
regulations for bathroom setups. The boiler has to be set up to a at, perpendicular
wall that has to be riggid enough to sustain the weight of the boiler.
Important: two people for the setup are HIGHLY RECOMMENDED!
Attach the wall suspension using wall dowel plugs included with the device. Lift the
boiler above the wall suspension, set it along the wall and put it onto the wall
suspension.
Note: If the boiler is mounted on a wooden wall, be sure to pay attention to the
weight of the boiler and use appropriate reinforcement methods in accordance to
local safety regulations.
Return valve
(cold water)
Start valve
(warm water)

SENel—Electric Boiler 8
3.3.3. Connecting the mains cable
Note:
Before working on the boiler, cut the power and secure from accidental start.
The bolier is considered a high-power device and thus has to use xed electrical
installations. By using xed electrical installations, a method to cut power from the
device has to be available. This can be achieved with an automatic safety fuse or
switch or any other method in accordance with local safety regulations. The device
has to be grounded!!
Note:
The wire has to be attached to the underside of the boiler with a special
attachment. All wires in the electrical plugin space have to be tightened up.
Ground
Zero
Phase
Phase
Phase
3.3.2. Boiler outlets

SENel—Electric Boiler 9
Ground the boiler rst before doing any other action.
Ground must never be of a smaller crossection than all other inputs.
Please check that all the wires are properly secured!
3.3.4. Ground plugin
3.3.5. Main boiler components
De-air pot
Warm water sonde
Expansion tank
Tank
Composite pump
Return valve
(cold water)
Start valve
(warm water)
Extra PCB (15kW or
above
LED PSU
Main PCB
Clamps
Heating unit
Switch
In-valve port

SENel—Electric Boiler 10
4. PRODUCT HANDLING
UP-04 display
The display is a singular module with a graphics display and four buttons.
No Unipel UP-04
1„OK“ button
2„Up“ button
3„Dolje“ button
4ON/OFF button
5Display
3.3.6. Single phase network plugin
Low-power devices are connected to the single phase network (6 & 9 kW)
In that case, connect via bypass.

SENel—Electric Boiler 11
4.1.1. Main menu
1– Select simultaniously
plus and minus buttons
2-Select „key“ icon.
4.1.2. Parameter change
1
2
3
4
6
5
1. Heating temperature settings
2. Parameter settings
3. Language options
4.Pump start temperature settings
5. Mode settings (summer, winter..)
6. Code input
4.1. USER INTERFACE

SENel—Electric Boiler 12
4.1.2.2 Electrical circuit

SENel—Electric Boiler 13
4.1.2.3 Electrical circuit /combi

SENel—Electric Boiler 14
1– Select simultaniously plus and
minus buttons
2– select „pump“ icon
3– setup
4.1.4. Pump start temperature setup
1– Select simultaniously plus and
minus buttons
2– Select „lock“ icon
4.1.5. Parameter change code input
1– Select simultaniously
plus and minus buttons
2– select „key“ icon.
4.1.6. Parameter change
4.1.3. Day/ hour change
weekday.
The selected value will icker; select the
desired value with the „plus“ and
„minus“ buttons and conrm by
pressing „OK“.
Press the „OK“ button two times to
select the hour (h) then again the „OK“
button to select minutes (min).
Press the „OK“ button again to select
the

SENel—Electric Boiler 15
1– Select simultaniously plus and
minus buttons
2- Select „key“ icon.
3– Input parameter „30“
4.1.7. Heating section control
4.1.8. System operation mode change
Please make sure all settings match exactly installed heating systems. This is
very important for correct operation of all logics and priorities used.
To maximize exibility if possible use two separate pumps for heating and hot water
supply (P2).
MODE Description
►SUMMER
Selected element is „SUMMER”. Press ОК to
conrm.
The symbol „►” shows which the selected season – in
this case „SUMMER”.
WINTER
AUTO ANTI ICE
STOP ROOM TERM.
► ►DHW=P2/
EXIT
Operation during season „ SUMMER” :
System operates according to following notes:
Boiler temperature changes with respect to DHW’s temperature settings.
Room thermostat is ignored
Both temperatures of DHW and boiler determine the conditions for boiler
ignition/extinction.
If DHW mode is selected as “P2”, the main pump (P1) will not be activated, only
P2 is activates
If DHW mode is selected as valve ” ” , the main pump (P1) will be activated
together with P2. It is necessary to manually cut the circulation for heating circuit
MODE Description
SUMMER
Selected element is „WINTER”. Press ОК to conrm
The symbol „►” shows which the selected season – in
this case „WINTER”.
►WINTER
AUTO ANTI ICE
STOP ROOM TERM.
► ►DHW=P2/
EXIT

SENel—Electric Boiler 16
If DHW tank temperature reaches DHW set value and room temperature is ne
(ROOM THERMOSTAT is OFF) – the boiler is extinguish no matter of boiler’s tem-
perature
If Room Thermostat mode is selected as “STOP ROOM TERM.”
systems’s operation is according to room temperature (ROOM THERMOST’S
STATE) and temperature setting of boiler.
MODE Opis
►SUMMER Selected element is – „ROOM TERMOSTAT”. Press ОК to
change this function operation state
„STOP/TANK+” – the function is selected
Set to :
„STOP” to control by priority by external room thermostat
„TANK+” to combine the operation of external room thermostat
and sanitary water tank temperature .
WINTER
AUTO ANTI ICE
STOP ROOM TERM.
► ►DHW=P2/
EXIT
MODE Description
►SUMMER Selected element is – „ANTI ICE”. Press ОК to change this
function operation state
„AUTO/OFF” – the function is selected
Set to „AUTO” to activate anti ice function
Set to „OFF” to deactivate anti ice function
* Function: Automatic ignition of system if temperature
readed is < 5’С
WINTER
AUTO ANTI ICE
STOP ROOMTERM.
► ►DHW=P2/
EXIT
* Sets systems operation and relations between temperatures of boiler, sanitary tank and room thermostat
MODE Opis
►SUMMER Selected element is -”Type of DHW output”. Press OK to
change this function operation state
“► ►“ - the function is selected
Set to: “P2” if two pumps are available (P1 for circulation of
heating and P2 for DHW tank”.
“► ►” systems with only one pump.
WINTER
AUTO ANTI ICE
STOP ROOM TERM.
► ►DHW=P2/
EXIT
Operation during season „ WINTER” :
System operates according to following notes:
Room thermostat input is used to control boiler operation
If Room Thermostat mode is selected as “TANK+ROOM TERM.”
If DHW tank temperature goes below the DHW set value and boiler temperature
is not sucient and boiler is extinguished a new ignition is initiated no matter of
room thermostat’s state.

SENel—Electric Boiler 17
4.2. PRODUCT OPERATION
4.2.1. Closet-like sheeting
4.2.2. Start up requirement
4.2.3. Starting up the product
The sheeting is subject to special regulations. If you want to envelop the boiler with
sheeting, contact the SENKO service center. NEVER do it yourself.
Start the product ONLY when the doors are shut and secured with screws.
Check if power is available to the product
The product is ON immediately when connected. The display shows the actual
initial heating temperature
Note:
In order for the anti freeze and surveilance systems stay active, it is necessary to turn
on and o the device via the optional regulation device
Consult your SENKO service center.
If you set DHW output controls a pump (P2) the main pump (P1) can be activated independently of DHW pump output
If you set DHW output controls un electrical valve the main pump (P1) is activated together with DHW valve output.
MODE Opis
►SUMMER
Selected element is – „EXIT”.
Press OK to go back to main menu
WINTER
AUTO ANTI ICE
STOP ROOM TERM.
► ►DHW=P2/
EXIT

SENel—Electric Boiler 18
4.2.5. Pressure check
Select simultaniously plus and minus buttons
Select the „radiator“ icon.
Set the desired temperature
Exit the menu via the „ON/OFF“ button
For optimal system operation, cold heating system ll pressure has to be between
one and two bar.
If the heating system spans multiple stories, then higher pressure may be required.
If the system ll pressure drops bellow 0,7 bar, on the display the pressure icon ic-
kers.
If the pressure drops bellow 0,7 bar, the system shuts down.
4.2.4. Initial heating temperature setup

SENel—Electric Boiler 19
5. TROUBLESHOOTING
Error messages have precedence over all other information on the display.
If you encounter an error, refer to the table below.
If your product doesn't work awlessly afterwards, contact your SENKO
service center.
Clean the sheeting with a wet towel and a small amount of non-solvent
detergent
Dont use sprays, dish washing detergent or any cleaning products that contain
solvents or chlor
Error
code Message Description Possible cause Solution
- SYSTEM OK Everything is in good working condition, no alarms
E1 BAD H20
SENZ
Problem detected
with temperature
sensor of boiler
or room
(depending on
application
HYDRO/AIR)
No sensor or sensor short
circuit
Defective sensor
Temperature reading
extremely low or
extremely high
Defective control board
Check sensor's cable and
bord terminal
Check temperature by
other means
Check sensor and replace if
needed
Replace control bord if
needed
E5 ALARM INPUT
The input for
external STB is
activated (no
connection)
Overheating
E7 PRESSURE PRESSURE
SWITCH IS Pressure reading is lower than required
E8 FROZEN Temperature below 3°C, ignition prohibited
6. MAINTAINANCE

SENel—Electric Boiler 20
7. FREEZING PROTECTION
The heating system and plumbing is suciently protected from freezing when the
system remains operational during freezing periods and when rooms are at the
required temperature.
Alternatively, the system can be emptied out. Contact your service center.
The product is equiped with an antifrost function.
When the system is plugged in and the initial temperature falls below 5°C, then the
system automatically turns on and heats up the water.
Caution!
Property damage risk due to freezing!
The anti freezing device and the surveilance devices are only active when the product
is plugged in -> DO NOT DISCONNECT!
8. ADVANCED DEVICE FUNCTIONS
7.1 TEMPORARY PUTTING THE DEVICE OUT OF OPERATION
8.1. SYSTEM POWER MANAGEMENT
The power regulation software controls the heating in three steps shown in three
sections on the control panel
In low power mode, section 1 is active, sections 2 and 3 are OFF (SEC1 and SEC
1A on the display)
In medium power mode, sections 1 and 2 are active, section 3 is OFF (SEC2 and
SEC 2A on the display)
In high power mode, sections 1, 2 and 3 are active (SEC3 and SEC 3A on the
display)
Table of contents
Popular Boiler manuals by other brands
DOMUSA
DOMUSA BIOCLASS TR Installation and operating instructions

Radiant
Radiant R1K 50 user manual

Lincat
Lincat Opus OG7003 User, installation, servicing and conversion instructions

Keston
Keston HEAT 45 Installation and servicing instructions
U.S. Boiler Company
U.S. Boiler Company ES2 Installation, operating and service instructions
UTICA BOILERS
UTICA BOILERS SW3 Installation, operation & maintenance manual
Baxi
Baxi Solo WM 30/4 PF user manual
Weil-McLain
Weil-McLain PFG-5 Brochure & specs
Grant
Grant Combi 26e Installation and servicing instructions
MCZ
MCZ PERFORMA 15HQ EASYCLEAN H1 OPERATION AND CLEANING
Twothousand
Twothousand TT-WB23 user manual
Dettson
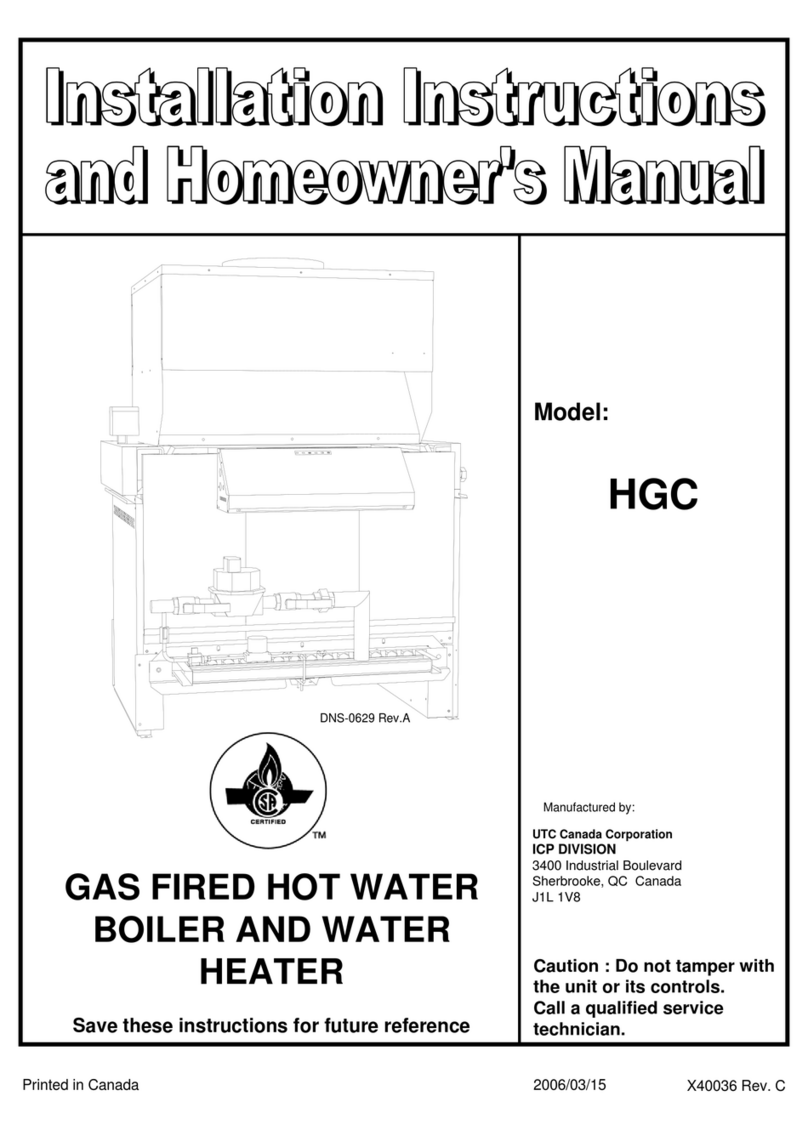
Dettson HGC Installation instructions and homeowner's manual

