Serioux UrbanPilot Q475T2 User manual

GPS UrbanPilot Q475T2 - 4.3”
GPS UrbanPilot Q550T2 - 5”
USER MANUAL

EN
PRECAUTIONS AND NOTICES
The GPS is a navigation system.
It is not for precise measurement of direction, distance,
location or topography.
It is the user's responsibility to follow the traffic signs and local regulations along the roads.
GPS satellite signals cannot pass through solid materials (except glass).
When you are inside a tunnel or building, GPS positioning is not available.
A minimum of 4 GPS satellite signals is needed to determine current GPS position.
Signal reception can be affected by situations such as bad weather or dense overhead obstacles
(e.g. trees and tall buildings).
Other wireless devices in the vehicle might interfere with the reception of satellite signals and
cause the reception to be unstable.
If the GPS device screen stops responding, press the OFF button; if it does not respond, press the
RESET button.
When you get off the car, do not leave your GPS device exposed to sunlight.
The overheating of the battery can cause malfunction.
For your safety, do not access device functions while driving.
Do not install the GPS device in places that could obstruct the driver's view.

1. Introduction
1.1 Understanding Hardware Features
NOTE: Depending upon the specific model purchased, the colour of your device may not exactly
match the device shown in this manual.
Front Components
1 Touch screen Displays the output of your device. Tap the screen
to select menu commands or enter
information.
2 Charge indicator The light indicator glows red (to indicate that the battery is charging)
and yellow (when the battery is fully charged).
Back components
1 Speaker
For music, sound and voice
2 Backlight window
3 Reset button
Restarts the system.
4 Stylus
1
2
1
2
Ref Component Description
Ref Component Description
4
3

Top components
1 ON/OFF switch To turn the device ON or OFF.
Side components
1 MicroSD slot Compatible with microSD cards, for accessing your
favourite files.
2 Mini-USB connector For mini-USB connection.
3 Headphone connector For connection of stereo headphones.
1
Ref Component Description
1
2
3
Ref Component Description

Getting started
1.2 Connecting to AC Power and Charging the Battery (Optional)
When charging the battery for the very first time, you should charge it for at least 8 hours.
1. Slide and click the connector converter onto the AC adapter.
2. Connect the adapter cable to the bottom of your device.
3. Plug the AC adapter into a wall outlet.
The charge indicator glows red when charging is in progress. Do not disconnect your device from AC
power until the battery is fully charged.
NOTE:
Do not immediately turn on your GPS device after connecting the AC adapter; wait for at least one
minute.
The GPS device can be charged by connecting it to the USB port of a computer.
1.3 Using Your Device in a Vehicle
A car holder and a car charger are supplied with your device.
CAUTION:
Select an appropriate location for the car holder; never place the holder where the driver’s field of
vision is blocked.
Make sure that the GPS antenna has a clear view of the sky.
The GPS may take a few minutes to find its current location initially.
1.4 Connecting the Car Charger
The car charger supplies power to your GPS device when you are using the device in a car.
CAUTION: To protect your device against power surges, connect the car charger only after the car
engine has been started.
1. Connect one end of the car charger to the power connector of your device.
2. Connect the charger to the car power socket.

2. Operating basics
2.1 Performing the Initial Start Up
1. Press the ON/OFF button for several seconds.
2. The Main Menu appears on the screen.
3. Fully charge the battery before using your device for the first time.
2.2 Turning On and Off / Sleep Mode
1. Press and hold the ON/OFF button and the display shows:
1. Press to turn off the device.
2. Press , and the device will enter the sleep mode.
ON/OFF

2.3 Operating the GPS device
To communicate with your device, touch the screen with your fingertip. You can perform the
following actions:
. Tap
Touch the screen once with your fingertip to open items or options.
. Drag
Hold your fingertip on the screen and drag up/down/left/right or across the screen.
. Tap and hold
Tap and hold your fingertip until the desired action is completed or until a menu or a result
is displayed.
2.4 Main Menu
The first time you initialize your device, the Main Menu appears. The Main Menu is your
starting place for various tasks.
After tapping the Multimedia button, the following submenu will be displayed.
1
2
3
4

1 Navigation Start navigation.
2 Settings Device settings.
3 Multimedia Music and video player, etc.
4 FM FM transmitter
2.5 Inserting a microSD Card
The GPS device is equipped with a microSD card slot.
To remove a card, first make sure that no application is accessing the card, then slightly push
the top edge of the card to release it and pull it out of the slot.
NOTE:
. Make sure that no foreign objects enter the slot.
. To access the Device Settings menu, tap the Settings button.
Ref Button name Description

3. Settings ____
3.1 Using Device Settings
The Device Settings menu appears as shown above. Once you customize the device settings
such as backlight, volume or date and time, your new settings will be saved.
3.2 Volume
1. Tap to adjust the volume of your GPS device as shown below.
2. Tap or to adjust the volume.
3. Tap to save the settings.
4. Tap go back to the previous menu.
3.3 Date/Time
1. Tap to access the date/time menu.
2. Tap and to adjust the time/date.
3. Tap button to save the changes and go back to the previous menu.
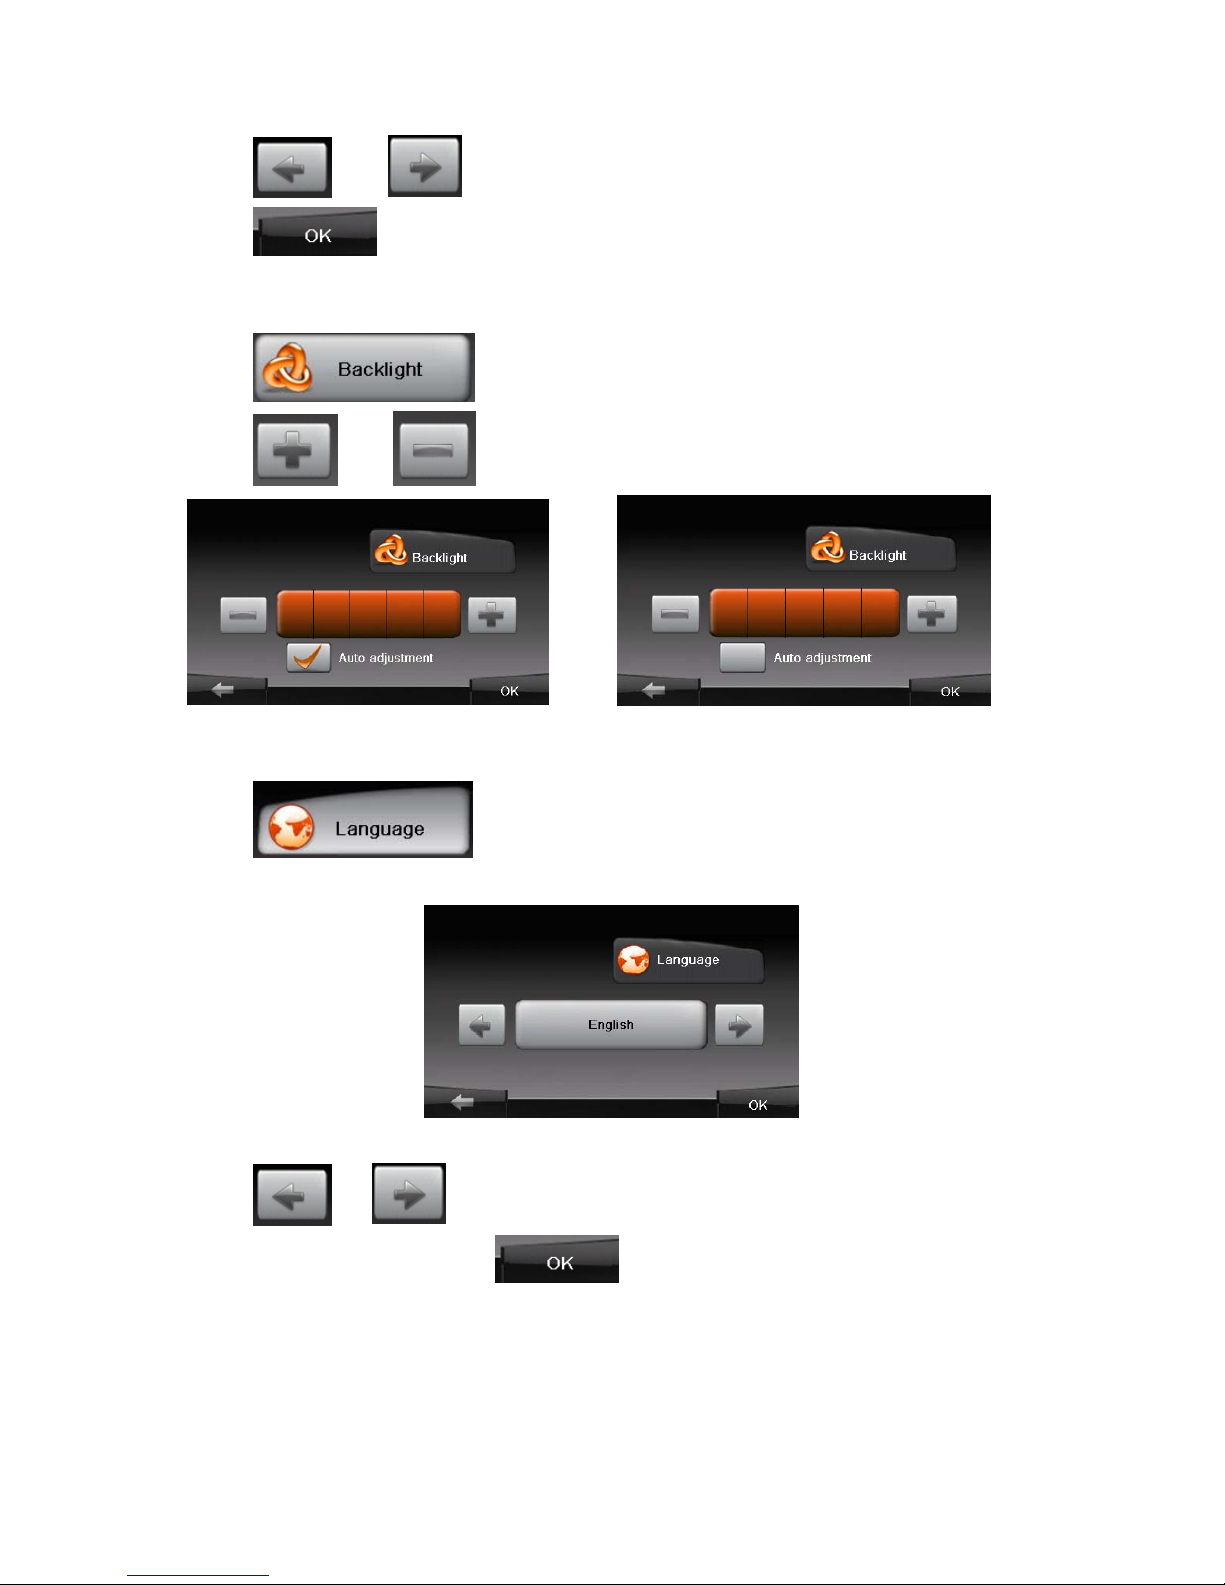
3.4 Backlight
1. Tap to set the backlight.
2. Tap and to adjust the backlight.
3.5 Language
1. Tap to set the language of the menus.
2. Tap or to select language.
3. After setting the language, tap save the setting and go back to the previous
menu.

3.6 Calibration
You can calibrate the touch screen if it is not responding accurately to your Taps.
1. Press “calibrate”.
2. Tap and hold the centre of the target of the screen; the target will change its position.
3. The target will be displayed in 5 positions (left-up, left-down, right-up, right-down, centre).
3.7 About
1. Tap for additional information.
2. Tap to go back to the previous menu.
3.8 NAVI Path
1. Tap the button of the “About” menu.
2. Tap the folder to find the navigation application location such as .exe file.
By accessing the * .exe file, the menu will be displayed as shown below:

3. Tap to confirm.
4. If you want to run the map directly after restarting the GPS device, tap:
5. Tap go back to the previous menu.
3.9 USB Settings
Connect your GPS device to the computer via the USB cable.
1. Tap the button of the “Function” menu, and the screen will display
the following menu:
Two options will be displayed: "Mass Storage" and "Active Sync".

a. Mass Storage:
When selecting Mass Storage, the screen will display the following menu. Tap “OK” to save
the settings.
The following menu will appear on the screen, and the GPS can be used as a mass storage
device.
b. Active Sync:
Disconnect the GPS device from the computer and connect it again, then select "Active
Sync".
The following menus will appear on the screen:
The GPS is synchronized with the computer.
4. GPS Receiver
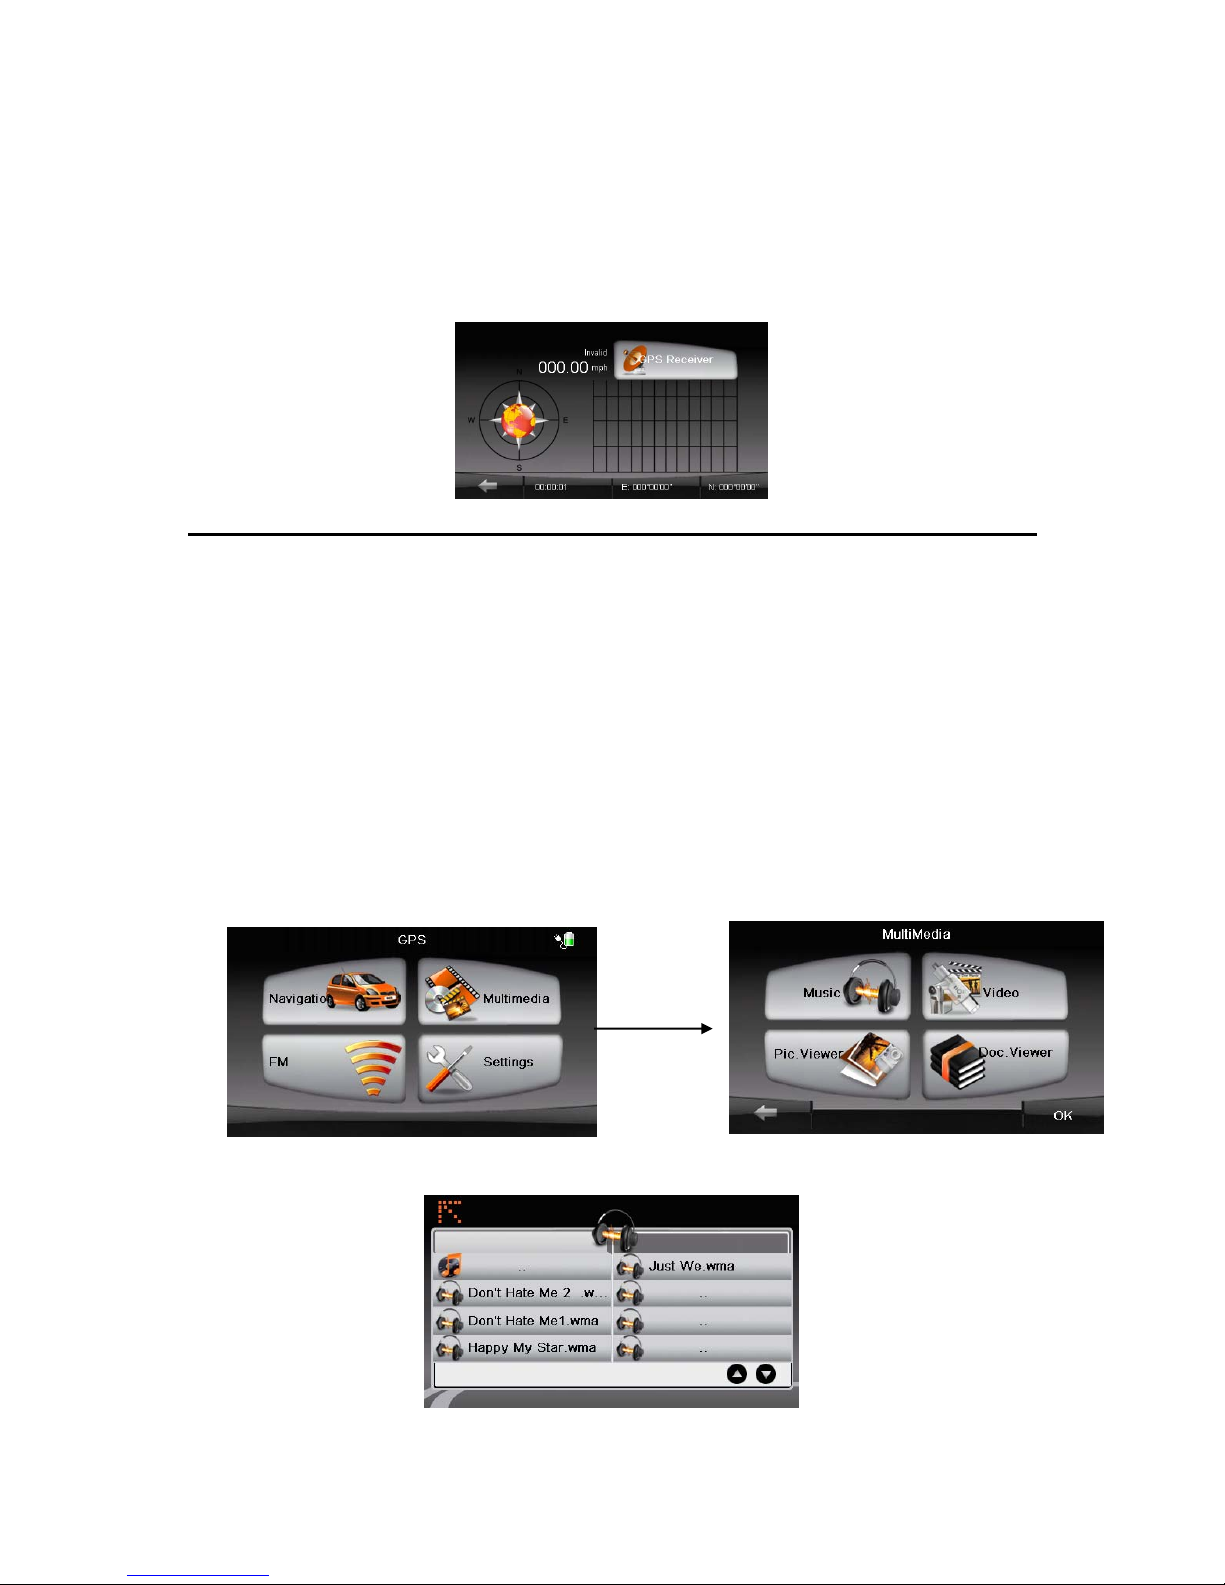
1. Tap “GPS Receiver” button of the Device Setting menu.
2. The menu will be displayed as shown below.
This page gives your current position in degrees longitude and latitude.
Multimedia
5. Music Player
5.1 Starting and exiting the music player
The Music Player Program turns your device into a Music Player.
Features:
. Playback of Music files
. Basic playback controls such as play, pause, stop, next and previous
. 17 preset equalizer audio profiles
. Playback includes single selection playback, repeat, single repeat,
sampling playback, normal sequence and random sequence.
. Playlist support
1. Tap the Multi Media button of the main menu.
2. Tap the “Music” button to enter the file lists menu.
3. After selecting a song, the music player will be displayed on the screen.

Preparing the Audio Files for Your GPS Device
1. Use "ActiveSync" to copy files from your computer to the microSD card.
2. Insert your microSD card into the GPS device.
5.3 Music Playback Control
You can control the Music Player via control buttons.
Details:
Play play current song
Pause Pause playing current song
Previous/Next Play previous or next song
Random Random playback
Replay Replay song
Stop Stop playing current song
Volume Increase or decrease the volume
Exit Exit player and return to playlist
1 Song name Shows the name of the current song
2 Play time
3 Total time
Button Name Description
1 3
2

6. Video Player
6.1 Starting and exiting the video player
1.Tap the Multi Media button of the main menu. The following submenu will be displayed:
2. Tap the “Video” button to enter the file lists menu.
3. After selecting a video file, the video player will be displayed on the screen.
Full screen
2
1

6.2 Video Playback Control
Play Play current video
Pause Pause playing current video
Volume Increase or decrease the volume
1 Play time
2 Total time
Full screen
Stop Stop playing current video
Previous/Next Play the previous or next video
Exit Exit player and return to playlist
7. Picture Viewer
7.1 Viewing a picture file:
1. Tap the “ Multimedia ” button on the main menu to display the submenu.
2. Tap the “Pic. Viewer” button to enter the file lists menu.
3. Select the picture, and it will be displayed on the screen.
Button Name Description

8. Document Viewer
8.1 Viewing a document file
1. Tap the “Multimedia” button on the main menu to display the submenu.
2. Tap the “Doc. Viewer” button to enter the file lists menu.
3. 3. Select the document, and it will be displayed on the screen.
9. FM Function
The GPS device is equipped with an FM transmitter.
9.1 Accessing the FM Transmitter
1. Tap the “FM” button to display the submenu.
2. The following submenu will be displayed:
3. Tap or to set the frequency.

10. Troubleshooting and Maintenance
NOTE: If you encounter a problem you cannot solve, contact an authorized service centre for
assistance.
10.1 Resetting Your System
If the GPS device stops responding, press the RESET button.
Insert a small rod, such as a straightened paperclip, into the reset button on the bottom of
your device.
If the GPS device does not respond after resetting, follow the instructions below:
1. Disconnect all cables.
2. Put the ON/OFF switch in the OFF position.
3. Wait for approximately 1 minute, then put the ON/OFF switch in the ON position.
4. Your GPS device turns on.
ON/OFF
RESET

10.2 Troubleshooting
Power Problems
The remaining battery power may be too low to run your device.
Screen Problems
Screen is off
If the screen does not respond even after you press the power button, follow the instructions
below:
Connect your GPS device to the power supply.
Reset your system.
Screen responds slowly
Make sure the battery has sufficient power.
Screen freezes
Reset the system.
Screen is hard to read
Make sure that the backlight of the display is on.
Move to a location with more light.
Connection Problems
Make sure that your device and your computer are both turned on.
Make sure that the cable is securely plugged into the USB port.
10.3 Maintaining Your GPS Device
Taking good care of your device will ensure trouble-free operation and reduce the risk of
damage to your device. Keep your device away from excessive moisture and extreme
temperatures.
Do not place anything on top of your GPS device.
Do nor subject your device to severe shock.
Do not subject your device to sudden temperature changes.
The screen surface can easily be scratched; avoid touching it with sharp objects.
Do not clean the GPS device during operation.
Do not use paper towels to clean the device.
Do not attempt to dismantle the GPS device as this will void any warranty.
This manual suits for next models
1
Table of contents
Languages:
Other Serioux GPS manuals


