PAGE 5
PAGE 4
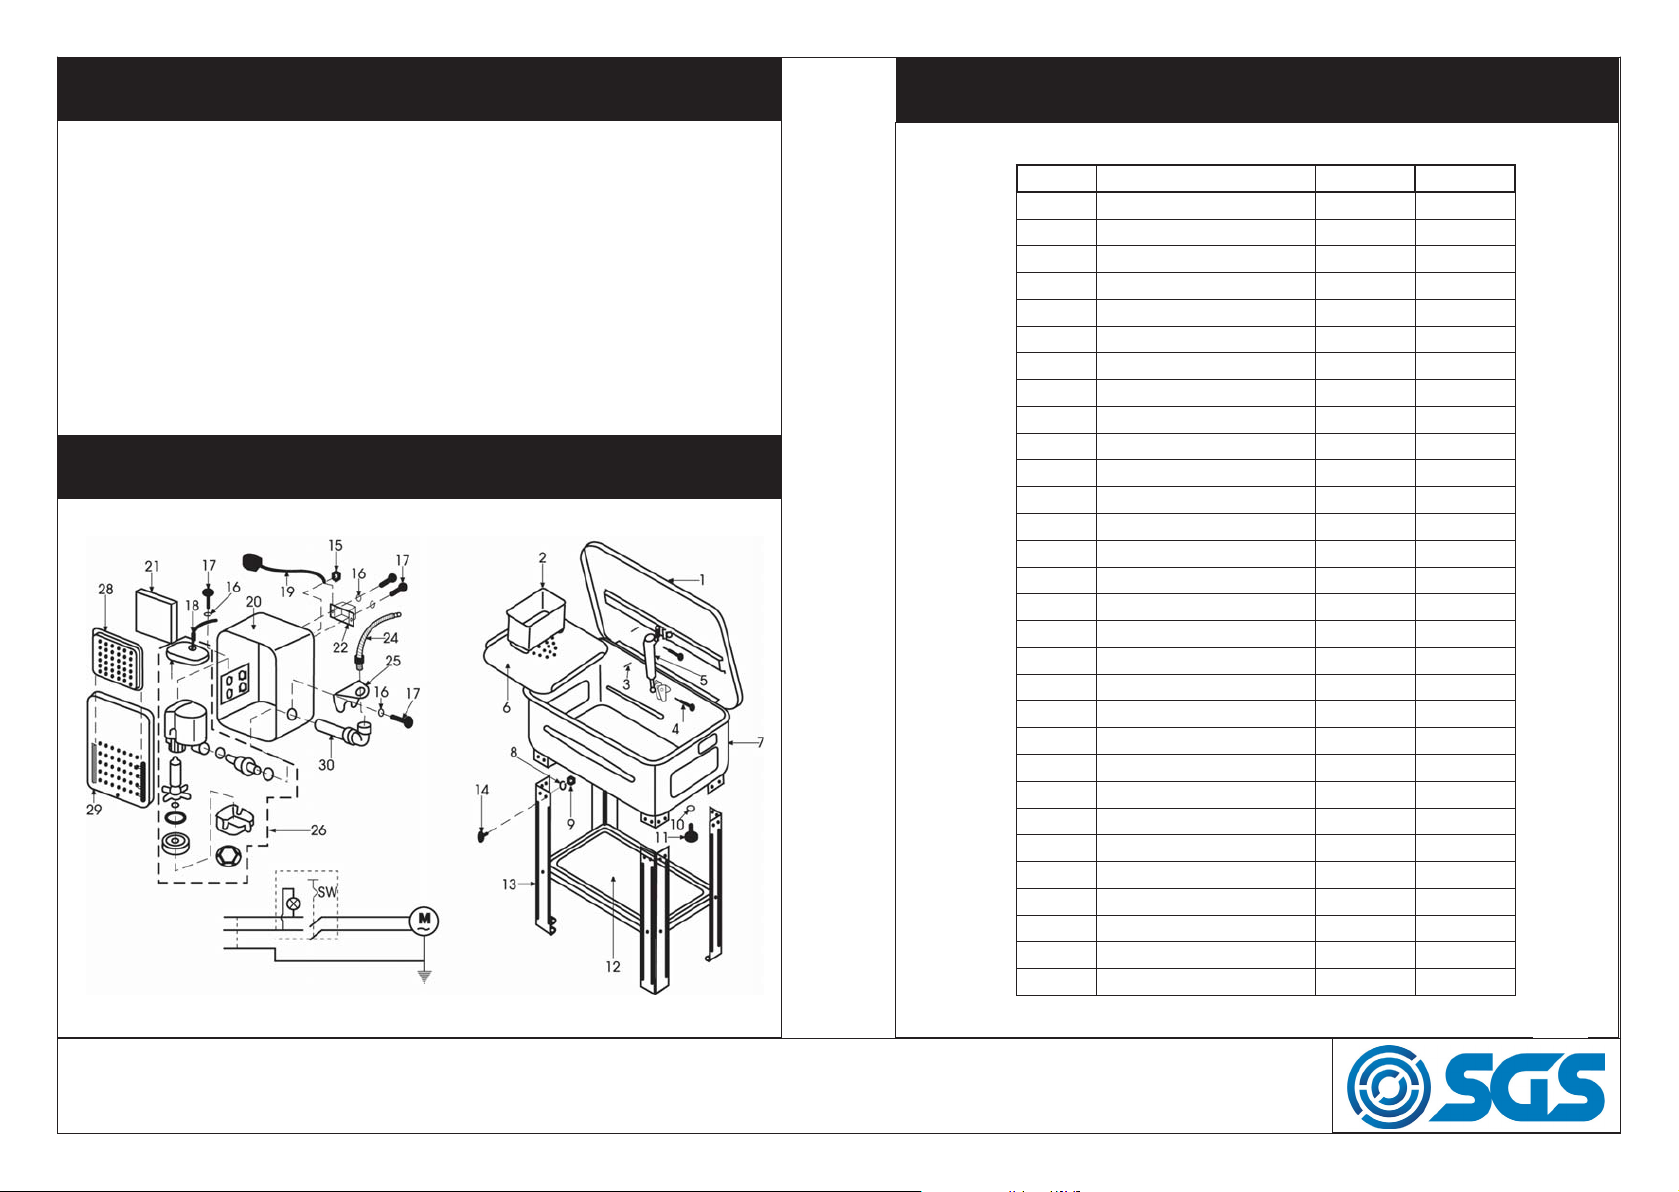
ASSEMBLY
1. Choose a firm, flat and level surface to site the machine on, in a well-
ventilated area and away from any naked flames.
2. Assemble the legs and shelf to the parts washer as shown in the parts-
diagram, using the screws and nuts supplied.
3. Remove the pump housing cover plate and dispose of any packaging
around the pump.
4. Replace the cover plate and mount the pump housing through the slot
in the side of the tank. The switch housing protrudes through the slot
with its underside hooking over the edge of the tank.
5. Attach the earth lead from the pump to the parts washer tank.
6. Ensure all packaging is removed before filling with parts washer fluid.
OPERATION
1. Fill only with a non-flammable degreaser or cleaning agent, such as-
parts washer fluid, to just below the level of the parts shelf. DO NOT
fill with flammable solvents such as paraffin, thinners, etc. Never oper-
ate the parts washer without sufficient water.
2. Open the lid, switch the pump on and hold the part to be cleaned
under the nozzle, slowly rotate the component until clean.
3. When clean, leave to drain on the tray or in a small component con-
tainer until dry.
4. Switch off the pump and close the lid and disconnect the power sup-
ply.
5. Remove gloves and goggles, store safely.Note: Any spillages should be
mopped up immediately, so as not to cause a safety hazard.
WARNING! READ THESE ELECTRICAL SAFETY IN-
STRUCTIONS THOROUGHLY BEFORE CONNECTING
THE PRODUCT TO THE MAINS SUPPLY.
Before switching the product on, make sure that the voltage of your elec-
tricity supply is the same as that indicated on the rating plate. This product
is designed to operate on 230VAC 50Hz. Connecting it to any other power
source may cause damage.
This product may be fitted with a non-rewireable plug. If it is necessary to
change the fuse in the plug, the fuse cover must be refitted. If the fuse
cover becomes lost or damaged, the plug must not be used until a suitable
replacement is obtained.
If the plug has to be changed because it is not suitable for your socket, or
due to damage, it should be cut off and a replacement fitted, following the
wiring instructions shown below. The old plug must be disposed of safely,
as insertion into a mains socket could cause an electrical hazard.
We strongly recommend that this machine is connected to the mains sup-
ply via a Residual Current Device (RCD). If in doubt, consult a qualified
electrician. DO NOT attempt repairs yourself.
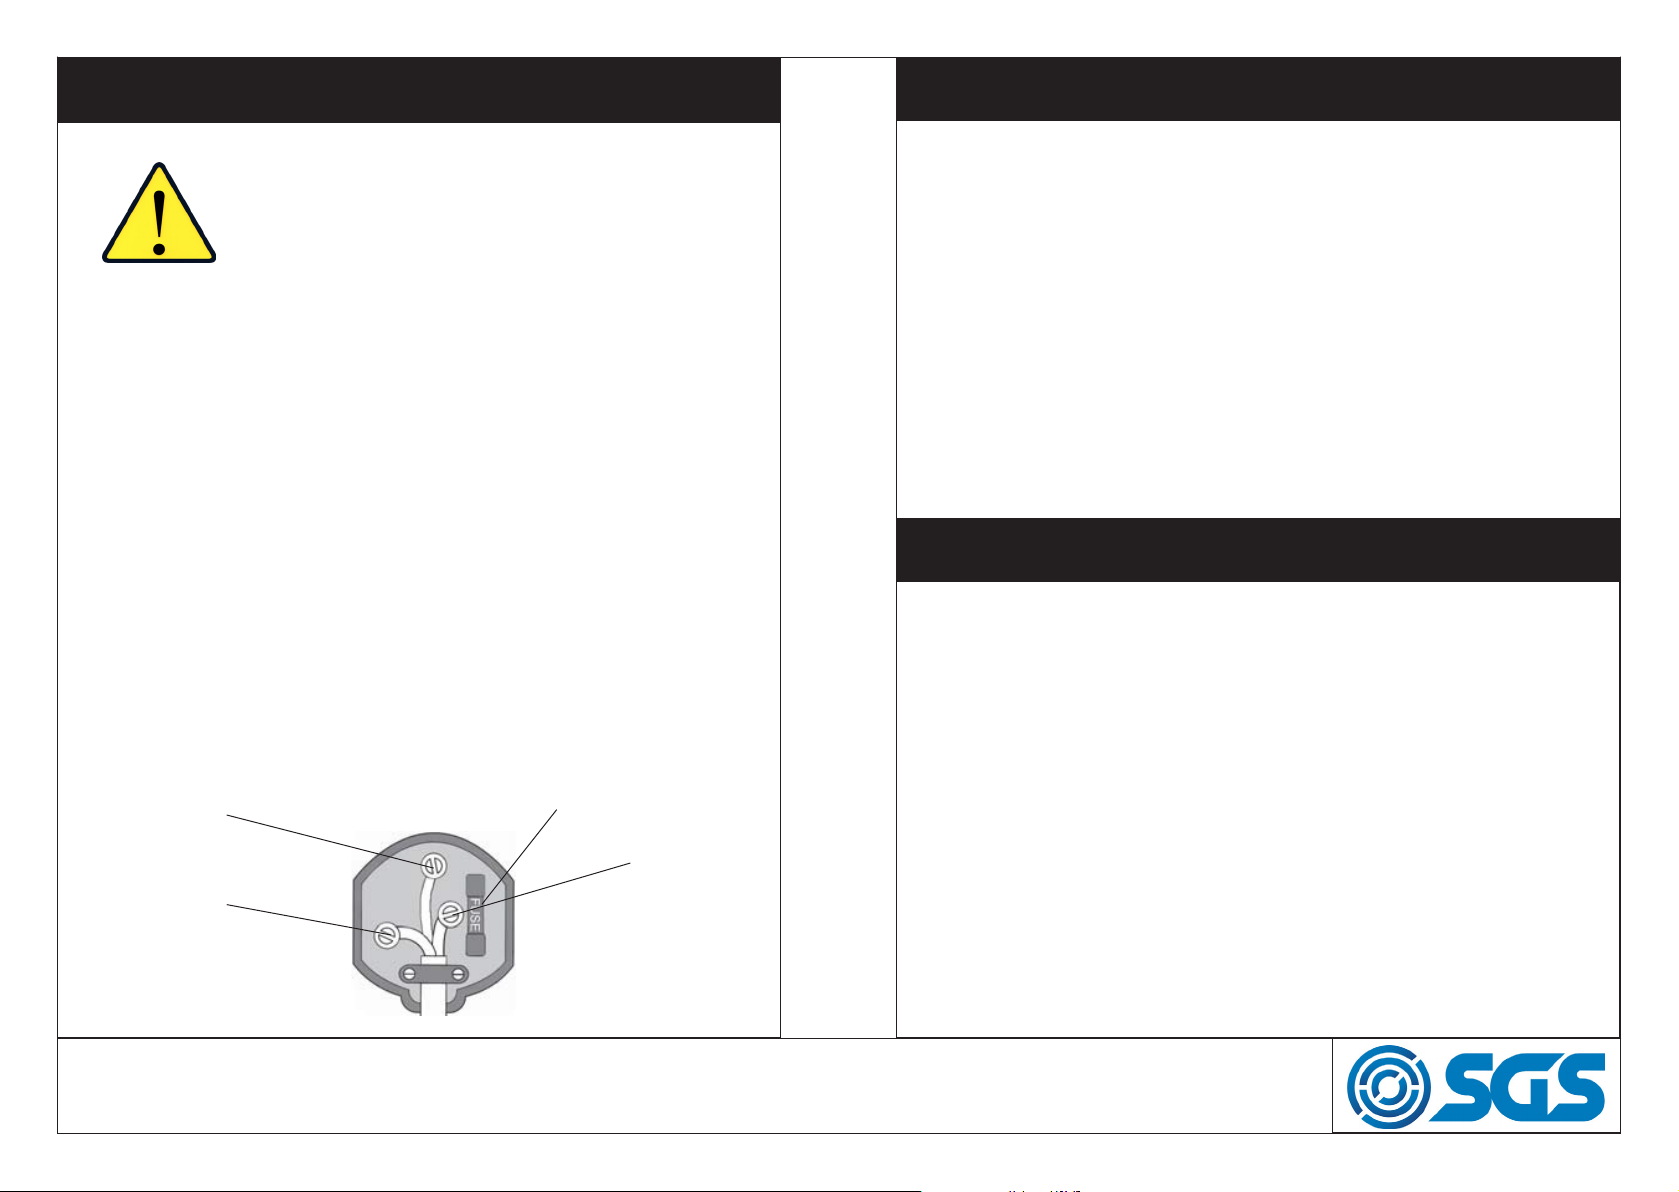
Plug must be BS1363/A
approved
ELECTRICAL CONNECTIONS
Earth
(Green & Yellow)
Blue
(Neutral)
Always fit a 3amp fuse
Live
(Brown)
WWW.SGS-ENGINEERING.COM