Shenzhen Rakwireless Technology WisNode-Lora User manual

WISNODE-LORA QUICK START GUIDE
Copyright © Shenzhen Rakwireless Technology Co., Ltd
1
WisNode-Lora EVB Quick Start Guide
Shenzhen Rakwireless Technology Co., Ltd
www.rakwireless.com
info@rakwireless.com
© 2016 Rakwireless all rights reserved .
Mentioned in this document , the actual company and product
names, trademarks are their respective owners.
After update the new version, this document without prior notice.

WISNODE-LORA QUICK START GUIDE
Copyright © Shenzhen Rakwireless Technology Co., Ltd
2
1. General Description
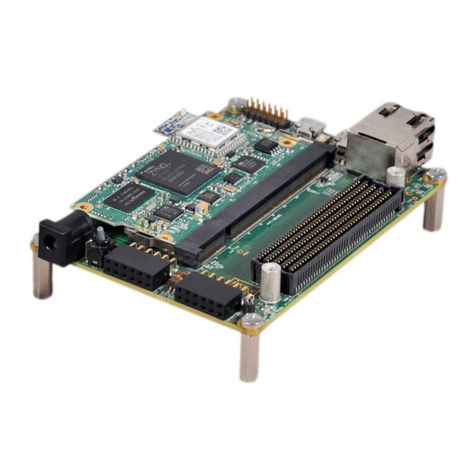
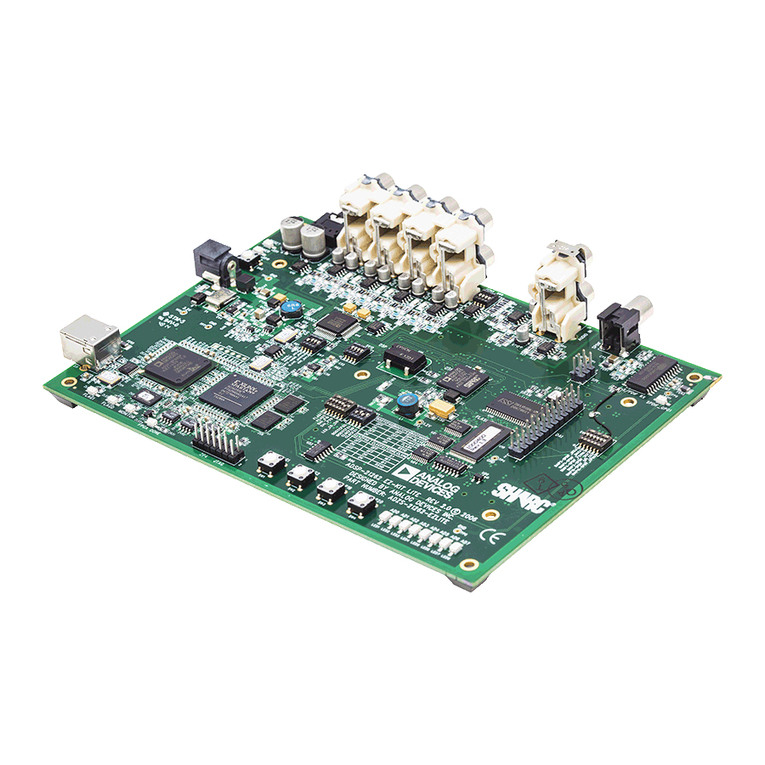
The following image is RAK WisNode-Lora development board,and it compatible Arduino development board, It
also can be used as an extension board development with Arduino. The interface resource are as follow:
Function
Name
Description
Module
U3
RAK811 Lora module
External Interface
Micro USB
Power Supply;DC 5V Input,USB to TTL
communication interface
Key
Reset
Module Reset Key
Leading Foot
P1
Boot Switch Pin,When Boot Pin Switch to
3.3VModule will into the Boot Mode
P4
Debug Pin
P5
Uart Switch Pin
Power Test
J1
Module Power Test Pin
LED Indicator
LED1(Power)
Power Indicator Light
P5 Uart Switch Pin Switching instructions:In the following instructions are used in the operation of the default
EVB Micro USB power supply and serial port functions, We need to connect the CTX and RXD, CRX and TXD
short before operation.
Micro USB
Power Supply/Uart
Power Test Pin
Reset Key
Boot Switch Pin
RAK811 Module
Uart Switch Pin

WISNODE-LORA QUICK START GUIDE
Copyright © Shenzhen Rakwireless Technology Co., Ltd
3
2. Quick Start Demonstrate
Use Micro USB interface to the module power supply. One end of the serial line is connected to the module, and
one end is connected to the computer. Then open the Uart Assist Tool, send AT command to operate the module.
2.1 Join-Otaa
Welcome to RAK811
Send: at+mode=0 /* SET LoraWAN work mode */
Return: OK
Send: at+get_config=dev_eui /* GET Dev_EUI check */
Return: OK3037343644357402
Send: at+set_config=app_eui:39d7119f920f7952&app_key:a6b08140dae1d795ebfa5a6dee1f4dbd
/* SET LoraGateway app_eui and app_key , big endian*/
Return: OK
Send: at+join=otaa/* Join OTAA type*/
Return: OK
at+recv=3,0,0/* Join status success*/
2.2 Join-Abp
Welcome to RAK811
Send: at+mode=0 /* SET LoraWAN work mode */
Return: OK
Send: at+set_config=dev_addr:00112233&nwks_key:3432567afde4525e7890cfea234a5821
&apps_key:a48adfc393a0de458319236537a11d90
/* SET LoraGateway dev_addr nwks_key and apps_key , big endian*/
Return: OK
Send: at+join=abp /* Join ABP type*/
Return: OK
2.3 LoraWAN send&recv
/*After join gateway success, then can send and receive data*/
Send: at+send=0,2,000000000000007F0000000000000000
/*APP port:2, battery level 50%, unconfirmed message*/
Return: at+recv=2,0,0 /*unconfirmed mean tx success*/
Send: at+send=1,2,000000000000007F0000000000000000

WISNODE-LORA QUICK START GUIDE
Copyright © Shenzhen Rakwireless Technology Co., Ltd
4
/*APP port :2, battery level 50%, confirmed message*/
Return: at+recv=1,0,0/*confirmed mean receive ack from gateway*/
/*If gateway has data to send module, will receive date meanwhile ack */
Return: at+recv=0,2,10,30313233343536373839
/*APP port :2, receive size 10, hex:30313233343536373839*/
2.4 P2P send&recv
/* Module A Rx Side*/
Welcome to RAK811
Send: at+mode=1 /* SET LoraP2P work mode */
Return: OK
Send: at+rf_config=867700000,10,0,1,8,14
/* SET LoraP2P Frequency:867.7MHz, SF10,Bandwith 125KHz, coding Rate:4/5, Preamlen:8, tx power:14dbm */
Return: OK
Send: at+rxc=1 /* SET LoraP2P Rx continue enable report rx data */
Return: OK
Send: at+rx_stop /* If want stop Rx continue */
/* Module B Tx Side*/
Welcome to RAK811
Send: at+mode=1 /* SET LoraP2P work mode */
Return: OK
Send: at+rf_config=867700000,10,0,1,8,14
/* SET LoraP2P Frequency:867.7MHz, SF10,Bandwith 125KHz, coding Rate:4/5, Preamlen:8, tx power:14dbm */
Return: OK
Send: at+txc=100,1000,800100000600010002da9557e142d9
/* SET LoraP2P Tx continue ,100 packets, 1S interval, hex data */
Return: OK
Send: at+recv=9,0,0 /*When Tx complete */
Send: at+tx_stop /* If want stop Tx continue */

WISNODE-LORA QUICK START GUIDE
Copyright © Shenzhen Rakwireless Technology Co., Ltd
5
3. How To Upgrade Firmware
To upgrade the Lora module, First we should make the module get into Boot mode. We should switch the P1
pin make the Boot pin connection with 3.3V Pin. Then reset the module, Operate according to the steps:
1.Open the Flash Loader Demonstrator tool,Set the serial port parameters;
2.Click the “NEXT” button, arrive the following interface;

WISNODE-LORA QUICK START GUIDE
Copyright © Shenzhen Rakwireless Technology Co., Ltd
6
3.The again the “Next” button,Choose STM32L1_Cat2-128K;
4.Choose “Download to device”,Set the path to the new firmware, and click “NEXT” button.

WISNODE-LORA QUICK START GUIDE
Copyright © Shenzhen Rakwireless Technology Co., Ltd
1
5.Upgrading:
6.Upgrade Successful.

WISNODE-LORA QUICK START GUIDE
Copyright © Shenzhen Rakwireless Technology Co., Ltd
2
4. Appendix

WISNODE-LORA QUICK START GUIDE
Copyright © Shenzhen Rakwireless Technology Co., Ltd
3
5. Modify Record
Version
Author
Data
Modify content
V1.0
caoxiaocheng
2016/12/09
Create Document
V1.2
wenyong.tang
2017/03/01
Modify Document
Table of contents
