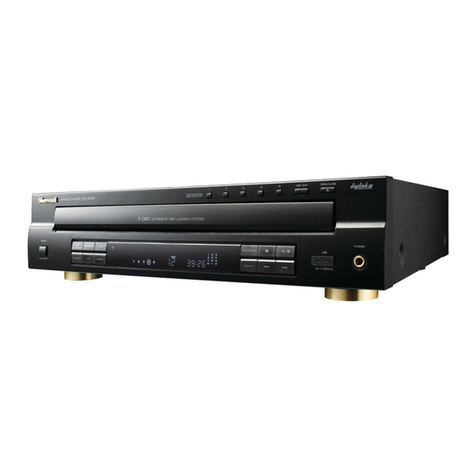
Sherwood CD-2030C User manual

a
Se
ST
OPERATING
INSTRUCTIONS
BEDIENUNGSANLEITUNG
D-2030C/3030R
Compact
Disc
Player
CD.-Spteler
SSSSSSSSSSG6

|
trouble
free
service.
Please
take
a
few
moments
to
read
this
manual
thoroughly.
It
will
explain
the
fea-
Unpacking
and
Installation
Congratulations
on
Your
Purchase!
Your
new
high
fidelity
Compact
Disc
Player
is
designed
to
deliver
maximum
enjoyment
and
years
of
tures
and
operation
of
your
Compact
Disc
Player
and
help
a
trouble
free
installation.
Please
unpack
your
Compact
Disc
Player
carefully.
We
recommend
that
you
save
the
carton
and
packing
material.
They
will
be
helpful
if
you
ever
need
to
move
your
unit
and
may
be
required
if
you
ever
need
to
return
it
for
service.
Your
Compact
Disc
Player
is
designed
to
be
placed
in
a
horizontal
position
and
it
is
important
to
allow
at
least
two
inches
of
space
behind
your
unit
for
adequate
ventilation
and
cabling
convenience.
To
avoid
early
damage,
never
place
the
unit
near
radiators,
in
front
of
heating
vents,
in
direct
sun
light,
or
in
exces-
sively
humid
or
dusty
location.
Connect
your
complementary
components
as
illustrated
in
the
following
section.
.
CAUTION
CLASS
1
Invisible
laser
radiation
when
open
the
unit.
LASER
PRODUCT
Do
not
stare
into
beam.
CAUTI
@)
AN
This
symbol
is
intended
to
alert
the
user
to
the
presence
of
uninsulated
“dangerous
voltage”
RISK
OF
ELECTRIC
SHOCK.
within
the
product’s
enclosure
that
may
be
of
DO
NOT
OPEN.
sufficient
magnitude
to
constitute
a
risk
of
elec-
tric
shock
to
persons.
CAUTION:
TO
REDUCE
THE
RISK
OF
This
symbol
is
intended
to
alert
the
user
to
the
presence
of
important
operating
and
maintenance
ELECTRIC
SHOCK.
DO
NOT
REMOVE
(servicing)
instructions
in
the
literature
accom-
COVER
(OR
BACK).
NO
USER
pening
Sieapp
aes
SERVICEABLE
PARTS
INSIDE.
Caution:
To
prevent
electric
shock
do
not
use
this
(pola-
REFER
SERVICING
TO
OUALIFIED
rized)
plug
with
an
extension
cord,
receptacle
h
]
less
the
blad
bei
d
SERVICE
PERSONNEL.
to
preven
blade
exposure.
Attention:
Pour
prévenir
les
choes
électriques
ne
pas
utiliser
cetre
fiche
polarisée
avec
un
prolon-
gateur,
une
prise
de
courant
ou
une
autre
sor-
WARNING
tie
de
courant,
sauf
si
les
lames
prérent
étre
;
insérées
a
fond
sans
en
laisser
aucune
partie
To
prevent
fire
or
shock
hazard,
do
not
a
découvert.
expose
the
unit
to
rain
or
moisture.

ro
an
Read
this
Before
Operating
Your
Unit
For
Europe
220V/230V!
FOR
YOUR
SAFETY
To
ensure
safe
operation
the
three-pin
plug
supplied
must
be
inserted
only
into
a
standard
three-pin
power
point
which
is
effectively
earthed
through
the
normal
household
wiring.
Extension
cords
used
with
the
equipment
must
be
three-core
and
be
correctly
wired
to
provide
connection
to
earth.
Wrongly
wired
extension
cords
are
a
major
cause
of
fatalities.
The
fact
that
the
equipment
operates
satisfactorily
does
not
imply
that
the
power
point
is
earthed
and
that
the
installation
is
completely
safe.
For
your
safety,
if
in
any
doubt
about
the
effective
earthing
of
the
power
point,
consult
a
qualified
electrician.
Units
shipped
to
Europe
are
designed
for
operation
on
220V/230V
AC
only.

Concerning
Compact
Discs
*
You
can
also
play
8cm
CD
or
CD-single
on
the
inside
circle
of
the
tray.
Do
not
put
a
normal
CD
over
it.
¢
Always
place
the
compact
disc
in
the
disc
tray
with
the
labelled
side
up.
(Compact
discs
can
be
played
only
on
one
side).
Back
surface
has
the
recorded
signal
Labelled
surface
Disc
tray
°
To
remove
a
disc
from
its
storage
case,
press
down
on
the
center
of
the
case
and
lift
the
disc
out
of
a
case,
holding
it
carefully
with
edges.
Proper
way
to
hold
out
a
compact
disc
in
its
storage
case
Proper
way
to
hold
a
compact
disc
¢
Fingermarks
and
dust
should
be
carefully
wiped
off
the
disc’s
recorded
surface
with
a
soft
cloth.
Unlike
conventional
records,
the
compact
disc
has
no
grooves
to
collect
dust
and
microscopic
debris
and
so
gently
wiping
with
a
soft
cloth
will
remove
most
particles
completely.
Wipe
straight
from
the
inside
to
the
outside
of
the
disc.
Small
dust
parti-
cles
and
light
stains
will
have
absolutely
no
effect
on
reproduction
quality.
Never
use
such
chemicals
as
record
sprays,
anti-
static
sprays
or
fluid,
benzine
or
thinner
to
clean
compact
discs.
Such
chemicals
would
damage
the
disc’s
plastic
surface
irreparably.
¢
Discs
should
be
stored
in
their
cases
after
play
to
avoid
serious
scratches
that
could
cause
the
laser
pickup
to
“skip”.
¢
Don’t
expose
discs
to
direct
sunlight
or
high
humidity
and
temperature
for
extended
periods.
Long
exposure
to
high
temperature
can
warp
the
disc.
¢
Don’t
stick
paper
or
write
anything
with
ball-point
pen
on
the
surface
of
the
labelled
side.
Installation
¢
This
unit
is
composed
of
many
sensitive
objects,
laser.
pickup
and
LSI,
etc.
Therefore
please
avoid
installing
this
unit
under
the
following
conditions.
1.
On
an
inclined
or
unstable
location.
2.
In
a
closed
vehicle
or
high
temperature
(over
100°
F;
40°C).
.
Exposure
for
long
time
in
direct
sunlight.
.
In
very
humid
locations.
.
In
dusty
or
smoky
locations.
.
In
very
low
temperature
(below
40°
F;
5°C)
.
Near
strong
magnetic
fields.
“NMR
W
*
CAUTION
1.
In
installing
your
own
system,
do
not
lay
the
player
directly
upon
an
amplifier
under
any
cir-
cumstances
because
such
an
amplifier
gives
off
excessive
heat.
2.
Avoid
installing
this
unit
near
a
tuner
or
a
televi-
sion.
Because
it
uses
high
frequency
signals,
this
unit
may
influence
radio
or
television.
If
the
above
precaution
can
not
be
met,
you
may
have
to
turn
off
the
CD
player
when
not
in
use.

Rear
Panel
Connections
For
the
whole
system
connections
see
the
connecting
diagram
in
the
operating
instruction.
manual
of
Sherwood
compatible
unit.
1.
CONNECTION
CORDS
You
will
have
two
leads
from
the
COMPACT
DISC
PLAYER
to
connect
to
your
system.
One
lead
(WHITE)
carries
the
LEFT
channel
signal
and
should
be
connected
to
the
LEFT
of
CD
input
of
the
system.
The
other
lead
(RED)
should
be
connected
to
the
RIGHT
of
CD
input
of
the
system.
2.
AC
INPUT
CORD
Plug
this
cord
into
the
switched
AC
outlet
on
the
back
of
your
receiver
or
amplifier
or
a
household
AC
outlet.
3.
SYSTEM
REMOTE
CONTROL
CORD
(GREEN)
This
cord
is
only
useful
if
this
unit
is
a
part
of
Sherwood
compatible
remote
controlled
unit
such
as
AX-
3030R,
RX-4030R
or
RV-5030R,
etc..
Connect
this
cord
to
the
DIGILINK
jack
of
Sherwood
amplifier
or
another
equipment.
NOTE:
Do
not
connect
this
cord
to
the
DECK
PAUSE
jack
that
is
used
only
for
Sherwood
mechanical
cassette
deck.
;
Front
Panel
Controls
@
POWER
SWITCH
Press
the
POWER
switch
to
turn
on
this
CD
player
and
press
this
again
to
turn
it
off.
In
system
operation,
plug
the
AC
input
cord
into
the
switched
AC
outlet,
keep
the
power
switch
ON
and
control
power
ON/OFF
with
the
main
power
switch
on
your
system.
@
DISC
TRAY
The
disc
is
inserted
in
this
tray
with
the
labelled
side
up.
@®
OPEN/CLOSE
BUTTON
(A)
This
button
is
used
for
opening
or
closing
the
disc
tray.
@
PLAY/PAUSE
BUTTON
(P/]])
This
button
is
used
for
starting
play,
holding
play
at
the
beginning
of
a
track
or
interrupting
play.
@
STOP/CLEAR
BUTTON
(@)
This
button
is
used
for
stopping
play,
clearing
programmed
tracks
or
recovering
the
deleted
tracks.
©
FORWARD
SKIP/SEARCH
BUTTON
(>>4/PP)
This
button
is
used
for
moving
onto
a
next
track
or
searching
for
a
particular
passage
in
fast
forward.

@
BACKWARD
SKIP/SEARCH
BUTTON
(144/44)
This
button
is
used
for
replaying
from
the
beginning
of
the
current
track,
returning
to
a
previous
track
or
searching
for
a
particular
passage
in
fast
reverse.
REPEAT
BUTTON
This
button
is
used
for
repeating
one
track
or
all
tracks.
@
PROGRAM/REVIEW
BUTTON
This
button
is
used
for
storing
or
reviewing
the
track
numbers
of
a
program.
EDIT
BUTTON
This
button
is
used
for
editing
the
tracks
to
be
recorded
onto
the
cassette
tape.
a)
TAPE
SIZE
BUTTON
This
button
is
used
for
selecting
the
tape
length.
@2
DELETE
BUTTON
This
button
is
used
for
deleting
the
undesired
tracks.
@)
RANDOM
PLAY
BUTTON
This
button
is
used
for
playing
a
disc
at
random.
TIME
BUTTON
This
button
is
used
for
checking
the
elapsed
playing
time
from
the
beginning
of
current
track
or
remaining
playing
time
of
current
track,
or
remaining
playing
time
of
the
disc.
@)
HEADPHONE
JACK
This
JACK
is
used
for
listening
with
the
headphone.
HEADPHONE
VOLUME
This
is
used
for
the
adjustment
of
the
headphone
level.
@
INFRARED
RECEIVER
WINDOW
(ONLY
FOR
CD-3030R)
This
receives
the
pulse
code
modulated
(PCM)
infrared
signals
transmitted
by
the
remote
control
and
con-
verts
it
into
the
electrical
signal
to
control
the
unit.
MULTI
FUNCTION
DISPLAY
This
display
shows
the
corresponding
information
according
to
each
mode.

Operations
ea
1.
LOADING
AND
UNLOADING
¢
Press
the
OPEN/CLOSE
button.
The
disc
tray
slides
out
automatically.
¢
Take
care
that
the
tray
is
not
obstructed.
If
it
is
obstructed
in
opening,
it
will
be
closed
after
about
five
seconds.
If
it
is
obstructed
in
closing,
it
will
be
opened
automatically
after
about
five
seconds.
¢
Load
a
disc
with
the
labelled
side
up
after
the
disc
tray
is
opened
completely.
Labelled
surface
¢
If
you
want
to
take
a
disc
out
of
the
tray,
press
the
OPEN/CLOSE
button.
¢
Hold
a
disc
out
of
the
tray
in
the
same
way
as
loading
to
avoid
leaving
fingerprints
on
the
disc
surface.
¢
After
putting
a
disc
into
its
storage
case,
close
the
disc
tray
by
pressing
the
OPEN/CLOSE
button
or
pushing
the
tray.
*
CAUTION
IN
LOADING
AND
UNLOADING
¢
Do
not
tilt
the
unit
while
the
disc
tray
is
opening
or
closing
because
the
disc
could
fall
off.
*
Do
not
insert
any
objects
into
the
tray
as
it
can
damage
the
mechanism.
*
Do
not
leave
the
disc
tray
open
to
prevent
dirt
and
dust
from
entering
the
mechanism,
when
not
in
use
.
2.
NORMAL
PLAY
@
PLAYING
A
DISC
¢
Press
the
POWER
switch.
¢
Open
the
disc
tray,
load
a
disc
and
close
it.
e
The
display
shows
the
total
number
of
the
tracks
and
the
total
playing
time
of
the
disc.
And
music
calen-
dar
displays
each
number
of
tracks.
When
the
total
number
of
tracks
is
more
than
15,
=>
will
appear
next
to
15
as
indicated
below.
%
STOP
MODE

¢
Press
the
PLAY/PAUSE
button.
Then
the
play
starts
and
the
first
track
number
and
elapsed
playing
time
from
beginning
of
the
first
track
and
appears
on
the
display.
PLAY
MODE
¢
After
the
last
track
has
been
played,
the
unit
switches
to
the
stop
mode.
@
INTERRUPTING
PLAY
(PAUSE
MODE)
e
Press
the
PLAY/PAUSE
button
to
temporarily
interrupt
play.
The
disc
continues
to
spin
but
the
sound
stops,
and
J
appears
on
the
display.
To
replay,
press
the
PLAY/PAUSE
button
again.
PAUSE
MODE
@
STOPPING
PLAY
(STOP
MODE)
¢
Press
the
STOP/CLEAR
button
to
stop
play
before
the
end
of
the
disc
is
reached.
3.
MUSIC
SEARCH
OPERATION
@
SKIP
PLAY
@
SELECTING
A
NEXT
TRACK
IN
PLAY
MODE
e
Press
the
FORWARD
SKIP
button
(PDH)
to
advance
to
the
beginning
of
the
next
track.
¢
During
normal,
deleted,
repeat
all
programmed
or
intro
scan
play,
if
the
FORWARD
SKIP
button
is
pressed
when
playing
the
last
track,
the
last
track
is
skipped
to
the
first
track.
@
SELECTING
A
PREVIOUS
TRACK
IN
PLAY
MODE
¢
If
a
track
is
playing,
press
the
BACKWARD
SKIP
button
(K4)
to
return
to
the
beginning
of
the
track.
¢
Press
the
BACK
WARD
SKIP
button
before
a
track
begins
playing
to
move
to
the
beginning
of
the
previous
track.
¢
During
normal,
deleted,
repeat
all
programmed
or
intro
scan
play,
if
the
BACKWARD
SKIP
button
is
pressed
at
the
beginning
of
the
first
track,
the
first
track
is
skipped
to
the
last
track.
¢
During
random
play,
the
BACKWARD
SKIP
button
can
be
pressed
only
to
return
to
the
beginning
of
a
track.
M@
BEGINNING
AT
A
SPECIFIC
TRACK
IN
STOP
MODE
1.
Repeatedly
press
the
FORWARD
or
BACKWARD
SKIP
button
(PP
]/
K44)
until
the
desired
track
num-
ber
appears
on
the
display.
.

TRACK
al
Baa
Fag
Ae
al
(2)
[a] (a)
v
2.
Press
the
PLAY/PAUSE
button.
eT
RA
j
tru!
take
£3]
fa]
fis]
>
@
SEARCHING
A
SPECIFIC
PASSAGE
IN
PLAY
MODE
¢
Press
and
hold
down
the
FORWARD
or
BACKWARD
SEARCH
button
(PP
/44).
The
sound
level
is
decreased
by
1/4
(12dB)
compared
with
the
normal
level.
®
Release
the
button
when
the
desired
point
has
been
reached.
e
If
the
CD
player
reaches
the
end
of
the
last
track
during
forward
search,
the
unit
switches
to
the
stop
mode.
¢
If
the
CD
player
reaches
the
beginning
of
the
first
track
during
backward
search,
play
restarts
at
this
point.
4.
REPEAT
PLAY
@
REPEAT
ALL
TRACKS
e
Press
the
REPEAT
button
before
or
during
play.
¢
repeat[ALL]
appears
on
the
display
and
all
tracks
of
the
CD
will
be
repeated.
¢
If
the
CD
player
reaches
the
end
of
the
last
track
during
forward
search,
the
unit
goes
back
to
the
begin-
ning
of
the
first
track
and
continues
to
search
forward.
@
REPEAT
ONE
TRACK
e
After
selecting
a
desired
track
with
the
FORWARD
or
BACKWARD
SKIP
button,
press
the
REPEAT
but-
ton
twice
before
or
during
play.
e
repeast(i]
appears
on
the
display
and
the
selected
track
will
be
repeated.
¢
If
the
REPEAT
button
is
pressed
once
again
in
this
mode,
repeat
play
mode
is
canceled.
5.
PROGRAMMED
PLAY
You
can
program
up
to
20
tracks
to
play
in
any
sequence
you
choose.
If
you
exceed
20
tracks,
the
“Full”
sign
appears
to
remind
you
that
the
memory
is
full
and
cannot
accept
any
more
tracks.
BZ
PROGRAMMING
Example:
When
you
wish
to
program
the
tracks
4,
17
and
8,
the
programming
procedure
is
as
follows.
1.
In
the
stop
mode,
press
the
PROGRAM/REVIEW
button.

'
2.
Select
the
desired
track
with
the
FORWARD
or
BACKWARD
SKIP
button.
ii
(eRGg
=
:
Tal
a
yun
TRACK
1
>
3.
Press
the
PROGRAM/REVIEW
button.
After
about
I
second
TRAE
min
sec
al
|
an
a
ees
fe]
&]
=
¢
After
the
last
programmed
track
has
been
played,
the
last
programmed
track
number
and
the
total
playing
time
of
the
programmed
tracks
are
shown
on
the
display.
¢
If
the
FORWARD
SKIP
button
is
pressed
when
playing
the
last
programmed
track,
the
“End”
sign
appears
on
the
display
and
the
last
track
continues
to
be
played.
@
RECTIFYING
ANY
WRONG
PROGRAMMED
TRACK
¢
When
you
made
a
mistake
and
programmed
any
wrong
track,
you
can
rectify
as
follows.
Example:
When
you
took
a
mistake
and
stored
track
17
instead
of
track
10.
1.Find
track
17
with
the
PROGRAM/REVIEW
button.
(]
TRACK
—
!
f
Fy
oo
2.
Select
track
10
with
the
FORWARD
or
BACKWARD
SKIP
button.

@
CHECKING
THE
CONTENTS
OF
THE
PROGRAM
You
can
check
the
contents
of
the
program
during
programming
or
after
completion
of
programming.
e
Each
time
the
PROGRAM/REVIEW
button
is
pressed,
the
programmed
track
will
appear
in
the
programmed
sequence.
@
CLEARING
THE
PROGRAMMED
TRACKS
e
Each
time
the
STOP/CLEAR
button
is
pressed
during
programming
or
after
completion
of
program-
ming,
the
programmed
tracks
are
cleared
one
by
one
in
the
opposite
sequence.
¢
If
you
wish
to
clear
a
specific
track,
find
that
track
with
the
PROGRAM/REVIEW
button
and
clear
with
the
STOP/CLEAR
button.
¢
By
pressing
the
OPEN/CLOSE
or
STOP/CLEAR
button
over
4
seconds
in
the
stop
mode,
all
programmed
tracks
will
be
cleared.
6.
EDIT
FOR
RECORDING
You
can
edit
up
to
20
tracks
to
be
recorded
according
to
the
tape
length.
A.
AUTO
EDIT
1.
In
the
stop
mode,
press
the
EDIT
button.
AUTO
EDIT
Oe)
‘~
\
4
7Seee
PU
ele
Gl
/
|
S
space
[3]
fa)
5}
>
at
2.
a.
Select
the
desired
tape
length
with
the
TAPE
SIZE
button.
Example:
When
the
desired
tape
length
is
46
minutes.
AUTO
EDIT
Q_o
By
{2] [3]
(4)
_
we
&)
&)
L7-
70a
8
bal
a.space
[3]
fa]
fs]
|
After
about
2
seconds
e
Each
time
the
TAPE
SIZE
button
is
pressed,
the
tape
length
display
changes
as
follows.
fae
C-54———>
C-60
>
|
b.
Select
the
desired
tape
length
at
your
option
with
the
NUMERIC
buttons
on
the
remote
control.
Example:
When
the
desired
tape
length
of
each
side
is
23
minutes,
press
2,
3,
0
and
0
to
enter
“23:00”.
AUTO
EDIT
foo}
F)
2) 8)
317-07
282858
rou
Ble
aspace
[13]
[ta]
fis]
>

3.
Press
the
EDIT
button
to
automatically
edit
the
tracks
to
be
recorded.
AUTO
cor
fees
()
2]
B)
f4]
i
ro»
»
8a
a
ees
Oe
Ce
ee
OE)
A.
SPACE
>
|
The
tracks
and
remaining
time
of
the
side
A
appear.
|
©
J
After
about
2
seconds
Ne
AUTO
EDIT
(ATS
7
pisos
MIN
SEC
soe
‘ :
Il
clam
The
tracks
and
remaining
time
of
the
side
B
appear.
PEt
“trent
I
A.
SPACE
>
J
After
about
2
seconds
:
AUTO
EDIT
2)
1c
rt
ic
=
Auto
eidt
is
completed.
a
a
B.
MANUAL
EDIT
1.
In
the
stop
mode,
press
the
EDIT
button
twice.
;
EDIT
C)
f2}
&)
{4}
‘\
S
Ap
rveeae
Lo
Litt
&
bo
&
“
/
|
A
smace
£3)
Ea
[5]
>
2.
Select
the
desired
tape
length
like
the
auto
edit.
3.
Press
the
PROGRAM/REVIEW
button
to
manually
edit
the
tracks
to
be
recorded.
“port
pac
fas
MIN
SEC
ann
—!
Lt
le
A.
SPACE
>
4.
Select
and
program
the
tracks
to
be
edited
like
programming
for
the
side
A.
Example:
When
the
tracks
1,2,3,4,5,6
and
9
are
edited
for
the
side
A.
mee
er
(ao)
&
B)
fa]
m7
pte
SEC
[s]
3-2
ii
A.
SPACE
;
>

5.
After
edting
the
tracks
of
the
side
A,
press
the
EDIT
button.
6.
Select
and
program
the
tracks
to
be
edited
like
programming
for
the
side
B.
Example:
When
the
tracks
7,8,10,11,12,13,14
and
18
are
edited
for
the
side
B.
After
a
few
seconds
[PROG]
oat,
EDIT
Es
ae
E]
io
678.7%
eeoR
am
(Li
"tro
i
Beare
A.
SPACE
ied
¢
If
the
PLAY/PAUSE
button
is
pressed
after
editing
the
tracks,
play
starts
from
the
first
track
of
the
side
A
for
recording.
¢
If
all
tracks
of
the
side
A
have
been
played,
the
unit
switches
to
the
pause
mode.
e
If
the
PLAY/PAUSE
button
is
pressed,
play
starts
from
the
first
track
of
the
side
B
for
recording.
NOTE:
1.
In
the
edit
mode,
the
auto
space
function,
leaving
the
spaces
of
4
seconds
between
the
tracks,
is
automat-
ically
activated.
2.
In
the
edit
mode,
repeat
and
random
play,
etc.
are
not
operative.
3.
When
checking,
clearing
or
rectifying
the
tracks,
do
like
programming.
4.
During
manual
edit,
if
the
“—”
sign
on
the
time
display
disappears,
it
means
that
the
total
time
of
the
edited
tracks
is
greater
than
the
selected
tape
length.
So
edit
the
tracks
again
lest
the
total
time
of
the
edited
tracks
should
exceed
the
tape
length.
7.
DELETED
PLAY
When
there
are
the
undesired
tracks
on
a
CD,
you
can
delete
up
to
20
tracks
like
programming.
@
DELETING
Example:
When
you
wish
to
delete
the
tracks
4,
8
and
17,
the
deleting
procedure
is
as
follows.
1.
In
the
stop
mode,
press
the
DELETE
button.
b3}
Fa)
bs]
>
2.
Select
the
undesired
track
with
the
FORWARD
or
BACKWARD
SKIP
button.
See
a
Track
“|
~
2)
hfe)
rl
Bicjela
Aaa
e
G3}
be]
Es]
>

3.
Press
the
DELETE
button.
After
about
1
seocond
OELETE
Cc)
2)
ad
|
4
2
>
oO
x
~,
Ly
CI
1
cr
Lo
cl
@]
BG)
ENC)
ial
sae
=
4.
Repeat
steps
2
and
3
to
compete
deleting.
ing
OELETE
fb)
(2]
=
PleAa
eso
!
—
Ob
Sietotciale
bs]
ba]
bs]
§.
Press
the
PLAY/PAUSE
button.
[
ode
DELETE
mare
|
>
SS
«F808
t
ic
ogee
ai
s+
H@
CHECKING
THE
DELETED
TRACKS
You
can
check
the
deleted
tracks
during
deleting
or
after
completion
of
deleting.
e
Each
time
the
DELETE
button
is
pressed,
the
deleted
tracks
will
appear
in
the
deleted
sequence.
@
RECOVERING
THE
DELETED
TRACKS
e
Each
time
the
STOP/CLEAR
button
is
pressed
during
deleting
or
within
4
seconds
after
completion
of
deleting,
the
deleted
tracks
are
recovered
one
by
one
in
the
opposite
sequence.
e
If
you
wish
to
recover
a
specific
track,
find
that
track
with
the
DELETE
button
and
recover
with
the
STOP/CLEAR
button.
e
By
pressing
the
OPEN/CLOSE
or
STOP/CLEAR
button
over
4
seconds
in
the
stop
mode,
all
deleted
tracks
will
be
recovered.
8.
RANDOM
PLAY
In
this
mode,
CD
player
plays
the
tracks
on
the
CD
in
random
sequence.
e
Press
the
RANDOM
PLAY
button.
The
unit
automatically
select
and
play
tracks
at
random.
ff]
[4]!
After
a
few
seconds
ON
He
o>
ESCIBE2|
>
TF
ao)
aaa
aga)
[2]
fa
Fl
Fal
ad
Cu
Cfo
ieee
b3]
fa]
5]
>
£3]
Fa]
fs}
>
¢
If
the
RANDOM
PLAY
button
is
pressed
during
random
play,
random
play
is
canceled
and
normal
play
starts
at
the
present
track.
e
During
random
play,
repeat
one
track
play
is
not
operative.

9.
TIME
DISPLAY
SELECTION
This
unit
has
three
different
time
display
modes.
Example:
When
a
disc
of
53
min.
47
sec.
is
playing
at
the
point
of
3
min.
15
sec.
after
the
beginning
of
track
7.
[-—_—_——9
Tracks,
$3
Min.
47
See.
———____
6min.
4min.
23
min.
47sec.
Smin.
7min.
8
min.
TRACK
| |
TRACK
2)
-:
«
TRACK
7
|
TRACK
8
|
TRACK
9
3
Min.
15
Sec.
Point
of
Track
7
¢
Each
time
the
TIME
button
is
pressed,
the
time
display
changes
as
follows.
me
|
!
TRACK
l
bo
$
z
o
m
0
Lr
|
[2]
—_
aw
2
om
‘cm
Hy)
m
ie)
|
a
_t
Lr
[o]
aL
od
If
|
a
14
a
Lt.
NOTE:
The
track
number
and
remaining
playing
time
of
the
current
track
appear.
The
remaining
playing
time
of
the
disc
appears.
The
track
number
and
elapsed
playing
time
from
beginning
of
the
current
track
appear.
1,
When
a
track
of
which
number
is
greater
than
30
is
programmed,
edited,
deleted
or
being
played,
the
time
display
may
show
“--:--”,
2.
During
random
play
or
when
the
total
playing
time
is
more
than
99
min.,
the
time
display
may
show
£6
”

Remote
Controls
1.
DIGI
LINK
SYSTEM
REMOTE
CONTROL
This
CD
player
can
be
remotely
controlled
with
Sherwood
compatible
units
such
as
AX-3030R,
RX-2030R,
RX-4030R,
RV-5030R,
RV-6030R,
etc.
¢
For
available
control
functions,
refer
to
compatible
units
manual.
To
listen
to
the
sound
of
CD
by
digilink
system
remote
control,
make
sure
of
connecting
a
system
remote
control
cord
to
the
DIGILINK
jack of
Sherwood
compatible
unit.
2.
SELF
REMOTE
CONTROL
(
OPTION
)
@
NUMERIC
BUTTONS
(0~9)
e
If
you
press
the
number
that
corresponds
to
your
desired
track
with
the
NUMERIC
buttons,
the
unit
plays
that
track
immediately
without
the
PLAY/PAUSE
button.
¢
To
select
two
digit
track
number,
the
second
digit
must
be
pressed
within
about
2
sec.
after
the
first
digit
has
been
pressed.
¢
During
programming
or
deleting,
etc.,
if
you
select
the
desired
or
undesired
track
with
the
NUMERIC
but-
tons,
that
track
is
programmed
or
deleted
without
the
PROGRAM/REVIEW
or
DELETE
button.
¢
During
program
play,
If
you
want
normal
play,
select
the
desired
track
with
the
NUMERIC
buttons,
then
normal
play
starts
from
that
track.
¢
If
you
want
program
play
again,
press
the
PROGRAM/REVIEW
button
in
the
stop
mode,
then
the
unit
switches
to
the
program
mode.
@
INTRO
SCAN
BUTTON
_
©
If
the
INTRO
SCAN
button
is
pressed,
INTRO
appears
on
the
display
and
the
CD
player
plays
the
first
10
seconds
of
each
track.
e
If
you
want
to
cancel
the
intro
scan
play,
press
the
STOP/CLEAR
or
INTRO
SCAN
button.
@
REPEAT
A+—r
B
BUTTON
¢
During
play,
press
this
button
at
the
beginning
of
the
passage
you
want,
then
REPEAT
appears
on
the
display.
e
Press
this
button
at
the
end
of
the
passage
again,
then
appears
on
the
display
and
the
specific
pas-
sage
is
being
played
repeatedly.
e
If
you
want
to
cancel
repeat
A~—-~+
B
play,
press
the
REPEAT
A~—>+
B
or
STOP/CLEAR
button.
@
DISPLAY
BUTTON
¢
Each
time
the
DISPLAY
button
is
pressed,
the
brightness
of
the
display
changes
as
follows.
ae
ee
|
¢
In
the
display
OFF
mode,
if
any
button
is
pressed,
the
unit
switches
to
the
display
ON
mode.

¢
PROGRAM/REVIEW,
TAPE
SIZE,
EDIT,
RE-
PEAT
(1/ALL),
RANDOM
PLAY,
DELETE,
TIME,
BACKWARD
SKIP
(K44),
FORWARD
SKIP
(PPI),
BACKWARD
SEARCH
(44),
FORWARD
SEARCH
(>),
PAUSE
(I),
STOP/
CLEAR
(@)
and
PLAY
(®)
BUTTONS.
These
buttons
have
the
same
functions
as
those
on
the
CD
player.
NOTE:
This
remote
control
is
used
for
many
Sherwood
CD
players.
So,
some
features
on
remote
are
not
avail-
able
for
this
model.
e
DISC,
INDEX
SEARCH
(—-and-—»)
and
VOL
UME
(DOWN
and
UP)
BUTTONS
are
not
avail-
able
for
CD-3030R.
DIRECT
MUSIC
ACCESS
SYSTEM
Gora
AOS
REMOTE
CONTROL
UNIT
AM-30
Self
Remote
Control
(CD-3030R
only)
Remote
Control
Operation
Range
(CD-3030R
only)

CONCERNING
USE
OF
BATTERIES
©
Open
the
cover
by
sliding
it
as
shown.
¢
Insert
two
size
“AA”
(R6)
batteries,
matching
the
polarity
and
close
it.
NOTE:
1,
Replace
them
with
two
new
batteries
when
the
remote
control
does
not
operate
the
unit.
2.
Retnove
the
batteries
if
it
is
not
to
be
used
for
an
extended
period
of
time.
3.
Do
not
use
rechargeable
batteries
(Ni-Cd
type).

Troubleshooting
Guide
Although
the
greatest
care
has
been
taken
in
the
manufacture
of
this
COMPACT
DISC
player,
the
possibil-
ity
remains
that
a
fault
could
appear
or
that
for
some
reasons
the
player
could
fail
to
function
to
your
complete
satisfaction.
The
cause,
however,
will
not
always
be
found
in
the
player
itself.
External
factors,
and
the
fact
that
it
takes
time
to
become
accustomed
to
the
whole
concept
of
the
new
product
and
the
new
discs,
can
also
play
a
role.
To
save
your
unnecessary
calls
on
your
dealer
or
our
Service
Organization,
we
have
compiled
a
list
of
possi-.
ble
faults
and
their
causes.
To
even
mention
some
of
these
causes,
such
as
those
to
do
with
power
connec-
tion,
may
perhaps
seem
excessive.
Our
experience
shows,
however,
that
they
are
easily
overlooked
as
sources
of
troubles.
If,
by
using
this
list,
you
do
not
succeed
in
solving
the
problem,
stop
your
investigation.
Disconnect
the
AC
cord
and
contact
your
dealer.
Under
no
circumstances
should
you
open
up
the
player.
If
you
should,
this will
invalidate
all
your
rights
under
the
guarantee.
NOTE:
If
the
faults
relating
to
the
power
or
the
connections
arise
when
the
player
is
a
part
of
a
system,
check
your
operating
instructions
for
the
amplifier
of
the
system.
1.
After
pressing
the
POWER
switch,the
display
is
not
on.
e
The
POWER
switch
is
not
pressed
completely.
*
One
of
the
plugs
of
the
AC
input
cord
is
not
connected
or
is
not
making
contact.
*
There
is
no
supply
at
the
AC
outlet.
Plug
in
another
electrical
appliance
and
check
if
that
works.
2.
After
pressing
the
OPEN/CLOSE
button,
the
disc
tray
does
not
slide
out
or
in.
¢
The
player
is
not
switched
on.
Press
the
POWER
switch
again.
¢
The
microprocessor
has
not
received
the
command
properly.
Press
the
OPEN/CLOSE
button
once
more.
¢
The
tray
drive
is
not
functioning.
You
cannot
repair
it
yourself.
3.
Disc
is
inserted
but
the
number
of
tracks
and
playing
time
are
not
displayed.
¢
The
disc
is
not
inserted
with
the
labelled
side
up.
¢
The
disc
is
dirty.
See
if
cleaning
the
disc,
or
using
another
clean
disc
clears
the
fault.
¢
The
disc
is
defective.
Try
another
disc
and
see
if
that
clears
the
fault.
¢
There
is
an
unwanted
object
such
as
a
piece
of
paper
or
a
remnant
of
package
in
the
disc
tray.
4,
The
disc
is
played
and
the
track
number
and
the
elapsed
time
indication
function
well,
but
there
is
no
sound.
¢
The
amplifier
is
not
turned
on.
¢
The
position
of
the
amplifier
source
selector
switch
does
not
correspond
with
the
input
to
which
the
player
is
connected.
¢
The
amplifier
or
the
speakers
connected
to
it
are
not
working.
Check
it
with
another
sound
source
to
see
_
if
this
is
the
case.
¢
The
microprocessor
has
not
received
the
command
correctly.
Try
to
turn
the
player
off
and
on
again,
and
then
restarting
clears
the
fault.
¢
The
player
is
not
connected
to
amplifier
correctly.
©
The
input
to
which
the
player
is
connected
is
defective.
Check
it
by
connecting
the
player
to
another
input
jack.

5.
The
sound
is
poor
or
distorted
or
you
can
hear
only
one
channel.
¢
The
player
is
not
connected
to
the
CD
input
of
the
amplifier
but
to
the
PHONO
input.
*
One
of
the
plugs
of
the
connection
cords
is
either
not
connected
or
not
properly
connected.
¢
The
amplifier
or
the
speakers
connected
to
it
are
not
working
properly.
Check
it
with
another
sound
source
to
see
if
this
is
the
case.
6.
Programming
is
not
working.
°
The
disc
is
dirty
or
badly
scratched.
See
if
cleaning
the
disc
or
try
to
program
with
a
scratch-free
disc.
¢
The
microprocessor
has
not
processed
the
commands
properly.
Clear
the
program
by
pressing
the
OPEN/CLOSE
button
and
try
to
program
again
and
restart
play
and
check
if
the
fault
is
cleared.
¢
All
20
memory
places
were
already
occupied
and
you
missed
the
“Full”
sign
that
indicated
it.
Check
it
by
with
the
PROGRAM/REVIEW
button.
This manual suits for next models
1
Table of contents
Other Sherwood CD Player manuals

Sherwood
Sherwood Newcastle CD-980 User manual
Sherwood
Sherwood CDC-690T User manual
Sherwood
Sherwood CD-5505 User manual

Sherwood
Sherwood CLASS1 User manual

Sherwood
Sherwood CD-5090 User manual

Sherwood
Sherwood CDC-5506 User manual

Sherwood
Sherwood CDC-5506 User manual

Sherwood
Sherwood CDC-5506 User manual

Sherwood
Sherwood CDC-5090C User manual
Sherwood
Sherwood CD-772 User manual