manuals.online logo
Brands
  1. Home
  2. •
  3. Brands
  4. •
  5. Siemens
  6. •
  7. Freezer
  8. •
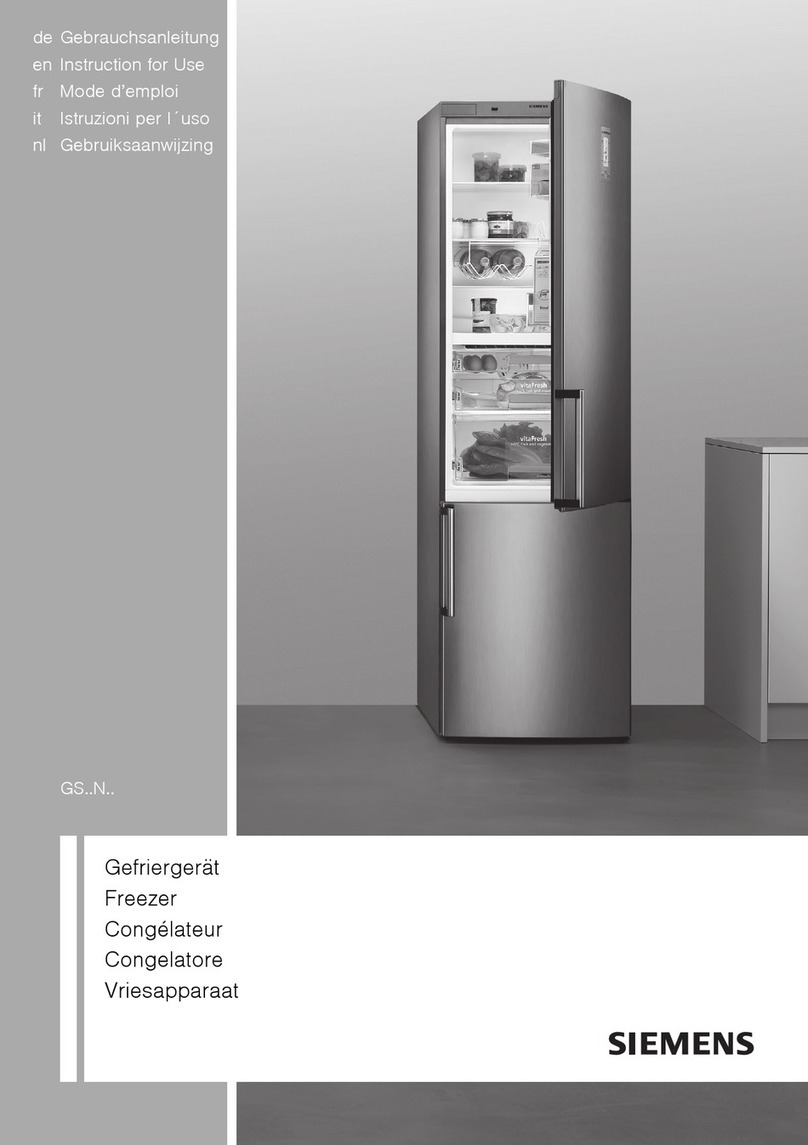
  9. Siemens KG E Series User manual

Siemens KG E Series User manual

Fridge/freezer combination
KG..E..
[EN]Instructions
Translated from Dutch to English - www.onlinedoctranslator.com
NL
enContentenInstruction manual In case of damage
Safety regulations
and warnings
■ Avoid open flames or
other ignition sources
keep near the device;
Before using the
device ■ Ventilate the room well for a
few minutes;
Read the operating instructions
and installation instructions
carefully. It contains important
information about installation,
use and maintenance of the
device.
■ Switch off the device
and pull the plug from
the socket;
■ Contact Customer
Service.
The manufacturer assumes
no liability if the instructions
and
warnings in the
operating instructions are not
observed. Keep
the operating instructions and
installation instructions for
later use or for any
subsequent owner.
The more refrigerant the
device contains, the larger the
room in which the device is
installed.
In a space that is too small, a
leak can create a flammable
mixture of gas and air.
The room must be at least 1 m³
per 8 g of refrigerant. The
amount of refrigerant in your
appliance can be found on the
rating plate on the inside of the
appliance.
Technical safety
Fire hazard
A small amount of
environmentally friendly, but
flammable refrigerant (R600a)
flows through the pipes of the
refrigerant circuit. This does not
harm the ozone layer and does not
increase the greenhouse effect.
However, escaping refrigerant
can cause eye damage or catch
fire.
When setting up the device,
make sure that the
connecting cable is not
pinched or damaged.
79
NL
If the connecting cable of the
device is damaged, it must be
replaced by the manufacturer,
its
service or another qualified
person. Improper installation
and repairs can pose great
danger to the user of the device.
When using
■ Never use electrical appliances
in the appliance
(e.g. heating devices, electric
ice cream makers, etc.).
Explosion danger!
■ Never defrost or clean the
appliance with a steam
cleaner! The hot steam can get
into the electrical parts
and cause a short circuit.
Danger of electric shock!
Repairs may only be carried
out by the manufacturer,
customer service or another
qualified person.
■ Apart from the
recommendations of the
manufacturer does not take
additional measures to
speed up defrosting.
Explosion danger!
Only original parts from the
manufacturer may be used. Only
these parts are warranted by the
manufacturer to comply with the
meet safety requirements. ■ Do not use pointed or sharp
objects to remove a layer of
ice or frost. This allows you to
cooling pipes
Refrigerant spraying out
could catch fire or cause eye
damage.
Do not use multiple outlets,
extension cords, or adapters.
Fire hazard
Portable Multiple
wall outlets or portable power
supplies can overheat and cause
a fire. Do not place a portable
multiple outlets or portable
power supplies behind the
device.
■ No products with
flammable propellants
(eg aerosols) and do not
store explosive substances
in the device.
Explosion danger!
80
NL
■ Do not use plinth, pull-out
baskets or drawers, doors,
etc. as a step or for leaning
on.
■ Avoiding risks to children
and vulnerable
persons:
Vulnerable are children/
persons with physical,
mental or sensory
disabilities, as well as
persons who have insufficient
knowledge of the safe
operation of the device.
■ To defrost or clean: unplug
the
mains socket or switch off the
fuse. Always pull the plug,
never the connecting cable.
■ Drinks with a high alcohol
percentage always well closed
and standing
keep.
Make sure that children and
vulnerable persons
understand the dangers.
A person responsible for
safety must supervise
children and vulnerable
persons near or instructing
them.
■ Do not use oil or grease on
plastic parts and door seals.
This
can therefore be porous
turn into.
■ The leg
Never cover or block any
vents on the device.
Only allow children from 8
years to use the appliance.
Children should be supervised
during cleaning and maintenance.
■ Bottles and cans of
liquids – especially
carbonated drinks – do not
store in the freezer
compartment. Such bottles
and cans can burst!
Never let children play with
the appliance.
■ Avoid prolonged contact of
your hands with the
frozen food, ice or the
evaporator tubes, etc.
Risk of frostbite!
■ Never put frozen food in your
mouth immediately after you
have taken it out of the freezer
compartment.
Risk of frostbite!
81
NL
Children in the household Directions about
the drain
■ Packaging materials and parts
thereof are not toys for
children. Risk of suffocation
due to foldable cardboard
boxes and foil!
* Disposal of the packaging
of your new device
The packaging protects your device
against transport damage. The
materials used are harmless to the
environment and can be reused. So help
and take care
that the packaging is disposed of in an environmentally
friendly manner.
■ The device is not a toy for
children!
■ For a device with a door lock:
keep the key out of the reach
of children! You can ask your supplier or the
cleaning service in your municipality
how you can dispose of your old
appliance and the packaging material of
the new appliance for environmentally
friendly processing.
General provisions
The device is suitable
■ for cooling and freezing
foodstuffs,
■ for making ice cream. * Disposal of your old
device
This appliance is intended for
private use in the household and
domestic environment.
Old appliances are not worthless waste!
Valuable raw materials can be recovered
through environmentally friendly
disposal.
The cooling circuit has been
checked for leaks. This appliance is marked in
accordance with the
European Directive 2012/19/EU
on waste
electrical and electronic
equipment (waste electrical and
electronic equipment - WEEE).
This device complies with the
applicable safety regulations for
electrical equipment and is radio
interference suppressed.
This device is intended for use
at altitudes up to 2,000
meters above sea level. The directive sets the framework
for the take-back and disposal of
old appliances that is valid in the
EU.
82
NL
m Warning The right place
With discarded appliances
1. Pull out the mains plug. Any dry, well-ventilated room is suitable.
Do not place the appliance in the sun or
next to a stove,
heating radiator or other heat source. If
installation next to a heat source is
unavoidable, use an insulating plate or
observe the following minimum distances
from the heat source:
2. Cut the connection cable and remove it
together with the plug.
3. Do not remove shelves and storage
compartments to make it difficult for
children to climb in!
4. Do not allow children to play with the
discarded appliance. Choking hazard!
Refrigerators contain refrigerant and gas
in the insulation. Which must be
disposed of carefully. In order to ensure
efficient and environmentally friendly
disposal, the pipes of the cooling circuit
must not be damaged until transport.
■ Next to electric or gas stoves 3 cm.
■ In addition to a central heating system 30 cm.
The floor at the installation site may not
give way, floor possibly
strengthen. Any imperfections
in the floor by putting something
underneath.
Size of
the delivery
Distance to the wall
Fig. #
The device does not require a wall
clearance to the side. The drawers and
shelves can nevertheless be fully
extended.
After unpacking, check all parts
for any
transport damage.
For complaints, please contact the store
where you purchased the device or our
customer service. Switch door stop
(If necessary)
The delivery consists of the following
parts: If necessary: We recommend you
have the door suspension replaced by the
after-sales service. You can request the
costs for changing the door stop from the
service department in your region.
■ Freestanding device
■ Equipment (model dependent)
■ Bag with mounting material
■ Instructions
■ Assembly instructions
■ Customer Service Booklet
■ Warranty Supplement
■ Information about energy consumption and
sounds
83
NL
m Warning Note
The device is fully functional within the
indoor temperature limits of the
indicated climate class. When a device of
climate class SN is used at a lower indoor
temperature,
damage to the device is excluded up to a
temperature of +5 °C.
While changing
door suspension, the appliance must not
be connected to the mains. First pull the
plug from the socket. Place enough soft
material on the floor to avoid damaging
the back of the appliance. Carefully lay
the device on its back.
Note Aeration
When the appliance is placed on its back,
the wall spacer must not be mounted. Fig. $
The sky at the back of
the device heats up. The heated air must
be able to be discharged without
hindrance. Otherwise, the chiller has to
perform more. This increases energy
consumption. The
The ventilation openings must therefore
never be covered!
Pay attention
the ambient temperature
hour and the aeration
Ambient temperature Connect device
The device is designed for a specific
climate class. Depending on the climate
class, the device can be used at the
following ambient temperatures.
After installing the device, you must wait
at least 1 hour before using the device.
During transport, the oil from the
compressor may enter the refrigeration
system.
The climate class can be
found on the type plate, fig. 4.
Before using the appliance for the first
time, clean the interior of the appliance
(see chapter „Cleaning
the device").
Climate class Permissible
ambient temperature
SN
N
ST
t
+ 10 °C to 32 °C
+ 16 °C to 32 °C
+ 16 °C to 38 °C
+ 16 °C to 43 °C
84
NL
Electrical connection
The mains socket must be close to the
device and easily accessible even after
setting up the device.
Meeting with
the device
m Warning
Danger of electric shock!
If the connecting cable is not long enough, do
not under any circumstances use
multiple outlets or extension cords.
Instead, contact customer service for
alternative solutions. Unfold the last page with the images. This
manual applies to more than one type.
The device complies with protection class
I. Connect the device to a
installed 220–240 V/50 Hz AC outlet with
ground wire. The socket must be
protected with a 10 A to 16 A fuse.
The equipment of the models may
vary.
Small deviations in the images are
possible.
Fig. !
* Not on all models.
For appliances that are used in non-
European countries, check whether the
connection voltage and the type of current
correspond to the values of your electricity
network. You will find this information on
the type plate, fig.4.
a
B
Cold room
freezer room
1-9
10
11
12*
13
14
15*
16*
17
18
19
20
21
22
Controls
Lighting (LED)
Glass shelf in the cooling
compartment Bottle rack
Fresh cool compartment
vegetable drawer
Butter and cheese box
Storage compartment in the door “EasyLift”
Compartment for large bottles
Freezer drawer (small)
Glass shelf in the freezer compartment
Freezer drawer (large)
Defrost water drainage channel
screw feet
m Warning
Under no circumstances may the device
be connected to electronic
energy saving plugs.
Mains power inverters and sine wave
inverters can be used for our devices.
Mains power inverters are used in
photovoltaic installations that are
directly connected to the public
power grid. For stand-alone systems (eg
on ships or in mountain huts) that do not
have a direct connection to the public
electricity grid, a sine wave inverter must
be used.
85
NL
Controls
Fig. "
1
Enable
the device
Button On/Off
To turn the whole device on
and off.
Fig. "
1. Switch on the appliance with the
On/Off button 1.
2“Super” button (Freezer compartment)
To switch the super freeze
system on and off. An alarm will sound,
the temperature display 4 flashes and the
alarm button 5 lights up.
3Freezer compartment
temperature setting buttons 2. By pressing the alarm button 5 the
alarm signal is switched off.
These buttons adjust the
temperature of the
freezer compartment set. The appliance starts to cool. The
lighting is switched on when the
door is open.
4Temperature indication
freezer room
The numbers correspond to
the set temperatures in the
freezer compartment in °C.
The factory recommends the following
temperatures:
■ Cold room: +4 °C
■ Freezer compartment: -18 °C
5Alarm key
To switch off the alarm signal
(see chapter “Alarm function”). Instructions for use
6Holiday key ■ After switching on, it can take several
hours before the set temperatures are
reached.
Used to switch Holiday Mode on
and off (see Holiday Mode
chapter). Before this time, do not put any food
in the appliance.
7Refrigerator compartment temperature
setting buttons ■ The front of the appliance behind the
door is partially heated slightly, which
prevents the formation of
condensation near the door seal.
The temperature of the refrigerator
compartment is set with these
buttons.
8Temperature display refrigerator
compartmentThe numbers correspond to
the set temperatures in the refrigerator
compartment in °C.
■ If the door of the freezer
compartment cannot be opened
immediately after closing, you
should wait a while until the negative
pressure has disappeared.
9“Super” button (Refrigerator)
To turn the super cooling system
on and off.
86
NL
Set up
the temperature
Vacation mode
If you are absent for a longer period of
time, you can switch the device into
energy-saving holiday mode.
Fig. "
Cold room When the holiday mode is switched
on, the automatic super freeze is
disabled.
The temperature is adjustable from +2 °C
to +8 °C. The temperature in the refrigerator
compartment is automatically set to +14 °C.
Temperature setting button refrigerator compartment 7,
press repeatedly until the desired temperature in the
refrigerator compartment
is set.
Do not store food in the refrigerator
compartment during this time.
The last set value is stored in the
memory. The set temperature is indicated
on the temperature display of the
cold room 8.
Switch on and off
Fig. "
Press Holiday button 6.
When the holiday mode is on, the
button lights up and the
temperature display of the refrigerator compartment
8 no longer shows the temperature.
Do not store sensitive food warmer than
+4 °C.
freezer room
The temperature is adjustable from -16 °C
to -24 °C. Alarm functions
Press the freezer compartment temperature
setting button 3 several times until the desired
freezer compartment temperature is set. door alarm
An alarm is activated if the appliance door
is left open for a long time. Closing the
door switches off the alarm signal.
The last set value is stored in the
memory. The set temperature is indicated
on the freezer compartment temperature
display 4.
87
NL
Temperature alarm
The temperature alarm is activated if it
is too hot in the freezer compartment,
which can cause the frozen food to
thaw.
Net content
You will find information about the net
content on the type plate in your appliance.
Fig.4
After pressing the alarm button 5, the
temperature indication
freezer compartment 4 at the warmest
temperature that has prevailed in the
freezer compartment for five seconds.
Freezing power full
utilize
In order to store the maximum amount of
frozen food, all equipment parts can be
removed. The foodstuffs can then
stacked directly on the shelves and on
the bottom of the freezer
compartment.
After this, this value is deleted. The
temperature display for freezer
compartment 4 shows the set
freezer compartment temperature, without
blinking.
From this moment on, the warmest
temperature is determined again and
stored in the memory.
Removing parts
Freezer drawers up to the stop
pull out, lift at the front and
remove. Fig.0
Without any danger to the frozen food,
the alarm can switch on automatically:
■ when using the device,
The cold room
■ when loading large quantities of fresh
food, The refrigerator compartment is the ideal
storage place for ready meals, baked goods,
preserves, condensed milk and hard cheese,
as well as vegetables and fruit sensitive to
cold.
■ if the freezer compartment door has
been opened for too long.
Note
Do not refreeze partially or completely
thawed frozen food. They can only be
frozen again after cooking or roasting
into a ready-made dish.
Attention when tidying up
Store the food well packed or covered.
This preserves fragrance, color and
freshness. In addition, the foodstuffs will
not taste like each other and
discolor the plastic parts.
Do not make full use of the maximum
retention time.
Disable alarm
Fig. "
Press the alarm button 5 to switch
off the alarm signal.
Note
Prevent the food from touching the
rear wall. Otherwise, air circulation
will be reduced.
Food or packaging can freeze to the rear
wall.
88
NL
Pay attention to the cold zones in the
refrigerator compartment
Switch on and off
Fig. "
Press the refrigerator compartment 9 super button.
The cold zones differ due to the air
circulation in the cold room: The button lights up when
the super cooling system is on.
■ Coldest zone
is in the interior against
the rear wall and in the fresh cooling
compartment Fig. !/13 freezer room
Note
Store sensitive foods such as fish,
sausage and meat in the coldest
areas.
Using the freezer compartment
■ for storing frozen
products,
■ The hottest zone
is located at the very top of the
door.
■ to make ice cubes,
■ to freeze food.
Note Note
Store eg hard cheese and butter in the
warmest zone. Cheese can further
develop its aroma and the butter remains
well spreadable.
Note that the door of
the freezer compartment is closed properly!
When the door is open, the
frozen foods. A lot of ice forms in the
freezer compartment. In addition: energy
wasted due to excessive power
consumption!
Super cooling
During super cooling, the refrigerator
compartment is cooled as cold as possible
for about 15 hours. After this, it
automatically switches to the temperature
set before supercooling.
Freezing capacity
Information about the freezing capacity can be
found on the type plate. Fig.4
Switching on the super cooling system e.g.
Conditions for
freezing capacity
■ before loading large quantities
of food.
■ to cool drinks quickly. ■ Switch on super freezing 24 hours
before adding fresh food (see
chapter Super freezing).
Note
When the super cooling
system is on
operating noises may increase. ■ Preferably freeze large quantities of
food in the lower compartment. There
they are frozen very quickly and
therefore carefully.
89
NL
Smaller quantities
freezing foods
Freeze and store
In the chapter Automatic super
freezing you can read how to freeze
smaller quantities of food in the
fastest way.
Buy from
frozen foods
■ The packaging must not be damaged.
■ Note the expiration date. Fresh foods
freeze
■ The temperature inside the sales fridge
must be -18°C or colder. Only use fresh food.
■ Preferably transport the frozen products in
a cool bag and quickly place them in the
freezer compartment. To best preserve the nutritional value,
aroma and color, vegetables should be
blanched before being frozen. Blanching
is not possible with aubergines, peppers,
courgettes and asparagus
necessary.
Freezing food
■ Only use fresh food.
■ Food which has already been frozen may not
be used with the yet-to-be-frozen
come into contact with foodstuffs.
You can find literature on freezing and
blanching in bookstores.
■ Pack the foodstuffs airtight so that
they do not dry out or lose their
flavour.
Note
Food which has already been frozen may not
be used with the yet-to-be-frozen
come into contact with foodstuffs.
Storing frozen foods
■ Suitable for freezing: Baked goods, fish
and seafood, meat, game, poultry,
vegetables, fruit, herbs, peeled eggs,
dairy products such as cheese, butter
and quark, prepared
dishes and leftovers such as soup,
stews, cooked meat and fish, potato
dishes, casseroles and sweet desserts.
Push the freezer drawer in all the way to
ensure good air circulation.
If there is a lot of food to be stored,
you can store the food immediately
the glass shelves and on the bottom of
the freezer compartment.
1. To do this, you must remove all freezer
drawers.
■ Not suitable for freezing: Vegetables
that are usually eaten raw, such as
lettuce and radishes, whole eggs,
wine grapes, whole apples, pears and
peaches, hard-boiled eggs, yogurt,
thick soured milk, sour cream, crème
frache and mayonnaise.
2. Pull out the freezer drawers as far
as the stop, lift at the front and
remove. Fig.0
90
NL
Pack frozen food
Pack the foodstuffs airtight so that they
do not dry out or lose their flavour.
super freezing
Foods should be frozen to the core as
quickly as possible to preserve vitamins,
nutritional value, appearance and taste.
1. Place food in the packaging.
2. Press out air. The appliance works continuously after the super
freeze has been switched on. The
temperatures of the
freezer compartments are significantly
lower than during normal operation.
3. Provide the whole with a good
closure.
4. State the contents and freezing date on
the packages.
Suitable for packaging:
Plastic, polyethylene and Enable Super Freeze
aluminum foil, freezer boxes.
These products are commercially
available.
Depending on the amount of food to be
frozen, you can use super freezing in
different ways.
Not suitable for packaging:Wrapping
paper, parchment paper, cellophane, Note
waste bags and used
shopping bags. Operating noises may increase when the
super freeze system is turned on.
Suitable as closure:
rubber bands, plastic clips, strings, Automatic super freezing
Smaller amounts of food
cold-resistant adhesive tape, etc
You can seal bags and wrap film made of
polyethylene (PE) with a film sealer.
freeze faster if you freeze them as
follows:
■ in the top freezer compartment
■ left
Shelf life of
the frozen foods The automatic super freezing switches
on when freezing hot
food automatically.
The shelf life depends on the type of
food.
At a temperature of -18 °C: Manual super freezing
Fig. "
■ Fish, sausage, ready meals, bread and
pastries: Preferably freeze large quantities of food
in the lower compartment. There they
are frozen very quickly and therefore
carefully.
up to 6 months.
■ Cheese, poultry, meat: up
to 8 months.
■ Vegetables fruit:
up to 12 months.
Switch on super freezing a few hours
before freezing fresh food to avoid
unwanted
prevent temperature rise.
91
NL
If you want to use the freezing capacity
according to the rating plate, you must
switch on the super freezing 24 hours
before freezing the fresh product.
m Attention
Do not refreeze partially or completely
thawed frozen food. They can only be
frozen again after cooking or roasting
into a ready-made dish.
Press the Super 2 button.
When super freezing is switched on, the
button lights up. This shortens the maximum storage
time.
Disable Super Freeze
Fig. "
Press the Super 2 button.
Super freezing is now disabled.
Performance
(not on all models)
At the end of the super freezing, the
appliance automatically switches to
normal operation.
Butter and cheese box
The butter compartment opens by applying a
light pressure in the middle of the flap.
■ With automatic super freezing: as soon
as the smaller amount of food to be
frozen is frozen. To clean, lift the butter compartment
slightly from below and take it out.
■ With manual super freezing: after
approx. 2 ½ days. Adjustable door shelf
“EasyLift”
Fig. %
The shelf can be adjusted in height
without having to be removed.
Defrosting
frozen foods Simultaneously press the buttons on the
side of the shelf to move the shelf
downwards. It can be moved up without
pressing the buttons.
Depending on the type and preparation
method of the food, you can choose from
the following options:
■ at ambient temperature
■ in the fridge bottle holder
■ in the electric oven, with/without
hot air fan Fig. '
The bottle holder prevents
the bottles tip over when opening and
closing the door.
■ in the microwave
92
NL
Glass shelves Fresh cool compartment
Fig. (
You can adjust the shelves and storage
compartments in the interior as desired
Moving: To do this, pull out the shelf,
lift it at the front and remove it.
Fig. !/13
Lower temperatures prevail in the fresh
cooling compartment than in the cooling
compartment. Temperatures below 0 °C can
also occur.
Ideal for storing fish, meat and sausage.
Not suitable for salads, vegetables and
cold sensitive
foodstuffs.
Variable shelf
Fig. )
The shelf can be folded down if desired.
Pull the shelf forward, lower it and press
it back.
Vegetable drawer with
humidity controller
Fig. -
To create optimal conditions for the
storage of fruit and vegetables, the
humidity can be adjusted
in the crisper drawer are adapted to
the amount of food:
It is suitable for storing food and
bottles.
breakfast set
Fig. *
The trays of the breakfast set can be
taken out and filled separately.
■ small amount of fruit and vegetables
– high humidity
■ large amount of fruit and vegetables
– low humidity
You can take out the breakfast set to fill
or empty it. To do this, lift the breakfast
set and pull it out. You can use the holder
of the containers
shift.
Clues
■ Cold-sensitive fruits (e.g. pineapple,
bananas, papaya and citrus fruits) and
vegetables (e.g. aubergines,
cucumbers, courgettes, peppers,
tomatoes and potatoes) should be
kept outside the refrigerator at a
temperature of approx.
+ 8 °C to +12 °C.
bottle rack
Fig. +
Bottles can be safely stored in the bottle
rack. The holder is variable.
■ Depending on the type of food and
the amount, condensation may form
in the crisper drawer. Condensate
remove with a dry cloth and adjust the
humidity in the crisper using the
humidity control.
93
NL
Insert for the vegetable drawer
picture .
The insert can be removed.
Sticker "OK"
(not on all models)
Freezer drawer (large) With the "OK" sticker you can check
whether the pre-
food recommended safe temperature
ranges +4 °C or colder have been
reached. If the sticker does not
indicate "OK", the temperature should
be reduced incrementally.
Fig. !/20
For storing large frozen foods, e.g.
turkeys, ducks and geese.
Note
Separator plate (if present) cannot be
removed.
Note
It may take up to 12 hours to reach the
set temperature after using the device.
ice tray
Fig. 2
1. Fill the ice tray with drinking water and
place in the freezer compartment. Correct setting
2. Only release the frozen ice tray with a
blunt object (handle of a spoon).
3. To loosen the ice cubes: slightly
bend the ice tray or briefly hold it
under running water.
Switch off device
and out of action
set
Cold battery
The cold accumulator can be removed to
temporarily keep food cool (eg in a cool
bag).
Switch off device
Fig. "
Press the On/Off 1 button.
The temperature indicator 8 goes out and
the chiller shuts down.
The cold battery slows down in the event of
a power failure or malfunction
heating the stored frozen food.
Shutting down the device
If you do not use the device for a long
time:
1. Switch off the device.
2. Pull out the mains plug or unscrew or
disconnect the fuse.
Switch off.
94
NL
3. Cleaning the device.
4. Leave the appliance door open.
Note
Approx. 4 hours before defrosting
switch on the super freezing system so
that the food reaches a very low
temperature and can therefore be stored
longer at ambient temperature.
defrost
Cold room 1. Switch off the appliance to
defrost.
The appliance defrosts
automatically. 2. Pull out the mains plug or unscrew or
disconnect the fuse.
Switch off.
The defrost water runs through
the defrost water channels and the drain
hole to the evaporating part of the
appliance.
3. Freezer drawers with
keep the food in a cool place. Place
the cold battery (if present) on the
food.
freezer room
The freezer compartment is not defrosted
automatically because the frozen food is not
allowed to defrost. A layer of frost in the
freezer compartment reduces the cold
release to the frozen food, which means that
power consumption is increased. Periodically
remove the layer of frost or ice.
4. Open the defrost water drain. Fig.3
5. The large bottle shelf can be used to
collect the defrosted water. To do this,
remove the shelf for large bottles (see
chapter Cleaning the device) and place
it under the open defrost water drain.
m Attention
6. To speed up the defrosting process,
place two pans of hot water on a
trivet in the appliance.
Do not scrape a layer of frost or ice with a
knife or sharp object. This can damage
the cooling pipes. Refrigerant escaping
may catch fire or cause eye damage.
7. After defrosting, pour out the collected
defrost water. The remaining defrost
water on the bottom of
wipe the freezer compartment with a
sponge.
You proceed as follows: 8. Close the defrost water drain.
9. Place the shelf for large bottles back in
the door.
10.After defrosting, reconnect the
appliance and switch it on.
95
NL
Performance
Cleaning of
the device
All variable parts of the device can be
removed for cleaning.
m Attention Remove shelves from the door
Fig. &
■ Do not use cleaning agents or
solvents containing sand, chloride or
acids.
Lift and remove shelves.
Remove glass shelvesFig.
(
■ Do not use abrasive or
scratching sponges. Raise the glass shelves, pull it forward,
lower it and swing it out sideways.
Corrosion can develop on the
metal surfaces. Remove drawer
Slightly lift the drawer and take it out.
■ The shelves and storage
compartments must not be cleaned
in the dishwasher. Defrost water drain valve
For cleaning the defrost water
They can distort! drain, the glass shelf above the vegetable
drawer, fig. !/14, must be detached from
the defrost water drain valve:
Proceed as follows:
1. Switch off the appliance before
cleaning.
1. Remove glass shelf.
2. Lift and remove the defrost water
drain valve. Fig. ,
2. Pull out the mains plug or switch off
the fuse. Note
3. Remove frozen food and store in a cool
place. Cold battery (if present) on
put the foodstuffs.
Regularly clean the condensate trough
and the drain hole with cotton swabs
or similar, so that the defrost water can
drain properly.
4. Wait until the frost layer has thawed.
vegetable drawer
Fig. /
5. Clean the device with a soft cloth and
lukewarm water with a dash of pH
neutral
cleaning agent. The suds should not
get into the lighting.
The vegetable drawer cover can be
removed for cleaning.
Press the side buttons one after the
other and remove the cover plate from
the vegetable drawer.
6. Clean the door seal only with clean
water and wipe it dry thoroughly.
Remove container
Fig. %
7. After cleaning, plug the device back in
and switch it on. Pull out container as far as it will go, lift
at the front and remove.
8. Put frozen food back in the
freezer compartment.
96
NL
odors Save energy
If you smell unpleasant odors: ■ Place the device in a dry, well-
ventilated room! Do not place the
device directly in the sun or near a
heat source such as a heating radiator
or stove.
1. Switch off the appliance with the On/
Off button. Fig. "/1
2. Remove all food from the appliance.
3. Clean the interior (see chapter
Cleaning the appliance). If necessary, use an insulation board.
■ Allow hot dishes and drinks to cool
down before placing them in the
appliance.
4. Clean all packaging.
5. Pack strong-smelling foods in an
airtight container to prevent odors. ■ Place frozen foods in the refrigerator
compartment to thaw them and use
the coldness of the frozen foods to
cool other foods.
6. Switch the device back on.
7. Stock up on food.
8. Check after 24 hours if odors have
reappeared.
■ Defrost a layer of frost or ice in the
freezer compartment regularly.
A layer of frost or ice reduces the
delivery of cold to the
frozen foods and increases energy
consumption.
Lighting (LED)
The device is equipped with
maintenance-free LED lighting. ■ Open the appliance doors for as short a
time as possible.
Repairs to this lighting may only be
carried out by the after-sales service or
an authorized specialist.
■ To avoid increased power
consumption, the back of the device
should be cleaned from time to time.
■ If present:
Mount the wall spacer to achieve the
planned energy consumption of the
device (see
installation manual). A closer distance
to the wall does not affect the
operation of the device. The energy
consumption can then be slightly
higher. The distance of 75 mm should
not be
exceeded.
■ The arrangement of the equipment
parts does not affect the
energy consumption of the device.
97

This manual suits for next models

1

Other Siemens Freezer manuals

Siemens GS36NAX3P User manual

Siemens

Siemens GS36NAX3P User manual

Siemens KG36NXI20 User manual

Siemens

Siemens KG36NXI20 User manual

Siemens KG39N Series Specification sheet

Siemens

Siemens KG39N Series Specification sheet

Siemens KA93DVIFP Setup guide

Siemens

Siemens KA93DVIFP Setup guide

Siemens GUD15A55/03 User manual

Siemens

Siemens GUD15A55/03 User manual

Siemens GS36NMW30 User manual

Siemens

Siemens GS36NMW30 User manual

Siemens GS29VVW31 User manual

Siemens

Siemens GS29VVW31 User manual

Siemens GI31NAE30G User manual

Siemens

Siemens GI31NAE30G User manual

Siemens FI24 Series User manual

Siemens

Siemens FI24 Series User manual

Siemens GS29VVW31 iQ300 User manual

Siemens

Siemens GS29VVW31 iQ300 User manual

Siemens KS36VAW41/06 User manual

Siemens

Siemens KS36VAW41/06 User manual

Siemens GI38NP60 User manual

Siemens

Siemens GI38NP60 User manual

Siemens FI18 Series User manual

Siemens

Siemens FI18 Series User manual

Siemens FI24NP32 User manual

Siemens

Siemens FI24NP32 User manual

Siemens GS51NUWDP User manual

Siemens

Siemens GS51NUWDP User manual

Siemens GU15DA55I/01 User manual

Siemens

Siemens GU15DA55I/01 User manual

Siemens GI38NP60/09 User manual

Siemens

Siemens GI38NP60/09 User manual

Siemens KG series N User manual

Siemens

Siemens KG series N User manual

Siemens GI81NH Series User manual

Siemens

Siemens GI81NH Series User manual

Siemens GS..D SERIES User manual

Siemens

Siemens GS..D SERIES User manual

Siemens KA G Series Setup guide

Siemens

Siemens KA G Series Setup guide

Siemens GU..D SERIES User manual

Siemens

Siemens GU..D SERIES User manual

Siemens GS32NX77 User manual

Siemens

Siemens GS32NX77 User manual

Siemens GS V Series User manual

Siemens

Siemens GS V Series User manual

Popular Freezer manuals by other brands

Electrolux EU 7120 C Installation and instruction manual

Electrolux

Electrolux EU 7120 C Installation and instruction manual

Cooler Master Hyper TX3 user manual

Cooler Master

Cooler Master Hyper TX3 user manual

Bosch GID18ASE0 user manual

Bosch

Bosch GID18ASE0 user manual

Electrolux ARCTIS 2686-4GT operating instructions

Electrolux

Electrolux ARCTIS 2686-4GT operating instructions

Baumatic HUZ107.1 user manual

Baumatic

Baumatic HUZ107.1 user manual

Hoover CFH106AWK instruction manual

Hoover

Hoover CFH106AWK instruction manual

Electrolux EUF2949AFW user manual

Electrolux

Electrolux EUF2949AFW user manual

HURAKAN HKN-UF50G manual

HURAKAN

HURAKAN HKN-UF50G manual

INVENTOR INVMVF157A user manual

INVENTOR

INVENTOR INVMVF157A user manual

AEG ABB68211AF installation guide

AEG

AEG ABB68211AF installation guide

LG GC-Q247CBDC owner's manual

LG

LG GC-Q247CBDC owner's manual

Smeg VR145NE Emploi et manutention

Smeg

Smeg VR145NE Emploi et manutention

Vollrath STOELTING SU444-I2 Series Operator's manual

Vollrath

Vollrath STOELTING SU444-I2 Series Operator's manual

Living Essentials AFMBK0117 instruction manual

Living Essentials

Living Essentials AFMBK0117 instruction manual

Sharp SJ-UF103M4S-EU user manual

Sharp

Sharp SJ-UF103M4S-EU user manual

HomeKing HUZ107.1 user manual

HomeKing

HomeKing HUZ107.1 user manual

Thermador T181F Series Use & care guide

Thermador

Thermador T181F Series Use & care guide

Electrolux EC 4109N Instruction book

Electrolux

Electrolux EC 4109N Instruction book

manuals.online logo
manuals.online logoBrands
  • About & Mission
  • Contact us
  • Privacy Policy
  • Terms and Conditions

Copyright 2025 Manuals.Online. All Rights Reserved.