manuals.online logo
Brands
  1. Home
  2. •
  3. Brands
  4. •
  5. Singer
  6. •
  7. Sewing Machine
  8. •
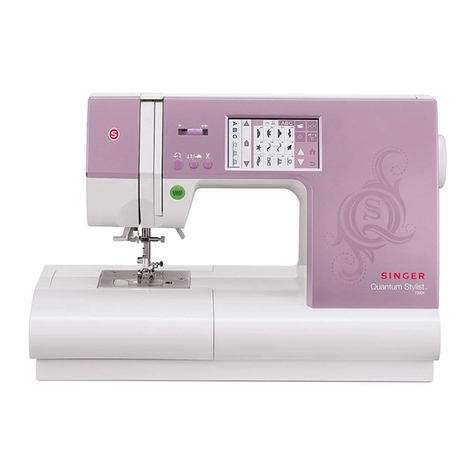
  9. Singer QUANTUM STYLIST 9960 User manual

Singer QUANTUM STYLIST 9960 User manual

Other manuals for QUANTUM STYLIST 9960

4

Other Singer Sewing Machine manuals

Singer 591 User manual

Singer

Singer 591 User manual

Singer 9980 Quantum Stylist Installation guide

Singer

Singer 9980 Quantum Stylist Installation guide

Singer 312 U141 User manual

Singer

Singer 312 U141 User manual

Singer M2500 User manual

Singer

Singer M2500 User manual

Singer 134W1 Quick start guide

Singer

Singer 134W1 Quick start guide

Singer 221K1 Installation and operation manual

Singer

Singer 221K1 Installation and operation manual

Singer C5200 User manual

Singer

Singer C5200 User manual

Singer 12W214 User manual

Singer

Singer 12W214 User manual

Singer 6704 User manual

Singer

Singer 6704 User manual

Singer 20UX142 User manual

Singer

Singer 20UX142 User manual

Singer 117-1 User manual

Singer

Singer 117-1 User manual

Singer Heavy Duty 14HD854 User manual

Singer

Singer Heavy Duty 14HD854 User manual

Singer 46K29 Installation and operation manual

Singer

Singer 46K29 Installation and operation manual

Singer Sewing Machine User manual

Singer

Singer Sewing Machine User manual

Singer 24-56 User manual

Singer

Singer 24-56 User manual

Singer SEWING MACHINE NO. 15 User manual

Singer

Singer SEWING MACHINE NO. 15 User manual

Singer 457G UTT User manual

Singer

Singer 457G UTT User manual

Singer Scholstic 5523 User manual

Singer

Singer Scholstic 5523 User manual

Singer 301 User manual

Singer

Singer 301 User manual

Singer Scholastic 85SCH User manual

Singer

Singer Scholastic 85SCH User manual

Singer 412U UTT User manual

Singer

Singer 412U UTT User manual

Singer 9143 User manual

Singer

Singer 9143 User manual

Singer 111W152 Quick start guide

Singer

Singer 111W152 Quick start guide

Singer 221 User manual

Singer

Singer 221 User manual

Popular Sewing Machine manuals by other brands

Brother PE-180D Service manual

Brother

Brother PE-180D Service manual

ELNA 2002 instruction manual

ELNA

ELNA 2002 instruction manual

Siruba DL7200D-NM1 Instruction book

Siruba

Siruba DL7200D-NM1 Instruction book

Silver Viscount 9500e instruction manual

Silver

Silver Viscount 9500e instruction manual

Pfaff 3588-05/020 instruction manual

Pfaff

Pfaff 3588-05/020 instruction manual

JUKI DDL-9000A instruction manual

JUKI

JUKI DDL-9000A instruction manual

Pfaff 284 Instruction book

Pfaff

Pfaff 284 Instruction book

Reliable MSK-335B Specification sheet

Reliable

Reliable MSK-335B Specification sheet

Kenmore 385. 19000 owner's manual

Kenmore

Kenmore 385. 19000 owner's manual

Brother FD4-B271 instruction manual

Brother

Brother FD4-B271 instruction manual

Brother Computerized Embroidery Machine Operation manual

Brother

Brother Computerized Embroidery Machine Operation manual

Husqvarna Viking Designer SE user guide

Husqvarna Viking

Husqvarna Viking Designer SE user guide

Riccar RL634DE user manual

Riccar

Riccar RL634DE user manual

ZOJE ZJ9800 Operation manual

ZOJE

ZOJE ZJ9800 Operation manual

Siruba C007JP Instruction book

Siruba

Siruba C007JP Instruction book

IKEA SY user guide

IKEA

IKEA SY user guide

Pfaff 571 instruction manual

Pfaff

Pfaff 571 instruction manual

Brother BB370 Quick setup guide

Brother

Brother BB370 Quick setup guide

manuals.online logo
manuals.online logoBrands
  • About & Mission
  • Contact us
  • Privacy Policy
  • Terms and Conditions

Copyright 2025 Manuals.Online. All Rights Reserved.

INSTRUCTION MANUAL
NOTICE D’UTILISATION
MANUAL DE INSTRUCCIONES
9960
2
INSTRUCTION MANUAL
This sewing machine is intended for household use.
This sewing machine is not intended for use by young children or infirm persons without
supervision.
IMPORTANT SAFETY INSTRUCTIONS
When using a sewing machine, basic safety precautions should always be followed,
including the following.
Read all instructions before using.
DANGER - To reduce the r sk of electr c shock:
Never leave unattended when plugged in. Always unplug this machine from the electric
outlet immediately after using and before cleaning.
- To reduce the r sk of burns, f re, electr c shock,
or njury to persons:
WARNING
1. o not allow to be used as a toy. Close attention is necessary when this sewing
machine is used by or near children.
2. Use this sewing machine only for its intended use as described in this manual. Use only
attachments recommended by the manufacturer as contained in this manual.
3. Never operate this sewing machine if it has a damaged cord or plug, if it is not working
properly, if it has been dropped or damaged, or dropped into water. Return the sewing
machine to the nearest authorized dealer or service center for examination, repair,
electrical or mechanical adjustment.
4. Never operate the sewing machine with any air openings blocked. Keep ventilation
openings of the sewing machine and foot controller free from the accumulation of lint,
dust, and loose cloth.
5. Never drop or insert any object into any opening.
6. o not use outdoors.
7. o not operate where aerosol (spray) products are being used or where oxygen is being
administered.
8. To disconnect, turn the power switch to the off position (symbol “O”), then remove plug
from outlet.
9. o not unplug by pulling on cord. To unplug, grasp the plug, not the cord.
10. Keep fingers away from all moving parts. Special care is required around the sewing
machine needle.
11. Always use the proper needle plate. The wrong plate can cause the needle to break.
12. o not use bent needles.
13. o not pull or push fabric while stitching. It may deflect the needle causing it to break.
14. Switch the sewing machine off (symbol “O”) when making any adjustments in the
needle area, such as threading needle, changing needle, threading bobbin, or changing
presser foot.
15. Always unplug sewing machine from the electrical outlet when removing covers,
lubricating, or when making any other user servicing adjustments mentioned in the
instruction manual.
16. Handle the foot controller with care and avoid dropping it on the floor. Be sure not to
place anything on top of it.
17. Use only the handle to lift and move the machine.
18. o not expose the machine or machine case to sunlight directly. Also, do not keep it in a
very warm or damp place.
SAVE THESE INSTRUCTIONS
Servicing should be performed by an authorized service representative.
SINGER is a registered Trademark of The Singer Company Ltd.
3
CONTENTS
IMPORTANT SAFETY INSTRUCTIONS ............ 2
MO EL 9960 ...................................................... 8
FOR EUROPEAN AN SIMILAR TERRITORIES: ...... 8
MAIN PARTS .................................................... 10
ACCESSORIES ................................................ 12
UST COVER .................................................. 12
EXTENSION TABLE ......................................... 14
a. REMOVING THE EXTENSION TABLE ................................ 14
b. OPENING THE ACCESSORY CASE ................................... 14
CHANGING THE PRESSER FOOT ................. 14
A. Changing the presser foot ..................................................... 14
B. Removing the presser foot holder ......................................... 14
INSERTING THE NEE LE ............................... 16
FABRIC, THREA AN NEE LE TABLE ........ 16
CONNECTING THE MACHINE ........................ 18
FOOT CONTROLLER ...................................... 18
FUNCTION OF EACH PART ............................ 20
A. START/STOP BUTTON ........................................................ 20
B. REVERSE STITCH BUTTON ............................................... 20
C. NEE LE UP- OWN / SLOW BUTTON ............................... 20
. SPEE CONTROL BUTTON ............................................... 20
E. PRESSER FOOT LIFTER .................................................... 20
F. THREA CUTTER BUTTON ................................................ 22
G. ROP FEE LEVER ............................................................ 22
H. THREA CUTTER ................................................................ 22
I. TOP COVER ......................................................................... 22
J. HAN WHEEL ...................................................................... 22
EXTRA WI E TABLE ....................................... 22
CONTROL PANEL ............................................ 24
A. L.C. . ISPLAY .................................................................... 24
B. L.C. . CONTRAST CONTROL ............................................ 24
C. PATTERN CHART ................................................................ 24
. IRECT STITCH SELECTION BUTTONS ........................... 24
E. UTILITY STITCH BUTTON ................................................... 24
F. ECORATIVE & LETTER STITCH BUTTON ....................... 24
G. FUNCTION BUTTONS ......................................................... 24
H. E IT BUTTON ...................................................................... 24
I. CLEAR BUTTON .................................................................. 26
J. SCROLL BUTTONS ............................................................. 26
K. CURSOR BUTTONS ............................................................ 26
L. TACK BUTTON ..................................................................... 26
M. TWIN NEE LE BUTTON ...................................................... 26
TO TURN OFF THE AU IBLE BEEP ............... 26
BOBBIN SETTING ............................................ 28
A. REMOVING THE BOBBIN .................................................... 28
B. SETTING SPOOL OF THREA ON SPOOL PIN ................ 28
C. WIN ING THE BOBBIN ....................................................... 28
. INSERTING THE BOBBIN .................................................... 30
THREA ING THE MACHINE ........................... 32
A. PREPARING TO THREA MACHINE ................................. 32
B. SETTING SPOOL OF THREA ON SPOOL PIN ................ 32
C. THREA ING THE UPPER THREA ................................... 32
. THREA ING THE NEE LE EYE ......................................... 34
E. RAWING UP THE BOBBIN THREA ................................ 34
STARTING TO SEW ......................................... 36
A. START AN EN OF SEAM ................................................ 36
B. REVERSE STITCHING ........................................................ 38
C. AUTO TACK STITCH ........................................................... 38
. TURNING CORNERS ........................................................... 40
E. SEWING HEAVY FABRIC .................................................... 40
F. SEWING OVER OVERLAPPE AREAS .............................. 40
G. WI TH OF SEAM ALLOWANCE ......................................... 40
THREA TENSION .......................................... 42
SELECTING UTILITY STITCH PATTERN ....... 44
A. IRECT STITCH PATTERN ................................................. 44
B. SELECTING OTHER UTILITY STITCH PATTERNS ........... 44
C. MIRROR/REVERSE STITCH ............................................... 44
. ELONGATION ...................................................................... 46
E. SETTING STITCH WI TH AN LENGTH ........................... 46
WHERE TO USE EACH STITCH ..................... 48
STRAIGHT STITCH SEWING .......................... 50
A. Straight Stitch ........................................................................ 50
B. Straight Stitch With Auto-lock Stitch (Pattern No. 3, 4) ......... 50
BASTING .......................................................... 52
A. ATTACHING THE ARING/ EMBROI ERY FOOT ............. 52
B. BASTING .............................................................................. 52
ELASTIC STITCH SEWING ............................. 54
QUILTING ......................................................... 54
A. Joining the pieces of fabric ................................................... 54
B. Quilting .................................................................................. 54
C. Hand Look Quilting Stitch (No. 8) ......................................... 54
ZIGZAG STITCH SEWING ............................... 56
MULTI-STITCH ZIGZAG ................................... 56
FREE ARM SEWING ........................................ 56
OVERCASTING-OVERLOCKING .................... 58
A. USING THE OVERCASTING FOOT .................................... 58
B. USING THE GENERAL PURPOSE FOOT ........................... 58
C. NOTE: .................................................................................... 58
BLIN HEM STITCHING .................................. 60
PATCH WORK .................................................. 62
APPLIQUE ........................................................ 62
INSERTING ZIPPERS
CENTERE INSERTION .................................. 64
LAPPE INSERTION ....................................... 66
To stitch around the zipper tab: ( iagram A) .............................. 66
BUTTONHOLE SEWING .................................. 68
BOUN BUTTONHOLE ................................... 72
EYELET ............................................................ 74
AUTOMATIC BAR-TACK AN ARNING ....... 76
SEWING ON BUTTONS ................................... 78
A. Thread Shank ....................................................................... 78
NARROW HEMMING ....................................... 80
COR ING ......................................................... 80
A. SINGLE COR ING ............................................................... 80
B. TRIPLE COR ING ............................................................... 80
CONTINUOUS ECORATIVE PATTERN ........ 82
A. SEWING THIN FABRICS ..................................................... 82
USING THE EVEN-FEE FOOT ...................... 82
A. ATTACHING THE EVEN-FEE FOOT ................................ 82
B. SEWING ............................................................................... 82
ARNING/FREE-HAN EMBROI ERY .......... 84
A. ATTACHING THE ARING/ EMBROI ERY FOOT ............. 84
B. ARING ................................................................................ 84
C. FREE-HAN EMBROI ERY ................................................ 84
. After darning or free-hand embroidery .................................. 84
TWIN NEE LE SEWING .................................. 86
ECORATIVE & LETTER STITCH SEWING ... 88
A. SELECTING ECORATIVE & LETTER STITCH (selecting
mode) .................................................................................... 88
B. SHIFTING THE CURSOR .................................................... 88
C. TO CHECK SELECTE PATTERNS ................................... 90
. INSERTING PATTERN ......................................................... 90
E. TO ELETE PATTERN ........................................................ 90
F. E ITING OF EACH PATTERN ............................................. 92
G. TO RECALL THE SELECTE PATTERNS .......................... 94
H. SEWING THE SELECTE PATTERNS ............................... 96
I. TO SEW PATTERN FROM BEGINNING ............................. 96
ECORATIVE AN LETTER STITCH CHART 98
A JUSTING THE FORWAR AN REVERSE STITCHES
98
MAINTENANCE .............................................. 100
CLEANING ...................................................... 100
Messages on LC .......................................... 102
HELPFUL HINTS ............................................ 104

4
NOTICE D’UTILISATION
La machine à coudre est exclusivement destinée à l’usage domestique.
Cette machine à coudre n’a pas conçue pour être utilisée par de jeunes enfants ni des personnes
handicapées sans supervision.
CONSIGNES DE SÉCURITÉ IMPORTANTES
Il est important d’observer des précautions de sécurité élémentaires lors de l’utilisation de la
machine à coudre et notamment celles qui suivent.
Veuillez lire l’ensemble de la notice avant l’utilisation.
DANGER – Pour rédu re les r sques de décharge électr que :
Ne laissez jamais la machine branchée sans surveillance. ébranchez toujours la
machine immédiatement après l’usage et avant le nettoyage.
ATTENTION! – Pour rédu re les r sques de brûlure,
d’ ncend e, de décharge électr que et de blessures corporelles :
1.
Ne permettez pas que la machine à coudre soit utilisée comme un jouet. L’étroite surveillance d’un
adulte est nécessaire quand la machine est utilisée par des enfants ou en présence d’enfants.
2. N’utilisez la machine à coudre que pour l’usage prescrit dans la présente notice. N’utilisez que les
pièces conseillées par le constructeur et indiquées dans la présente notice.
3. N’utilisez jamais la machine à coudre si une fiche ou un fil électrique est défectueux, si la machine
ne fonctionne pas correctement, si la machine est tombée ou endommagée, ni si elle a été
immergée. Retournez la machine au distributeur agréé ou au centre de service après-vente le
plus proche pour tout examen, réparation, réglage électrique et mécanique.
4. N’utilisez jamais la machine si une aire d’aération est obstruée. Veillez à ce que les ouvertures
destinées à la ventilation de la machine ainsi que la pédale restent dégagées de peluches, de
poussière et de fibres de tissus.
5. Veillez à ne rien laisser tomber ni insérer dans les ouvertures d’aération.
6. N’utilisez pas la machine en plein air.
7. N’utilisez pas la machine dans les lieux où des aérosols sont utilisés ou de l’oxygène administré.
8. Pour déconnecter la machine, tournez le bouton d’alimentation en position d’arrêt (O), puis
débranchez la fiche électrique.
9. Ne débranchez pas la machine en tirant sur le câble d’alimentation. Pour débrancher, saisissez la
fiche et non pas le câble.
10. Ne placez pas vos doigts près des parties en mouvement. Il est nécessaire de faire
particulièrement attention dans la zone de l’aiguille de la machine à coudre.
11. N’utilisez que la plaque à aiguille correcte. Une autre plaque à aiguille pourrait casser l’aiguille.
12. N’utilisez pas d’aiguilles tordues.
13.
Ne tirez pas et ne poussez pas le tissu pendant la couture. Ceci pourrait tordre l’aiguille et la casser.
14. Arrêtez la machine avant d’effectuer tout ajustement et réglage dans la zone de l’aiguille, par
exemple pour enfiler l’aiguille, changer d’aiguille, enfiler la canette ou changer de pied presseur.
15. Veillez à toujours débrancher la machine avant de retirer des couvercles, de lubrifier la machine
et d’effectuer toute opération d’entretien mentionnée dans la notice d'utilisation.
16. Maniez la pédale avec soin et évitez de la faire tomber. Veillez à ne rien poser dessus.
17. Pour soulever ou déplacer la machine, utilisez toujours la poignée.
18. N’exposez pas la machine ni la housse de protection à la lumière directe du soleil. e même,
n’entreposez pas la machine dans un endroit très chaud ni très humide.
CONSERVEZ CETTE NOTICE D’UTILISATION
La maintenance de la machine doit être assurée exclusivement par un professionnel agréé.
SINGER® est une marque déposée par The Singer Company Ltd.
5
TABLE DES MATIÈRES
CONSIGNES E SÉCURITÉ IMPORTANTES .. 4
MO ÈLE 9960 .................................................... 9
POUR LES TERRITOIRES EUROPÉENS ET ASSIMILÉS : . 9
PIÈCES PRINCIPALES .................................... 11
ACCESSOIRES ................................................ 13
HOUSSE E PROTECTION SOUPLE ............. 13
PLATEAU ’EXTENSION ................................ 15
a. ÉGAGER LE PLATEAU ’EXTENSION ............................ 15
b. OUVRIR LE COMPARTIMENT À ACCESSOIRES .............. 15
CHANGEMENT E PIE PRESSEUR ............ 15
A. Changer de pied presseur .................................................... 15
B. Ôter le support du pied presseur .......................................... 15
MISE EN PLACE E L’AIGUILLE .................... 17
TABLEAU ES TISSUS, FILS ET AIGUILLES 17
BRANCHEMENT E LA MACHINE ................. 19
PE ALE E CONTRÔLE ................................. 19
FONCTION ES PIÈCES ET TOUCHES ........ 21
A. TOUCHE MARCHE / ARRÊT ............................................... 21
B. TOUCHE COUTURE ARRIERE ........................................... 21
C. TOUCHE AIGUILLE POSITION HAUTE - BASSE / COUTURE
LENTE .................................................................................. 21
. TOUCHE CONTRÔLE E VITESSE .................................... 21
E. RELEVEUR E PIE PRESSEUR ...................................... 21
F. TOUCHE COUPE-FIL ........................................................... 23
G. LEVIER ES GRIFFES ........................................................ 23
H. COUPE-FIL ........................................................................... 23
I. CAPOT SUPERIEUR ............................................................ 23
J. VOLANT ................................................................................ 23
TABLE ’EXTENSION ..................................... 23
ÉCRAN ’AFFICHAGE .................................... 25
A. ÉCRAN LC ......................................................................... 25
B. MOLETTE E RÉGLAGE U CONTRASTE ....................... 25
C. TABLEAU ES POINTS ....................................................... 25
. TOUCHE E SELECTION IRECTE ES POINTS ............ 25
E. TOUCHE POINTS UTILITAIRES .......................................... 25
F. TOUCHE POINTS ECORATIFS ET LETTRES ................. 25
G. TOUCHES FONCTIONS ...................................................... 25
H. TOUCHE E IT ..................................................................... 25
I. TOUCHE ANNULATION ....................................................... 27
J. TOUCHE E EFILEMENT ................................................. 27
K. TOUCHES E CURSEUR .................................................... 27
L. BOUTON E COMMAN E ’ARRÊT .................................. 27
M. TOUCHE AIGUILLE OUBLE ............................................... 27
POUR SUPPRIMER L’IN ICATEUR SONORE27
CANETTE ......................................................... 29
A. RETIRER LA CANETTE ....................................................... 29
B. MISE EN PLACE E LA BOBINE SUR LA TIGE À BOBINE 29
C. BOBINAGE E LA CANETTE .............................................. 29
. MISE EN PLACE E LA CANETTE ..................................... 31
ENFILAGE E LA MACHINE ........................... 33
A. PRÉPARATION EN VUE E L’ENFILAGE .......................... 33
B. MISE EN PLACE E LA BOBINE SUR LA TIGE À BOBINE 33
C. ENFILAGE U FIL ’AIGUILLE ........................................... 33
. ENFILAGE U FIL ANS LE CHAS E L’AIGUILLE .......... 35
E. REMONTER LE FIL E CANETTE ...................................... 35
ÉBUT E LA COUTURE ................................ 37
A. ÉBUT ET FIN E LA COUTURE ......................................... 37
B. COUTURE ARRIERE ........................................................... 39
C. POINT ’ARRÊT AUTOMATIQUE ....................................... 39
. COUTURE ES ANGLES .................................................... 41
E. COUTURE E TISSUS ÉPAIS ............................................. 41
F. COUTURE ES SURÉPAISSEURS .................................... 41
G. LARGEUR ES RABATS ..................................................... 41
TENSION U FIL .............................................. 43
SÉLECTION ES POINTS UTILITAIRES ........ 45
A. MO ELE E POINTS .......................................................... 45
B. SECTIONNER ’AUTRES POINTS UTILITAIRES .............. 45
C. POINT MIROIR / INVERSE .................................................. 45
. ALLONGEMENT ................................................................... 47
E.
PARAMETRER LA LONGUEUR ET LA LARGEUR E POINT .....
47
ESCRIPTION ES POINTS ........................... 49
COUTURE AU POINT ROIT .......................... 51
A. Point droit .............................................................................. 51
B. Point droit avec point d’arrêt automatique (Modèles No. 3, 4)51
FAUFILAGE ...................................................... 53
A. MISE EN PLACE U PIE BRO ERIE ET REPRISAGE ... 53
B. FAUFILAGE .......................................................................... 53
COUTURE E POINTS ÉLASTIQUES ............ 55
QUILTING ......................................................... 55
A. Assemblage des morceaux de tissu ..................................... 55
B. Quilting .................................................................................. 55
C. Point de quilting, apparence fait main (n°8) .......................... 55
COUTURE AU POINT ZIGZAG ........................ 57
POINT ZIGZAG MULTIPLE .............................. 57
COUTURE AVEC BRAS LIBRE ....................... 57
SURJET - SURFILAGE .................................... 59
A. AVEC LE PIE E SURJET ................................................ 59
B. AVEC LE PIE UNIVERSEL ................................................ 59
C. REMARQUE : ....................................................................... 59
COUTURE ’OURLETS INVISIBLES .............. 61
PATCHWORK ................................................... 63
APPLIQUE ........................................................ 63
FERMETURE À GLISSIÈRE
- POSE BOR À BOR .................................... 65
- POSE SOUS PATTE ...................................... 67
A.
OUVRIR LA FERMETURE À GLISSIÈRE PEN ANT LA COUTURE
67
COUTURE E BOUTONNIÈRES .................... 69
BOUTONNIERE PASSEPOILEE ...................... 73
OEILLET ........................................................... 75
ARRÊT ET REPRISAGE AUTOMATIQUES .... 77
COUTURE E BOUTONS ............................... 79
A. TIGE E FIL ......................................................................... 79
OURLET ROULÉ .............................................. 81
COR ONNETS ................................................ 81
A. COR ONNETS SIMPLES .................................................... 81
B. COR ONNETS TRIPLES .................................................... 81
SÉQUENCE E MOTIFS ÉCORATIFS ......... 83
A. SUR LES TISSUS LÉGERS ................................................. 83
UTILISATION U PIE POUR ENTRAÎNEMENT
SYNCHRONISÉ ........................................... 83
A.
MISE EN PLACE U PIE POUR ENTRAÎNEMENT SYNCHRONISÉ .......
83
B. COUTURE ............................................................................ 83
REPRISAGE / BRO ERIE ............................... 85
A. MISE EN PLACE U PIE BRO ERIE ET REPRISAGE ... 85
B. REPRISAGE ......................................................................... 85
C. BRO ERIE ........................................................................... 85
. APRÈS LE REPRISAGE ET LA BRO ERIE ........................ 85
COUTURE AVEC AIGUILLE JUMELÉE ........... 87
COUTURE E LETTRES ET POINTS ÉCORATIFS ..
89
A. SELECTION POINT ECORATIFS ET LETTRES ............... 89
B. FAIRE EFILER LE CURSEUR ........................................... 89
C. VERIFIER LES MO ELES SELECTIONNES ...................... 91
. INSERER ES MO ELES ................................................... 91
E. SUPPRIMER UN MO ELE .................................................. 91
F. E ITION E CHAQUE MO ELE ......................................... 93
G. RETROUVER LES MO ELES SELECTIONNES ................ 95
H. COU RE LES MO ELES SELECTIONNES ....................... 97
I. POUR COU RE LES MO ELES AU EBUT ..................... 97
TABLEAU ES LETTRES ET POINTS ÉCORATIFS .
99
AJUSTER LES POINTS EN ROITS ET ENVERS ..
99
ENTRETIEN .................................................... 101
NETTOYAGE .................................................. 101
Messages sur écran LC ............................... 103
SOLUTION AUX PROBLÈMES COURANTS . 105
6
MANUAL DE INSTRUCCIONES
Esta máquina de coser está diseñada sólo para uso doméstico.
Esta máquina de coser no está diseñada para ser utilizada por niños pequeños o personas enfermas
sin la debida supervisión
NORMAS DE SEGURIDAD IMPORTANTES
Cuando utilice la máquina de coser, debe seguir siempre unas normas básicas de
seguridad, incluyendo las siguientes.
Lea todas las instrucciones antes de utilizar su máquina.
PELIGRO - Para reduc r el r esgo de descarga eléctr ca:
La máquina nunca debe dejarse sola y encendida. esenchufe siempre la máquina de
la red inmediatamente después de usarla y antes de limpiarla.
PRECAUCIONES - Para reduc r el r esgo de
quemaduras, fuego, cortoc rcu to o daños personales:
1. No permita que se emplee como un juguete. Tenga un cuidado especial cuando la máquina sea
usada por niños o si éstos se encuentran cerca de ella.
2. Utilice esta máquina de coser correctamente, tal como se describe en este manual. Use solo los
accesorios recomendados por el fabricante que aparecen el manual.
3. Nunca trabaje con esta máquina de coser si tiene el cable o el enchufe dañados, si no funciona
adecuadamente, si ha sido golpeada o dañada o si se ha caído al agua. Lleve la máquina al
comerciante o al centro de reparaciones autorizado más próximo para que la examinen, la
reparen o realicen su ajuste eléctrico o mecánico.
4. Nunca trabaje con la máquina con alguna de las salidas de aire bloqueadas. Mantenga las
ventilaciones de la máquina abiertas y el regulador de velocidad libre de acumulación de
hilachas, polvo y trozos de tela.
5. Nunca deje caer ni inserte ningún objeto en las aberturas.
6. No la utilice en el exterior.
7. No trabaje donde se hayan utilizado aerosoles o donde se esté administrando oxígeno.
8. Para desconectar, gire el botón de encendido a la posición de apagado (
O
) y después
desenchufe de la red.
9. No desenchufe la máquina tirando del cable. Para desenchufarla, tire del enchufe, no del cable.
10. Mantenga los dedos alejados de todas las partes giratorias. Es necesario que tenga especial
cuidado con la aguja de la máquina de coser.
11. Utilice siempre la placa de aguja apropiada. Una placa incorrecta puede causar la rotura de la
aguja.
12. No utilice agujas dobladas.
13. No tire o empuje el tejido mientras cose. Puede deformar la aguja y romperla.
14. esconecte la máquina de coser cuando esté haciendo ajustes en el área de la aguja, como
enhebrando la aguja, cambiándola, enhebrando la canilla o cambiando el prensatelas.
15. esenchufe siempre la máquina de la red eléctrica cuando retire las cubiertas, la lubrique, o
realice cualquier otro servicio de ajuste mencionado en el manual de instrucciones.
16. Maneje el pedal con cuidado y evite que golpee el suelo. Asegúrese de no situar nada sobre él.
17. Utilice el asa solamente para levantar y mover la máquina.
18. No exponga la máquina o la cubierta de la máquina directamente a la luz del sol. Tampoco la
guarde en un lugar muy caliente o húmedo.
CONSERVE ESTAS INSTRUCCIONES
Las reparaciones deben ser realizadas únicamente por un servicio representativo autorizado.
SINGER® es una marca registrada de The Singer Company Ltd.
7
ÍNDICE
NORMAS E SEGURI A IMPORTANTES ..... 6
MO ELO 9960 ................................................... 9
PARA EUROPA Y TERRITORIOS EQUIPARABLES:
9
PARTES PRINCIPALES ................................... 11
ACCESORIOS .................................................. 13
CUBIERTA ........................................................ 13
EXTENSIÓN ..................................................... 15
a. RETIRA A E LA EXTENSION ........................................... 15
b. APERTURA EL COMPARTIMENTO E ACCESORIOS .. 15
CÓMO CAMBIAR EL PRENSATELAS ............. 15
A. Cómo cambiar el prensatelas ............................................... 15
B. Cómo retirar el portaprensatelas .......................................... 15
INSERCION E LA AGUJA .............................. 17
TABLA E TEJI OS, HILOS Y AGUJAS ......... 17
CONEXIÓN E LA MAQUINA .......................... 19
PE AL E CONTROL ...................................... 19
FUNCIÓN E CA A UNA E LAS PARTES ... 21
A. BOTÓN INICIO / PARO ........................................................ 21
B. BOTÓN E PUNTA A REVERSA ....................................... 21
C. BOTÓN AGUJA ARRIBA / LENTO ....................................... 21
. BOTÓN E CONTROL E VELOCI A ............................. 21
E. PALANCA ALZAPRENSATELAS ......................................... 21
F. BOTÓN CORTA OR E HILO ............................................ 23
G. PALANCA E ARRASTRE ................................................... 23
H. CORTA OR E HILO .......................................................... 23
I. CUBIERTA SUPERIOR ........................................................ 23
J. VOLANTE MANUAL ............................................................. 23
TABLA EXTENSORA EXTRA ANCHA ............. 23
PANEL E CONTROL ...................................... 25
A. PANTALLA LC ................................................................... 25
B. CONTROL E CONTRASTE E LA PANTALLA LC ........ 25
C. TABLA E PUNTA AS ........................................................ 25
. BOTONES E SELECCIÓN E PUNTA A IRECTA ........ 25
E. BOTÓN E PUNTA A UTILITARIA ..................................... 25
F. BOTÓN E PUNTA A ECORATIVA Y E LETRAS ........ 25
G. BOTONES E FUNCIÓN ..................................................... 25
H. BOTÓN E E ICIÓN ........................................................... 25
I. BOTÓN BORRAR ................................................................. 27
J. BOTONES E PAGINACIÓN ............................................... 27
K. BOTONES E CURSOR ...................................................... 27
L. BOTÓN E REFUERZO TACK ............................................ 27
M. BOTÓN E AGUJA OBLE .................................................. 27
PARA APAGAR EL IN ICA OR AU IBLE ..... 27
AJUSTE E LA CANILLA ................................. 29
A. CÓMO SACAR LA CANILLA ................................................ 29
B.
COLOCACIÓN EL CARRETE E HILO EN EL PORTACARRETES .
29
C. EVANA O E LA CANILLA .............................................. 29
. COLOCACIÓN E LA CANILLA .......................................... 31
ENHEBRA O E LA MÁQUINA ...................... 33
A. PREPARACIÓN PARA ENHEBRAR LA MÁQUINA ............. 33
B.
COLOCACIÓN EL CARRETE E HILO EN EL PORTACARRETES .
33
C. ENHEBRA O EL HILO SUPERIOR .................................. 33
. ENHEBRA O EL OJO E LA AGUJA .............................. 35
E. EXTRACCIÓN EL HILO E LA CANILLA .......................... 35
COMENZAR A COSER .................................... 37
A. PRINCIPIO Y FINAL E UNA COSTURA ............................ 37
B. PUNTA A REVERSA ........................................................... 39
C. PUNTA A E REFUERZO AUTOMATICA ......................... 39
. CÓMO GIRAR EN LAS ESQUINAS ..................................... 41
E. CÓMO COSER TEJI OS FUERTES ................................... 41
F. CÓMO COSER SOBRE ÁREAS SOLAPA AS ................... 41
G. ANCHO EL MARGEN E COSTURA ................................ 41
TENSIÓN EL HILO ......................................... 43
SELECCIÓN E PUNTA AS UTILITARIAS .... 45
A. PATRÓN E PUNTA A IRECTA ...................................... 45
B. SELECCIONAN O OTRO PATRÓN E PUNTA A UTILITARIA .. 45
C. PUNTA A INVERSA / REVERSA ........................................ 45
. ELONGACIÓN (ALARGAMIENTO) ...................................... 47
E. AJUSTE E ANCHO Y LARGO E PUNTA A ................... 47
ÓN E UTILIZAR CA A TIPO E PUNTA A 49
PUNTA A RECTA ............................................ 51
A. Puntada Recta ...................................................................... 51
B. Puntada Recta con Puntada Auto Lock (Patrón No. 3, 4) .... 51
HILVANA O ..................................................... 53
A.
CÓMO COLOCAR EL PRENSATELAS PARA ZURCI O Y BOR A O
53
B. HILVANA O ......................................................................... 53
PUNTA A ELÁSTICA ...................................... 55
ACOLCHA O ................................................... 55
A. Cómo unir las piezas de tejido .............................................. 55
B. Cómo coser acolchados ....................................................... 55
C. Puntada de acolchado con aspecto artesanal (nº 8) ............ 55
PUNTA A E ZIG-ZAG ................................... 57
PUNTA A MÚLTIPLE E ZIG-ZAG ................. 57
COSTURA CON BRAZO LIBRE ....................... 57
SOBREHILA O-REMALLA O ......................... 59
A. CON EL PRENSATELAS PARA SOBREHILA O ................ 59
B. CON EL PRENSATELAS UNIVERSAL ................................ 59
C. NOTA: ................................................................................... 59
OBLA ILLO E PUNTA A INVISIBLE ......... 61
LABORES E PARCHEA O ........................... 63
APLICACIONES ............................................... 63
INSERCIÓN E CREMALLERAS
INSERCIÓN CENTRA A ................................. 65
INSERCIÓN SOLAPA A .................................. 67
A. PARA ABRIR LA CREMALLERA MIENTRAS SE COSE ..... 67
CÓMO COSER OJALES .................................. 69
OJAL REFORZA O ......................................... 73
OJAL BOR A O .............................................. 75
PRESILLAS Y ZURCI OS AUTOMÁTICOS .... 77
CÓMO COSER BOTONES .............................. 79
A. Zanco Hilo ............................................................................. 79
OBLA ILLOS ARROLLA OS ....................... 81
COR ONCILLO ................................................ 81
A. COR ONCILLO SIMPLE ..................................................... 81
B. COR ONCILLO TRIPLE ...................................................... 81
PUNTA AS ECORATIVAS CONTINUAS ..... 83
A. COSTURA E TEJI OS FINOS .......................................... 83
USO EL PRENSATELAS E TRANSPORTE UNIFORME
83
A.
CÓMO COLOCAR EL PRENSATELAS E TRANSPORTE UNIFORME ....
83
B. CÓMO COSER ..................................................................... 83
ZURCI O Y BOR A O A MANO LIBRE ........ 85
A.
CÓMO COLOCAR EL PRENSATELAS PARA ZURCI O Y BOR A O
85
B. ZURCI O .............................................................................. 85
C. BOR A O A MANO LIBRE ................................................. 85
. espués del zurcido o bordado a mano libre ....................... 85
CÓMO COSER CON AGUJA OBLE .............. 87
PUNTA AS ECORATIVAS Y LETRAS ......... 89
A. SELECCIONAN O LA PUNTA A ECORATIVA Y E
LETRAS (modo de selección) ............................................... 89
B. CAMBIAN O EL CURSOR .................................................. 89
C. PARA REVISAR LOS PATRONES SELECCIONA OS ...... 91
. INSERTAN O UN PATRÓN ................................................ 91
E. PARA BORRAR UN PATRÓN .............................................. 91
F. E ICIÓN E CA A PATRÓN .............................................. 93
G. PARA RECOR AR LOS PATRONES SELECCIONA OS .. 95
H. COSIEN O CON LOS PATRONES SELECCIONA OS ..... 97
I. PARA COSER UN PATRÓN ES E EL PRINCIPIO .......... 97
TABLA E PUNTA AS ECORATIVAS Y LETRAS
99
AJUSTAN O LAS PUNTA AS A ELANTE Y REVERSA .
99
MANTENIMIENTO .......................................... 101
LIMPIEZA ........................................................ 101
Mensajes en pantalla LC .............................. 103
RECOMEN ACIONES ÚTILES ..................... 106
8
MODEL 9960
PREFACE
Thank you for your purchase of this sewing
machine.
This machine intended for household use will
provide you with excellent performance in sewing
from light to heavy material.
Please refer to this booklet for proper use and
optimum service. To get the most out of your
sewing machine, read the entire instruction
manual before attempting to operate the machine.
Then familiarize yourself with the machine by
following the instruction manual page by page.
To ensure that you are always provided with the
most modern sewing capabilities, the
manufacturer reserves the right to change the
appearance, design or accessories of this sewing
machine when considered necessary without
notification or obligation.
Copyright © 2010 THE SINGER COMPANY
All Rights Reserved Throughout The World.
FOR EUROPEAN AND
SIMILAR TERRITORIES:
This product is suppressed for radio and television
interference with the International Electrotechnical
Commission requirements of the CISPR.
The wires in this mains lead are colored in
accordance with the following code.
Blue: neutral (N) Brown: l ve (L)
As the colors of the wires in the mains lead of this
appliance may not correspond with the colored
markings identifying the terminals in your plug,
proceed as follows:
The wire which is colored blue must be connected
to the terminal which is marked with the letter N or
colored black. The wire which is colored brown
must be connected to the terminal which is
marked with letter L or colored red. If a 13 Amp.
(BS 1363) plug is used, a 3 Amp. Fuse must be
fitted, or if any other type of plug is used, a 5 Amp.
fuse must be fitted either in the plug or adaptor or
at the distribution board.
Neither cord is to be connected to the earth
terminal of a three-pin plug.
EU only
EU seulement
Sólo para Estados Unidos
1. This appliance is not intended for use by
persons (including children) with reduced
physical, sensory or mental capabilities, or lack
of experience and knowledge, unless they have
been given supervision or instruction
concerning use or the appliance by a person
responsible for their safety.
2. Children should be supervised to ensure that
they do not play with the appliance.
1. Cet appareil n’est pas destiné à être utilisé par
des personnes (y compris enfants) avec des
capacités physiques, sensorielles ou mentales
déficientes ou manquant de connaissances ou
d’expérience, sauf s’il leur a été donné des
instructions ou s’il sont supervisés par une
personne responsable de leur sécurité.
2. Les enfants doivent être surveillés afin qu’ils ne
jouent pas avec l’appareil.
1. Este aparato no está pensado para ser usado
por personas (incluidos niños) con limitaciones
en sus capacidades físicas, sensoriales o
mentales, o falta de experiencia y
conocimiento, a menos que tengan supervisión
o instrucción relacionada con el uso del
producto por una persona responsable por su
seguridad.
2. Los niños deben ser supervisados para
asegurar que no jueguen con el aparato.
9
MODÈLE 9960
PRÉFACE
Merci d’avoir acheté cette machine à coudre.
La machine est destinée à l’usage domestique et
vous procurera d’excellents résultats pour la
couture de matériaux légers tout aussi bien
qu’épais (de la batiste au jean). Veuillez vous
référer au présent manuel pour une utilisation et
un entretien corrects de la machine. Afin de tirer le
meilleur parti de la machine, il est conseillé de lire
l’ensemble de la notice avant de l’utiliser. Ensuite,
familiarisez-vous avec la machine en suivant la
notice d’utilisation page par page.
Afin de vous garantir une actualisation constante
des fonctions de couture, le constructeur se
réserve le droit de modifier l’apparence de la
machine, son esthétique et ses accessoires quand
jugé nécessaire, et ceci sans obligation ni
notification préalable.
Copyright © 2010 THE SINGER COMPANY
Tous droits réservés dans le monde entier.
POUR LES TERRITOIRES
EUROPÉENS ET ASSIMILÉS :
Les interférences radio et télévision sont
supprimées conformément aux normes de la
Commission internationale électrotechnique du
CISPR.
Les fils électriques du câble d’alimentation sont
colorés suivant le code suivant :
Bleu : neutre (N) Marron : phase (L)
Si la couleur des fils dans le câble ne correspond
pas aux couleurs des marquages identifiant les
bornes de votre prise, veuillez procéder comme
suit :
Le fil bleu doit être connecté à la borne marquée N
ou colorée en noir. Le fil marron doit être connecté
à la borne marquée L ou colorée en rouge. Si
vous utilisez une prise de 13 ampères (BS 1363),
il est nécessaire de placer un fusible de 3
ampères. Si vous utilisez tout autre type de prise,
il est nécessaire de placer un fusible de 5
ampères. Le fusible peut être soit intégré à la
prise, soit placé dans l’adaptateur ou dans le
tableau de distribution.
Aucun fil ne doit être raccordé à une prise de terre
à trois broches.
MODELO 9960
PRÓLOGO
Gracias por la adquisición de esta máquina de
coser.
Esta máquina ideada para uso doméstico le
proporcionará un excelente resultado cuando cosa
tejidos ligeros y pesados (desde linón a tela
vaquera). Consulte este manual para su uso
apropiado y servicio óptimo. Para conseguir el
máximo rendimiento de su máquina de coser, lea
por completo el manual de instrucciones antes de
intentar trabajar con la máquina. espués
familiarícese con la máquina siguiendo el manual
de instrucciones página por página.
Para asegurarle que siempre pueda disponer de
los más modernos adelantos para la costura, el
fabricante se reserva los derechos de cambiar la
apariencia, el diseño o los accesorios de su
máquina de coser cuando lo considere necesario,
sin obligación ni notificación previa.
Reproducción © 2010 THE SINGER COMPANY.
Reservados todos los derechos internacionales.
PARA EUROPA Y TERRITORIOS
EQUIPARABLES:
Este producto está protegido contra las
interferencias de radio y televisión de acuerdo con
las normativas de CISPR de la Comisión
Electrotécnica Internacional.
Los cables de esta conducción principal están
coloreados de acuerdo al siguiente código:
Azul: neutral (N), Marrón: pos t vo (L).
Como los colores de los cables en la conducción
principal de este producto pueden no
corresponderse con las marcas coloreadas que
identifican los terminales en su enchufe, proceda
de la siguiente manera:
El cable que está coloreado de azul debe ser
conectado al terminal que está marcado con la
letra N o coloreado de negro. El cable que está
coloreado de marrón debe ser conectado al
terminal que está marcado con la letra L o
coloreado de rojo. Si se utiliza un enchufe de 13
Amp. (BS 1363), debe incorporarse un fusible de
3 Amp, o si se utiliza cualquier otro tipo de
enchufe, debe incorporarse un fusible de 5 Amp
en el enchufe o adaptador o en la tabla de
distribución.
No se debe conectar ningún cable al terminal de
tierra de un enchufe de tres clavijas.
10
MAIN PARTS
1.Handle
2.Top Cover
3.Thread Take-Up Lever (Inside)
4.Face Plate
5.Thread Cutter Button
6.Speed Control Button
7.Needle Up- own / Slow Button
8.Reverse Stitch Button
9.Start/Stop Button
10.Extension Table (Accessories)
11.Presser Foot Lifter
12.Forward / Reverse Adjusting Screw
(underneath machine)
13.Foot Controller
14.Power Line Cord
15.Hand Wheel
16.Power Switch
17.Terminal Box
18.Controller Jack
19. irect Stitch Selection Buttons
20.E IT Button
21.Tack Button
22.Twin Needle Button
23.Utility Stitch Button
24. ecorative Stitch & Letter Button
25.Liquid Crystal isplay (L.C. .)
26.Function Buttons (F1 - F5)
27.Clear Button
28.Scroll Buttons
29.Cursor Buttons
30.Thread Cutter
31.Buttonhole Lever
32.Needle Threader Lever
33.Needle Threader
34.Presser Foot Thumb Screw
35.Presser Foot Holder
36.Presser Foot
37.Fabric Feed ogs
38.Needle Clamp Screw
39.Needle Thread Guide
40.Needle
41.Bobbin Cover Latch
42.Bobbin Cover
43.Needle Plate
44. rop Feed Lever
45.Pattern Chart
46.Thread Guide
47.Thread Guide
48.Bobbin Winder Thread Guide
49.Thread Tension Regulator
50.Spool Stand
51.Felt Washer
52.L.C. . Contrast Control
53.Auxiliary Spool Holder
54.Bobbin Winder Shaft
55.Bobbin Winder Stop
1
2
7
5
6
4
3
8
9
10
11
12
14
13
15
16
17
18
19 20 21 22 23 24
25
26
27
28
29
30
31
32 41
40
33
34
38
35
36
37
42
43
44
45 46
39
47 48
49 50 51 52 53 5554