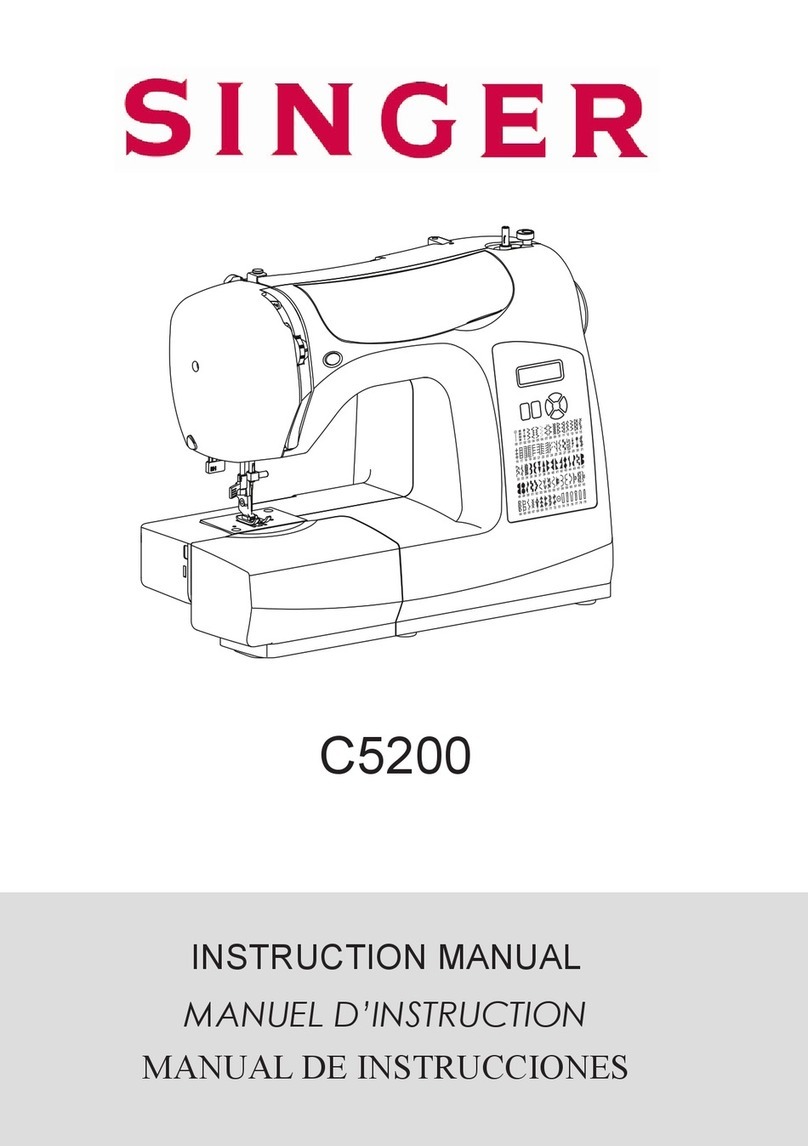
Singer Quantum User manual

*

I
MPORTANT
SAFETY INSTRUCTIONS
•Beoroe
removing0
the
bobbin,
case,
remove
pu
fom
the
sock,
et
S
For
double
insulated
machines,
when
servicing,
u
se
only
identical
Singer
replacement
parts.
See
instruchions
bor
Servicing
of
Double.Insulatod
Whenl
using this
machine
basic
sufety
precautions
should
always
be
followed
Appliances.
irt(ludirtg
the
following
FRead
all
josh
uct ions
before
u
si
r
this
rahie •.
Never
operate
the
machine
if
it
has
a
damaged
cord
or
plug, if i S
ro
working properly
it it
has
been
dropped
or
damaged,
or
dropped
into
water
Return
the
machine
to
the
nearest
authorized
dealer
or
Service
Center
DANGER.
for
examination,
repa,,
electrica,
or
ehria
duiret
•Never
operate
the
machine
with
any
air openings blocked
Keep
ventilation/
To
rediuice
the risk
of
electric
shock:
openings
of
the
machine
and
foot
controller
free
from the
accumulation
of
*
the
machine
should
neve,
be
left
unattended
when
plugged
in.
Always
unplug
lint,
dust,
and
loose
cloth.
the
machine
from
the
electri
cutlet
immediately
after
using
and
bebore
cleaning.
*
Never
drop
or
insert
any
object
into any
opening
*
Alwa
ys
uripilig
before
changirng
ligjht
bulb Replace
bulb
with
the
same
t
ype
S
Do
riot
use
outdoors
rated
I?
volts
S
watts
3e
sure
to
replace
the
lace
plato
which
covers the
light
S
Do0
not
operate
where aerosol
(sprayt
products
are
being
uised or
where
bulb
belowe
operating
the
mnachine.
oxygen
is
being
administered.
WA
NI
G*
Do
ot
allow
to
beused
as
a
oy
Close
attenton
is
neesar
when
the
W
A
NI
G.machine
is
used
by
or
near
children.
To
reduce
the
rsk
of
burns,
fire.
electric
shock
or
iury
to
persons:USEVCN OFOULISLADPR UT.Inadulinute
product,
two
systems
of
insulation
are
provided
instead
ci
grounding.
No
*
Be
sure
that
the
electrical
voltage
of
the
socket
oullet
(walt
roceptacle)
is
the
grounding
means
is
provided
on
a
double-insulated
product,
nor
should
a
saole
as
he
rated
voltage
of
the motor
means
for
grounding
be
added
to
the
produc.
Servicing
of
a
double-insulated
*
Use
this
mac¢hine
onty
for
its
intended
use
as
described
in
this Operator's
product
requires extreme care
and
knowledge
ol
the
system.
and
should
be
Guide
Use
only
attac~hments
recommended
by
the manufacturer
as
contained
done only
by
qualified
service personnel Replacement
parts
for
a
double-
in
ire
Operators
Guide,
insulated
product
must
be
identical
to
those
parts
in
the
product.
A
double-
insulated
product
is
marked
with
the
words
"DOUBLE-INSULATlON'
or
*
lO
dis:onlnect,
urn
all
controls
tol
the
off
(''O''
position.
then
remove
plug
'DOUBLE
INSULATED'.
,rom
u...,SAVE
THESE
INSTRUCTIONS
*
Disoonnerl
tire
power-line
plug
from the
socket
outlet
or
switch
the
machine
Servicing
should
be
performed
by
an
authorized service
representative
off
when
making
any
adjustments
in
the
needle
area,
such
as
threadingThspoutiineddoroshld
s.
ne
edle,
changing
needle,
changing
needle
plate
or
changing
presser
toot,
etcTi.rduti
nene
o
oueodue
FOR
EUROPEAN AND
SIMILAR TERRITORIES
*
Always
unplug
[the
machine
rnm
the
electrical
outlet when
removing
covers
This
product
is
suppressed
for
radio
and
tleevision
interferencee
wubh
the
lubricating,
or
when
making
any
other
user
servicing
adjustments mentioned
international Electrotechnica Commission requirements
of
the
CISPR
I
the
Operator's
Guide
Machine
for
Great
Britain
and
some
other
couniries
having
similar wiring
*
[Do
not
attempt
to
adjust
the
motor
belt
Contact
your
nearest
Service
Center
standards
are
shipied
torn
the
factory with
a
plug
ton
connection
to
the
should
any
adtustmerit
be
required,
mains.
The
wires
in
this
mqains
lead
are
coloured
in
accordance
with the
following
code:
*
Do
not
unplug
by
pulling
on
cord.
Th
unplug,
grasp the
plug,
not
the
cord.
Blue:
neutral
(N)
drown-
live
(L)
*
Flardle
the
toot
controller
with
care
and avoid
dropping
it
on
the
floor
AS
the
colours
of
the
wires
in
the
mains
lead
of
this
appliance
may
not
Be
sure
not
to
place
anything
on
top
of
it.
correspond
with
the
coloured marktngs
indentilying
the
terminals
in
your
plug
•Always
Ljse
thle
proper needle
plate
The
wrong
plate
Canl
cause
the
needle
pioceod
as
follows:
to breakThe
wire
which
is
coloured
blue
must
be
connected
to
the
terminal
which
is
marked
to breakwith
the
letter N
or
coloured black,
The
wire
which
is
cloured
brown
must
be
*
Do
not
uise
bentl
needles, connected
to
{the
termi~nal
which
is
marked
with
the
letter
L
or
coloured
red.
If
•
Whn
swin,
kep
fnges
aay
rom
ll
lovng
artsSpeialcar
isa
43
Amp.
(e
1363)
plug
is
used
, a 3
Amp use must
be
tilted.
or
if
any
other
*
Whn
swin,
kep
fnges
awy
fom
ll
ovin
pats.Specal
areis
ype
of
plug
is
used,
a
5
Amp use
must
be
tilted
either
in
the
plug
or
adaptor
required
around
the
sowing
machine
needle
or
at
the
dist
ribution
board
Neither
cord
is
to
be
connected
to
the
earth
ter
mina
*
1Do
not
pull
or
push
fabric
while
ntirching.
T
his
may
deflect
the
naedle
causing
of
a
three-pin
plug,
ii
to
break.

IP
R
ANTAL
SAFE
Y
I
TUTIONS.............................................2TOE
STEP
BUTTONHOLING
.............................. 1........9
ACCESSORIES INCLUDED
WITH
MACHINE
........................ 3
ADJUSTING BUTTONHOLE
BALANCE
............................
21
CONNECTING
AND
RUNNING
MACHINE
.....
.................... 4
SEWING
ON
A
BUTON
.,,,.............................................
21
INT
RAD IN
SMACHIN
............................. .........
FDRE
MIN
EMBROIDERY..........................................
.
22
WINEDING
BOBB
IN
E
6........................................CHANR
iN
MO
NEDLE..
ER....................................2
INSERTING
E
PREVIOUSLYBIN.............WOUND.....BOBBIN.....
8
FARFABRICD
AD
EELTHREAD......AND....NEEDLE......TABLE......22
LIQUID
R
STA
CRYSTAL.........DISPLAY.................OPTIONAL........ACCESSORIESSS
RIS
OTINNOTD
...
INCLUDED...............242
SELECTING
ATER
......
A...PATTERN...................REMOVING..........ANDMO
INREPLACINGGBO
BI
CA
E
.BOBBIN.......CASE...........22
SELECTING
YOUR
LANGUAGE
..................................
10
REMOVING
AND
REPLACING
LIGHT
BULB
........................
26
LCDUSIN
G
H
E
D
T
N IN...... .......................... 1FORMATIN
S
R
E
S112C
E
N
N
E
M
CH
KIN
E................................. .
26
ADJUSTING
STITCH
WIDTH
AND
LENGTH
...................... 13
BALACIN
A
PTTEN
...
,,,,,~
14Dear
Customer:
We
recommend
that
for
future
reference
you
record
the
Serial Number
cf
your
STRAIGHT
STITCH
..........................................
14
Sewing
Machine
in
the space
provided.
STITCHING
IN
REVERSE
....................................... 14
ADJUSTING NEEDLE
POSITION
.....
.........................
15 Rotor
to
lust
ration
at
right
Wo
location
Serial
Na
........ '
KEEPING
SEAMS
STRAIGHT
15
o
eilNme
n
TURNING
SQUARE
CORNERS
............ .........................
15
your machine
USING
SEAM
GUIDE........
....... ......................
16
Model
No.
_
Serial
No
FREE
ARM
SEWING
...................... ...............
.........
16
To
ensure
that you
are
always
prOVided
with
the
most
modern sewing
capabities
CHANGING
PRESSER
FEET
.....
..................... .........
17
the
manutacturer
reserves
the
right
to
change
the
appearance,
design
or
accessories
of
this
sewing
machine
when
considered
necessary
ATTACHING FEED
COVER
.................... ............... 17
BLINDSTITCHING
.......... ................................
18
SINGER CUSTOMER
ASStSTANCE
IN
THE
U.S.A
TOLL-FREE
NUMBER:
1-800-877-7782
OVEREDGING
AND
SEAMING
I.................................1
-1-

IPattern
display
" ..
Needle
posdlion
selector
Bobbin
storage
-,
Stitch
balance
lever
~Liquid
crystal display
-~
7
ENT
button
Thread
guide
eSEL
button
Spool
pin
and
cap
Stthwdt
ee
Face
plate
Stitch
length
lever
Thread cutter
Sewing
light
Accessory
Box
Reverse
lever
HNdeel
Nede
lt
Prse
ot"
Patt
er
tn
dia
Bobbin
C>,
Presser
foot
lifter
Bobb
ncaseSe
~t
Speed
contro,,er
gts~o
® .i

(A)
,(C)
/7\
I:
pn,
General
purpose
Srfltraight
stitch
,(R
1
needle
plate
nedeplate
II
_
(on
machine)
4
313066
\"312"77
Ba
General
purpose
(G)
<Apresser
foot
(F)
(on mchin)(
Twin
needle
#2025
(o
mchne FedcvesDrnngan
pin
#313026
#313150
4
edcve
ann
n
D
'#313117
1'
embroidery
foot
(Q)
(DesrStraight
stitch
fot
-#807
064Small
spool
cap
#353628
E(J)
(H)
Zipper
loot
<'Ipresser
foot
Button
sewing
foot
,c--
\
Spool
cap
#171480
ff714OJ3
#361066
(o
acie
/
#179967
(L)
(K)
..
Onetpbttonhole
foot
431303S-i(LL)Two-step
buttonhole
B
idstitch
presser
fool
(N)gudfo
()(S) ~' e m(p)
Overedge
foot
# a
Shirring
loot
541582
#543106Lint
brush
#546358
Mnual
needle
threader
Pin
luck
foot
(1 Uinmine
3123Open
toe
foot
#312956
"~
•When
using
presser
feet
(G),
(H)
and
(K),
you
can
3146,
edepc
only
use
manual needle
threader
to
thread
needle.
-3-

CONNECTING
-RUNNING-
L)
A
I
: "
I,
Push
speed
controller
tube
(1)
and
Power
on-press
'"
side
of
switchl
Press
speed
contrOller
to
run
When
not
using
machine
electrical
power
cord
(2}
into
receplacle
machine,
rewind
air
hose
around
speed
(4).
controller
for
storage,
as
Plug
power
cord
(3)
into
electric
outlet.
Power
oft-press
'O'
side,
shown.
Note
Do
not
operate
machine without
material
under
presser
toot.
To
simplify
understanding,
the
following
symbolssu
are
used
throughout
the
operator's
manual.
1
Lower
presser
toot.
SPesSLbutton-
Turn
power
off.
-
aspesrfo
SPssNT
button.-
Press
speed
controller
Use
hand
wheel
tOrseede
-4-

W W :: 0
USING
BUILT-IN
NEEDLE
THREADER
C
W
Move
stitch
width
lever
to
straight
stitch1
Place thread
and
cap
onto
spool
pin.
Snap
thread
into
thread
guide. Following
arrows,
guide
thread
Pull
thread
own
down
to
needle.
Loop
thread around thread guide
(1).
Slide
spool
cap
firmly
over
the
rim
of
the
spool
to
prevent thread
tangling.
For
best
sewing
i
performance
use
(3}
proper
spool
cap.
Turntheer3)oinrtoo(2
through
eye
of
needle.]
~A
Guide
thread
into
hook
(2).
Turn
threader
(3)
to
draw hook
(2)
&YY
-- - -, " ----
,and
thread
through
eye
of
needle.
~~Release
threader,
it
will
rebound
to/
tL
"'
original
position.
I.4 _ ..
,
-5--

*
D~m
USING
MANUAL
NEEDLE
THREADER
m
Move
stitch width lever
to
straight
1 ."
Slide
threader
as
far
to
the
left
as
Oe
ld
lt
itwill
go
.,
/
._.,
-- idBe
sure
guide
(1)
is
against
the
leftonede.....
Put
an
empty bobbin,
with
rings
(1)
I
/facing
up,
into
bobbin
case
j
Brng
metal
hook
of
threader
"- / x ./
Gidethread
into metal
hook,
-"' / ~ ~~Draw
metal
hook
and
thread
-agnsCselieutnae(,ni
tsop
backwards
Sltde
threader
to
the right
to()
remove
I
______
-.-

,
NOTE:
Do
not
allow
thread
to
wind
I
beyond
the
outside
ring
(5).
(3,.
Bring
needle
thread
under
presser
t
foot
screw
(3)
one
time.I
-----
-_ _SRemove
thread
from
presser
foot
~Hold
thread
and
run
machine.
IWatch
bobbin
winding
from
the
/ ~ ~~~~wndow
(4)
in
slide
plate.~
.[
ll l~
--

'
7
." '>
Hold
needle
thread.
Open
sieplate.
Turn
hand
wheel
towards
you
Inetbobnitobbi
cs.Ilowering,
then
raising needle.
~Gently
pufl
needle
thread
to
raise
Guide
thread
into
notch
(1).
bobbin
thread.
\ -
Brtngol
thread
arnd
ansesde
pateit
pn
op
(2).
--

SCREEN
(1I)
SH
IRT
)
01
ONE-STEP
(3)
A- (t)
iK
TWO-STEP
(2)
"
A4UT.
Ii(6
~(1)
Sewing
application
or
stitch
name
and
sequence
no
S ! ,r
Turn
pattern
selector
dial
to
(2)
Pattern
illustration.
~select
patterns.
L~lNote:
Power
must
be
on,
to
(3)
Presser
loot.
J
/see
pattern
selected.
(4)
Buttonhole
lever
(5)
Recommended thread tension setting.
SCREEN
(I
(6)
Advice
that
pattern
requires
balancing.
Will
illuminate
first.
(It
there
are
two
or
more
sewing
applications)
(7)
Stitch width
optimum
setting
and
width
position.
~(8)
Stitch
length
optimum
setting
and
length position.
SHIRT
Push
SEt
button
to
select
sewing
application
on
01 ONE-STEP
screen
(I).
I'IITWOI-STEPF
Then
push
ENT
button
to
enter
into
screen
(II).
--

SCREEN
Ill
GETTING
MORE INFORMATION
Push
SEL
button
once
or
twice
"- " -
MAKE
PRACTICE
BUTTON-
.
HOLE.
MARK
BUTTIONHOLE
POSITION
ON
FABRIC.
INSERT
BUTTON
BETWNEEN
CLAMPS
ON
FOOT.
MAKE
SURE
THE
FOOT
IS
ALL
THE
WAY
FORWARtkMORE>
/
PULL
LEVER
DOWN.PRESS
Use
manual
needle
threader
(P')
to
move
language
selector
,,
LEVER
TOWARDS
YOU.SEW
(l)
to select
your
Jan
guagea
ENTIRE
BUTTONHOLE
IN
ONE
OPERATION.
ADJUST
WIDTH
AND
BALANCE
OF
A I,
"Lr
/ , i
PRACTICE
BUTTONHOLE,
IF
NECESSARY.
Engthsh
up
French
Middle
Spanish
Dlown
-10-

s*t I]*MAE FACT
Lr
ON
Cen A
HOU)l
MAFI<
~t ~hlo
irO
ape-___
....
OV OSFIION CtMFAIAH C.
F TOLE UAF
KTEA1HDNSOLE
7IPI
MEi
[1 T
n
UIT
Op~~
OfiOTt#TtCII$
~
U~I
NRAT)~&Ut/O
N 1flH
OStI
U SE ,Ar,.r '
TWPIIJN
NG
S NGWING
E~n fLOCK
On
SIAAPCHINsE

USED
F01
DEOSA tVE
OOOEOtR
AND
EflE
SWCRESO
I
T
4Trrrw
~CLOSE
TO
S
USED
FOR
oECOaATIVr
in~I1Cn~AtNLL
BO4OERS
AND
EDG
ES
m9
--
A4WOU
T
C1OS
JFC
OR
D+RAT
For
E
HU
&SULr+O$
EMBRO
EWy
EMBjaSE}
SAO U WLI,
VNG
r + ...........
CAREPUUt
INEDh+I
A
IVC
PATTERN
.........
FOR
EMhJ
UNiT
t
n
J vU
n
ehi
I
PLA(
S~ot
A
oEtORA
I
VE
ST[ITCH
I -- / ,.-
Sffl
SMOC
AOM
TVCSTTCN
*
RlSO
APIAOUE
S
Ofl
JOr[NNO
-+
PLAN
AYi
SUEFUL F
OR
BO
RDERS.
-
MD
SErUL
FOR
4r +vYDUfl
III
-u
.F4 D
ALSOECdITV
AT
+ + --
An/ALSO
++ + +
OU
fl
UE
P
SAI
ANOI
AFTEF
AGG
ING
RhE
PAGT#40
..+_RS
.. .. ......... .
p+.
V.
M+AALSOENSt
OT
N
i.-,/c++,,,,++
flI
,=E'
r+on
+tva.y
SEW
,OVER+
+ ..... l reosAt Ivr
:1
P'l
tNWhchMA
B
-12-

:4
1
Recommended
thread
tension
Move
lever
(1)
up
or
down
to
TOO
much tension
-
Too
little
tension-
position
appears
on
LCD.
adjust
thread
tension.
Move
lever
up.
Move
leve,
down.
Ii
! IMove
lever
(2)
to
widen
or
narrow
:4
I
I
stitch.
N:
AUTD.
width
wider
than
twin-needie
graphics
+ (Z
Whnusn
wi-edl
ono
e
__
.__
_____-
_
.........
~~~~01234--".. ..
For
more
density
(shorten stitch)
T'
'J
move
lever
(3)
to
left.
-
For
less
density
(longer
stitch)
-13-
--
move lever
(3)
Io
right
-- 13-

When
stitches
are
too
close
(4)-
{
, .,
~'
[move
lever
(1)
to
the
left.
J:> '
When
stitches
are
too
far
apart
(5)-
}
L
~%iJ
t~ -l
"
4
move
lever
(1)
to
the
right.
* i
Secure
beginning
and
end
of
Press reverse
lever
for
steps
1
anid
3.
seam
as
shown
-
""x
C
Guide
fabric
.~ ~~~~~and
etb°°
er°srttlowerfool,
\.\
@
At
edofsa
Begin
sewing
BIN/
'
".,.
I. ,
Cemlovefab
ric
-14-

Note:
needle
position
only
works
with
straight
stitch
pattern.
(--)
__................
' [
Line
up
fabrtc
with
guideline
(1).
~~Center
needle
position.
'
~~~~~~~Left
needle
position.° ' tWe
oto
ffbi
ece
_______________Use
stitch
width
lever
to
position
needle
from,
center
to
full
left
Whe
coslne
bot
to
ofsabictches
position.
rosits()
tpsicig
, ~
Right
needle
position,
_____________Use
stitch width
lever
to
position
needle
from
center
to
full
right-
positionTurn
fabric,
bringing
bottom
edge
Tin
lne
with
guideline
(1),
CAUTION:
Sew
only
in
center
needle
position
when
using
straight
stitch
-
footandneele pate,
Continue
stitching
seam.
-15--

-....
"
To
attach
seam
guide, place screw
-,-Swing
accessory
box
to
back
of
i of
guide
into
hoe
(1)<4
machine
or
remove
bylifting.
Position
guide
for
desired
seam
-
Topstitch
edges
on
sleeves
or
alowncfinish
waistband
and
pants
legs.
--
Hand
tighten
screw
N
_
\
~
To
sew
curved
seams,
attach seam
>,J
-
Attach
buttons
without
stretching
\
.guide
at
an
angle.
• "---cuffs
and
neckbands.
-16-

To
REMOVE-
__
_Loosen
presser
foot
screw
and
J
TO
RMOVE-remove
foot.
,-'-zi/
,
it
snaps
oif
shank
(2).t
ORPAE
M barcrw
!
Take
toot
off
machine.
TO
REPLACE-
,
Lowerpreser
fot
lfterOpen
slide
plate.
Center
new
presser
foot
(1)
under
.
/ -.
Press
srw3)down.
(3)
.
J"
dlPress
tab(1)
and
(2)
into
hodes
on
Close
slide
plate.
-17-

S!Wrong
Right
Finished
Screw
Sid
Side
Wrong
Wrong
Hem
Gd
Side
Sde
i .G
ie
--- , _
Fold
hem
to
wrong
side.
Fold
hem
back
as
shown.
Place
folded
edge
against
presser
Turn
fabric
to
right
side
and
press.
Pin
or
baste
in
place.
toot
guide
Sew,
allowing
w~de
stitches
to
enter edge
of
fold.
Adjust
foot
if
necessary
There
are
four
sttIch
patterns
that can
be
used
for
overcasting
For
overcasting
edge
of
fabric
to
For
hemfinishing
on
fabrics
to
prevent
For
stitching
and
finishing
seams
For
stitching
and
finishing
seams
prevent
fraying.
rolling,
in
light weight fabrics,
in
heavyweight
fabrics.
Use with
stretchy
material
which
tends
For
overcasting
edge
of
fabric
to
to
fray
or
roll.
prevent
fraying.
-18-
Table of contents
Other Singer Sewing Machine manuals

Singer
Singer 66-1 User manual

Singer
Singer 2210 User manual

Singer
Singer 72W19 User manual

Singer
Singer Sewing Machine User manual

Singer
Singer 2259 User manual

Singer
Singer 117-1 User manual

Singer
Singer 4423CL User manual

Singer
Singer 99W124 User manual

Singer
Singer 246-3 User manual

Singer
Singer 154W101 Quick start guide

Singer
Singer 147-81 User manual

Singer
Singer 4325 User manual

Singer
Singer 17U241 User manual

Singer
Singer 95-100 User manual

Singer
Singer 6660 User manual

Singer
Singer 2001A User manual

Singer
Singer 147-20 User manual

Singer
Singer 6SS User manual

Singer
Singer 569U2100A Series Setup guide

Singer
Singer 114-25 Quick start guide