Sinmag Europe SM705E User manual
ENG
Manual ●Mode d’emploi ●Handleiding ●Handbuch ●Manuale
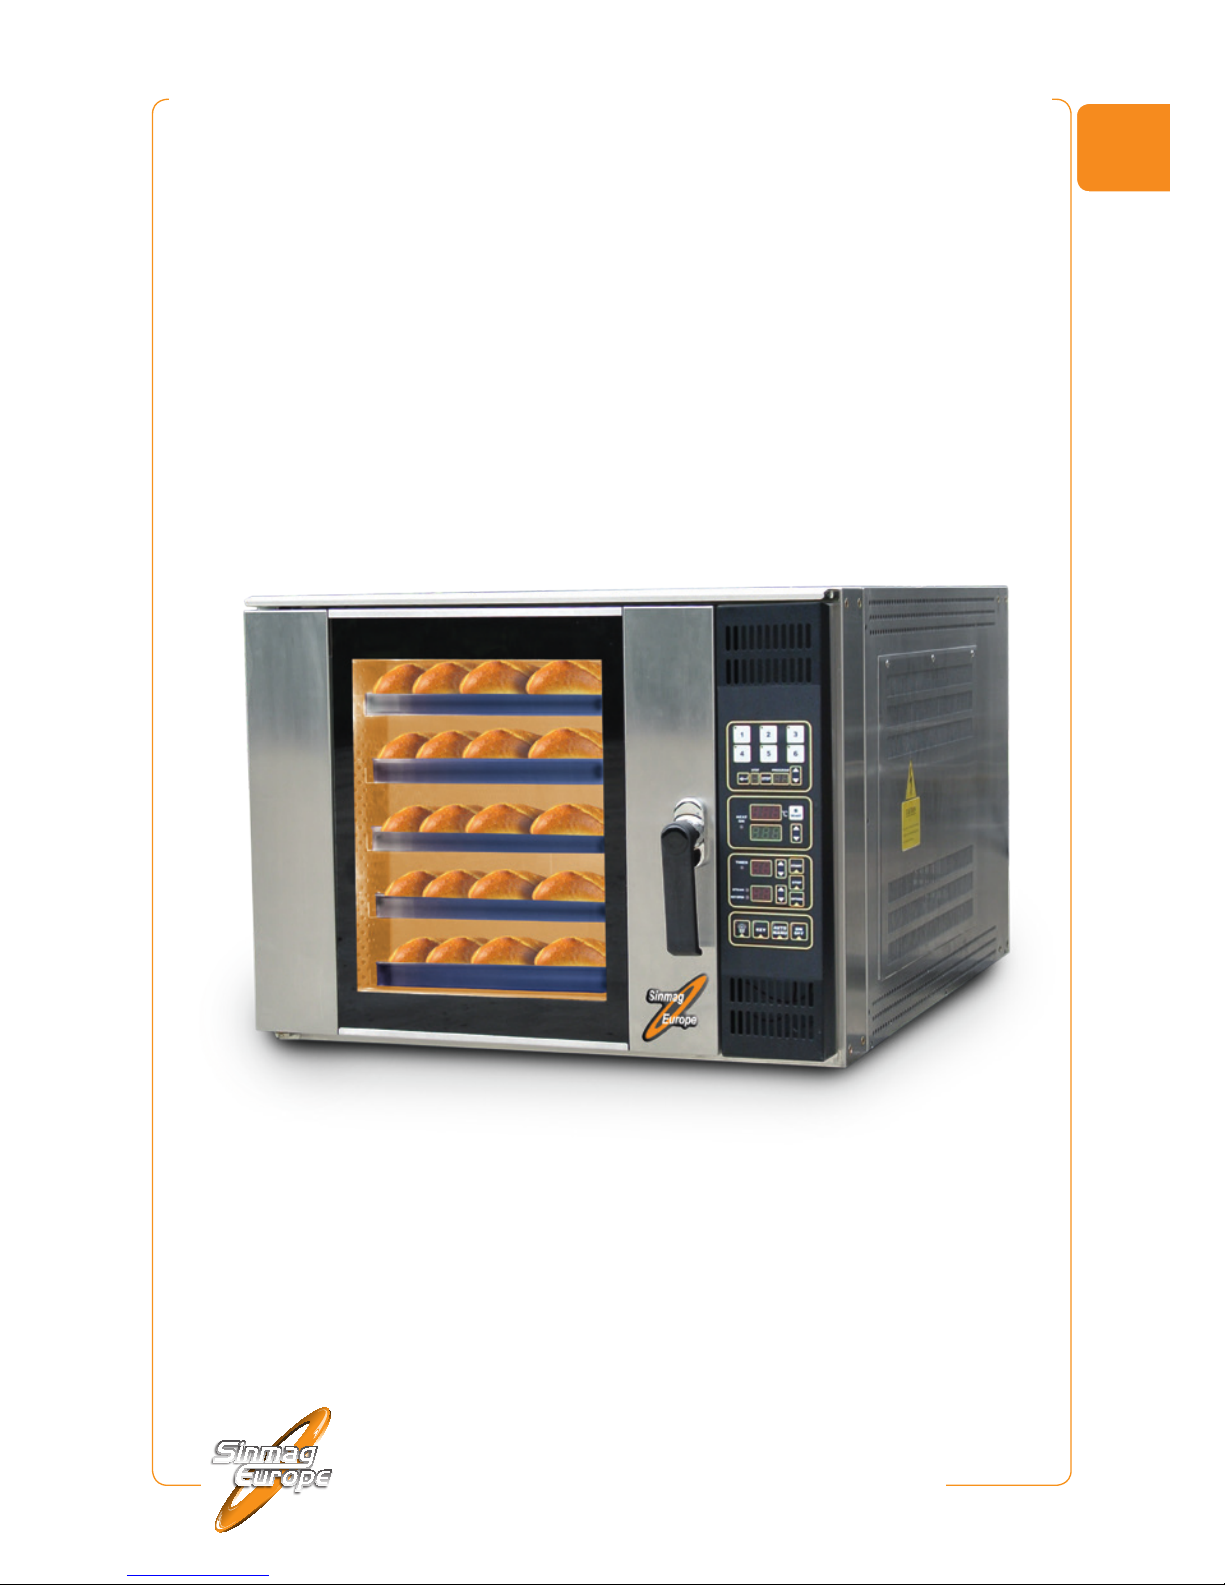
SM705E •SM710E •SM805E •SM810E
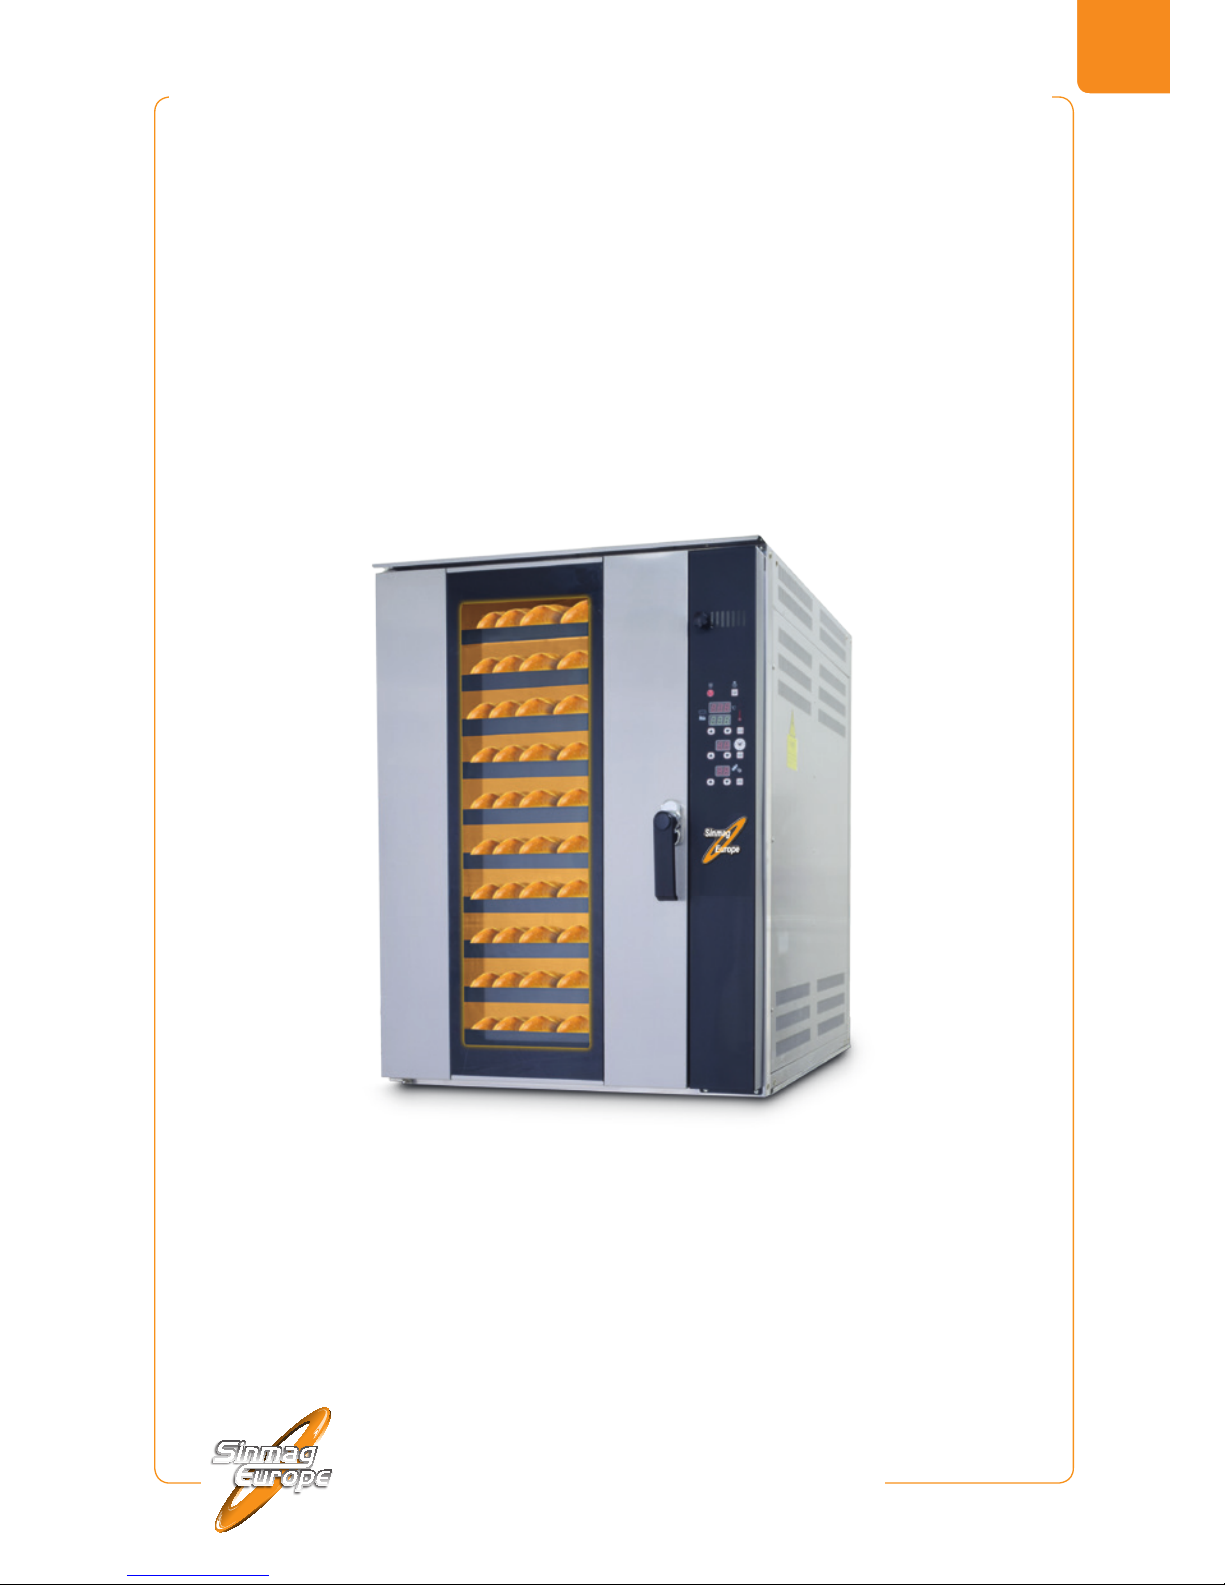
Convection oven •Four ventilé •Convectieoven
•Heiß-Umluftofen •Horno de convección •
Forno termoventilato

ENG
2
SINMAG EUROPE BVBA
Congratulations with the purchase of this oven.
This machine has been tested thoroughly in our warehouse in Belgium before
delivery.
This way, Sinmag Europe is able to guarantee delivery of a machine ready for
installation.
For correct use and long service life of your oven, we recommend that you
read this manual attentively before starting to use the machine.
Sinmag Europe thank you for your trust and wish you much job satisfaction
with this spiral mixer.
Sinmag Europe Team.

ENG
SINMAG EUROPE BVBA
3
1. INSTALLATION
1.1. The oven is ready for installation. It should be installed in a dry and
ventilated place on a table or stand.
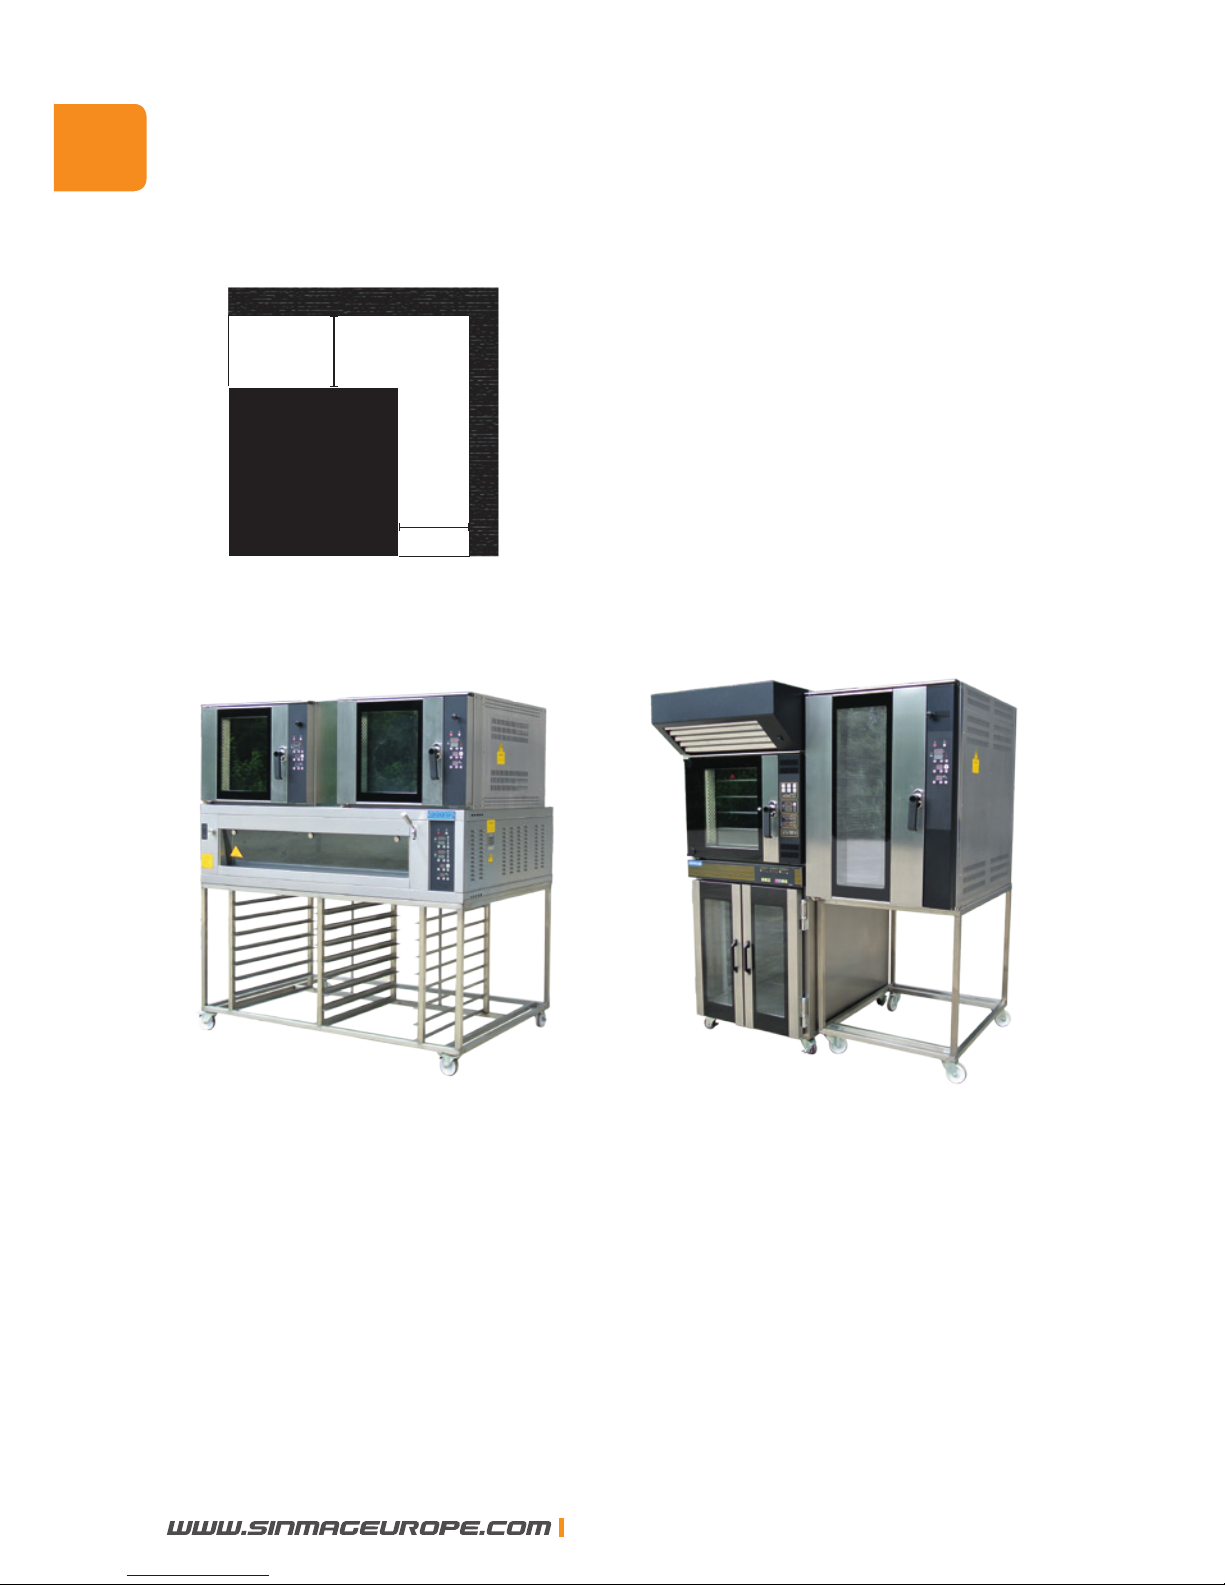
1.2. Select a horizontal and plain oor to install the oven. The space
between the oven and the wall should be more than 30 cm, and
the space between the back side of the oven and the wall should be
more than 50 cm.
50 cm
50 cm
1.3. The oven can be placed on the electric deck oven SM-941F, or on the
prover SM-716F(B) or on a stand.
1.4. Connect the correct electric supply to the oven, as indicated on the
identication plate.
1.5. Turn on the main switch and then check all the components of the op-
eration panel, including thermostats, indication lamps, timer, lighting
and switches to ensure their normal working status.
1.6. Turn off the main switch and shut off the electric supply.
ENG
4
SINMAG EUROPE BVBA
2. ELECTRIC SUPPLY
Connect the correct electric supply to the oven as indicated on the nameplate.
The electric supply should be connected to the oven by a professional elec-
trician. The connection of the wires should be tied rmly. The oven should be
in grounding protection. (L1: red or brown, L2: green, L3: White, N: blue, E:
yellow and green)
After the oven has been connected to the electric supply, rst of all check the
direction of rotation of the fan. It should rotate clockwise when looking from the
front of the oven. If the rotating direction is adverse, please exchange any two
of the electric cables to reverse the direction.
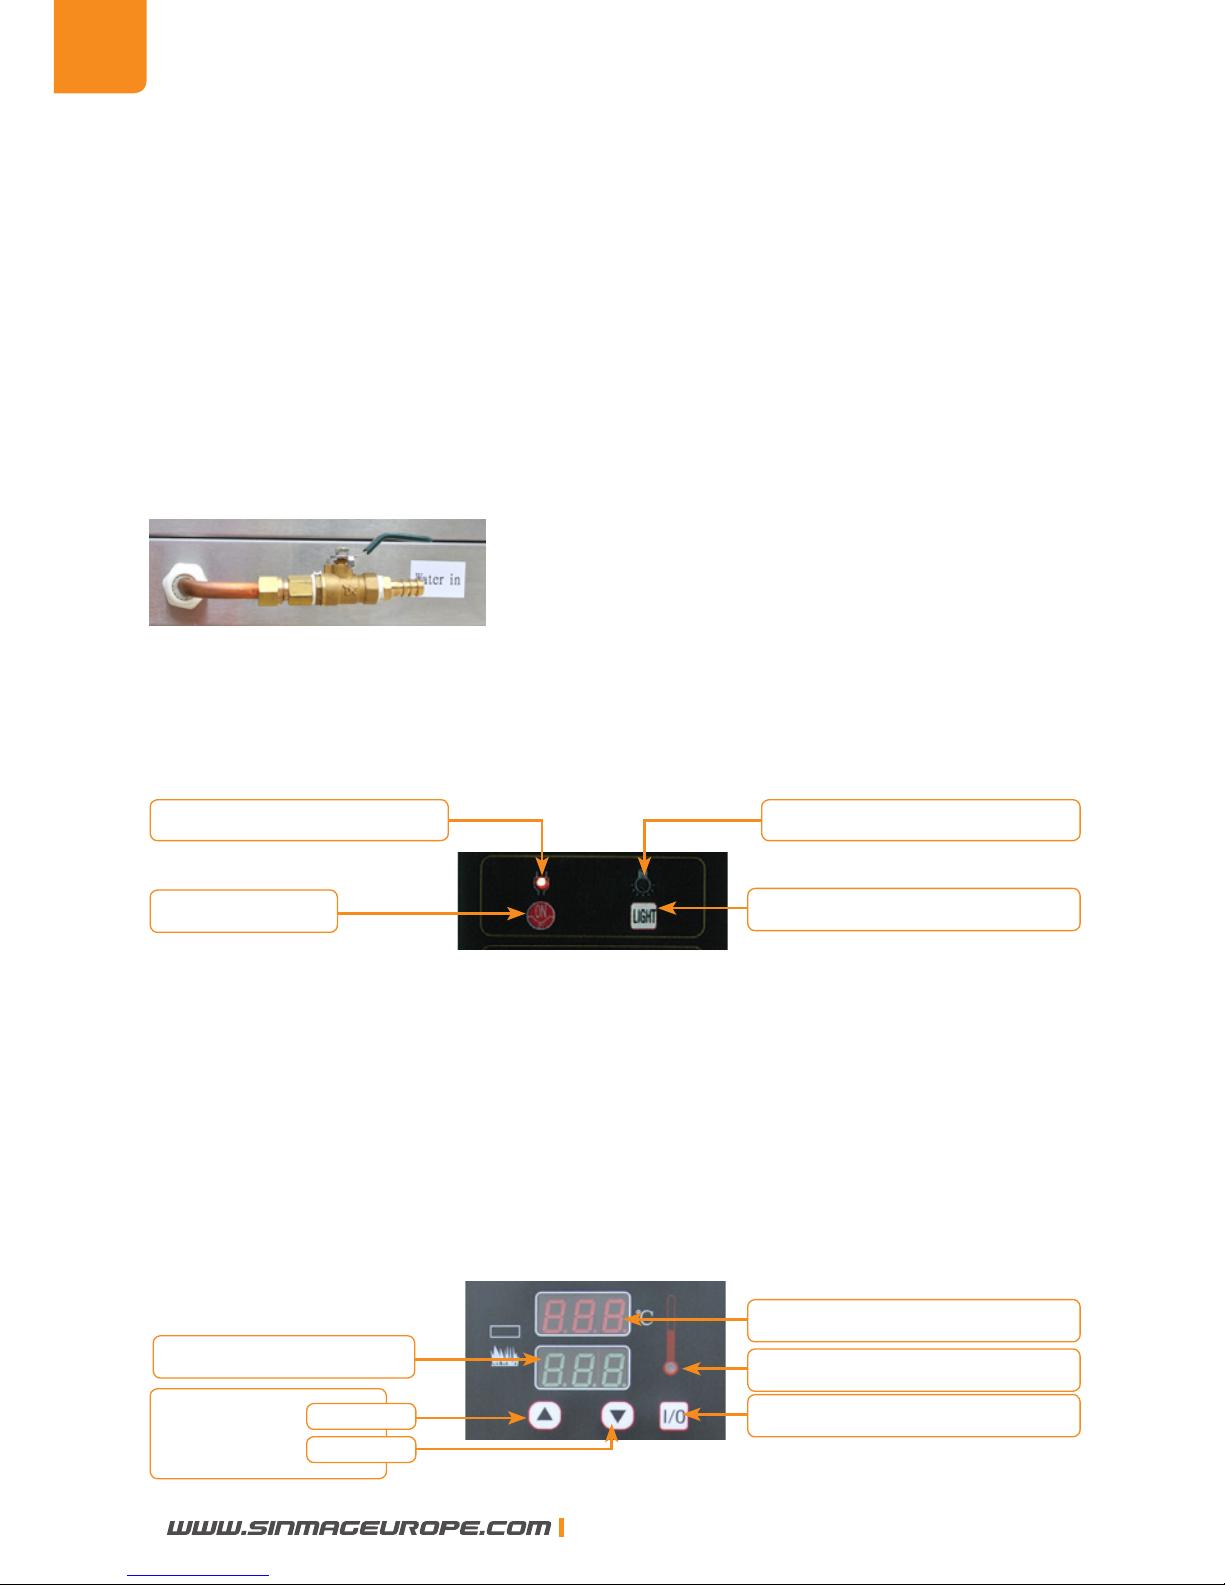
3. WATER SUPPLY
Please choose a ø 12 X 1mm hose to connect the water inlet and the water
supply. Incoming water pressure should be 1 - 7 kg/cm2.
4. DESCRIPTION OF THE OPERATION PANEL
4.1. Power button
Power button Lighting button
Power indication lamp Lighting indication lamp
• Before work, press power button, power indication lamp is on.
• After work, press power button again, power indication lamp is off.
4.2. Lighting button
• Press the button “LIGHT”, turn on lighting indication lamp.
• Press the button “LIGHT” again, turn off lighting indication lamp.
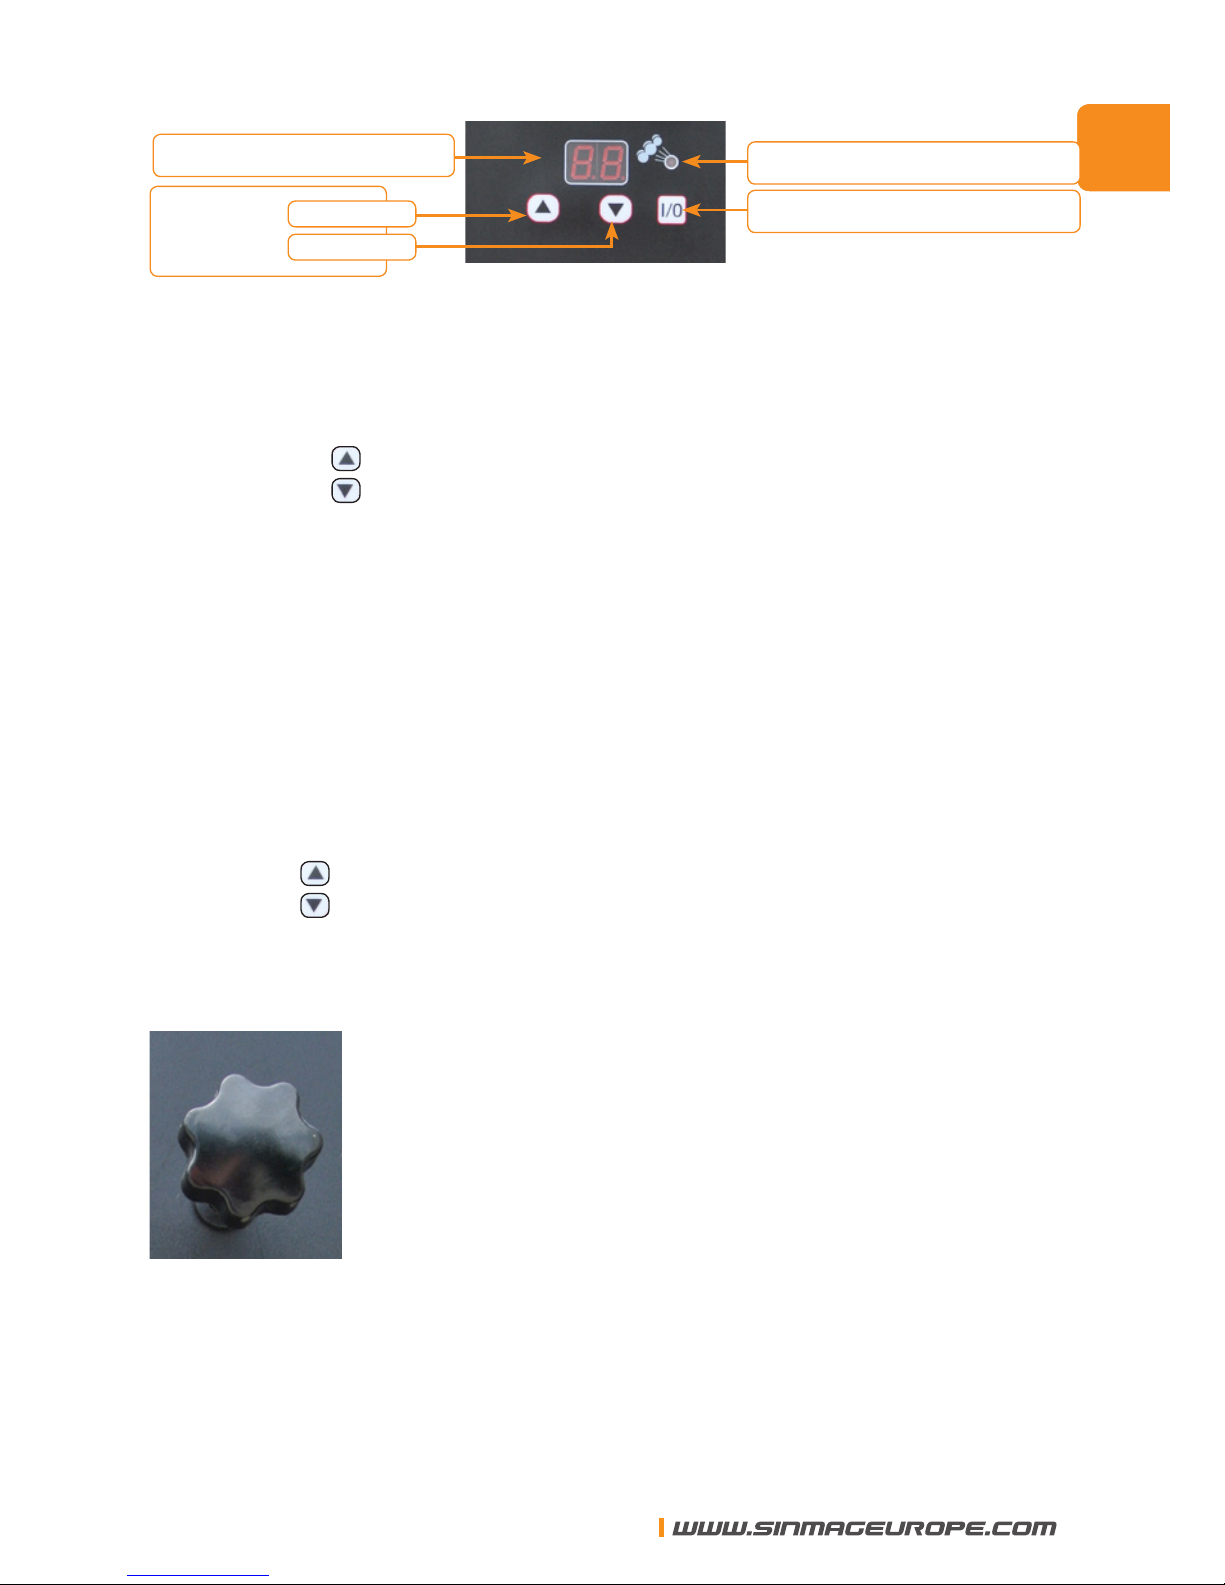
4.3. Thermostat
4.3.1. Set baking temperature
Set temperature
Baking
temperature DOWN
UP
Temperature indication lamp
Actual temperature
On/Off thermostat
ENG
SINMAG EUROPE BVBA
5
A. Check the indication lamp above “I/O”, if indication lamp is off, you
can set baking temperature. If indication lamp is on, press “I/O”, to
turn it off.
B. then: turn up the baking temperature.
turn down the baking temperature.
4.3.2. Heating up
A. After setting baking temperature.
B. Press “I/O”, indication lamp is on, convection oven is heating up.
When it gets to the set temperature, convection oven will stop heat-
ing. Max set temperature is 250 °C.
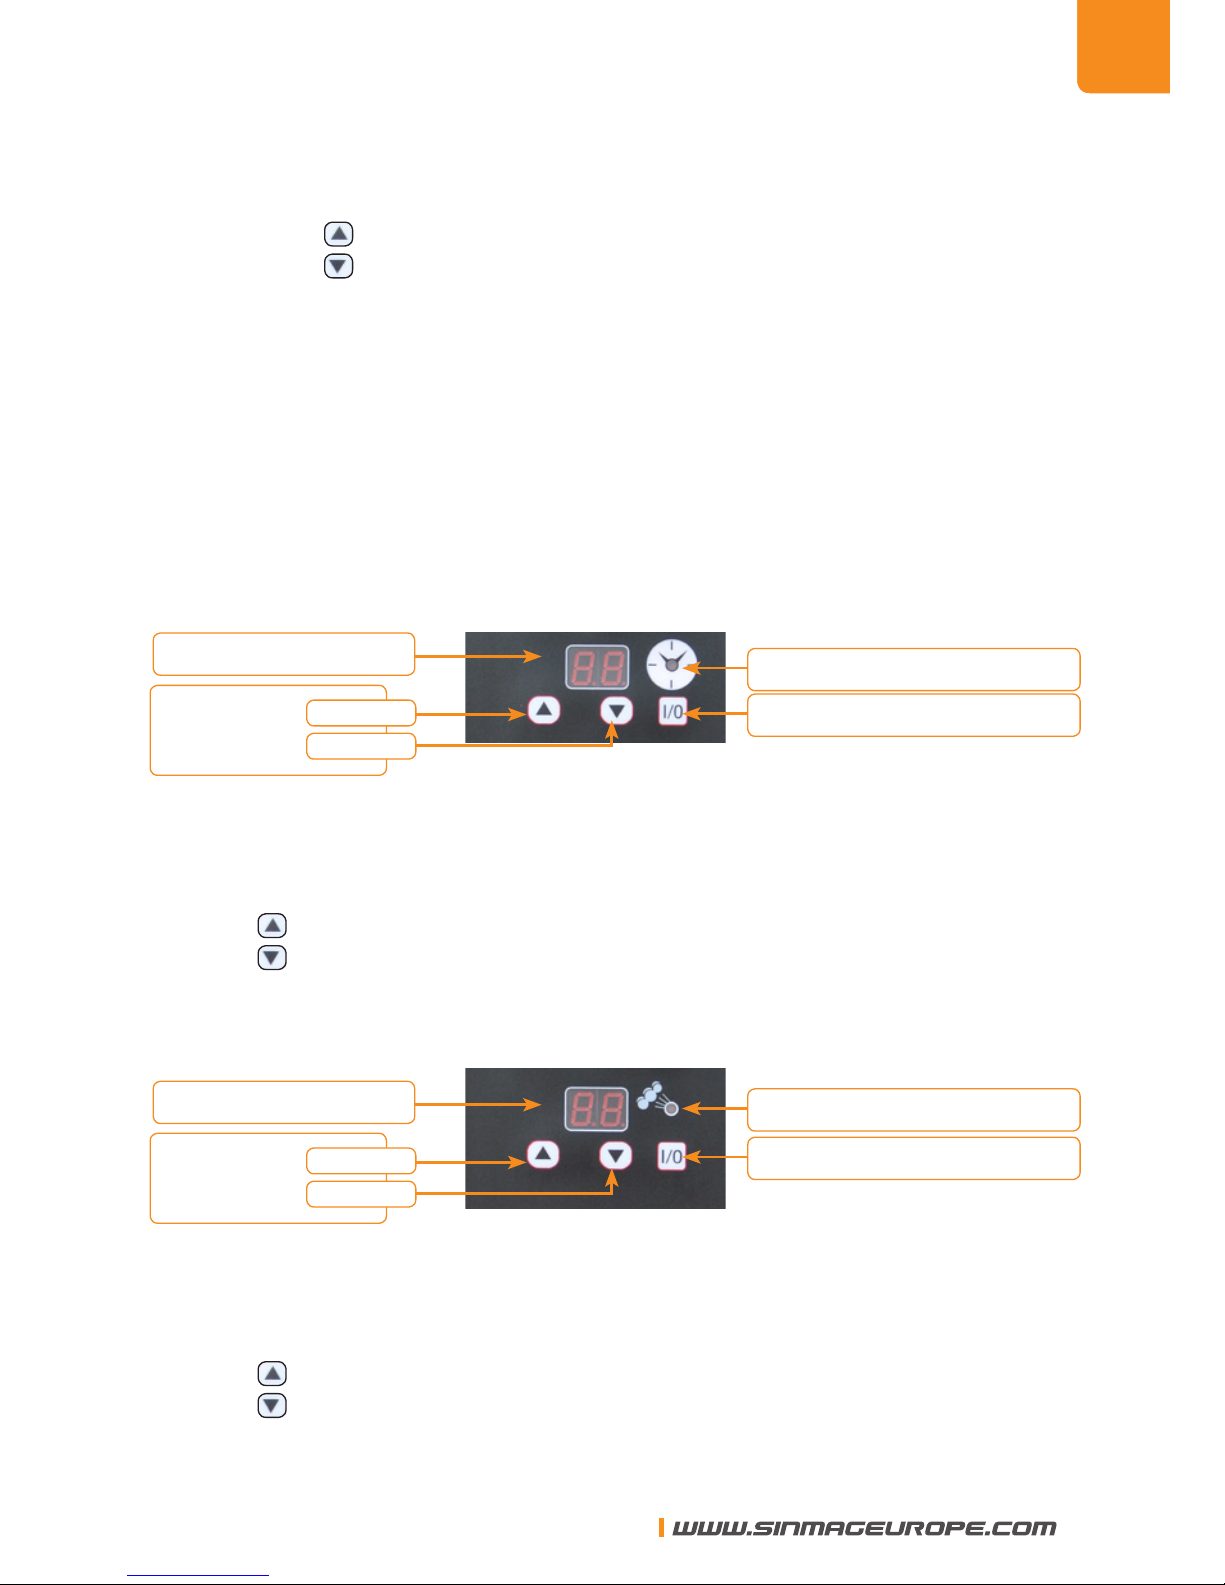
4.4. Timer and timer button
Baking timer in minutes, from 0 to 99 minutes
4.4.1. Set baking time
Set baking time
Baking time DOWN
UP
Baking time indication lamp
On/Off timer
A. Check the indication lamp above “I/O”, if indication lamp is off,
you can set baking time. If indication lamp is on, press “I/O”, to
turn it off.
B. to increase the baking time.
to decrease the baking time.
4.5. Steam device
Set steam time
Steam time DOWN
UP
Steam time indication lamp
On/Off steam
4.5.1. Set steam device
A. Check the indication lamp above “I/O”, if indication lamp is off, you
can set steam time. If indication lamp is on, press “I/O”, to turn it off.
B. to increase the steam time.
to decrease the steam time.

ENG
6
SINMAG EUROPE BVBA
4.5.2. Steam time starting
Press “I/O”. Indication lamp is on and timer is starting to count down
until it gets to zero.
4.5.3. Stopping time of the convection fan setting.
A. Turn off the main power.
B. Keep on pressing the steam ON/OFF button with one nger.
C. Indication will show stopping time of the convection fan.
D. Press with second nger
to increase the stopping time of the convection fan.
to decrease the stopping time of the convection fan.
E. Release buttons to nish setting.
4.6. Set dampkey
To open or close exhaust opening of the baking chamber.
5. OPERATION
A. Close the oven door and push the “On/Off” switch.
B. The fan will begin to run automatically 15 seconds after the door has been
shut. Let it run about two minutes before you start heating the oven in
order that the fan has time to remove all steam from the baking chamber.
C. Set the thermostat at the required temperature and set the required
time on the timer for the baking time.
D. Put the products into the oven after the set temperature has been
reached. Then close the oven door and start the countdown of the
timer by pushing the button. If you have set steam application, steam
will be applied now. In this operation mode, you can open or close
the damp key at any time. When the timer reaches 0, the buzzer will
sound. Switch off the timer to stop the buzzer. Push “STOP” or open
the door. Switch on the lighting in order to see if you will take out your
products or if you will continue baking.

ENG
SINMAG EUROPE BVBA
7
6. SAFETY MEASURES
A. You can avoid damage to the cables and the water supply by keeping
them off the ground.
B. Make sure to turn off the main switch when cleaning, performing main-
tenance or repair works.
C. The thermostat and the frequency cannot be changed continuously
when the oven is in use.
D. It is strictly prohibited to put water and oil on top of the oven.
E. Do not touch the oven door when the oven is working in order to avoid
injury or loss of quality of the products.
F. Do not cover or put things over the exhaust opening of the oven.
G. Cleaning can only be performed after the oven has completely cooled
down.
7. CLEANING AND MAINTENANCE
A .Please switch off all switches after use.
B .Open the damp key to exhaust the remaining steam of the baking chamber
after daily use.
C .Use a brush to clean the rests inside the baking chamber.
D .Clean the outside surface of the oven with a dry cloth. Do not wash with
running water. The left, right and back convection plate (the perforated
plates in the oven chamber) can be taken out for cleaning. It is recommend-
ed to use appropriate cleanser.
E .Check the oven door, the operation panel and other parts every day, to
ensure their good working condition.
F .Check the power wire and water pipes regularly to ensure that there is no
leak or damage.
G .In case of damage, please do not use the oven until the problem has been
solved.

ENG Manual ●Mode d’emploi ●Handleiding ●Handbuch ●Manuale
SM705EEP •SM710EEP •SM805EEP •SM810EEP
Convection oven •Four ventilé •Convectieoven
•Heiß-Umluftofen •Horno de convección •
Forno termoventilato

ENG
SINMAG EUROPE BVBA
9
1. PROGRAMMATION –KEY BUTTONS
1. Direct programs (1-6)
2. Enter
3. Display steps
4. Steps
5. Programs display
6. Setting programs (7-20)
7. Display T°
8. Display demanded T°
9. Heat on lamp
10. Ready lamp
11. Setting T°
12. Timer lamp
13. Display timer
14. Setting timer
15. Steam lamp
16. Key open lamp
17. Display steam and key
18. Selection steam and
key
19. Start
20. Stop
21. Option
22. Light
23. Key (on/off)
24. Auto/manu
25. On/off
2
1
3
4
5
6
7
10
9
8
11
12
13
14
15
16
17
18
19
20
21
22
23
24
25

ENG
10
SINMAG EUROPE BVBA
2. PROGRAMMATION
A. Start the oven by pushing on/off 25
B. Make sure the oven is in Auto mode 24 .
C. Select program number that you want to modify. From 1 to 6 with direct
buttons 1, and from 7 to 20 with the up and down arrows 6
D. Push on enter 2until the program number 5 starts ashing.
E. On the display « step » 3you can see the letter H for pre-heating.
F. With T° selection 11 button you ajust the T°
G. Push the step button 4
H. In the display “step” 3 you will now see 1. This is the rst step of your
baking process.
I. With T° selection button 11 you adjust the time for step 1.
J. With the timer setting button 14 you can set the required duration of step 1.
K. With the steam/key setting button 18 you adjust the steam time (up to 30s).
L. Push on « option » 21 . The steam lamp 15 switch off and the « key open »
lamp switch on.
M. Adjust the opening of the key in the 1st step 18 .
N. For open the display 17 should show « O » and for closed the display 17
should show « C ».
O. Push step 4again.
P. In step display 3you will see 2. You are now ready to program step 2 of
your program.
Q. Follow same procedure as from I.
R. Follow same procedure for all steps. For each program you have one
pre-heating step 3and 5 baking steps.
S. Once you program is fullled press enter 2to validate.

ENG
SINMAG EUROPE BVBA
11
3. BAKING IN AUTO MODE
A. Before choosing your program make sure the auto mode 24 is activated.
B. Select the program with direct buttons (1-6) 1or with the arrows 6.
C. Push start.
D. The oven will heat up till the T° you selected in the pre-heating step..
E. Once the T° is reached the “ready” lamp 10 will switch on and you will hear
a signal.
F. By opening the door you stop the oven.
G.
Once you have loaded your product and closed the door, push start.
19
H. The ovens will now follow the steps of your program.
I. On the timer display 13 you see the remaining baking time.
J. Once the program is completed the signal will ring.
K. You can stop it by opening the door or push on stop. 20
L. During the baking process if you wish to by-pass a step you can push on
the step button 3or change time with the timer setting 14 .
4. BAKING IN MANU MODE
A. Before starting make sure the “Manu” mode 24 is activated.
B. Adjust the T° with the T° setting buttons. 11
C. On the T° display (red) 7you see the T° of the oven.
D. Once the requested T° is reached you can put your product in the oven.
E. Adjust the time with the timer setting buttons 14 .
F. Adjust the steam time with the arrows 18 .
G. Open or close the key with the button 23 . If the lamp is on the key is open.
H. To start the baking process push start 19
I. Once the time is elapsed you will hear the signal.
J. Open the door or push stop 20 .

FR
Manual ●Mode d’emploi ●Handleiding ●Handbuch ●Manuale
SM705E •SM710E •SM805E •SM810E
Convection oven •Four ventilé •Convectieoven
•Heiß-Umluftofen •Horno de convección •
Forno termoventilato

FR
SINMAG EUROPE BVBA
13
Nous vous félicitons pour l’achat de votre Four ventilé.
Avant l’expédition, cette machine a été contrôlée dans notre dépôt en
Belgique. De cette façon, nous pouvons vous assurer une livraison
d’une machine prête à l’installation.
Pour un bon emploi et une longue durée de vie de la machine, nous
vous recommandons de lire ce mode d’emploi avec attention avant
d’utiliser la machine.
Sinmag Europe vous remercie pour la conance et l’intérêt et nous
vous souhaitons beaucoup de joie au travail avec cette machine
Sinmag Europe Team.
FR
14
SINMAG EUROPE BVBA
1. INSTALLATION
1.1. Le four est prêt à être installé. Il doit être mis dans un espace sec
et bien ventilé.
1.2. Choisissez un sol horizontal et égal pour la mise en place du four.
L’espace entre le four et le mur doit être de plus de 30 cm et l’es-
pace entre le côté droite du four et le mur doit être de min 50 cm.
50 cm
50 cm
1.3. Le four peut être mis sur le four à sole SE-941F,
sur l’étuve SM-716F(B) ou sur un socle.
1.4. L’alimentation électrique doit correspondre au voltage du four qui
est indiqué sur la plaque signalétique.
1.5. Mettez l’interrupteur principal en marche et contrôlez tous les
composants du panneau de commande, le thermostat, les lampes
d’indication, les minuteries, l’illumination et les interrupteurs an de
vous assurer du fonctionnement normal.
1.6. Mettez l’interrupteur principal de nouveau hors service et
débranchez la machine de l’électricité.

FR
SINMAG EUROPE BVBA
15
2. ALIMENTATION ELECTRIQUE
Assurez que l’alimentation électrique est correcte, comme indiquée sur la plaque
indicatrice du fabricant. L’électricité doit être branchée au four par un électricien
professionnel. L’accouplement du câble doit être bien xé. Le four doit avoir une
mise à la terre. (L1: rouge ou brun, L2: bleu ou vert, L3: Blanc, N: noir, E: jaune et
vert).
Après avoir branché le four, on doit d’abord vérier la direction de rotation du ven-
tilateur. Celui-ci doit tourner dans le sens des aiguilles d’une montre quand le four
est vu de face. Quand le ventilateur tourne dans la direction inverse des aiguilles
d’une montre, on doit échanger deux des câbles de phase.
3. RACCORDEMENT A L’EAU
Veuillez utiliser un tuyau ø 12 X 1 mm pour le raccordement du robinet à bille
avec l’alimentation d’eau (voir . 2). La pression de l’eau devrait être de 1-7
kg/cm2.
4. DESCRIPTION DU PANNEAU DE COMMANDE
4.1 Bouton d’alimentation
bouton “LIGHT”
lampe de signalisation lampe de signalisation
bouton d’alimentation
• Poussez le bouton d’alimentation. La lampe s’allumera.
• Poussez le bouton de nouveau pour éteindre le four. La lampe s’éteindra.
4.2. Bouton d’éclairage
• Poussez le bouton “LIGHT” pour allumer l’éclairage.
• Poussez ce bouton une deuxième fois pour l’éteindre.

FR
16
SINMAG EUROPE BVBA
4.3. Thermostat
4.3.1. Température de cuisson préréglée
température préréglée
température
de cuisson diminuer
Augmenter
lampe de signalisation
température actuelle
Marche/arrêt thermostat
A. Contrôlez la lampe de signalisation en haut de “I/O”. Si la lampe n’est
pas allumée, vous pouvez régler la température de cuisson. Si la
lampe est allumée, éteignez-la pour régler la température
B. Puis: pour augmenter la température de cuisson.
pour diminuer la température de cuisson.
4.3.2. Préchauffer
A. Quand le four atteint la température préréglée, le préchauffage s’ar-
rêtera. La température maximale est 250°C.
4.4. Minuterie et bouton pour la minuterie
La minuterie indique le temps en minutes, de 0 à 99 minutes.
4.4.1. Réglage du temps de cuisson
temps de cuisson préréglée
temps
de cuisson
diminuer
Augmenter
lampe de signalisation
Marche/arrêt minuterie
A. Contrôlez la lampe de signalisation en haut de “I/O”. Quand cette
lampe n’est pas allumée, vous pouvez régler le temps de cuisson.
Quand la lampe est allumée, poussez “I/O” pour l’éteindre.
B. Puis : augmente le temps de cuisson.
diminue le temps de cuisson.
4.4.2. Mise en marche du temps de cuisson
Après avoir réglé le temps de cuisson, poussez le bouton “I/O” jusqu’à
ce que la lampe s’allume. Maintenant, la minuterie commence à comp-
ter à rebours. Quand le temps arrive à 0, la sonnerie donne un signal
pour indiquer que le temps de cuisson est écoulé.
FR
SINMAG EUROPE BVBA
17
4.5. Générateur de vapeur
temps de vapeur préréglée
temps
de vapeur
Diminuer
Augmenter
lampe de signalisation
Marche/arrêt vapeur
4.5.1. Réglage de l’injection vapeur
A. Le dispositif peut être réglé quand la lampe en haut du bouton “I/O”
n’est pas allumée. Quand elle est bien allumée, vous devez l’éteindre
en pressant le bouton “I/O”.
B. Puis : augmente le temps de vaporisation.
diminue le temps de vaporisation.
4.5.2. Mise en marche du temps de vaporisation
Poussez le bouton “I/O”. Maintenant, la lampe s’allume et la minuterie
commence décompte, jusqu’à ce qu’elle arrive à 0.
4.5.3. Réglage du temps de pause du ventilateur
A. Eteignez le four.
B. Poussez le bouton du dispositif de vapeur pour quelques secondes.
C. L’écran indiquera le temps de pause du ventilateur.
D. Poussez, pendant que vous continuez à pousser le bouton du dispo-
sitif de vapeur:
pour prolonger la pause du ventilateur.
pour raccourcir la pause du ventilateur.
E. Relâchez le bouton du dispositif de vapeur, pour terminer le réglage.
4.6. Levier pour l’échappement
Destiné à ouvrir ou fermer la vanne d’échappement.
5 OPERATION
A. Fermez la porte du four et poussez le bouton d’alimentation.
B. Le ventilateur commencera automatiquement à tourner 15 secondes après
la fermeture de la porte du four. Veuillez faire tourner le ventilateur pendant
environ deux minutes, avant que d’ouvrir chambre de cuisson.

FR
18
SINMAG EUROPE BVBA
C. Introduire le produit dans le four dès que la température souhaitée est
atteinte. Puis fermez la porte du four et mettez la minuterie en marche
avec le bouton.
D. Quand la minuterie atteint 0, la sonnerie retentit. Eteignez la minuterie
pour arrêter la sonnerie. Allumez la lampe pour voir si vous retirez le prod-
uit hors du four ou si vous voulez continuer la cuisson.
F. A chaque moment, vous pouvez tirer le levier pour l’échappement pour
faire sortir la vapeur de la chambre de cuisson.
G. Quand vous voulez injecter de la vapeur, vous ne devez que pousser le
bouton pour la vapeur, an de faire entrer de la vapeur dans la chambre
de cuisson. La minuterie pour le dispositif d’étuvage a été mise à cinq
secondes.
6. PRECAUTIONS DE SECURITE
A. Vous pouvez éviter des dommages aux câbles et tuyau d’eau en les
tenants hors de contact du sol.
B. Assurez-vous que la machine est débranchée quand vous la nettoyez,
maintenez ou réparez.
C. Le réglage du thermostat et de la fréquence ne peuvent pas être adapté
continuellement pendant que la machine fonctionne.
D. Il est interdit de garder de l’eau ou de l’huile sur la partie supérieure du
four.
E. An d’éviter des blessures évitez de toucher le four pendant qu’il fonctionne.
F. Ne couvrez pas la bouche de sortie d’air.
G. Le nettoyage ne peut être fait que quand le four est refroidi.
7. NETTOYAGE ET MAINTENANCE
A. Veuillez éteindre le four après utilisation.
B. Tirez le levier pour faire sortir la vapeur après utilisation.
C. Tirez le levier au moins une fois par jour, an d’enlever la vapeur superue
de la chambre de cuisson.
D. Utilisez une brosse pour enlever les restes de la chambre de cuisson.
E. Nettoyez l’extérieur du four avec un chiffon sec. Ne le lavez pas avec de
l’eau coulante. La plaque gauche et droite et la plaque au fond doivent
être enlevées pour le nettoyage de la chambre à cuisson. Nous vous
recommandons l’emploi d’un nettoyant pour le nettoyage.
F. Contrôlez la porte, le tableau de commande et les autres parties du four
quotidiennement pour garantir un fonctionnement correct.
G. Contrôlez le câble d’alimentation et le tuyau d’eau de temps en temps
pour vérier qu’il n’y a pas de fuite ou de dommage. Veuillez réparer tout
dommage avant d’employer le four.
FR
Manual ●Mode d’emploi ●Handleiding ●Handbuch ●Manuale
SM705EEP •SM710EEP •SM805EEP •SM810EEP
Convection oven •Four ventilé •Convectieoven
•Heiß-Umluftofen •Horno de convección •
Forno termoventilato

FR
20
SINMAG EUROPE BVBA
1. PROGRAMMATION - LES TOUCHES
1. Touches de programme
2. Touche de validation
3. Afchage étape de
programme
4. Touche pour étape
5. Afchage programme
6. Réglage programme
7. Afchage T°
8. Afchage T° demandée
9. Témoin de T°
10. Témoin de
fonctionnement
11. Réglage T°
12. Témoin minuterie
13. Ecran minuterie
14. Réglage minuterie
15. Témoin vapeur
16. Témoin ouverture de
l’échappement
17. Afchage temps vapeur
et ouverture vanne
d’échappement
18. Réglage vapeur ou
ouverture vanne
19. Touche de démarrage
20. Touche stop
21. Touche option
22. Touche éclairage
23. Touche ouverture
vanne d’échappement
24. Touche auto/manu
25. Touche On/Off
2
1
3
4
5
6
7
10
9
8
11
12
13
14
15
16
17
18
19
20
21
22
23
24
25
This manual suits for next models
3
Table of contents
Languages:
Popular Convection Oven manuals by other brands


Inoxtrend
Inoxtrend RUA-110 Series Operating and maintenance instructions

Fagor
Fagor 6HA-200 TLX Installation use & care instructions

Aroma
Aroma AeroMatic AST-910DX instruction manual

Aroma
Aroma AeroMatic AST-910DX Instruction manual & recipe guide

inosmart
inosmart INO-FBE 10 instruction manual

Falcon
Falcon G7204 installation instructions


