Sinotec T1311LS User manual
产品名称:英文说明书-南非
产品型号:T1311LS T1311LW
技术要求:
1,页面规格:297mmx210mm(展开);
2,印刷颜色应均匀,且无毛边;
3,图案和文字清晰、规范;
4,说明书共2 0页,1 0张图纸,正反面印刷;
5,需经技术中心封样确认后方可批量生产。
标记 处数 分区 更改文件号 签名
年、月、日
设计
审核
工艺
标准化
批准
模块审核
A
英文说明书-南非
南非说明书
开发会签
营销会签
开发会签
营销会签
2016.3.25
2016.3.25
2016.3.25
2016.3.25
2016.3.25
2016.3.25
2016.3.25
2016.3.25
李吉刚
顾 鑫
张中林
郑成汉
闫 龙
张 弦
曹振
曹振
X71050015
X2073-0 01-0361
X71050015

:T1311LS
T1311LW
Model No

T1311LS
13kg
0.03-0.8
T1311LW
13kg
0.03-0.8
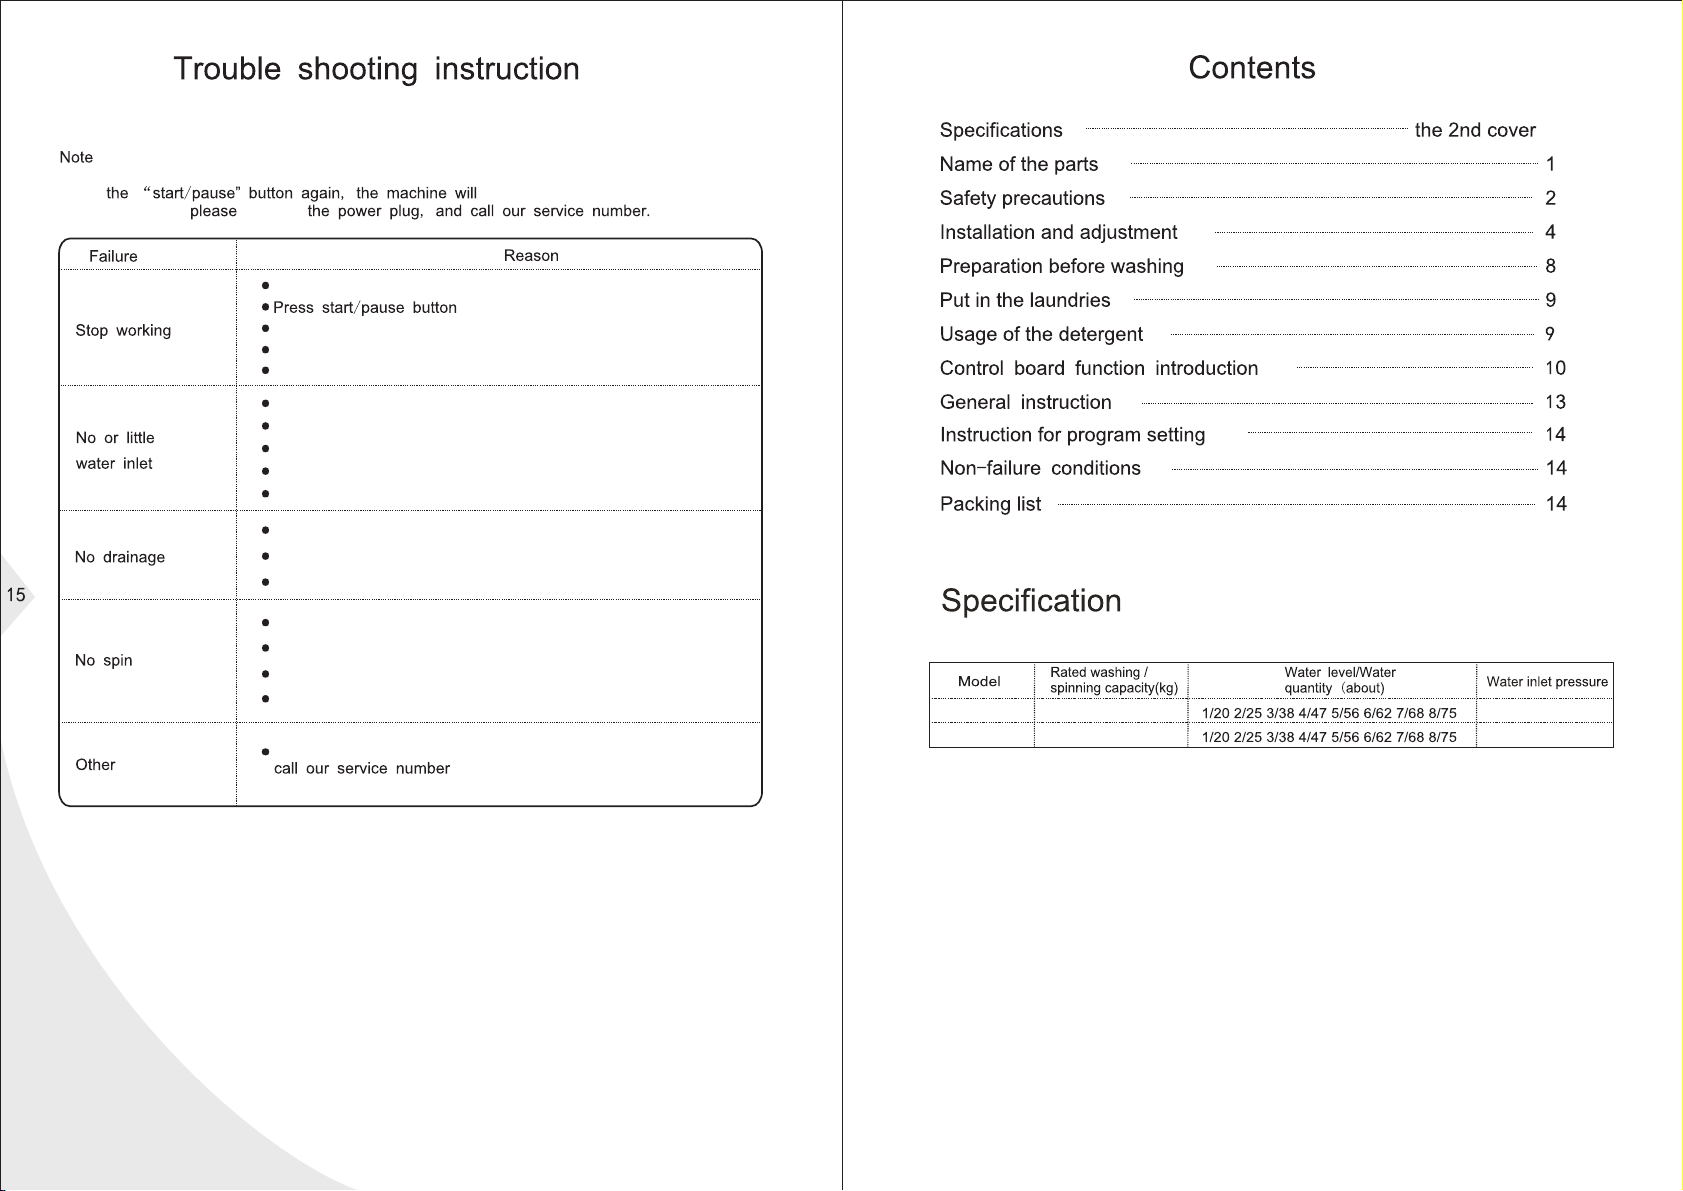
When the following problems occur, the microcomputer will test the abnormal status and
give buzzing warning sounds for 10 seconds
Press"Start/pause" button,the failure display will be cleared.Check and fix all the failures,
press resume operation. Ifthe error
status continues, unplug
Ensure it is connected to the power.
delete.
Ensure the fuse is in working order and that the power is on.
Ensure the power is on
Check that the wiring has not come loose.
Is the tap open?
Has the water supply stopped?
Is the water inlet pipe blocked?
Is the water inlet pipe frozen?
Ensure the water pressure is enough.
Ensure the drainage pipe is placed down.
Ensure that the outlet pipe is not placed too high (exceeding 15cm).
Is the drainage outlet blocked?
Redistribute the washing to even out the weight of the load.
Ensure the machine is placed on a level surface.
Ensure the top cover is closed properly.
Check if the "wash only" program is selected.
Switch off the power, unplug the plug and

safety of
The amount of detergent on the table is as reference only, please use the correct amount
of detergent according to the directions provided by the supplier.
When the fuzzy mode is selected, there may be some differences in water level due to the
difference is laundry size, weight and texture. This is a normal occurrence.
Close the cover of the machine when washing.
When the cover is not closed properly the washing machine will stop automatically and
sound an alarm before draining the water.
laundry
the wash/rinse tub
the drainage pipe
risk
delete
risk
Inlet pipe for cold water
Inlet pipe for hot water
Two
hose

Washing capacity(kg)
Washing capacity(kg)
Other detergent type
Other detergent type
Press the corresponding control using detergent instructions
Press the corresponding control using detergent instructions
3.0~6.0
3.0~6.0
6.0~9.0
6.0~9.0
9.0
9.0
≤3.0
≤3.0
≤
≤
T1311LS
T1311LW
about24
about24
about29
about29
about34
about34
about40
about40
about47
about47
about55
about55
about64
about64
occur
laundry
use a wet
remove
damaged,
place the machine in a damp place like than
flooring with carpets, a
when
plug socket connection is loose,
Do not place wet laundry
the risk of injury or fire, it is should be replaced by
becomes
to the table below,

Do not reach into the machine with your
hands whilst it is turning, washing or
spinning.It is dangerous even if the
rotation is slow. Do not leave children
unattended with the machine. Do not
allow children to climb up against the
washing machine.
dismantle,
screen
Water level sensor is
loose or faulty
and sound an alarm to notify the user.
When you want to set the delay function, this button can be set for time.
After finishing setting the program, press this button to activate the delay state.The initial delay
time is 2 hours; every single press of this button will increase one hour, till a maximum of 24
hours. When "Delay" function starts, the digital light will flash every 0.5 seconds.When the
washing program starts, the light stops flashing and will display washing time,meanwhile all
the other buttons will be locked(except "delay",''water-keeping" and "power" button).
At this time, when pressing the "delay" button, it will display the program procedure and data
for 3 seconds. Then it continues to display "delay'' time. After "delay" function starts,if you want
to change "delay" time, you must switch the machine off and restart the setup process. The
"delay" time, displayed when the delay mode is selected,is the end time of washing program.
sources like a
“Wash” “Rinse” “Spin”

as the default setting.
safety and for operating the machine correctly.
assemble
After you have openedthepackage,please
leanthewashingmachinegentlydownona
soft cloth (like a towel or a blanket).Installthe
bottomplatetothebottomofthemachinewith
theeightscrewsandacrossscrewdriver,then
liftthemachineupgently.Seetothefigure:
therefor you can't adjust it.
activate a single wash cycle.
Used to select the desired water level.Understandbymode,itcanbeselectedfromoneto
eight.
The water level of "standard", "intensive" and "gentle" can be adjusted. The default settings
for the water level for washing is the 5th and for rinsing it is the 6th level.(the default water
level of "standard" is a perceptive gear.)
As a default the rinsing water level will always be one level higher than for the washing level
except when the highest/lowest level is selected, then the water level for rinsing and washing
would be the same.
Thewaterlevelof "quick"can'tbeadjusted, the default setting of the 5th level applies.but
itcanbe topped-up. (Thetypeof XQB90-91Acanadjustwaterlevelwhenselect"quick"
washingprogram.)
“Air-dry" washing program isa set process of spinning that do not require the addition of water.
Its water level button is invalid.
and drain the water in the last stage as usual.
"water-keeping".
When a program is already running, the "water-keeping" button is invalid after the last drain.
Pressing the "water-keeping" button during the last drain can only activate a drained or
undrained option. Pressing the start/pause button in an attempt to suspend the drain in the
program and then pressing the "water-keeping" button will only activate an undrained option.
The "standard", "intensive", "gentle" and "quick" washing programs defaults to "wash, rinse
and spin". Before the "standard", "intensive" and "gentle" begin to wash, the system can
select the soak function. The "self-dry" washing program is fDCed on"soak-wash-rinse-spin"
and can never be adjusted. "Air-dry" washing program is a set process of spinning and do not
allow for the option to soak, wash and rinse.
Every program usually drains the water after the completion of a wash/rinse cycle. When
"water-keeping" is activated, the tub will not drain and keep the water if it has detected having
water inside. The light will start flashing followed by a buzzer sounding for 5 seconds every 5
minutes to notify the user. Press the "water-keeping" button again to deactivate (this will turn
the water-keeping light off and turn the drain light on). The program will continue to the next
cycle.
therefor the amount of times
activate a rinse and spin cycle.
Whenpressing the"wash"buttonundertheprogramalreadyset(orthestateof
suspension),thewashtimecanbeselectedrecurrentlyfromzerototwenty-five.
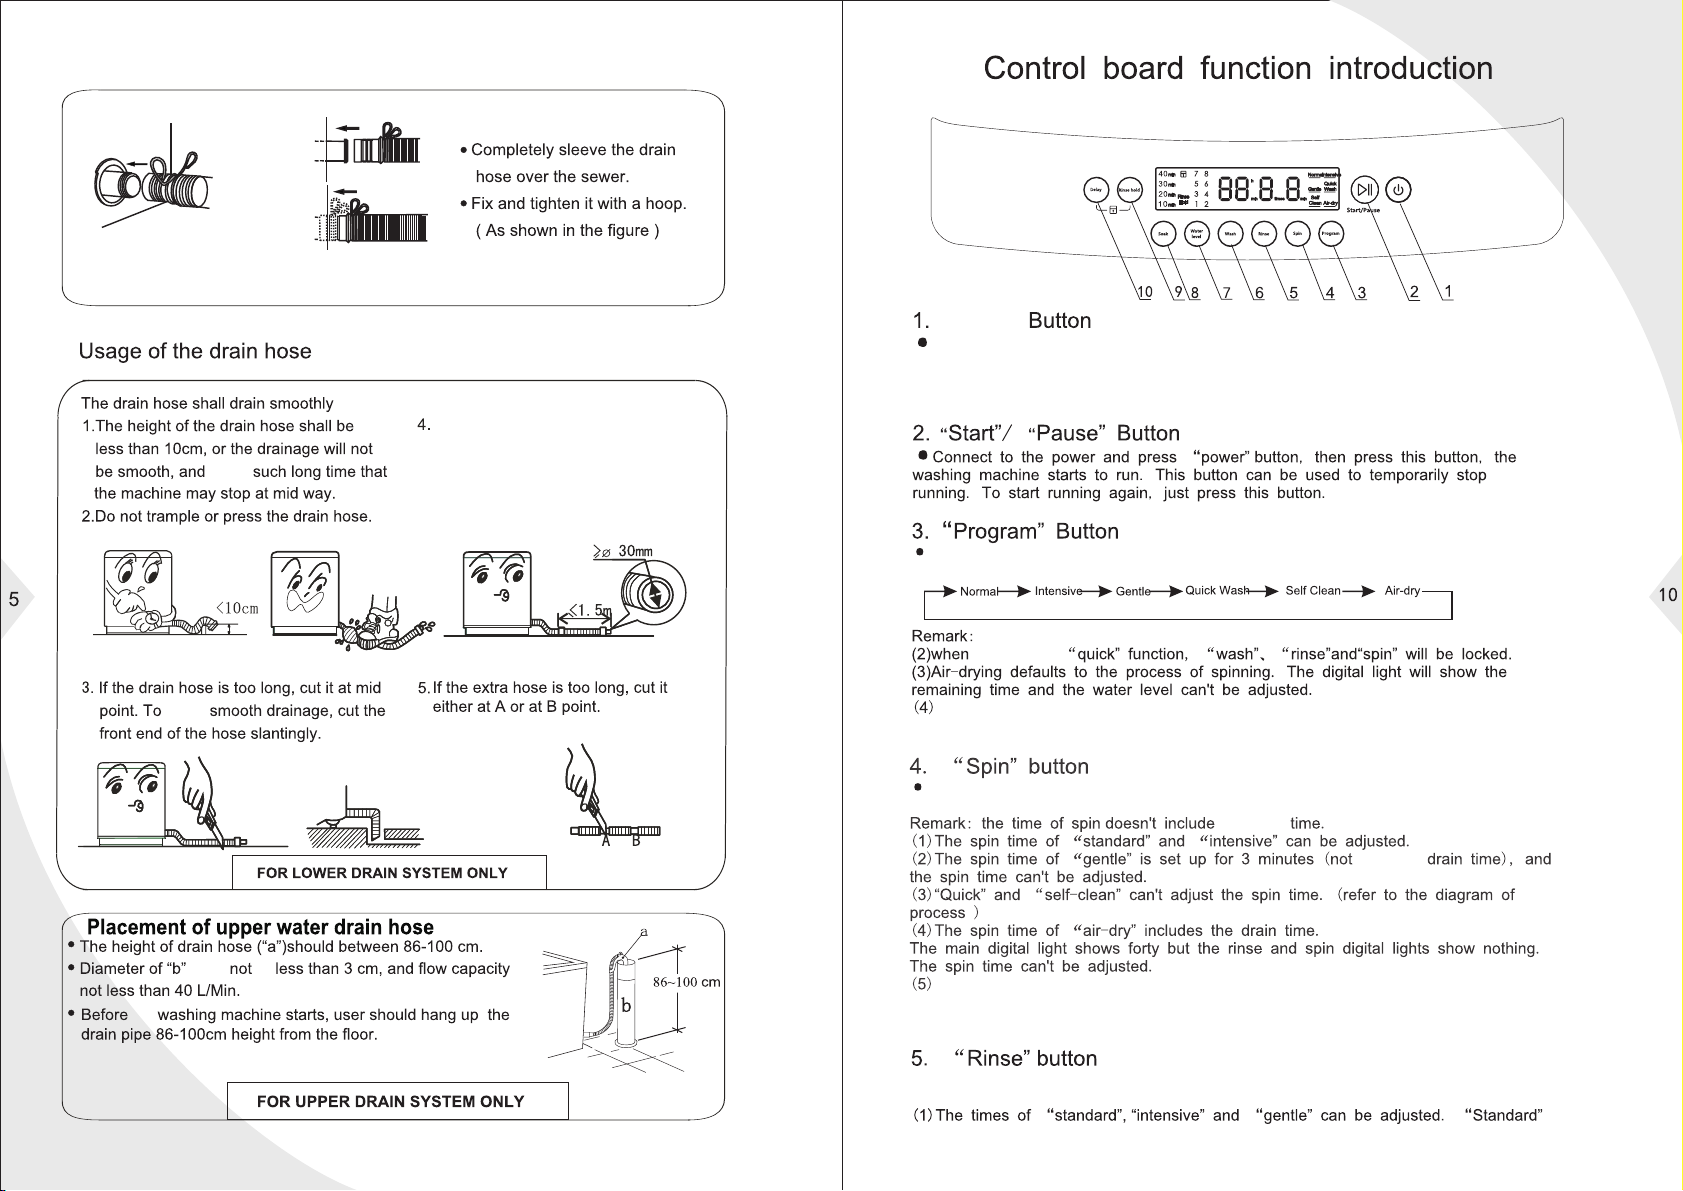
Installation of drain hose
spend
Used to select programs automatically, when selecting a program in standby mode,the
program will follow the following cycle rules:
1Whenselecting the"soak"function,theprogramswillrunwithout"quick".
selecting the
When pressing the "process"button for 5 seconds, the standard light flashes and the
program enters into the testing procedures with 5th water level and full water level.
When pressing the "spin" button under the program already set, the time of spin can be
selected recurrently from zero to nine.
drainage
including
It is set at 40 minutes as the default.
Pressing "spin" button for two seconds can activate a single spin cycle.
Notice: single wash, spin and rinse are effective only under the standard, intensive and
gentle modes.
When pressing the "rinse" button under the program already set. the times of rinse can be
selected recurrently from zero to three.
Press this button to connect the power. To switch the power off, press this button again.
If you press this button and do not press any other button within 10 minutes, the machine
will automatically switch off. After the washing programs finished, the power will be
automatically switch off after the buzzer has sounded six times to notify the user.
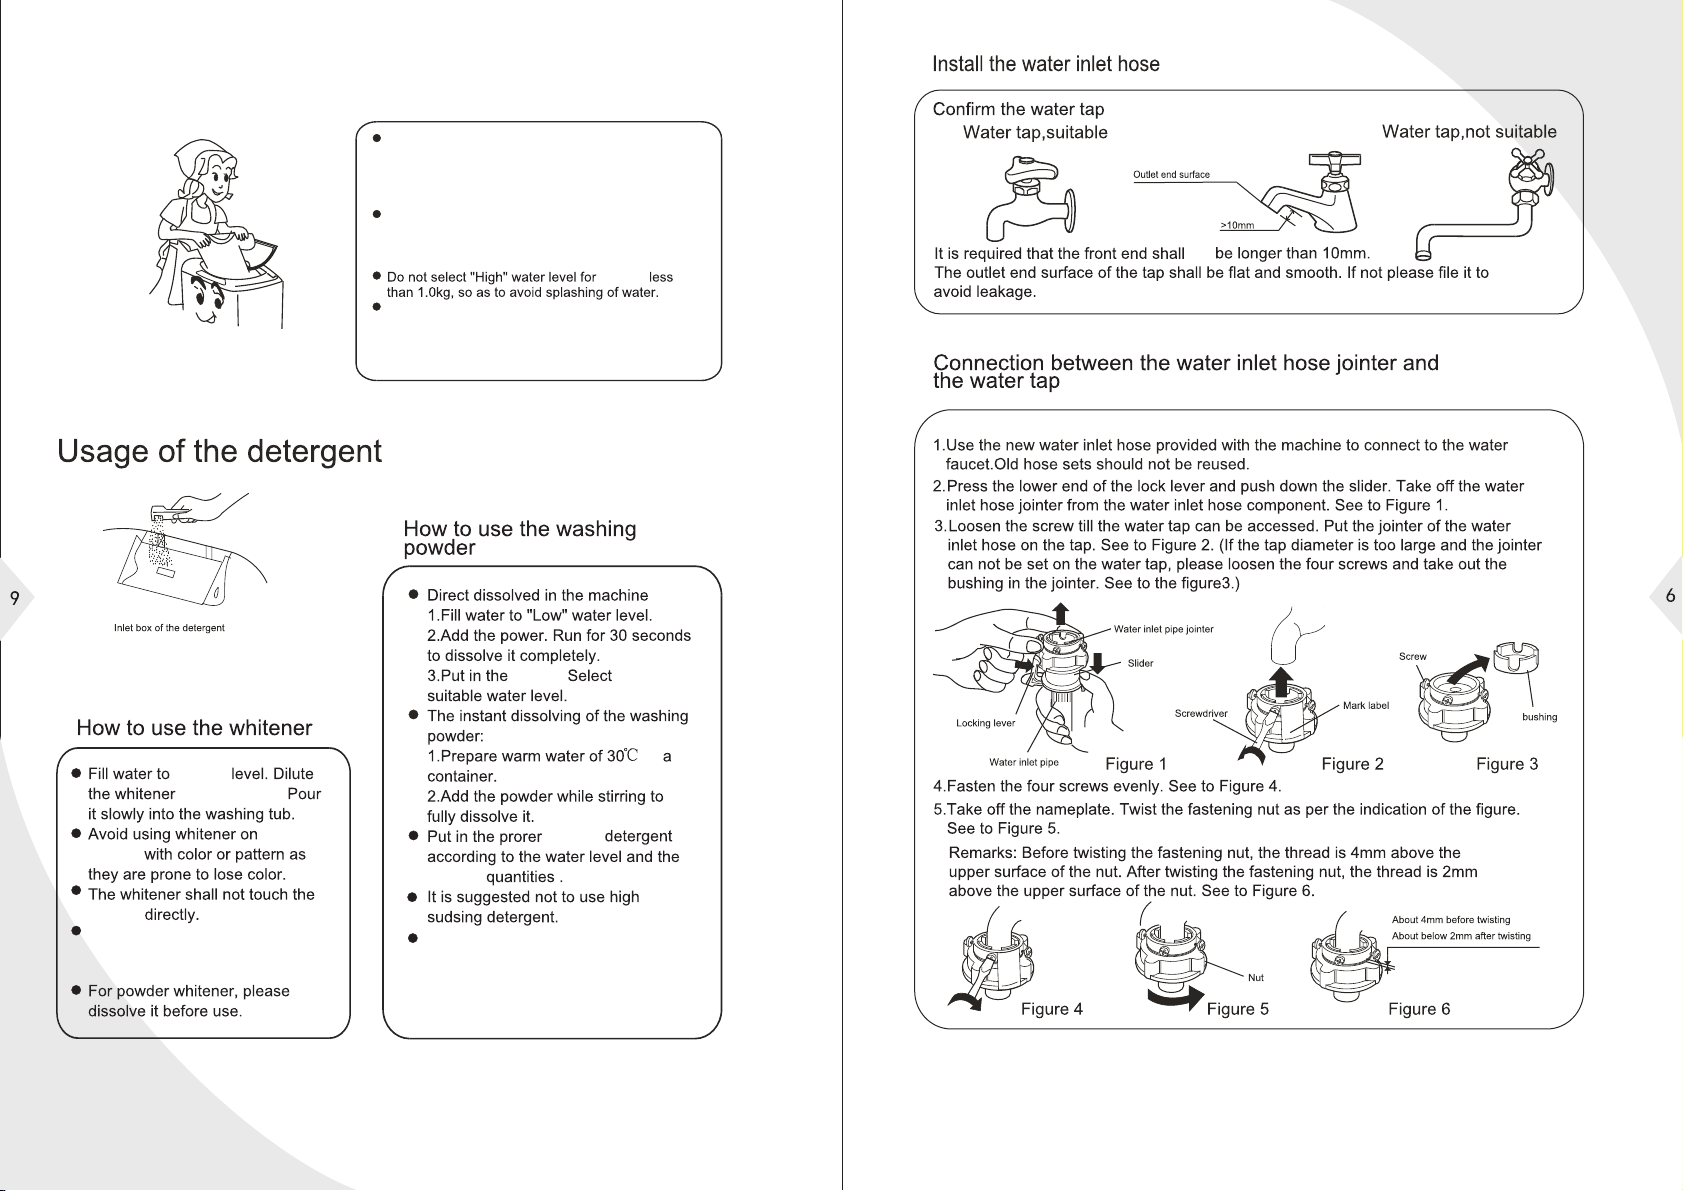
ensure
should be
the
To extend the hose, purchase one
separately adhering to the following:
The inner diameter of the extra hose
shall not be less than 30mm, and the
length shall not be exceed 1.5m.
ON/ OFF
“ON/OFF”
Loading the laundry
Refer to the total weight of all the items in a single
load under dry conditions to determine if it is within
the machine's washing and rinsing capacity.The
actual weight of the load should be less than the
recommended capacity.
The thickness, size and type of cloth will influence
the actual washing capacity. It is recommended to
only load enough laundry ensuring that the items
can still move freely when being washed.
laundry
To wash thin laundry like stockings, silk etc.,
please first put them into a washing mesh bag (which
can be purchased separately) before wash.
desired
laundry
laundry
laundry
not
Washing powder with poor quality or
in storage for a long time maybe caked.
Please pay attention to cleaning
thedetergent box often.
in
amount
laundry
Refer to the manufacturer's
instructions for the usage and
quantity of the whitener.
in a container.

by overstraining it.
gas or tap water
pipe.
instructions for
the laundry.
laundry
laundry
laundry
laundry
laundry
For small laundry items,
the other laundry
pre-treating it.
hand wash these items separately.
For heavily soiled laundry,
the items turned
inside out into the
tub.
place
Empty the pocket.
Remove all foreign
items like coins,
sand, hairpins etc.
Payattentionto thefollowingbeforewashingthelaundry
Large items like
jeans shall be
This manual suits for next models
1
Table of contents
Other Sinotec Washer manuals

Popular Washer manuals by other brands


Alliance Laundry Systems
Alliance Laundry Systems SF135PV Operation/programming

GEAppliances
GEAppliances GTW680 series Owner's Manual & Installation Instructions

Siemens
Siemens WM12K260IL Instruction manual and installation instructions

Whirlpool
Whirlpool WFW94HEX Series Product dimensions

NEFF
NEFF W946UX0GB User manual and installation instructions

Hotpoint Ariston
Hotpoint Ariston ECOTF 1051 Instructions for use