Sionyx Aurora User manual
AURORA NIGHT VISION CAMERA
User Manual

Aurora User Manual 2
SiOnyx, LLC
100 Cummings Center, Suite 135P
Beverly, MA 01915
(978) 922-0684
suppor[email protected]
Follow us on Facebook
@SiOnyxNightVision

Aurora User Manual 3
Chapter 1. Getting Started ................................................................................. 6
1.1 Unpacking the Box.......................................................................................................... 6
1.2 Charging the Battery ...................................................................................................... 6
1.2.1 Removing the Battery ................................................................................................................ 9
1.2.2 Viewing the Battery Charge...................................................................................................10
1.3 Viewing the Camera Modes and Settings.............................................................10
1.3.1 Button Overview........................................................................................................................11
1.3.2 Settings Dial.................................................................................................................................11
1.3.3 Viewnder ....................................................................................................................................12
1.3.4 Scene Ring....................................................................................................................................12
1.3.5 Focusing Ring..............................................................................................................................13
1.4 Inserting the Micro SD Card.......................................................................................13
1.5 Setting the Date and Time..........................................................................................15
1.6 Downloading the SiOnyx Aurora App to Connect to Your Camera.............18
1.7 Attaching the Neck Strap............................................................................................23
Chapter 2. Photos and Videos........................................................................... 25
2.1 Taking a Photo and Shooting a Video ....................................................................25
2.1.1 Taking a Photo ............................................................................................................................25
2.1.2 Shooting a Video........................................................................................................................26
2.1.3 Adjusting the Focus ..................................................................................................................27
2.1.4 Zooming In and Out .................................................................................................................28
2.1.5 Setting Exposure Compensation .........................................................................................28
2.1.6 Using the Scene Ring ...............................................................................................................29
2.2 Viewing and Deleting Photos and Videos.............................................................29
2.2.1 Viewing and Zooming In on Photos and Videos............................................................30
2.2.2 Viewing Thumbnails of Photos and Videos......................................................................30
2.2.3 Playing Videos.............................................................................................................................32
2.2.4 Deleting Photos and Videos...................................................................................................32
2.2.5 Deleting Multiple Photos and Videos.................................................................................34
2.3 Shooting Photos: Settings ..........................................................................................35
2.3.1 Shutter Speed .............................................................................................................................35
2.3.2 Burst................................................................................................................................................38
2.3.3 HDR.................................................................................................................................................40
Table of Contents

Aurora User Manual 4
2.3.4 Self Timer ......................................................................................................................................42
2.3.5 Panorama......................................................................................................................................44
2.3.6 Time Lapse ...................................................................................................................................45
2.4 Shooting Photos and Videos: Advanced Settings..............................................48
2.4.1 Brightness.....................................................................................................................................48
2.4.2 Overlay...........................................................................................................................................50
2.4.3 EVF Time Out ...............................................................................................................................58
2.4.4 Night Glow ...................................................................................................................................60
2.4.5 Quick Review...............................................................................................................................62
2.4.6 Invert Image ................................................................................................................................63
2.5 Shooting Videos: Settings...........................................................................................64
2.5.1 EIS....................................................................................................................................................64
2.5.2 Setting the Frame Rate ............................................................................................................66
2.5.3 Resolution ....................................................................................................................................68
2.5.4 HDR.................................................................................................................................................70
Chapter 3. Loop Mode....................................................................................... 72
3.1 Trigger Type .....................................................................................................................72
3.2 Trigger Mode ...................................................................................................................74
Chapter 4. WIFI/Settings Mode......................................................................... 76
4.1 About..................................................................................................................................76
4.1.1 Factory Reset...............................................................................................................................77
4.2 Auto Power OFF..............................................................................................................78
4.3 Compass............................................................................................................................79
4.4 Date and Time .................................................................................................................80
4.4.1 GPS Set ..........................................................................................................................................80
4.4.2 Format............................................................................................................................................83
4.5 SD Card ..............................................................................................................................85
4.6 Chimes ...............................................................................................................................87
4.7 Audio ..................................................................................................................................88
4.8 GPS ......................................................................................................................................89
4.8.1 Turning GPS On ..........................................................................................................................89
4.8.2 Changing the GPS Format......................................................................................................90
4.8.3 GeoTag Image .............................................................................................................................93
4.9 WIFI .....................................................................................................................................94

Aurora User Manual 5
Chapter 5. Reference Information.................................................................... 95
5.1 Battery................................................................................................................................95
5.1.1 Operating Temperature Range .............................................................................................95
5.1.2 Tips on Reducing Battery Usage ..........................................................................................95
5.1.3 Battery Storage and Handling...............................................................................................95
5.1.4 Battery Disposal .........................................................................................................................95
5.2 Camera Specications..................................................................................................96
5.3 SiOnyx Customer Care..................................................................................................97
Chapter 6. Troubleshooting.............................................................................. 98
Chapter 7. Warranty .......................................................................................... 99

Aurora User Manual 6
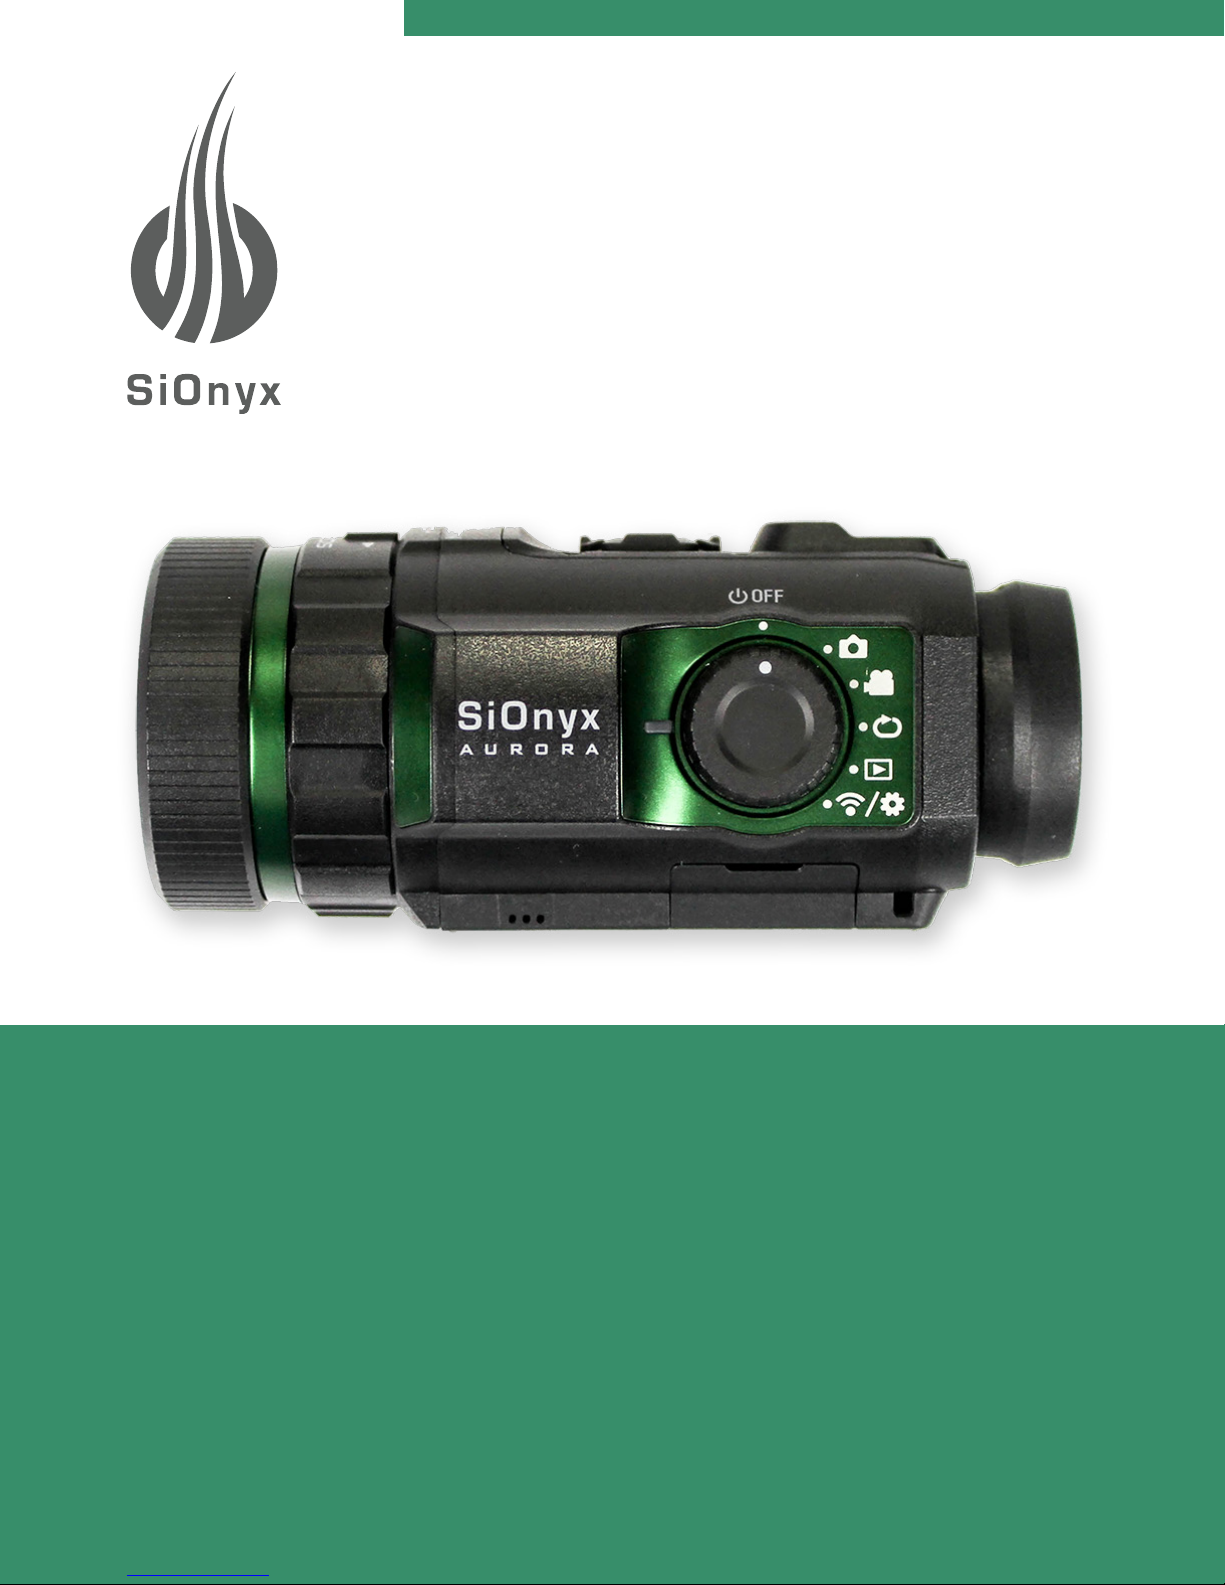
Congratulations on purchasing your new SiOnyx Aurora Night Vision camera! Let’s get started!
1.1 Unpacking the Box
The SiOnyx Aurora Night Vision camera box contains the following items:
1. Camera
2. SX-50 lithium-ion
battery
3. USB cable
4. Quick Start Guide
5. Neck strap
6. Microber bag
1
2
3
4
5
6
1.2 Charging the Battery
The rst thing you need to do after unpacking the camera is to charge the battery. You charge the battery
via the USB port.
Click here to view a related video
To charge the battery:
1. Make sure the camera is in OFF mode.
Chapter 1. Getting Started
Aurora User Manual 7
Chapter 1. Getting Started
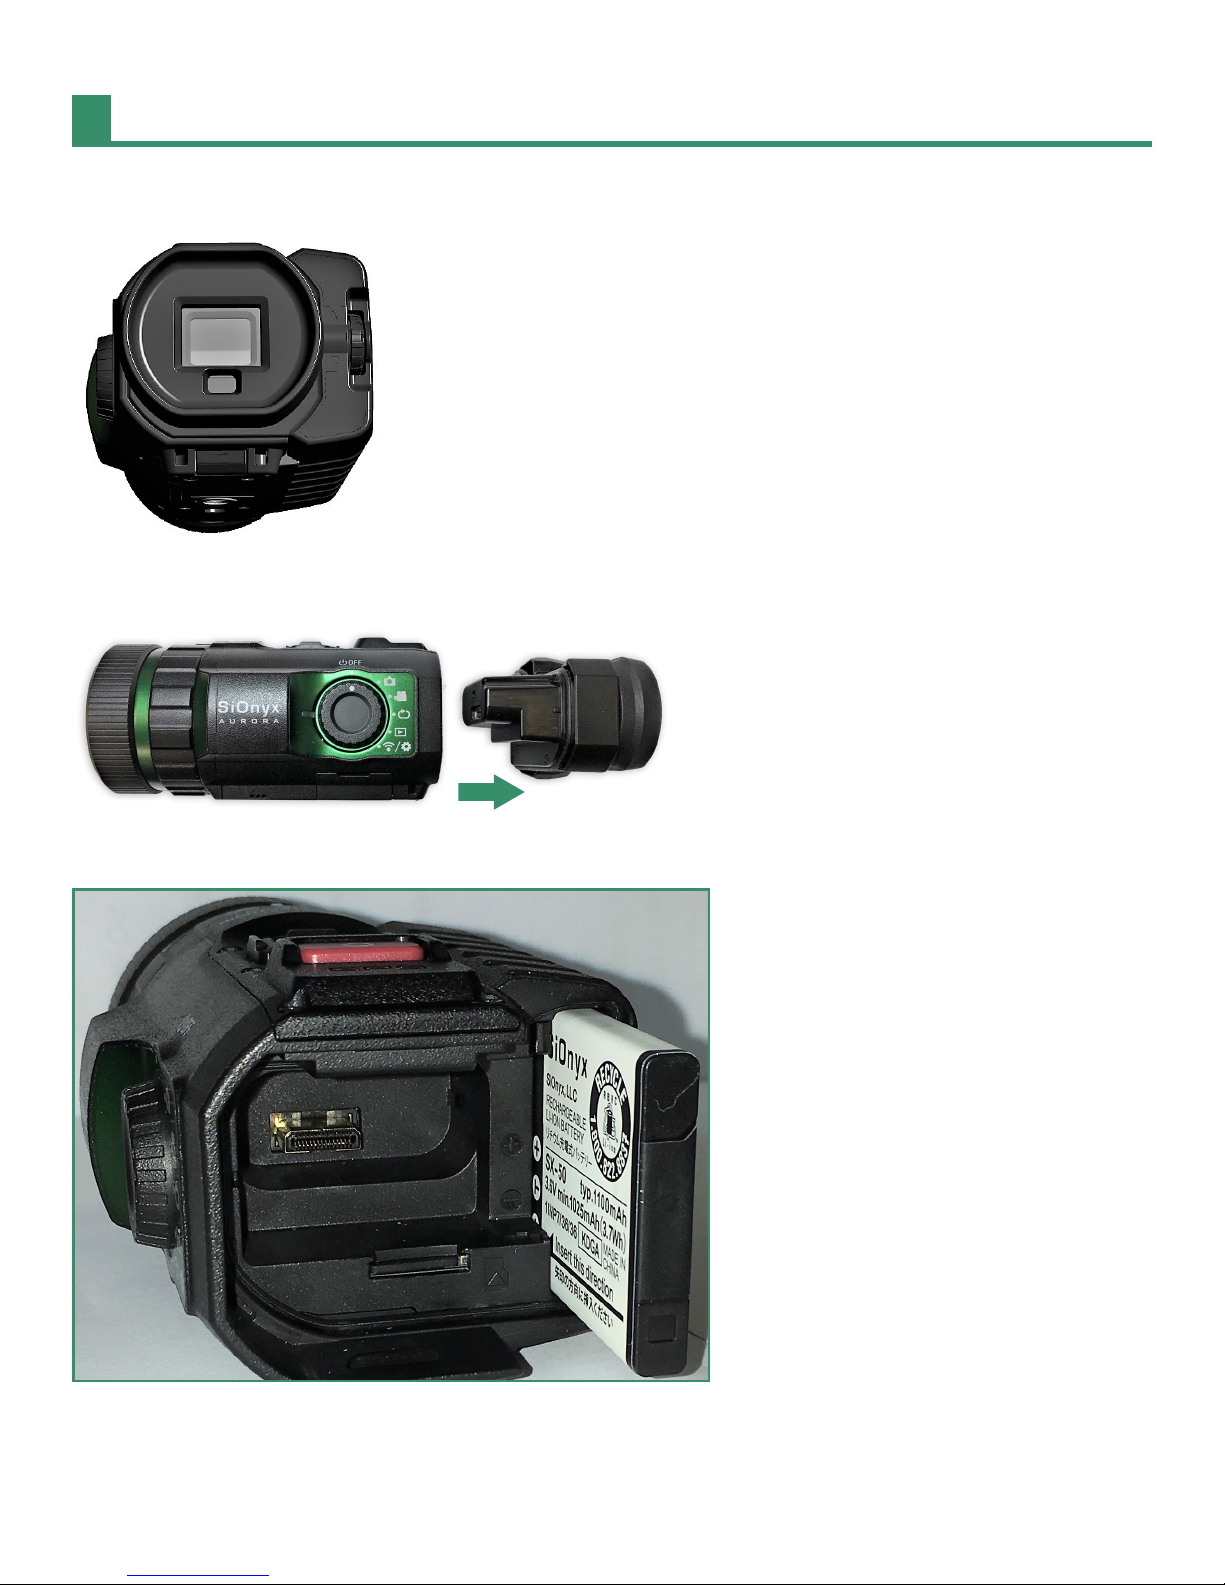
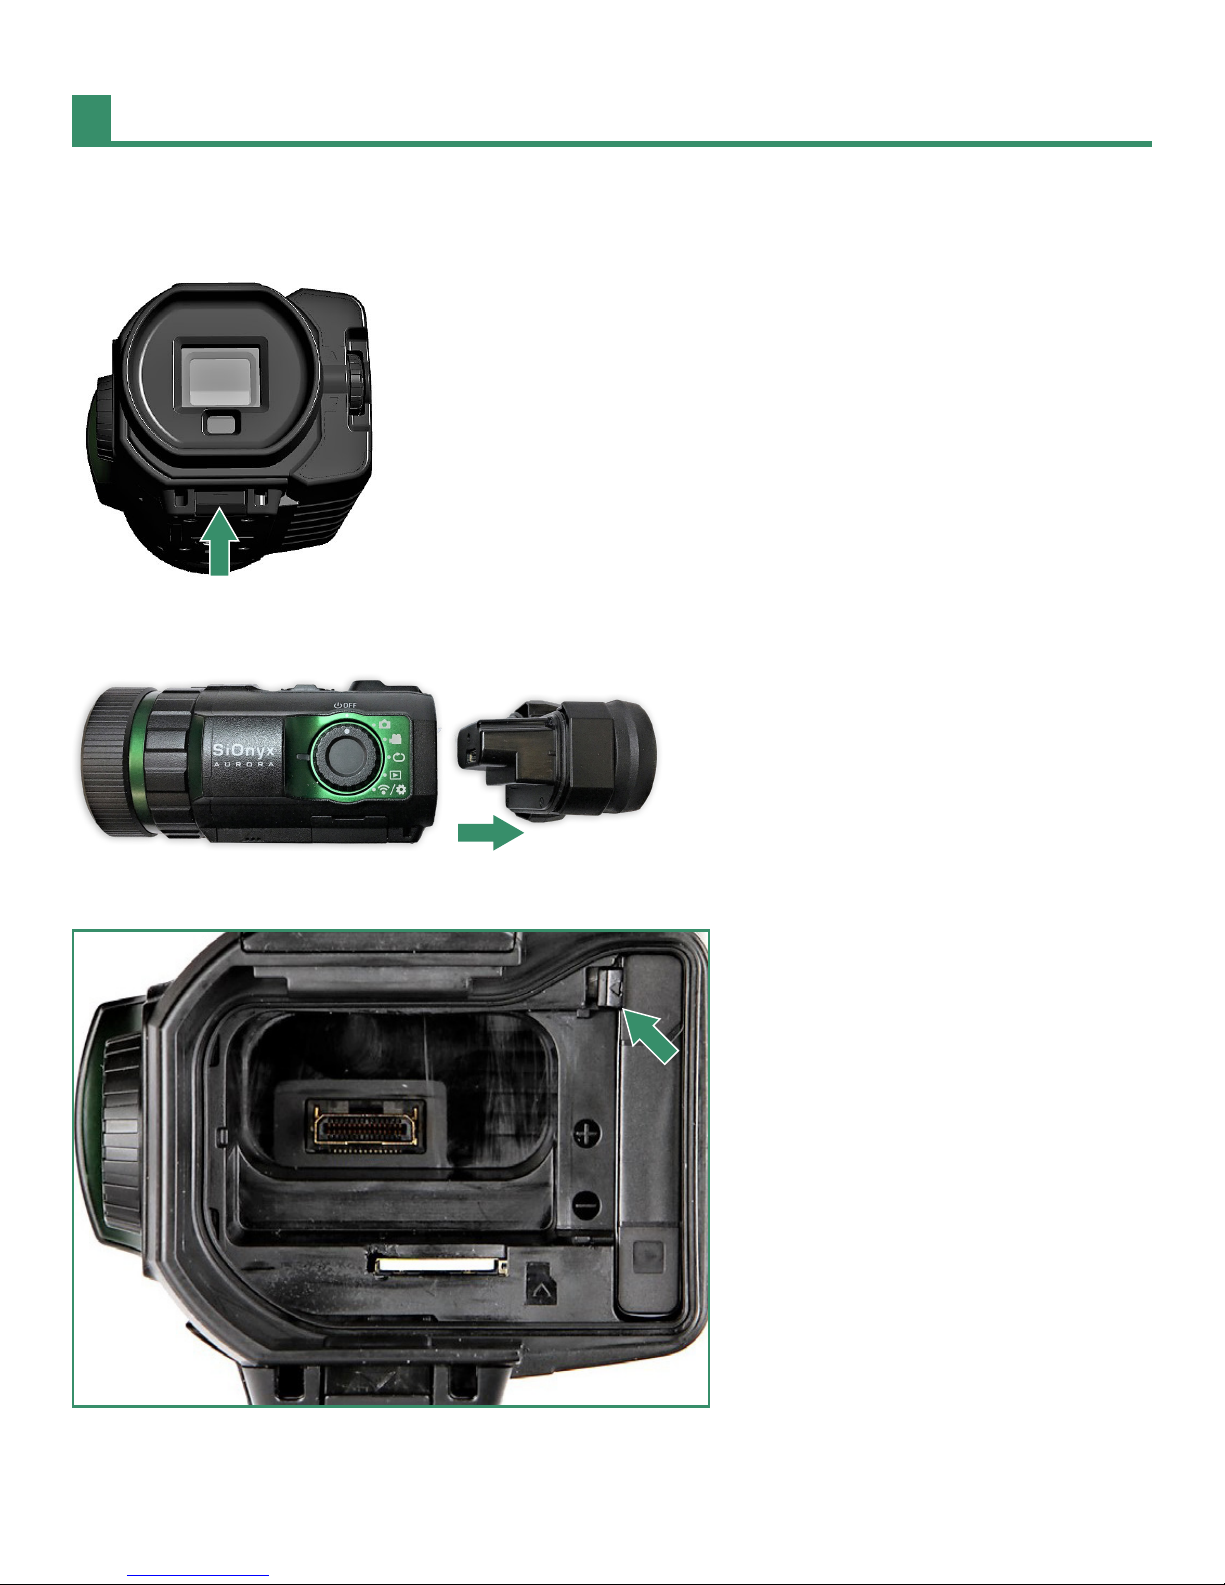
2. Remove the Viewnder by pulling down on the Viewnder Release button.
3. Pull the Viewnder straight out.
4. Slide the battery into the battery slot.
Aurora User Manual 8
Chapter 1. Getting Started
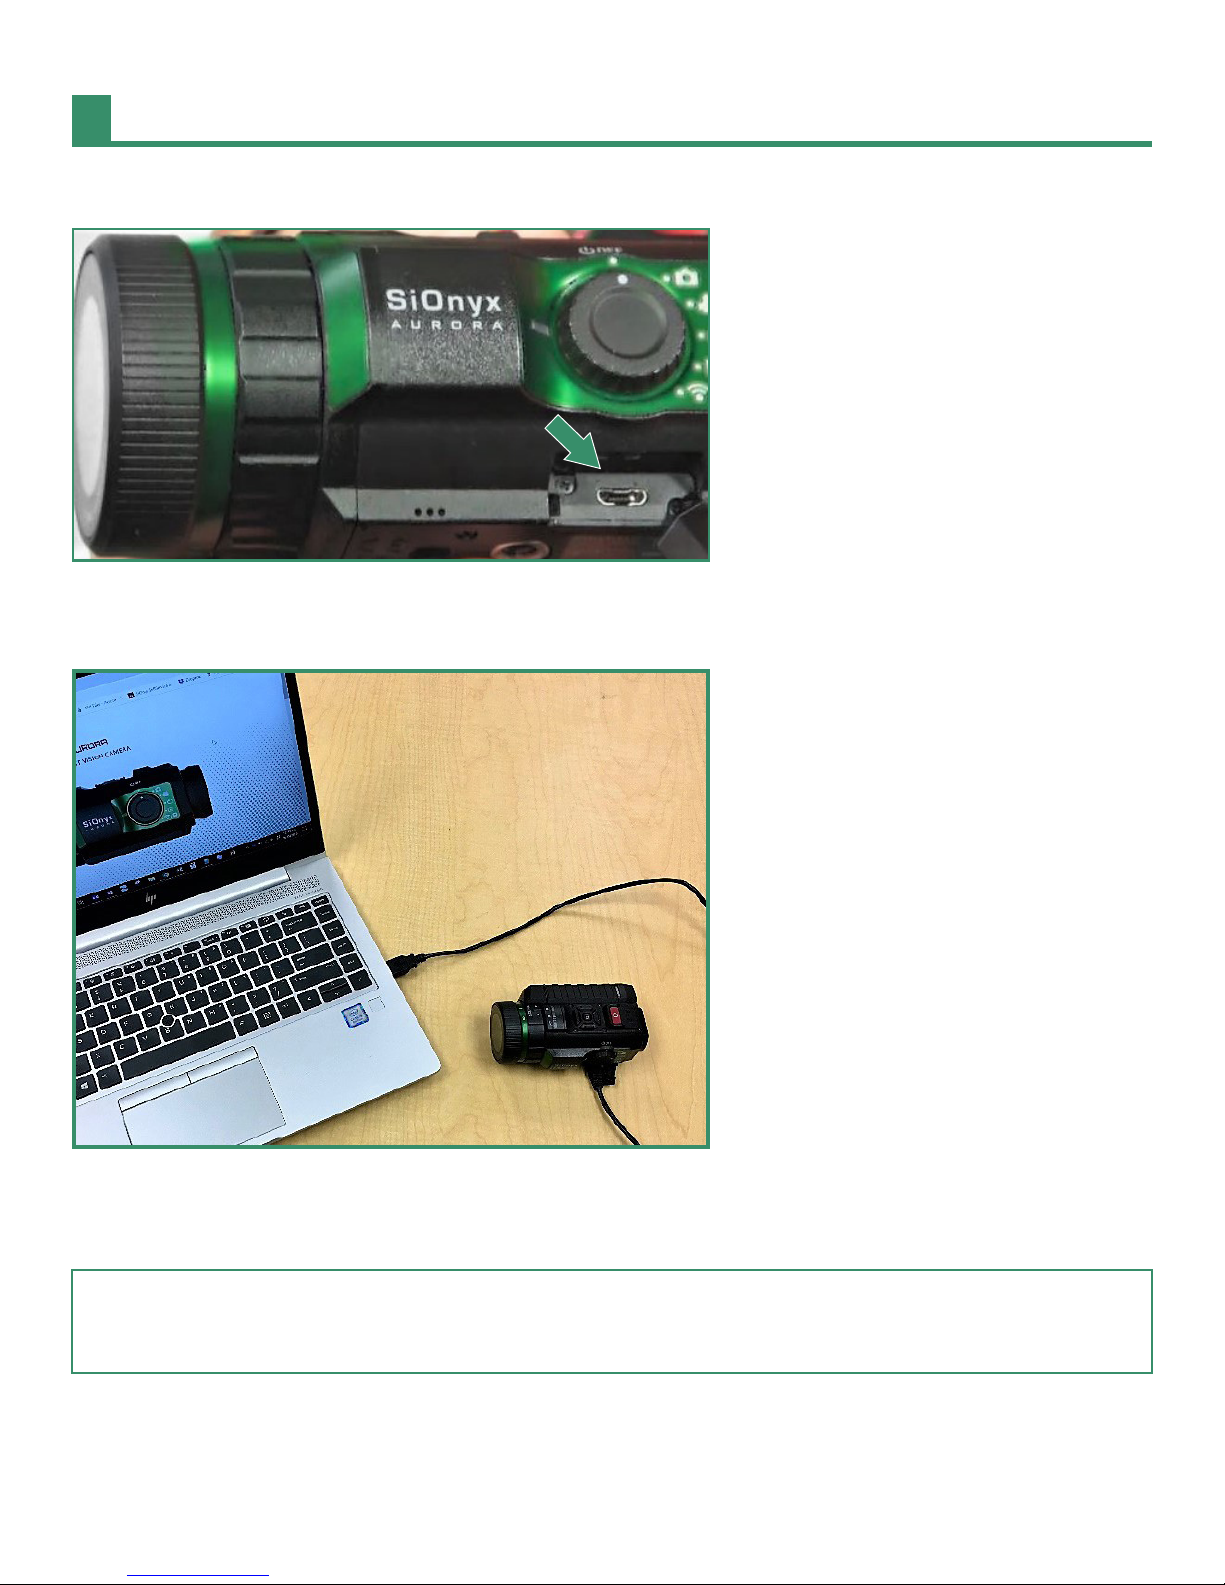
5. Insert the Micro USB cable into the camera.
6. Connect the camera to a powered-on computer or plug it into a wall charger using the supplied Micro
USB cable.
A green light appears and blinks slowly during the charging process. When the battery is fully charged,
the light will turn o.
Note. It will take about 2-3 hours to charge the battery to 100% and it will last approximately 2 hours of shooting
video.
Aurora User Manual 9
Chapter 1. Getting Started
1.2.1 Removing the Battery
1. Open the Viewnder by pulling down on the Viewnder Release button.
2. Pull the Viewnder straight out.
3. Press the tab on the left side of the battery and slide the battery out.
4. Slide the Viewnder back into its slot.
Aurora User Manual 10
Chapter 1. Getting Started
1.2.2 Viewing the Battery Charge
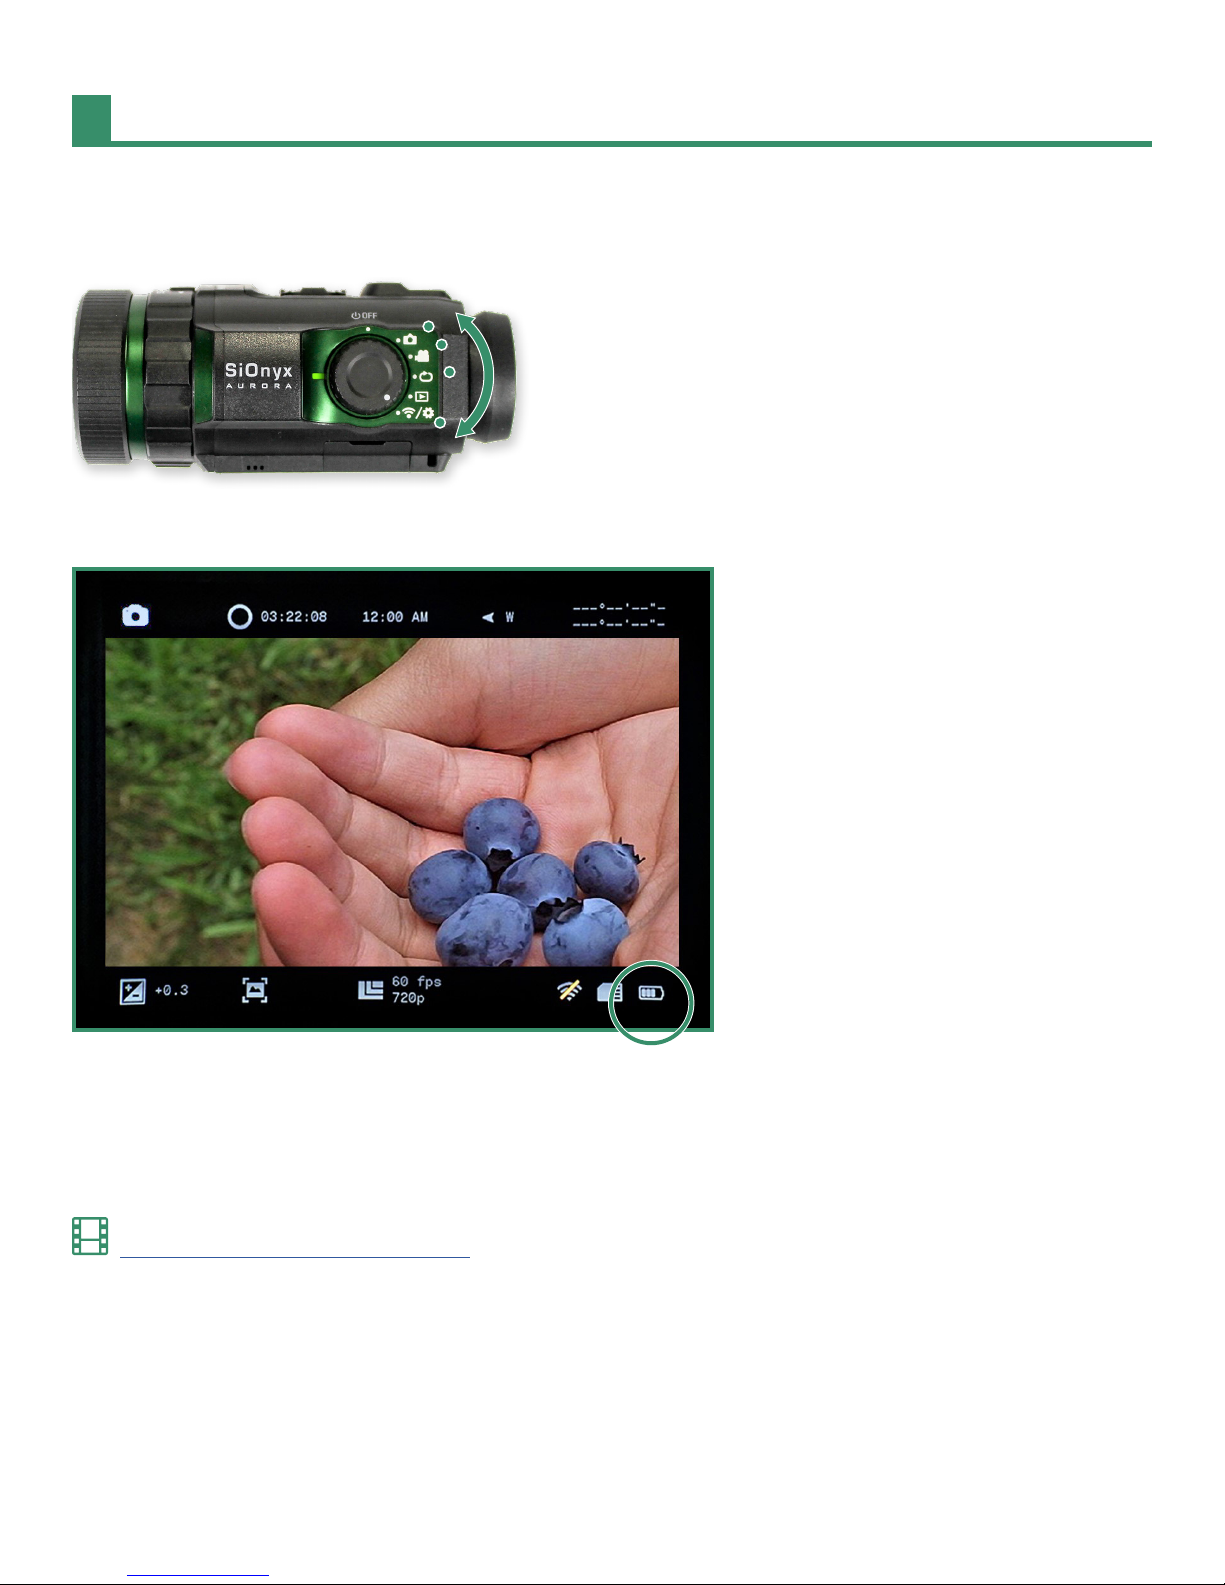
To view the remaining battery charge, rotate the Settings Dial to Photo, Video, Loop or WiFi/Settings.
The battery gauge icon is on the bottom right of the screen.
1.3 Viewing the Camera Modes and Settings
Here’s an overview of the camera buttons.
Click here to view a related video

Aurora User Manual 11
Chapter 1. Getting Started
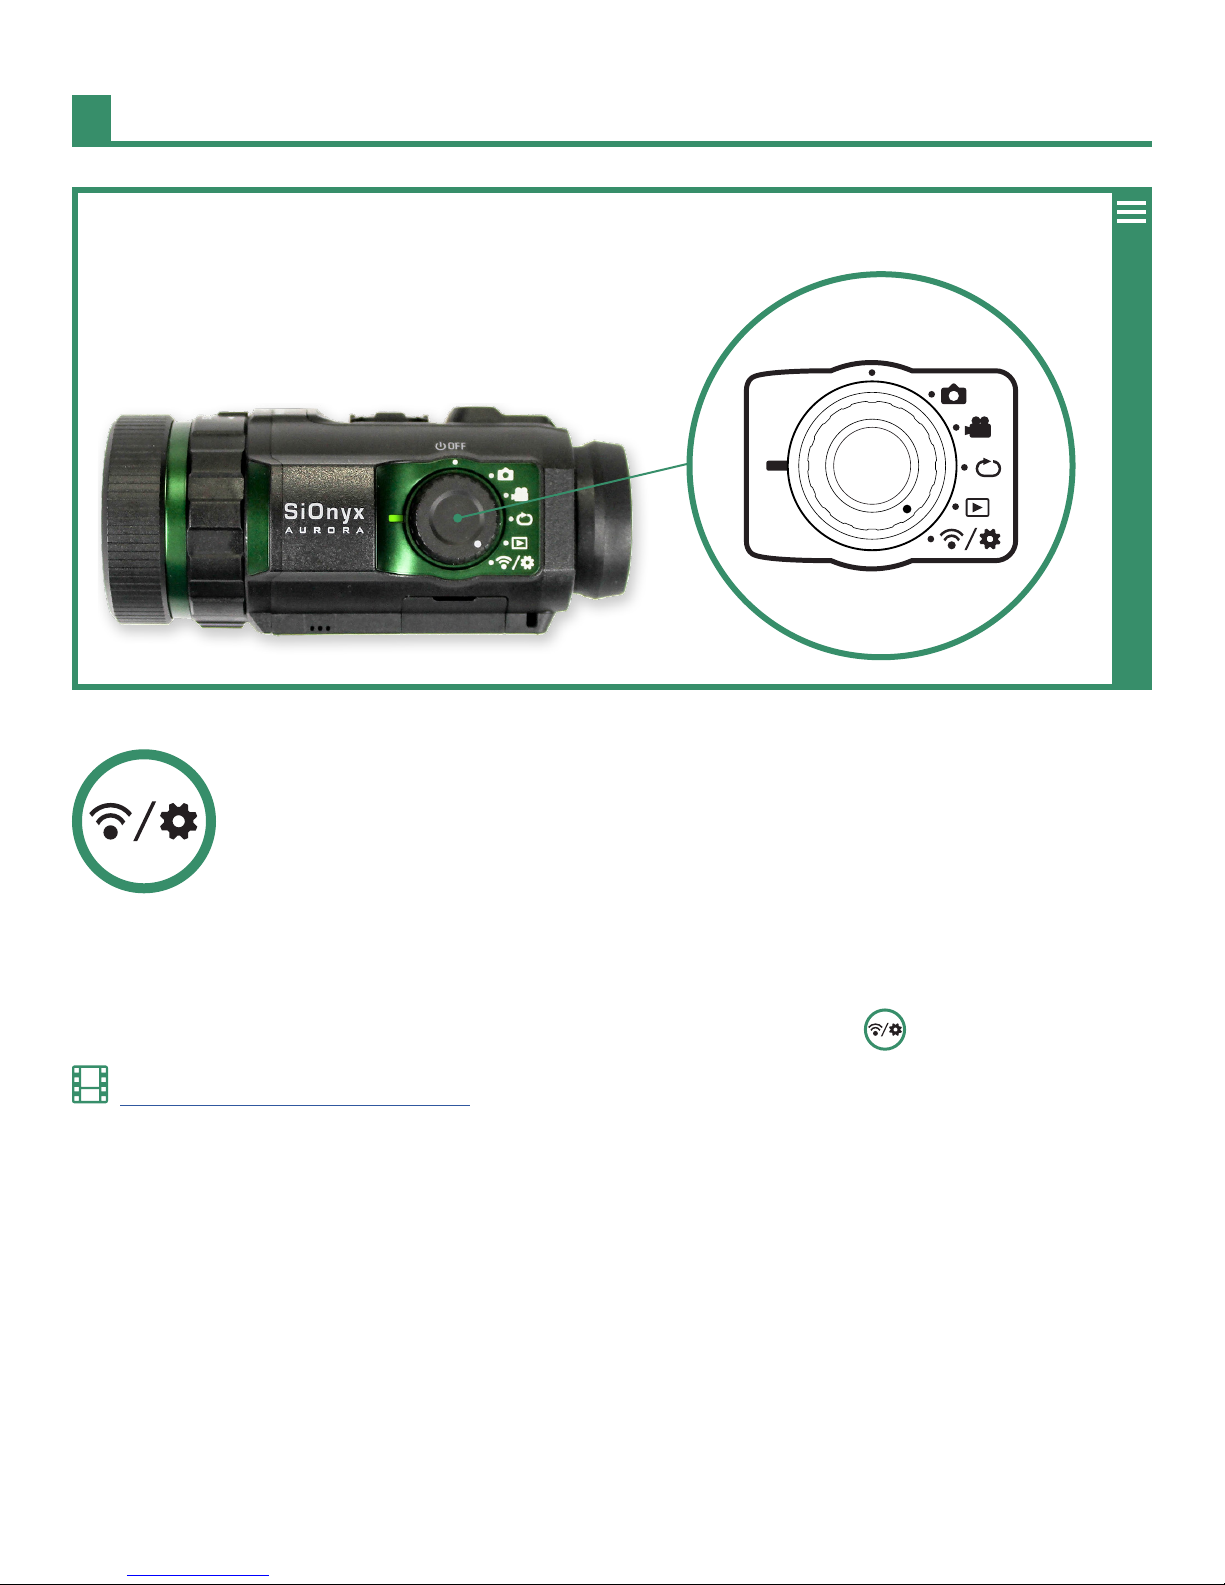
1.3.1 Button Overview
Shutter Button
(Single Shot, Video Start/Stop)
Advanced Settings
(Zoom, Gain, etc.)
Scene Ring
(Day, Twilight, Night)
Power/Camera Mode
(Photo, Video, Loop,
Playback, Settings)
Focus Ring
1.3.2 Settings Dial
The Settings Dial turns the camera on and o as well as to set the camera mode.
• Power O
• Photo
• Video
• Loop
• Playback
• WiFi/Settings
Aurora User Manual 12
Chapter 1. Getting Started
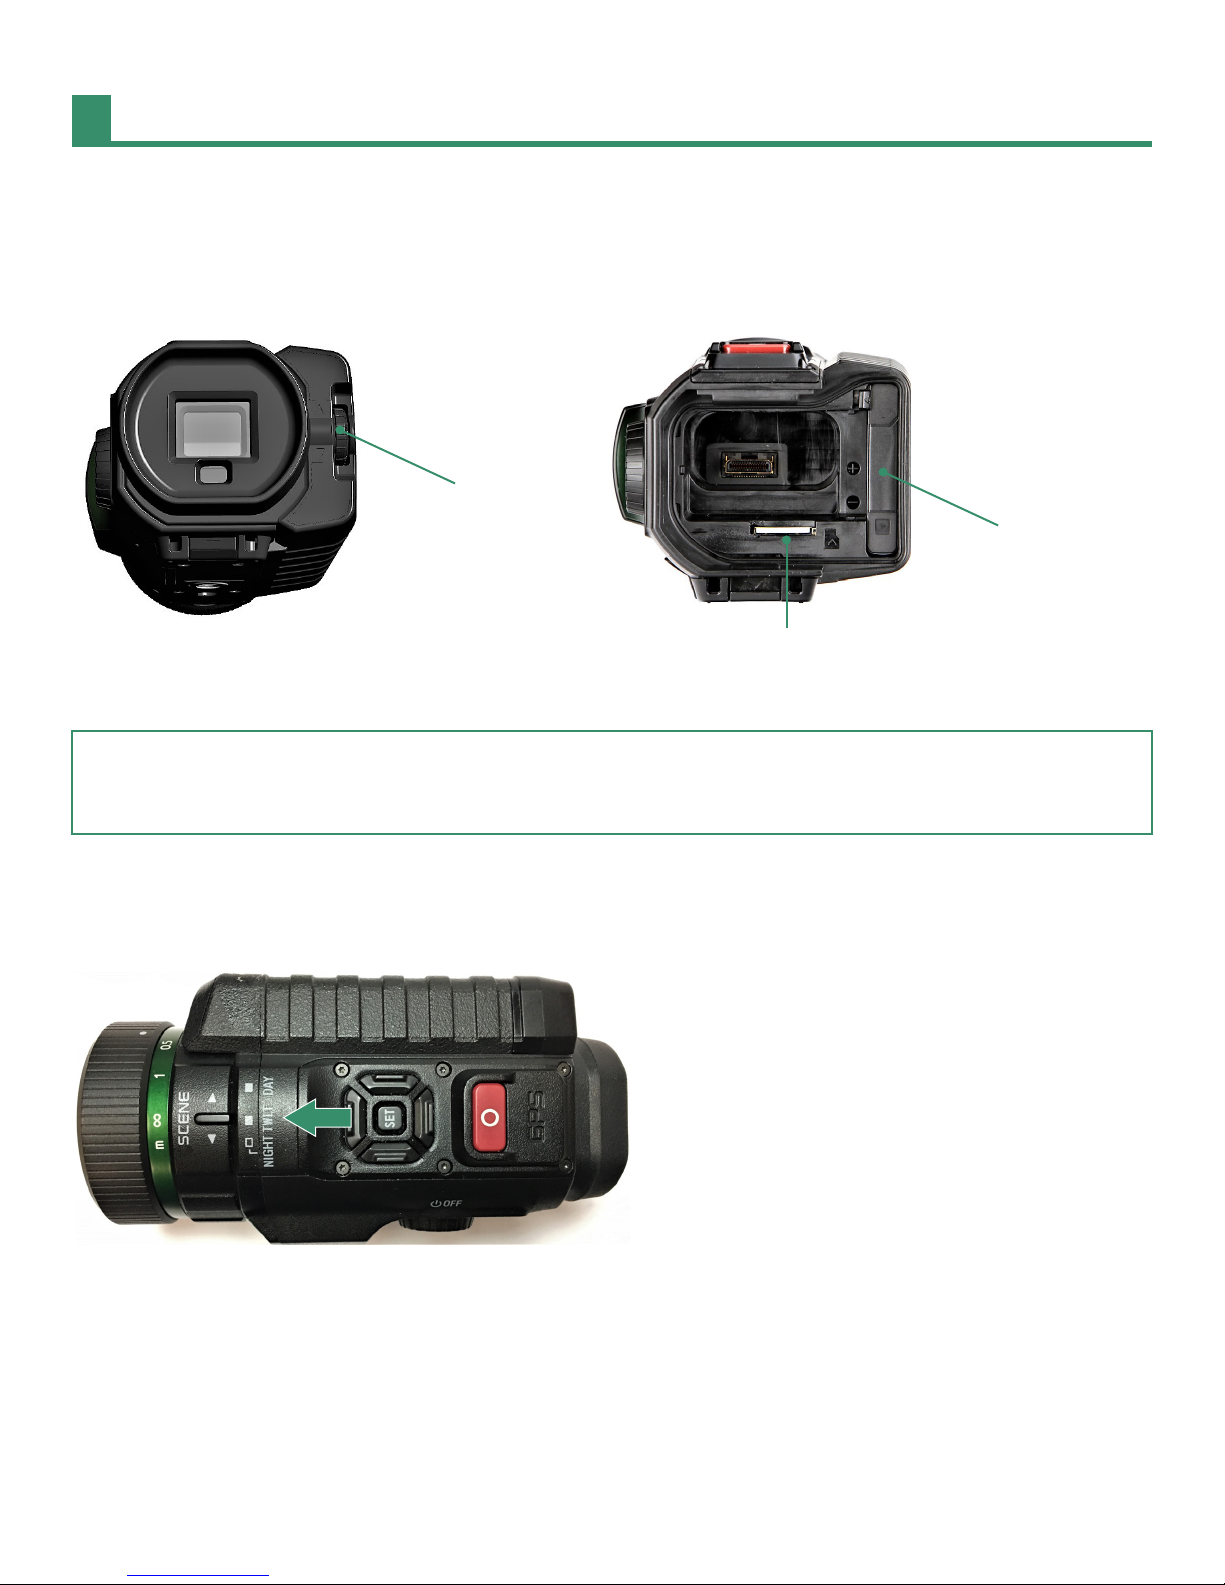
1.3.3 Viewnder
The EVF, or Electronic Viewnder, contains a menu and control system for the camera. On the right side of
the EVF is the Diopter Dial, which will allow you to focus the EVF screen without prescription glasses. The EVF
will need to be removed to access the battery and Micro SD card.
Micro SD card
Battery
Diopter Dial
Note. By default the EVF timeout is set to automatic. The Viewnder will turn o when the camera is moved away
from your eye. See “Section 2.4.3 EVF Time Out” on page 58 for more information.
1.3.4 Scene Ring
Use the Scene Ring to adjust the lens to the time of day.
Aurora User Manual 13
Chapter 1. Getting Started
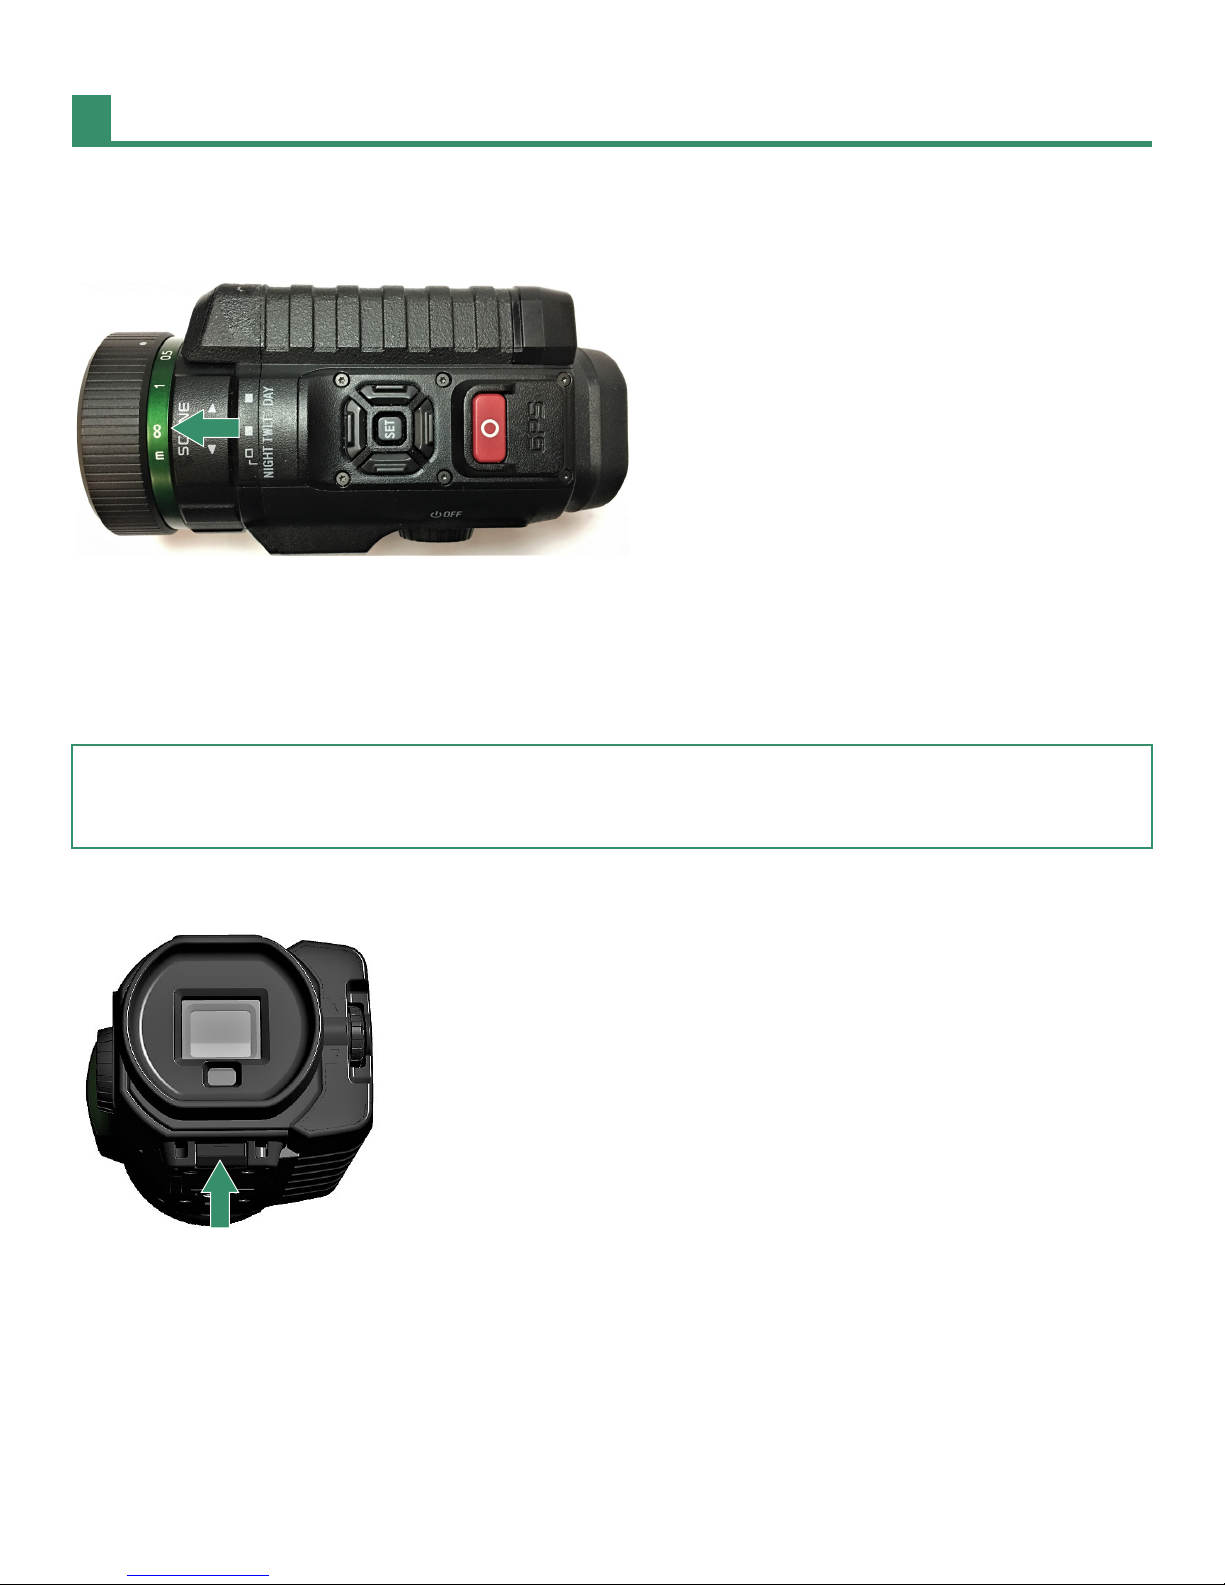
1.3.5 Focusing Ring
Use the Focusing Ring to adjust the focus visually or by the distance settings on the dial.
1.4 Inserting the Micro SD Card
The Micro SD card holds all your videos and photos.
Note. The camera does not come with a Micro SD card. You need to purchase a Micro SD/Micro SDHC Class 10 or
UHS-1 with a capacity of up to 32GB.
1. To insert the Micro SD card, remove the Viewnder by pulling down on the Viewnder Release button.

Aurora User Manual 14
Chapter 1. Getting Started
2. Pull the Viewnder straight out.
3. Insert the SD card into its slot and push it until it locks. To remove it, push it again and it will release. Pull
it straight out.
CAUTION
Don’t force the SD card into the slot or the data my be damaged.
4. Slide the Viewnder back into its slot.
Aurora User Manual 15
Chapter 1. Getting Started
WiFi/Setting
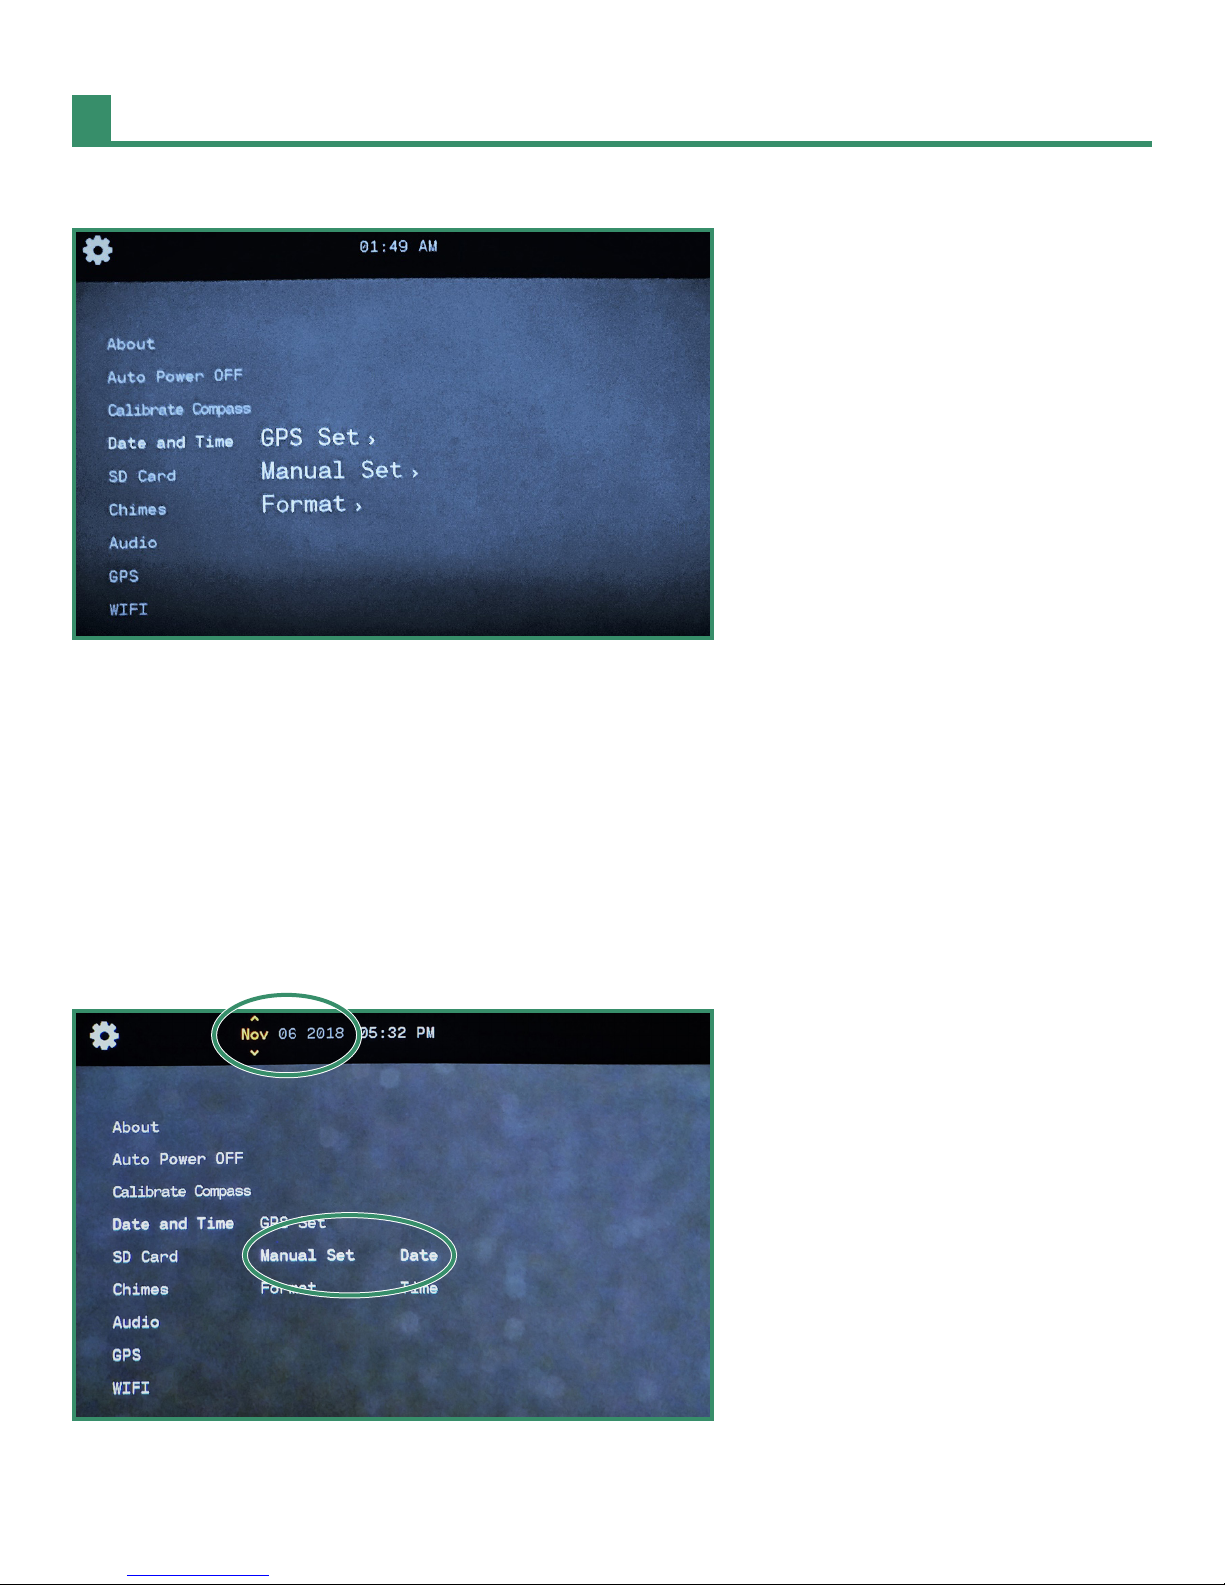
1.5 Setting the Date and Time
1. To set the date and time, rotate the Settings Dial to the WiFi/Settings menu .
Click here to view a related video
2. Press SET to access the WiFi/Settings menu.
3. This warning will appear until the date and time are set.
Aurora User Manual 16
Chapter 1. Getting Started
4. Toggle down to Date and Time and toggle right to the Date and Time options.
5. You can either set the time by GPS (see “Section 4.4.1 GPS Set” on page 80) or manually. You can also
change the format of the date and time (see“Section 4.4.2 Format” on page 83). To set the date and time
manually, toggle down to Manual Set.
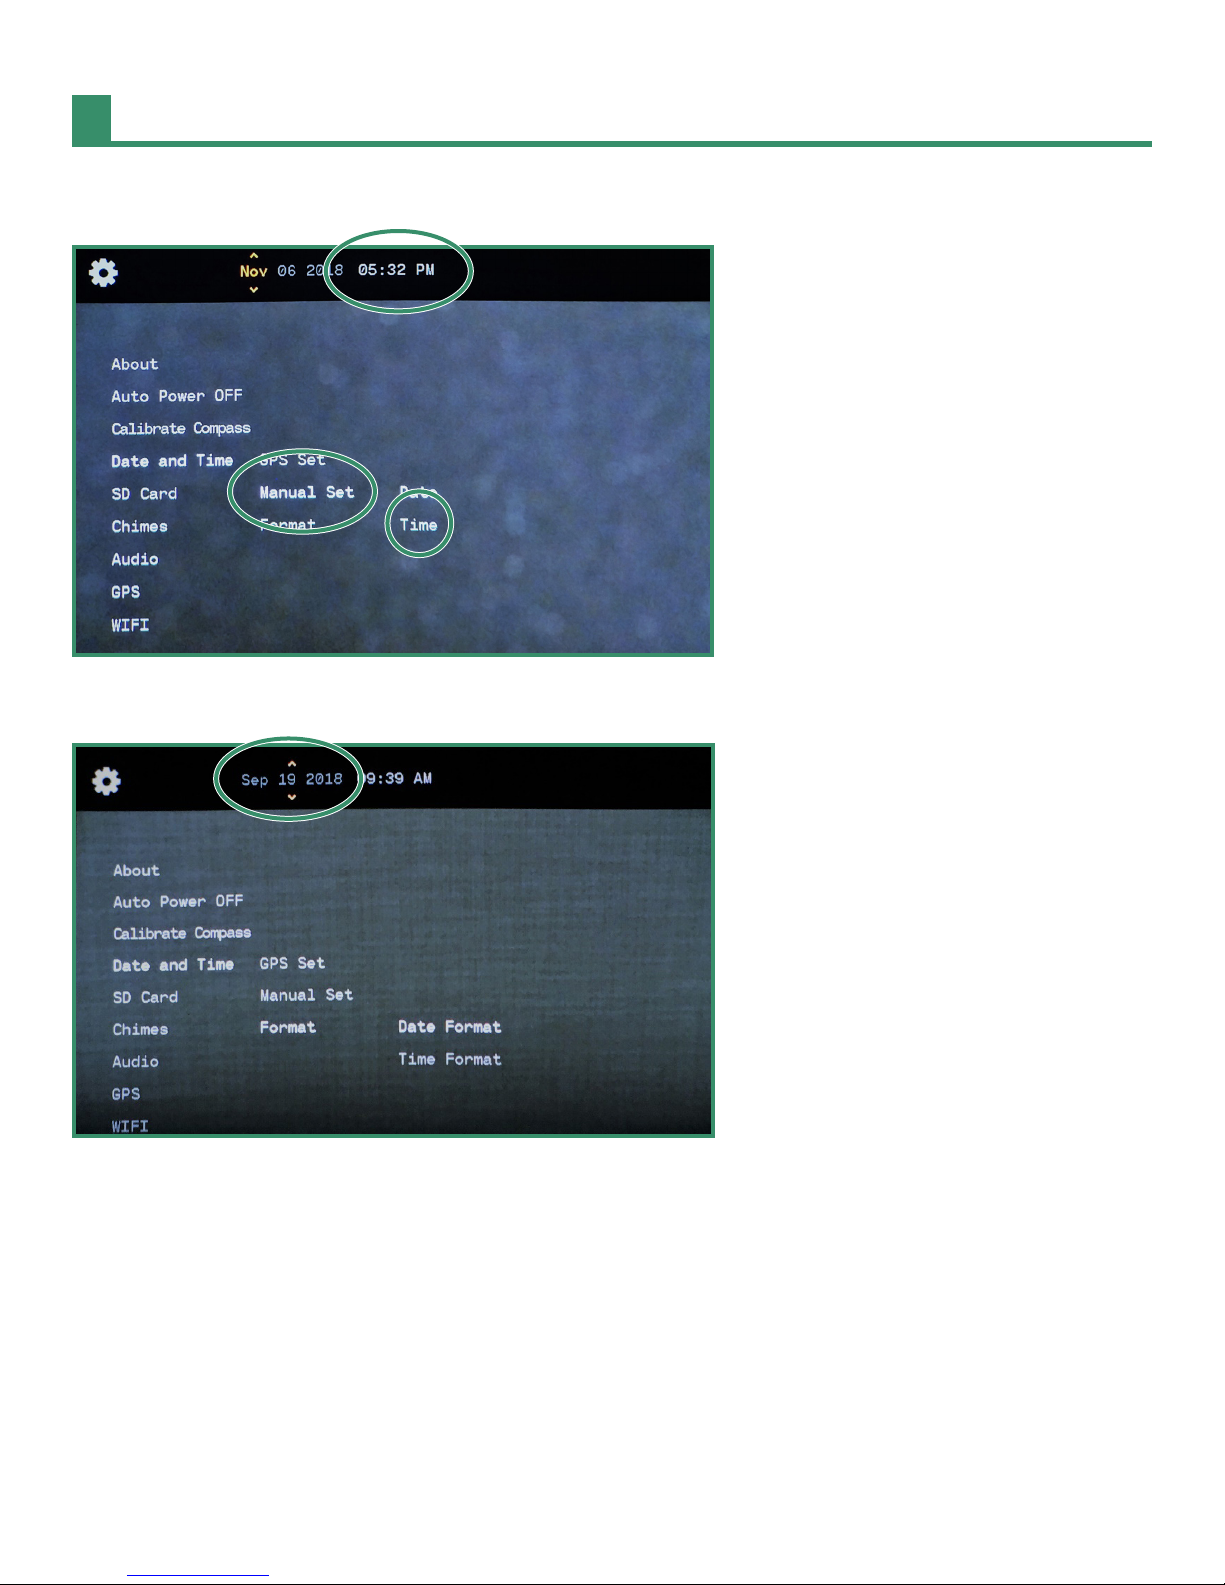
When your SiOnyx Aurora is powered on for the rst time, you will be prompted to set the date and time.
This prompt will persist until the date and time has been set.
1. Rotate the Settings Dial to the WiFi & Settings position.
2. Toggle down to Date and Time and then right to Manual Set.
3. Toggle right to Date and press SET. The date at the top of the menu is now in change mode.
Aurora User Manual 17
Chapter 1. Getting Started
4. Toggle up and down to change the Date and press SET. Repeat these steps to set the Time.
5. To set the Date Format, toggle right and press SET.
6. Select the Date Format at the top of the screen. Select an option and press SET. See “Section 4.4.2 Format”
on page 83 for more details.
Aurora User Manual 18
Chapter 1. Getting Started
7. Toggle down to Time Format and press SET and select the option you want at the top of the screen and
press SET.
8. Toggle left twice to exit to the main menu and toggle left twice to return to the main WIFI/Settings menu.
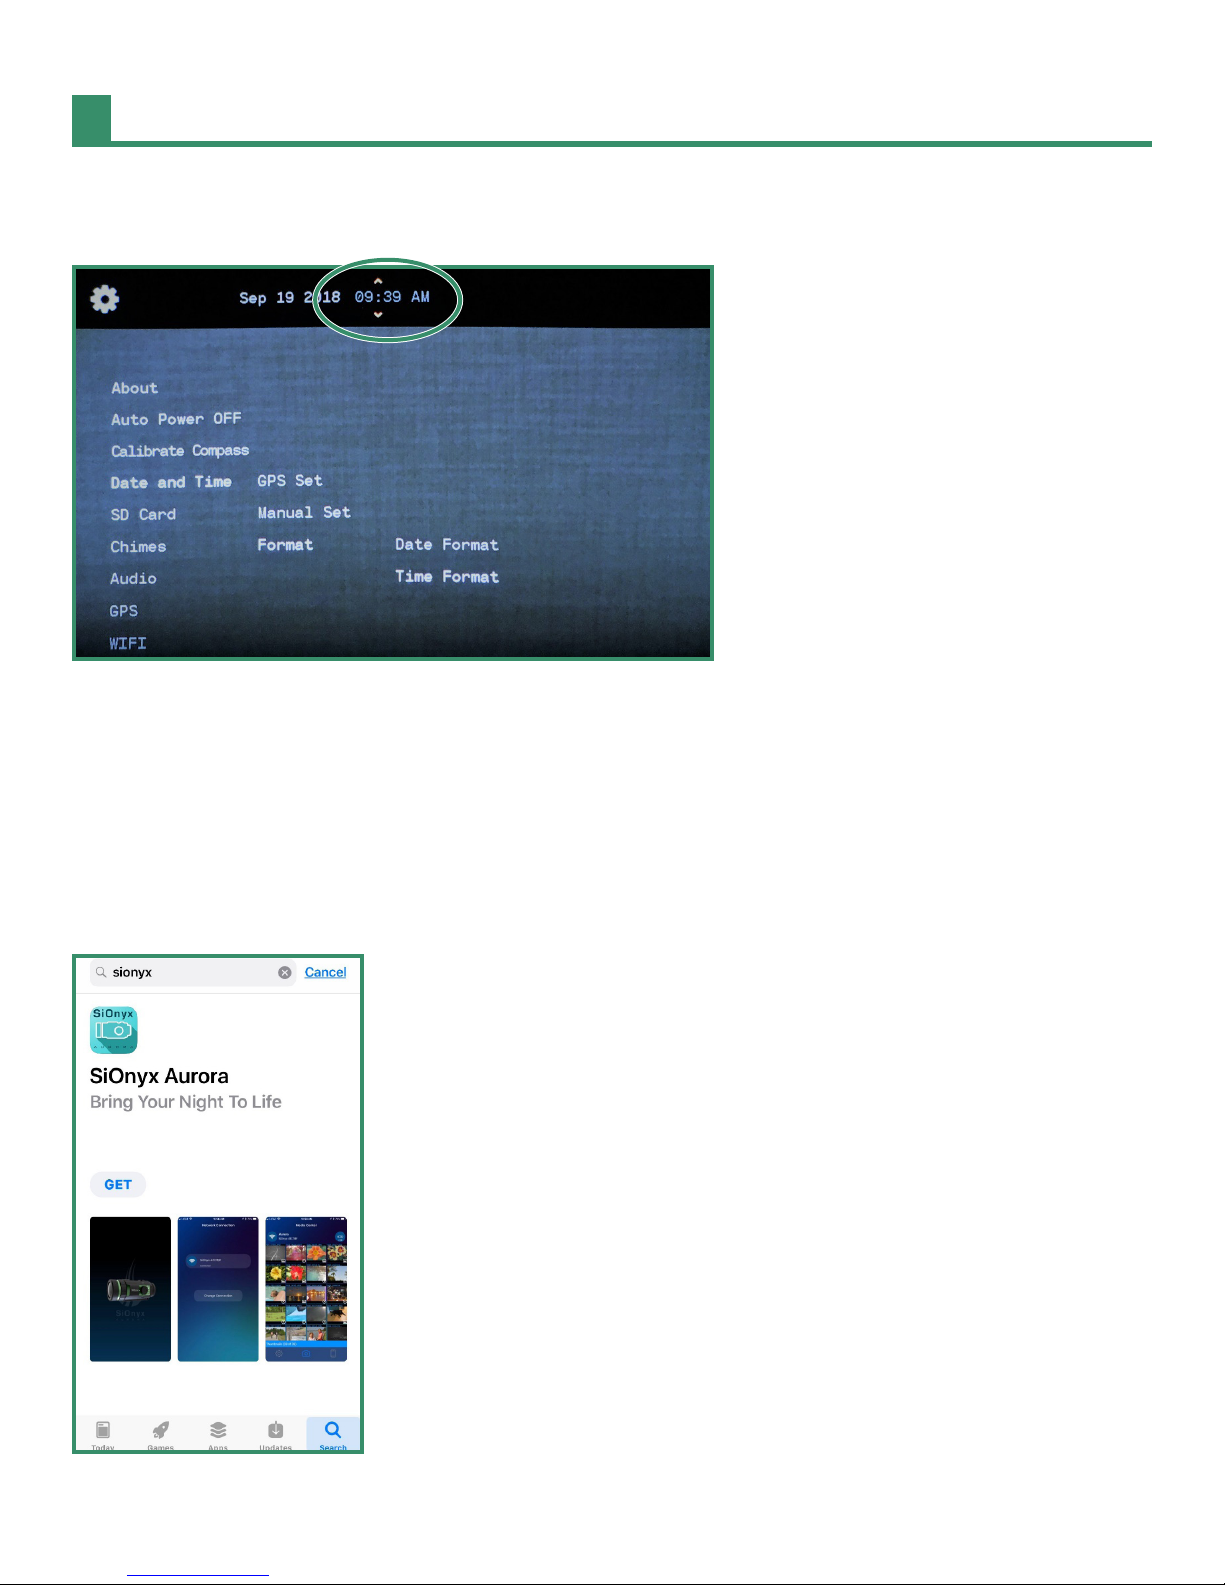
1.6 Downloading the SiOnyx Aurora App to Connect to Your Camera
The SiOnyx Aurora app works as your camera’s Viewnder with all your camera controls. The app is available
at the App Store and Google Play.
1. Download the SiOnyx Aurora App from the App Store or Google Play.

Aurora User Manual 19
Chapter 1. Getting Started
2. To connect your smartphone or tablet to the camera, rotate the Settings Dial to the WiFi/Settings Mode
to access the menu .
3. Toggle down to WIFI and toggle right to WIFI On and press SET.

Aurora User Manual 20
Chapter 1. Getting Started
4. The screen will display “Waiting for WIFI connection…”
5. Go to the WiFi setting on your smartphone or tablet and select the SiOnyx camera WiFi connection.
Note. If you’re using an iPhone or iPad, turn o Bluetooth in iOS Settings before connecting to Aurora. Do not use
the Control Center.
6. Enter the Wi-Fi password, SiOnyx_cam.
Other manuals for Aurora
1
Table of contents
Other Sionyx Digital Camera manuals


