Skotti-grill CAP User manual

JUST.GRILL.ANYWHERE.
INSTRUCTION MANUAL
BRUGSANVISNING
GEBRAUCHSANWEISUNG
MANUAL DE INSTRUCCIONES
MANUEL D‘INSTRUCTIONS
MANUALE D‘ISTRUZIONI
GEBRUIKSAANWIJZING
BRUKSANVISNING
INSTRUKCJA OBSŁUGI
BRUKSANVISNING
EN
DK
DE
ES
FR
IT
NL
NO
PL
SE
SKOTTI CAP

SKOTTI CAP. PLEASE NOTE!
• Hold or place your Skotti CAP at a maximum angle of 80 de-
grees to the ground.
• Never light your Skotti grill when the Skotti CAP is completely
on.
• After lighting Skotti, wait for at least one minute before putting
your Skotti CAP onto the grill. If not, you risk an explosion.
• Use your Skotti CAP only with Skotti grill A4.
• Caution! Skotti CAP’s accessible parts can be very hot. Keep
away from children!
SKOTTI GRILL. PLEASE NOTE.
• Only use Skotti outdoors.
• Familiarize yourself with Skotti before connecting it to the
gas cartridge.
• Operate Skotti with a standard EN417 propane/butane gas
mixture only, using approved screwable cartridges up to a
maximum of 500 g.
• Connecting other gas cartridges or gas mixtures can be very
dangerous.
• Before connecting the gas cartridge, make sure the gaskets
between the device and the gas cartridge are in working or-
der and condition.
• Never use Skotti with defective or worn out gaskets.
• Never use Skotti if the gas supply is defective or faulty or if
Skotti is not working properly.
• Always operate Skotti on a stable, flat surface.
• Please note all warnings and follow the user instructions
when grilling.
• Caution! Skotti and its individual parts can heat up to high
temperatures.
• Keep away from children, even when Skotti is cooling down
after use.
32
USER INSTRUCTIONS
USER INSTRUCTIONS
From now on, you can barbecue with your Skotti not only every-
where, but also “proper with a topper”. Because our Skotti CAP
is your Skotti’s lid, windshield, rotary grill, toaster and much
more - including practical grill tongs.
Please read the user instructions carefully and completely to
familiarize yourself with Skotti CAP before using it on your Skotti.
Keep the user instructions, so you can read them again or pass
them on to other users.
Manufacturer:: Vennskap GmbH & Co. KG
Device: Skotti Cap , collapsible grill lid for Skotti grill
SKOTTI CAP. PLEASE NOTE / SKOTTI GRILL. PLEASE NOTE.

6
3
4
5
Please check for clear assembly instructions in a
short explanatory film at www.skotti-grill.eu
2
1
54
LET’S GET STARTED ALL THIS BELONGS TO YOUR SKOTTI CAP
1 LET’S GET STARTED:
ALL THIS BELONGS TO YOUR SKOTTI CAP
Your Skotti CAP is packed up in our handy space-saving and du-
rable canvas bag. Place the bag on a hard, flat surface in front of
you, with the big company logo and the handles facing upwards.
Open the velcro fastener carefully to make sure no parts fall out
and unfold the bag completely.
Presto! Skotti CAP’s five durable stainless steel parts are laid in
front of you. Three more elements for the grill tongs, which serve
as a handle for your Skotti CAP, are waiting in the center pocket.
Put Skotti CAP together from these parts in no time at all. With a
little practice you can do it in under a minute..
Have fun saving the time.
1x Skotti grill tongs / Skotti CAP handles
1x long side panel with triangle mark
1x long side panel without triangle mark
1x short foot panel with triangle mark
1x short head panel without triangle mark
1x big cover plate
1
2
3
4
5
6

76
SET UP SET UP
2 SET UP:
MAKE 1 FROM 8 IN 6 STEPS
Step 1:
• Take the long side panel with the Skotti logo and the small tri-
angle mark facing upward in your left hand.
• Take the short foot panel with the triangle mark facing upward
in your right hand and slide the short panel onto the longer one
at the corresponding triangle-adjacent slits.
Step 2:
• Slot the other long side panel with the Skotti logo onto the foot
panel at the open slim slits.
Step 3:
• Slide the bottom panel into the three-sided structure, pointed
side down and the long tabs with the triangle mark towards
the foot panel.
• Make sure that the hooks and tabs are at an equal height with
the slits.
• Slide the large tabs with a triangle mark on the cover plate into
the corresponding slits on the short foot panel. Slide the hooks
on the big cover plate into the slits on the long side panels and
slot the cover plate onto the short foot panel at the slits. Both
triangle marks of the large tabs should be visible.

98
SET UP SET UP
Step 4:
• Take the short head panel and slot it onto the long side panels
at the two open slits and push it down all the way to the end.
Step 5:
Lock Skotti CAP
• Pull the cover plate back towards the short head panel using
the two larger hooks protruding from the sides. The cover
should lock in place..
Step 6:
Put the handles/grill tongs together
• Take the three parts for the handles/grill tongs of your Skot-
ti CAP. Put the rods together so that the ends with the slot
openings face each other and the Skotti logos on the rods face
outward. Insert the finished handle from the outside into the
free rectangular slots on the two long side panels..
Done!
3 DISSEMBLING:
HOW TO PUT YOUR SKOTTI CAP BACK INTO ITS BAG
When your Skotti CAP has cooled down after grilling, you can
easily stow it away in the canvas bag, saving space. Simply take it
apart in the reverse order of assembly:
Take apart the handles/grill tongs. To unlock the cover plate, lift
up its large tabs. Then you can remove the small head part, fol-
lowed by the cover plate, one side panel and the foot panel one
after the other.

1110
DISSEMBLING
BRUGSANVISNING DK
4 SET UP POSSIBILITIES:
STAYING FLEXIBLE
Skotti CAP as a hood
(for indirect grilling)
Skotti CAP as a lid
(slightly inclined) Skotti CAP as a lid
(slightly inclined)
Skotti CAP as a rotary grill spit
(grill spit available soon in online
shop)
Skotti CAP bag
(keeps everything together)
Skotti CAP as a windshield

FAREADVARSEL SKOTTI CAP!
• Hold eller opsæt din Skotti CAP op i en vinkel på maksimalt
80° til jorden!
• Tænd aldrig din Skotti-grill med lukket Skotti CAP!
• Vent med at sætte din Skotti CAP på, indtil der gået 1 minut
efter at Skotti-grillen er antændt – eksplosionsfare!
• Brug kun Skotti CAP til Skotti-Grill A4.
• Advarsel! Tilgængelige dele af Skotti CAP kan være meget
varme. Børn bør holdes væk fra grillen!
GEFAHREN SKOTTI GRILL!
• Skotti.-grillen må udelukkende benyttes udenfor i det fri.
• Bliv fortrolig med Skotti, før du tilslutter den til gastanken.
• Skotti må benyttes udelukkende med en kommercielt til-
gængelig propan-/butangasblanding EN 417.
Brug kun tilladte skruepatroner på op til maks. 500 g.
• Tilslutning af andre gasbeholdere eller gasblandinger kan
være meget farligt.
• Før du tilslutter gasbeholderen, skal du sikre dig, at paknin-
gerne mellem udstyret og gasbeholderen er på plads og i
perfekt tilstand.
• Brug aldrig Skotti med ødelagte eller slidte pakninger.
• Brug aldrig Skotti, hvis gastilførslen er brudt, defekt eller
ikke fungerer korrekt.
• Brug altid Skotti på et sikkert og jævnt underlag.
• Følg alle advarsler og denne betjeningsvejledning, når du
griller.
• Advarsel! Skotti-grillen og alle dens dele kan blive meget
varme. Børn bør holdes væk fra Skotti, også mens den køler
af efter grillning.
1312
BETJENINGSVEJLEDNING
BETJENINGSVEJLEDNING
Fra nu af kan du grille med Skotti ikke blot overalt, men også
„happy med cappy“. Fordi vores Skotti CAP er dit Skotti-låg, din
vindskærm, dit rotisserie-spyd, din brødrister og meget mere –
inklusive en praktisk grilltang.
Læs denne betjeningsvejledning omhyggeligt og fuldstændigt
igennem for at blive bekendt med Skotti CAP, inden du bruger
den på din Skotti..
Opbevar denne betjeningsvejledning, så du kan læse den igen
ellervideregive dem til andre brugere.
Producent: Vennskap GmbH & Co. KG
Udstyrsbetegnelse: Aftageligt grilllåg „Skotti CAP“ til Skotti-grillen
FAREADVARSEL SKOTTI CAP / FAREADVARSEL SKOTTI -GRILL!

Tip:
Du kan også finde en informationsrig monteringsvej-
ledning i form af en kort video www.skotti-grill.eu
6
3
4
52
1
1514
SÅ GÅR DET LØS
1 SÅ GÅR DET LØS:
ALT DETTE FØLGER MED DIN SKOTTI CAP
Din Skotti CAP ligger kompakt pakket ind foran dig – i vores prak-
tiske bærepose lavet af slidstærk presenning. Placer posen med
det store logo og håndtagene vendt opad foran dig på en fast og
flad overflade. Åbn den forsigtigt ved hjælp af velcrolukningen, så
ingen dele kan falde ud og fold tasken helt ud.
Et voilà! Der ligger nu 5 holdbare dele i rustfrit stål til din Skotti
CAP foran dig. I den midterste lomme finder du 3 yderligere dele
til din Skotti-grilltang, som også er dit håndtag til Skotti-Cap. Din
Skotti CAP kan lynhurtigt sammensættes af disse 8 dele. Med lidt
øvelse kan du gøre dette på mindre end 1 minut.
God fornøjelse med tage tid.
1 x Skotti-grilltang / Skotti CAP-håndtag
1 x lang sidesektion med Δ-markering
1 x lang sidesektion uden Δ-markering
1 x lang bundsektion med Δ-markering
1 x lang hoveddel uden Δ-markering
1 x stor lågplade
1
2
3
4
5
6
ALT DETTE FØLGER MED DIN SKOTTI CAP

1716
MONTAGE
2 MONTAGE:
8 BLIVER TIL 1 I 6 TRIN
Trin 1:
• Tag den lange sidesektion med Skotti-logoet og den lille
Δ-markering øverst i din venstre hånd.
• Tag den lille bundsektion med Δ-markeringen øverst i din højre
hånd, og sæt begge dele ind i hinanden ved Δ på forbindelses-
ledene.
Trin 2:
• Forbind på samme måde den lille bundsektion ved det stadig
frie smalle forbindelsesled med den anden lange sidesektion
på siden med Skotti-logoet..
MONTAGE
Trin 3:
• Anbring den store lågplade med krumningen nedad og de lange
tapper med Δ-markeringen i retning af bundsektionen mellem
de 3 opbyggede vægge.
• Sørg for, at krogene og tapperne er på højde med slidserne.
• Sæt først de lange tapper ind med Δ-markeringen på lågpla-
den i åbningerne på den lille bundsektion. Indsæt derefter kro-
gene på den store lågplade i slidserne i de store sidesektioner,
og skub lågpladen ind i slidserne i den lille bundsektion, indtil
du ser de to Δ-markeringer på de lange tapper.

1918
MONTAGE
Trin 4:
• Tag nu den lille hoveddel. Sæt den i ovenfra i de to frie forbin-
delsesled på de store sidesektioner, og skub den ned til enden.
Trin 5:
Lås Skotti CAP
• Som det sidste monteringstrin skal du trække den store låg-
plade på de 2 større udragende kroge på siden tilbage mod
den lille hoveddel for at låse Skotti CAP med et hørbart klik.
MONTAGE
Trin 6:
Saml håndtaget/grilltangen
• Tag nu de 3 dele til håndtaget eller grilltangen på din Skotti
CAP. Sæt træstykkerne sammen på en måde, så de to ender
sammenlagt danner en spids, og Skotti-logoerne på træstyk-
kerne peger udad. Indsæt derefter det færdige håndtag udefra
i de frie rektangulære huller i de to lange sidesektioner.
Færdig!
3 DEMONTERING:
SÅDAN PUTTER DU SKOTTI CAP TILBAGE I TASKEN
Så snart din Skotti CAP er afkølet efter grillning, kan du hurtigt
gemme den tilbage i presenningslommen for at spare plads.
Dette gør du i den omvendte montage-rækkefølge..
Med andre ord: Skil håndtaget eller grilltangen ad. Lås nu de
store tapper op på lågpladen ved at løfte dem op. Derefter kan
du demontere den lille hoveddel, lågpladen, en sidesektion og
bundsektionen en efter en.

2120
DEMONTERING
GEBRAUCHSANWEISUNG DE
4 MONTAGEVARIANTER:
VÆR ALTID FLEKSIBEL
Skotti CAP som hætte
(til indirekte grilning)
Skotti CAP som låg
(let på skrå) Skotti CAP som låg
(helt skråt)
Skotti CAP som rotisseriespyd-
holder (grill spit available soon in
online shop)
Skotti CAP-taske
(holder alt sammen)
Skotti CAP som vindskærm

GEFAHREN SKOTTI CAP!
• Halte oder stelle Deine SKOTTI CAP maximal im 80°-Winkel
zum Erdboden auf!
• Zünde Deinen SKOTTI Grill niemals mit geschlossener
SKOTTI CAP!
• Leg Deine SKOTTI CAP erst 1 Minute nach Zünden des
SKOTTI Grills auf – Explosionsgefahr!
• Verwende die SKOTTI CAP nur für den SKOTTI.
• Vorsicht! Zugängliche Teile der SKOTTI CAP können sehr heiß
sein.
• Halte Kinder fern!
GEFAHREN SKOTTI GRILL!
• Verwende SKOTTI ausschließlich im Freien.
• Mach Dich mit SKOTTI vertraut, bevor Du ihn an den Gasbe-
hälter anschließt.
• Betreibe SKOTTI ausschließlich mit einem handelsüblichen
Propan- /Butan-Gasgemisch EN 417. Benutze dazu nur zu-
lässige Schraubkartuschen bis max. 500 g.
• Andere Gasbehälter bzw. Gasgemische anzuschließen kann
sehr gefährlich sein.
• Überzeuge Dich vor dem Anschließen des Gasbehälters
davon, dass die Dichtungen zwischen Gerät und Gasbehälter
vorhanden und in einwandfreiem Zustand sind.
• Verwende SKOTTI nie mit defekten oder abgenutzten Dich-
tungen.
• Benutze SKOTTI nie, wenn die Gaszufuhr defekt oder fehler-
haft ist oder er nicht ordnungsgemäß arbeitet.
• Betreibe SKOTTI immer auf sicherem und geradem Unter-
grund.
• Halte Dich beim Grillen an alle Warnhinweise und an diese
Gebrauchsanweisung.
• Vorsicht! SKOTTI und alle seine Einzelteile können sehr heiß
werden.
• Halte Kinder von SKOTTI fern, auch während des Abkühlens
nach dem Grillen.
2322
GEBRAUCHSANWEISUNG
GEBRAUCHSANWEISUNG
Ab jetzt grillst Du mit SKOTTI nicht nur einfach überall, sondern
auch „happy mit cappy“. Denn unsere SKOTTI Cap ist Dein SKOT-
TI Deckel, Dein Windschutz, Dein Drehspießaufsatz, Dein Toaster
und vieles mehr – inklusive praktischer Grillzange.
Lies Dir diese Gebrauchsanweisung bitte aufmerksam und voll-
ständig durch, um Dich mit der SKOTTI Cap vertraut zu machen,
bevor Du sie auf Deinem SKOTTI verwendest.
Bewahre diese Gebrauchsanweisung auf, um sie erneut lesen
oder an andere Nutzer weitergeben zu können.
Hersteller: Vennskap GmbH & Co. KG
Gerätebezeichnung: Steckbare Grilldeckel für Skotti Grill „Skotti Cap“
GEFAHREN SKOTTI CAP/ GEFAHREN SKOTTI

Tipp:
Eine anschauliche Aufbauanleitung findest Du auch
als kurzen Erklärfilm auf www.skotti-grill.eu
6
3
4
52
1
2524
LOS GEHT‘S
1 LOS GEHT’S:
DAS ALLES GEHÖRT ZU DEINER SKOTTI CAP
Deine SKOTTI CAP liegt platzsparend verpackt vor Dir – in unserer
praktischen Tragetasche aus widerstandsfähigem Planenstoff.
Leg die Tasche mit dem großen Logo und den Tragegriffen nach
oben vor Dich auf einen festen und flachen Untergrund. Öffne sie
vorsichtig am Klettverschluss, sodass keine Teile herausfallen
können, und klapp sie komplett auf.
Et voilà! Vor Dir liegen nun 6 langlebige Edelstahlteile für Deine
SKOTTI CAP. In der mittleren Einstecktasche findest Du 3 weitere
Teile für Deine Skotti-Grillzange, die gleichzeitig auch Dein Griff
für die Skotti CAP ist. Aus diesen 9 Teilen entsteht im Handumdre-
hen Deine Skotti CAP. Mit etwas Übung gelingt Dir das in weniger
als 1 Minute.
Viel Spaß beim Zeitstoppen.
1 x SKOTTI Tongs/Griff SKOTTI Cap
1 x Langes Seitenteil mit ∆-Markierung
1 x Langes Seitenteil ohne ∆-Markierung
1 x Kleines Fußteil mit ∆-Markierung
1 x Kleines Kopfteil ohne ∆-Markierung
1 x Großes Deckelblech
1
2
3
4
5
6
DAS ALLES GEHÖRT ZU DEINER SKOTTI CAP

2726
AUFBAU
2 AUFBAU:
AUS 8 MACH 1 IN 6 SCHRITTEN
Schritt 1:
• Nimm das lange Seitenteil mit SKOTTI-Logo und kleiner
∆-Markierung oben in Deine linke Hand.
• Nimm das kleine Fußteil mit ∆-Markierung oben in Deine
rechte Hand und stecke beide Teile an den ∆ der Verbindungs-
fugen ineinander.
Schritt 2:
• Verbinde das kleine Fußteil an der noch freien schmalen Ver-
bindungsfuge auf dieselbe Weise mit dem zweiten langen
Seitenteil auf der Seite mit SKOTTI-Schriftzug.
AUFBAU
Schritt 3:
• Leg das große Deckelblech mit der Wölbung nach unten und
den langen Nasen mit Δ-Markierung in Richtung Fußteil zwi-
schen die 3 aufgebauten Wände.
• Achte darauf, dass sich die Haken und Nasen auf Höhe der
Schlitze befinden.
• Füge zuerst die langen Nasen mit ∆-Markierung des Deckel-
blechs in die dafür vorgesehenen Schlitze des kleinen Fuß-
teils ein. Dann füge die Haken des großen Deckelblechs in die
Schlitze der großen Seitenteile und schiebe das Deckelblech
so weit in die Schlitze des kleines Fußteils hinein, dass Du die
beiden ∆-Markierungen der langen Nasen siehst.

2928
AUFBAU
Schritt 4:
• Nimm nun das kleine Kopfteil. Stecke es von oben in die bei-
den noch freien Verbindungsfugen der großen Seitenteile und
schiebe es bis zum Ende nach unten.
Schritt 5:
SKOTTI CAP verriegeln
• Zieh als letzten Aufbauschritt das große Deckelblech an den 3
größeren seitlich herausstehenden Haken wieder nach hinten
Richtung kleines Kopfteil, um die SKOTTI CAP hörbar zu ver-
riegeln.
AUFBAU
Schritt 6:
Griff/Grillzange zusammensetzen
• Nimm nun die 3 Teile für den Griff bzw. die Grillzange Deiner
SKOTTI CAP. Steck die Hölzer so zusammen, dass die beiden
Enden zusammengelegt eine Spitze ergeben und die SKOTTI-
Logos auf den Hölzern nach außen zeigen. Steck den fertigen
Griff dann von außen in die noch freien rechteckigen Löcher
der beiden langen Seitenteile.
Fertig
3 ABBAU:
SO STECKST DU DIE SKOTTI CAP WIEDER IN DIE TASCHE
Sobald Deine SKOTTI CAP nach dem Grillen abgekühlt ist,
kannst Du sie schnell wieder platzsparend in der Planentasche
verstauen. Mach das ganz einfach in der umgekehrten Aufbau-
Reihenfolge.
Also: Bau den Griff bzw. die Grillzange auseinander. Entriegle
nun die großen Nasen des Deckelblechs, indem Du sie nach
oben hebst. Dann kannst Du nacheinander das kleine Kopfteil,
das Deckelblech, ein Seitenteil und das Fußteil abbauen.

3130
ABBAU
ES
MANUAL DE INSTRUCCIONES
4 AUFBAUVARIANTEN:
IMMER SCHÖN FLEXIBEL BLEIBEN
Skotti CAP als Haube
(zum indirekten Grillen)
Skotti CAP als Deckel
(leicht schräg) Skotti CAP als Deckel
(echt schräg)
Skotti CAP als Drehspießaufsatz
(Spieß bald im Shop erhältlich) Skotti CAP-Tasche
(hält alles zusammen)
Skotti CAP als Windschutz

PELIGROS DE SKOTTICAP
• ¡Mantén o coloca tu Skotti-Cap en un ángulo máximo de 80°
con respecto al suelo!
• No enciendas tu barbacoa Skotti nunca con Skotti-Cap ce-
rrada!
• Coloca tu Skotti-Cap un minuto después de encender la
barbacoa – ¡Peligro de explosión!
• Utiliza Skotti-Cap sólo para Skotti-Grill A4
• ¡Cuidado!! Los componentes accesibles de Skotti-Cap pue-
den estar muy calientes. ¡Mantén alejados a los niños!
PELIGROS CON SKOTTIGRILL
• Utiliza Skotti únicamente al aire libre.
• Familiarízate con Skotti andes de conectarlo al recipiente de
gas.
• Maneja Skotti únicamente con una mezcla de gas butano /
propano común según EN417. Utiliza para ello sólo cartu-
chos atornillados autorizados de un máximo de 500 g.
• Conectar otros recipientes de gas o mezclas de gas puede
ser muy peligroso.
• Asegúrate antes de llevar a cabo la conexión, de que las
juntas entre Skotti y el cartucho de gas están disponibles y en
perfecto estado.
• No utilices nunca Skotti con juntas defectuosas o gastadas.
• No utilices nunca Skotti si el suministro de gas está defec-
tuoso o averiado o no funciona correctamente.
• Maneja Skotti siempre sobre una superficie segura y recta.
• Cumple con todas las advertencias y este manual de instruc-
ciones al utilizar la barbacoa.
• ¡Cuidado! Skotti y todos sus componentes pueden estar muy
calientes. Mantén a los niños alejados del Skotti, también
durante el enfriamiento una vez que ha sido utilizado.
3332
MANUAL DE INSTRUCCIONES
MANUAL DE INSTRUCCIONES
A partir de ahora podrás asar con Skotti con facilidad no sólo en
cualquier lugar, sino también «happy con Cappy». Nuestro Skotti
CAP es tu tapa Skotti, tu protector de viento, tu juego de
brochetas giratorias, tu tostadora y mucho más, incluyendo una
práctica pinza.
Lee este manual de instrucciones con atención y al completo
para familiarizarte con el uso del Skotti CAP antes de utilizarlo
con tu Skotti.
Guarda este manual de uso para volver a leerlo o poder entre-
gárselo a otros usuarios.
Fabricante: Vennskap GmbH & Co. KG
Descripción de los instrumentos:
Tapa desmontable para barbacoa Skotti «Skotti CAP»
LOS PELIGROS DE LA GORRA SKOTTI
/ LOS PELIGROS DE LA BARBACOA SKOTTI

Consejo:
Encontrarás instrucciones de montaje como peque-
ño vídeo demostrativo en www.skotti-grill.eu
6
3
4
52
1
3534
VAMOS ALLÁ
1 VAMOS ALLÁ:
TODO LO QUE INCLUYE TU SKOTTI CAP
Tu Skotti CAP se encuentra embalada ahorrando espacio ante tí –
en nuestra práctica bolsa de transporte de lona resistente. Coloca
la bolsa con el logotipo grande y las asas hacia arriba ante tí en
una superficie firme y lisa. Ábrela con cuidado por el velcro para
que no se caiga ningún componente y despliégala por completo.
Et voilà! Ante tí se encuentran 5 piezas de acero inoxidable dura-
deras para tu Skotti CAP. En los bolsillos intermedios encontrarás
otras 3 piezas para tus pinzas Skotti, que al mismo tiempo son tu
asa para la Skotti CAP. Tu Skotti CAP se monta en un abrir y cerrar
de ojos con estos 8 componentes. Con un poco de práctica lo con-
seguirás en menos de 1 minuto.
¡Que te diviertas deteniendo el tiempo!
1 x pinzas Skotti/ asa Skotti CAP
1 x pieza lateral larga con marca Δ
1 x pieza lateral larga sin marca Δ
1 x soporte pequeño con marca Δ
1 x cabezal pequeño sin marca Δ
1 x placa radiante grande
1
2
3
4
5
6
TODO LO QUE INCLUYE TU SKOTTI CAP

3736
MONTAJE
2 MONTAJE:
DE 8 HAZ 1 EN 6 PASOS
Paso 1:
• Coge la pieza lateral larga con el logotipo de Skotti y la marca Δ
pequeña de arriba con tu mano izquierda.
• Coge el pequeño soporte con marca Δ de arriba en la mano
derecha y encájalo en las juntas de conexión Δ.
Paso 2:
• Encaja el soporte pequeño a la junta de conexión fina que aún
está libre de la misma manera a la segunda pieza lateral larga
por el lado con el logotipo de Skotti.
MONTAJE
Paso 3:
• Coloca la placa radiante larga con el abombamiento hacia aba-
jo y la lengüeta grande con la marca Δ en dirección al soporte
entre las tres paredes.
• Procura que los ganchos y las lengüetas se encuentren a la
altura de la ranura.
• Inserta primero la lengüeta grande con la marca Δ de la placa
radiante en las ranuras del soporte pequeño previstas para
ello. Entonces inserta los ganchos de la placa radiante en las
ranuras de las piezas laterales grandes y empuja esta hacia las
ranuras del so porte pequeño hasta que veas las marcas Δ de
la lengüeta grande.

3938
MONTAJE
Paso 4:
• Coge ahora el pequeño cabezal. Insértalo desde arriba en las
juntas de conexión que aún están libres en la pieza lateral
grande y desplázalo hasta el tope inferior.
Paso 5:
Bloquear Skotti CAP
• Como último paso de montaje presiona la placa radiante a los
dos ganchos más grandes que sobresalen por los laterales
otra vez hacia atrás hacia el cabezal pequeño para encajar la
Skotti CAP de manera audible.
MONTAJE
Paso 6:
Montaje del asa/tenazas de barbacoa
• Coge sólo 3 partes para el asa o las pinzas de barbacoa de tu
Skotti CAP. Encaja las maderas las unas con las otras de for-
ma tal que cuando los extremos se junten formen una punta
y los logotipos de Skotti queden en la parte exterior. Encaja el
asa terminada desde fuera en los agujeros rectangulares de
las piezas laterales largas.
¡Terminado!
3 DESMONTAJE:
ASÍ VUELVES A GUARDAR SKOTTI CAP EN LA BOLSA
Tan pronto como se haya enfriado tu Skotti CAP puedes volver a
colocarla rápidamente y ahorrando espacio en la bolsa de lona.
Hazlo de forma sencilla en el orden contrario al de montaje.
Es decir: Retira el asa o la pinza de la parrilla. Desbloquea las
lengüetas grandes de la placa radiante elevándolas hacia arriba.
Entonces puedes desmontar el pequeño cabezal, la placa ra-
diante, una pieza lateral y el soporte uno detrás de otro.
Table of contents
Languages:
Popular Grill manuals by other brands

Spirit
Spirit 210 premium Assembly guide
Dansons Group
Dansons Group PIT BOSS PRO Series Assembly and operation

Sears
Sears Kenmore 122.16648901 Use and care guide

Livoo
Livoo KAMADO DOC283 instruction manual
Nexgrill
Nexgrill DELUXE 720-0958D Operating instruction
Grandhall
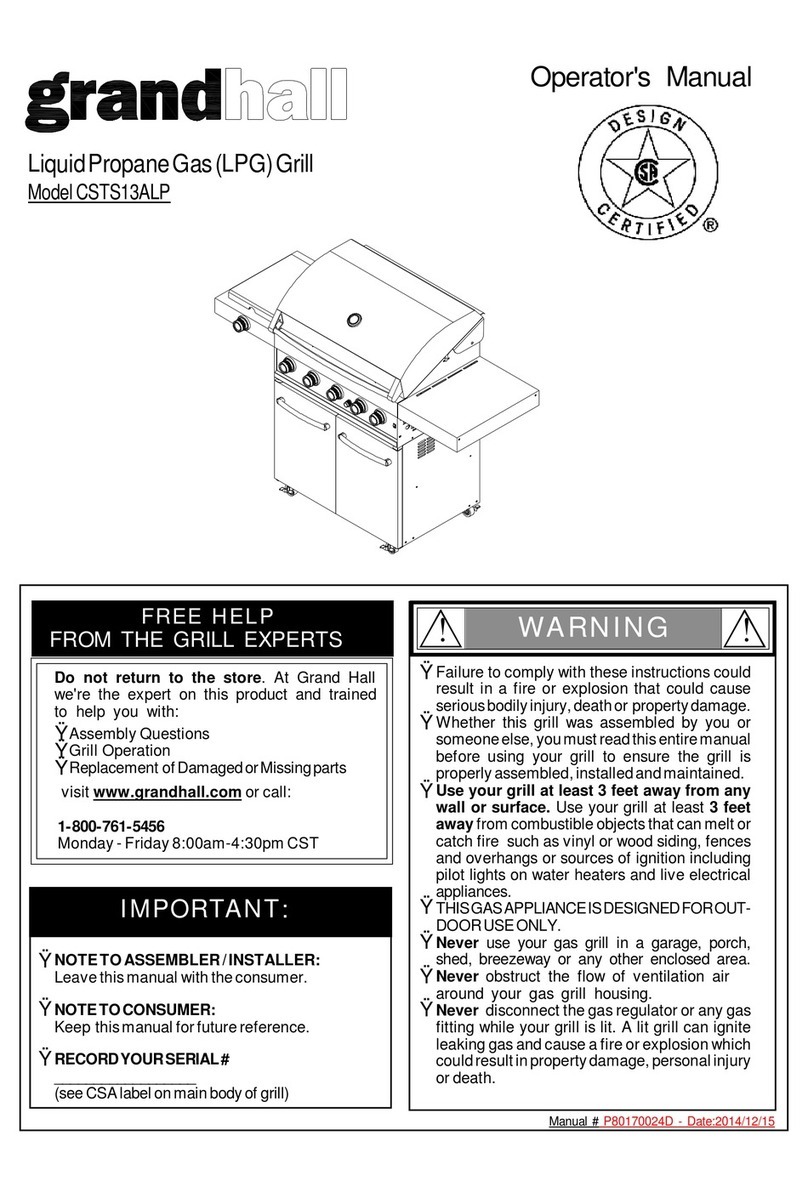
Grandhall CSTS13ALP Operator's manual
