Sleep Science Q Series User manual

Sleep
l
Science
e
e™
advan
ce
d
techno
l o
gy
co
mf
o
rt
systems
Q SeriesAdjustable Base User's Manual
THIS MANUALCONTAINS IMPORTANT SAFETY INFORMATION.
PLEASE READ AND KEEP FOR FUTURE REFERENCE
Serial Number:
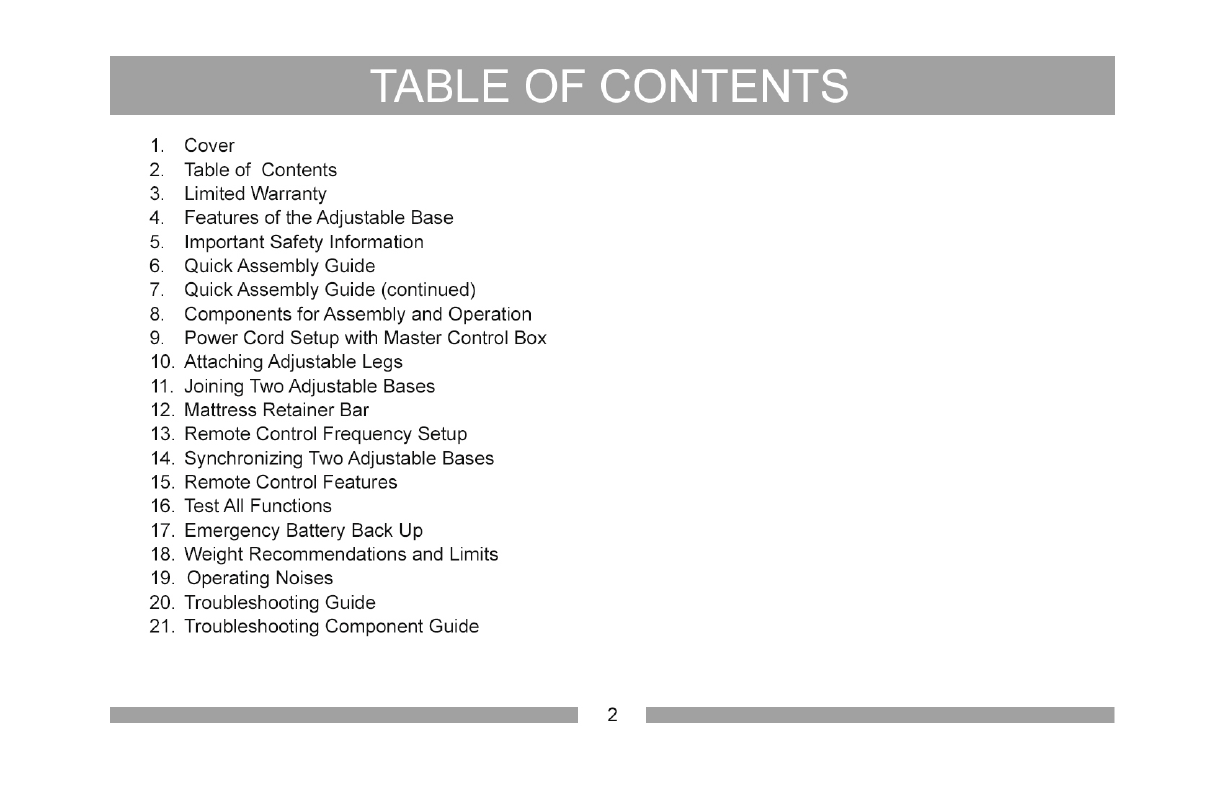
TABLE
OF
CONTENTS
1.
Cover
2. Table of Contents
3.
Limited Warranty
4. Features ofthe Adjustable Base
5.
Important Safety Information
6. QuickAssembly Guide
7. QuickAssembly Guide (continued)
8.
Components forAssembly and Operation
9. Power Cord Setup with MasterControl Box
10. Attaching Adjustable Legs
11.
Joining Two Adjustable Bases
12. Mattress Retainer Bar
13. Remote Control Frequency Setup
14. Synchronizing TwoAdjustable Bases
15. Remote Control Features
16. Test All Functions
17. Emergency Battery Back Up
18. Weight Recommendations and Limits
19. Operating Noises
20. Troubleshooting Guide
21. Troubleshooting Component Guide
2

10 Year Limited Warranty

Features
of
the
Q Series
Adjustable
Base
Head and foot up/down positions
5 button wireless remote control
Pre-programmed flat position
Six legs with customizable heights
Undercarriage is made with reinforced steel components for strength and durability
Emergency backup battery box
Mattress foot retainer bar
Notes:
This base is designed to fit with
in
a standard bedframe.
The legs must
be
installed onto the adjustable base; the base will not operate properly without
the
m. Legs
MUST
be a MINIMUM
of
6" to allow for articulating clearance. IMPORTANT: Using ONLY one 3" segment
of
the leg will result
in
damage to the bas
e,
void
the warranty for improper use and may cause damage to the
fl
oor.
4
Need Assistance? Call us
at
1-800-723-0316 from 8:00am to 5:00pm
PDT
Monday -Friday

Important
Safety
Information
Please read all instructions carefully before assembling this product.
For your safety, assembly by two
or
more adults is strongly recommended.
This product is not intended for children; always supervise children when operating this product.
CAUTION: Do
not
place the adjustable bed base
or
any
of
its components
near
or
in
water.
5
Need Assistance? Call us
at
1-800-723-0316 from 8:00am to 5:00pm PDT Monday -Friday
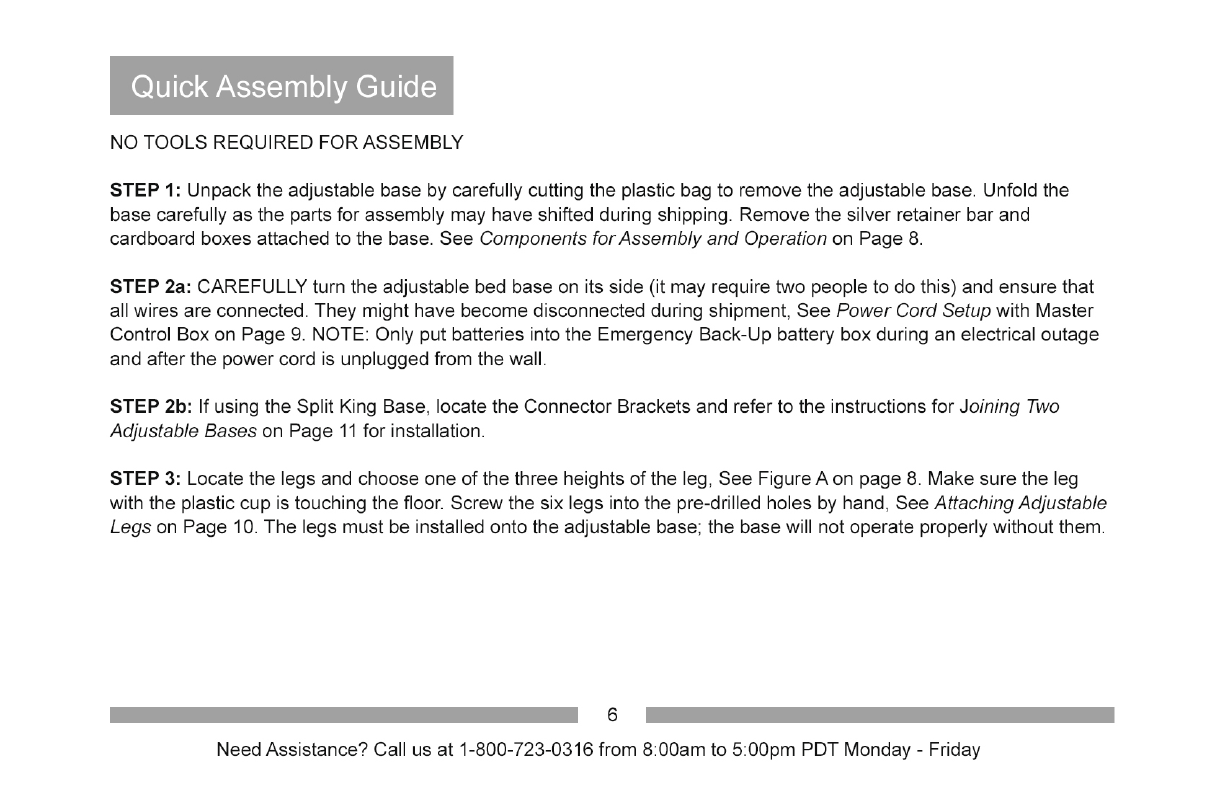
Quick
Assembly
Guide
NO
TOOLS REQUIRED FORASSEMBLY
STEP 1: Unpack the adjustable base
by
carefully cutting the plastic bag to remove the adjustable base. Unfold the
base carefully as the parts for assembly may have shifted during shipping. Remove the silver retainer bar and
cardboard boxes attached to the base. See Components forAssembly
and
Operation on Page
8.
STEP 2a: CAREFULLY turn the adjustable bed base on its side (it may require two people to do this) and ensure that
all wires are connected. They might have become disconnected during shipment, See Pow
er
Cord Setup with Master
Control Box on Page
9.
NOTE: Only put batteries into the Emergency Back-Up battery box during
an
electrical outage
and after the power cord is unplugged from the wall.
STEP 2b:
If
using the Split King Base, locate the Connector Brackets and refer to the instructions for Joining Two
Adjustable Bases on Page
11
for installation.
STEP 3: Locate the legs and choose one
of
the thr
ee
heights
of
the leg, See Figure A on page
8.
Make sure the leg
with the plastic cup
is
touching the floor. Screw the six legs into the pre-drilled holes
by
hand, See AttachingAdjustable
Legs on Page 10. The legs must be installed onto the adjustable base; the base will not operate properly without them.
6
Need Assistance? Call us
at
1-800-723-0316 from 8:00am to 5:00pm PDT Monday -Friday
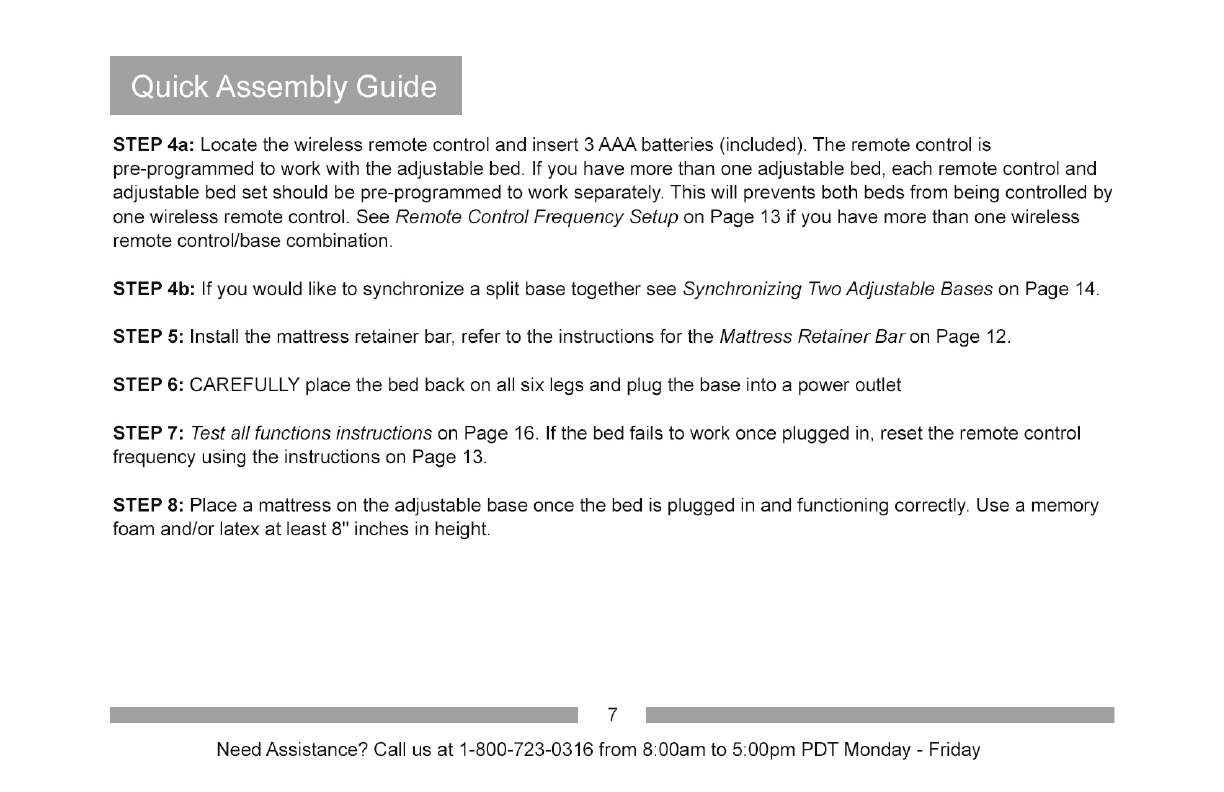
Quick
Assembly
Guide
STEP 4a: Locate the wireless remote control and insert 3
AAA
batteries (included). The remote control is
pre-programmed to work
wit
h the adjustable bed. If you have more than one adjustable bed, each remote control and
adjustable bed set should be pre-programmed to work separately. Th
is
will prevents both beds from being cont
ro
lled by
one wireless remote control. See Remote ControlFrequency Setup on Page 13
if
you have more than one wireless
remote control/base combination.
STEP 4b: Ifyou would like to synchronize a split base together see Synchronizing
Two
Adjustable Bases on Page
14
.
STEP
5:
Install the mattress retainer bar, refer to the instructions forthe Mattress Retainer
Bar
on Page 12.
STEP
6:
CAREFULLY place the bed back on all six legs and plug the base into a power outlet
STEP 7: Test allfunctions instructions on Page 16. Ifthe bed fails to work once plugged in, reset the remote control
frequency using the instructions on Page 13.
STEP
8:
Place a mattress on the adjustable base once the bed is plugged in and functioning correctly. Use a memory
foam and/or latex
at
least 8" inches in height.
7
Need Assistance? Call us
at
1-800-723-0316 from 8:00am to 5:00pm PDT Monday -Friday
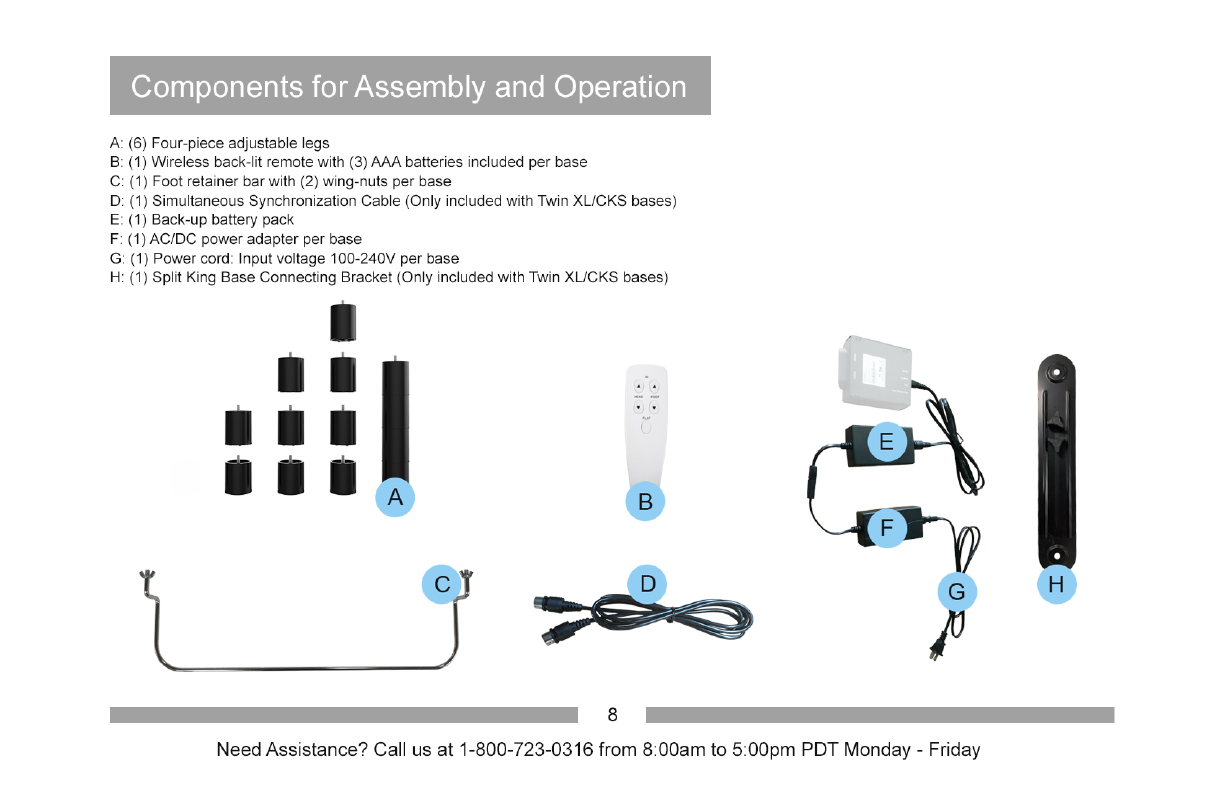
Components
for
Assembly
and
Operation
A: (6) Four-piece adjustable legs
B:
(1) Wireless back-lit remote with (3) AAA batteries included per base
C: (1) Foot retainer barwith (2) wing-nuts per base
D: (1) Simultaneous Synchronization Cable (Only included with Tw
in
X
UCKS
bases)
E:
(1) Back-
up
battery pack
F:
(1) AC/DC power adapter per
ba
se
G: (1) Powercord: Inputvoltage 100-240V per base
H: (1) Split King Base Connecting Bracket (Only i
nc
luded with Twin XL/CKS bases)
I
ii
iii
---
~
j
l
___
_
B
8
G
I
Need Assistance? Call us
at
1-800-723-0316 from 8:00am to 5:00pm PDT
Monday
-
Fr
iday
H

Power
Cord
Set
Up
with
Master
Controller
Power Cord
I
nput
Voltage 100-240V
Battery
Ba
ck
Up
Box
Master Control Box
9
Need Assistance?
Call
us
at
1-800-723-0316 from
8:00am
to
5:00pm
PDT
Monday
-
Fr
i
day

Attaching
Adjustable
Legs
The legs must be installed onto the ad
jus
table base; the base will not operate properly without them. L
egs
MUST
be
a MINIMUM
of
6"
to
all
ow
for
articulating
cl
eara
nc
e.
IMPORTANT: Using O
NL
Y one 3" segment
of
the leg will result in damage to the base, void the warranty for improper
use
and
may
cause
da
mage to the floor.
10
Need Assistance? Call us
at
1-800-723-0316 from 8:00am to 5:00pm PDT Monday -Friday
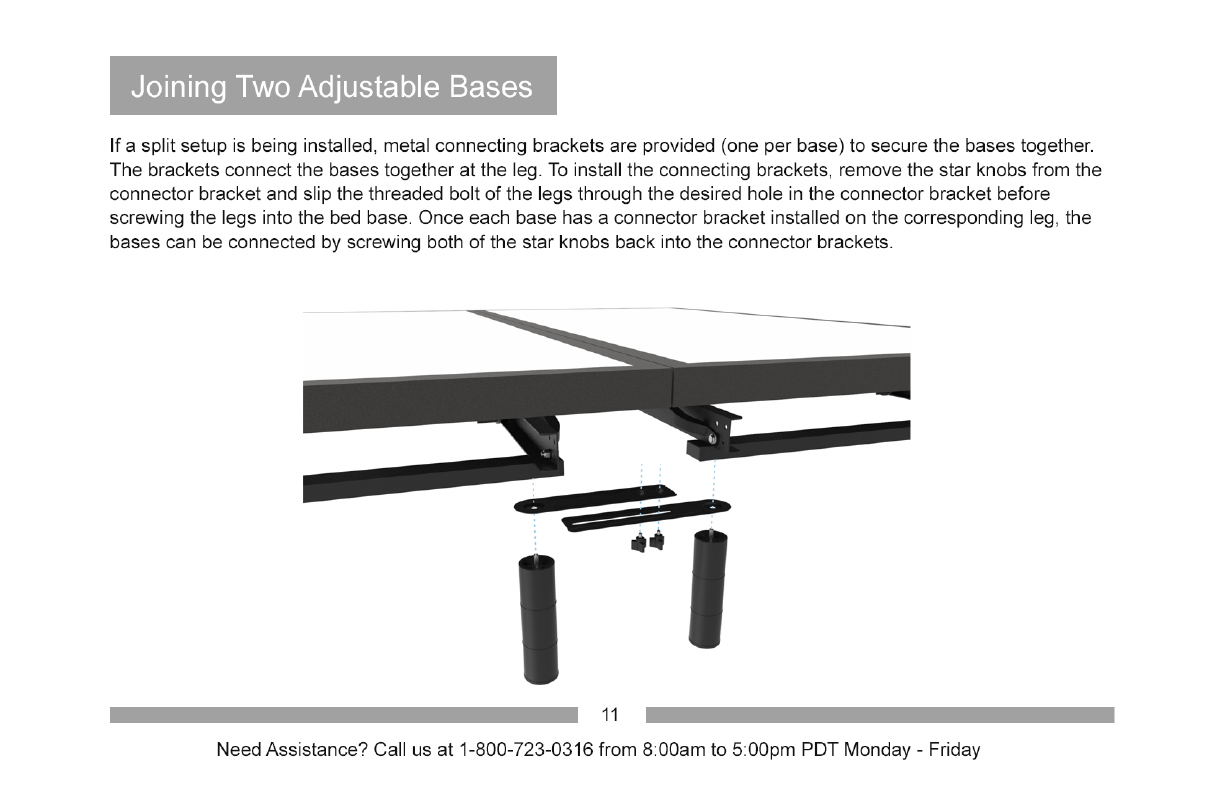
Joining
Two
Adjustable
Bases
Ifa split setup is being installed, metal connecting brackets are provided (one per base) to secure the bases together.
The brackets connect the bases together
at
the leg.
To
install the connecting brackets, remove the star knobs from the
connector bracket and slip the threaded bolt
of
the legs through the desired hole in the connector bracket before
screwing the legs into the bed base. Once each base has a connector bracket installed on the corresponding leg, the
bases can be connected by screwing both
of
the star knobs back into the connector brackets.
a
••
I
11
Need Assistance? Call us
at
1-800-723-0316 from 8:00am to 5:00pm
PDT
Monday - Friday

Mattress Retainer
Bar
To
Install the mattress retainer bar:
STEP 1: Locate the chrome mattress retainer bar in the packaging.
STEP 2: At the foot
of
the base, there are two openings to insert the mattress retainer
bar.
Slide the large retainer bar
into the opening
at
the foot
of
the bed.
STEP 3: Secure the retainer bar with the included wing-nuts. This will hold the mattress retainer bar in place.
See Figure 1 and Figure 2 below.
Figure 1 Figure 2
12
Need Assistance? Call us
at
1-800-723-0316 from 8:00am to 5:00pm PDT Monday -Friday
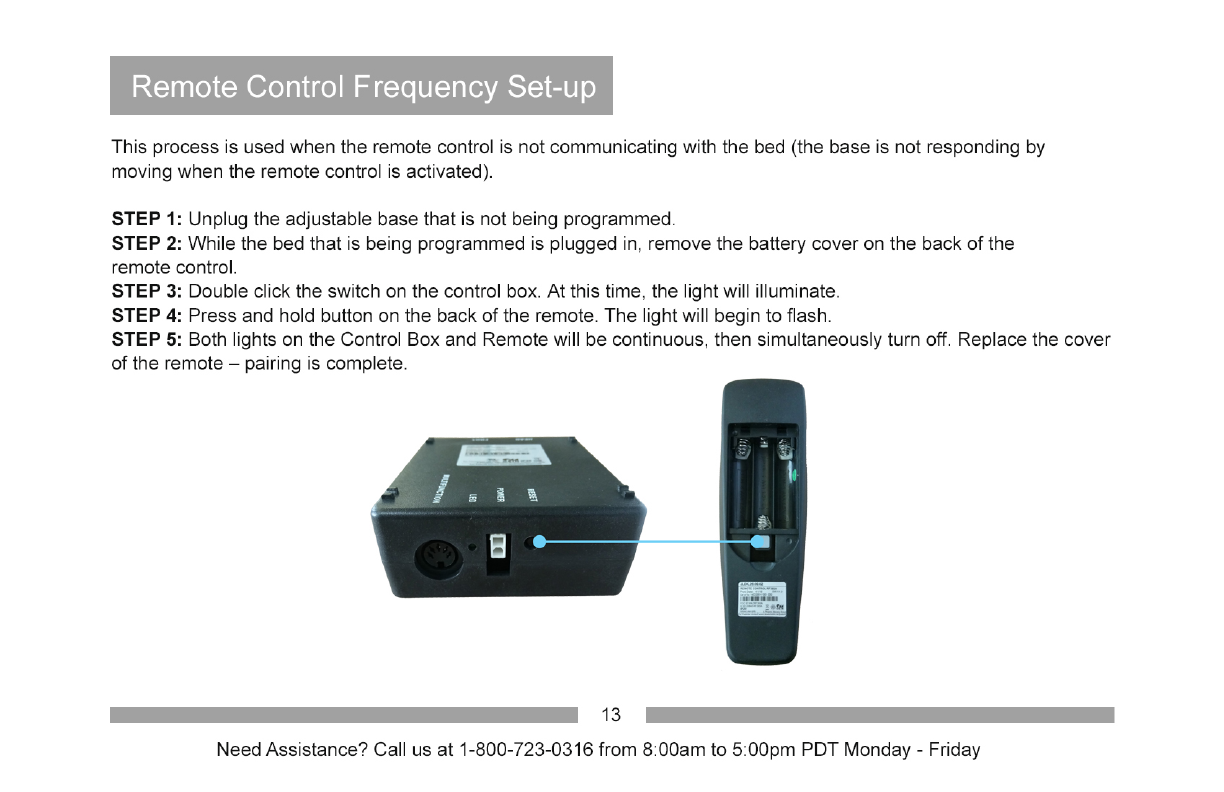
Remote Control Frequency Set-up
This process is used when the remote control is notcommunicating with the bed (the base is not responding
by
moving when the remote control is activated).
STEP 1: Unplug the adjustable base that is
not
being programmed.
STEP 2: While the bed that is being programmed is plugged in, remove the battery cover on the back
of
the
remote control.
STEP 3: Double click the switch on the control box.
At
this time, the light will illuminate.
STEP 4: Press and hold button on the back
of
the remote. The light will begin to flash.
STEP 5: Both lights
on
the Control Box and Remote will be continuous, then simultaneously tu
rn
off. Replace the cover
of
the remote -pairing is complete.
13
Need Assistance? Call us
at
1-800-723-0316 from 8:00am to 5:00pm PDT Monday -Friday
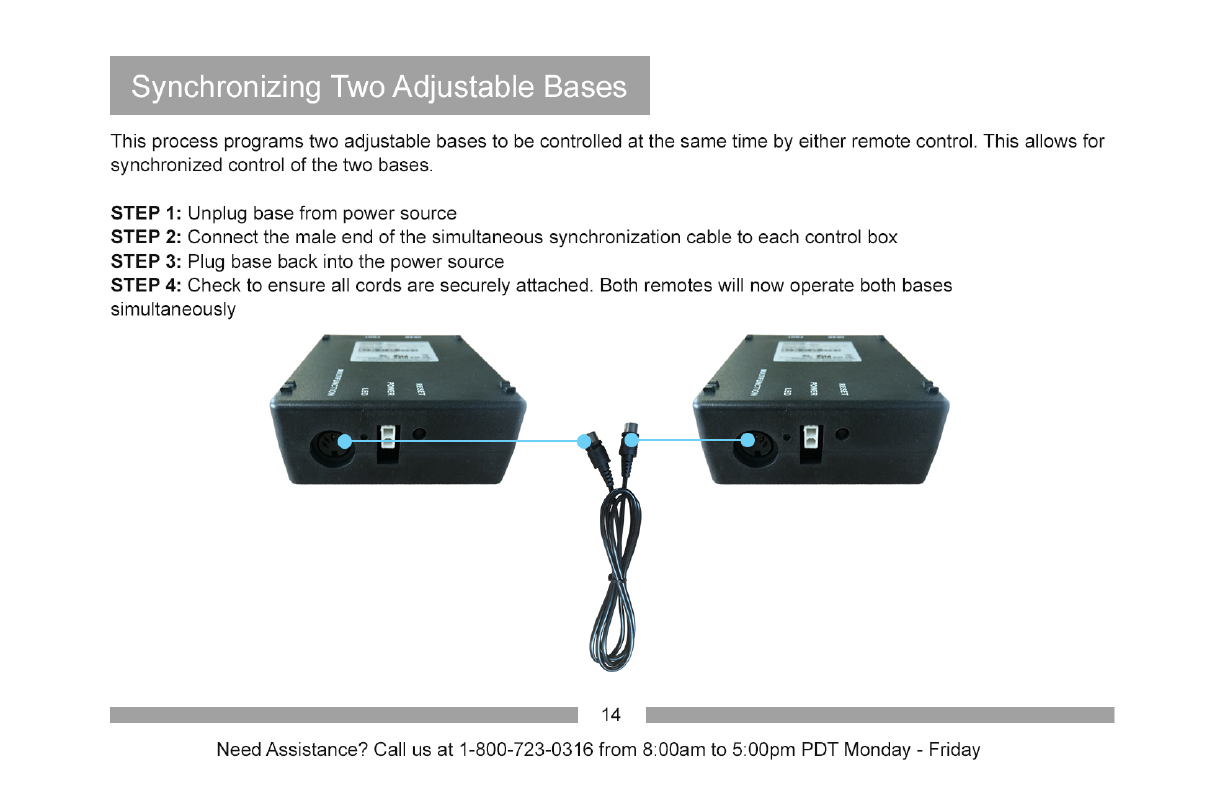
Synchronizing
Two
Adjustable
Bases
This
process
programs
two
ad
justable bases to be controlled
at
the
same
time
by
eith
er
remote
control. This allows
for
synchronized control
of
the
two
bases.
STEP 1: Unplug
base
from p
ower
source
STEP
2:
Connect
the
male end
of
the simultaneous
sync
hronization cable to
each
control
box
STEP 3: Plug
base
back
into
the
power
source
STEP 4:
Check
to
ensure
all cords
are
securely attached. Both remotes will
no
w
operate
both
bases
simultaneously
14
Need Assistance?
Call
us
at
1-800-723-0316 from
8:00am
to
5:00pm
PDT
Monda
y -
Fr
i
day

Remote
Control
Features
-
Head
Up
•) (j Foot Up
HEAD
FOOT
Head Do
wn
j (T Foot
Do
wn
FLAT
C Flat Position
15
Need Assistance? Call us
at
1-800-723-0316 from 8:00am to 5:00pm PDT Monday -Friday

Test
All
Functions
• Head up/down positions
• Foot up/down positions
• Pre-programmed flat position
16
Need Assistance? Call us
at
1-800-723-0316 from 8:00am to 5:00pm
PDT
Monday -Friday

Emergency
Battery
Back
Up
In case ofa powerfailure, the Q SeriesAdjustable Base features an emergency backup feature that allows you
to return the bed to the flat position without power.
Step
1:
Unplug the adjustable base.
Step
2:
Locate the Emergency Battery Back Up Box that is attached to the power cord.
Step
3:
Insert four 9 Volt alkaline batteries (not included) into the battery box.
Step
4:
Press and hold the emergency button on the body
of
the control box to flatten the bed.
Step
5:
Immediately remove the four 9-volt batteries after the base is returned to the flat position. The four 9-volt
batteries must be removed before power is restored to the adjustable bed base.
NOTE: Leaving in the 9 Volt batteries in the Emergency Battery Back Up Box after power has been restored will
cause the electrical components to short out and damage the master controlle
r.
17
Need Assistance? Call us
at
1-800-723-0316 from 8:00am to 5:00pm PDT Monday -Friday

Weight Recommendations and Limits

Operating
Noises
During typical operation, the wheels, which allow the bed to articulate, wi
ll
make contact with the steel platform
supports ofthe base creating a contact noise. When entering, exiting
or
shifting weight on the base, this contact noise
may be audible as the wheels make contact with the steel platform supports
of
the base. This is norma
l.
19
Need Assistance? Call us
at
1-800-723-0316 from 8:00am to 5:00pm
PDT
Monday -Friday

Troubleshooting
Guide
If
one
or
more functions on the base have stopped operating:
Check underthe bed base
to
verify that thewired connections are secure and that there
are
no
cords or bedding obstructi
ng
the
movement
of
the base.
Check that the powercord is assembled properly and that the connections
are
secure.
If the lights on your remote control
no
longer illuminate andwill not operate your adjustable bed base:
Make su
re
the batteries are installed correctly.
Install (3) newAAA batte
ri
es
in
the remote control.
If all
of
the remote control buttons illuminate, however nothing on your adjustable bed basewill operate:
Unplug the base for 5 minutes
to
reset t
he
electronic components.
Pl
ug
the adjustable base into a different electrical
out
l
et
,
or
test current outletwith another worki
ng
appliance(a grounded,
electrical surge protector is recommended.)
Complete the "RemoteControl
Fr
equency Set
Up
" on page 13 as the frequency on the
bed may have been lost.
If the head
or
foot mechanisms will elevate but will not retu
rn
to the flat position:
Check the undercarriage for obstruct
io
n
s.
Remove any obstructions away from the head and foot mechanisms and return the base
to
its flat
position.
If you have any questions regardi
ng
this product or if you need assistancewith set up and troubleshooting, please call
Cus
tomer
Service: 1-800-723-0316
20
Need Assistance? Call us
at
1-800-723-0316 from 8:00am to 5:00pm
PDT
Monday - Friday
Table of contents


