manuals.online logo
Brands
  1. Home
  2. •
  3. Brands
  4. •
  5. Smeg
  6. •
  7. Washer
  8. •
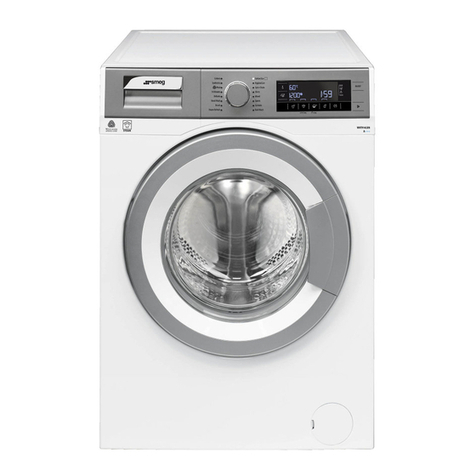
  9. Smeg LBB16AZ User manual

Smeg LBB16AZ User manual

Other manuals for LBB16AZ

1

This manual suits for next models

9

Other Smeg Washer manuals

Smeg LBE16 User manual

Smeg

Smeg LBE16 User manual

Smeg WHT812LSIT User manual

Smeg

Smeg WHT812LSIT User manual

Smeg K430CT1 Instructions for use

Smeg

Smeg K430CT1 Instructions for use

Smeg STA120 User manual

Smeg

Smeg STA120 User manual

Smeg LBW508CIT User manual

Smeg

Smeg LBW508CIT User manual

Smeg SWM107ES User manual

Smeg

Smeg SWM107ES User manual

Smeg WHTS914LSSA User manual

Smeg

Smeg WHTS914LSSA User manual

Smeg SWM126MD User manual

Smeg

Smeg SWM126MD User manual

Smeg SW86-1 User manual

Smeg

Smeg SW86-1 User manual

Smeg LBB14PB User manual

Smeg

Smeg LBB14PB User manual

Smeg Washing Machine K85 User manual

Smeg

Smeg Washing Machine K85 User manual

Smeg LBW60IT User manual

Smeg

Smeg LBW60IT User manual

Smeg LBW912IT User manual

Smeg

Smeg LBW912IT User manual

Smeg SAWS 8160-1 User manual

Smeg

Smeg SAWS 8160-1 User manual

Smeg LBS108F User manual

Smeg

Smeg LBS108F User manual

Smeg LB502 Installation and operation manual

Smeg

Smeg LB502 Installation and operation manual

Smeg 47P User manual

Smeg

Smeg 47P User manual

Smeg WMI16AAA User manual

Smeg

Smeg WMI16AAA User manual

Smeg SAWS 8160 User manual

Smeg

Smeg SAWS 8160 User manual

Smeg LBS106-9 User manual

Smeg

Smeg LBS106-9 User manual

Smeg WHT712EIN User manual

Smeg

Smeg WHT712EIN User manual

Smeg WMF147-2 User manual

Smeg

Smeg WMF147-2 User manual

Smeg KSE120 User manual

Smeg

Smeg KSE120 User manual

Smeg WM127IN User manual

Smeg

Smeg WM127IN User manual

Popular Washer manuals by other brands

Zanussi ZWF 14080 W user manual

Zanussi

Zanussi ZWF 14080 W user manual

Zanussi FV 825 N Instruction booklet

Zanussi

Zanussi FV 825 N Instruction booklet

LG WM8000HVA Specifications

LG

LG WM8000HVA Specifications

Whirlpool 3RGSC9400 Use and care guide

Whirlpool

Whirlpool 3RGSC9400 Use and care guide

Zanussi TJ 1284 H instruction manual

Zanussi

Zanussi TJ 1284 H instruction manual

AEG KO-LAVAMAT 74740 User information

AEG

AEG KO-LAVAMAT 74740 User information

Beko WSRE7512PRA user manual

Beko

Beko WSRE7512PRA user manual

Whirlpool LA5OOOXP Use and care guide

Whirlpool

Whirlpool LA5OOOXP Use and care guide

Miele PW 6207 operating instructions

Miele

Miele PW 6207 operating instructions

GE GE Profile WWSE3160AAA Specifications

GE

GE GE Profile WWSE3160AAA Specifications

Bush WMNB712EB instruction manual

Bush

Bush WMNB712EB instruction manual

ALLIANCE UW60AV Information manual

ALLIANCE

ALLIANCE UW60AV Information manual

Bosch WAN280H3 User manual and installation instructions

Bosch

Bosch WAN280H3 User manual and installation instructions

Maytag MAT15MNAW installation instructions

Maytag

Maytag MAT15MNAW installation instructions

LG T2109VSAL owner's manual

LG

LG T2109VSAL owner's manual

Indesit IWC 61481 Instructions for use

Indesit

Indesit IWC 61481 Instructions for use

Electrolux EWF12843 user manual

Electrolux

Electrolux EWF12843 user manual

Indesit WIN 70 Instructions for use

Indesit

Indesit WIN 70 Instructions for use

manuals.online logo
manuals.online logoBrands
  • About & Mission
  • Contact us
  • Privacy Policy
  • Terms and Conditions

Copyright 2025 Manuals.Online. All Rights Reserved.

1
LAVABIANCHERIA
WASHING MACHINE
LIBRETTO ISTRUZIONI IT
INSTRUCTION MANUAL EN
2
I EN
Indice
1. Il nuovo sistema di lavaggio 3
1. T e new was ing system 25
2. Avvertenze per la sicurezza e l’uso 4
2. Safety warnings 26
3. Istruzioni per l’installazione 6
3. Installation instructions 29
4. Descrizione comandi 9
4. Description of controls 31
5. Utilizzazione della macc ina per il lavaggio 14
5. Was ing instructions 35
6. Pulizia e manutenzione 20
6. Cleaning and maintenance 41
7. Avvertenze in caso di anomalie e malfunzio-
namento 22
7. Troubles ooting 43
8. Simboli pannello comandi 24
8. Control panel symbols 45
Questo apparecc io dispone di contrassegno ai sensi della direttiva europea 2002/96/CE in materia di
apparecc i elettrici ed elettronici (Waste Electrical and Electronic Equipment - WEEE).
Il simbolo del cassonetto barrato riportato sull’apparecc iatura o sulla confezione indica c e il prodotto alla
fine della propria vita utile deve essere raccolto separatamente dagli altri rifiuti. L’utente dovrà pertanto con-
ferire l’apparecc iatura giunta a fine vita agli idonei centri di raccolta differenziata dei rifiuti elettronici ed elet-
trotecnici, oppure riconsegnarla ai rivenditori al momento dell’acquisto di una nuova apparecc iatura di tipo
equivalente, in ragione di uno a uno.
L’adeguata raccolta differenziata per l’avvio successivo dell’apparecc iatura dimessa al riciclaggio, al tratta-
mento e allo smaltimento ambientalmente compatibile contribuisce ad evitare possibili effetti negativi
sull’ambiente e sulla salute e favorisce il reimpiego e/o riciclo dei materiali di cui è composta
l’apparecc iatura.
Lo smaltimento abusivo del prodotto da parte dell’utente comporta l’applicazione delle sanzioni amministrati-
ve ai termini di legge.
T is appliance is marked according to t e European directive 2002/96/EC on Waste Electrical and Electronic Equipment
WEEE).
By ensuring t is product is disposed of correctly, you will elp prevent potential negative consequences for t e environ-
ment and uman ealt , w ic could ot erwise be caused by inappropriate waste andling of t is product.
T e symbol on t e product, or on t e documents accompanying t e product, indicates t at t is appliance may not
be treated as ouse old waste. Instead it s all be anded over to t e applicable collection point for t e recycling of elec-
trical and electronic equipment.
Disposal must be carried out in accordance wit local environmental regulations for waste disposal.
For more detailed information about treatment, recovery and recycling of t is product, please contact your local city of-
fice, your ouse old waste disposal service or t e s op w ere you purc ased t e product.
T e symbol of crossed-out w eeled bin on t e equipment or its confection indicates t at t e product at t e end of its life
utility must be collected separately from t e ot er wastes. T erefore t e user will ave to confer t e equipment t at as
reac ed t e end of its life, to t e suitable points of collection differentiated of t e electronic and electrical wastes, or to
give back it to t e retailer at t e moment of t e purc ase of one new equipment of equivalent type, in reason of one to
one.
T e suitable collection differentiated for t e recycling, t e treatment and t e environmentally compatible scrap of t e
waste equipment, contributes to avoid possible armful effects on t e environment and uman ealt and promotes t e
reuse and/or recycling of t e materials of w ic t e equipment is made.
T e illicit scrap of t e product from part of t e user involves t e application of t e administrative endorsements pre-
scribed by t e National Law
25
1. THE NEW WASHING SYSTEM
T is new was ing mac ine is t e outcome of years of researc .
T e leading-edge design and t e quality of t e production processes used to manu-
facture t is product ensure it will give you many years of excellent service.
Its concept satisfies all current and future was ing requirements.
Its low water, power and deter ent consumption help protect the environment
and reduce runnin costs to a minimum.
Water and power consumption has been reduced in all pro rammes.
T ese results were ac ieved by means of a special washin system valid for all
programmes and all fabrics.
T e drum is fitted wit t ree external vanes t at keep t e water constantly circulating,
t ereby offering intensive and uniform was ing w ilst consuming less water.
T is ensures your laundry is was ed and treated wit utmost care.
The new washin system is so effective that normally dirty laundry can even be
cleaned without a pre-wash cycle.
Was ing times ave also been reduced.
Pre-was ing is only recommended for very dirty laundry.
Please read t e operating instructions wit care in order to take full advantage of all
t e features offered by t is was ing mac ine.
Warning!
Please read all the instructions contained in this manual in order to understand how
to operate this appliance correctly and safely.
This manual is divided into paragraphs which provide a step-by-step description of
all the functions of the appliance. The instructions are easy to understand and are
accompanied by detailed illustrations.
This manual provides a quic and easy reference for answering all your questions
concerning the use of your new washing machine.
Keep this manual near the machine for future consultation.
When selling or moving the appliance, ma e sure this manual remains with the
machine.
26
2. SAFETY WARNINGS
Attention!
These warnin s are iven for safety reasons.
Please read them carefully before installin and usin the appliance.
T is manual forms an integral part of t e appliance and must t erefore be kept intact toget er wit t e
mac ine. Before using t e appliance, carefully read all t e instructions contained in t is manual. Instal-
lation must be performed by a qualified tec nician in compliance wit t e regulations in force. It as
been designed for domestic use and complies wit EEC Directives 72/23, 89/336 (including 92/31 and
93/68) currently in force. T e appliance is designed for t e following purpose: was ing linen or fabrics
declared by t eir manufacturers to be suitable for mac ine was ing by means of an appropriate sym-
bol. Any ot er use s all be considered improper. The manufacturer declines all responsibility for
uses other than those described above.
T e name plate featuring t e tec nical data, serial number and markings is visibly positioned on t e
inner edge of t e door. This name plate must never be removed.
Do not leaving discarded packaging materials unsupervised wit in t e ome. Separate t e various
packaging materials and take t em to t e nearest sorted waste collection centre.
The electrical and plumbin work require to install the appliance may only be performed by
qualified technicians.
T e appliance must be provided wit an eart connection in accordance wit t e electrical safety regu-
lations in force. The manufacturer declines all responsibility for dama e to persons or property
resultin from failure to earth the appliance or from a defective earth connection.
If t e appliance is not connected to t e electrical power supply by means of a plug, it is necessary to
install an isolation switc wit a contact opening gap of at least 3 mm.
T e plug on t e power cord and t e corresponding socket must be of t e same type and must conform
to t e regulations in force. C eck t at t e voltage and frequency of t e electrical power supply matc
t e ratings on t e name plate. Avoid using adaptors or s unt connections. Never unplug t e appliance
by pulling t e power cord.
The machine is only disconnected from the electrical power supply if the plu has been re-
moved from the socket or if the eneral switch has been turned off. After installation, the plu
must remain accessible.
T e appliance must always be connected to t e water supply wit new oses (supplied wit t e appli-
ance). Old oses must never be reused.
Make sure t e appliance does not lie on t e power cord.
Before use, make sure t e tub assembly as been released (see instructions).
If t e tub assembly as not been released, it may damage t e appliance or adjacent furniture or appli-
ances during t e spin cycle.
T e was ing mac ine must never be used in ve icles, on s ips or planes, or in special environmental
conditions suc as explosive or corrosive (powder, vapour and gas) atmosp eres or near explosive
and/or corrosive liquids.
Do not install t e was ing mac ine in areas subject to frosting. Frozen pipes may burst under pres-
sure.
Make sure t at t e drain ose is securely attached to the basin and cannot move.
If it is not securely fitted, t e repulsive force of t e water may detac it from t e basin and cause flood-
in .
W en attac ing t e ose to t e basin, make sure the water drains away rapidly and does not fill
the basin up.
Do not overload t e appliance.
Never use detergents containing solvents or c emicals.
These may dama e the machine and form poisonous fumes.
They may also catch fire and explode.
27
Do not was petrol-soaked garments in t e was ing mac ine. Make sure t ere are no inflammable
items (e.g.: lig ters, matc es, etc.) in pockets before was ing.
If volatile fluids ave been used to clean garments, make sure t at t e substances ave been removed
before loading t em in t e was ing mac ine.
Before loading garments for was ing, make sure t e pockets are empty, t e buttons securely fixed and
t e zips closed.
Do not was frayed or torn garments.
T e glass of t e door will eat up considerably w en was ing at elevated temperatures.
Make sure all the water has drained away before you open the door.
If water is present, only open t e door after draining it. If in doubt, read t e instructions manual.
The water in the machine is not drinkable!
Swallowing was ing mac ine detergents can cause lesions in your mout and t roat.
Before removing laundry from t e was ing mac ine, make sure the drum has stopped movin .
Always switc off t e appliance after use to avoid wasting electricity.
Leave t e door ajar between one was and t e next in order to keep t e gasket in good condition.
Prolon ed inactivity.
If t e mac ine is left inactive for a long period: disconnect t e mac ine from t e electricity and water
supplies and leave t e door ajar to prevent bad smells from forming.
In t e event of a fault, never attempt to repair the machine yourself. Disconnect t e appliance from
t e electrical power supply and s ut off t e water tap. T en call a qualified tec nician. Repairs may
only be performed by qualified technicians.
Repairs performed by unqualified people may be azardous for users.
Obsolete appliances must be rendered unusable: make sure that the door cannot be closed (to
prevent children from ettin trapped inside while playin and riskin their lives) and cut off
the power cord after unplu in it.
The appliance must then be taken to a sorted waste collection centre.
This appliance is intended for use by adults.
Do not allow c ildren to tamper wit t e controls or play wit t e was ing mac ine.
Do not allow children to approach the appliance while it is workin .
Keep children away from the appliance.
Small animals or c ildren may get inside t e was ing mac ine.
Always c eck t e inside of t e drum before use and do not allow children to play with the appli-
ance.
Packaging materials (plastic bags, polystyrene, metal profiles, etc.) must not be left wit in reac of
c ildren.
Keep c ildren away from t e mac ine w en t e door or detergent tray is open; t e appliance may con-
tain residues of detergent w ic can cause irreversible damage to t e eyes, mout and t roat, as well
as possible deat by suffocation.
Important !
T is appliance is easy to use.
In order to obtain t e best results, owever, read t is manual wit care and follow all t e instructions
before starting.
T e manual gives instructions and useful advice on ow to install, use and service t e appliance cor-
rectly.
The manufacture declines all responsibility for damage to persons or property resulting
from failure to observe t e above precautions, from tampering wit even just a single com-
ponent of t e appliance, or from t e use of unoriginal spare parts.
28
For Great Britain only
Warnin : t is appliance must be eart ed.
Fuse replacement
If t e mains lead of t is appliance is fitted wit a
BS 1363A 13amp fused plug, to c ange a fuse in
t is type of plug use an A.S.T.A. approved fuse to
BS 1362 type and proceed as follows:
1. Remove t e fuse cover (A) and fuse (B)
2. Fit replacement 13A fuse into fuse cover
3. Refit bot into plug
Important:
T e fuse cover must be refitted w en c anging a
fuse and if t e fuse cover is lost t e plug must not
be used until a correct replacement is fitted.
Correct replacement are identified by t e colour
insert or t e colour embossed in words on t e
base of t e plug.
Replacement fuse covers are available from your
local electrical store.
If t e appliance is provided wit a plugless supply cord:
• It is necessary to install in t e fixed wiring an all-pole disconnection device aving a gap be-
tween contacts of at least 3,5mm. After installation t e disconnection device as to be easy to
reac .
• T e connection to t e mains must be carried out by a qualified tec nician in accordance to t e
sc eme s own below and t e regulations in force
L = brown
N = blue
= yellow-green
• In t e event of damage to t e supply cord, it as to be replaced by t e manufacturer or an au-
t orized tec nical service center in order to avoid any risk.
29
3. INSTALLATION INSTRUCTIONS
Important !
The appliance must be installed by a specialised technician accordin to current re ulations.
The washin machine is very heavy. Take care when liftin it.
3.1 UNPACKING
T e inside of t e mac ine comprises a moving assembly w ic is blocked for transport purposes by t e screws
(A) located at t e rear of t e was ing mac ine.
4. Release t e assembly by removing t ese screws wit a 13 mm wrenc .
5. Remove t e screws (A) and relative spacers (B) from t e back of t e was ing mac ine.
6. To prevent water from entering t e mac ine or people from touc ing live components wit t eir fingers, close
the four holes left open by the screws with the supplied plastic plu s (C).
Attention!
• Do not turn t e mac ine upside down and do not place it on its side.
• Keep all t e components used to block t e drum assembly as t ey will be needed if you decide to move t e
appliance in future.
3.2 POSITIONING AND LEVELLING
3. Place t e appliance in t e
c osen position.
4. Carefully level t e mac ine in
all directions using a spirit
level and adjusting t e eig t
of t e feet if necessary. After
adjusting t e mac ine, lock
t e feet wit t e relative lock
nuts.
T e water inlet and drain oses can be turned to t e rig t or left depending on installation requirements.
Attention!
• Carry out this operation carefully to prevent the washin machine from vibratin , eneratin noise or
movin durin operation.
• If the appliance is installed on a carpeted floor, ensure that the openin s on its underside are not ob-
structed.
• Make sure t e was ing mac ine does not touc walls, furniture, etc., w ile it is working.
• T e appliance must not be installed be ind a lockable door, or sliding door, or a door wit inge on t e oppo-
site side to t e tumble dryer
30
3.3 WATER SUPPLY CONNECTION
2. C eck t at inlet pressure lies between t e following values: 50-900kPa. For ig er
pressures, install a pressure reducer.
4. Connect t e cold water inlet ose (li ht blue ring nut) to t e cold water tap wit a ¾
gas t read, taking care to screw it firmly into place in order to prevent leaks. T e water
inlet ose must not be bent or crus ed and must not be replaced or cut.
5. If a hot water inlet is used, inlet water temperature must not exceed 60°C and t e
ose wit t e red ring nut must be connected to t e ot water tap.
Attention!
• If t e water pipe is new or as not been used for a long time, let a certain amount of water run before attac -
ing t e inlet ose. T is stops any deposits of sand and ot er impurities from clogging t e filters used by t e
mac ine to protect t e water inlet valves.
• T e new ose-set supplied wit t e appliance are to be used and t e old ose-set s ould not be reused.
3.4 DRAIN CONNECTION
3. Insert t e end of t e drain ose into a drain pipe aving an internal diameter of at least 4 cm and a eig t
ranging between 50 and 90 cm, or attac it (using t e relative curved plastic profile) to a basin or bat tub.
4. Always c eck t at t e end of t e drain ose is securely attac ed in order to prevent t e repulsive force of t e
water from moving it out of position.
Attention!
• Do not bend or obstruct t e ose as t is will reduce t e flow of water.
• Any extensions to t e drain ose must not exceed 1 metre, t ey must ave t e same internal diameter and
must not be obstructed in any way.
• In no case may t e end of t e drain ose be submerged in water.
3.5 ELECTRICAL CONNECTION
Before fitting t e plug into t e socket, make sure t at:
4. Input voltage matc es t at indicated on t e name plate attac ed to t e inner edge of t e door.
5. T e contactor, pressure relief valves, power line and socket are capable of wit standing t e maximum
rated power input indicated on t e name plate.
6. T e socket is compatible wit t e plug supplied wit t e mac ine wit out t e need to fit multiple sockets,
adaptors or extension leads t at could cause over eating or burning.
If t e socket does not correspond to t e supplied plug, replace t e socket wit one of a suitable type.
Attention
• T e plug must be accessible after installation.
• The appliance must be earthed. Plug t e mac ine into a socket fitted wit an efficient eart connection.
The manufacturer declines all responsibility for dama e to persons or property resultin from
failure to earth the appliance or from a defective earth connection. Correct electrical connec-
tions uarantee maximum safety.
• T is appliance complies wit EEC directive 89/336 of 3.5.89 (modified by EEC directive 92/31) relative to t e
elimination of radio interference.
• If t e power cord is damaged, only replace it wit an original spare part available from our service depart-
ment.
• Do not insert/remove the plu from the socket if your hands are wet.
• Remove the plu from the socket by rippin the plu and not the cord.
31
4. DESCRIPTION OF CONTROLS
4.1 CONTROL PANEL
All t e commands and controls of t e appliance are assembled toget er on t e front panel.
Models without delayed
start option
Models with delayed
start option
Description of controls
A Open door button
B ON-OFF and pro ramme selection knob
C Time remainin s own on display LED
D Spin speed s own on display LED
E Heatin phase LED
F Display
G Select spin speed button
H Options buttons
I Options enabled LED's
L Start-Pause button
M Start-Pause button LED
N Delayed start time s own on display LED
Q Select delayed start button
R Select delayed start button LED
32
A
Open door button
Press t e button to open the door. C apter 5 – Was ing in-
structions – explains ow t e door works and ow to use it.
B
ON-OFF and washin pro-
ramme selection knob
T is knob lets you:
• switc t e mac ine on and off by moving it in eit er
direction from t e OFF position (knob indicator verti-
cal)
• select washin temperatures wit in t e various fab-
ric sectors by turning it in bot directions
T e knob does not move w ile t e programme is running.
T e programme is electronically controlled by t e mac ine.
C
Time remainin shown on
display LED
T is LED indicates t at t e display is s owing t e total dura-
tion of t e selected programme before t e programme starts,
and t e time remaining w ile t e programme is running.
D
Spin speed shown on dis-
play LED
T is LED indicates t at t e display is s owing t e maximum
spin speed for t e selected programme. It stays on w ile spin
speed is being selected wit t e relative button.
E
Heatin phase LED
During t e eating cycle, t is LED indicates t at t e pro-
gramme is in t e was ing water eating p ase.
F
Display
T e display s ows t e following information:
7. time remainin for t e selected programme, given
in ours/minutes.T e stated value is an estimate based on t e
mac ine's normal ope
rating parameters (size of load, incoming
water temperature, etc.). T e program time may t erefore be a
few minutes longer or s orter t an stated ere.
8. delayed start (for models featuring t is option).
Given in ours/minutes. W en t e time remaining before
t e
programme starts is less t an 60 minutes, t is information is
given in minutes/seconds.
9. spin speed
10. cycle pause - flas ing STOP
11. end of cycle - END
12. error codes
To find out w ic of t e first 3 pieces of information are
s own on t e display, c eck w ic
of t e LED's, C, D, or N (t e
latter for models featuring t e delayed start option) is lit.
G
Select spin speed button or
stop with tub full
Press t e button repeatedly to select t e required spin
speed. T e following spin speeds are available:
• 0000: spin disabled and stop wit tub full. T e ma-
c ine does not perform t e final spin and ends t e
was ing programme wit water in t e tub. To drain
t e water, see t e explanations s own in paragrap
5.14
• from 600 rpm to the maximum speed indicated for
the model: for cotton and coloured programmes,
speed increases by 100 rpm starting from 600 rpm
up to t e maximum speed indicated for t e model
• from 600 to 900 rpm: for synthetics, delicates and
woollens programmes, speed increases by 100 rpm
starting from 600 rpm up to 900 rpm.