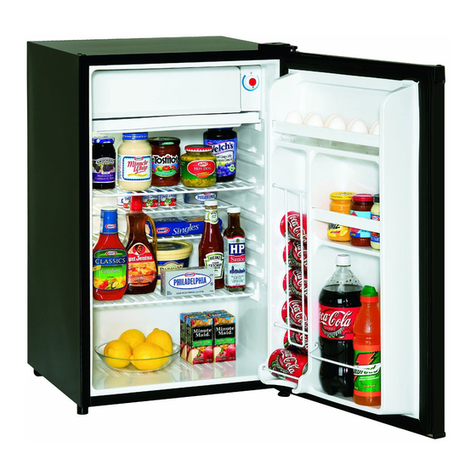
SnackMate 3.3SM4R User manual

CAUTION:
Read and follow all safety
rules and operating
instructions before first use
of this product.
PRÉCAUTION:
Veuillez lire attentivement
les consignes de sécurité et
les instructions d'utilisation
avant l'utilisation initiale de
ce produit.
OWNER’S MANUAL
MANUEL DE
L’UTILISATEUR
Model • Modèle
3.3SM4R
3.3SM4R
25.04.14
ALL REFRIGERATORS
• Before Putting Into Use ..............................................................
• Important ....................................................................................
• Placing and Installation...............................................................
• Refrigerator bracket & Microwave installation ...........................
• Description of the Appliance.......................................................
• Operation Control ......................................................................
• Maintenance and Cleaning ........................................................
• Changing the Direction of opening the Door .............................
• Trouble Shooting Guide .............................................................
• Bulb Replacement ......................................................................
• WARRANTY ..............................................................................
LES TOUT RÉFRIGÉRATEURS
• Avant la mise en marche ...........................................................
• Important ....................................................................................
• Placement et installation ............................................................
• Support du réfrigérateur et installation du micro-ondes .............
• Description de l’appareil .............................................................
• Contrôle du fonctionnement .......................................................
• Entretien et nettoyage ................................................................
• Changer le sens d’ouverture de la porte ...................................
• Guide de dépannage .................................................................
• Changer l’ampoule .....................................................................
• GARANTIE .................................................................................
2
2
3
4
5
6
7
8
9
10
11
13
13
14
15
16
17
18
19
20
21
22

All Refrigerators
This Refrigerator is for domestic use only and is intended
for storing fresh foods at temperatures higher than 0° /
32°F.
1
SAVE THESE INSTRUCTIONS
Before Putting Into Use ....................................2
Instructions for Use
Tips for Energy Savings
Important ............................................................2
Placing and Installation ....................................3
Choosing the Right Place
Placing the Self-standing Appliance
Connection to Power Supply
Refrigerator bracket & Microwave
Installation ..........................................................4
Description of the Appliance ...........................5
Operation Control .............................................6
Temperature Selection
Maintenance and Cleaning ...............................7
Automatic Defrosting of the Refrigerator
Cleaning the Appliance
Switch Off the Appliance When Not In Use
Changing the Direction of the
Door Opening (swing) ......................................8
Trouble-Shooting Guide ...................................9
Bulb Replacement .............................................10
Warranty...............................................................11

Before Putting Into Use
2
• Before connecting the appliance to electrical power supply, let it stand for about 2 hours, which will reduce
the possibility of malfunctions in the cooling system due to transport handling.
• Clean the appliance thoroughly, especially in the interior (See Cleaning and Maintenance).
• In case the interior accessories are not correctly placed, rearrange them as described in chapter
"Description of the Appliance".
Instructions for Use
These instructions for use are intended for the user. They describe the appliance and correct operating
procedures for safe use.
SAVE THESE INSTRUCTIONS
Tips for Energy Savings
• Try not to open the door too often, especially when the weather is hot and humid. Once you open the door,
close it as soon as possible. This is especially important if you have an upright model.
• Every now and then check if the appliance is sufficiently ventilated (adequate air circulation behind the
appliance).
• Set the thermostat from higher to lower settings as soon as possible (depends on how loaded the
appliance is, ambient temperatures, etc.)
• Before loading the appliance with packages of fresh foods, make sure that they are cooled to ambient
temperature. (excluding soups).
• Ice and frost layers increase energy consumption, so clean the appliance as soon as the frost layer is 1/8-
1/4 inch thick.
• If the gasket is damaged or the door seal is poor, energy consumption is substantially higher. To restore
efficiency, replace the gasket.
• Always consider instructions stated in sections Positioning and Energy Saving Tips, otherwise the energy
consumption is substantially higher.
Important Read all safety information before using
Risk of fire or explosion due to puncturing of refrigerant tubing. Do not use sharp objects to aid in defrost.
Please handle with care. Keep flammable materials and vapors such as gasoline away from the
refrigerator. Use nonflammable cleaner.
Disposal of this unit should be in accordance with federal and local regulations.
WARNING! EXPLOSION HAZARD!
An empty refrigerator is a very dangerous attraction to children. Remove the gasket, latches, lids or doors
from unused appliances, or take some other action that will guarantee the appliance harmless.
DANGER: Risk of child entrapment. Before you throw away your old refrigerator:
• Take off the doors.
• Leave the shelves in place so that children may not easily climb in.
DON’T WAIT! DO IT NOW!
IMPORTANT WARNING!

Important
• The appliance must be properly connected to an electrical power supply. (See: Connection to Power Supply).
• Always disconnect the appliance from the power supply before cleaning the appliance or replacing the light bulb.
WARNING: repairs should be preformed by qualified service personnel only.
• Do not defrost the appliance with other electric appliances (for example a hair dryer) and never attempt to
scrape/remove ice/frost with sharp objects.
• The rating plate containing Model No/Serial No and other technical data specific to this unit, is located either inside the
appliance or outside on the rear wall.
• The refrigerator system of the appliance is filled with refrigerant and insulating substances which should be separately
treated and processed. Call your nearest authorized service agent or specialized servicing center. If you are unable to
locate one, contact your local authorities or your distributor. Be careful not to damage the tubes on the rear wall of the
appliance (danger of pollution).
3
Placing and Installation
Choosing the right place
Place the appliance in a dry and regularly ventilated
room. Never place the appliance near heat emitting
devices (e.g. cooking appliances, radiators, water
heaters or similar devices) and do not expose to direct
sunlight.
The appliance should be positioned at least 1.2 inches
(3 cm) away from electric or gas cooking appliances
and at least 12 inches away from oil or coal fired stoves.
If this is not possible, use an appropriate insulation
barrier.
Installation
Place the appliance firmly on a solid base. Some
appliances have adjustable feet on the front side; use
them to level the appliance.
WARNING
Instructions pertaining to the risk of fire, electric shock,
or injury to persons.
Grounding Instructions
This appliance must be grounded. In the event of an
electrical short circuit, grounding reduces the risk of
electrical shock by providing an escape wire for the
electrical current. This appliance is equipped with a cord
having a grounding wire with a grounding plug. The plug
must be plugged into an outlet that is properly installed
and grounded.
WARNING - Improper use of the grounding plug
can result in a risk of electric shock. Consult a qualified
electrician or serviceman if the grounding instructions
are not completely understood, or if doubt exists as to
whether the appliance is properly grounded.
Connection to Power Supply
Connect the appliance power cord and plug to a
properly grounded wall outlet. The required nominal
voltage and frequency are indicated on the rating plate
(inside the unit or on the exterior rear wall of the unit).
DO NOT USE AN EXTENSION CORD
Use an exclusive 115V wall outlet. Do not connect your
refrigerator to extension cords or together with any other
appliance in the same wall outlet. Do not splice the
cord.
Read all safety information before using
Please ensure that component parts shall be replaced with like components and that servicing shall be done
by factory authorized service personnel, so as to minimize the risk of possible ignition due to incorrect parts
or improper service.

REFRIGERATOR BRACKET & MICROWAVE INSTALLATION
1. Place the bracket on top of the refrigerator with its rear lip with two loops facing upward. The rear lip of the bracket
should be lined up with the back edge of the refrigerator, with the two side loops facing up to accept the microwave.
2. With the bracket lined up as stated above the preset holes on top of the refrigerator should be lined up with the holes
on the bracket. Attach the bracket to the refrigerator using the six screws that come supplied with the refrigerator.
3. Place the microwave oven on top of the refrigerator and inside the two upright loops on the sides and in front of the two
upright loops on the back of the bracket. Line up the holes on each side and on the back of the bracket and attach the
microwave using the screws supplied. The two back screws come supplied with the refrigerator while the two side screws
are already on the microwave. Please remove the two microwave screws prior to placing the microwave oven on top of the
refrigerator.
4
2 LOOPS FACING UPWARDS
BACK OF
REFRIGERATOR
SCREWS BRACKET
BRACKET HOLES FOR SCREWS
SCREWS (x6)
come with
refrigerator
REFRIGERATOR
SIDE VIEW MICROWAVE
Bracket Screws
REFRIGERATOR
FRONT VIEW

5
3.3SM4R
Description of the Appliance
(A) Plastic Coated Shelves
Odor resistant, rustproof, and removable for easy
cleaning.
(B) Door Liner
The door liner consists of tall, medium,and large
bottles, cans or jars, The canstor door liner holds
355ml cans of pop. juice or beer.
(C) Defrost Water Outlet
The interior of the refrigerator is cooled with a
cooling plate mounted in the rear wall. Under the
plate there is a channel and an outlet for defrost
water
Regularly check the defrost water outlet and the
drain channel for blockage. They should always be
kept free and clean of food particles. If the drain
outlet does become clogged, use a plastic straw to
dean it.
Illumination in the Interior Of the Refrigerator
The light for illuminating the interior of the refrigerator is on. when the door is opened, off when the door is
closed.
tall, medium,and large
door liner holds
beer.
cooling plate mounted in the
plate there is a channel and
water
Regularly check the defrost
drain channel for blockage.
kept free and clean of food p
outlet does become clogged,
dean it.
Of the Refrigerator
interior of the refrigerator is on. when the door is opened, off
A
B
C

The temperature of the refrigerator is controlled by
setting thermostat knob to a desired setting.
Temperature Selection
To start the refrigerator, turn the temperature
control knob to the position corresponding to the
desired cooling (on the graduated blue dial )
Fig A
The refrigerator temperature will vary depending on
the quantity of the food stored and on the
frequency with which the door is opened.
To turn the control to the "OFF" position, rotate the
control knob to the "0° position. If the refrigerator
has been left out of use for some time, set the
control to maximum for 2-3 hours before turning to
the desired position. If the refrigerator is not being
used for long time periods, disconnect the plug and
leave the door partially open. This will help to
reduce mold/mildew from accumulating inside the
refrigerator cabinet.
6
Operation Control
• Changes in ambient room temperature will affect
internal refrigerator temperatures (choose correct
setting of the thermostat knob).
• In STOP (0) position the appliance does not
operate (cooling system is switched off), yet
power supply is not interrupted (the light is on ,
when you open the refrigerator door).
• Temperature in the refrigerator also depends on
how often the door is opened.
FIG A

7
Maintenance and Cleaning
Switch Off the Appliance When
Not In Use
If you do not intend to use the appliance for long
periods of time, (vacations) set the thermostat knob
to the STOP (0) position, disconnect the power
supply, take out the foods and defrost and clean the
appliance. Leave the door slightly open.
Automatic Defrosting of the
Refrigerator
There is no need to defrost the refrigerator,
because ice depositing on the inner back wall is
defrosted automatically.
Ice build-up on the inner back wall during the
compressor operation; will (when the compressor
has cycled off) defrost automatically Defrost water
collects inside the drain through passing through
the drain outlet in the inner back wall into a drain
pan situated above the compressor, from where it
evaporates.
Cleaning the Appliance
Disconnect the power bar before cleaning the
appliance.
Do not use coarse or aggressive cleaning agents as
you can damage the surface.
Clean the exterior with water and detergent.
Remove the detachable accessories in the interior
of the appliance and dean with water and liquid
detergent. Plastic parts cannot be washed in
dishwashers.
Wash the interior of the appliance with lukewarm
water, adding one or two spoonfuls of vinegar. After
cleaning, connect the appliance to power supply
and reload it.

8
Changing the Direction of the Door Opening (Swing)
Your refrigerator has a factory-installed left-hand door swing. To avoid personal injury to yourself and/or
property, we recommend someone assist you during the door reversal process.
Tools needed: No. 2 Phillips screwdriver
1. Remove the upper hinge pin from the right side of the door frame and
reinstall it on the left side of the door frame (the previous pin location)(See Fig.B)
2. Remove the plastic cap from the top right-hand side of the cabinet and reinstall on
the left side of the cabinet (the previous pin location) (See fig.C)
3. Remove the upper door hinge from the left-hand side of the cabinet and reinstall on
the right side of the cabinet (the previous pin location) (See fig.C)
4. Remove the three retaining screws on the bottom right side of the cabinet and reinstall the
fixed foot on the left side in the former lower hinge assembly screw positions, remove the
leveling leg and bottom hinge (See fig. A)
5. With the door closed, reinstall the lower hinge assembly on the right side of the refrigerator.(See fig. A)
6. Reinstall leveling leg. (See fig. A)
Fig.C Fig.B
Fig.A
FACTORY INSTALLED DOOR HINGE
(LEFT-HAND DOOR SWING)
PLASTIC CAPS
REVERSED DOOR HINGE
(RIGHT-HAND DOOR SWING)
PLASTIC
CAPS
TOP HINGE
PIN
LEVELING LEG AND
BOTTOM HINGE
FIXED FOOT
AND RETAINING
SCREWS

9
Trouble-Shooting Guide
- the door is frequently opened or left open too
long;
- the food stored in the refrigerator was warm;
- the food or dish is touching the inner back wall.
Water is Leaking From the Refrigerator
If the discharge water outlet is clogged, or the
defrost water drips over the channel, water will leak
from the refrigerator.
• Clean the clogged outlet, for example with a
plastic straw.
• Manually defrost the increased ice layer. See "Ice
Formation on the Inner rear Wall"
Noise
Cooling in a refrigerator-freezing appliance is made
possible by cooling the system using a
compressor, which will produce certain noise
levels. How noisy the appliance is depends on
where it is placed.
• During the operation of the compressor the
noise of the liquid is heard and when the
compressor is not operating, the refrigerant flow
is heard. This is a normal condition and it has no
influence on the lifetime of the appliance.
• After starting the appliance, the operation of the
compressor and the refrigerant flow may be
louder, which does not mean that something is
wrong with the appliance and it has no influence
on the lifetime of the appliance. Gradually the
noise is reduced.
• Sometimes unusual and louder noise is heard,
which is rather unusual for the appliance. This
noise is often a consequence of inadequate
installation.
- The appliance must be level and installed on a
firm solid base/floor.
- It should not touch the wall or kitchen units
standing next to it.
- Check the accessories on the interior of the
appliance, they should be placed correctly in their
positions; also check, bottles, tins, and other
vessels are not touching each other causing
rattling and/or vibrations.
Sometimes you may come across minor problems
that in most cases do not require a service call and
can be easily eliminated. The problem may have
resulted from improper handling and/or installation
of the appliance. Please refer to the below
troubleshooting guide to assist you in identifying
the possible cause and solution to your problem.
Should the problem still persist after completing
these checkpoints. Contact the closest authorized
service agent in your area for assistance.
The Appliance Fails to Operate
After Connecting to Electrical Power
Supply
• Check the power cord is properly connected.
• Check the power supply in the electrical outlet.
(blown fuse / circuit breaker)
• Make sure the appliance is switched on.
(thermostat knob in operating position)
Continuous Operation of the Cooling
System
• The door is frequently opened or left open for too
long.
• The door is not properly closed (the door may
sag, the gasket may be damaged).
• Perhaps you may have overloaded the appliance
with fresh foods.
• The reason may be inadequate ventilation of the
compressor (assure adequate air circulation).
Ice Formation on the Inner Rear Wall
As long as the defrost water runs to the channel
and through the outlet to the drain pan on the
compressor, automatic defrosting of the appliance
is assured.
In case the ice formation on the inner back wall is
increased (1/8 - 1/4 inches), ice should be
manually defrosted.
Set the thermostat knob to STOP (0) position and
leave the door open. Never use electric devices for
defrosting and do not scrape the ice or frost layer
with sharp objects.
After defrosting is complete, turn the knob to
desired position and close the refrigerator door.The
cause of increased ice formation may be one of
the following: the door does not seal well (clean
the gasket if it is dirty, or replace it if it is

10
Bulb Replacement
Before replacing the light bulb, disconnect the appliance from the power supply. Using a phillips screwdriver.
remove the screw located on the left (center) side of the light cover. Pull the light cover straight down.
Replacement light bulb must be the same wattage as the original bulb.( 15 watts only)

11
snackmate by MicroFridge®, a Product of INTIRIONTM Corporation
Microwave Oven and Refrigerator/Freezer Residential Limited Warranty
INTIRION, a division of Danby Limited, is pleased to provide a comprehensive warranty on these products.
INTIRION takes pride in its product and manufacturing standards and warrants its products and parts against
defects in materials or workmanship to the original purchaser.
Subassembly
- Microwave oven and
refrigerator/freezer components
Duration
1 year
All requests for service should be directed to Customer Service at INTIRION by calling 1-800-637-7567 if you are
located in the U.S., and 1-800-263-2629 if you are located in Canada. INTIRION offers a quick response customer
service program. Customer Service will diagnose the problem and either promptly replace or repair the unit, at the
discretion of INTIRION.
snackmate by MicroFridge®warranty services are performed by INTIRION authorized service providers.
INTIRION expects prompt, courteous and efficient service. INTIRION further expects that all authorized service
providers will make every reasonable effort to enhance the image and reputation of INTIRION and its products.
Inadequate service or customer dissatisfaction should be promptly reported to INTIRION.
Damage initiated by spark fires caused by using inappropriate material inside the microwave oven is specifically
excluded from this warranty. INTIRION assumes no liability and does not guarantee or warrant any repairs and/or
replacement parts not supplied or performed by an authorized service provider, nor any 50/60 cycle or 60/50
cycle conversions, damage caused by failure to follow the owner’s manual as to adjustments and/or maintenance,
customer adjustments that are not covered in the instruction booklet, broken or marred cabinet, misuse, neglect,
accident, fire, flood or other acts of nature.
THIS WARRANTY WILL BECOME INVALID IF ANY SERIAL NUMBER ON THE PRODUCT IS ALTERED,
REPLACED, DEFACED OR MISSING. THIS WARRANTY IS FOR INTIRION PRODUCTS PURCHASED
AND USED IN THE UNITED STATES AND CANADA EXCEPT FOR UNITED STATES POSSESSIONS
AND/OR DOMINIONS OF THE UNITED STATES.
This is the entire INTIRION warranty and it may not be changed or amended by any person, agency, distributor,
dealer, or company. INTIRION assumes no liability and indeed specifically denies responsibility for any
consequential damages beyond the repair or replacement of the product or its components.
The warranty period begins on the date of sale and proof of that date (evidenced by an original sales slip or bill of
sale) will be necessary to initiate a warranty claim.
SNACKMATE BY MICROFRIDGE®, A PRODUCT OF INTIRIONTM CORPORATION
2 Annette Rd Ste 3, Foxborough, MA 02035 1-800-637-7567 U.S. Customers
PO Box 1778, Guelph, Ontario, Canada N1H 6Z9 1-800-263-2629 Canada Customers
For your protection in the event of theft or loss of this product,
Please fill in the information below:
Model No. _______________________________________________
(Located on rear and inner right wall)
Serial No. ________________________________________________
(Located on rear and inner right wall)
Date of Purchase __________________________________________
INTIRION CORP.
2 Annette Road, Suite 3
Foxborough, MA 02035
1-800-637-7567
4/14 Printed in China

Les tout réfrigérateurs
Ce réfrigérateur est réservé à l’usage domestique
uniquement et il est conçu pour la conservation
d’aliments frais à des températures supérieures à
0° C / 32°F.
12
CONSERVEZ CES INSTRUCTIONS
Avant la mise en marche ..................................13
Instructions d’utilisation
Conseils d’économie d’énergie
Important ............................................................13
Placement et installation ..................................14
Choix de l’emplacement approprié
Placer l’appareil autoporteur
Branchement à l’alimentation électrique
Support du réfrigérateur et installation
du micro-ondes .................................................15
Description de l’appareil ..................................16
Contrôle du fonctionnement ............................17
Sélection de la température
Entretien et nettoyage ......................................18
Dégivrage automatique du réfrigérateur
Nettoyer l’appareil
Couper l'alimentation de l'appareil lorsqu'il n'est
pas utilisé
Changer le sens d'ouverture de la porte ........19
Guide de dépannage .........................................20
Changer l’ampoule ............................................21
Garantie ..............................................................22

Avant la mise en marche
13
• Avant de brancher l’appareil à l’alimentation électrique, laissez-le reposer pendant environ 2 heures, ce qui réduira la
possibilité que le système de refroidissement présente des dysfonctionnements en raison de la manutention au cours
du transport.
• Nettoyez bien l’appareil, surtout à l’intérieur (voir la section relative au nettoyage et à l’entretien).
• Si les accessoires intérieurs ne sont pas bien placés, remettez-les en ordre selon les instructions figurant dans le
chapitre intitulé « Description de l’appareil ».
Instructions d’utilisation
Ces instructions d’utilisation sont destinées à l’utilisateur. Il décrit l’appareil et les procédures permettant de l’utiliser de
manière sécuritaire.
CONSERVEZ CES INSTRUCTIONS
Conseils d’économie d’énergie
• Essayez de ne pas ouvrir la porte trop fréquemment, surtout lorsque les conditions météorologiques sont chaudes et
humides. Une fois la porte ouverte, fermez-la dès que possible. Cela est particulièrement important si votre modèle est
de type armoire.
• Vérifiez de temps en temps si l’appareil est suffisamment ventilé (si l’air circule bien derrière l’appareil).
• Réglez le thermostat dès que possible pour que les paramètres passent d’une valeur élevée à moins élevée (en
fonction du degré de remplissage de l’appareil, de la température de la pièce, etc.)
• Avant de mettre au réfrigérateur des emballages contenant des aliments frais, assurez-vous qu’ils sont refroidis à la
température de la pièce. (À l’exception des soupes).
• La présence de couches de glace et de givre augmente la consommation d’énergie; nettoyez l’appareil dès que
l’épaisseur de la couche de givre atteint 0,3 à 0,6 cm (1/8 à 1/4 po).
• Lorsque le joint d’étanchéité est endommagé ou que la porte ne ferme pas hermétiquement, la consommation
d’énergie est considérablement plus élevée. Afin de rétablir l’efficacité, remplacez le joint d’étanchéité.
• Il convient de toujours prendre en compte les directives figurant dans les sections relatives à la mise en place et aux
conseils en matière d’économie d’énergie, sans quoi la consommation d’énergie sera considérablement plus élevée.
Risque d’incendie ou d’explosion causé par la perforation de tuyaux frigorigènes. Ne jamais utiliser un
objet pointu pour assister au dégel. Manipuler avec soin. Garder les matériaux et vapeurs inflammables
comme de l’essence loin du réfrigérateur. Utiliser un nettoyant ininflammable.
La mise au rebut de cet item doit être faite selon les lois locales et fédérales.
AVERTISSEMENT! DANGER D’EXPLOSION!
Un réfrigérateur vide peut représenter un attrait dangereux aux enfants. Retirer le joint d’étanchéité, les
loquets, les couvercles ou portes des appareils ménagers inutilisés, ou prenez d’autres mesures qui
assureront que l’appareil ne posera aucun danger.
DANGER: Risque de piéger un enfant. Avant de mettre votre vieux congélateur ou réfrigérateur au rebut:
• Enlever les portes.
• Laisser les tablettes en place afin que les enfants ne puissent pas facilement y entrer.
N’ATTENDEZ PAS! FAITES-LE IMMÉDIATEMENT!
AVERTISSEMENT IMPORTANT!
Important
Veuillez lire attentivement les consignes de sécurité et les instructions d’utilisation avant l’utilisation
initiale de ce produit.

14
Important
• L’appareil doit être correctement branché à l’alimentation électrique. (Voir la section relative au branchement à
l’alimentation électrique).
• Débranchez toujours l’appareil avant de le nettoyer ou de changer l’ampoule. -AVERTISSEMENT :
les réparations ne peuvent être effectuées que par le personnel d’entretien agréé.
• Ne faites pas dégivrer l’appareil à l’aide d’autres appareils électriques (par exemple, un séchoir à cheveux) et
n’essayez jamais de gratter ou d’éliminer la glace ou le givre à l’aide d’objets pointus.
• La plaque signalétique sur laquelle figure le numéro de modèle ou de série et d’autres données techniques propres à
cet appareil se trouve soit à l’intérieur de celui-ci ou à l’extérieur sur la paroi arrière.
• Le système frigorifique de l’appareil contient un fluide frigorigène et des substances isolantes qui doivent être
transformés et traités séparément. Appelez votre réparateur autorisé ou centre de réparations spécialisé le plus
proche. Si vous êtes dans l’impossibilité d’en trouver un, contactez les autorités ou le distributeur de votre localité.
Prenez soin de ne pas endommager les tubes situés sur la paroi arrière de l’appareil (risque de pollution).
Placement et installation
Choix de l’emplacement approprié
Placez l’appareil dans une pièce sèche et régulièrement
ventilée. Ne placez jamais l’appareil près d’appareils
émettant de la chaleur (p. ex. des appareils de cuisson,
des radiateurs, des chauffe-eau ou des appareils
similaires) et n’exposez pas l’appareil à la lumière
directe du soleil.
L’appareil doit être placé à au moins 3 cm (1.2 po) de
tous les appareils électriques ou à gaz et à au moins 30
cm (12 po) des cuisinières fonctionnant au charbon ou
au mazout. Si cela n’est pas possible, utilisez une
barrière d’isolation appropriée.
Installation
Placez l’appareil de manière à ce qu’il repose de
manière ferme sur une base solide. Certains appareils
possèdent des pieds réglables à l’avant; utilisez-les
pour mettre l’appareil à niveau.
Veuillez lire attentivement les consignes de sécurité et les instructions d’utilisation avant l’utilisation
initiale de ce produit.
AVERTISSEMENT
Instructions concernant le risque d’incendie, de choc
électrique ou de blessures.
Directives relatives à la mise à la terre
Cet appareil doit être mis à la terre. En cas de court-
circuit, la mise à la terre réduit les risques de décharge
électrique en fournissant un échappatoire au courant
électrique. L’appareil est muni d’un cordon électrique
comprenant un fil de mise à la terre et une fiche de
terre. Branchez la fiche dans une prise de courant
correctement installée et mise à la terre.
AVERTISSEMENT - Une fiche de mise à la
terre mal branchée peut entraîner un risque d’incendie,
de choc électrique ou de blessures aux personnes qui
utilisent l’appareil.Consultez un électricien ou un
technicien qualifié si vous ne comprenez pas bien les
instructions de mise à la terre ou si vous avez un doute
quelconque sur la bonne mise à la terre de l’appareil.
Branchement à l’alimentation électrique
Branchez le cordon d’alimentation de l’appareil à une
prise murale mise à la terre de manière appropriée. La
tension et la fréquence nominales requises sont
indiquées sur la plaque signalétique (à l’intérieur de
l’appareil ou sur sa paroi arrière extérieure).
N’UTILISER JAMAIS DE FIL DE RALLONGE -
Brancher le réfrigérateur à son propre circuit de 115V.
N’utilisez pas de rallonge électrique pour brancher votre
réfrigérateur. Ne branchez pas le réfrigérateur à une
prise femelle multiple qui sera également utilisée pour
d’autres appareils électriques. N’épissez pas le cordon
électrique.
Veuillez vous assurer que les pièces de rechange sont remplacées par des pièces similaires, et que l’entretien
soit effectué par un technicien agréé par l’usine, afin de réduire le risque d’incendie à cause de mauvaises
pièces ou d’entretien mal fait.

SUPPORT DU RÉFRIGÉRATEUR ET INSTALLATION DU MICRO-ONDES
1. Placez le support sur le réfrigérateur avec la lèvre arrière avec deux boucles orientées vers le haut. La lèvre arrière du
support doit être alignée avec le rebord arrière du réfrigérateur, avec les deux boucles latérales vers le haut pour accueillir
le four à micro-ondes.
2. Une fois le support aligné tel qu’indiqué ci-dessus, les trous prépercés sur le réfrigérateur doivent être alignés avec les
trous du support. Fixez le support sur le réfrigérateur à l’aide des six vis fournies avec le réfrigérateur.
3. Placez le micro-ondes sur le réfrigérateur et dans les deux boucles droites situées sur les côtés et devant les deux
boucles droites à l’arrière du support. Alignez les trous de chaque côté et à l’arrière du support et fixez le micro-ondes à
l’aide des vis fournies. Les deux vis arrière sont fournies avec le réfrigérateur alors que les deux vis latérales sont déjà sur
le micro-ondes. Veuillez retirer les deux vis du micro-ondes avant de le placer sur le réfrigérateur.
15
2 BOUCLES ORIENTÉES VERS LE HAUT
ARRIÈRE DU
RÉFRIGÉRATEUR
VIS SUPPORT
SUPPORT TROUS POUR LES VIS
Les vis (x 6)
sont fournies
avec le
réfrigérateur
RÉFRIGÉRATEUR
VUE
LATÉRALE
MICRO-ONDES
Support Vis
RÉFRIGÉRATEUR
VUE DE
FACE

16
Description de l’appareil
(A) Clayettes recouvertes de plastique
Résistantes aux odeurs, à l’épreuve de la rouille et
amovibles pour faciliter le nettoyage.
(B) Contre-porte
La contre-porte comporte des supports pour les
bouteilles, les cannettes ou les bocaux, qu’ils soient
petits, moyens ou grands. La partie Canstor de la contre-
porte peut contenir cannettes de soda, de jus de fruit ou
de bière de 355 ml.
(C) Orifice d’évacuation de l’eau de dégivrage
L’intérieur du réfrigérateur est refroidi à l’aide d’une
plaque de refroidissement montée sur la paroi arrière.
Un conduit et un orifice d’évacuation de l’eau de
dégivrage sont logés sous cette plaque
Vérifiez régulièrement que l’orifice d’évacuation de l’eau
de dégivrage et le conduit d’égouttement ne sont pas
bloqués. Ils doivent constamment être propres et
exempts de tout débris d’aliments. Si l’orifice
d’égouttement s’obstrue, utilisez une paille en plastique
pour la nettoyer.
Éclairage de l’intérieur du réfrigérateur
La lumière à l’intérieur du réfrigérateur est allumée lorsque la porte est ouverte, elle s’éteint lorsque la porte est
refermée.
3.3SM4R
tall, medium,and large
door liner holds
beer.
cooling plate mounted in the
plate there is a channel and
water
Regularly check the defrost
drain channel for blockage.
kept free and clean of food p
outlet does become clogged,
dean it.
Of the Refrigerator
interior of the refrigerator is on. when the door is opened, off
A
B
C

La température du réfrigérateur est contrôlée en réglant
le bouton du thermostat au niveau désiré.
Sélection de la température
Pour démarrer le réfrigérateur, tournez le bouton de
réglage de la température vers la position
correspondant au niveau de refroidissement désiré (sur
le cadran bleu gradué)
Schéma A
La température du réfrigérateur variera en fonction de la
quantité d’aliments entreposés et de la fréquence à
laquelle la porte est ouverte.
Pour mettre le bouton en position « ARRÊT » (OFF),
tournez le bouton de réglage jusqu’à la position « 0 ° ».
Si le réfrigérateur n’a pas été utilisé pendant un certain
temps, réglez le bouton de réglage sur la position «
maximum » pendant 2 à 3 heures avant de le régler à la
position désirée. Si le réfrigérateur n’est pas utilisé
pendant de longues périodes, débranchez-le de la prise
et laissez la porte entrouverte. Cela contribuera à
réduire l’accumulation de moisissures à l’intérieur du
réfrigérateur.
17
Contrôle du fonctionnement
• Les changements de température de la pièce influent
sur la température interne du réfrigérateur (réglez le
bouton du thermostat au niveau approprié).
• L’appareil ne fonctionne pas lorsqu’il est réglé sur la
position « ARRÊT (0) » (STOP (0)) (le système de
refroidissement est mis hors tension), mais
l’alimentation n’est pas interrompue (la lumière
s’allume lorsque vous ouvrez la porte du réfrigérateur).
• La température interne du réfrigérateur dépend
également de la fréquence à laquelle la porte est
ouverte.
Schéma A

18
Entretien et nettoyage
Coupez l’alimentation de
l’appareil lorsqu’il n’est pas utilisé
Si vous ne comptez pas utiliser l’appareil pendant
de longues périodes (vacances), réglez le
thermostat sur STOP (0), débranchez l’appareil,
retirez les aliments, dégivrez et nettoyez l’appareil.
Laissez la porte entrouverte.
Dégivrage automatique du réfrigérateur
Nul besoin de dégivrer le réfrigérateur car les dépôts de
glace se formant sur la paroi arrière intérieure sont
dégivrés de manière automatique.
L’accumulation de glace sur la paroi arrière intérieure
occasionnée par le fonctionnement du compresseur
sera automatiquement éliminée par le dégivrage
(lorsque le compresseur aura terminé son cycle). L’eau
de dégivrage s’accumule dans la gouttière
d’évaporateur, passant de l’orifice d’égouttement situé
dans la paroi arrière intérieure au plateau de dégivrage
situé au-dessus du compresseur, où elle s’évapore.
Nettoyage de l’appareil
Débranchez la barre d’alimentation avant de nettoyer
l’appareil.
N’utilisez pas de produit de nettoyage grossier ou
agressif, car vous pourriez endommager la surface.
Nettoyez l’extérieur avec de l’eau et du détergent.
Retirez les accessoires amovibles de l’intérieur de
l’appareil et nettoyez avec de l’eau et du détergent
liquide. Les pièces en plastique ne peuvent pas être
lavées dans un lave-vaisselle.
Nettoyez l’intérieur de l’appareil avec de l’eau tiède en
ajoutant une ou deux cuillères de vinaigre. Après avoir
nettoyé le réfrigérateur, branchez-le et replacez les
éléments à l’intérieur.

19
Changer le sens d’ouverture de la porte (rotation)
Votre réfrigérateur a une porte préinstallée s’ouvrant vers la gauche. Afin d’éviter de vous blesser ou de
causer des dégâts matériels, nous vous recommandons de solliciter l’aide d’autrui lors des manœuvres liées
à l’inversion de la porte.
Outils nécessaires : un tournevis cruciforme n° 2
1. Retirez l’axe de charnière supérieure du côté droit du cadre de la porte et réinstallez-le sur le côté gauche
du cadre de la porte (l’ancien emplacement de l’axe) (voir la figure B)
2. Retirez le capuchon en plastique en haut à droite du meuble et réinstallez-le du côté gauche du meuble
(l’ancien emplacement de l’axe) (voir la figure C)
3. Retirez la charnière supérieure de la porte du côté gauche du meuble et réinstallez-la du côté droit du
meuble (l’ancien emplacement de l’axe) (voir la figure C)
4. Retirez les trois vis restantes en bas à droite du meuble et réinstallez le pied fixe du côté gauche à l’endroit
où les vis de l’ancienne charnière se trouvaient, retirez le pied de nivellement et la charnière inférieure (voir
la figure A)
5. Une fois la porte fermée, réinstallez la charnière inférieure du côté droit du réfrigérateur.(Voir la figure A)
6. Réinstallez le pied de nivellement. (Voir la figure A)
Figure C Figure B
Figure A
CHARNIÈRE DE PORTE
PRÉINSTALLÉE (OUVERTURE DE LA
PORTE VERS LA GAUCHE)
CAPUCHONS EN
PLASTIQUE
CHARNIÈRE DE PORTE
INVERSÉE (OUVERTURE DE
LA PORTE VERS LA DROITE)
CAPUCHONS EN
PLASTIQUE
AXE DE
CHARNIÈRE
SUPÉRIEURE
PIED DE NIVELLEMENT ET
CHARNIÈRE INFÉRIEURE PIED FIXE ET VIS DE
FIXATION
This manual suits for next models
1
Table of contents
Languages:
Other SnackMate Refrigerator manuals
