manuals.online logo
Brands
  1. Home
  2. •
  3. Brands
  4. •
  5. Sony
  6. •
  7. Camcorder
  8. •
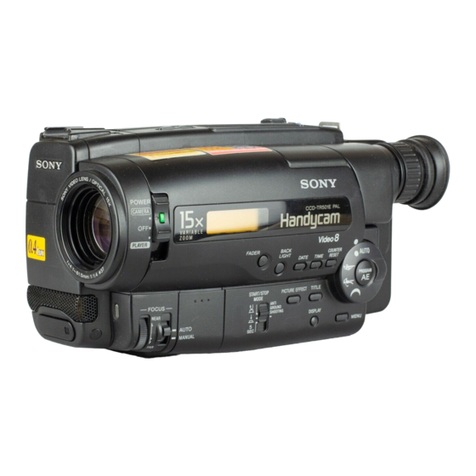
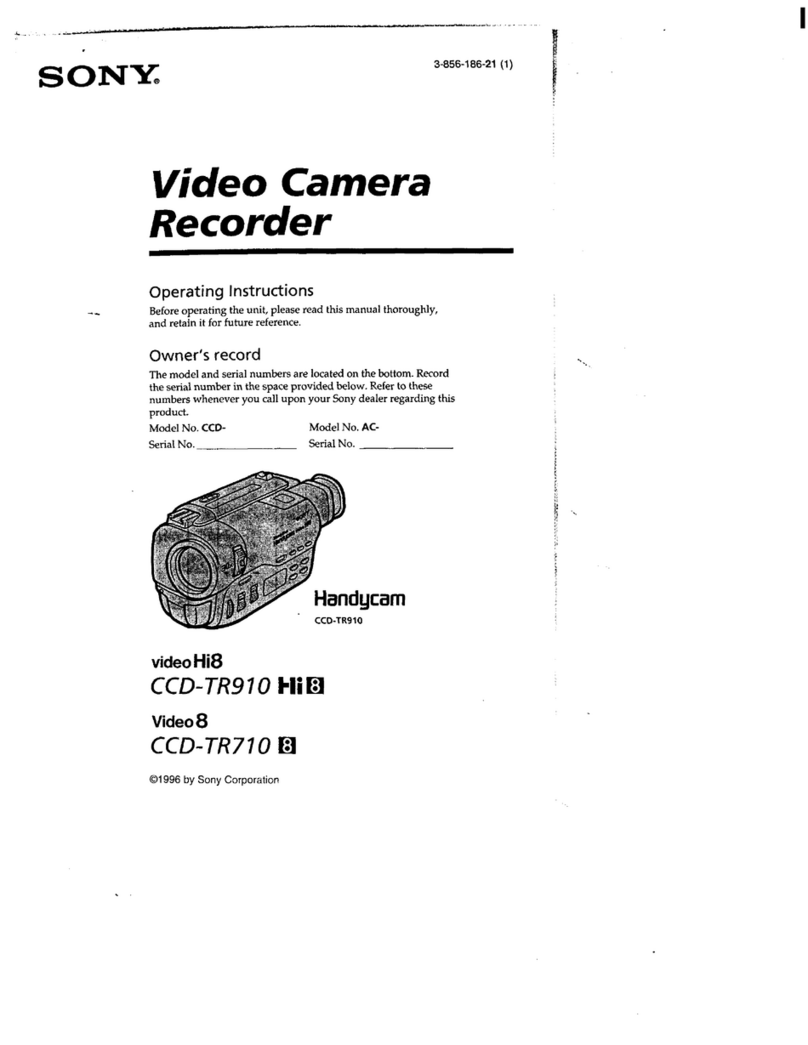
  9. Sony Handycam CCD-TR30 User manual

Sony Handycam CCD-TR30 User manual

S01NI Y. 3-7_84_9-2.(11
Video Camera
Recorder=
CCD-TR28/TR30
I
Operation Manual
Before operating the unit, please read this manual thoroughly
and retain it for future reference.
Owner's Record
The model and serial numbers are located on the bottom. Record the serial
number in the space provided below. Refer to these numbers whenever
you call upon your Sony dealer regarding this product.
Model No. CCD-TR28/TR30 Serial No.
Model No. AC-V25/V25A/V25B/V25C Serial No
Photo:CCO-TR28
Video8 Handgcam
_-,;_"Z _ _" /i y Sony Corporation
To prevent fire or shock
hazard, do not expose the
unit to rain or moisture.
This symbol is intended to alert
the user to the presence of
uninsulated "dangerous voltage"
within the product's enclosure that
may be of sufficient magnitude to
constitute a risk of electric shock
to persons.
This symbol is intended to alert
the user to the presence of
important operating and
maintenance (servicing) instructions
in the literature accompanying the
appliance.
RECYCLING NICKEL-CADMIUM
BATTERIES
Ni-Cd
NICKEL-CADMIUM BATTERY.
MUST BEDISPOSEDOF PROPERLY.
Nickel-Cadmium batteries are
recyclable. You can help preserve our
environment by returning your
unwanted batteries to your nearest
Sony Service Center or Factory
Service Center for collection,
recycling or proper disposal.
Note: In some areas the disposal of nickel-
cadmium batteries in household or
business trash may be prohibited.
For the Customers in,_e gist.
WARNING
This equipment has been tested and found to
comply with the limits for aClass B digital device,
pursuant to Part 15 of the FCC Rules. These limits
are designed to provide reasonable protection
against harmful interference in a residential
installation. This equipment generates, uses, and can
radiate radio frequency energy and, if not installed
and used in accordance with the instructions, may
cause harmful interference to radio communications.
However, there is no guarantee that interference
will not occur in a particular installation ff this
equipment does cause harmful interference to radio
or television reception, which can be determined by
turning the equipment off and on, the user is
encouraged to try to correct the interference by one
or more of the following measures:
- Reorient or relocate the receiving antenna.
- increase the separation between the equipment
and receiver.
- Connect the equipment into an outlet on a circuit
different from that to which the receiver is
connected.
- Consult the dealer or an experienced radio/TV
technician for help.
CAUTION ]
You are cautioned that any changes or
modifications not expressly approved in this manual
could void your authority to operate this
equipment.
For the Custo_rs in _NADA
Notice for the customers in Canada
This apparatus complies with the Class B limits
,€or radio noise emissions set out in Radio
Interference Regulations.
CAUTION ]
TO PREVENT ELECTRIC SHOCK, DO NOT USE
THIS POLARIZED AC PLUG WITH AN
EXTENSION CORD, RECEPTACLE OR OTHER
OUTLET UNLESS THE BLADES CAN BE FULLY
INSERTED TO PREVENT BLADE EXPOSURE.
2
For the Sony Service Center nearest you call
_..800-222-SONY (United States only)
::or the Factory Service Center nearest you call
416-499-SON¥ (Canada only)
Caution: Do not handle damaged or leaking
nickel-cadmium batteries.
Welcome to Video 8
Congratulations on your purchase of this Sony Handycam ® camcorder. With your Handycam
you can capture life's precious moments with superior picture and sound quality. Your
Handycam is loaded with advanced features, but at the same time it is very easy to use. You
will soon be producing home video that you can enjoy for years to come.
Before You Begin
About This Manual 4
Checking Supplied Accessories 5
Getting Started
Charging and Installing the Battery Pack 6
Tips for Using the Battery Pack 9
Inserting a Cassette 12
Adjusting the Viewfinder Lens I3
Hints for Better Shooting 14
Basic Operations
Camera Recording 15
Using the Zoom Feature 17
Recording the Date or Time 18
Connections for Playback 19
Connecting to a TV without Audio/Video Input Jacks 19
Connecting to a TV or VCR with Audio/Video Input Jacks 19
P]aying Back a Tape 20
Advanced Operations
Using Alternate Power Sources 21
Using House Current 2I
Editing onto Another Tape 23
Additional Information
Changing the Lithium Battery 24
Resetting the Date and Time 25
Playback Modes 26
Maintenance Information and Precautions 27
Using Your Camcorder Abroad 31
Identifying the Parts 32
Remote Commander 36
Specifications 39
Trouble Check 40
Indicators in the Viewfinder 43
Index (Back cover)
3
Before You
The instructions in this manual are for two models, CCD-TR28 and CCD-TR30. CCD-TR28 and
CCD-TR30 are different in body color. The former is gray and the latter is black. There is no
difference in function.
If you want to shoot as soon as possible, read the chapters "Getting Staffed" and "Basic Operations"
first. As you read through this manual, buttons and settings on the camcorder are shown in capita]
letters.
e.g. Set the POWER switch to CAMERA.
TV color systems differ from country to country. To view your recordings on a TV, you need an
NTSC system based TV. When you want to use a PAL-M system based TV, you will need an
NTSC/PAL-M transcoder (as this is an NTSC system based camcorder).
Please check the list on page 31 to see the TV color system of your country.
Since each country has its own electricity and TV color system, you may not be able to use the RFU
adaptor when you use the camcorder abroad,
Television programs, films, video tapes, and other materials may be copyrighted. Unauthorized
recording of such materials may be contrary to the provision of the copyright laws.
•Do not let sand get into the camcorder. When you use the camcorder on a sandy beach or
dusty place, protect it from the sand or dust. Sandor dust may causethe unit to malfunction
and sometimes the malfunction cannot be repaired. [a]
•Do not let the camcorder get wet. Keep the camcorder away from rain or sea water. It may
cause the unit to malfunction and sometimes the malfunction cannot be repaired. [b]
•Never leave the camcorder under temperatures above 140°F (60 °C), such as in a car parked
in the sun or under direct sunlight. [c]
[a] [cl
4
Check that the following accessories are supplied with your camcorder.
[]
[]
[]
[]
[]
[]
[] RFU-95UC
RFU-9OUC
[_ Wireless Remote Commander (1) (p. 36)
[] NP-55 Battery pack (1) (p. 6)
[_ AC*V25/V25A/V258/V25C AC power adaptor (1) (p. 6, 42)
[_ CR2025 Lithium Battery (Installed in the camcorder) (1) (p. 24)
[]Size AA (R6) battery for Remote Commander (2) (p. 36)
[] RFU-90UC or RFU-95UC RFU adaptor (1) (p. 19)
(The RFU-95UC is used in the connection diagram in this manual.)
[]Shoulder strap (1) (p. 38)
3_
Cr
O
e_
_d
rh
_e
tD
_o
"o
r_
D.
O
5
Getting
Before using your camcorder, you first need to charge and install the battery pack. To charge the
battery pack, use the supplied AC-V25/V25A/V25B/V25C AC power adaptor.
Charge the battery pack on a fiat place without vibration.
(1) Connect the power cord to a wall outlet. (2) Align the right side of the battery pack with the line
on the AC power adaptor, then slide the battery pack in the direction of the arrow, (3} Set the
selector to CHARGE. Charging begins.
When charging is completed, the CHARGE lamp goes out. Set the selector to the center position and
anplug the unit from the wall outlet. Then remove the battery pack and install it on the camcorder.
Fo stop charging, set the selector to the center position.
12
Charging Time and Battery Life
3
Battery pack
Charging time"
}/pica]
recording time*"
Continuous
:ecording
time _-
NP-55
(supplied)
70
NP-80
NP-80D
180
INP-77H
160
75
NP:66H
12o
55
NP-60D
90
40
30 80
60 16o 150 110 80 70
NP-551-1
80
35
Approximate minutes to charge an empty batter}! pack using the AC-V25/V25A/V25B/V25C
(Lower temperatures require a longer charging time.)
*" Approximate minutes when recording while you repeat recording start/stop and turning the power
on/off. The actual battery life may be shorter.
*'" Approximate continuous recording time indoors.
6
Important!
Usethe battery completely before re-charging!
Before you recharge the battery, make sure the battery has been used up (discharged) completely.
Repeated charging while some capacity remains causes a lowering of battery capacity. However,
the original battery capacity can be recovered if you use the battery completely and charge it fully
again.
To use up the battery, remove the cassette and set the POWER switch to CAMERA with the
battery attached, and leave the camcorder until the _ indicator and the red lamp flash in the
viewfinder.
Removing the Battery Pack
Slide the battery pack in the direction of the arrow (see drawing).
Note on charging the battery pack
• The POWER lamp wit] remain lit for a while even if the battery pack is removed and the power
cord is unplugged after charging the battery pack. This is normal.
• If the POWER lamp does not light, set the selector to the center position and disconnect the power
cord. After about one minute, reconnect the power cord and set the selector to CHARGE again.
• You cannot operate the camcorder using the AC power adaptor while charging the battery pack.
=P
5"
co
,,2
"o
€,*
7
(1) Lift up the viewfinder. (2) Align the right side of the battery pack with the white line on the
camcorder, and slide the battery pack to the right.
12
Removing the Battery Pack
(1) Lift up the viewfinder. (2) While pressing BATT, slide the battery pack to the left.
2
8
This section shows you how you can get the most out of your battery pack.
Always Carry Additional Batteries
Have sufficient battery pack power to do 2 to 3 times as much recording as you have planned.
Battery Life is Shorter in Cold Environment
Battery efficiency is decreased and the battery will be used up more quickly if you are recording in
cold environment.
To Save Battery Power
Turn STANDBY on the camcorder down when not recording to save battery power. [a]
Asmooth transition between scenes can be made even if recording is stopped and started again.
While positioning the subject, selecting an angle, or looking through the viewfinder lens, the lens
moves automatically and the battery is used. The battery is also used when a tape is inserted or
removed.
When _o Replaceth Battery Pa ...............................................
e ck .... .................................
While you are using your camcorder, the remaining battery indicator decreases gradually as battery
power is used up.
÷q--31÷q----I
When the remaining battery indicator reaches the lowest point, the ,CK3indicator appears and starts
flashing in the viewfinder. [b]
When the _ indicator in the viewfinder changes from stow flashing to rapid flashing while you are
recording, set the POWER switch to OFF on the camcorder and replace the battery pack. Leave the
tape in Ihe camcorder to obtain smooth transition between scenes after the battery pack is replaced.
Note on the remaining battery indicator
The remaining battery indicator of the camcorder may indicate a different rerunning capacity from that
of the battery pack with its own indicator (not supplied). The indicator of the battery pack is more
accurate
¢h
m
e_
¢b
00
I1}
"0
"4
"5"
_¢
_o
9
The Battery Heats Up
During charging or recording, the battery pack heats up. This is caused by energy that has been
generated and a chemical change that has occurred inside the battery pack. This is not cause for
concern,
Battery Care
•Remove the battery pack from the camcorder after using the battery pack, and keep it in a cool
place. When the battery pack is attached to the camcorder, a small amount of current flows to the
camcorder even if the POWER switch is set to OFF, which shortens battery life.
•The battery pack is always discharging even when it is not in use after charging. Therefore, you
should charge the battery right before using the camcorder.
How to Use the Switch on the Battery Pack
This switch is provided so that you can mark the charged battery. Set the switch to the "no mark"
position when charging is completed. Set the switch to the "red mark" position when the battery is
used up (or in whichever direction you want to remind yourself). [c]
The Life of the Battery Pack
The battery pack can be fully charged and discharged about 500 times under normal temperatures. If
the battery indicator flashes rapidly just after turning on the camcorder with a fully charged battery
pack, the battery pack should be replaced with anew fully charged one.
Charging Temperature
You should charge batteries at temperatures from 50*F to 86"F (from 10°C to 30"C). Lower
temperatures require a longer charging time.
Sony Batteries are Recommended
Use of non-Sony batteries may damage your Handycam eamcorder.
A Brand-new Battery
A brand-new battery pack is not charged. Before using the battery pack, charge it completely.
Before Recharging a Used Battery Pack
• Make sure to use up the battery before recharging.
•If recording is completed before the _ indicator appears in the viewfinder, you should remove the
tape, set the POWER switch to CAMERA, turn STANDBY up, and leave the camcorder until the
battery indicator flashes rapidly.
• When yol.i use the AC-S10 power adaptor, the DC-S10 car battery charger or BC-S10 portable
battery charger, you can use the discharging function.
• Charging the usable battery causes a lowering of battery capacity. Battery capacity can be
recovered if you fully discharge and charge the battery again.
After Long Storage
Recharge the battery pack after a long period of storage, If the battery pack is charged fully but not
used for a long time (about ] year), it becomes discharged. Charge it again, but in this case the
battery life will be shorter than normal. After several charging and discharging cycles, the battery life
will recover its original capacity.
! tii i!!ii;!_! < i [i_
If the terminals (metal parts on the back) are not clean, the battery duration will be shortened.
When the terminals are not clean or when the battery pack has not been used for a long time, repeat
installing and removing the battery pack. This improves the contact condition. Also, wipe the + and
- terminals with a soft cloth or paper.
Be Sure to Observe the Following
•To prevent an accident caused by a short circuit, do not allow metal objects such as a
necklace to touch the battery terminals. Carry the battery pack attaching to the terminal
cover. [d]
• Keep the battery pack away from fire.
• Keep the battery pack dry..
• Do not open nor convert the battery pack.
• Do not expose the battery pack to any mechanical shock.
ii[d] i i
u_
tD
oJ
"0
11
Make sure that the power source is installed.
(1) While pressing the small blue button on the EJECT knob, slide it down, The cassette holder
automatically lifts up and opens. (2) Insert a cassette with the window facing out. (3) Close the
cassette holder by pressing the "PUSH" mark on the cassette homer.
123
To Eject the Cassette
While pressing the small blue button on the EJECT knob, slide it down.
12
Before you use the camcorder for the first time or after someone else has used it, focus the viewfinder
lens. Make sure that the power source is atlached to the camcorder.
(1) Pull out the viewfinder until it clicks. (2) While pressing the green button of the POWER switch,
turn it to CAMERA. (3) Turn STANDBY up. (4) Turn the viewfinder lens adjustment ring so that the
indicators in the viewfinder come into sharp focus.
1
4
13
For hand-held shots, you'll get better results by holding the camcorder according to the following
suggestions:
2;AIII I lm
• Hold the camcorder firmly and secure it with the grip strap so that you can easily manipulate the
controls with your thumb. [a]
• Place your right elbow against your side.
• Place your left hand under the camcorder to support it.
• Place your eye firmly against the viewflnder eyecup.
• Use the viewfinder frame as a guide to determine the horizontal plane.
• You can also record in alow position to get an interesting recording angle. Turn the viewfinder up
for recording from alow position. [b]
Cautions on the Viewfinder
• Do not pick up the camcorder by the viewflnder. [c]
• DO not place the camcorder so as to point the viewfinder toward the sun. The inside of the
viewfinder heats up and may be damaged, [d]
[€l
Place the camcorder on a flat surface or use a tripod
Try placing the camcorder on a table top or any other flat surface of suitable height. If you have a
tripod for a still camera, you can also use it with the cameorder (p, 33). Make sure the tripod screw is
shorter than 9/32 in (6.5 mm).
14
Basic Operations
M,'ff,e sure that the power source is installed and a cassette is inserted. When you start recording, the
:late is automatically recorded for 10 seconds (AUTO DATE feature), This feature works only once a
Jay. You can use the Remote Commander to record yourself with your friends or family. When you
ase the Remote Commander, make sure that the REMOTE COMMANDER switch on the camcorder
LSset to ON (p. 37).
Before you record one-time events, you may want to make a trial recording to make sure that the
:amcorder is working perfectly.
(1) Pull out the viewfinder until it clicks. (2) Slide the LENS COVER switch to OPEN. (3) While
pressing the green button of the POWER switch, turn it to CAMERA. (4) Turn STANDBY up. Adjust
_he viewfinder lens so that the indicators in the viewfinder come into sharp focus (p. 13). (S) Press
START/STOP. As the camcorder starts recording, the red lamp in the viewfinder and the camera
recording/battery lamp on the camcorder light up.
LENS COVER
OPEN
CLOSE
1
7
AUTO DATE
5REC
0:00:01
S[...... ]E
j
_ JUL4.,_;.1994
To Stop Recording Momentarily
Press START/STOP again. The "STBY" indicator appears in the viewfinder (Standby mode).
To Finish Recording
Turn STANDBY clown and turn the POWER switch to OFF. Slide the LENS COVER switch 3o
CLOSE and eject the tape (p. _J2).
Notes on Standby mode
If you leave the camcorder in Standby mode for 5minutes, the camcorder goes off automatically. This
prevents wearing down the battery and wearing out the tape. To resume Standby mode, turn
STANDBY down once and turn it up again. To start recording, press START/STOP.
t/,
O_
fli
O
&
t'l
3
;Io
o
15
Note on the tape counter
The tape counterindicates the recording or playback time. Use it as a guide. Therewill be a time lag
of several seconds from the actual time. To set the counter to zero, press COUNTER RESET.
Note on the AUTO DATE feature
• The AUTO DATE feature works once a day. However, the date may automatically appear more
than once a day when:
- you reset the date and time.
- you eject and insert the tape again.
-you stop recording within 10 seconds,
•Once the AUTO DATE feature turns off the date display 10 seconds after the start of recording,
the date and time are displayed as follows:
- If the date display setting has been made, the date is displayed.
- If the time display setting has been made, the time is displayed.
- If neither display setting has been made, nothing is displayed.
If you wear glasses
You can bend back the eyecup to get a better view of the viewfinder.
When moving from indoors to outdoors (or vice versa)
Turn STANDBY up and point the camcorder at a white object for about 15 seconds so that the.white
balance is properly adjusted.
Note on recording
When you record from the beginning of a tape, run the tape for about I5 seconds before starting the
actual recording. This will ensure that you won't miss any start-up scenes when you playback the tape.
You can record tapes in SP (standard play) mode only.
To prevent accidental erasure, slide the tab on the cassette to expose the red mark, If you try to
record with the red mark exposed, the _ and A indicators flash in the viewfinder, and you dannoi
record.
To re-record on this tape, slide the tab back out covering the red mark.
/_ ' ' i_JL 'ii _::/_ ';_;;_i ¸!¸¸
16
Zooming is a recording technique that lets you change the size of the subject in the scene. You can
also use the zoom to decide on a shooting angle before you start recording,
For more professional-looking recordings, use the zoom function sparingly.
"T'" side: for telephoto (subject appears closer)
'W" side: for wide-angle (subject appears farther away)
Zooming Speed (Dual speed zooming)
Press the power zoom button firmly for a high-speed zoom, press it softly for a relatively slow zoom.
When you shoot a subject using atelephoto zoom
If you cannot get a sharp focus while in extreme telephoto zoom, press the "W" side of the power
zoom butlon until the focus is sha,"p. You can shoot a subject that is at least about 31 1/2 inches
(80 cm) away from the lens surface in the telephoto position, or about 1/2 inches (1 cm) in the wide-
angle position.
gJ
3
=1o
o
17
While you are recording, press DATE (+) or TIME (NEXT). The date or time displayed in the
viewfinder is recorded with the picture. You cannot record the date and time at the same time. Except
for the date or time indicator, no indicator in the viewfinder is recorded.
To Stop Recording with the Date and Time
Press DATE (+) or TIME (NEXT) again. The date or time indicator disappears. The recording
continues.
18
You can use this camcorder as a VCR by connecting it directly to your TV for playback. There are
several ways to connect the carncorder to your TV.
Connect the camcorder to the TV using the supplied RFU adaptor. Make sure that the TV is turned
off to prevent speaker damage before hooking up your camcorder. Set the channel selector on the
RFU adaptor and your TV to VHF CH3 or CH4, whichever is not active in your area.
: Signal flow
t
RFU-90UCi95UC
Connect the camcorder to the TV using an A/V connecting cable (not supplied). Set the TV/VCR
selector on the TV to VCR.
IAUD!ONIDEO AUDIO/VIDEO
_ OUTPUT INPUT ['-- ,2
o
&
o
&
o
0"
19
You can monitor the playback picture in the viewfinder. You can also monitor the picture on a TV
screen, after connecting the camcorder to a TV or VCR (p. 19). You can use the supplied Remote
Commander to control playback, if you want. Before using the Remote Commander, make sure that
the REMOTE COMMANDER switch on the camcorder is set to ON (p. 37).
(1) While pressing the green button of the POWER switch, turn it to PLAYER. (2) Insert the recorded
tape with the window facing out. (3) Open the lid of the control panel. (4) Press _:>. Playback staffs.
21
To stop playback, press [3.
To rewind the tape. press
To fastforward the tape, press _,
PLAY
STOP RLcW_)-- PLAY-- _FF PAUSE
Various Playback Modes
To view a still picture
Press II during playback. To resume playback, press II or c>.
To locate ascene (Picture search)
Keep pressing _ or _ during playback. To resume normal playback, release the button.
To monitor the high-speed picture during fastforward or rewind (Skip scan)
Keep pressing _ while rewinding or _ while advancing the tape. To resume normal playback,
press r>.
To view the picture at 1/5 speed (Slow Playback) (only with the Remote Commander)
Press I_- on the Remote Commander during playback. To resume normal playback, press t_. If slow
playback lasts for about 1 minute, it shifts to normal speed automatically.
Note on playback
•Streaks appear and the sound is muted in the various playback modes.
• When still picture mode lasts for 5 minutes, the camcorder automatically enters stop mode.
To display the viewfinder screen indicators on the TV
_-0 Press DISPLAY on the Remote Commander. To erase the indicators, press it again.

Other manuals for Handycam CCD-TR30

1

This manual suits for next models

1

Other Sony Camcorder manuals

Sony Digital Handycam DCR-PC8E User manual

Sony

Sony Digital Handycam DCR-PC8E User manual

Sony Handycam DCR-PC2E User manual

Sony

Sony Handycam DCR-PC2E User manual

Sony HDR-CX550V User manual

Sony

Sony HDR-CX550V User manual

Sony HANDYCAM DCR-SR220 User manual

Sony

Sony HANDYCAM DCR-SR220 User manual

Sony HVR-V1U User manual

Sony

Sony HVR-V1U User manual

Sony XDCAMTM User manual

Sony

Sony XDCAMTM User manual

Sony CX550VE User manual

Sony

Sony CX550VE User manual

Sony DCR-DVD200 - Dvd Handycam Camcorder User manual

Sony

Sony DCR-DVD200 - Dvd Handycam Camcorder User manual

Sony DCR-SX45 Handycam® User manual

Sony

Sony DCR-SX45 Handycam® User manual

Sony CineAlta HDCAM HDW-F900R Service manual

Sony

Sony CineAlta HDCAM HDW-F900R Service manual

Sony Handycam CCD-F40 User manual

Sony

Sony Handycam CCD-F40 User manual

Sony DVCAM DSR-PD150 User manual

Sony

Sony DVCAM DSR-PD150 User manual

Sony SSC-CB561R User manual

Sony

Sony SSC-CB561R User manual

Sony Digital Betacam DVW-700 User manual

Sony

Sony Digital Betacam DVW-700 User manual

Sony HDR-CX560V User manual

Sony

Sony HDR-CX560V User manual

Sony PMW-EX1R User manual

Sony

Sony PMW-EX1R User manual

Sony Handycam HDR-FX7 User manual

Sony

Sony Handycam HDR-FX7 User manual

Sony HDR-GW77V/B User manual

Sony

Sony HDR-GW77V/B User manual

Sony DSR-1600P User manual

Sony

Sony DSR-1600P User manual

Sony Handycam Digital8 DCR-TRV238E User manual

Sony

Sony Handycam Digital8 DCR-TRV238E User manual

Sony DCR-PC101 User manual

Sony

Sony DCR-PC101 User manual

Sony BVP-950P Series User manual

Sony

Sony BVP-950P Series User manual

Sony Handycam CCD-F56 User manual

Sony

Sony Handycam CCD-F56 User manual

Sony DCR-TRV840 - Digital Handycam Camcorder User manual

Sony

Sony DCR-TRV840 - Digital Handycam Camcorder User manual

Popular Camcorder manuals by other brands

Panasonic SDR-H48GK user manual

Panasonic

Panasonic SDR-H48GK user manual

SECO-LARM ENFORCER EV-5105-N1SQ manual

SECO-LARM

SECO-LARM ENFORCER EV-5105-N1SQ manual

CAMERA LINK FC2600CL instruction manual

CAMERA LINK

CAMERA LINK FC2600CL instruction manual

Samsung VP-M50 Owner's instruction book

Samsung

Samsung VP-M50 Owner's instruction book

Vivitar DVR 969HD user manual

Vivitar

Vivitar DVR 969HD user manual

AIPTEK A-HD user manual

AIPTEK

AIPTEK A-HD user manual

SMTAV BV20S user manual

SMTAV

SMTAV BV20S user manual

Besteker Z18 user manual

Besteker

Besteker Z18 user manual

Samsung SC-D903 Owner's instruction book

Samsung

Samsung SC-D903 Owner's instruction book

JVC GZ-MG135U instructions

JVC

JVC GZ-MG135U instructions

JVC HD10U - Camcorder - 1.18 MP instructions

JVC

JVC HD10U - Camcorder - 1.18 MP instructions

Panasonic NVMS50 user manual

Panasonic

Panasonic NVMS50 user manual

Sharp ViewcamZ VL-Z3H Operation manual

Sharp

Sharp ViewcamZ VL-Z3H Operation manual

Velleman CAMTVI16 user manual

Velleman

Velleman CAMTVI16 user manual

JVC GR-D328 instructions

JVC

JVC GR-D328 instructions

Samsung VP-D963i Owner's instruction book

Samsung

Samsung VP-D963i Owner's instruction book

Toshiba Canvio AeroCast Firmware update manual

Toshiba

Toshiba Canvio AeroCast Firmware update manual

Vivitar DVR 785HD user manual

Vivitar

Vivitar DVR 785HD user manual

manuals.online logo
manuals.online logoBrands
  • About & Mission
  • Contact us
  • Privacy Policy
  • Terms and Conditions

Copyright 2025 Manuals.Online. All Rights Reserved.