Sophia Electric 91-03 User manual

Sophia Electric
Model 91-03 Stereo Integrated
300B Tube Amplifier
User’s Manual

2
Introduction
Sophia Electric wishes to thank you for choosing the Sophia Electric model 91-03 300B stereo
integrated tube amplifier. Please read this manual thoroughly before using your new product so
that you may gain maximum enjoyment from your music collection.
Warning
To reduce the risk of fire and electric shock, please:
DO NOT expose this appliance to rain or moisture.
DO NOT operate in the presence of children or pets.
Do not remove the base plate: High Voltage inside and
THERE ARE NO USER SERVICEABLE PARTS INSIDE.
Warranty
The 91-03 300B stereo integrated tube amplifier is warranted against any defect in material and
workmanship for a period of 12 months from date of purchase. Within this period, we undertake
to supply replacement parts and labor free of charge, provided failure was not occasioned by
misuse or negligence. Sophia Electric brand tubes are warranted for 12 months and third party
tubes are warranted for 6 months.
Service
If service is required, the unit should be returned to an authorized Sophia Electric dealer or agent.
Partnering Equipment
The amplifier is capable of very high resolution but, as with any audio system, will be limited by
the “weakest link” in the chain. We therefore suggest and recommend that you select high
quality source equipment (pre-amp, speaker cable, power cord, CD player etc). Please consult
with your dealer or with Sophia Electric for system recommendation
3
Unpacking
Before your new amplifier left our factory, it was inspected and tested to ensure your
satisfaction: In the event of damage during shipping, please note:
THE RIGHT TO A CLAIM AGAINST A PUBLIC CARRIER CAN BE FORFEITED IF THE
CARRIER IS NOT NOTIFIED PROMPTLY IN WRITING AND IF THE SHIPPING CARTON
AND PACKING MATERIALS ARE NOT AVAILABLE FOR INSPECTION BY THE
CARRIER.
Ensuring that the carton is the correct way up, cut through the security bands and carefully cut
through the sealing tape on the outer carton. Carefully cut through the sealing tape on the inner
carton. Fold back the carton closure flaps and remove the top polystyrene shell. Prepare a stable
surface large enough to set the amplifier down. Stand so that the heavy side of the amplifier is
towards you. Have an associate hold the box carton down. Place each hand at each side of the
chassis with the fingers securely under the amplifier and lift the amplifier free of the carton.
WARNING! The tube amplifier is heavy (About 25 kg/55 lb per stereo amplifier). To reduce
the possibility of injury, seek help when it is needed. Sophia Electric cannot accept liability for
injury resulting from handling of the amplifier.
Save all packing materials as they are intended to reduce the possibility of transportation damage
should the need to ship your amplifier arise down the road.
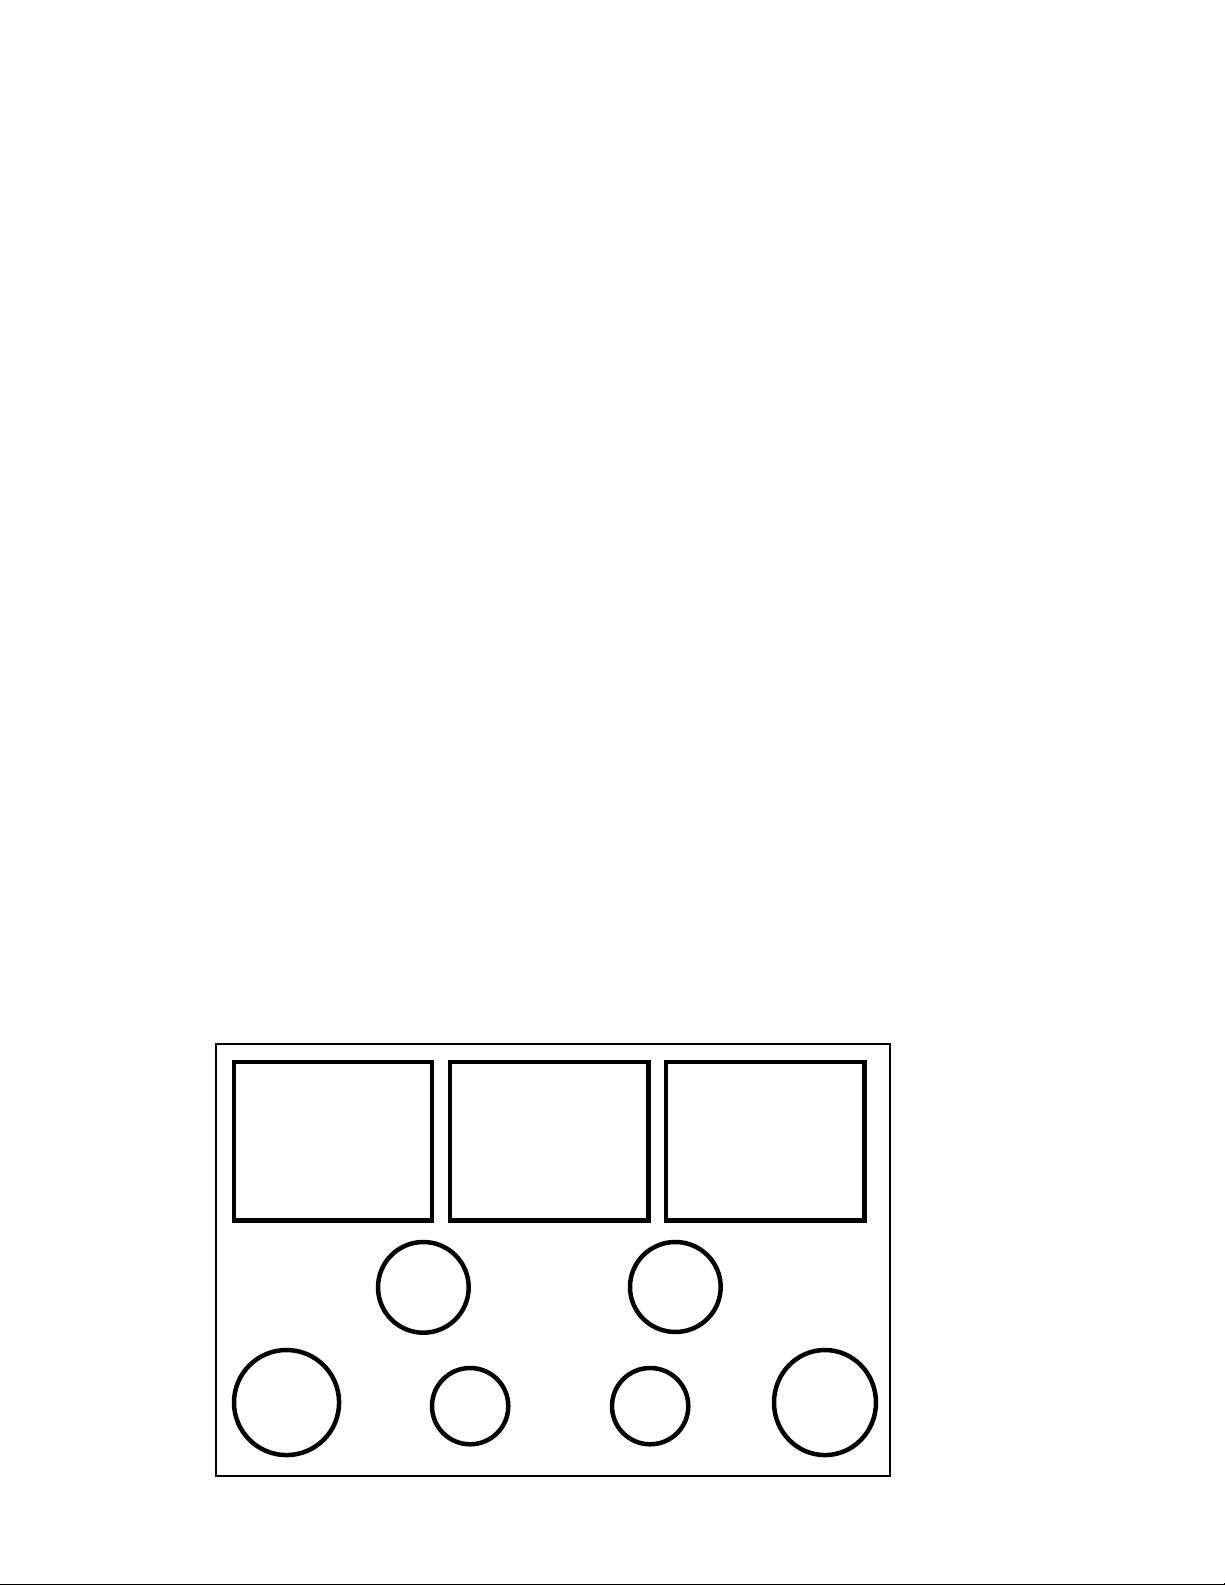
Tube Installation (See Diagram Below)
Always handle the tubes with clean hands. NEVER touch them when an amplifier is turned on
or for at least ten minutes after it is turned off. You may suffer severe burns to your fingers and
hands.
V1
Output
Transformer
Output
Transformer
V4
V2
V3
V5
V6
Power
Transformer

4
Following diagram above, first insert the 6SN7 (V5 and V6) input tubes and 5U4G/5Z3PAT
rectifiers (V2 and V3) into sockets, then insert the 300B (V1 and V4) tubes into the 300B
sockets. You should line up the pins of the 300B tube with the holes in the socket (The two big
holes are for the two big Filament pins). Press down gently until the tube fits securely into the
base. If the tube doesn’t fit readily, Do Not use brute force. Take it out and start again. Please
make sure you put the tubes in correctly.
5
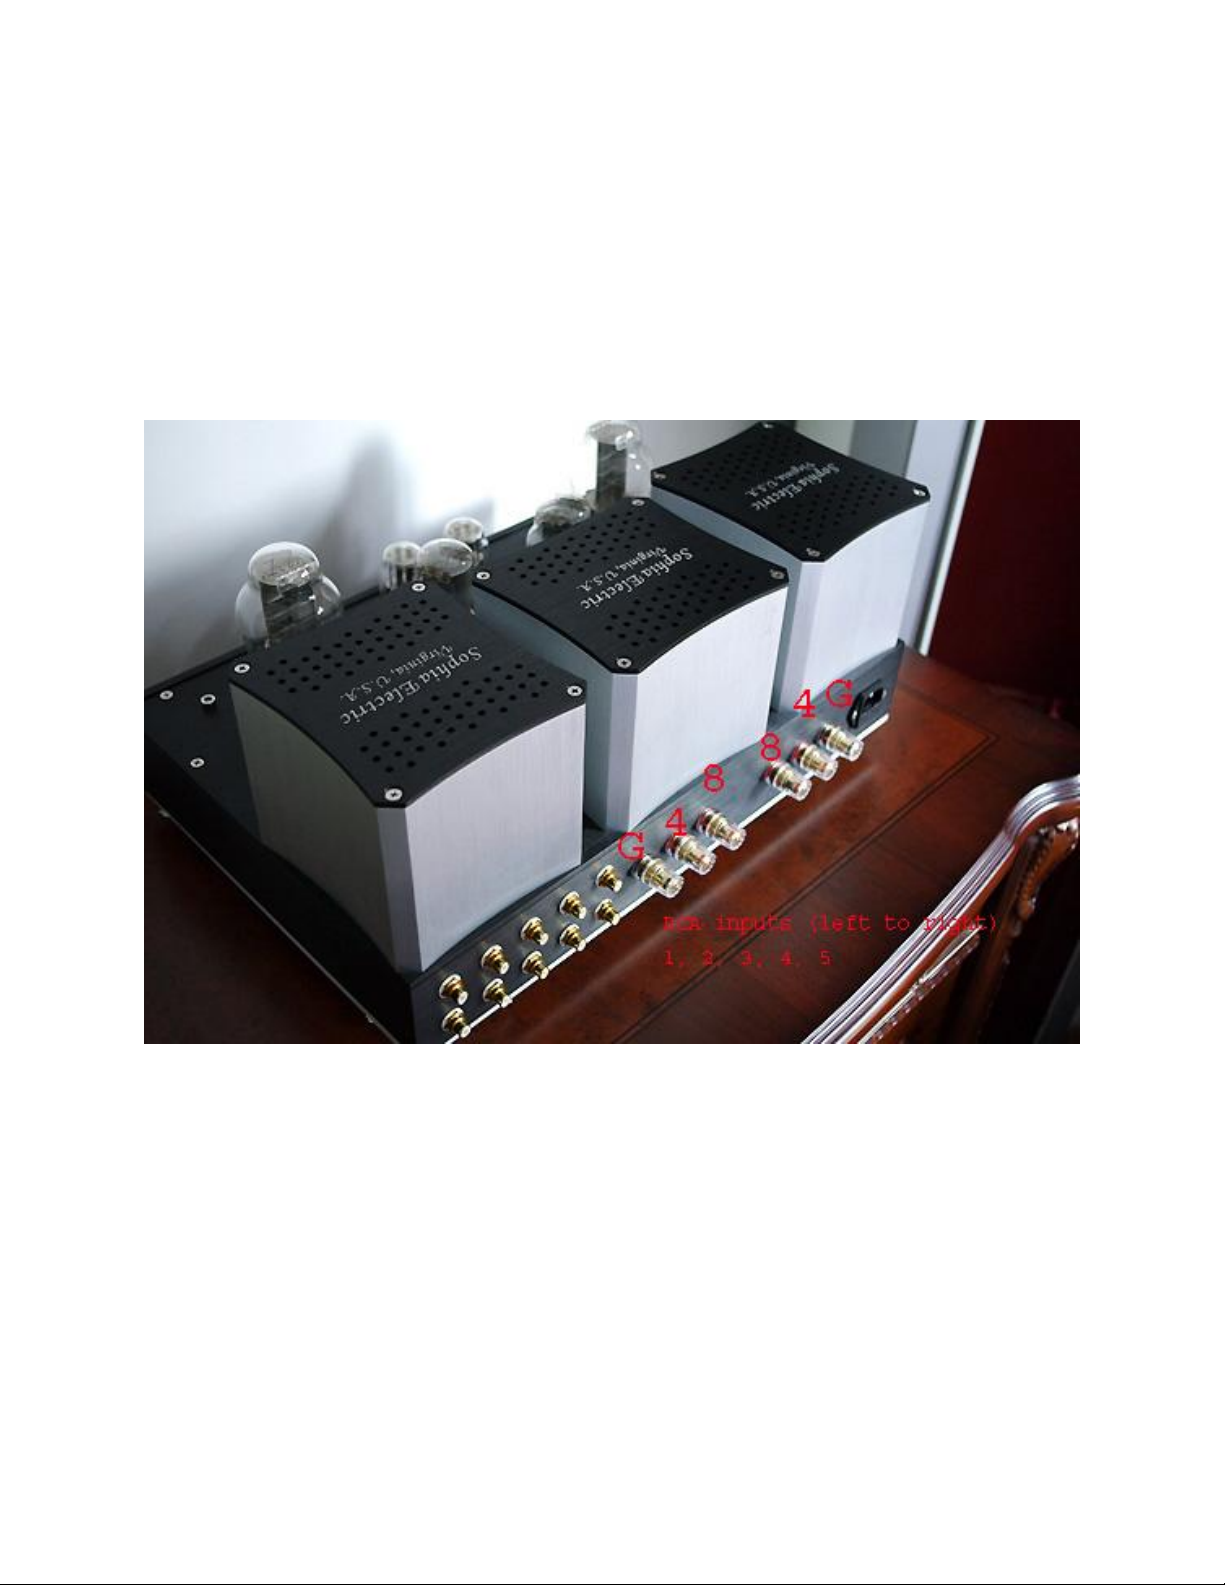
Loudspeaker Connection
First connect your loudspeakers. The 8 ohm connection is the outer Red binding posts (see
diagram below).
Rear of Integrated Amplifier
(Showing input jacks, output binding posts, line socket)
CAUTION: While it is very unlikely that damage will result if you power your amplifier up
without the loudspeakers connected, SOPHIA ELECTRIC RECOMMENDS THAT YOU DO
NOT POWER THE AMPLIFIER UP UNLESS LOUDSPEAKERS OF THE PROPER
IMPEDANCE ARE CONNECTED TO BOTH CHANNELS.
Connecting the 300B Stereo Amplifier into the system
All connections are located on the rear panel of the unit. Looking at the panel, you will see RCA
inputs and binding posts for the ground connection.
Fuse: Only one fuse (4A for USA voltage and 3A for European/Asian voltage) is fitted and is
accessible from the outside of the tube amplifier.

6
AC Input: 120V/60Hz (USA) or 235V/50Hz (Europe).
The IEC AC powerinput socket connection is located at the far left in the back. A main
fuse is located inside under IEC socket. One Computer grade main cables (Detachable) is
included with the 300B tube amplifier. If you choose to replace the AC main cable with an
esoteric type, make sure that is has a third pin for grounding the unit.
ON/OFF Switch: Left Side Panel control: On/Off push button power switch.
Source Selector: 1 –2 –3 –4 - 5 - mute
Using Sophia Electric 91-03 300B Stereo tube amplifier
1) Allow the unit about 15-20 minutes to warm up before doing any serious listening. This
will allow the circuit to stabilize and components to settle.
2) Avoid repeatedly turning the unit on and off in quick succession. This may damage the
tubes and some of the power supply capacitors quickly.
3) Never disconnect the output wires while your amplifier is turned on (damages to the
single ended output transformer may happen).
4) Caution: Do not touch the speaker binding post once the amplifier is on or within 2
minutes after it is turned off.
5) Do not keep the amplifier on around the clock overnight. Capacitors and tubes have
finite lifespan. Recommend to take a short break every 5 hours to let the amplifier cool
down to the room temperature before your next session.
6) Do not do silly things with a vacuum tube amplifier, such as take amplifier for car wash.
Do not use dish washer to clean tubes.
Sophia Electric amplifiers have been designed with quite operation in mind. All
new amplifiers shipped from Sophia Electric have been adjusted to factory
specification for quietness.
At times when users are in need for hum control adjustment, please follow the
following steps.
Hum Control Adjustment Procedure:
1. The main hum control pots on the top next to the 300B tube sockets are for the
300B tubes. User can adjust these main hum control pots to achieve min
hum/noise when changing to another 300B tube.
2. The second pair of hum control pots in the front row next to 6SN7 tubes is for
6SN7 driver tubes. User can adjust the pots to achieve min hum/noise when
changing to another 6SN7 tube.
3. User can use multi-meter AC function or scope to monitor the hum level.

7
Human ears are not sensible enough for super quiet adjustment. Again, factory
adjustment are the best, please use factory supplied tubes for the best possible
sound and quietness.
Please contact to your dealer for any questions you may have. Or Send fax/email to Sophia
Electric when dealer advice is not possible. Thank you for using Sophia Electric Products.
Sophia Electric, Inc. USA
sales@sophiaelectric.com
www.sophiaelectric.com
Phone: 703-992-8546
Table of contents
Other Sophia Electric Amplifier manuals


