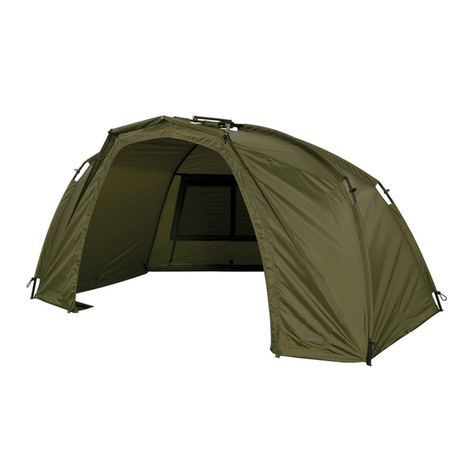
SoulPad 4000-hybrid User manual

SoulPad 4000-hybrid™
Instruction Manual.
Version 2, Published Feb 2012. © SoulPad Ltd. 2012
Page 1of 13

SoulPad 4000-hybrid™
Instruction Manual.
Version 2, Published Feb 2012. © SoulPad Ltd. 2012
Page 2of 13
CONTENTS
Page
WELCOME
3
INTENDED USE
3
THE NATURE OF CANVAS
3
TRIAL PITCHING OF THE TENT
4
CHOICE OF THE SITE
4
ITEMS INCLUDED
4
GETTING STARTED
5
HOW TO ERECT YOUR SOULPAD TENT
5
HOW TO ROLL THE WALLS UP AND DOWN
7
PACKING YOUR SOULPAD TENT AWAY
7
STORING YOUR SOULPAD TENT
8
IN THE EVENT OF A FIRE
8
VENTILATION
9
PARTICULAR PROBLEMS THAT MAY ARISE
10
CLEANING YOUR SOULPAD
12
REPAIRS
12
DIAGRAMS
13

SoulPad 4000-hybrid™
Instruction Manual.
Version 2, Published Feb 2012. © SoulPad Ltd. 2012
Page 3of 13
WELCOME
Dear SoulPadder,
Thank you for choosing a SoulPad tent. I welcome you whole-heartedly to the SoulPad community. If you
didn’t already have it, you now have soul.
Please keep this instruction manual in a safe place and remember to take it with you each time you use your
SoulPad equipment. These instructions are also available on our website.
If this is your first erection, please don’t be nervous. We’ve all been there and we’re keen to help show you
the way. Very few of us achieve a perfect erection first time, but before long yours is sure to stand as
proudly as any other good, strong erection that has stood before it.
It’s generally easier for two people to get an erection, but if you follow our guidelines one person can do it
alone. So relax, take it slowly and let us know how you get on!
If you ever have any questions not covered in this manual, please contact SoulPad Ltd. direct. We will
endeavor to assist you.
We hope that you will connect with us on a deeper level and join us on the various social networking
websites on the web today. It is here that we SoulPadders tend to share pictures, tips and advice and we
hope you will too.
With soul,
Mr OM
SoulPad Ltd
Thetford
Norfolk
UK
T: +44 (0)1366 727770
INTENDED USE
The SoulPads are intended for regular, light, leisure use.
It is our opinion that SoulPad tents do not make for a suitable permanent shelter. They are primarily a
temporary structure. They are classed as a Touring Tent (type T) in accordance with ISO 5912.
We are aware that some SoulPad customers do choose to use their SoulPad for long periods at a time, and
in some instances as a permanent shelter (some with far more success than others). This is done so against
our recommendation.
Specifically, the SoulPads have been designed for use in the temperate regions of the United Kingdom and
are ideally suited for use between the months of March and September inclusive.
THE NATURE OF CANVAS
The SoulPads are made from cotton canvas. Cotton canvas is a natural material. As such colour variances
and minor imperfections in the canvas can be expected. These variances and imperfections should not
detract from the overall performance of the product.

SoulPad 4000-hybrid™
Instruction Manual.
Version 2, Published Feb 2012. © SoulPad Ltd. 2012
Page 4of 13
TRIAL PITCHING OF THE TENT
It is recommended that all SoulPad users conduct a trial pitching of their SoulPad tent to become familiar
with the equipment ahead of when it may be needed most.
Erect the SoulPad according to the instructions. Never assume you will remember the order in which to erect
your SoulPad. Bad habits are easy to fall in to and can have a negative impact on the longevity of your
SoulPad.
CHOICE OF THE SITE
Check with the land owner on the best places to pitch. They will understand best how their land fairs during
different types of weather. The ideal site is flat and well-drained with short grass on a sound soil structure.
Avoid areas which are prone to flooding.
Avoid pitching under trees. Pitching under a tree and in woodlands can present problems: -
Falling leaves - left on the canvas to get wet can cause discoloration and degradation of the canvas
beneath.
Bird droppings - birds like to rest in trees and leave deposits on your SoulPad.
Falling debris from the tree - can penetrate the canvas.
Mould and mildew formation - can be accelerated in woodland conditions, as it is here (damp, moist
conditions) that moulds and fungus’ can thrive.
The direction of the prevailing wind should also be taken into consideration. Try to pitch with the back of your
SoulPad facing the prevailing wind. This will help to conduct the wind over the SoulPad rather than up
against it.
An uneven pitch will place uneven tension on the canvas, poles and other components, as will an overly
exposed pitch.
Once you have selected a good spot, before pitching remove any stones and loose debris that may cause
damage to the groundsheet or discomfort underfoot.
ITEMS INCLUDED
x26 pin pegs
x13 stake pegs
x1 a-frame cap
x1 peg bag
x1 canvas fly sheet
x1 canvas bag
x1 groundsheet
x1 central pole
x1 a-frame
x1 pole bag
x13 guy lines with slides

SoulPad 4000-hybrid™
Instruction Manual.
Version 2, Published Feb 2012. © SoulPad Ltd. 2012
Page 5of 13
GETTING STARTED
Here follows a quick guide to pitching your SoulPad tent. More detailed instructions can be found in the
pages that follow.
1. Peg out the groundsheet so it is taught.
2. Peg out the canvas loops lightly.
3. Position the central pole.
4. Position the A frame.
5. Fit the A frame cap.
6. Close entrances and windows and peg out the guy lines evenly.
7. Apply tension to the guy lines evenly.
8. Tap in the canvas peg loops.
HOW TO ERECT YOUR SOULPAD TENT
The order in which your SoulPad is erected is very important. Never assume that you will remember the
order, and always make sure you have a set of instructions with you each time you pitch your SoulPad tent.
SoulPad users can fall into bad habits and receive bad erection advice from other campers. This can have a
negative impact on the longevity of your SoulPad and its overall performance. In case you lose them, these
instructions are also available on our website.
It is recommended that the SoulPad-hybrid is erected with the groundsheet fully attached. This will ensure a
good shape is achieved.
Groundsheet
1. Lay out the groundsheet as flat as possible, with the canvas connected and on top.
Make sure you have the entrance facing the correct direction and the entrance is zipped closed.
2. Using the smallest pegs (the pin pegs) peg out the groundsheet keeping it as taught as possible.
3. Again using the pin pegs lightly peg out the peg loops at either side of the entrance.
4. Continue to lightly peg out the remaining peg loops around the entire circumference, working methodically
in either a clockwise or anti-clockwise direction, being sure not to miss any.
Guy Lines Preparation
5. Now it’s time to get the guy lines ready. The first time you erect your SoulPad you will need to unravel all
of the guy lines. Do not peg out the guy lines at this stage; we’re just getting them ready for later steps.
6. The plastic on the guy rope (the black nylon 'slides' that create the peg loop and allow us to adjust the
tension) should rest about 50-70cm from the point they are connected to your SoulPad’s walls to begin with.
This allows you room to adjust the tension in later steps. You will use the loop created by the guy rope to
fasten the larger stake pegs through later.
Poles
7. Partially extend the poles. Unzip the entrance and take the central pole (with rubber stoppers) inside.
Then find the inside of the top of your SoulPad and marry it with the rubber stopper. Make sure the small
metal loop fixed onto the pole is at the top, this is to attach the optional inner tent.
8. Standing roughly in the middle of the groundsheet, pull the pole up so that the roof of your SoulPad rises,
clicking the pole into full length as you do so. This should be reassuringly quite challenging to get into place
due to the tension created by the pegged out canvas fly. It is this tension that keeps your SoulPad in place.

SoulPad 4000-hybrid™
Instruction Manual.
Version 2, Published Feb 2012. © SoulPad Ltd. 2012
Page 6of 13
9. Make the central pole stand as vertical as possible, in the centre of the groundsheet. The pole should hold
upright by itself. The canvas will droop but the pole shouldn’t slip out of position. Go back outside.
10. Get the A frame and re-enter your SoulPad. This is much easier if you unlock one section next to the
top.
11. Once inside your SoulPad click the sections back into place and put the metal spike on the top of the A
frame through the eyelet in the canvas above the entrance, at the apex.
12. Now edge the A frame’s feet forward into the entrance space until it is almost vertical.
13. Position the A frames feet into the cups on the groundsheet.
14. There are also ties which you can loosely fasten around the legs of the A frame if desired. Remember,
the A frame serves only to create the porch shape, it is not as structural as the central pole. Do not try to
force it into a vertical position. Go back outside.
15. Attach the A frame cap (to stop water getting in) onto the A frame spike now visible on the outside of
your SoulPad (top of the a-frame). Zip the entrance closed.
Guy lines
In the first instance the guy lines should be pegged out with plenty of slack. In the first steps of pegging out
the guy lines our aim is simply to get the positioning right by following the lines of the seams in the canvas.
It is very important that the guy lines are not pegged out with too much tension at this point, because we will
apply tension evenly in later steps.
16. Use one of the larger stake pegs to attach the first guy rope from above the entrance (remember, with
plenty of slack) then secure the guy lines either side of the entrance too. Don’t push the stake pegs all the
way into the ground or else you won’t be able to adjust the tension on the guy lines later.
17. Once the first three guy lines are in place at the front, go to the back of your SoulPad and repeat with the
opposite three guy lines at the back (remember, with plenty of slack).
18. Return to the front of your SoulPad and position the next two guy lines along (working methodically in
either a clockwise or anti-clockwise position).
19. Go and peg out the two guy lines opposite to those in the step above. Repeat this process until all of the
remaining guy lines are in position, always following the line of the seams at all times.
20. Now in the same order that you pegged out the guy lines, adjust the slides on the guy lines to take up
the slack with even tension. Get the canvas nice and taught without stressing any of the components. The
best way to do this is to hold and pull the canvas loop where the guy rope is attached to the SoulPad (noting
its affect on the SoulPad’s walls), and take up the slack by re-positioning the slide. You will see the walls
begin to relocate more vertically and neatly at this stage.
NB: Too much tension or the incorrect positioning of the wall loops may cause the wall to crease.
Return To The Peg Loops
21. Now you can push in the pegs at the base of the walls (don’t worry if they don’t go all the way into the
ground. These peg loops serve mainly to keep the storm flap in place protecting the zip of the groundsheet).
In doing this you will notice any remaining slack in the canvas will disperse, giving the SoulPad a good
shape.

SoulPad 4000-hybrid™
Instruction Manual.
Version 2, Published Feb 2012. © SoulPad Ltd. 2012
Page 7of 13
Check that the storm flap (the canvas guard that rests over the groundsheet-to-fly zip) is positioned
downward, to protect the zip from any rainfall.
Well done, Job done! Cup of tea anyone?
HOW TO ROLL THE WALLS UP AND DOWN.
To roll up:
1) Un-peg the canvas loops on the outside of the SoulPad tent, at the base of the walls but leave them in
position in the ground.
2) Unzip the canvas fly from the groundsheet along each section until the two are completely separate.
3) Roll up and tie back the entrances completely.
4) Roll up the canvas walls and fix up into position using the tie backs and peg loops spaced at intervals
around the circumference.
To roll down:
Simply reverse the above steps.
PACKING YOUR SOULPAD TENT AWAY
Make sure your SoulPad tent is completely dry before packing. Your SoulPad needs to dry out while pitched,
any other way and the air may not circulate satisfactorily. This can be difficult during the colder months but is
an absolute must. If it is wet moulds will appear, these are often extremely difficult to remove. If you must
pack it away wet, you must pitch it again within 24 hours. Even if you have to pitch it in wet conditions, this
will prevent the problems that occur when leaving a wet SoulPad tent in its bag. A SoulPad tent is better off
wet but pitched than it is wet and packed in a bag without air circulating around it.
The canvas bag is large enough to contain your SoulPad in its entirety. However, it is advisable to pack the
poles and pegs separately from the canvas in order to protect the canvas from damage.
1. Remove all of your belongings from the SoulPad tent.
2. Close all of the windows.
3. Remove the A frame cap and place it in the peg bag ready for next time.
4. Go inside the SoulPad tent, untie the A frame straps (if you used them), remove the A frame’s feet
from its cups and collapse the A frame. Take it outside of the SoulPad tent and place it inside the
pole bag ready for next time. Repeat this process for the central pole.
5. Zip the entrance closed.
6. Outside the SoulPad tent reposition all of the slides so that they rest approximately 50-70cm from
the point they are connected to your SoulPad’s walls, ready for next time.
7. Remove all of the stake pegs from the ground, remove any loose dirt and place inside the peg bag.
As you do this throw the guy rope onto the canvas fly sheet out of the way for later. Be careful not
to throw dirt onto the canvas in doing so.
8. Remove all pin pegs from the ground (groundsheet and base of the walls), remove any loose dirt
and place inside the peg bag.
9. If the groundsheet is particularly dirty it may be a good idea to remove it and pack it away
separately to be cleaned and re-packed later. Fold the circular tent in half with the canvas tucked
and folded in on the inside. A semi circle of groundsheet will remain in contact with the ground,
while the upmost semi-circle of groundsheet will be exposed to the air. If the weather is fair, leave
like this for 5-10 minutes to allow it to dry, then turn the whole thing over to allow the other side to
dry.
10. Fold in half again.
11. Take the peak and fold it in so that the new flat edge is roughly the same length as the canvas bag.
12. Using the poles as a rule (in their bag), place the poles mid-way along the straightest edge.

SoulPad 4000-hybrid™
Instruction Manual.
Version 2, Published Feb 2012. © SoulPad Ltd. 2012
Page 8of 13
13. Fold the canvas over the poles from each side and remove the poles.
14. Now you can choose to either place the poles at the top of this shape and roll them into the canvas.
Or to protect the canvas from the poles you can roll this shape without them. Remove any debris as
you roll.
15. Fasten the canvas with the ties it came with. Helping it to hold its shape whilst in the main canvas
bag.
16. Place the rolled canvas into the main canvas bag.
17. It is good practice to store the poles, pegs and canvas in their separate bags in order to protect the
canvas from the other components.
STORING YOUR SOULPAD TENT
1. Only store your SoulPad tent if it is dry.
Never store it if the canvas fly sheet or the groundsheet is damp or wet. Both the groundsheet and the
canvas must be completely dry before storing. Otherwise there is a very high risk of mildew forming on the
canvas. Mildew is often irremovable, and so its prevention is of very high importance.
If you are forced to pack your SoulPad tent away when it is damp or wet then it must be erected again within
24 hours, even in adverse weather.
2. Store in a dry place.
Moderate, temperate conditions are ideal. Extremes of temperature will harm the structure of the canvas.
The optimum storage temperature is room temperature.
3. Do not store anything on top of your SoulPad tent as this may distort the canvas or cause harm to the
other components.
4. Your SoulPad tent should be taken out of storage at least once a year to allow it to recover from its
compacted and stored state.
5. Be aware that rodents and insects can cause damage to stored SoulPad tents.
6. Choose your storage area carefully and remember to check on your SoulPad tent from time-to-time. For
example: five minutes spent checking the bag for dampness, or checking for signs of rodent activity could
save you time, effort and unwanted repair costs later.
IN THE EVENT OF A FIRE
There is a legible notice permanently attached inside your SoulPad tent, to the left of the entrance as you
enter the tent. Do not remove it. These Fire Precautions should be noted and followed each time you use
your SoulPad tent. It reads as follows: -

SoulPad 4000-hybrid™
Instruction Manual.
Version 2, Published Feb 2012. © SoulPad Ltd. 2012
Page 9of 13
Never block the exit of your SoulPad on the inside or the outside of the tent. In the event of an emergency
the exit will need to be clear of obstacles to allow the occupants to vacate the tent as quickly as possible.
It is advisable to include a small hand held fire extinguisher as part of your camping kit.
The SoulPads do not have a designated cooking area. Cooking equipment should be used outside the
SoulPad tent. Please carefully follow the instructions that came with your cooking equipment.
VENTILATION
The SoulPad 4000-hybrid has three vents at the peak of the tent. These are lined with a mosquito mesh.
The vents must be kept clear at all times. Never block the vents. To do so will compromise the tents
performance and the occupant’s safety.

SoulPad 4000-hybrid™
Instruction Manual.
Version 2, Published Feb 2012. © SoulPad Ltd. 2012
Page 10 of 13
PARTICULAR PROBLEMS THAT MAY ARISE
The lifespan of your SoulPad is very much dependent upon the camping conditions and the way in which
you care for and maintain your SoulPad. Air pollution, ultraviolet radiation, natural dirt (bird droppings, sand,
salt and water) and domestic dirt (cooking stains, wine and sun cream) all limit the lifespan of your cotton
canvas SoulPad tent, as will the level of care and maintenance that you choose to apply. Any problem areas
should be dealt with immediately.
Weathering:
Brand new cotton canvas tents can often leak on their first few wets, with the leaks becoming less and less
with each wetting and drying process. This doesn’t always happen, but some new cotton canvas tents may
need to go through a process called weathering. Weathering is the wetting and drying of a canvas tent.
Some water droplets may penetrate the canvas to begin with, but the cotton fibres in the weave will
eventually swell and nestle into each other. The result is a perfectly water resistant tent and one that will
give years and years of good service if it is looked after properly. Some SoulPad tents will need weathering
two, three or even more times before every last water inlet is eliminated. With patience, those last few drips
will eventually cease. This process can be accelerated artificially using a fine spray on a hose pipe if
preferred. For the weathering process to be completed (either artificially or naturally), it is important that the
tent dries thoroughly in-between wets.
Commonly water will accumulate on the labels inside the SoulPad tent during the weathering process, or
where the vertical walls are attached to the sloping roof. This falsely gives the impression that these are
problem areas. This is not the case. Again, this will eventually cease.
Loose Pegs:
If the ground is too wet or soft (such as with sandy soil), pegs may become loose and pop out of the ground
more easily in a small breeze. In this instance it is advisable to switch to wooden pegs as these purchase
the ground better in such conditions.
Loose Poles:
If there is not enough tension on the poles they will move. Please check the pitching instructions and follow
them carefully.
Migrating Slides:
The slides on your SoulPad tent will need to have tension re-applied to them following heavy rain, or wind.
Check them over periodically. If you plan to use your SoulPad tent in particularly adverse weather conditions
(especially windy conditions) it is advisable to switch the standard slides to locking slides. Always close all
windows and entrances before adjusting the slides.
Correct Placing of Items Inside The SoulPad Tent:
Do not place items too close to the canvas. During windy and/or wet conditions these may harm the canvas
or cause it to let in water.
Do not hang objects from any of the fixings inside the tent intended for the inners. This will cause undue
stress on the canvas and may cause distortion. The objects you hang may also cause damage to the
canvas during windy conditions.
UV Degradation:

SoulPad 4000-hybrid™
Instruction Manual.
Version 2, Published Feb 2012. © SoulPad Ltd. 2012
Page 11 of 13
Ultraviolet radiation can affect the SoulPad tent’s canvas performance and its water resistant capabilities.
When re-waterproofing your SoulPad tent, look for products that also include UV protection.
Immediate effects of UV can be ‘bleaching’ - a change in colour of the canvas to lighter shades. Compare
your SoulPad canvas fly sheet with the canvas bag it came in. They are made of the same material but it is
likely that the canvas bag has been less exposed to UV. Is there a marked difference in colour? If so, it may
be time to treat your canvas fly sheet. UV can also lead to a reduction in the effectiveness of the
waterproofing and anti-fungal treatments.
All of the components used to produce SoulPads tents have anti-UV treatments and properties but will need
to be monitored carefully and replaced at the first sign of degradation. All the canvas used to produce
SoulPad tents is treated to be water, UV and mould resistant to protect it from dirt, ultraviolet radiation and
fungus. SoulPads can be used straight out of the bag, without any need for treatments prior to use.
However, the treatments will not last forever. Your SoulPads lifespan will depend largely on how well you
replenish these treatments.
Guy lines and slides will eventually need replacing and a common cause for accelerated wear can be due to
UV exposure.
Snow:
SoulPads are not winterised tents and as such they are not intended for use in snowy conditions. If for any
reason your SoulPad does find itself in these conditions you must regularly remove the snow from the
canvas surface. The SoulPad tents are not designed to withstand heavy payloads of snow.
Zips:
Zips sometimes endure extreme tensions. These can be caused by wind gusts, improper erections and
adverse pressures caused by people or objects leaning against your SoulPad. Close all zips before erecting,
adjusting or taking down your SoulPad. Handle the zips with care. To protect the zips treat them with
silicones once in a while. If a zip on your erected SoulPad seems strained, play with the tension on the guy
lines or adjust the positioning of the wall loops to find out which adjustment helps the zip to function better.
When a SoulPad is erected incorrectly it can cause the zips to fail.
Re-proofing:
This is the process of replenishing the treatments already applied at the point of manufacture. Spotting when
it is time to re-proof can be difficult. A SoulPad tent that has enough proofing agents present will cause the
water on the surface to ‘bead’ after a downpour.
The tent will dry quickly in a breeze or sunlight and it will not fade when exposed to UV. You will literally see
beads of water forming on the outer surface of the canvas. When it is time to re-proof your SoulPad, you will
notice that the water no longer beads, and that the SoulPad retains the moisture in the canvas for longer,
taking longer to dry than before. The colour of the canvas may also have faded. In the worst cases, mildew
will start to appear in the form of small irremovable specs.
Reproofing is simple. SoulPad recommends the use of Granger’s Fabsil with UV. A 5 litre container of this is
enough to treat even the largest of SoulPads. Please follow the manufacturer’s guidelines when using this
product. In simple terms: add the liquid to a pressurised container and spray onto the outer surface of the
dry SoulPad tent (in fine weather) and allow it to dry. A fine coating is sufficient.
Fungus & Mildew:
One of the most common problems to occur in canvas is mildew. This is easily preventable.

SoulPad 4000-hybrid™
Instruction Manual.
Version 2, Published Feb 2012. © SoulPad Ltd. 2012
Page 12 of 13
The onset of fungus or mildew is a sure sign that your SoulPad is past needing a treatment with a cleaner
and waterproofing agent, or that it has been stored incorrectly.
There are a number of reasons why mildew develops in canvas (exposure to dust and/or bacteria for
example). It is most commonly formed when exposed to certain conditions of humidity and temperature.
Even if the canvas is mildew resistant, mildew will form if left damp. The best way to dry your SoulPad tent is
for it to be fully pitched and allowed to dry naturally in fair weather. It should not be hung to dry as fungus
and mildew could form in the folds and creases of a hung SoulPad tent.
Mildew is very destructive to cotton fabrics as well as other materials. Mildew most commonly forms when
tents are stored damp. However, depending on the environment mildew can start while the tent is set up
also. under certain conditions of humidity and temperature it’s on-set can be very fast indeed. If mildew has
started to grow, it can be stopped from spreading by thoroughly drying the tent (preferably in the hot sun)
and applying a cleaner, followed by the re-waterproofing of any areas cleaned.
When dealing with fungus use a soft brush or sponge and a lot of fresh water to remove as much as you can
and to stop the fungus from spreading. Only use specialised canvas tent cleaning products for this purpose.
Other domestic, chemical products can be too harsh and cause the canvas structure to breakdown and leak.
Be sure to air your tent from time-to-time. Condensation levels should be kept to a minimum by regular
airing. Open the windows and entrances regularly to allow air to circulate inside the tent too.
Keeping grass and weeds trimmed around the bottom of the tent is also important since dampness clings to
foliage and does not allow air to get to the fabric.
CLEANING YOUR SOULPAD
If using your SoulPad frequently or for long periods of time, a cleaning and re-proofing treatment should be
applied more frequently.
It is easy to spot when a SoulPad needs to be cleaned. However, we all have different standards and a
sloppy cleaning and maintenance regime will cause the SoulPad tent to deteriorate more quickly. The
sooner a dirty or stained spot is dealt with, the better. Left for too long and the problem may spread and lead
to other problems such as canvas disintegration whereby the material begins to ‘dissolve’ and disappear
completely.
It is advisable to first use a specialised cleaning agent on your SoulPad tent, then a specialised
waterproofing agent. The other way around will cause the waterproofing agent to be washed away. If you
ever spot clean an area of your SoulPad, always re-waterproof that area too. Whether it is a small area that
is being treated, or the entire SoulPad, this is an important rule to follow as failure to do so will lead to leaks.
It is in your interests to keep the canvas as clean as possible and remove stains when they first appear.
Dust and dried mud is better wiped away with a soft brush before a cleaning agent (and then re-
waterproofing agent) is applied.
If you feel the cleaning and treatment is beyond your capabilities then your SoulPad tent can be taken to a
professional canvas cleaning specialist to be cleaned and re-treated. Feel free to contact SoulPad for details
of third parties offering this service in your area.
Never try to clean your SoulPad in a washing machine. This will cause too much damage to the canvas
fibres and it may also damage your washing machine.
REPAIRS
Inevitably accidents do happen and SoulPads get wounded in the process. The components used on

SoulPad 4000-hybrid™
Instruction Manual.
Version 2, Published Feb 2012. © SoulPad Ltd. 2012
Page 13 of 13
SoulPad tents have been selected for their durability and ease of maintenance. You might be surprised by
the level of repair you can achieve yourself.
Canvas; Always apply any repair work on the outside of your SoulPad tent. Small rips in the canvas can
literally be stitched closed using a common needle and thread (use as fine a needle as you can bare, and try
to match the cotton colour to the canvas). Larger rips and tears will need to be patched, but again use a
needle and thread to do so. Try to use the same canvas colour and type as the original SoulPad. If applying
a patch, try to use a diamond shape with the peak of the diamond being upmost. This will enable any rain
run-off to disperse more quickly than a patch applied squarely.
When stitching, always try to keep the stitching runs tight and close together. It might pay to go over the
same area a few times, just to be sure you have achieved a good seal.
It is a good idea to include a basic sewing kit with your camping equipment. Having access to common
needle and thread can make or break a trip away. Other campers may have to end their trip due to a rip or a
tear, but as a canvas tent user, more often than not you will able to repair your SoulPad tent yourself and
continue with your trip. Remember, canvas is very forgiving! Any holes left by your needle will soon be filled
with the expanding fibres of the canvas when it becomes wet. Have confidence in your repairs!
Groundsheets; Circular repairs are advisable on groundsheets in order to reduce the likelihood of the patch
becoming loose through footfall and contact. In most instances, the groundsheet can be repaired using a
patch of the same material and a good, strong contact adhesive. It is more effective to apply a patch on both
sides of the groundsheet.
Table of contents
Other SoulPad Tent manuals

