Sound Magus H500 User manual
OWNERS MANUAL
5-CH
Hybrid
Car Amplifier
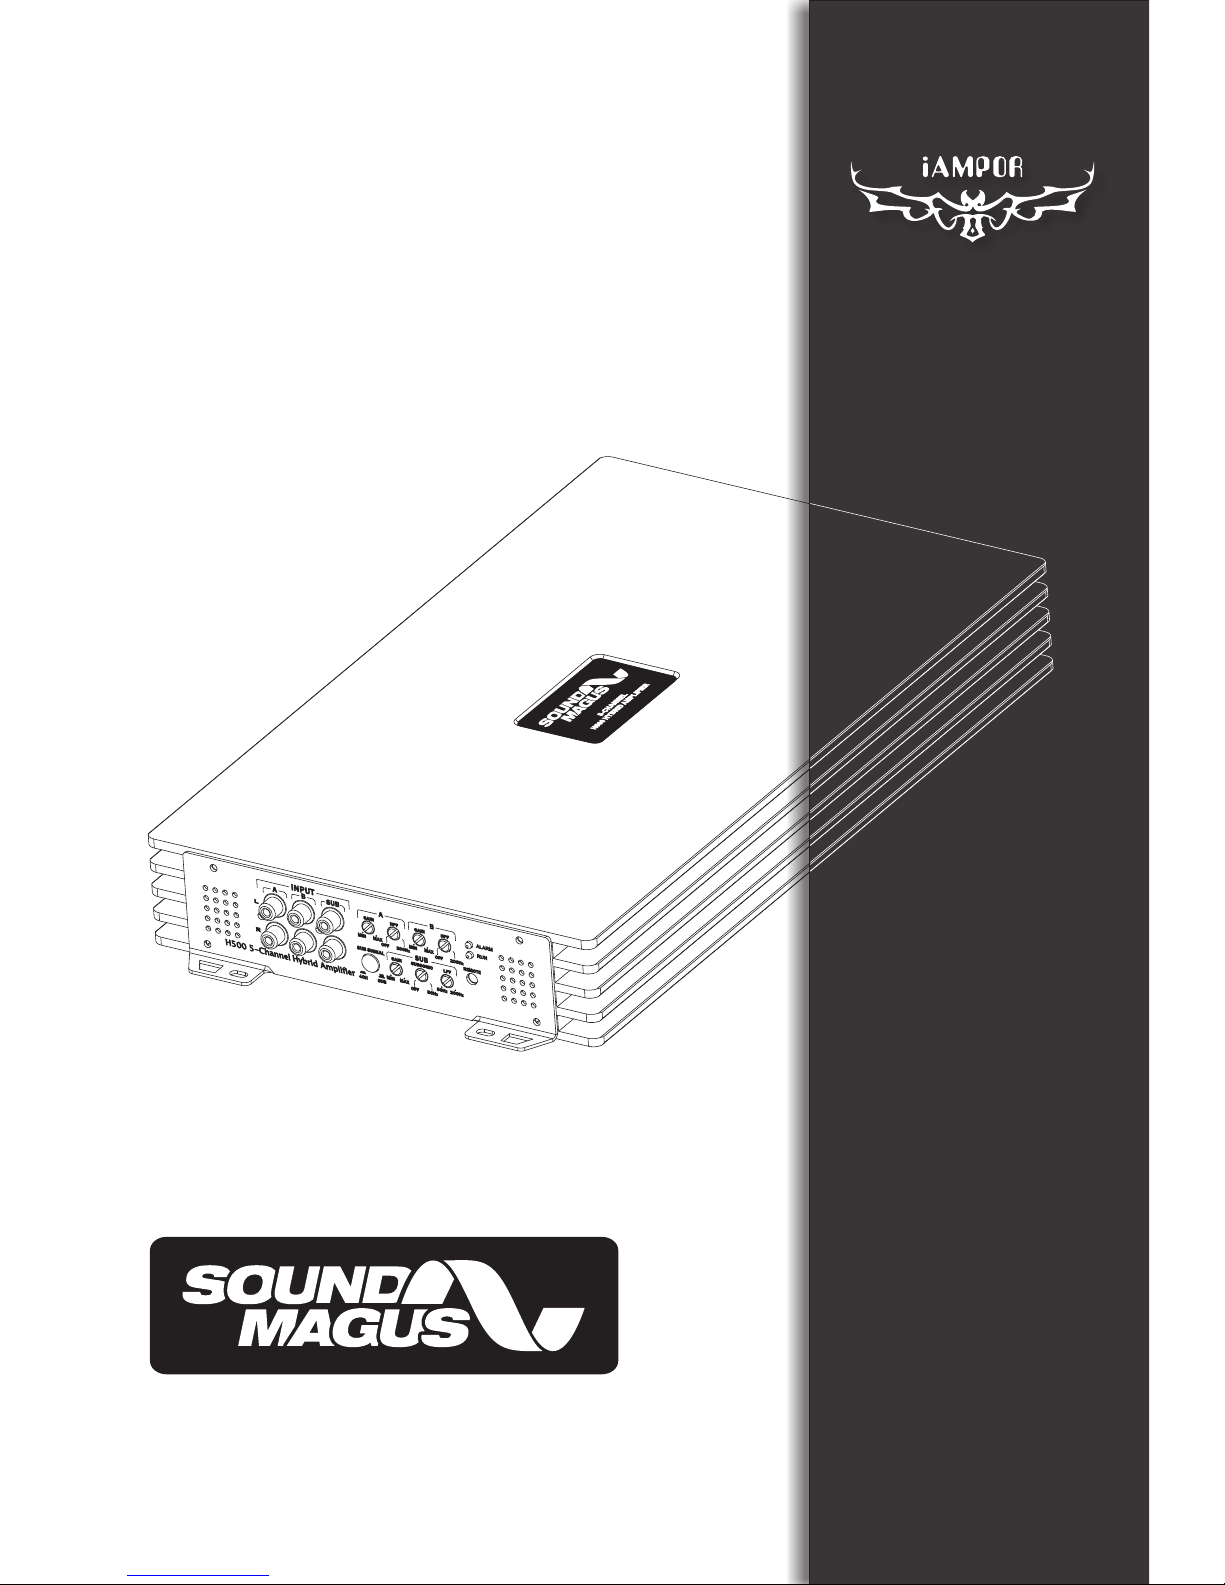
H500
5-CH Hybrid Car Amplifier

Congratulations!
Thank you for purchasing SOUNDMAGUS 5-CH Hybrid Car Amplifier for
your car audio system. Now you own an amplifier of uncompromising
design and engineering incorporating the latest advanced circuit
technology. You will soon discover the amplifier displays optimum sound
w high quality and reliable performance. All are proven the high quality
of SOUNDMAGUS products.
SOUNDMAGUS amplifiers are the result of advanced craftsmanship which
using the highest quality components and strict quality control system. In
order to provide you a long joyful listening journey, we recommend you
install your amplifier by an authorize SOUNDMAGUS dealer. It will ensure
the proper installation of your amplifier and it will also increase the
warranty to one year.
Please read this manual thoroughly to ensure that you can get the
maximum benefit from this new amplifier. When you install it properly, this
unit will provide you years of trouble-free performance. To install and use
this amplifier properly, please record the following information which will
help you protect your investment.
ith
1
INTRODUCTION
Model # :______ ____ ____ _______
Dealer name:_____________________
Date of purchase:_____________________
Installation place and date:_____ ____ ____ _______ _
DESIGN FEATURES
Super noise rejection circuit
Frequency response 12Hz~25KHz,THD<0.04%
Double side FR-4 PCB
High quality SMD components, high accurate resistors
and capacitors
RoHS, E-mark certification
Full MOSFET power circuit design
Overload, shortcircuit, thermal, low voltage protection
Class-D + Class-AB Hybrid desi gn, Best conbi nation
of strong bass and Hi-Fi performance .
Adjustable High pass, Low pass, Subsonic filters.
12

Congratulations!
Thank you for purchasing SOUNDMAGUS 5-CH Hybrid Car Amplifier for
your car audio system. Now you own an amplifier of uncompromising
design and engineering incorporating the latest advanced circuit
technology. You will soon discover the amplifier displays optimum sound
w high quality and reliable performance. All are proven the high quality
of SOUNDMAGUS products.
SOUNDMAGUS amplifiers are the result of advanced craftsmanship which
using the highest quality components and strict quality control system. In
order to provide you a long joyful listening journey, we recommend you
install your amplifier by an authorize SOUNDMAGUS dealer. It will ensure
the proper installation of your amplifier and it will also increase the
warranty to one year.
Please read this manual thoroughly to ensure that you can get the
maximum benefit from this new amplifier. When you install it properly, this
unit will provide you years of trouble-free performance. To install and use
this amplifier properly, please record the following information which will
help you protect your investment.
ith
1
INTRODUCTION
Model #:_____________________
Dealer name:_____________________
Date of purchase:_____________________
Installation place and date:_____________________
DESIGN FEATURES
Super noise rejection circuit
Frequency response 12Hz~25KHz,THD<0.04%
Double side FR-4 PCB
High quality SMD components, high accurate resistors
and capacitors
RoHS, E-mark certification
Full MOSFET power circuit design
Overload, shortcircuit, thermal, low voltage protection
Class-D + Class-AB Hybrid desi gn, Best conbi nation
of strong bass and Hi-Fi performance .
Adjustable High pass, Low pass, Subsonic filters.
12
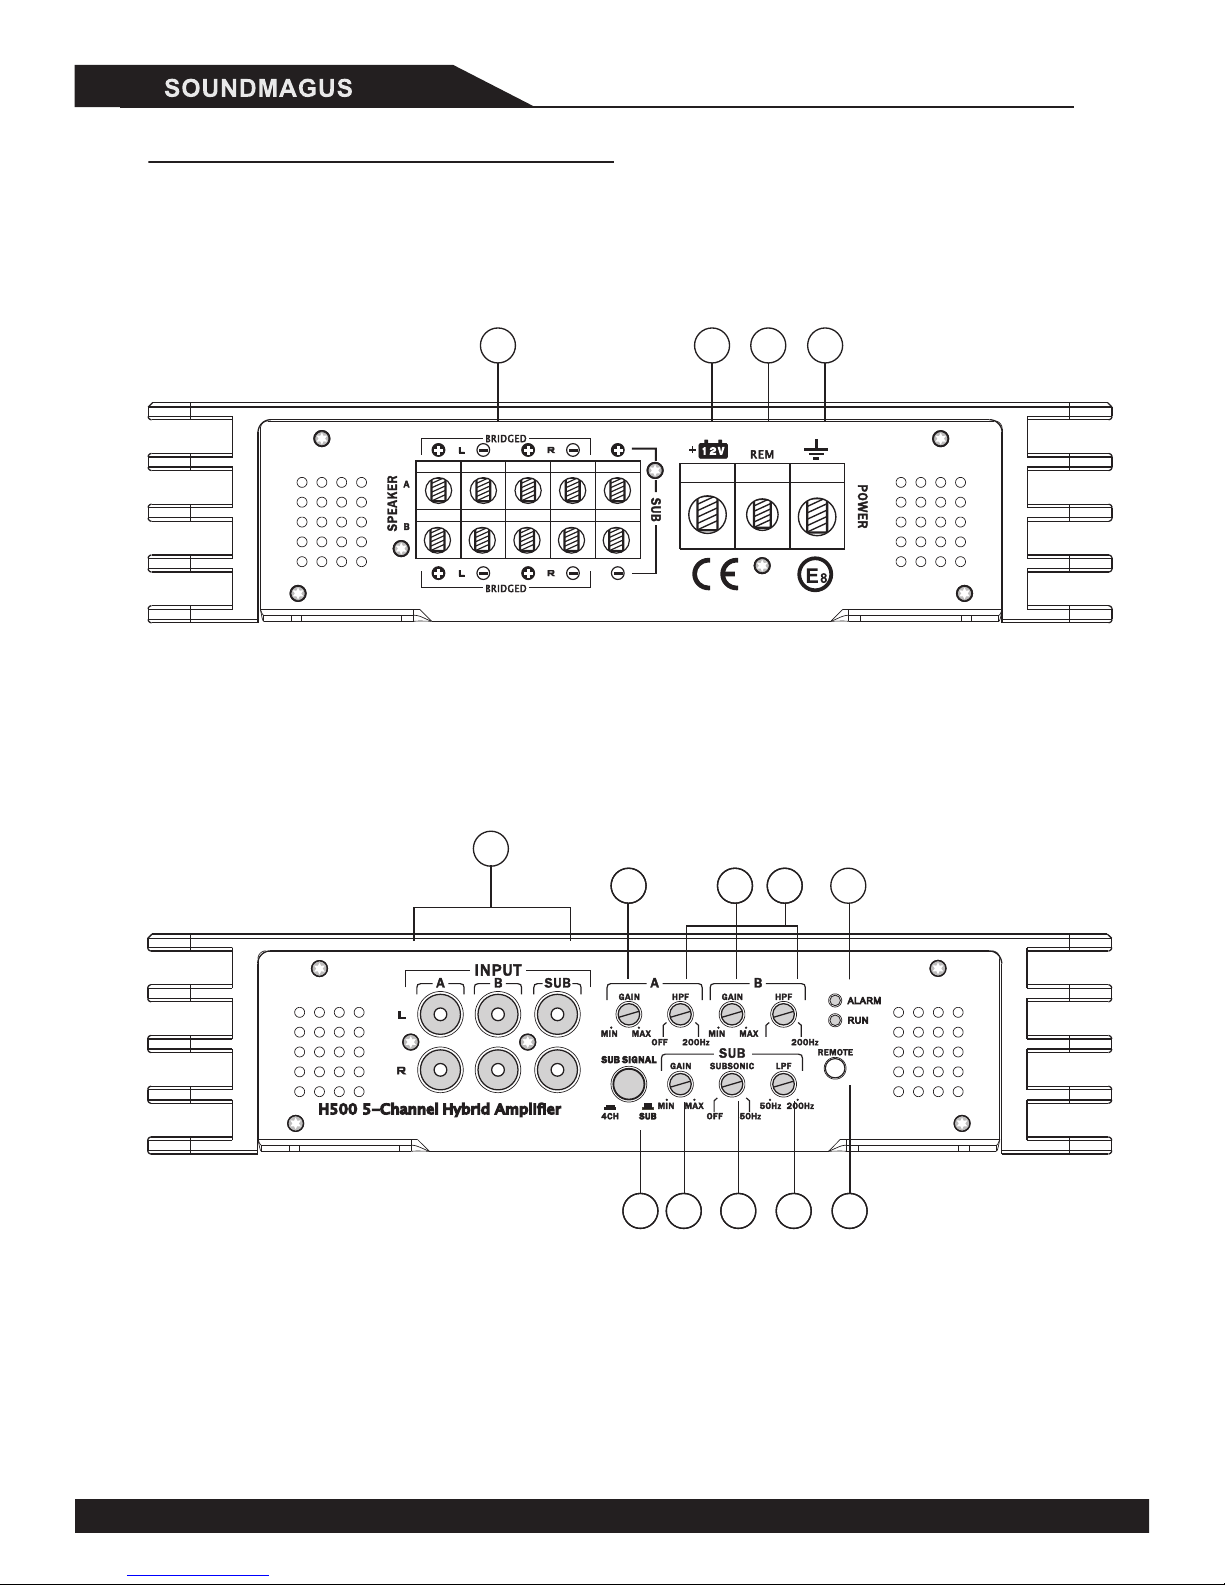
AMPLIFIER FUNCTIONS
1 2 34
1 Speaker connection
2 +12V Battery Terminal
3 Remote ON/OFF input
4 Ground Terminal
6 RCA audio-input
This knob adjust the high-pass frequency for 4x full frequency channels. The high-
pass filter will turn off at the most counterclockwise position, the cutoff frequency will
increase when knob turning clockwise till 200Hz.
Gain control regulates the sensitivity of amplifier to match the signal output voltage
of your source unit. The gain control is not a volume adjustment. Use high quality
CD music and increase the volume of your source unit to 75%.Position the gain at
the minimum and then increase gain slowly(clockwise).Stop at the first sign of
distortion, then lower the gain a little(counter clockwise) to achieve clear
undistorted music at the maximum level.
7 High-Pass-Filter for 4x full frequency channels
Connect your speakers correctly which means plus to plus and minus to minus.
Never connect speaker cables with chassis ground directly. It may destroy your
amplifier. We recommend AWG 16# speaker cable. The detailed connection ways
are shown in page 7-8.
The +12 Volt power cable must be connected with a fuse in line near the battery+
terminal. Please use Gauge 4(or up) power cable and 80A in-line fuse.
Remote control terminal. The remote control cable must be connected with source
unit remote terminal so the amplifier will switch on and off automatically with
source unit. If there are two or more amplifiers connected to this terminal it might
be necessary to add an additional relay.
Chassis ground terminal. The chassis ground cable must be connected very tight
on a nearby massive and electric conductive place. Please connect chassis ground
near amplifier with same gauge as power cable.
5 Gain
These RCA audio-inputs connect with your source unit RCA outputs. Please use
car audio RCA cables, otherwise it may be disturbed. Keep these cables as short
as possible. To avoid disturbances from your car electronics, please don't close
the existing car cables when you install the RCA cables. If your source unit has
only one group output, please use a suitable Y-RCA adaptor. If your source unit
has only speaker outputs, you should use a HIGH-LOW level adaptor.
OF F
55
55 55
6
7
98
10
1112
34

PRE-INSTALLATION
Don't expose any cable out of your car. Please take care insulated cables to
avoid be damaged when cables pass through metal, rubber and plastic etc.
Don't install cables too tight.
Please use car audio RCA cables, otherwise it may be disturbed. Keep these
cables as short as possible. To avoid disturbances from your car electronics,
please don't close the existing car cables when you install the RCA cables.
Use good insulated 4# (or up) power cable. The +12Volt power cable must be
connected with a 80A fuse in line fuse near 20cm of battery+ terminal.
When using the remote bass level control, you can adjust volume in the drive
seat conveniently.
The button select the signal source for subwoofer channel .When the button is
up, subwoofer signal switched to the subwoofer channel’s RCA input jack. when the
button is down, it mix up 4x full freqencny channel’s bass signal and pass to
subwoofer channel.
11 Remote bass level control(Optional)
12 Woofer channel signal selector
The amplifier must be mounted securely at a solid, dry and low vibration
surface in the trunk or passenger area. Fix the amplifier in an open air area to
insure proper heat dissipation. Fix the amplifier in a place where the amplifier
can access easily to set input controllers.
The ground cable should be connected directly with the chassis of your vehicle
which should be metal to metal ground point connection.
56
10 Run/Alarm Indicator
Filter out high frequency from 50~200Hz that the woofer can't play.Adjust this
knob to match the woofer's frequency response.
9 Low Pass Filter
The blue LED will light up when the amplifier work properly.
The red LED will light up if the amplifier detect a fault. This may be caused by
one of the following: excessive heat, reverse polarity, short circuit or input
overload. If this happens, please shut off amplifier and check the problem.
The subsonic filter can filter out unwanted low frequency from 10Hz(OFF)to
50Hz. This function will increase the power handling of your woofers.
8 SUBSONIC Filter
7
2-8Ω
WIRING CONFIGURATION
5-Channel mode
8
FUSE
2-8Ω2-8Ω2-8Ω
2-8Ω
FUSE
2-8Ω
4-8Ω
Bridged
4-8Ω
Bridged
3-Channel mode

7
2-8Ω
WIRING CONFIGURATION
5-Channel mode
8
FUSE
2-8Ω2-8Ω2-8Ω
2-8Ω
FUSE
2-8Ω
4-8Ω
Bridged
4-8Ω
Bridged
3-Channel mode
910
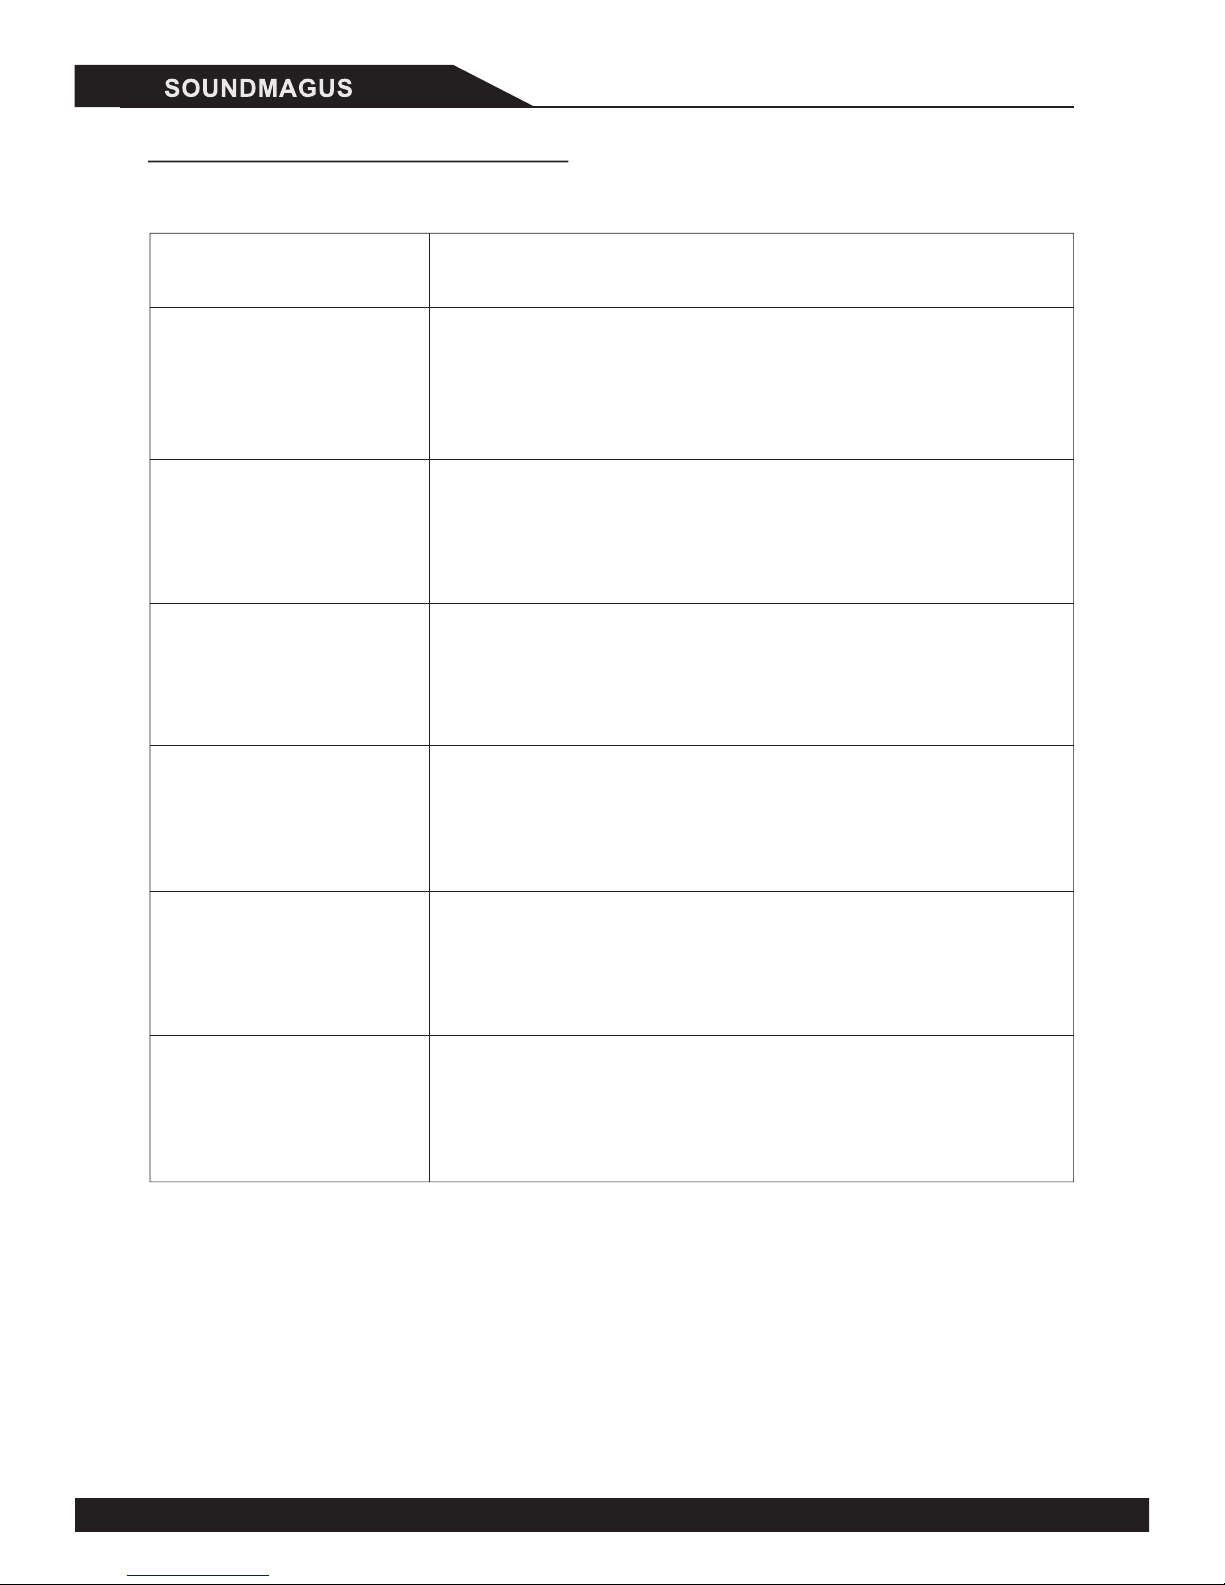
TROUBLE SHOOTING
If your amplifier is still malfunction after checking through the troubleshooting
section,please contact our authorized SOUNDMAGUS dealer.
Power LED off
No Output
(Power LED on)
No Output
(Protect LED on)
Distorted Output
Amplifier switches
on and off
MALFUNCTION SOLUTION
One Channel has
as no function
Check volume control on the source unit
Check GAIN regulator on amplifier
Check RCA cables and connections
Check speaker cables and connections
Check connetions both at amplifier and at other ends
Check plus and minus battery cables
Check all fuses on amplifier
Check remote voltage
Speaker is short circuit or damaged
Amplifier is over temperature
Amplifier is over loaded
Battery is low voltage
Source unit gain set too high
Amplifier gain set too high
Speaker(s) blown
Check chasis ground connection with amplifier
Check cable terminals and battery terminals
Low voltage from battery
Check the connection of the remote wire
Check RCA connections of this channel
Check speaker connection of this channel
Balence regulator of source unit do not set in middle
Speaker of this channel is damaged
SPECIFICATION
RMS@4Ω(Power supplier14.4V) 4×90W + 300W
Input Level 0.2V-5V
4x channel Frequency Response 20Hz-25KHz
4x channel HPF Frequency 20Hz-200Hz
Subwoofer Channel frequency response 8Hz-200Hz
Subsonic Filter Frequency 8Hz-50Hz
LPF frequency 40Hz-200Hz
The size of the whole machine Dimension 383mm×228mm×52mm
RMS@2Ω(Power supplier14.4V) 4×120W + 500W
THD at 4ohm load 30% rated power <0 05%.
S/N Ratio
Optional remote control YES
Overload protect system YES
Overheat protect system YES
RMS@4 Bridged powerΩ ( supplier 14.4V)2×200W + 300W
4x Channel Bridged
>89dB
Enable in same group

910
TROUBLE SHOOTING
If your amplifier is still malfunction after checking through the troubleshooting
section,please contact our authorized SOUNDMAGUS dealer.
Power LED off
No Output
(Power LED on)
No Output
(Protect LED on)
Distorted Output
Amplifier switches
on and off
MALFUNCTION SOLUTION
One Channel has
as no function
Check volume control on the source unit
Check GAIN regulator on amplifier
Check RCA cables and connections
Check speaker cables and connections
Check connetions both at amplifier and at other ends
Check plus and minus battery cables
Check all fuses on amplifier
Check remote voltage
Speaker is short circuit or damaged
Amplifier is over temperature
Amplifier is over loaded
Battery is low voltage
Source unit gain set too high
Amplifier gain set too high
Speaker(s) blown
Check chasis ground connection with amplifier
Check cable terminals and battery terminals
Low voltage from battery
Check the connection of the remote wire
Check RCA connections of this channel
Check speaker connection of this channel
Balence regulator of source unit do not set in middle
Speaker of this channel is damaged
SPECIFICATION
RMS@4Ω(Power supplier14.4V) 4×90W + 300W
Input Level 0.2V-5V
4x channel Frequency Response 20Hz-25KHz
4x channel HPF Frequency 20Hz-200Hz
Subwoofer Channel frequency response 8Hz-200Hz
Subsonic Filter Frequency 8Hz-50Hz
LPF frequency 40Hz-200Hz
The size of the whole machine Dimension 383mm×228mm×52mm
RMS@2Ω(Power supplier14.4V) 4×120W + 500W
THD at 4ohm load 30% rated power <0 05%.
S/N Ratio
Optional remote control YES
Overload protect system YES
Overheat protect system YES
RMS@4 Bridged powerΩ ( supplier 14.4V)2×200W + 300W
4x Channel Bridged
>89dB
Enable in same group
5-CH
Hybrid
Car Amplifier
Manufacturer: Soundmagus Technology Co.,Ltd
Website: www.soundmagus.com
Table of contents
Other Sound Magus Car Amplifier manuals


