SoundForce SFC-60 User manual

SFC-60 User Manual
SoundForce SFC-60 Manual V1.0

Installation and start-up :
The SFC-60 is class-compliant USB-MIDI de ice which means that no dri ers are necessary. The controller
should directly be recognized by your computer when plugged-in. In most cases, the de ice must be
connected directly in the computer USB ports or ia a POWERED USB hub to get enough power ia the USB
cable.
If the de ice is turned on (red LEDs are on) but it is not recognized by the computer, here are some tracks
to help with troubleshooting :
http://www.akaipro.com/kb/article/1602
http://www.akaipro.com/kb/article/1603
http://global.no ationmusic.com/answerbase/my-usb-midi-de ice-isnt-working-on-my-mac
Workflow :
The SFC-60 sends CC MIDI messages to the TAL U-NO-LX to take control of the synth parameters.
Therefore the plugin needs the right MIDI mapping and MIDI needs to be routed to the plugin's track. To
make your life easier, a mapped preset for the plugin has been made and can be downloaded here :
http://sound-force.nl/wp-content/uploads/2015/05/SFC-60_mapped_preset.pjunoxl.zip
To load the preset, click on the menu bar within the plugin, then “Load Preset” :
After loading the preset within the TAL plugin, it is strongly recommended to sa e a DAW user default
preset to assure that the mapping is always loaded when new instances of the plugin are created. See how
to do this in your DAW : HERE LINK WITH PAGE FOR DIFFERENT DAWS.
Of course you can always tweak the default preset and make your own within the plugin as well as within
the DAW. When switching to other TAL presets, the mapping stay in memory.
Routing :
To specify which instance of the plugin you want to control, simply route the MIDI to the right track. This is
usually down by scrolling (or clicking) from one track to another and thus putting a specific track in "record-
arm".
Recall :
When the plugin window and the state of the controller differs, it is sometimes preferable to "push" the
state of the controller to the plugin interface. That way nothing is jumping around when you start mo ing
the sliders and it helps getting the controller and plugin synced up when you get starting. Recall is reading
e ery slider position and switch status and sending a pack of CC message to the plugin.
To launch the recall function, keep the "sync" switch of the Arpeggiator function engaged for at least 1
second. The "sync" LED will blink to let you know that the recall has been done.
Please note : This function is not working consistently in some ersions of Abelton Li e 9 at moment.
Step sequencer :
The SFC-60 Firmware ersion 10 has brought a hardware step sequencer function into the SFC-60 MIDI
controller. Both the controller normal function and the step sequencer function can run simultaneously
which means that you consistently tweak your sequence as well as the synth parameters, going back and
forth between normal mode and step sequencer mode.
To control the step sequencer parameters, you need to access the step sequencer mode. To do so, press
down the ARP "on/off" and "sync" switches simultaneously for about a second. The “on/off” LED will start to
blink to notify that you entered step sequencer mode.
I n step sequencer mode, the interface is used to control the step sequencer parameters and all MIDI cc
messages to plugins are turned off. You can easily lea e step sequencer mode the same way you entered it
and the controller will send MIDI cc messages again. This how you switch between normal mode and step
sequencer mode.
Step sequencer controls:
When in step sequencer mode, you can turn on and off the sequencer by pressing the ARP "on/off" switch.
The 16 first sliders (from top left DCO LFO until ADSR R) are used to define the step pitch like in analog step
sequencer. The first 8 switches (from DCO PWM until LFO trig mode) are used to put steps on and off, in
other words to skip steps in order to create patterns.
By default, the sequence length is 16. The first 8 steps are displayed when chorus I is on (page 1) and
chorus II (page 2) displays the rest of the sequence. You can change length of the sequence with bender
CO slider. If the sequence length is equal to or less than 8 steps, e erything will be displayed on the first
page. To turn on and off steps abo e 8 you need to access the second page.
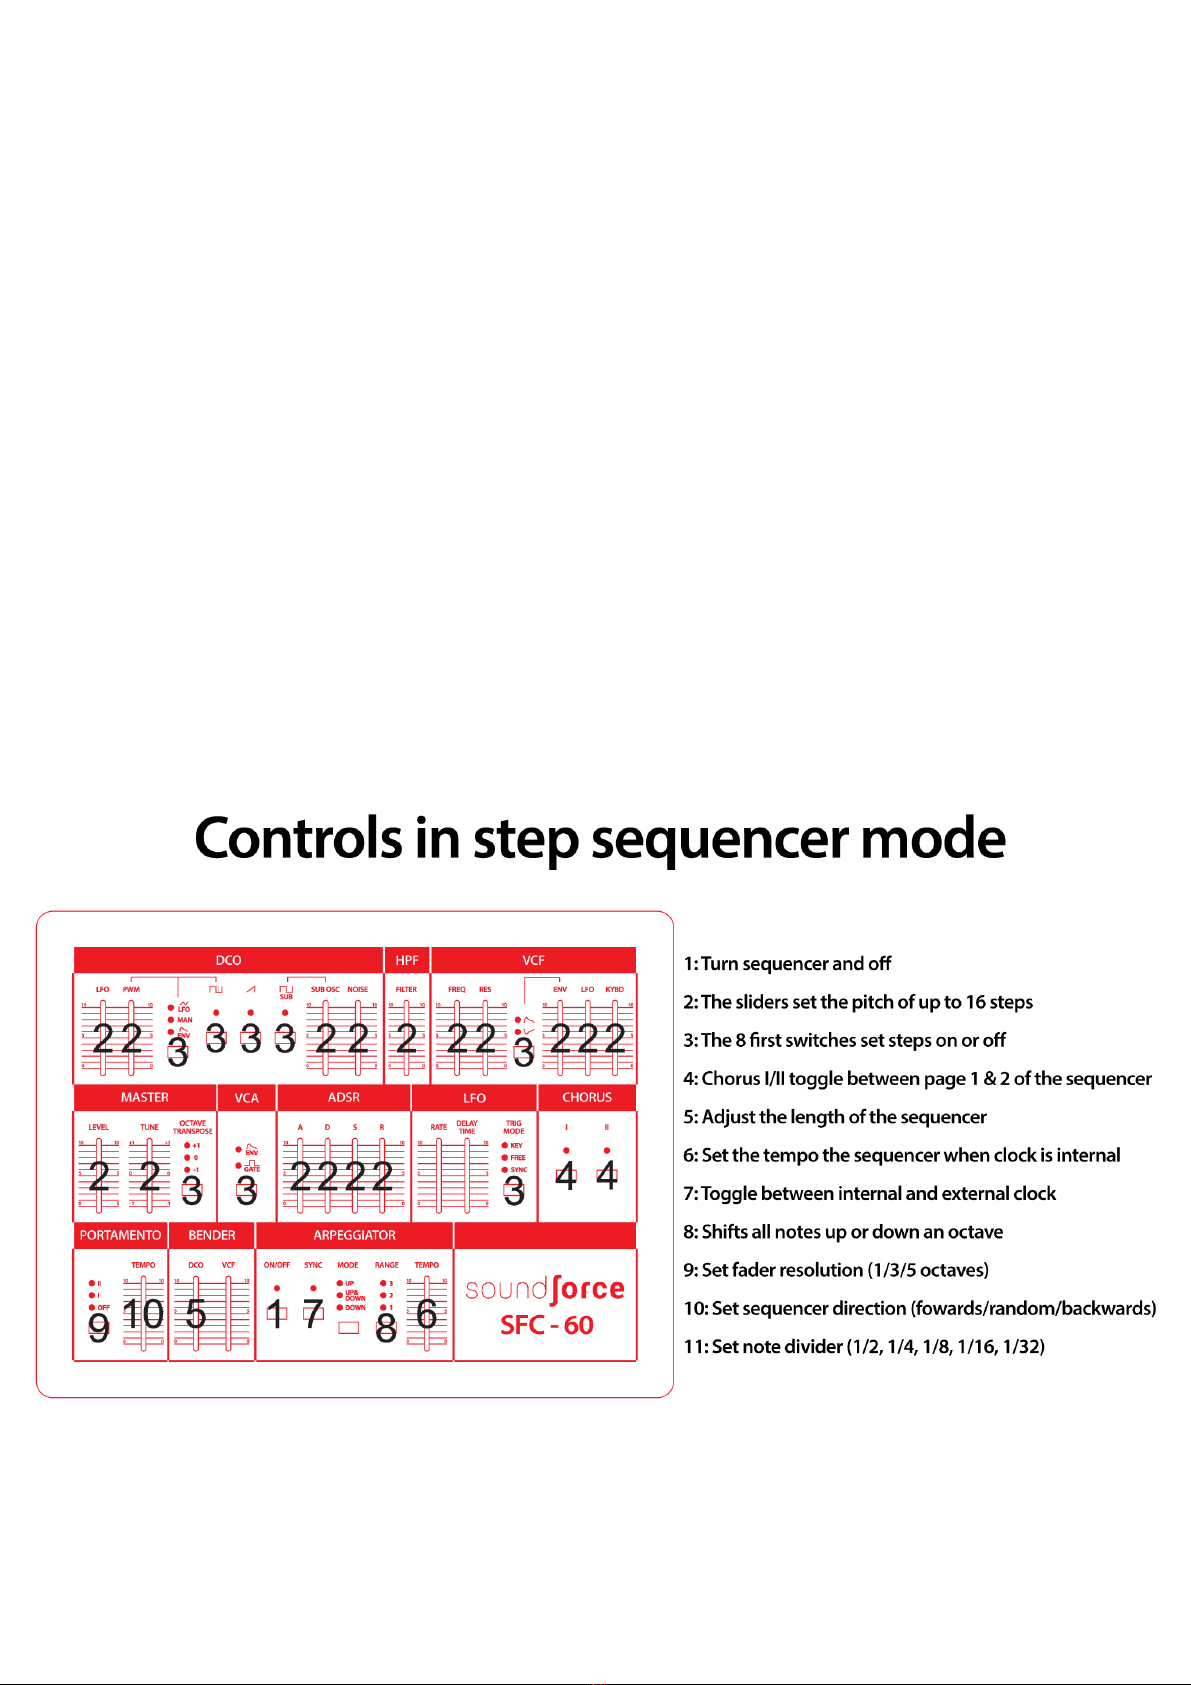
The sequencer can run either on its internal clock or an external clock generated by your DAW and sent ia
USB-MIDI.
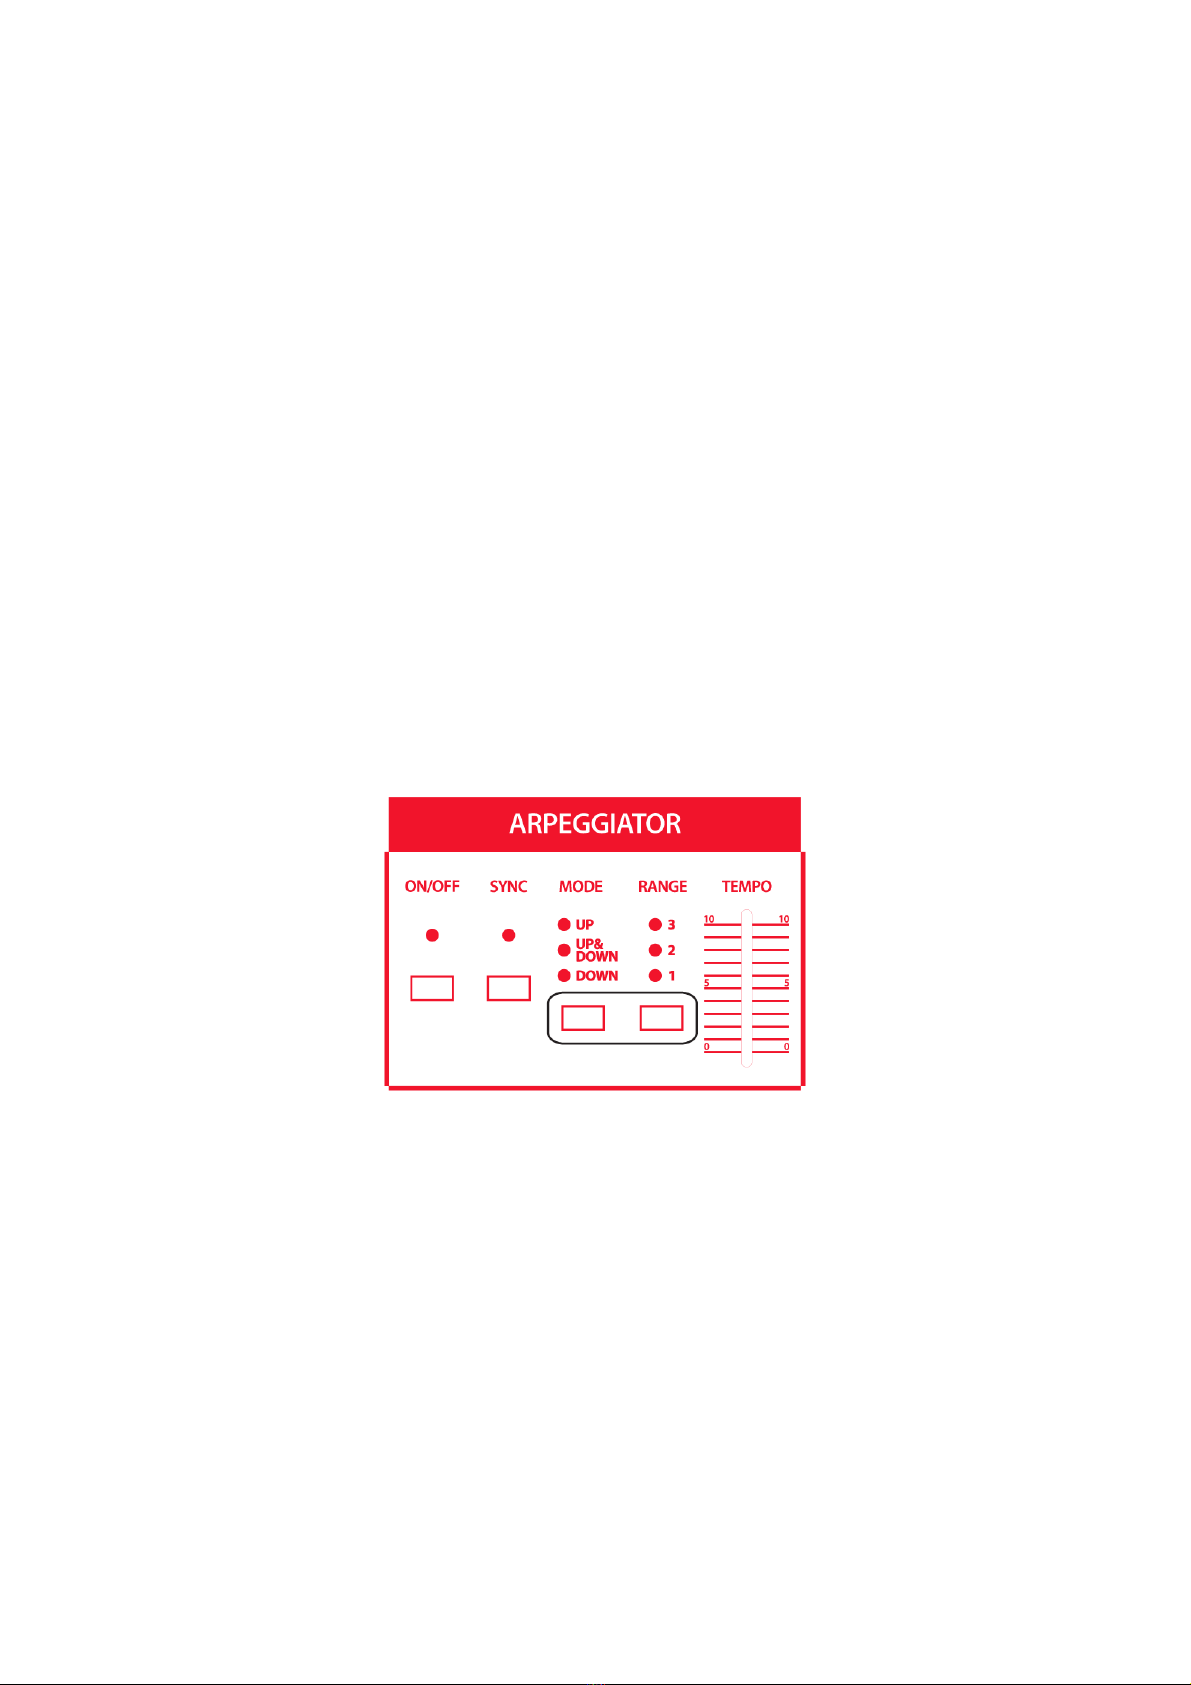
When on internal clock, the tempo of the step sequencer is set with the ARP "tempo" slider.
To clock the SFC-60 step sequencer to your DAW, please make sure that your DAW is sending MIDI clock
signal to the MIDI controller (this set-up is described in your DAW user manual). You will probably ha e to
set a certain clock offset to make sure things are running sync depending on your system. To toggle
between Internal Clock and External Clock, use the ARP "sync" switch. The LED will blink at the clock rate
when the DAW is running. Always start playback on a beat (preferably the first of the bar) to make that
things stay in sync, the clock is just a pulse, the sequencer can't know on which beat the DAW is.
You can shift the step sequencer note range abo e 3 octa es using the ARP "range" switch. The default
central alue is 2 (middle alue), the 3 position shifts the notes an octa e up, and 1 an octa e down.
With the portamento switch, you can change the resolution of the sliders, that's how many notes are
contained within a full tra el of the slider. "off" gi es 1 octa e of resolution, "I" gi es 2 octa es and "II" 5
octa es.
The direction of the sequence can be changed using the ARP "mode" switch. The default mode "up" is
simply going forward along the sequence. "down" is going backwards and "up&down" is the random mode.

Table of contents


