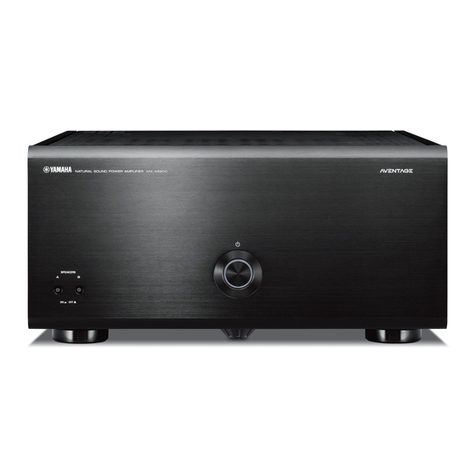
Soundolier THP-CXB User manual

SOUNDOLIER@
Integrated Home
Electrorlics
THP-CXB Owner’s Manual
Congratulations on your purchase of the
Atlas/Soundolier
THP
-
CXB Subwoofer Power Amplifier.
Coupled with any of the Soundolier Passive Subwoofer Speaker Systems, it will give your audio/video
system excellent low frequency output.
Bass frequencies are critical to realistic sound reproductions. After you’ve hooked up the THP-CXB
with a subwoofer speaker system, you will discover just how much “punch” and depth you’ve been miss-
ing. No matter what kind of music you listen to... whether you listen to it loud or soft... you’ll experience
sound that’s richer and fuller. Bass guitar and string bass will have more impact. You’ll be able to FEEL
as well as hear percussion just the way you would at a live performance. If you have a
“Home Theater
System” movies will come alive with thunderous sound effects that were never possible without the
THP-CXB Subwoofer Power Amplifier coupled with any Soundolier Passive Subwoofer Speaker.
The THP-CXB is a dedicated subwoofer amplifier with active crossover. It frees your receiver or power
amplifier from the power demands of high-performance subwoofers such as the Soundolier
THP
-
1,
Freestanding Subwoofer the Soundolier
T/P
-
2 In-Floor Subwoofer, and the
SubCenter
System. To do
this, the
7HP-CXB
incorporates a built-in crossover system that can automatically “assign” higher fre-
quencies to the main speakers and lower frequencies to the subwoofer.
The THP-CXB has been designed and tested to insure high performance, durability and longevity. The
THP-CXB can be used with any
4-ohm
or
8-ohm
subwoofer that requires a separate power amplifier.
This manual is designed to take you step-by-step through the hook-up and operating process. The pro-
cedure is not difficult, but IS slightly different than connecting line level components such as a CD play
er or cassette deck. Reading this manual carefully will insure maximum performance from your
THP-
CXB
and subwoofer speaker.
SPECIFICATIONS
POWER:
AMPLIFIER CLASS:
CROSSOVER:
FREQUENCY RESPONSE:
INPUT
SENSITIVITV:
PROTECTION:
DIMENSIONS:
POWER SOURCE:
100 watts RMS per channel at 4 or 8 ohms over rated power bandwidth;
200 watts peak power output at 4 or 8 ohms over rated power bandwidth.
A/B
Hi-Pass
-
6dB
/
octave at 85 Hz. Low-Pass
-
24dB
/
octave at 85 Hz.
(power bandwidth)
20Hz
to
70Hz
+
3dB
25mV RMS in for rated power
Short-Duration Short Circuit Protection
17”W
x
4-1/8”H
x
12-3/4”D
(including front volume control knob and rear connectors)
117VAC
-
50/60Hz
A. SAFETY INSTRUCTIONS
. . . . . . . . . . . . . . ..*.............*.*.......
Page 2
6.
UNPACKING
. . . . . . . . . . . . . . . . . . . . . . . . . . . . . . . . . . . . . . . . . . . . . . . . . . . . . . . . . . . .
Page 2
C. THP-CXB REAR PANEL TOUR
. . ..*..a......................
Page 3
D. HOOK-UP
Pages 4-9
. . . . . . . . . . . . . . . . . . . . . . . . . . . . . . . . . . . . . . . . . . . . . . . . . . . . . . . . . . . . . . . .
I
E. THP-CXB FRONT PANEL TOUR
. . . . . . . . . . . ..*..............
Page 10
F.
INITIAL LISTENING TESTS
&
ADJUSTMENTS . . . . . . . . . . Page
10
G. TROUBLESHOOTING INFORMATION
. . . . . . . . . . . . . . . . . . . . Page
11

RISK OF ELECTRIC SHOCK
DO
NOT
OPEN
R/SOW
DE
SNUCK
ELEh?kX4E
NE PAS
UWR/R
CAIJTKBN:
TO REDUCE
TNE
RISK
OF
ELECTRlC
SHOCK
DONCTREMov~CoVER(ORMCK)
NO USEFI-SERWCEAME
PARTS
INSIDE
REFER
8ERWCIWa
TO
WAlMED
PERSONNEL
AnEmowfw.mEvnwrLlFsR/~fs~CHOC
ELEclnmllc,
Me
PAS
EULEVERLECOUVERCLE.
AUY=UN
Ef@TRE77EN
DE
PfECES
ffWERfEtJRE3 PAR L’USAOER.
CDfWER
L’-fEN
AU
PEfWCWNEL
QUAURIC.
1.
2.
3.
4.
5.
Read these instructions
-
Read all the safety and operating instructions before operating the THP-CXB.
Retain Instructions
-
Keep the safety and operating instructions for future reference.
Heed Warnings
-
Follow all warnings on the THP-CXB and in these operating instructions.
Follow Instructions
-
Follow all operating and other instructions.
Water and Moisture
-
Do not use the THP-CXB near water- including a bath tub, washbowl, kitchen sink, laundry
tub, in a wet basement or near a swimming pool.
6.
7.
Heat
-
Locate the THP-CXB away from heat sources such as radiators or other devices that produce heat.
Power Sources
-
Connect the THP-CXB only to a power source of the type described in these operating instructions and
as marked on the THP-CXB .
8.
Power Cord Protection
-
Route power supply cords so that they are not likely to be walked upon or pinched by items placed
upon or against them, paying particular attention to cords at plugs, convenience receptacles, and the point where they
exit the THP-CXB.
9.
Object and Liquid Entry
-
Do not drop objects or spill liquids into the inside of the THP-CXB.
AM&
WUR
EWlER
lE3
RfSWES
D’lNCENDlE
ou
D’ELECTROClJl’RW,
N’E.XR3SE.Z PAS
Cl3
AfW-fCLE
AUPW~DifAL’HUMfDfm
10. Damage Repair Service
-
The
THP-CXB
should only be serviced by qualified service personnel when:
A. The THP-CXB power-supply cord or the plug has been damaged; or
8. Objects have fallen, or liquid has spilled into the THP-CXB
;
or
C. The
THP-CXf3
has been exposed to rain; or
D. The THP-CXB does not appear to operate or exhibits a marked change in performance; or
E. The
THP-CXB
has been dropped or its chassis damaged.
11. Servicing
-
Do not attempt to service the THP-CXB beyond those means described in this operating manual. All other
repairs should be referred to qualified service personnel.
12. To prevent electric shock, do not use the THP-CXB polarized plug with an extension cord, receptacle or other outlet unless
the plug blades can be fully inserted to prevent blade exposure.
13. Grounding and Polarization
-
Do not defeat the grounding or polarization of the THP-CXB.
14. This apparatus does not exceed the Class A/Class B (whichever is applicable) limits for radio noise emissions from
digital apparatus as set out in the radio interference regulations of the Canadian Department of Communications.
WARNING
-
To reduce the risk of fire or electric shock, do not expose this component to rain or moisture.
Carefully remove the
THP-CXB
from its packing and inspect it for any shipping damage. If you discover damage, contact your
Atlas/Soundolier
dealer immediately.
If possible, save the carton and internal packing materials. It’s the best possible protection for your THP-CXB if you need to
transport it or ship it for service.

THP-CXB
rear panel
Before actual hook-up, you should familiarize yourself with the connections on the back of the THP-CXB as shown in the
drawing above.
1.
2.
3.
4.
5.
FROM RECEIVER
(
speaker-level
)
inputs. These spring-terminal, color-coded connections are used to connect the
THP-
CXB
to your receiver. They are used with one of the hook-up methods described in the next section.
LINE IN
&
LINE OUT
(
line level
)
connections. These connections are used ONLY if you have a preamplifier or a receiv-
er/integrated amplifier which has line level outputs that follow the volume control. The LINE IN connections on the
THP-
CXB
are also used to connect the “s&woofer output” from most
A#
Surround Sound Receivers.
TO SPEAKERS (speaker level) outputs. If you are using the FROM RECEIVER inputs, you will hook your main speakers to
these spring-terminal, color-coded connections. They are NOT used with the LINE IN
/
LINE OUT connection method.
Q-OHM
/
8-OHM
Switch.
This switch should be placed in the setting that matches the specifications of the subwoofer
being used. If you are using the THP-CXB with the Soundolier THP
-
1
Freestanding Subwoofer or the Soundolier
THP
-
2 In-Floor Subwoofer, configure the jumpers on the subwoofer cabinet for
“4-ohm
operation”. Consult the THP
-
7
or THP
-
2 owner’s manual for additional information.
If you are using the THP-CXB with the Soundolier
SubCenter,
configure the jumpers on the
SubCenter
cabinet for “8-ohm operation”.
/VOTE:
The THP-CXB is NOT compatible with
2-ohm
speaker systems.
TO SUBWOOFER Output. Color-coded binding posts are provided to identify where the Soundolier THP
-
7,
Soundolier THP
-
2,
Soundolier
SubCenter
or other subwoofer should be connected. The red terminal is
(
+
);
and the black terminal is
(
-
).
WHERE TO PUT THE THP-CXB
The
THP-CXf3
is intended to be placed on a shelf in a stereo rack or bookcase along with your other audio/video components.
Make sure that you leave enough room on the top and sides of the unit for adequate ventilation. Also, try to avoid placing the
THP-CXB on top of a high-wattage power amplifier or receiver (over 100 watts per channel), since it can block the ventilation
of the component below and could become overheated.
CONNECTING THE THP-CXB TO A WALL PLUG
The THP-CXB draws a moderately high amount of current. We do not recommend plugging it into a “convenience” outlet
(switched or
unswitched)
that are often found on the back of receivers and other stereo components. Instead, connect the
THP-
CXf3
directly to its own AC outlet. See items 8 and 9 in the Safety Instructions.
Both hook-up methods, “Amplifier Wiring Hook-Up” and “Line Level Hook-up” require speaker wire connections. Here are some
suggestions that will insure proper operation:
PREPARING SPEAKER WIRES
1. Separate the two conductors that comprise each speaker wire and strip off
318”
of the insulation from both ends of each
conductor.
2. Twist each set of thin wires into a tightly bunched spiral. If the wire is exceptionally thick
(
12-gauge
zipcord
or
special speaker interconnect cable), divide the strands into three equal bundles and twist each into a
spiral. For connections between the THP-CXB and the subwoofer, you can also use speaker wire connectors that
attach to the speaker wire, such as spade lugs or banana plugs. Your audio dealer can advise you on this.
lit
3

ESTABLISHING POLARITY
It is very important that left and right connections be made with the same plus
/
minus polarity.
lMost speaker wire is polarity coded. This means that each conductor is labeled either ( + ) or
(
-
).
The positive ( + )
conductor may be a different color or texture than the negative (
-
) conductor. For instance, it may be copper-colored
(instead of silver colored), have a series of fine ridges stamped in it or simply be labeled with little (
+
) marks.
l
Most speaker and subwoofer terminals are color coded: Red for positive ( + ) and black for negative
(
-
)
.
l
Any connection that uses speaker wire requires care in maintaining polarity. When connecting speakers or a subwoofer to
speaker terminals, make sure to connect ( + ) wires to ( + ) terminals, and (
-
) wires to (
-
) terminals. For example, if
your speaker wire has one copper-colored conductor and one silvered-colored connector, connect both ends of the copper-
q
colored wire ( + ) to red ( + ) terminals. Likewise, connect the wire you have identified as negative ( in this case, the
silver colored wire
)
to black terminals.
SPEAKER WIRE TYPE
The choice of speaker
wire
type is dependent on the type of amplifier, the distance you intend to run the wire and your budget.
In
general, you should not use extremely thin wire. If in doubt as to what brand or type of wire to use, consult your audio dealer.
LENGTH OF SPEAKER WIRES
When hooking-up your main /satellite speakers, make the hook-up wires the SAME LENGTH for BOTH speakers, even if one
is much closer to your amplifier than the other one. You may need to loosely coil up part of one channel’s wire behind the ampli-
fier if one speaker is quite close and the other far away from the amplifier or receiver. But it’s worth it. Keeping both wires the
same length will help maintain proper signal balance and imaging. Likewise, when making connections between your receiver
and the
THP-CXB’s
’
FROM SPEAKERS
”
terminals, make the wire lengths the same.
First,
determjne
whether
the receiver has line level outputs
(most don’t). Look on the
back of the unit or consult the owners manual. Line level outputs are often part of a set of
four jacks connected by small
”
U
’
shaped connectors and marked
”
PRE
”
and “MAIN
“.
These outputs are also sometimes marked
’
PRE
OUT
‘.
outputs with
connectors.
Method A.- AMPLIFIER WIRING HOOK-UP
Here
are
two Instances where
”
Method A Amplifier
Wiring
H
.
oak-UD”
would be used,
Method A-l
-
Amplifier
WMng
Hook-Up for Most Receivers
(as shown in the drawing on page 5) should be used if the
receiver or integrated amplifier does NOT have line level outputs.
Method
A-2
-
Amplifier Wiring Hook-Up Steps for A/V Surround Sound Receivers
should be used if the receiver does not
have line level outputs, but has a
“Subwoofer
Out
”
connector. Proceed to page 6.
ethod B
l -
LINE LEVEL HOOK-UP
Method
8-I
-
receiver or
integmted
amp/M.ier
with
line
level
outputs. Some of the “deluxe” receivers and
integrated amplifiers also have separate line level outputs. See page 7.
Method
B-2
-
preampliner
8nd
power
empllfier.
All preamplifiers have left and right line level outputs which are con-
trolled by the preamp’s volume control. These are marked;
OUT,
PRE
OU7;
or MAIN OUT. See page 8.
Method B-3
-
A/V Surround Sound Receiver or outboard decoder. Most multi-channel
”
A#
Surround Sound
Receivers
’
and separate decoders have a dedicated line level output for subwoofer operation. This output, usually labeled
*
Subwoofer Out
“,
can be directly connected to the LEFT or RIGHT
”
Line
In
”
connections on the THP-CXB. For
increased performance, use an RCA
”
Y
”
adapter
(
single female
/
dual male
)
to apply the
’
Subwoofer
Out
”
to both
LEFT and RIGHT
II
Line
Inputs
’
on the THP-CXB . See page 9.
NOTE: Some surround processors have their own internal crossovers assigned to the
’
SUBWOOFER
OUTPUT
”
connection. Consult the
Surround Sound Processors owner’s manual to determine if the unit has an internal crossover. Combining the THP-CXB
‘s
crossover with the
crossover in the surround sound processor may result in low output
volume
and’ increased noise. If this condition arises, use; Method A-l
”
Amplifier
wiring
For
Mosf
Receivers
‘via
the main speaker terminal outputs of the
A#
receiver or processor.
USING
TWO SUBWOOFERS If using two
a-ohm
subwoofers wired together in parallel, set the
4-OHM
/
a-OHM
switch on the back of the
TNP-CXB
to the
4-ohm
position. Do not attempt to use TWO subwoofers that create less than a combined 4 ohms load to the THP-CXB.
,

1. IMPORTANT: Make sure that ALL stereo components including the
THP-CXf3
are turned OFF before proceeding.
2. Following the directions on “Preparing Speaker Wires”, strip and twist TWO lengths of speaker wire that will reach between the receiv-
er’s speaker terminals and the THP-CXB. Make these two lengths of wire only as long as is necessary to run between the two
components.
3. Connect one speaker wire to the RIGHT (
+
) and (
-
) speaker terminals of the receiver or integrated amplifier. Then connect the
other end of this speaker wire to the RIGHT ( + ) and (
-
)
FROM AMPLIFIER terminals on the back of the THP-CXB. Use the tips
on determining speaker wire polarity to make sure that (
+
) is connected to ( + ) and (
-
) is connected to (
-
).
4. Connect the other speaker wire to the LEFT (
+
) and (
-
) speaker terminals of the receiver or integrated amplifier. Then connect
the other end of this speaker wire to the LEFT ( + ) and (
-
) FROM AMPLIFIER terminals on the back of the THP-CXB. As in step
3, double check polarity.
5. Connect the main left and right channel speakers to the THP-CXB “TO SPEAKERS” terminals.
6. Connect the Soundolier or other subwoofer to the round red and black “TO
SUBWOOFER”
terminals on the back of the THP-CXB.
Make sure that polarity is correct, using the
BLACK
binding post for the (
-
) connection and the RED binding post for the ( + ) con-
nection.
7. IMPORTANT: Consult the owner’s manual that
came with the subwoofer to determine if it is rated
at 4 ohms or 8 ohms. Then set the
THP-CXBS
“4 OHM
/
8 OHM” switch accordingly. If you are
using two subwoofers, refer to the section titled;
“Using
Two
Subwoofers”
on page 4.
NOTE: See Section C: THP-CXB REAR PANEL
TOUR,
“4
OHM
/
8 OHM switch”, for additional
information on page 3.
8. You are now ready to put the THP-CXB and
subwoofer into use. Skip to the next section
titled:
”
E.
THP-CXB FRONT PANEL MINI-
TOUR
’
on page 10.
Amplifier Wiring
Hook-up for
Most Receivers
and Integrated
Ampllflers
:;.
;
i
:
‘,
:
:.
:.
:
:.i. :. .;
‘:
‘.
:
;
\
:
.*.
.f..:::.‘..::
..:
:
A:
:
!
,.
:::
f
“:
0
:
.’
.i:
:.
:i
:
:::.,:i
+
::.:::‘;:
.I:;:
.:
:
:1.:; :,
:
:
I;:.
.:
:::::
.
:
:
*
riiliii:
:
.’
;:
.
.
:
..I,
,
:
f
,t
;
..’
I
j:
.!
::
.j
‘.i’.’
.
i:
I,...
:
:
:
.
.
:I:
.>. .
:
.:
..:
;.:
5
ii
i
.*
i*.. :
‘:..
.:
.
J’

1. IMPORTANT: Make sure that ALL stereo components including the THP-CXB are turned OFF before proceeding.
2. Following the directions on “Preparing Speaker Wires”, strip and twist TWO lengths of speaker wire that will reach between
the A/V receiver’s FRONT speaker terminals and the THP-CXB. Make these two lengths of wire only as long as is nec-
essary to run between the two components.
3. Using speaker wire, the RIGHT ( + ) and (
-
) FRONT SPEAKER terminals of the
AN
receiver to the RIGHT ( + ) and
(
-
) FROM AMPLIFIER terminals on the back of the THP-CXB. Use the tips on determining speaker wire polarity to
make sure that ( + ) is connected to ( + ) and
(
-
)
is connected to (
-
).
4. Using speaker wire, connect the LEFT (
+
) and (
-
) FRONT SPEAKER terminals of the A/V to the LEFT ( + ) and (
-
)
FROM AMPLIFIER terminals on the back of the THP-CXB. As in step 3, double check polarity.
5. Connect the left and right FRONT channel speaker WIRING to the
THP-CXB
‘s
“TO SPEAKERS” terminal.
6. Connect the Soundolier or other subwoofer to the round red and black “TO SUBWOOFER
“terminals
on the back of the
THP-CXB. Make sure that polarity is correct, using the BLACK binding post for the (
-
) connection and the RED bind-
ing post for the ( + ) connection.
7. IMPORTANT: Consult the
owner’s manual that came with
the subwoofer to determine if it
is rated at 4 ohms or 8 ohms.
Then set the
THP-CXf3
‘s
“4
OHM
/
8 OHM” switch
accordingly If you are using
two subwoofers, refer to the
section titled; “Using Two
Subwoofers”
on page 4.
NOTE: See Section C: THP-CXB
REAR
#‘PANEL
TOUR, “4
OHM
/
8 OHM switch”
,
for
additional information on page 3.
8.
You are now ready to put the
THP-CXB and subwoofer to
use. Skip to the next section,
titled:
E.
THP-CXB Front Panel
Mini Tour on page 10.
REAR
SPKR
REAR SPKR
CENTERSPKR
Ampllfier
Hook-up
for
A#
Surround
Sound Receivers
6

NOTE:
This connection procedure is only for receivers that have ’
PRE/
MA/N
u
connections. If the receiver does not have these
connections, use
”
Method A- 1 Amplifier Wiring Hook-up Steps For Most Receivers
”
located on page 5.
1. IMPORTANT: Make sure that ALL stereo system components including the THP-CXB are turned OFF before proceeding.
2. Locate the
’
PRE/
MAIN
‘connections
on the back of the receiver.
3. Remove the small metal
”
U’s
-
that are plugged into the
’
PRE
/
MA/N
”
connections on the back of the receiver.
4. Connect a pair of high-quality line-level connection cables
(
RCA patch cords
)
between the receivers
”
PRE
I)
connections
and the LINE IN connections on the back of the THP-CXB. Make sure that left is connected to left and right is connected to
right. We recommend that you treat the RED connection cable RCA plug as RIGHT and the BLACK or GREY plug as LEFT.
5. Connect another set of connection cables between the THP-CXB LINE OUT connections and the MAIN INPUTS of the
receiver. Again, make sure that left is connected to left and right is connected to right.
6. Connect the main left and right speakers to the speaker terminals on the back of the receiver.
7. Connect the Soundolier or other subwoofer to the round red and black “TO SUBWOOFER” terminals on the back of the
THP-
CXB. Make sure that polarity is
correct, using the BLACK binding
post for the (
-
) connection and the
RED binding post for the ( + )
connection.
8. IMPORTANT: Consult the owner’s
manual that came with the
subwoofer to determine if it is rated
at 4 ohms or 8 ohms. Then set the
THP-CXB
‘s
“4 OHM
/
8 OHM”
switch accordingly. If you are using
two subwoofers, refer to the section
titled; “Using Two Subwoofers” on
page 4.
NOTE: See Section C:
THP-CXf3
REAR PANEL TOUR, “4 OHM
/
8 OHM switch”, for additional infor-
mation on page 3.
9. You are now ready to put the
THP-
CXB
and subwoofer to use. Skip to
the next section, titled:
E.
THP-
CXB Front Panel Mini Tour on
page 10.
Line Level
Hook-
rm
up with Receiver
(
$
1;
that has
Pre/Maln
Connections
[
;;
f
.T+
7

1.
IMPORTANT:
Make sure that ALL stereo system components including the THP-CXB are turned OFF before proceeding.
2.
Locate the line output RCA connectors on the back of the preamplifier. These may be marked by the manufacturer as:
PRE, PRE OUT, LINE OUT, MAIN OUTPUTS
or
TO POWER AMP
3.
Connect a pair of high-quality line-level connection cables
(
RCA patch cords
)
between the pre amps MAIN OUT con-
nections and the LINE IN connections on the back of the THP-CXB. Make sure that left is connected to left and right is
connected to right. We recommend that you treat the RED connection cable RCA plug as RIGHT and the BLACK or GREY
plug as LEFT.
8
4.
Connect another set of connection cables between the THP-CXB LINE OUT connections and the INPUTS of the power
amplifier. Again, make sure that left is connected to left and right is connected to right.
5.
Connect with cables the main speakers to the speaker terminals on the back of the power amplifier.
6.
Connect with cables the Soundolier or other subwoofer to the round red and black “TO SUBWOOFER” terminals on the back
of the THP-CXB. Make sure that polarity is correct, using the BLACK binding post for the
(
-
)
connection and the RED
binding post for the ( +
)
connection.
7. IMPORTANT: Consult the owner’s
manual that came with the
subwoofer to determine if it is rated
at 4 ohms or 8 ohms. Then set the
THP-CXB’s
“4
OHM
/
8 OHM”
switch accordingly. If you are using
two subwoofers, refer to the section
titled; “Using Two
Subwoofers”
on
page
4.
NOTE: See
Section C: THP-CXB
REAR PANEL TOUR,
“4
OHM/
8
OHM switch”, for additional infor-
mation on page 3.
8. You
are now ready to put the
THP-
CXB
and subwoofer to use. Skip to
the next section, titled:
E.
THP-CXB
Front Pane/ Mini Tour on page 10.
Line Level Hook-Up
with Preamplifier and
Power Amplifier

In most cases, the main output of the decoder/processor will be connected to the
THP-CXB’s
“LINE IN “connection as shown
in the drawing below. Some decoders have a dedicated line level output for subwoofer operation. This output, usually labeled
”
Subwoofer Out
“,
can be directly connected to the LEFT or RIGHT “Line In” connections on the
THP-CXB
. For increased
performance, use an RCA
“Y ‘adapter
(
single female
/
dual male
)
to apply the
”
Subwoofer Out “to both
LER
and RIGHT
“Line Inputs” on the THP-CXB
.
NOTE: Some surround sound processors have their own internal crossovers associated with the dedicated
“SUBWOOFER
OUTPUT” connection. Combining the
THP-CXf3
‘s
crossover with the crossover in the surround sound processor may result in
low output volume and increased noise. If the surround sound processor is not configured
as
shown in this drawing, use;
Method A-l
“Amplifier Wiring For Most Receivers “via the main speaker terminal outputs of your receiver or integrated ampli-
fier.
LINE LEVEL CONNECTIONS WITH
A SURROUND SOUND RECEIVER
Many “5-channel Surround Sound
Receivers” and some hybrid AN pre-
amplifiers, may also have a “SUB-
WOOFER OUT” connection. As
noted above, combining this output
with the THP-CXB ‘s crossover may
result in low output volume and
increased noise. Do not attempt to
connect the “SUBWOOFER OUT”
output to the THP-CXB unless you
are certain that is not connected to an
internal crossover.
Line Level
Surround Sound
Processor
Connections
TO
!$I-
TO
-
‘+
LEFT
II
SPEAKER
SPzi$R
SUBUi&ER
9

The
THP-CXB’s
controls are pure simplicity; An ON
/
OFF switch, an LED indicator, and a big volume control.
1.
MAIN POWER SWITCH.
This rocker switch turns the THP-CXB on and off. We recommend that you turn the THP-CXB
on LAST, in the sequence of the receiver
/
integrated amp
/
preamp, CD player, cassette deck, etc. Some components send
out loud, low-frequency THUMP
S
when they are turned on. These thumps are not only startling and annoying, but could
also cause damage to the subwoofer if the volume control is cranked up high.
2. POWER ON INDICATOR LIGHT. When the small LED light is lit, the THP-CXB is on.
3.
VOLUME CONTROL.
Rotating this knob clockwise increases the output level of the subwoofer. To start out, make sure the
VOLUME is turned all the way down
(
fully counter-clockwise
).
Later, after some initial listening tests, you can adjust the
volume to your own tastes. However, care should be taken not to over-drive the subwoofer to the point of audible distortion.
It’s now time to introduce the THP-CXB and subwoofer combination into the listening environment.
1. Double-check all connections.
2.
Make sure that the volume controls on both the
THP-CXf3
and the receiver
/
integrated amplifier
/
preamp are turned all the
way down
(
counter-clockwise
).
3. Turn on the stereo system. Then turn on the THP-CXB. Confirm that the
THP-CXB
‘s indicator light is glowing. If it isn’t,
check the power connections between the THP-CXB and the wall socket.
4. Play a musical selection that you are familiar with. Pick a song that has regular low bass beats. Advance the receiver
/
integrated amp
/
preamp’s volume control up to a normal listening level. If you don’t hear sound through your main speak-
ers, turn off the system and check all connections. Also consult the troubleshooting tips in section G.
5.
If sound is indeed coming out of the main speakers, turn the
THP-CXf3
‘s
volume control clockwise until you hear noticeable
additional bass. If you don’t hear additional bass by the time you have advanced the
THP-CXB
‘s
volurrre
control halfway,
turn off the system and check all connections. Also consult the troubleshooting tips in section G.
6
Adjust the
THP-CXB’s
volume control until you are satisfied with the amount of additional bass. You may want to try
several different albums, tapes or compact discs while determining how high to adjust the THP-CXB volume control. The
amount of bass varies for different types of music.
7.
After you are satisfied with the output of your subwoofer, you can make all the volume settings through the main stereo’s
systems volume control. The only time you might want to re-adjust the THP-CXB
‘s
volume is when you encounter a musi-
cal selection that has extreme low or high
bass
levels.
8. A tip during normal operation: turn the THP-CXB off first, before your other components.
SUBWOOFER PLACEMENT
The Owner’s Manual that comes with Soundolier Subwoofers covers the advantages and disadvantages of various subwoofer
placement options. We encourage you to experiment with both main speaker placement and subwoofer placement for the best
performance in your listening environment.
MAINTENANCE
Normal dust accumulations can be removed with a vacuum brush attachment or duster. To remove fingerprints and other
real-
world substances that seem to mysteriously appear on stereo components, use a lightly-dampened, soft cloth moistened in mild
soap and water.
10

Before considering service for the THP-CXB, please review these ttvubleshooting suggestions:
No sound. Power light is not lit.
1.
Is the
THP-CXB plugged into a live AC wall socket ?
2. Is the power switch ON ?
3. Has the THP-CXB overheated and shut off temporarily ?
No sound from either set of speakers.
1. Are the other audio/video components turned ON ?
2. Is the receiver or preamp set to the appropriate input and is that sound source playing ?
.3.
Do you have an unconnected tape monitor selected ?
4. Is the
THP-CX5
correctly connected to the receiver, preamplifier or integrated amplifier ?
Sound comes from the main speakers but not the Subwoofer.
1.
Is the
THP-CXf3
‘s
VOLUME control turned up.
2. Is the subwoofer correctly connected to the round binding posts on the THP-CXB ?
3. Check the speaker connections for small strands of wire touching both terminals.
4. Make sure that the subwoofer is working properly. A quick way to test this is to momentarily connect your subwoofer
directly to the main output of your receiver or power amplifier. It won’t sound very good, but will determine whether
the subwoofer and speaker cables are functional. The subwoofer will not be harmed.
Sound comes from the
subwoofer
but not the main speakers.
1. If
you have used either version of
’
Hook-up Method A
‘:
check the connections between TO SPEAKERS on the back
of
the THP-CXB and the main or satellite speakers.
2. If
l
0
l
you
have used any of the three versions of “Hook-up Method 5”
confirm that the power amplifier is turned ON
check the RCA patch cord connections between LINE OUT on the THP-CXB and INPUTS on the power amplifier
check the speaker wire connections between the power amplifier and main or satellite speakers
Bass
is
muffled
or weak
1. Check the speaker wire polarity between the
THP-CXf3
and the subwoofer.
2. Refer to Item 13 in the Safety Instructions for conditions that ALWAYS require service by qualified personnel.
11
Table of contents

