Spy Tec HD SPY WATCH User manual

HD SPY WATCH
WITH NIGHT VISION
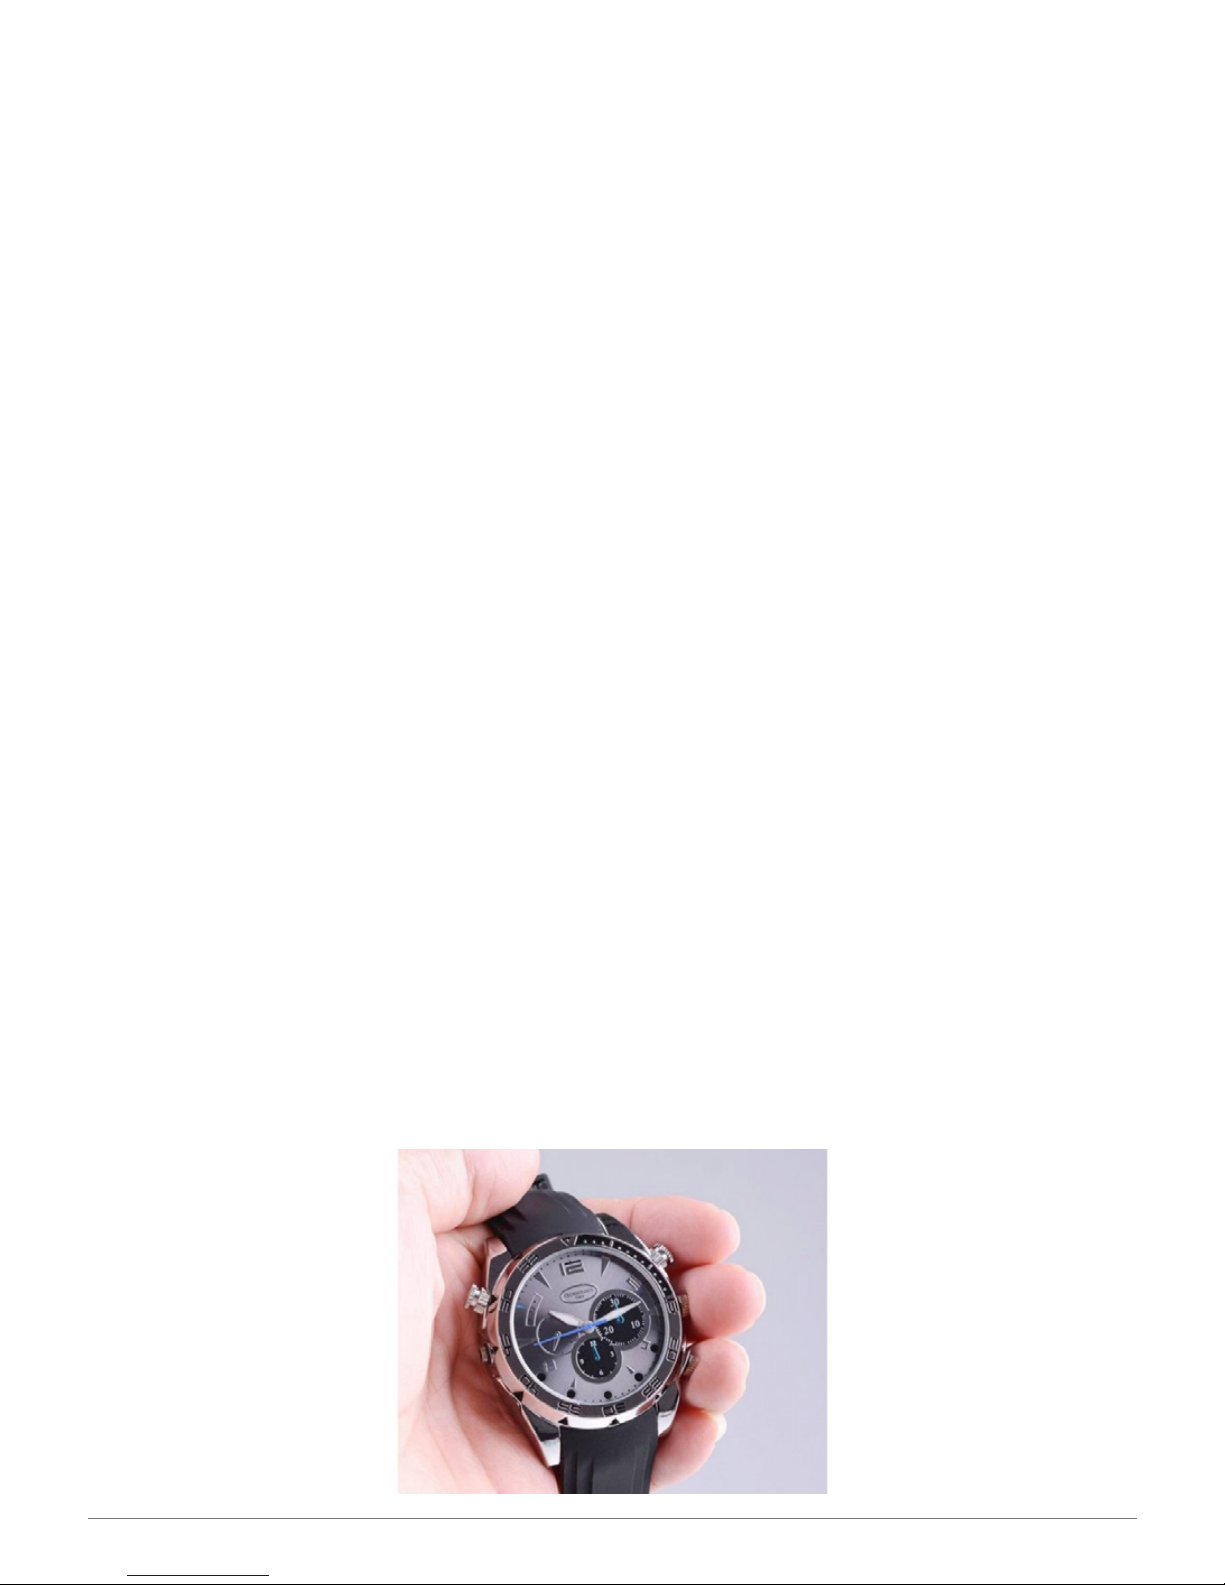
The HD Spy Watch with Night Vision combines a stylish analog wristwatch with
a hidden digital camera that captures full-motion video at Full HD resolution. The
camera can record video in the dark thanks to built-in infrared LEDs that enable
night vision. You’ll also be able to use the camera to take photographs or as an audio
recorder. The weather-resistant camera contains 8GB of internal memory and a
rechargeable battery.

In the Box
Watch/camera on wrist strap
CD-ROM
USB cable
AC adapter
Mic shutoff knob
User guide
Precautions
• Don’t leave the watch in a hot environment such as on the dashboard of a vehicle
parked under a blazing sun.
• The camera with its charging/data port closed is resistant to water in rain and
snow as well as to dust, but the watch should never be intentionally immersed in
liquid. It is not meant for use while swimming or diving.
• Don’t toss the watch into a re since the batteries could explode.
• Don’t aim a bright light into the lens or point the camera at the sun since either
could damage the sensor.
• Don’t operate the device in dusty, sandy or dirty places since the camera’s
components could be damaged. If you want to chance taking the camera into
less than desirable conditions, make sure the USB port is covered by its cosmetic
button.
• This product should not be used in illegal ways. Observe relevant laws.
HD SPY WATCH WITH NIGHT VISION USER GUIDE 2
All in Good Time
As a clandestine camera, the HD Spy Watch’s controls and features aren’t obvious.
Here’s a diagram showing where the controls and indicators are.

HD SPY WATCH WITH NIGHT VISION USER GUIDE 3
Charging the Camera
Find the combined USB/power socket by unscrewing the knob at 9’clock. Place the
tiny knob in a safe place so you can retrieve it later to conceal the port when the
camera is in use and cover the opening during inclement weather.
Insert one end of the USB cable in the included AC adapter and plug the single-pin
end of the cable into the watch’s power socket so that it snaps into place. Plug the
adapter into an electrical outlet for about an hour. Alternatively, you can charge the
watch without the adapter by plugging the cable into a standard USB port. However,
charging may take longer than using the AC adapter.
When the watch is connected to a USB port or the AC adapter, the blue LED on the
watch will stay steady during charging and turn red when fully charged.
Note: If battery power is low when you turn on the camera or the battery becomes
depleted when the camera is in use, blue and red LEDs will ash for about 5 seconds
and the camera will shut down. (If the camera has been recording, it will rst save
the current le.) The tiny LEDs can be seen when you look directly at the “12” on the
watch face.
Installing the Driver
Before connecting the HD Spy Watch to a computer the rst time, be sure to install
the driver software. Insert the included mini-CD-ROM in your computer’s CD/DVD
tray and install the PC camera driver. The camera is compatible with Windows,
Macintosh and Linux operating systems. Further driver installation instructions can
be read as a Word le from the disc or you can just click on Setup and go through the
guided setup. You’ll be prompted to restart the computer before plugging in the watch.
Setting the Watch Time
Place your ngernails under the time adjustment knob (at 3 o’clock) and push it
outward, then turn it clockwise or counterclockwise to change the position of the
hands on the clock face. Push the knob back in to set the time as shown.
The clock hands are powered from a dedicated, replaceable battery that does not
draw power from the camera’s rechargeable battery. If the time stops working, take
the product to a jeweler or watch repair shop to have the battery changed as you
would any wristwatch.
Remember to adjust the time twice a year when clocks spring ahead or fall back an
hour or when you travel to a different time zone.
HD SPY WATCH WITH NIGHT VISION USER GUIDE 4
Setting the Camera Date and Time
The date and elapsed time of each video will be superimposed on the bottom of the
screen during playback.You should enter the correct date and time before your rst
recording. Once you’ve installed the camera driver software from the enclosed disc
(see above), use a word processing program or text editor such as Notepad on your
computer, enter the current date and time on one line in this order:
year.month.day hour:minute:second followed by a space and the letter Y.
So, for example, Sept. 22, 2016 at 1:17 pm would be entered:
2016.09.22 13:17:00 Y
Tip: Add an extra minute or two to the time you type in to accommodate the steps
that follow.
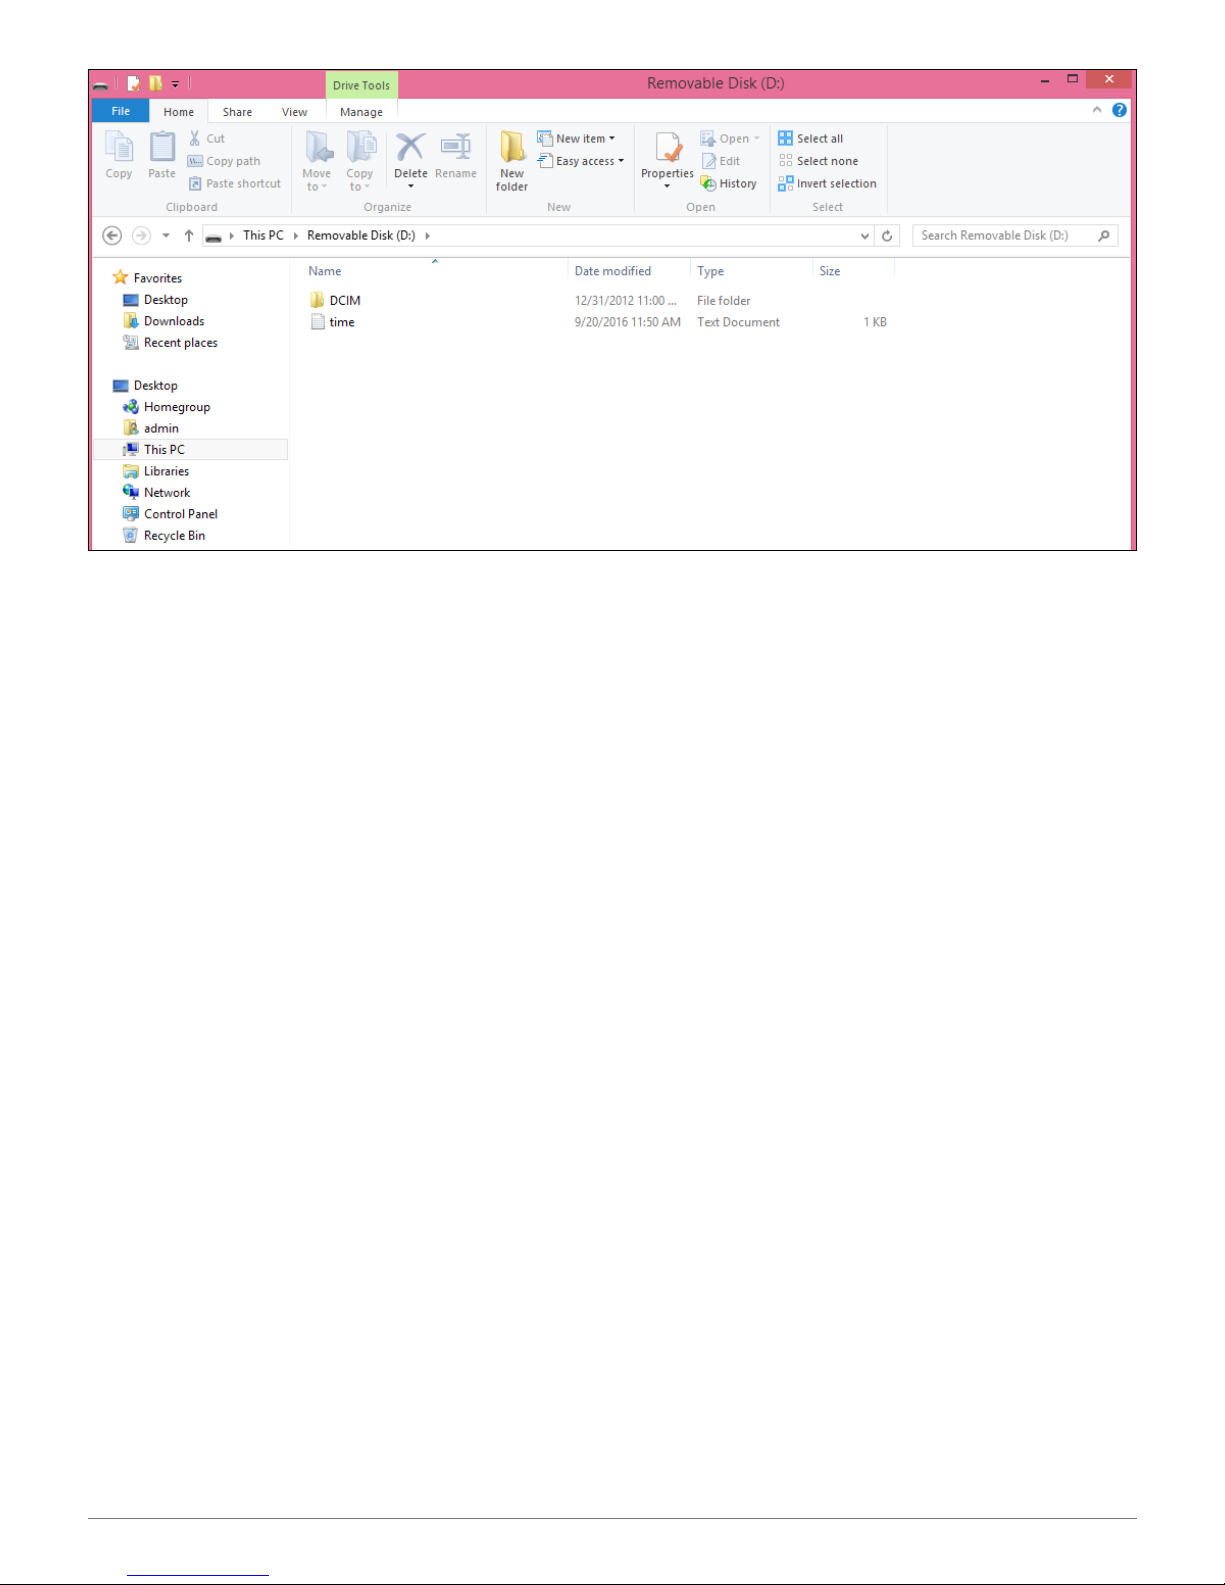
Save the data with the “time.txt” le name. (Microsoft Word, for example, enables
you to save content as a “txt” le rather than in its default “docx” format.) Once you
connect the watch to the computer’s USB port and it comes up as an external drive,
save or copy the time.txt le into the external drive’s root directory.
Note: Don’t save the time.txt le inside the DCIM folder, which is reserved for the
media les captured by the camera.
HD SPY WATCH WITH NIGHT VISION USER GUIDE 5
If you don’t want the date and time superimposed on the picture, you can disable the
data stamp on subsequent recordings Follow the instructions for setting the date and
time above but enter the letter “N” as in “no” instead of the “Y” at the end of the text in
the le. For example, the le would read:
2016.09.30 10:30:00 N
When the date and time are not superimposed on the picture, you can check the le
directory on your computer for the information.
Note: The camera default is to superimpose the date and time on the picture. If you
don’t do anything with the camera out of the box, an incorrect date and time will likely
appear until you change the setting.
Quick Start Video Recording
Assuming the camera is charged, it shouldn’t take more than a few seconds to start
recording video.
1. Press and hold the button on the watch periphery at 2 o’clock for about 2 seconds.
A tiny blue LED atop the “12” on the clock face will light up, then ash three times to
conrm that recording has started. The LED remains unlit during video recording.
2. To pause the recording double tap the same 2 o’clock button. The blue LED will
glow steadily indicating that the recording has been saved, and the camera is now in
Standby mode.
3. To resume recording, press the 2 o’clock button once. The LED will ash three
times indicating that a new recording has begun.
4. To turn off the camera while recording or from Standby mode, simply hold down
the 2 o’clock button for more than 2 seconds.

HD SPY WATCH WITH NIGHT VISION USER GUIDE 6
Watch and Wear
Wear the watch on your left or right wrist as you would any watch so you can read
the face with the 12 o’clock pointing up. The lens is built into the dot at 6 o’clock.
If you gaze at the watch on your wrist as it’s recording, you’ll appear upside down
on playback. Not to worry. The lens has been mounted upside down so that when
you hold your wrist outward horizontally with, for instance, your hand across your
stomach, subjects in front of you will appear upright on playback.
Note: Make sure while recording videos or taking photos to orient the watch with the
12 o’clock pointed toward the oor and the 6 o’clock to the ceiling. Be mindful of your
ngers and shirt or coat sleeves. Pay particular attention not to cover the portion of
the watch face near 6 o’clock since that’s where the lens is hidden.
Night Vision
Four infrared LEDs along the bottom of the clock face can be activated to record
black and white video in darkness. You must turn the night vision feature on each
time while the camera is recording video.
1. Start recording video (as described above), then press and hold the 10 o’clock
button for about 2 seconds. The red LED will ash three times, conrming that night
vision is engaged.
2. To disable night vision, press and hold the 10 o’clock button for about 3 seconds.
Though there will be no conrming LED ashing this time, night vision will be
disabled.
Note: The infrared LEDs cannot be set to automatically activate. Subjects you expect
to capture with night vision must be centered in the frame and no more than about
5-feet (1.5 m) away from the watch. Make sure that your ngers don’t cover the watch
face.
Taking Photos
When photographs are preferable to videos, you can set the camera to capture still
images.
1. Turn on the camera normally as you would to start a video recording by holding
down the 2 o’clock button, then pause the video recording by pressing the 2 o’clock
button twice. With the LED now a steady blue, the camera is in Standby mode.
2. Press the 2 o’clock button twice. The red LED will start to ash.

HD SPY WATCH WITH NIGHT VISION USER GUIDE 7
3. As soon as you see ashing red, press the 10 o’clock button once. The blue LED
will glow steadily.
4. Press the 10 o’clock button once so that the LED changes to red.
5. To take a snapshot, tap the 2 o’clock button. Each time you press this button, the
solid red LED will blink to conrm that a photo has been saved.
6. To power off the camera, press and hold the 2 o’clock button for 4- to 5 seconds.
Note: The watch should be held at least 12-inches (30 cm) away for the subject to
be in focus.
Each photo results in a JPG le that consumes between 700- and 850KB.On
playback in your computer, the photo’s date and time will be stamped in the bottom
right-hand corner of the image. It should match the original “date modied” eld in the
le directory as seen when you pull up the camera’s DCIM/100DSCIM subdirectory.
The date and time stamp on the picture can be disabled in photos going forward as
they can be for video. See “Setting the Camera Date and Time” on pg. 4.
You cannot choose the photo resolution nor can you take photos while recording
video. If you need to grab a photo from a video, use the take-snapshot command in
your playback software or PrtScn button on your keyboard for pasting into a paint
program or photo utility.
Voice Recording
Though you can use the video mode to record audio even if you don’t care about
the picture, the advantage of an audio-only recording is that you can store the audio
WAV le in a fraction of the space of a video AVI le. The steps necessary to put the
watch into audio-only recording mode, however, are a bit complicated.
1. Start recording video (as described above), then pause the video by double
tapping the 2 o’clock button to put the camera into Standby mode. The blue LED will
ash three times, indicating Standby mode.
2. In Standby mode press and hold the 10 o’clock button for 2 or 3 seconds until the
red LED starts to ash.
3. As soon as it starts to ash, press the button at 10 o’clock once. You should now
see a steady blue LED.

HD SPY WATCH WITH NIGHT VISION USER GUIDE 8
4. Press the 10 o’clock button once, and the LED will change to red. Then, 3 seconds
later, press the same button again. The LED should now change to a solid blue light
again.
5. Tap the 2 o’clock button to start the audio recording, and the LED will ash blue
every second continuously to conrm a recording in progress.
6. You can pause the audio recording by pressing the 2 o’clock button, and the LED
will turn solid blue. To resume audio recording, tap the button again.
7. You can power off the camera after pausing the audio recording (see Step 6 above)
by holding the 2 o’clock button for 4 or 5 seconds until the red LED starts to ash
quickly.
LED Indicators
Pay attention to the two light emitting diodes embedded in the “12” of 12 o’clock on
the clock face. Here’s a summary of what the lights mean:
Blue and red ashing together for 5 seconds indicate that the camera is out of
memory.
Blue and red alternatingly ashing indicate the battery must be recharged.
Blue means Video mode. When the LED ashes, video recording is starting. When
it’s steady, the camera is in Standby mode.
Red generally means Photo mode. When the LED is steady, the camera is set to take
still pictures. When you press the 2 o’clock button and the LED ashes, a still image
has been saved.
When the red LED ashes three times, it means you’ve activated the infrared LEDs
for night vision.
A ashing red LED also indicates a step in starting a voice recording.
When the watch is connected to a USB port or the AC adapter, the blue LED on the
watch will stay steady during charging and turn red when fully charged.

HD SPY WATCH WITH NIGHT VISION USER GUIDE 9
Playback and File Management
Once you plug the watch into a USB port on your computer, you’ll nd the recorded
content in an external drive subdirectory such as: D:\DCIM\100DSCIM. Use playback
software (not included) such as the VLC Media Player to play video, a paint or
photo viewing program to review photos and a music or media player to hear audio
recordings.
Use your computer’s le manager to copy les to your computer and delete les from
the HD Spy Watch’s internal memory. Once the camera’s memory lls up, you must
start deleting les to make room for new videos, photos or audio recordings.
FAQs
Can the camera be set for loop recording?
No. Once the internal memory lls up, the camera will stop recording. You must
transfer and delete les manually using your computer.
Can the device be used as a live webcam?
No. When the HD Spy Watch is plugged into a computer’s USB port, you can only
play and manage its recorded content.
Can the camera record video while plugged into a USB power port?
No. The camera can only record while powered from its battery.
Can the recording resolution be changed?
No. Video is always captured at 1920 x 1080 pixels.
Can the audio be disabled during video recording?
Yes. That is, if you screw off the tiny knob with the hole at 4 o’clock and replace it with
the included mic shutoff knob (without hole) that cuts off the path to the microphone.
How much memory does a 15-minute video le use?
More than 1GB.
What happens when a recording exceeds 15 minutes?
A new le is automatically started. Since it is contiguous, you shouldn’t lose content.
Do the three inner clocks on the watch face operate?
No. They’re only there for show.

HD SPY WATCH WITH NIGHT VISION USER GUIDE 10
Image sensor 12 MP (1/4˝ CMOS)
Video resolution 1920 x 1080
Frame rate 30 fps
Lens Fixed
Viewing angle 90°
Minimum focusing distance 12˝ (30 cm)
Internal memory 8GB
Video storage capacity 70- to 80 min.
Video format AVI
Photographic resolution 4032 x 3024
Photo format JPG
Photo storage capability About 2000 photos
Audio Mono
Voice sampling 8 KHz
Audio storage capability About 360 hr.
Audio format WAV
IR night vision 4 LEDs
IR illumination range Up to 5´ (1.5 m)
Interface One-pin socket on watch to USB
Cable length 26˝
Charging time About 1 hr.
Battery longevity About 150 min.
Battery charge DC 5V 500mA
Battery type Embedded high-capacity lithium polymer (LiPo)
Storage temperature -20° − 80°F (-29° − 27°C)
Compatible computers Windows, Macintosh, Linux
Size 2˝ (5 cm) clock face diameter with knobs
9.5˝ (24 cm) length with strap spread open
Weight 3.2 oz. (90 g)
SPECIFICATIONS
What if the computer doesn’t recognize the camera?
Check that both ends of the cable are rmly attached. Try a different USB port. Try
rotating the cable plug while it’s inserted in the watch socket.
How do I reset the camera?
In the event the camera locks up or crashes, the system can be reset by holding
down the buttons at 2 o’clock and 10 o’clock at the same time.

HD SPY WATCH WITH NIGHT VISION USER GUIDE 11
Thanks again for purchasing a SpyTec product! We appreciate your business and
strive to make your experience the best possible. If you have any issues with your
things started.
Warranty
This Limited Warranty applies to physical goods sold by STI and lasts for a period
of 90 days from the date of sale of the device. This Limited Warranty covers any
manufacturing defects to the device or accessories encountered by normal use.
This warranty does NOT cover damages resulting from improper use of the
device (including the use of incompatible accessories such as chargers, storage
devices, etc.), unauthorized modications to the device, negligence, or from any
environmental or natural disasters, or from loss or theft. This warranty requires proof
of sale of the device from STI or from approved resellers only.
Devices that are covered will be repaired or replaced at STI’s discretion. Devices
requiring replacement will be fullled with a new or refurbished unit, or a similar unit if
the original unit is no longer available.
To take advantage of our warranty, please go to:
http://www.spytec.com/return-policy/ and review our returns policy. If your device
meets the above guidelines as well as the guidelines on our website, please click the
button to proceed to the Return Authorization Form. In the event our online guidelines
change, this warranty will supersede any newer changes. Once you have lled out
the Return Merchant Authorization form, please wait for instructions. The date the
form is lled out must not exceed 90 days from the date of sale.
Help

HD SPY WATCH WITH NIGHT VISION USER GUIDE 12
SpyTec is a registered trademark of Spy Tec
International, 2019. All rights reserved.
Table of contents
Other Spy Tec Watch manuals


Popular Watch manuals by other brands

Casio
Casio QW 5513 Operation guide

Piaget
Piaget 560P Instructions for use

Armitron
Armitron pro sport MD0346 instruction manual

West Marine
West Marine BlackTip 13411293 Instruction Booklet and Care Guide

Jaeger-leCoultre
Jaeger-leCoultre HYBRIS MECHANICA CALIBRE 184 manual

FOREVER
FOREVER iGO PRO JW-200 user manual


