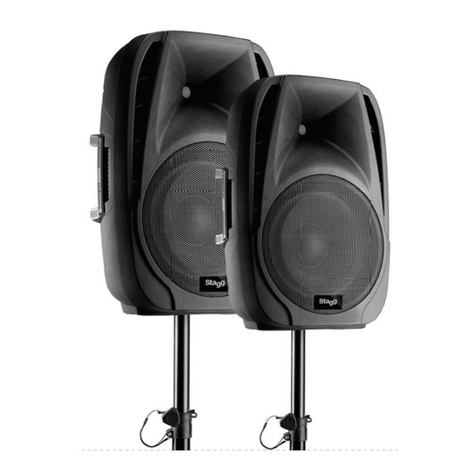
Stagg SPA-VIAGGIO User manual

!
User Manual
Portable PA
SPA-VIAGGIO

!
IMPORTANT SAFETY SYMBOLS
Use only with the cart, stand, tripod, bracket
The symbol is used to indicate that some hazardous live terminals are involved within
this apparatus, even under the normal operating conditions, which may be sufficient
to constitute the risk of electric shock or death.
The symbol is used in the service documentation to indicate that specific component shall
be replaced only by the component specified in that documentation for safety reasons.
Protective grounding terminal
Alternating current/voltage ON: Denotes the apparatus is turned on
Hazardous live terminal OFF: Denotes the apparatus is turned off
WARNING:
Describes precautions that should be observed to prevent the danger of injury or
death to the operator.
CAUTION:
Describes precautions that should be observed to prevent danger of the
apparatus.
1. IMPORTANT SAFETY INSTRUCTIONS
* Read these instructions.
* Keep these instructions.
* Heed all warning.
* Follow all instructions.
* Water & Moisture
The apparatus should be protected from moisture and rain, can not be used near
water, for example: near bathtub, kitchen sink or a swimming pool, etc.
* Heat
The apparatus should be located away from any heat source such as radiators,
stoves or other appliances that produce heat.

!
* Ventilation
Do not block areas of ventilation opening. Failure to do could result in fire. Always
install in accordance with the manufacturer's instructions.
* Object and Liquid Entry
Avoid dropping objects or spilling liquids inside the apparatus, failure to do so
may result in permanent damage.
* Power Cord and Plug
Protect the power cord from being walked on or pinched, particularly at plugs,
convenience receptacles, and the point where they exit from the apparatus.
Do not defeat the safety purpose of the polarized or grounding-type plug. A
polarized plug has two blades with one wider than the other. A grounding type
plug has two blades and a third grounding prong. The wide blade or the third
prong is provided for your safety. If the provided plug does not fit into your outlet,
refer to an electrician for replacement.
* Power Supply
The apparatus should be connected to a power supply only of the type as marked
on the apparatus or described in the manual. Failure to do could result in damage
to the product and possibly the user. Unplug this apparatus during lightning
storms or when unused for long periods of time. Where the MAINS plug or an
appliance coupler is used as the disconnect device, the disconnect device shall
remain readily operable.
* Fuse
To prevent risk of fire and damaging the unit, please use only the recommended
fuse type as described in the manual. Before replacing the fuse, make sure the
unit is turned off and disconnected from the AC outlet.
* Electrical Connection
Improper electrical wiring may void the product warranty.
* Cleaning
Clean only with a dry cloth. Do not use any solvents such as benzol or alcohol.
* Servicing
Do not implement any servicing other than those described in the manual. Refer
all servicing to qualified service personnel only.
Only use accessories/attachments or parts recommended by the manufacturer.

!
2. Introduction
Congratulations and thank you for purchasing the SPA-VIAGGIO PA system,
The SPA-VIAGGIO is a self-contained, portable PA system featuring multiple
input channels with individual tone controls, multiple digital effects and
convenient output routing capabilities that allow the user to integrate the system
into any number of audio environments. And with its lightweight and ergonomic
design the SPA-VIAGGIO is perfect for situations where ease and portability are
just as important as quality and flexibility.
Included in the SPA-VIAGGIO package are:
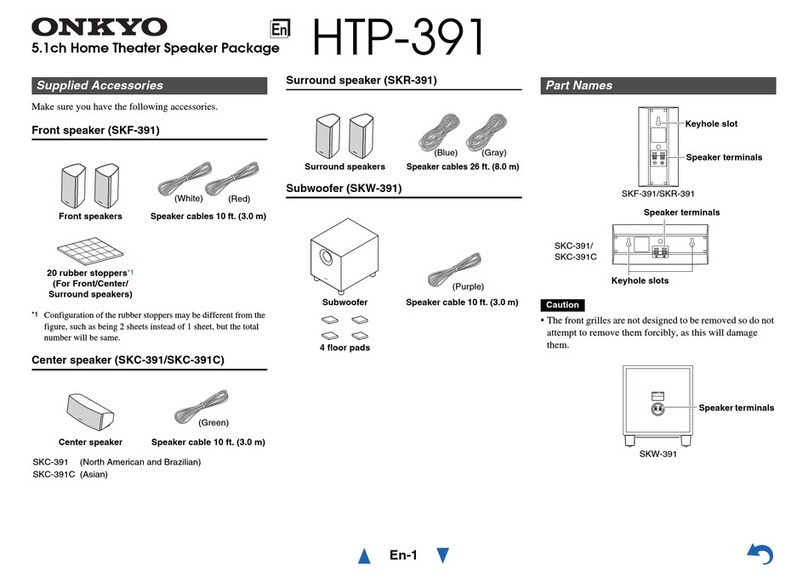
* 2 speakers with detachable modules
* 1 module contains the SPA-VIAGGIO powered mixer
* 1 module is designed for storage of speaker cables and microphones
* 1 pair of unshielded speaker cables (5m)
* 1 Power cable
* User s Guide
Caution! There are no user serviceable parts inside this speaker. Do not attempt
any repairs, without being instructed to do so by an authorized technician. Doing
so will void your manufactures warranty. In the unlikely event your speaker may
require service, please contact the shop that sold the unit.
Unpacking: SPA-VIAGGIO has been thoroughly tested and has been shipped in
perfect operating condition. Carefully check the shipping carton for damage that
may have occurred during shipping.
If the carton appears to be damaged carefully inspect your units for any damage
and be sure all accessories necessary to operate the system have arrived intact.
In the event damage has been found or parts are missing, please contact your
supplying shop for further instructions.

!
3. Main Features
1. Active amplified portable PA system
2. 200W RMS High-Performance powered speaker system.
3. State-of-the-art, high efficiency switch mode power supply with a class D high
frequency amplifier
4. 100HX60V asymmetrical wave guide for uniform audience coverage
5. 8 channel powered mixer with intuitive interface
6. On board digital multi-effects
7. Integrated 36 mm pole mount socket with stabilizing securing screw
8. Highly designed composite enclosures for durability, light weight, and acoustic
performance
4. Getting Started
1. Remove speakers, power cable and the speaker cables from the carton.
2. Detach the modules from the speakers by pressing and sliding the button on
the top of the speaker. All that is required is a little lift on the module once the
button is pressed. (Ex.1).
3.If you have purchased speaker stands, you can
place the speakers on the stands utilizing the pole
mount adaptor built into the SPA-VIAGGIO speaker
cabinets. Once the speaker is on the pole, tighten
the screw to snug the speaker to the pole.

!
4. Connect the Mixer Module to the speakers
On the right side of the mixer you will notice two 1/4” phone jacks –these are
your speaker output jacks. Take the speaker cables and connect them from these
jacks to the jacks on the back of the speakers.
5. Connecting the AC Power Cable
Connect the female end of the power cable to the mixer and plug the male end
into the wall socket or extension cord. Turn the “ MASTER VOLUME “ control to
“0”. Now turn the power switch to the “on”position. You should see the POWER
indicator illuminated. At this point you are ready to bring in an audio signal and
hear the signal amplified by the system.

!
Getting Acquainted with the SPA-VIAGGIO Powered Mixer
This part of the SPA-VIAGGIO system houses the mixing board and power
amplifier. Here you will connect all of the microphones, musical instruments,
external sound sources (like Mp3 or CD players), headphones in addition to any
recording devices or additional speakers like a personal monitor, subwoofer or
“Front of House” feed.
The Basics
While it looks complicated, the mixing board is actually a very simple device.
A “mixing board”brings audio sources “in” (through the inputs) and routes the
signal to the outputs (MASTER VOLUME/SPEAKER OUTPUTS or MONITOR
OUTPUTS), The mixer controls enable the user to affect the tone and/or volume
in addition to routing the signal and adding effects to an individual input source.
The abundance of knobs is simply due to the repetitive nature of the design.
Letʼus look at the “inputs”first:
AUDIO INPUTS
The SPA-VIAGGIO has 8 inputs: 4 mono inputs and 2 stereo inputs. All of the
inputs will route to the speakers and to the MONITOR OUTPUT SECTION
MONO MIC/LINE INPUTS
Moving from left to right there are 4 identical input strips comprised of (from top to
bottom) a “PEAK LED”, a combination input connector, MIC/LINE selector, Treble
and Bass controls, an effects send and a channel volume control.

!
STEREO INPUTS
The SPA-VIAGGIO has two stereo inputs and these are used primarily for MP3
or CD players but could be used with the stereo output of an electronic keyboard,
instrument pre-amp of processor, or an electronic drum machine. The inputs
labeled “STEREO IN 5 /6” offer the option of using 1/4” phone plugs or RCA
plugs and this channel has a volume control. The input labeled “ STEREO IN 7/8”
is a 3.5mm stereo input of the type typically found on personal music players.
This input does not have a volume control as personal music players usually
have a volume control built into the unit. This is the best way to control the
volume of the unit plugged into this input.

!
STEREO OUTPUTS
Weʼve brought signals into the mixer now. Letʼs send them somewhere.
The SPA-VIAGGIO has 3 stereo pairs of outputs:
1.LEFT/RIGHT Speaker Outputs
These outputs should only be connected to the
SPA-VIAGGIO speakers and under no condition
should they be connected to the input of another
electronic device. These outputs carry power and
as such could damage the electronic device.
Only use “ unshielded “ speaker cables (like
the cables provided with your SPA-VIAGGIO).
2. MONITOR OUTPUTS
These outputs allow you to route the stereo mixer signal
to another destination like a recording device, personal
monitor, subwoofer or to another PA system (Front of
House). Depending on the input connectors of the
destination device, you can use either the ¼” phone
jacks or the RCA jacks.
MONITOR OUTPUT VOLUME -This controls the overall
volume of the MONITOR OUTPUT.
3.HEADPHONE OUTPUTS
This output allows the user to listen to the main output
the SPA-VIAGGIO mixer. Headphones used will require
a 3.5 mm stereo plug.
MASTER VOLUME
Your SPA-VIAGGIO is equipped with a Master Volume
that controls the overall output volume of the system.

!
DIGITAL EFFECTS
Your SPA-VIAGGIO is equipped with digital multi-effects designed to enhance
instruments or vocals. There are sixteen effects available on the SPA-VIAGGIO.
An effect on a vocal or instrument can create a very natural sense of space for
the listener and is great fun for the performer. Used correctly, effects enhance
a voice or instrument in a very musical way, but when used to excess, they can
make the music or voice less intelligible and unnatural.

!
6. Connecting a microphone:
a. Turn the “MASTER VOLUME”to “0”.
b. Connect the microphone to the microphone cable
and insert the male end into a free channel input
of the SPA-VIAGGIO mixer.
c. Push in the MIC/LINE switch -this increases the
sensitivity of the input and is set for use with a dynamic
microphone.
d.Set the “TREBLE”and the “BASS” control to “0”
(IN THE CENTER AT THE DETENT)
e. Set the “ REVERB” TO “0”.
f. While talking loudly into the microphone bring up the
channel volume until the red “PEAK” indicator blinks quickly.
If the indicator does not come on at all and you have turned
the channel volume to “10”, then reduce the channel volume
to “7” and move on to the next step. If the “PEAK”indicator
comes on at 3 for instance, then press the MIC/LINE switch
returning it to the up position and increase the channel
volume control.
g. Slowly bring up the “MASTER VOLUME”
to the desired loudness.
If you are using a condenser microphone
engage the “PHANTOM POWER” button.
7. Connecting a keyboard, drum machine, cd or mp3 player to the 5/6 stereo input:
a. Turn down both the volume control on channel 5/6 and the “ MASTER
VOLUME “ control.
b. Connect the output of the device to the “5/6”input of the SPA-VIAGGIO mixer
using the appropriate Input jacks. (1/4” phone or RCA depending on the output
of the device you are trying to connect)
c. If there is an output gain or volume control on the device, set that to 70%.
This level is a starting point but should get you enough output to drive the input
of the SPA-VIAGGIO.

!
d. Bring up the “5/6 VOLUME CONTROL” to the 5-7 range.
e. Slowly bring up the “MASTER VOLUME” to the desired loudness.
8. Connecting a personal music player to the 7/8 stereo input:
a. Turn down the “MASTER VOLUME” control.
b. Connect the output of the device to the “7/8” input of the SPA-VIAGGIO mixer
using a 3.5mm stereo “mini plug”.
c. If there is an output gain or volume control on the device, set that to 70%.
This level is a starting point but should get you enough output to drive the input
of the SPA-VIAGGIO.
d. Slowly bring up the “MASTER VOLUME” to the desired loudness.
9. Using the monitor outputs:
You can connect these outputs to a variety of devices like a recording device,
a powered subwoofer, additional power amplifiers and speakers or even
another mixer.
a. Turn the “MONITOR OUTPUT VOLUME” control to “1”.
b. Connect the MONITOR OUTPUT (EITHER THE 1/4” PHONE OR RCA) to
the inputs of the device into which you want to plug the mixer.
c. Set the input level of the external device according to the manufacturer
instructions.
d. Slowly bring up the “MONITOR OUTPUT VOLUME” to the desired loudness.
10. Storing the SPA-VIAGGIO
a.Turn down the “MASTER VOLUME” control.
b. Turn the mixer unit off.
c. Disconnect the AC power cable from the mixer and then unplug the cable
from the wall outlet.
d. Disconnect the speaker cables from the speakers and then disconnect the
speaker cable from the mixer.
e. Disconnect all other inputs (microphones, instruments of music players) from
the mixer .
f. Return the cables to the storage module and secure the latch.

!
g. To return the storage module or mixer module back to their attached position
on the rear of the speakers simply reverse the process described in the Getting
Started portion of the manual.
11. MP3 Player
1. LCD
This large blue LCD screen displays all relevant information about the function
being selected or the Mp3 file (or song) being played.
2. FUNCTION SELECTOR:
This section provides front-selectable push switches, allowing you to choose
between one
A. Play/Pause
• Press this button to play the chosen song. Press it again to momentarily
interrupt the playing.

!
• Press a third time to continue playing the current song.
B. Next/Vol+
• Press this button once to go to the next song.
• Press and hold this button to increase the volume of the Mp3 reader.
C. Previous/Vol-
• Press this button once to go back to the previous song.
• Press and hold this button to lower the volume of the Mp3 reader.
D. Repeat/EQ
• Press this button once to play the current song repeatedly until stop is
pushed.
• Press this button twice and all loaded songs will be played one after the
other until stop is pushed.
• Press this button a third time to stop the repeating process.
• Press and hold this button to choose among different types of equalization
applied to the song currently playing.
E. USB/SD
• Use this knob select the USB memory card or SD/MMC memory card.
F. Stop/Power
• Press this button to end the song.
• Press and hold to turn the MP3 player on or off.
3. SD (Input)
• This slot is used to insert a SD (Secure Digital, formatted in FAT32), non-
volatile memory card with Mp3 files to be played.
4. USB (Input)
• In this port, plug in any USB memory stick (formatted in FAT32) with Mp3
files to be played.

!
SPECIFICATIONS
System
-System type: powered mixer with two-ways bass-reflex enclosures
-Maximum spl output: 124 db
-Frequency Range (-10 db): 50Hz-20Khz
-AC Input: 120-240V 50/60Hz, Voltage selector switch sets operational range
Amplification
- Amplifier: Class D (2x100w stereo) RMS
- Output Connector: 2* 1/4ʼʼ TS (unbalanced) amplifier outputs
Mixer
- Input Connectors: 8 inputs (4 mono mic/line, 2xstereo)
- Channels: 1-4 are XLR 1/4ʼʼ Jack combo connectors,
XRL is a mic level input ,1/4ʼʼ is a line level input .5-6,
one pair of 1/4ʼʼ balanced TRS jacks (L+R), and a pair of RCA jacks (stereo).
7-8 is a 3.5 mm stereo jack
- Phantom power: 15v
- Output Connectors: Monitor outputs: one pair of 1/4ʼʼ balanced
TRS jacks (L+R) and a pair of RCA connectors (stereo)
- Headphone output: one 3.5mm stereo jack.
- Signal Indicators: Ch1-4 Peak LED: Green=signal present, Red=input overload
- EQ: Individual channel Bass and Treble controls, center detent,
+/-6db cut and boost
- System limiter: High quality digital 16 effect
Speaker
- LF Driver: 10ʼʼ woofer
- HF Driver: 1ʼʼ compression driver
- Output Connector: 2* 1/4ʼʼ TS (unbalanced) amplifier outputs
- Handles: One on top
- Suspension/Mounting: 36mm pole socket with stabilizing screw
- Shipping package (H*W*D): 655*380*555 mm

!
!
IMPORTANT SAFETY INSTRUCTIONS
READ AND KEEP THESE INSTRUCTIONS. HEED ALL WARNINGS.
• If, after you have followed the instructions outlined above, this device fails to function, please
contact your dealer. Under no circumstances should this device be opened. Leave all servicing to
qualified personnel.
•Electrical appliances must never be used in conditions of high humidity or heat. To prevent any risk
of fire or electric shock, never spill or splash liquids on this device. Should this happen, unplug the
power cable from the mains outlet and switch off the mixer immediately.
MARKING & CONFORMITY
1. The CE mark on this product means it conforms to the EMC Directive (2004/108/CE), CE marking
Directive (93/68/EEC) and Low Voltage Directive (2006/95/EC).
2. The «Crossed-out Wheeled Bin» is to draw your attention to the WEEE (Waste Electric &
Electronic Equipment) Directive (2002/96/EC). It means this apparatus must be collected separately
for recycling.
3. «RoHS compliant» means this device conforms to the Directive (2002/95EC) on the restriction of
the use of certain hazardous substances in electrical and electronic equipments, such as: Mercury,
Lead, Cadmium, Hexavalent Chromium, Polybrominated Buphenyl (PBB) and Polybrominated
Diphenyl Ethers (PBDE).
Table of contents
Other Stagg Speakers System manuals
