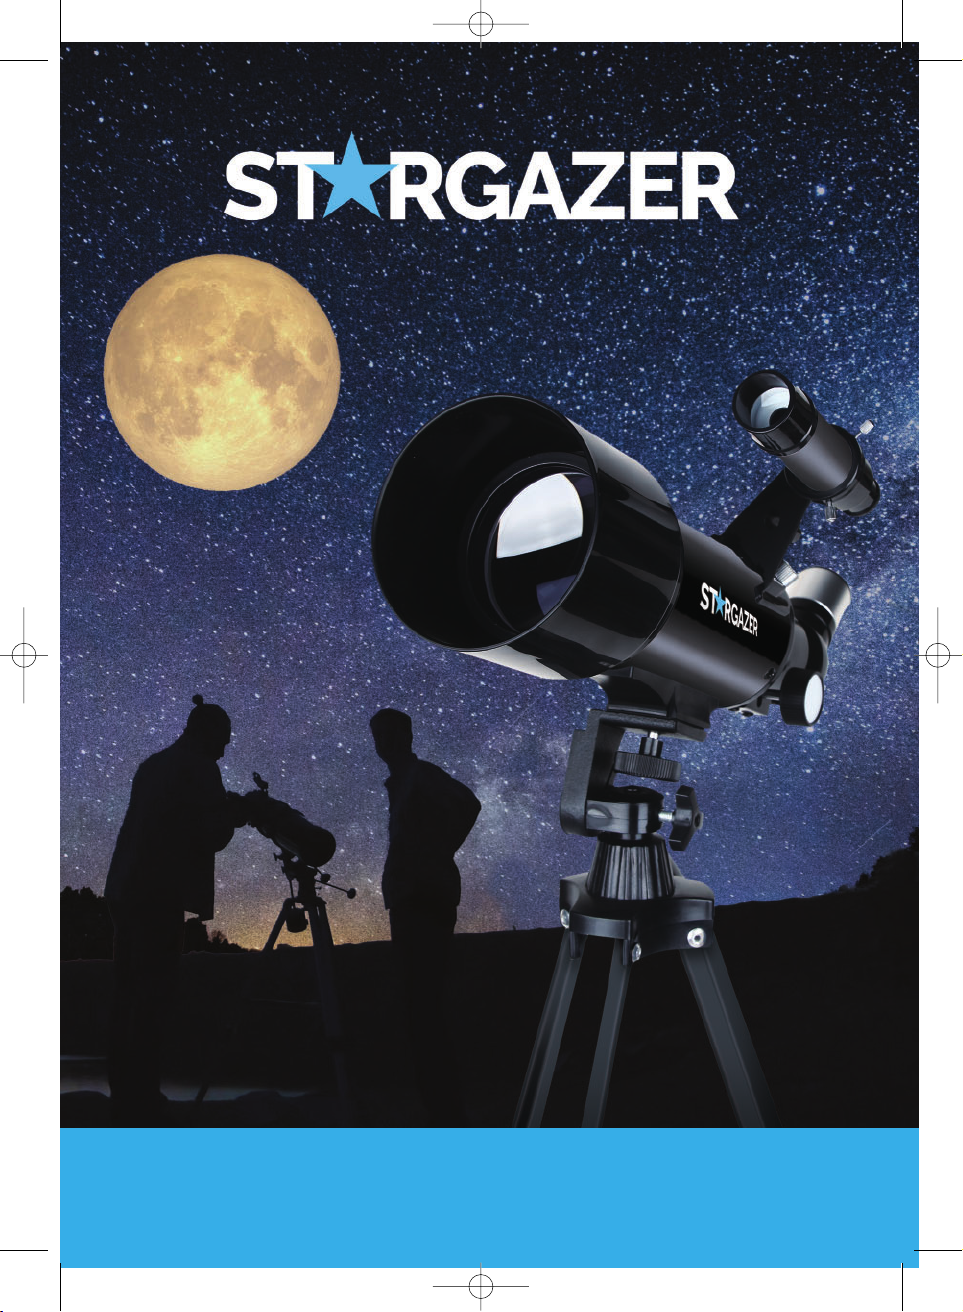
STARGAZER SG40070 User manual
www.hsdonline.co.uk
TELESCOPE
SG40070
SG40070_Manual 28/4/21 11:14 Page 1

Introduction
General Information
Please read the entire instruction manual before using the product
and then save it for future reference. We reserve the right for any
errors in text or images and any necessary changes made to
technical data. If you have any questions concerning technical
problems please contact our Customer Services on 0800 091 3171.
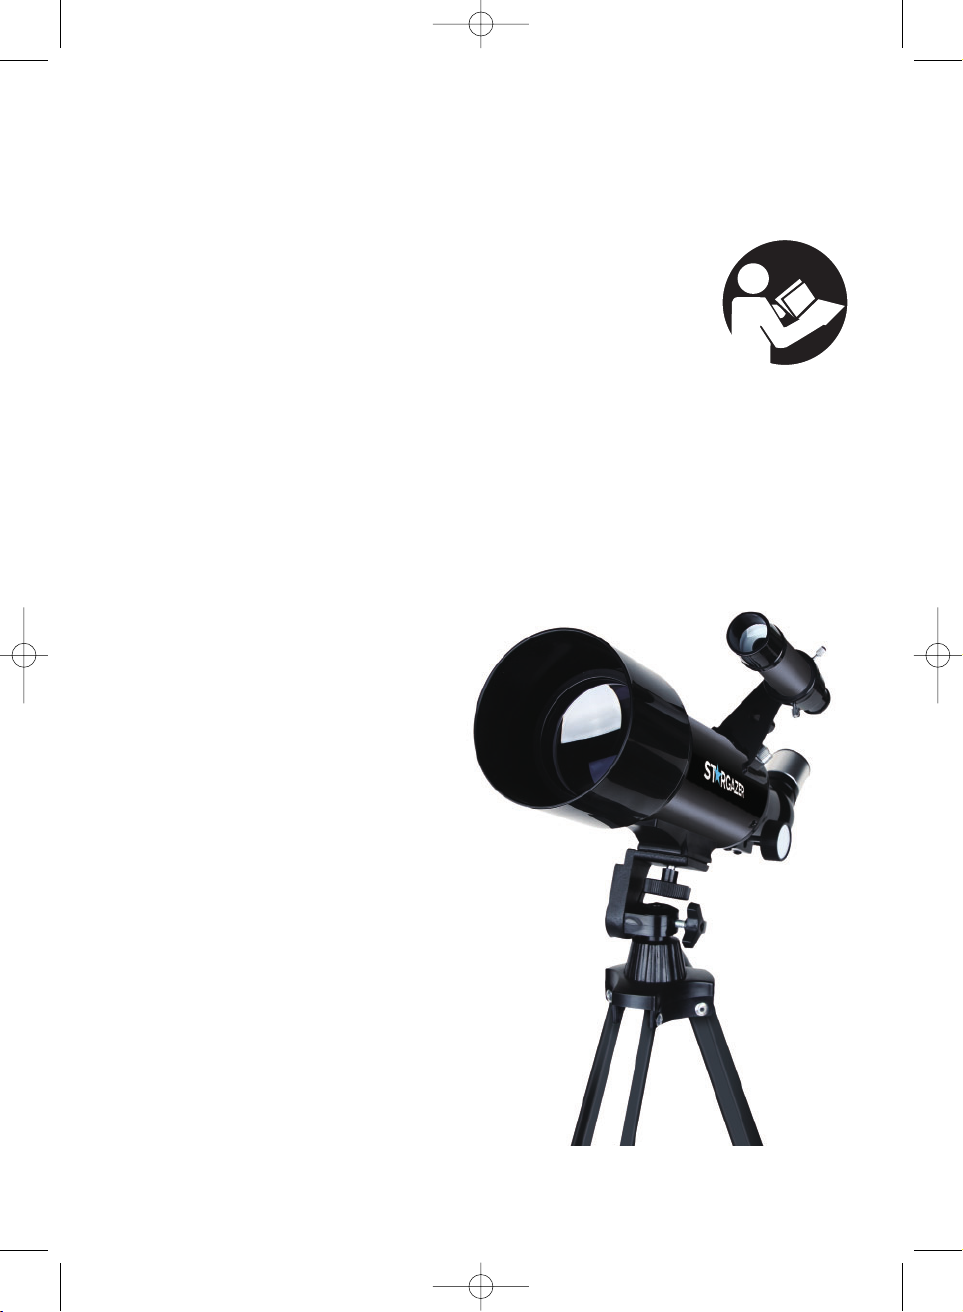
First Time Telescope Users Guide
Congratulations on the purchase of your Stargazer telescope -an
optical instrument that will help you explore our unique Universe.
Simply enjoy views of the moon, planets, cloud formations and
nature. Achieve your astronomy goals. This instruction leaflet will
guide you through a simple set up and show you how to use a
telescope.
Before we start, please digest this important warning: Never at
any time look or zoom in at the Sun through any telescope. Parents
please make sureyour children areawareof this point and that It
can just take a few seconds to damage your eyesight.
www.hsdonline.co.uk
2
SG40070_Manual 28/4/21 11:14 Page 2
www.hsdonline.co.uk
Safety Instructions
General safety instructions for the Stargazer Telescope:
Warning: Read all the instructions. Failure to comply with
the following instructions can lead to serious injury.
SAVE THESE INSTRUCTIONS.
The term “telescope” in the following text refers to your
Stargazer Telescope.
NEVER LOOK DIRECTLY AT THE SUN THROUGH A TELESCOPE
WITHOUT AN OBJECTIVE SOLAR FILTER!
NEVER LEAVE THE TELESCOPE UNSUPERVISED, EITHER WHEN
CHILDREN ARE PRESENT OR ADULTS WHO MAY NOT BE FAMILIAR
WITH THE CORRECT OPERATING PROCEDURES OF YOUR
TELESCOPE.
Contents
2. Introduction
3. Safety Instructions
4. Setting Up: Step-by-step Guide
6. Technical Specifications
6. Start using your Stargazer Telescope
8. Observing Tips
10. Troubleshooting and FAQ
11. Cleaning and Storage
12. Environmental Responsibilities
12. Warranty
3
SG40070_Manual 28/4/21 11:14 Page 3
www.hsdonline.co.uk
4
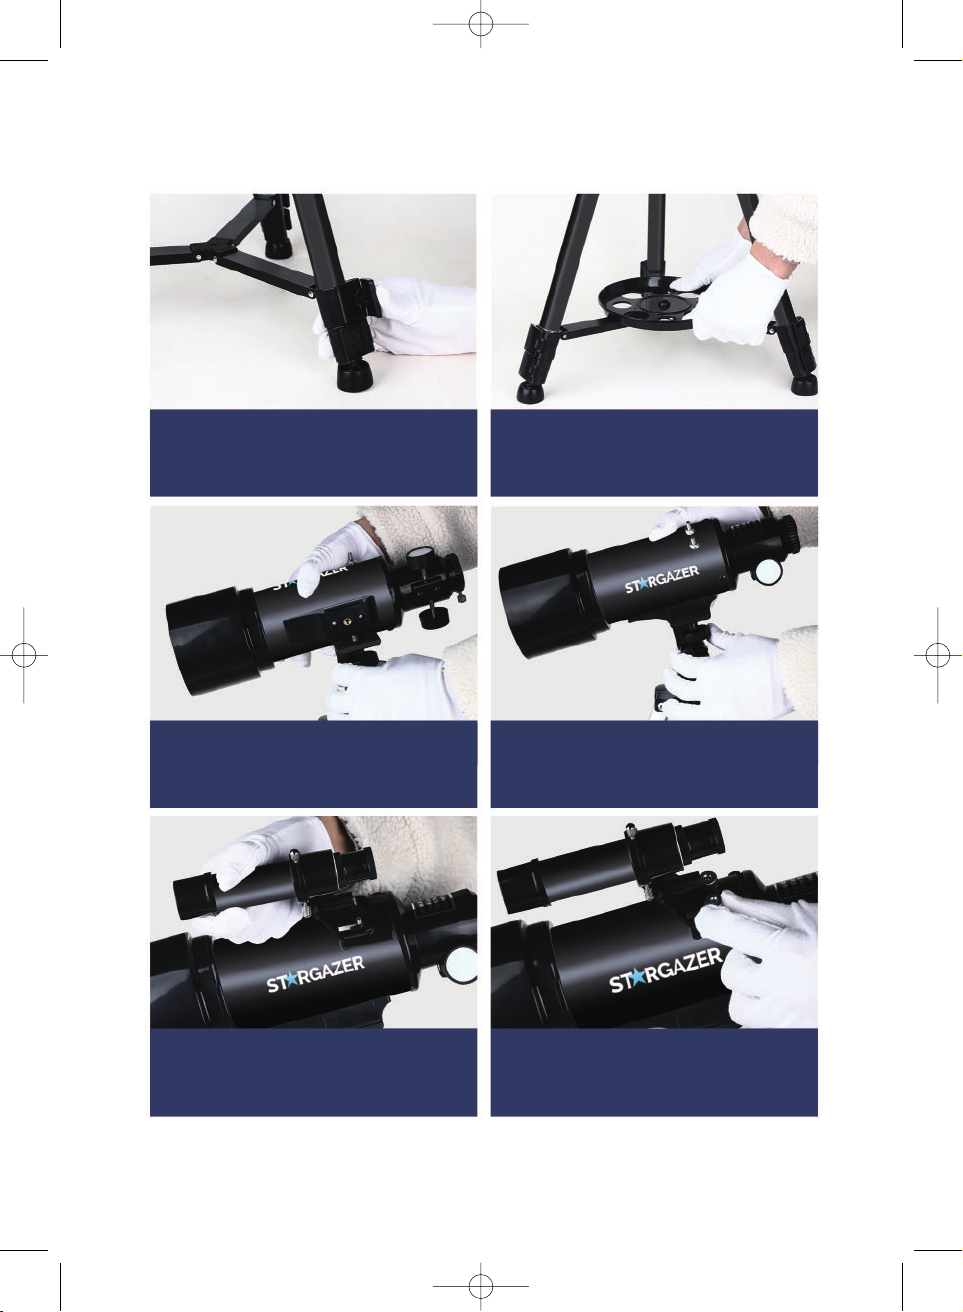
Setting up: Step-by-step Guide
1. Loosen the tripod levers and adjust to
the required height.
2. Install the tripod accessory platform.
3. Align the screw hole, under the main
scope, to the tripod screw.
4. Tighten the tripod screws to fix the
main scope tube.
5. Install the finder-scope. 6. Tighten the screws to fix the
finder-scope.
SG40070_Manual 28/4/21 11:14 Page 4

www.hsdonline.co.uk 5
7. Install the Zenith mirror into the end of
the main scope tube.
8. Tighten the screws to fix the Zenith
mirror.
9. Insert the eyepiece
(25mm eyepiece is
recommended first). Please note, prior to inserting
the eyepiece you can insert the Barlow Lens into the
Zenith Mirror, this will improve your magnification 3x.
10 a. Altitude control handle for up/down
adjustments (twist to unlock/lock)
10 b. Locking dial for left/right adjustments
11. Remember to remove the lens dust
protectors beforeobserving.
12. To focus on an object turn the focus
wheel until image becomes clear
Fig. 10a
Altitude Control Handle
Fig. 10b
Locking Dial
SG40070_Manual 28/4/21 11:14 Page 5

www.hsdonline.co.uk
6
Technical Specifications
TELESCOPE
SG40070
Optical System:
Calibre:
Focal Length:
Eyepiece:
Barlow Lens:
Multiplying Power:
Finder-scope
Zenith Mirror:
Optical Coating:
Resolution:
Viewing Angle:
Connection Mode:
Tripod:
Refraction
70mm
400mm
10mm/25mm
3times
16x/40x/48x/120x
5x24
48º full image Zenith Mirror
Multi-layer broadband green film
≥3.1
2º21’
Platform Screw
Aluminium alloy reinforced tripod
Start using your Stargazer telescope
Practice during the day:
Please remove the lens dust protectors first and then fit the 25mm eyepiece, we
always recommend for first use, and practice to use the 25mm eyepiece. Point the
telescope using the finder-scope to a distant object. Twist the altitude control
handle (see fig.10a) to move the telescope up and down and unscrew the locking
dial (see fig. 10b) on the opposite side to move the telescope left to right. Once the
target is found twist the altitude control handle and tighten the the locking dial to
secure the telescope to your target.
SG40070_Manual 28/4/21 11:14 Page 6

www.hsdonline.co.uk 7
It is important to practice this during daylight so that you get familiarised with the
telescope operation and how to secure the telescope into position when you have
chosen your target, practice makes perfect . A good target is a church tower,
distant tree, a chimney or a distant mountain peak if possible. Once locked into
position rotate the focuser dial so that the focuser tube moves in and out until you
find the best view possible, you may still need to adjust the telescope slightly if it
moves out of position of your chosen target, this is normal and adds to the
excitement and practice of finding your target perfectly. We suggest that you start
by rotating the focuser all the way in and slowly rotate it out until you find the
perfect view of your chosen object. Always practice first with the 25mm eyepiece.
Remember practice makes perfect.
NEVER LOOK DIRECTLY AT THE SUN THROUGH A TELESCOPE WITHOUT AN
OBJECTIVE SOLAR FILTER!
The Finder-scope:
The Finder-scope is a valuable part of the telescope when finding your chosen
object. Tooperate properly,the telescope and the finder-scope, should be aligned.
The chosen object through the finder-scope has a much broader field of view than
that of the telescope. Aligning your chosen image means matching the telescope’s
image as seen through the eyepiece to the chosen image at the centreof the
finder-scope. This way when looking through the finder-scope you know that the
telescope is pointing near exactly to the same point as the finder-scope. Thereis
nothing wrong with your finder scope if images appear upside down and reversed
left to right. This is a normal function of a finder-scope.
Barlow Lens:
The Barlow lens is a very interesting device. It is a negative lens that multiplies the
telescopes focal length. This unit is supplied with 1 piece Barlow Lens which offers
3 x Magnification. Meaning when using in conjunction with the 10mm or 25mm
eyepiece it will increase your magnification by 3 times. The barlow lens is fitted
between the Zenith mirror and the 10mm or 25mm eyepiece and usually best used
at night.
Zenith Mirror:
The Zenith Mirror is the right-angle prism or a plane mirror to reflect the rays from
an object near the zenith to the side of a refracting telescope for more convenient
observation.
SG40070_Manual 28/4/21 11:14 Page 7

www.hsdonline.co.uk
8
Please Note: If you wear corrective lenses (specifically glasses) you may want to
remove them when observing with an eyepiece attached to the telescope. If you
have astigmatism then corrective lenses should be worn at all times.
Astronomer:
On your journey to becoming an established Astronomer it is important to study
readily available astronomy magazines or study the internet which will give you
valuable information, updates and the locations of the planets and best viewing
dates and times as they change position from month to month.
Observing Tips:
Try to view objects that are high in the sky if possible. Waiting until the object rises
well above the horizon will provide a brighter and crisper image. Objects on the
horizon are viewed through several layers of earth’s atmosphere. Ever wonder why
the moon appears orange as it sets on the horizon? It’s because you are looking
through a considerable more amount of atmosphere than you would directly
overhead. (Note: If objects high in the sky are distorted or wavy, you are probably
viewing on a very humid night and can be frustrating.) During nights of unstable
atmosphere and overcast conditions, viewing through a telescope can be
frustrating, if not impossible, at times. Astronomers refer to crisp, clear nights as
nights of "good viewing" and will study the internet and weather forecasts for the
perfect night.
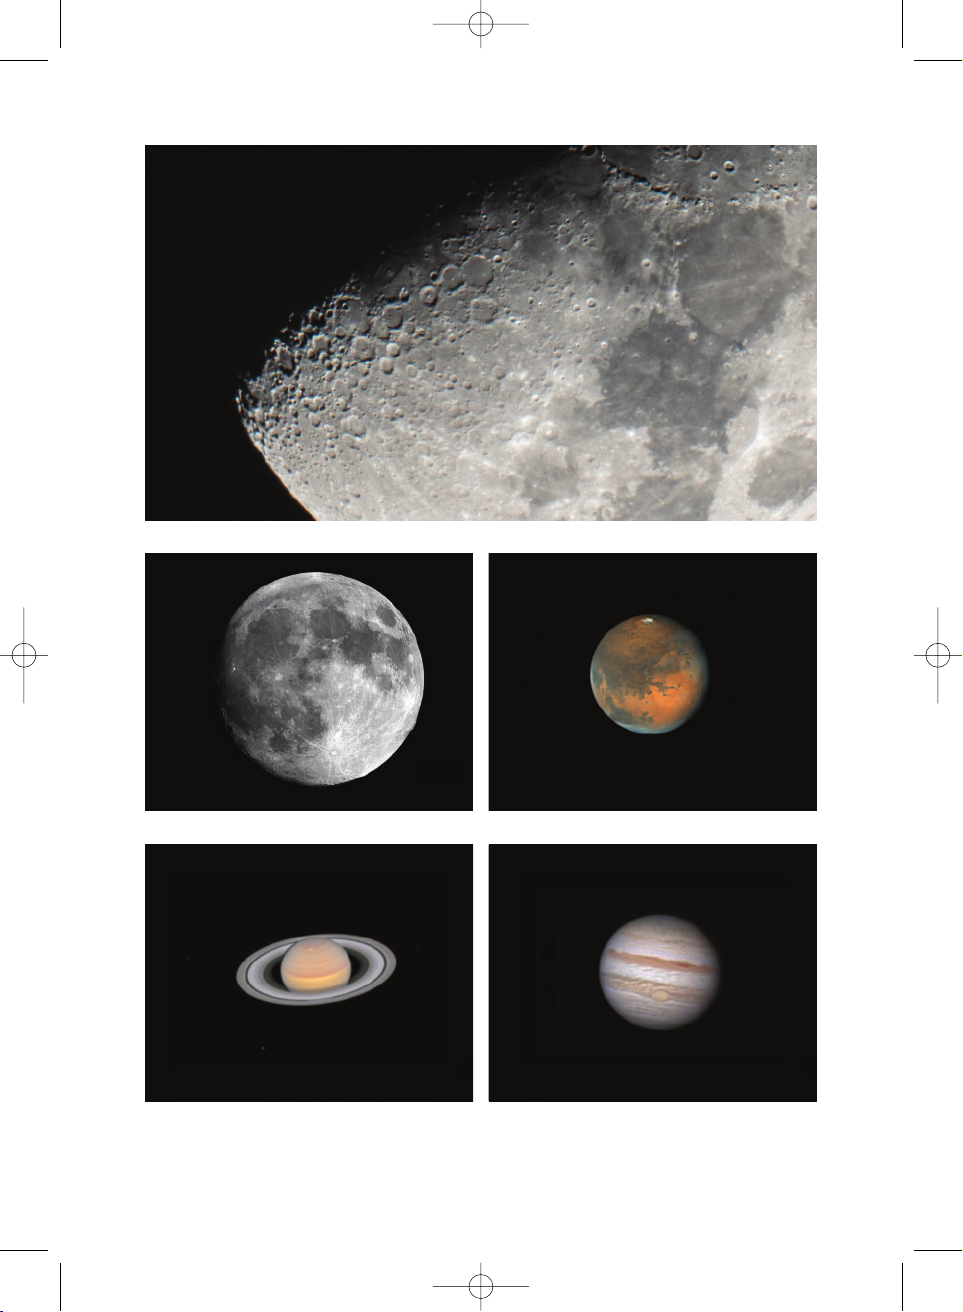
The Eight Planets:
In our solar system thereare 8 planets, of which 4 will show some form of surface
details, being Mars, Saturn and Jupiter and of course our Moon. Study the internet
regularly for best viewing dates when these planets will be at their best for viewing.
Our moon is the easiest observing target. It will always look approximately the
same through low magnification as any telescope. But larger instruments will allow
you to zoom in to reveal the real beauty of our moon, showing the craters and
mountains. Study when the moon will be at the largest and clear sky's for the best
results. Jupiter and Saturn are next. Saturn's rings can be seen by all but the
smallest telescopes (except when the rings areedge on). It is also possible to see
bands within Jupiter's atmosphere. Mars can be seen on a good night and will
show the largest and most prominent features on the Martian surface, although the
image will be very small and the resolution too low to reveal much detail.
SG40070_Manual 28/4/21 11:14 Page 8
www.hsdonline.co.uk 9
Our moon, showing the
craters and mountains
Moon
Saturn
Mars
Jupiter
SG40070_Manual 28/4/21 11:14 Page 9

www.hsdonline.co.uk
10
Troubleshooting and frequently asked questions
Q: I can’t get to focus my telescope, only get a bright circle.
A: Make sure you have inserted the diagonal Zenith mirror and an eyepiece
(start by the lowest power eyepiece – 25mm).
Q: I use the finder-scope to point to objects but I always miss the
target.
A: You probably need to realign the finder-scope on the target if you accidentally
nudge the telescope. After and learning how to tighten the telescope into
position of the target you will find you improve on this.
Q: When I use the barlow lens and the 10mm eyepiece the image
is so dark I can’t hardly see anything.
A: It depends on how stable the atmosphere is, too much turbulence causes
image distortion. The more magnified the image is the darker it gets.
Q: The stars only appear as points in the telescope, is this normal?
A: This is normal. Stars will always appear only as points, even in the largest
telescopes in the world. It is more interesting for beginners to observe two-
dimensional objects, such the moon or planets. Once you find these, you will
be able to start learning about the astronomical calendar.
Q: I would like to observe the Sun. How can I do it?
A: An appropriate specialist solar filter, placed over the objective, is essential for
observing the sun. These are available as plastic foil or glass filters (not
supplied by us). They allow only a tiny and harmless fraction of sunlight into the
telescope’s aperture. When securely positioned over the objective, they allow
observation of the sun in complete safety. Eyepiece solar filters should be
avoided at all costs as they are considered unsafe.
NOTE: NEVER LOOK DIRECTLY ATTHE SUN THROUGH A TELESCOPE
WITHOUT AN OBJECTIVE SOLAR FILTER!
Q: Ican’t see anything when I look through my telescope.
Did I do something wrong?
A: Check you have removed all the lens dust caps. All Telescopes are only suitable
for astronomical observing and when used outside at night when the sky is
clear is when you achieve the best results. Observing from inside a house
through a window or during the day is not usually best practice unless
practising and learning how to use the telescope.
SG40070_Manual 28/4/21 11:14 Page 10

www.hsdonline.co.uk 11
Cleaning and Storage:
Agood storage place should be dry, dust-free, secure, and large enough to get the
telescope in and out easily. Ideally, store the telescope in its storage bag when not
in use. Always fit the lens covers when not in use.
For Basic Cleaning:
1. Use suitable compressed air to blow off loose dust and large particles.
2. Use a lens cleaning solution for telescope lenses to gently lift off any remaining
dirt or smudges.
3. Use the solution to wet soft, plain tissue or cotton balls for larger optical surfaces
or cotton swabs for small parts like eyepiece lenses.
4. Make sure the lens protection caps are fitted and gently wipe the body over with
asoft cloth.
SG40070_Manual 28/4/21 11:14 Page 11
YESSS Electrical Ltd, Normanton, WF6 1TN declares that the Stargazer Telescope
is exclusively manufactured and imported for Hygiene Supplies Direct Ltd.
www.hsdonline.co.uk
12
Environmental Responsibilities
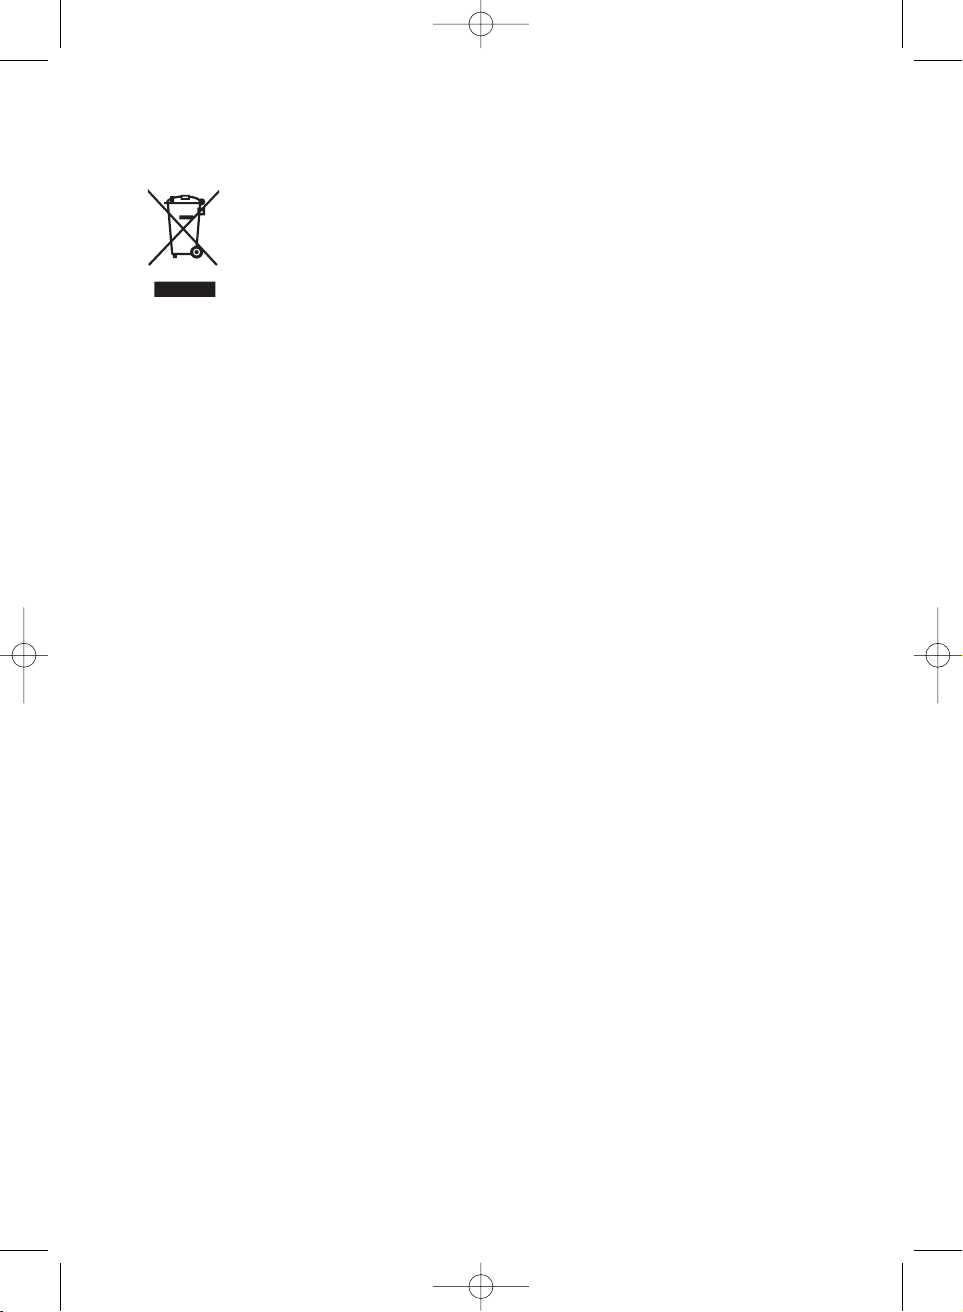
Meaning of crossed-out wheeled dustbin:
Do not dispose of electrical appliances as unsorted municipal waste,
use separate collection facilities.
Contact your local council for information regarding the collection
systems available.
If electrical appliances are disposed of in landfills or dumps, hazardous substances
can leak into the groundwater and get into the food chain damaging your health
and well-being.
When replacing old appliances with new ones, the retailer is legally obligated to
take back your old appliance for disposal free of charge.
SERVICE WARRANTY
Hygiene Supplies Direct guarantees the product free from defects in materials and
workmanship for a period of 1 year from date of purchase.
Should this unit be operated under conditions other than those recommended in
the manual or indicated on the unit, or any attempts made to service or modify the
unit, then the warranty will be rendered void. The product you buy may sometimes
differ slightly from illustrations. This warranty is in addition to, and does not affect,
your statutory rights.
If you have any problems with this product, please call our Help Desk
SG40070_Manual 28/4/21 11:14 Page 12
Table of contents
Other STARGAZER Telescope manuals


