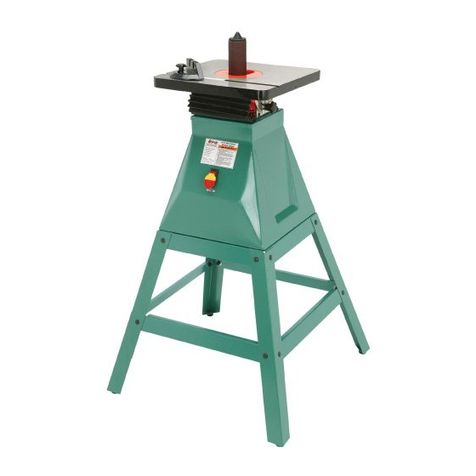
STEELTEC XWS028 User manual

XWS028
NAUHA- JA PENKKIHIOMAKONE
GRINDING / SANDING MACHINE
• Käyttöohje • Manual •
Maahantuoja/ Importer:
ISOJOEN KONEHALLI OY
Keskustie 26, 61850 Kauhajoki As, Finland
Tel. +358 - 20 1323 232, Fax +358 - 20 1323 388
www.ikh.fi
HUOMIO! Lue käyttöohjeet huolellisesti ennen laitteen käyttöä ja noudata
kaikkia annettuja ohjeita. Säilytä ohjeet myöhempää tarvetta varten.
NOTE! Read the instruction manual carefully before using the tool and follow
all given instructions. Save the instructions for further reference.


3
YLEISTURVAOHJEET
Noudata aina seuraavia turvaohjeita välttääksesi tulipalon, sähköiskun tai muun loukkaantumisen
riskin. Turvallisuutta edistää terveen järjen käyttö, valppaana oleminen sekä laitteen ja sen
toiminnan tunteminen. Lue laitteeseen kiinnitetyt tarrat ja käyttöohje kokonaan läpi ja säilytä ohjeet
myöhempää käyttöä varten.
1. Pidä työskentelytila siistinä. Sekaiset työtilat saattavat aiheuttaa vaaratilanteita.
2. Älä työskentele vaarallisessa ympäristössä. Laitetta saa käyttää ainoastaan kuivissa sisätiloissa
suojassa sateelta. Älä koskaan käytä laitetta helposti syttyvien nesteiden, höyryjen tai kaasujen
läheisyydessä. Huolehdi kunnollisesta työvalaistuksesta.
3. Suojaudu sähköiskulta. Vältä koskettamasta maadoitettuja pintoja (putket, patterit, liesi,
jääkaappi jne.).
4. Älä päästä ulkopuolisia, erityisesti lapsia, laitteen lähelle. Huolehdi, että ulkopuoliset
pysyttelevät turvallisen välimatkan päässä työalueelta äläkä anna kenenkään koskea laitteeseen
tai jatkojohtoon.
5. Mikäli laitetta ei hetkeen käytetä, varastoi se kuivaan ja suljettuun paikkaan lasten
ulottumattomille.
6. Älä ylikuormita laitetta. Se suoriutuu parhaiten ja turvallisimmin tehtävästä sille tarkoitetulla
nopeudella. Ota huomioon hiomakivelle asetetut rajoitukset.
7. Käytä oikeanlaista työkalua. Älä yritä väkisin tehdä laitteella sellaista työtä, johon sitä ei ole
tarkoitettu.
8. Käytä asianmukaista vaatetusta. Älä käytä väljiä vaatteita, käsineitä, solmiota, sormuksia,
rannerenkaita tai muita koruja, jotka saattavat tarttua laitteen liikkuviin osiin. Luistamattomien
jalkineiden käyttö on suositeltavaa. Suojaa pitkät hiukset esim. hiusverkolla.
9. Käytä aina hyväksyttyjä suojalaseja ja kuulosuojaimia. Myös kasvo- tai hengityssuojainta tulee
käyttää, mikäli työssä syntyy pölyä. Tavalliset silmälasit eivät korvaa suojalaseja.
10. Huolehdi siitä, ettei hiomisesta syntyvät kipinät eivät aiheuta vaaratilanteita (esim. osu ihmisiin
tai herkästi syttyviin aineisiin.
11. Mikäli mahdollista, kytke laite pölynpoistojärjestelmään. Varmista kiinnitykset ja oikea käyttö.
Tavallista pölynimuria voidaan käyttää mikäli imuroitava aines soveltuu siihen. Tarkista asia
pölynimurisi ohjeista.
12. Varmista, että laitteen ilmastointiaukot pysyvät avoinna, kun hionnasta syntyy pölyä. Mikäli
pöly täytyy erikseen poistaa, irrota laite aina ensin virtalähteestä, käytä puhdistukseen ei-
metallista työvälinettä ja varo vahingoittamasta laitteen sisäosia.
13. Pidä huolta johdosta. Älä koskaan nykäise pistoketta irti pitämällä kiinni johdosta. Pidä johto
etäällä kuumuudesta, öljystä ja terävistä kulmista.
14. Kiinnitä työ tarvittaessa puristimin. Tämä suojaa käsiäsi ja vapauttaa ne käyttämään laitetta. Tuo
työkappaletta asianmukaisesti.
15. Älä kurkottele. Seiso aina mahdollisimman hyvin tasapainossa.
16. Huolla laite säännöllisesti. Hyväkuntoinen ja puhdas laite toimii paremmin ja turvallisemmin.
Voitele liikkuvat osat ja vaihda lisävarusteet tarvittaessa. Tarkista laitteen kytkimen, johtojen ja
jatkojohtojen kunto säännöllisesti ja vaihda tai korjauta vaurioituneet osat sähköalan
ammattilaisella. Älä koskaan käytä laitetta mikäli sen kytkin on epäkunnossa.
17. Irrota laite virtalähteestä aina kun sitä ei käytetä, ennen huoltoa tai osien vaihtamista.
18. Poista jakoavaimet ja ruuviavaimet laitteesta. Ota tavaksi jo ennen käynnistystä tarkistaa, ettei
laitteeseen ole esim. säätöjen yhteydessä jäänyt jako- tai ruuviavaimia.
19. Vältä tahatonta käynnistystä. Varmista, että laitteen kytkin on OFF-asennossa ennen kuin
työnnät pistokkeen pistorasiaan.
20. Mikäli laitetta käytetään ulkona, käytä jatkojohtoa, joka on merkitty ulkokäyttöön soveltuvaksi.

4
21. Keskity työhön. Laitetta ei saa koskaan käyttää väsyneenä, sairaana tai alkoholin, huumeiden,
lääkkeiden tai muiden havainto- ja reaktiokykyyn vaikuttavien aineiden vaikutuksen alaisena.
22. Ennen kuin aloitat työn, tarkista ettei mikään osa ole vaurioitunut vaan toimii moitteettomasti.
Liikkuvien osien tulee olla oikeassa linjassa ja kunnolla kiinnitetty. Vaurioituneet tai huonosti
kiinnitetyt osat ja suojukset voivat aiheuttaa vaaratilanteen. Korjauta tai vaihdata ne välittömästi
valtuutetussa huoltoliikkeessä. Älä koskaan käytä laitetta mikäli sen virtakytkin on
epäkunnossa.
23. Varmista, että kaikki suojukset on huolellisesti kiinnitetty laitteeseen. Älä koskaan käytä laitetta
ilman suojuksia.
24. Käytä ainoastaan alkuperäisvaraosia ja -lisävarusteita. Muunlaisten osien käyttö saattaa
aiheuttaa henkilövahinkoja.
25. Laite on valmistettu ottaen huomioon turvallisuussäädökset. Laitteen saa huoltaa ainoastaan
valtuutettu huoltoliike alkuperäisvaraosia käyttäen. Tämä takaa laitteen turvallisuuden
säilymisen.
Erityisohjeita hiomakivien käyttöön
1. Hiomakivet vahingoittuvat helposti, joten niitä on käsiteltävä, säilytettävä ja kuljetettava
erityisen varovaisesti. Vaurioituneiden tai väärin kiinnitettyjen tai käytettyjen hiomakivien
käyttö saattaa aiheuttaa vakavan loukkaantumisen.
2. Hiomakivet tulee kuljettaa ja varastoida erityisen huolellisesti. Varastoi kivet niin, etteivät ne
vaurioidu kosketuksesta muihin esineisiin tai ympäröivien olosuhteiden takia.
3. Valitessasi hiomakiveä, ota huomioon hiomakiven merkinnät sekä laitteen vaatimukset,
turvaohjeet ja rajoitukset. Varmista, että hiomakiven nopeusmerkintä on yhtä suuri tai suurempi
kuin laitteen nopeus ja että hiomakiven mitat vastaavat käyttöohjeen teknisissä tiedoissa
ilmoitettuja sallittuja mittoja. Mikäli olet epävarma, ota yhteys laitteen jälleenmyyjään.
4. Tarkista hiomakivet silmämääräisesti aina ennen kiinnittämistä. Testaa läpimitaltaan 80mm
pienemmät keraamiset hiomakivet kopauttamalla kiveä varovasti. Ehjän hiomakiven ääni on
kirkas. Hävitä vaurioituneet kivet.
5. Mikäli hiomakivessä on pyöreä etikettipaperi, on se jätettävä paikalleen.
6. Pätevän henkilön tulee kiinnittää hiomakivi kaikkia ohjeita noudattaen. Aina kun uusi hiomakivi
on kiinnitetty, anna sen pyöriä hetken aikaa itsekseen – älä kuitenkaan ylitä hiomakiven sallittua
nopeutta.
Älä käytä mitään muita ylimääräisiä osia kuin soviterenkaita yrittääksesi sovittaa liian suurella
keskiöreiällä varustetun hiomakiven laitteeseen. Mikäli hiomakivi on tarkoitettu kiinnitettäväksi
kierteiden avulla, varmista että hiomakiven keskiöreiän kierteitys on tarpeeksi syvä akselin
kierteille. Älä käytä laitteessa katkaisulaikkoja.
Aina hiomakiven asentamisen jälkeen, anna kiven pyöriä kuormittamattomana noin 30 sekuntia.
Pysäytä laite välittömästi mikäli huomaat merkittävää värinää tai muita vikoja. Irrota laite
virtalähteestä tällaisessa tilanteessa ja tarkista laite vian paikallistamiseksi. Huomaa, että
hiomakivi jatkaa pyörimistään vielä kun laite on kytketty pois päältä.

5
Jatkojohtotaulukko
Taulukon osoittaa johtokokoa käyttämällä jännitteen ei tulisi pienentyä 5% enempää
nimelliskuormituksessa.
Ampeerilukema
(tyyppikilvessä) 3 6 10 13
Jatkojohdon
pituus (m) Johdon koko (mm²)
7,5 0,75 0,75 1,0 1,25
15 0,75 0,75 1,0 1,5
22,5 0,75 0,75 1,0 1,5
30 0,75 0,75 1,25 1,5
40 0,75 0,75 1,5 2,5
KOKOAMINEN
HUOMIO: Irrota laite virtalähteestä aina ennen säätö- ja huoltotoimenpiteitä.
Kipinäsuojus (kuva 1.)
Kiinnitä kipinäsuojus (A) hiomakivensuojukseen ruuveilla.
Säädä kipinäsuojus niin, että sen reunan ja hiomakiven väliin
jää n. 1,5mm.
Kuva 1.
Työkalutuki (kuva 2.)
Kiinnitä työkalutuki (B) hiomakivensuojuksen pultin (C)
kohdalle ja kiinnitä tuki pultein. Säädä työkalutuki niin, että
sen ja hiomakiven väliin jää n. 1,5mm.
Kuva 2.
Silmäsuojus (kuva 3.)
Kiinnitä läpinäkyvä muovilevy (D) metallikiinnittimeen (E)
käyttäen ruuveja ja muttereita. Yhdistä kiinnitin (E) tankoon
ja tanko hiomakivensuojukseen haluttuun asentoon ja kiristä
pultit ja mutterit.
HUOM: Älä kiristä muttereita liikaa välttääksesi
hiomakivensuojuksen halkeamisen.
Kuva3.

6
Laitteen kiinnittäminen työpöytään (kuva 4.)
Kiinnitä laite työpöytään tai muuhun tukevaan alustaan
laitteen sivuille sijoitettujen kiinnitysaukkojen kautta
(kiinnityspultteja ei toimiteta laitteen mukana). Varmista, että
laitteen ympärillä on tarpeeksi tilaa myös suurten
työkappaleiden (esim. puutarhatyökalut) työstämiseen.
Kuva 4.
Hiomakiven vaihto (kuva 5.)
Sammuta laite ja irrota se virtalähteestä. Irrota
hiomakivensuojusta pitelevät ruuvit ja mutterit ja irrota
suojus. Pidä kiinni hiomakivestä samalla kun irrotat
lukkomutterin ja laipan kiintoavaimella. Liu’uta vanha
hiomakivi irti.
HUOM: Hiomakiven lukkomutterissa on vasenkätinen
kierre. Asentaessasi uutta hiomakiveä, varmista aina että sen
ilmoitettu kierrosnopeus (rpm) on sama tai suurempi kuin
laitteen nopeus. Tarkista aina, ettei uudessa kivessä ole
vikoja tai vaurioita. Mikäli hiomakivi on moitteettomassa
kunnossa, kiinnitä se laitteeseen. Kuva 5.
Aseta laippa ja lukkomutteri paikoilleen ja kiristä ne, mutta älä kuitenkaan liian tiukalle, jottei
hiomakivi vahingoitu. Kiinnitä suojus paikalleen. Asetu seisomaan laitteen sivulle ja käynnistä se
niin, että kivi lähtee pyörimään.
Laite on suunniteltu ainoastaan käsin työstöön, kuten poranterien, talttojen ja ruuvimeisselien
teroittamiseen tai metallin poistoon työkappaleista. Karkeaa hiomakiveä voidaan käyttää kovien
metallien hiontaan, suurien metallimäärien poistamiseen ja töihin, joissa pinta saa jäädä karheaksi.
Hienoa hiomakiveä voidaan käyttää työkalujen teroittamiseen tai viimeistelyyn. Hieno hiomakivi
poistaa materiaalia karkeaa kiveä hitaammin luoden sileän pinnan.
1. Varmista, että työkalutuen ja hiomakiven pinnan sekä kipinäsuojuksen ja hiomakiven pinnan
väli on 1,5mm. Säädä tarvittaessa.
2. Tarkista silmäsuojusten oikea asento ja kiinnitys sekä hiomakiven lukkomutterin kireys.
HUOM: Ennen uuden hiomakiven kiinnittämistä, tarkista aina ettei siinä ole vikoja tai vaurioita.
Kiinnitä kunnossa oleva hiomakivi laitteeseen. Asetu laitteen sivulle ja käynnistä se. Anna
laitteen pyöriä täydellä teholla noin minuutin, jolloin hiomakiven mahdollisten vaurioiden tulisi
näkyä.
3. Asetu laitteen sivulle, käynnistä se ja annan sen saavuttaa täysi nopeus.
4. Liikuttele hioessasi työkappaletta kiven reunalta toiselle. Mikäli työkappaletta pidetään koko
ajan samassa kohtaa, hiomakivi kuluu epätasaisesti.
5. Mikäli hiomakiveä täytyy tasoittaa, käytä laitteen päälle sijoitettua hiomakiven tasoitinta.
Tasoittamisen jälkeen, säädä työkalutuki ja kipinäsuojus 1,5mm etäisyydelle hiomakiven
pinnasta.

7
KÄYTTÖ
Pidä työkappaletta tukevasti paikallaan. Vie työkappale varovasti hiomakiveä vasten ja paina
kevyesti ja tasaisesti. Hio vasten työkappaleen kylkeä välttääksesi teräviä reunoja. Älä koskaan
käytä hiomakiven sivua hiomiseen. Paras hiomatulos saavutetaan, kun laite saa pyöriä
maksiminopeudella. Hiomakiveen kohdistuva liiallinen paine saattaa vahingoittaa kiveä ja
ylikuormittaa moottoria. Tarkista hiomakivi säännöllisesti vaurioiden varalta. Vaihda hiomakivi,
kun se on kulunut yli 25%. Hävitä vahingoittuneet hiomakivet välittömästi, sillä ne ovat vaarallisia
ja aiheuttavat tärinää. Koneellisen hionnan jälkeen viimeistele ohutteräiset työkalut vielä käsin
hioen.
HUOMIO: Irrota laite virtalähteestä aina ennen säätö- ja huoltotoimenpiteitä.
Työkalutuen säätö (kuvat 6. & 7.)
Hiomanauhan alaosaan on sijoitettu säädettävä työkalutuki.
Tuen voi säätää niin, että työkappaletta voidaan hioa nauhan
tasaista tai pyöreää osaa vasten.
Tasainen osa (yläasento): Kiinnitä työkalutuki (G) käyttäen
lukkoruuvia (F) ja pulttia ja aluslaattoja ylempään
kiinnityskohtaan. Kun työkalutuki on tässä asennossa,
alasuojan (H) on aina oltava paikallaan. Kiristä työkalutuki
lukkoruuvilla (F) noin 1,5mm etäisyydelle hiomanauhan
pinnasta. Kuva 6.
Pyöreä osa (ala-asento): Poista alasuoja (H) ja laita se talteen.
Poista työkalutuki (G) ja asenna se uudestaan alempaan
asentoon. Kiristä työkalutuki lukkoruuvilla (F) noin 1,5mm
etäisyydelle hiomanauhan pinnasta.
Kuva 7.
Pölynpoisto (kuva8.)
Laitteen takaosassa on pölynpoistoaukko. On suositeltavaa
liittää laite sopivaan pölynimuriin käytettäessä hiomanauhaa.
Myös asianmukaisia suojia (esim. hengityssuojain) on
käytettävä.
Kuva 8.

8
Hiomanauhan vaihto (kuva 9.)
Avaa lukkoruuvi (I) ja irrota hiomanauhansuojus (J). Löysää
lukkoruuvia (K) ja siirrä ylempää hihnapyörää (L)
vähentääksesi hiomanauhan kireyttä. Kun hiomanauha on
irrotettavissa, lukitse pyörä lukkoruuvilla (K) ja ota vanha
hiomanauha irti. Aseta uusi nauha pyörien ympärille
varmistaen, että nauhan takaosan nuoli osoittaa samaan
suuntaan kuin hiomanauhansuojuksen nuoli. Edestä
katsottuna hiomanauhan tulee pyöriä ylhäältä alas.
Kuva 9.
Hiomanauhan kiristys (kuva 10.)
Löysää lukkoruuvia (M), jolloin jousikiristin kiristää
hiomanauhan automaattisesti. Kiristä lukkoruuvi (M), kun
nauha on kiristynyt.
Kuva 10.
Hiomanauhan kohdistaminen (kuva 11.)
Mikäli nauha pyrkii pyöriessään liikkumaan toiseen reunaan
on sen kohdistusta säädettävä. Löysää lukkoruuvia (M)
hieman. Lukkoruuvin (O) kiertäminen vaikuttaa nauhan
kulkurataan. Jokaisen ruuvin käännöksen jälkeen, liikuta
nauhaa käsin nähdäksesi säädön vaikutus. Kun hiomanauha
on taas saatu kulkemaan keskellä, kiristä ruuvi (M).
Kuva 11.
VIANETSINTÄ
VAROITUS: Sammuta laite ja irrota se virtalähteestä aina ennen säätö- ja huoltotoimenpiteitä.
Ongelma Syy Ratkaisu
1. Sulake 1. Vaihda sulake
Laite ei käynnisty. 2. Muu syy 2.Korjauta valtuutetussa
huoltoliikkeessä.
1. Hiomakivi on epätasapainossa. 1. Tasoita hiomakivi..
2. Hiomakivi on löystynyt. 2. Pysäytä laite välittömästi.
Kiristä hiomakivi.
Laite tärisee.
3. Vaurioitunut hiomakivi. 3. Vaihda hiomakivi.

9
HUOLTO JA LAITTEEN HÄVITTÄMINEN
Kun laitetta ei enää käytetä tai sitä ei enää pysty korjaamaan, se tulee hävittää asianmukaisella
tavalla.
− Älä hävitä talousjätteen mukana.
− Älä polta.
− Älä jätä luontoon.
Säännölliset tarkastukset vähentävät huollon tarvetta ja auttavat pitämään laitteen hyvässä
kunnossa. Moottorin on oltava asianmukaisesti ilmastoitu laitteen ollessa käytössä, joten älä peitä
ilmastointiaukkoja käsillä. Irrota laite virtalähteestä käytön jälkeen ja imuroi ilmastointiaukot.


11
GENERAL SAFETY INSTRUCTIONS
WARNING! When using electric tools, basic safety precautions should always be followed to
reduce the risk of fire, electric shock and personal injury, including the following. Read all these
instructions and the signs on the tool before operating this product and save these instructions.
For safe operations:
1. Keep work area clean. Cluttered areas and benches invite injuries.
2. Consider work area environment. Do not expose power tools to rain. Do not use power tools in
damp or wet locations. Do not use power tools in the presence of flammable liquids or gases.
Keep work area well lit.
3. Guard against electric shock. Avoid body contact with earthed or grounded surfaces. (e.g. pipes,
radiators, ranges, refrigerators).
4. Keep other persons, especially children, away. Do not let persons not involved in the work touch
the tool or extension cord and keep them away from work area.
5. Store idle tools. When not in use, tools should be stored in a dry, high or locked up place, out of
reach of children.
6. Do not force the tool. It will do the job better and safer at the rate for which it was intended.
Only grinding operations for which the abrasive product is suitable shall be carried out
7. Use the right tool. Do not force small tools or attachments to do the job of a heavy-duty tool.
Do not use tools for purposes not intended.
8. Dress properly. Do not wear loose clothing or jewellery; they can be caught in moving parts.
Non-skid footwear is recommended when working outdoors. Wear protecting hair covering to
contain long hair.
9. Use safety glasses and ear protection at all times. Also use face or dust mask if the cutting
operation is dusty. Ordinary eye glasses are not safety glasses.
10. Ensure that sparks resulting from the use of the tool do not create a hazard (e.g., do not hit
persons or ignite flammable substances).
11. Connect dust extraction equipment. If the tool is provided for the connection of dust extraction
and collection facilities ensure these are connected and properly used. Vacuum cleaners can be
used if suitable for the material being extracted. Check your vacuum cleaner’s manual for
instructions.
12. Ensure that ventilation openings are kept clear while working in dusty conditions. If it is
necessary to clear the dust, first disconnect the tool from the main supply (use non-metallic
objects) and avoid damaging internal parts.
13. Do not abuse the cord. Never yank the cord to disconnect it from the socket. Keep the cord
away from heat, oil and sharp edges.
14. Secure work. Where possible use clamps or a vice to hold the work. It is safer than using your
hand and it frees both hands to operate the tool. Check that the work piece is properly
supported.
15. Do not overreach. Keep proper footing and balance at all times.
16. Maintain tools with care. Keep cutting tools sharp and clean for better and safer performance.
Follow instructions for lubrication and changing accessories. Inspect tool cords periodically and
if damaged, have it repaired by authorized service centre. Inspect extension cords periodically
and replace, if damaged. Keep handles dry, clean, and free from oil and grease.
17. Always disconnect the tool from the power supply when not in use, before servicing, and when
changing accessories.
18. Remove adjusting keys and wrenches. Form the habit of checking to see that keys and adjusting
wrenches are removed from the tool before turning it on.
19. Avoid unintentional starting. Do not carry a plugged-in tool with a finger on the switch. Ensure
switch is off when plugging in.

12
20. Use outdoor extension leads. When tool is used outdoors, use only extension cords intended for
outdoor use and so marked.
21. Stay alert. Watch what you are doing. Use common sense. Do not operate tool when you are
tired, sick or under the influence of alcohol, drugs or other substances that might affect your
alertness.
22. Check damaged parts. Before further use of tool, it should be carefully checked to determine
that it will operate properly and perform its intended function. Check for alignment of moving
parts, binding of moving parts, breakage of parts, mounting and any other conditions that may
affect its operation. A guard or other part that is damaged should be properly repaired or
replaced by an authorized service centre unless otherwise indicated in this instruction manual.
Have defective switches replaced by an authorized service centre. Do not use the tool if the
switch does not turn it on and off.
23. Safety devices must be mounted to the machine and must be properly secured. No grinding
operations without protection by safety devices.
24. The use of any other than the original accessory or attachment, may present a risk of personal
injury.
25. Have your tool repaired by a qualified person. This electric tool is in accordance with the
relevant safety requirements. Repairs should only be carried out by qualified persons using
original spare parts. Otherwise this may result in considerable danger to the user.
Safety recommendations for the correct use of abrasive products
1. Bonded abrasive products are breakable and shall therefore be handled with utmost care. The use
of damaged or improperly mounted or used abrasive products is dangerous and can cause serious
injuries.
2. Abrasive products shall be handled and transported with care. Abrasive products shall be stored
in such a manner that they are not subjected to mechanical damage and harmful environmental
influences.
3. When selecting an abrasive product information on the label or the abrasive product as well as
restrictions of use, safety indications or any other instruction shall be followed. Check that speed
marked on the wheel is equal to or greater than the rated speed of the grinder. Ensure that the wheel
dimensions are compatible with the grinder. In case of doubt concerning the selection of abrasive
products, the user shall request information from the dealer.
4. Abrasive products shall be subjected to a visual inspection as received before mounting. Do not
use chipped, cracked or otherwise defective products. In addition, a ring test (tap the grinding wheel
lightly, undamaged wheel makes a clear sound) shall be executed for vitrified wheels with a
diameter less than 80mm. Damaged abrasive products shall be destroyed.
5. Ensure that blotters are used when provided with the bonded abrasive product and when they are
required.
6.The mounting of abrasive products shall be carried out according to the instructions provided by
both the wheel and the machine manufacturer. Mounting of abrasive products shall be carried out
by a qualified trained person.
Do not use separate reducing bushings or adapters to adapt large hole abrasive wheels. For tool
intended to be fitted with threaded hole wheel, ensure that the thread in the wheel is long enough to
accept the spindle length. Do not use cutting-off wheels for side grinding.

13
Each time after mounting, run the tool in no-load for 30 seconds in a safe position. Stop
immediately if there is considerable vibration or if other defects are detected. If this condition
occurs, disconnect the tool from the power supply, and check the machine to determine the cause.
Note that the wheel continues to rotate after the tool is switched off.
EXTENSION LEAD CHART:
Extension lead sizes shown assure a voltage drop of not more than 5% at rated load of tool.
Ampere rating
(on name plate) 3 6 10 13
Extension cable
length (m) Wire size (mm²)
7,5 0,75 0,75 1,0 1,25
15 0,75 0,75 1,0 1,5
22,5 0,75 0,75 1,0 1,5
30 0,75 0,75 1,25 1,5
40 0,75 0,75 1,5 2,5
ASSEMBLY
NOTE: Remove the plug from the socket before carrying out any adjustment, servicing or
maintenance.
Spark deflector (Fig.l)
Fit the spark deflector (A) to the wheel guard using the
screw provided. Adjust it so there is approximately
1.5mm gap between the face of the grinding wheel and
the edge of the spark deflector.
Fig. 1.
Tool rest (Fig.2)
Fit the tool rest (B), over the wheel guard securing bolt
(C) and secure in place with the bolts supplied. Adjust it
so there is approximately 1.5mm between the grinding
wheel face and the tool rest.
Fig. 2.
Eye shield (Fig. 3)
Assemble the clear plastic shield (D) to the metal plate
(E) using the nuts and screws provided. Clamp plate (E)
to the rod and fix the assembled shield to the wheel
guard. Select the required position and tighten all the nuts
and bolts.
Note: Do not over tighten the nuts holding the shield to
avoid cracking it. Fig. 3.

14
Bench mounting your grinder (Fig.4)
Securely bolt the bench grinder to a work bench or other
secure surface through the two points in the base (Fixings
are not supplied). Ensure there is enough clear space
around the grinder to accommodate large items which
may be ground, i.e. Garden Tools, etc.
Fig. 4.
Replacing the grinding wheel (Fig. 5)
Switch the grinder off and disconnect the power supply.
Remove the screws and nuts holding the wheel guard, and
remove the cover. Secure the wheel by hand, and using the
wrench supplied remove the locking nut and flange. Slide
off the old grinding wheel.
NOTE: The grinding wheel locking nut has a left-handed
thread. When fitting a new grinding wheel always check
the stated max. RPM on the wheel exceeds the RPM of the
bench grinder. Also inspect the new wheel for any damage,
such as flaws or cracks. If the wheel appears satisfactory,
fit it to the grinder. Fig. 5.
Replace the locking flange and nut and tighten. Do not over tighten to avoid damage to the wheel.
Re-assemble the cover and when stood to one side, switch the grinder on, to run the wheel up. A
bench grinder is designed for hand grinding operations only, such as sharpening drill bits, chisels
and screwdrivers or removing excess metal from workpieces. A coarse grit grinding wheel could be
used for grinding rough metals, to remove large amounts of metal, or where a smooth finish is not
important. A fine grit grinding wheel could be used for sharpening tools or grinding close to size. A
fine grit wheel removes a metal more slowly and therefore gives the workpiece a smooth finish.
1. Check that there is a l,5 mm clearance between the tool rests and the surface of the grinding
wheels. Adjust as necessary. Now check the gap between the spark deflectors and the surface of
the grinding wheels. These should also be 1.5mm. Adjust as necessary.
2. Check that the eye shields have been secured in the correct position and that the grinding wheel
lock nuts are tight.
NOTE: Before fitting a new grinding wheel to the bench grinder always carefully check the
wheel for damage such as chips, flaws or cracks. Then if the new wheel appears to be
satisfactory fit the wheel to the grinder. Stand to one side of the grinder and switch "ON". Let
the grinder operate at full speed for approximately one minute so that any undetected cracks or
flaws in the wheel will become apparent.
3. Stand to one side of the bench grinder, switch on and let it build up to full speed.
4. When grinding, always keep the workpiece moving across the face of the wheel. Grinding
against the same part of the wheel will cause uneven wear of the wheel face.
5. When necessary redress the grinding wheels using the wheel dressing tool supplied. After
redressing adjust the tool rests and spark deflectors as necessary to maintain a 1.5mm clearance
from the wheel.

15
OPERATION
Ensure that the item to be ground is comfortably and securely held. Present the workpiece smoothly
on to the grinding wheel face with a light and even pressure. Grind against the edge of the
workpiece to avoid burrs. Never grind on the sides of the wheels. Best results are achieved if the
grinder is allowed to rotate at its maximum speed. Excess pressure from the workpiece can damage
the wheel and overload the motor. Check grinding wheels regularly for wear or damage. Replace
wheels that are worn more than 25%. Damaged wheels should be discarded immediately as they are
dangerous and can cause the grinder to vibrate. After grinding fine edge tools, they should be honed
by hand.
NOTE: Remove the plug from the socket before carrying out any adjustment, servicing or
maintenance.
Adjusting the tool rest (Fig.6 & 7)
The belt sander is equipped with a multi position tool rest. The
two positions enable sanding on the flat part of the belt and also
on the rounded section.
Flat section: This is the upper position. Using the locking knob
(F) with the bolt and washers provided fix the tool rest (G) to the
upper mount. When in this position the lower section must
always have the protected guard (H) screwed in place. When the
tool rest is set to approximately 1.5mm from the sanding face
tighten (F). Fig. 6.
Rounded section: This is the lower position. Remove the
protective guard (H) and store safely to one side. Remove tool
rest (G) and refit to the lower position in the same manner. When
the tool rest is set to approximately l.5 mm from the sanding face
tighten (F).
Fig: 7.
Dust extraction (Fig. 8)
The tool is supplied with a dust extraction port at the rear of the
sanding belt housing. It is recommended that a suitable vacuum
cleaner is connected when using the sanding belt and suitable
protective equipment (e.g. dust mask) is worn.
Fig. 8

16
Replacing the sanding belt (Fig. 9)
Undo knob (I) and remove the protective cover (J). Loosen
locking knob (K) and move the top adjustable pulley (L) to
release the belt tension. When loose, lock in place with knob (K)
and remove the worn or damaged belt. Fit the new sanding belt,
ensuring the arrow indicating the direction of rotation printed on
the back of the sanding belt matches the arrow pressed into the
protective cover. The belt rotates from top to bottom, when
viewed from the front.
Fig. 9.
Tensioning the belt (Fig. 10)
Loosen the locking knob (M) and the spring tensioner will
automatically tension the sanding belt. Resecure locking knob
(M) when the tension has been taken up.
Fig. 10.
Tracking the belt (Fig. 11)
If, when the sanding belt is rotating the belt wanders across the
rollers towards the housing or cover, the tracking requires
adjustment. Loosen the locking knob (M) slightly to allow the
belt to be tracked. Slight adjustment on the tracking knob (O)
will cause the belt to travel across the pulley. After each turn on
the knob, rotate the belt by hand to check the effects of the
adjustment. When the belt rotates over the pulleys centrally, the
locking knob (M) must be tightened.
Fig. 11.
TROUBLESHOOTING
WARNING: For your own safety always turn the main switch on the OFF and remove the plug
from the power supply before carrying out any maintenance or troubleshooting.
Problem Cause Remedy
1. Fuse 1. Replace fuse.
Machine will not start. 2. Other 2.Take to an authorised service centre.
1. Wheel out of balance 1. Dress wheel.
2. Wheel loose 2. Stop machine immediately. Tighten
wheel.
Machine vibrates.
3. Damaged wheel 3. Replace wheel.

17
MAINTENANCE AND DISPOSAL
Regular inspection reduces the necessity for maintenance operations and will keep your tool in good
working condition. The motor must be correctly ventilated during tool operation. For this reason
avoid blocking the air inlets with hands. After use disconnect the tool from the power supply and
vacuum the ventilation slots.
If the replacement of the supplied cord is necessary, this has to be done by the manufacturer or his
agent in order to avoid safety hazard.
At the end of the machine’s working life, or when it can no longer be repaired, ensure that it is
disposed of according to local regulations.
− Do not dispose power tools with domestic waste.
− Do not incinerate.
− Do not abandon in the environment.

18
EY-VAATIMUSTENMUKAISUUSVAKUUTUS
Isojoen Konehalli Oy
Keskustie 26, 61850 Kauhajoki As
Suomi
vakuuttaa täten, että
NAUHA- JA PENKKIHIOMAKONE
malli no. XWS028
on konedirektiivin no. 98/37/EY, pienjännitedirektiivin
no. 2006/95/EY sekä EMC-direktiivin no. 2004/108/EY
mukainen.
Tuote täyttää seuraavien standardien vaatimukset:
EN55014-1:2006, EN55014-2:1997+A1,
EN61000-3-2:2006, EN61000-3-3:1995+A1+A2
Mikäli tuotteen teknisiä ominaisuuksia tai
käyttöominaisuuksia muutetaan ilman valmistajan
suostumusta, tämä vakuutus
lakkaa olemasta voimassa.
Päiväys: 30.03.2009
Allekirjoitus:
____________________
Harri Altis - Ostopäällikkö
EC-DECLARATION OF CONFORMITY
Isojoen Konehalli Oy
Keskustie 26, 61850 Kauhajoki As
Finland
herewith declares that
BENCH GRINDER WITH SANDING BELT
model no. XWS028
is in conformity with the Machinery Directive no.
98/37/EC, the Low Voltage Directive no. 2006/95/EC
as well as EMC Directive no. 2004/108/EC.
The product fulfils the requirements of the following
standards:
EN55014-1:2006, EN55014-2:1997+A1,
EN61000-3-2:2006, EN61000-3-3:1995+A1+A2
This declaration is not anymore valid if the technical
features or other features of the tool are changed
without manufacturer’s permission.
Date: 30.03.2009
Signature:
____________________
Harri Altis - Purchase Manager
Table of contents
Languages:
Other STEELTEC Sander manuals


