Stellah SLPP 380 User manual

SLPP 380 ELECTRIC GUITAR KIT
Please read these instructions carefully before beginning in order to have a complete overview of
the project. There are five steps that you will follow to complete your Electric Guitar Kit.
1. Check and Identify Parts
2. Finishing the Body and Neck
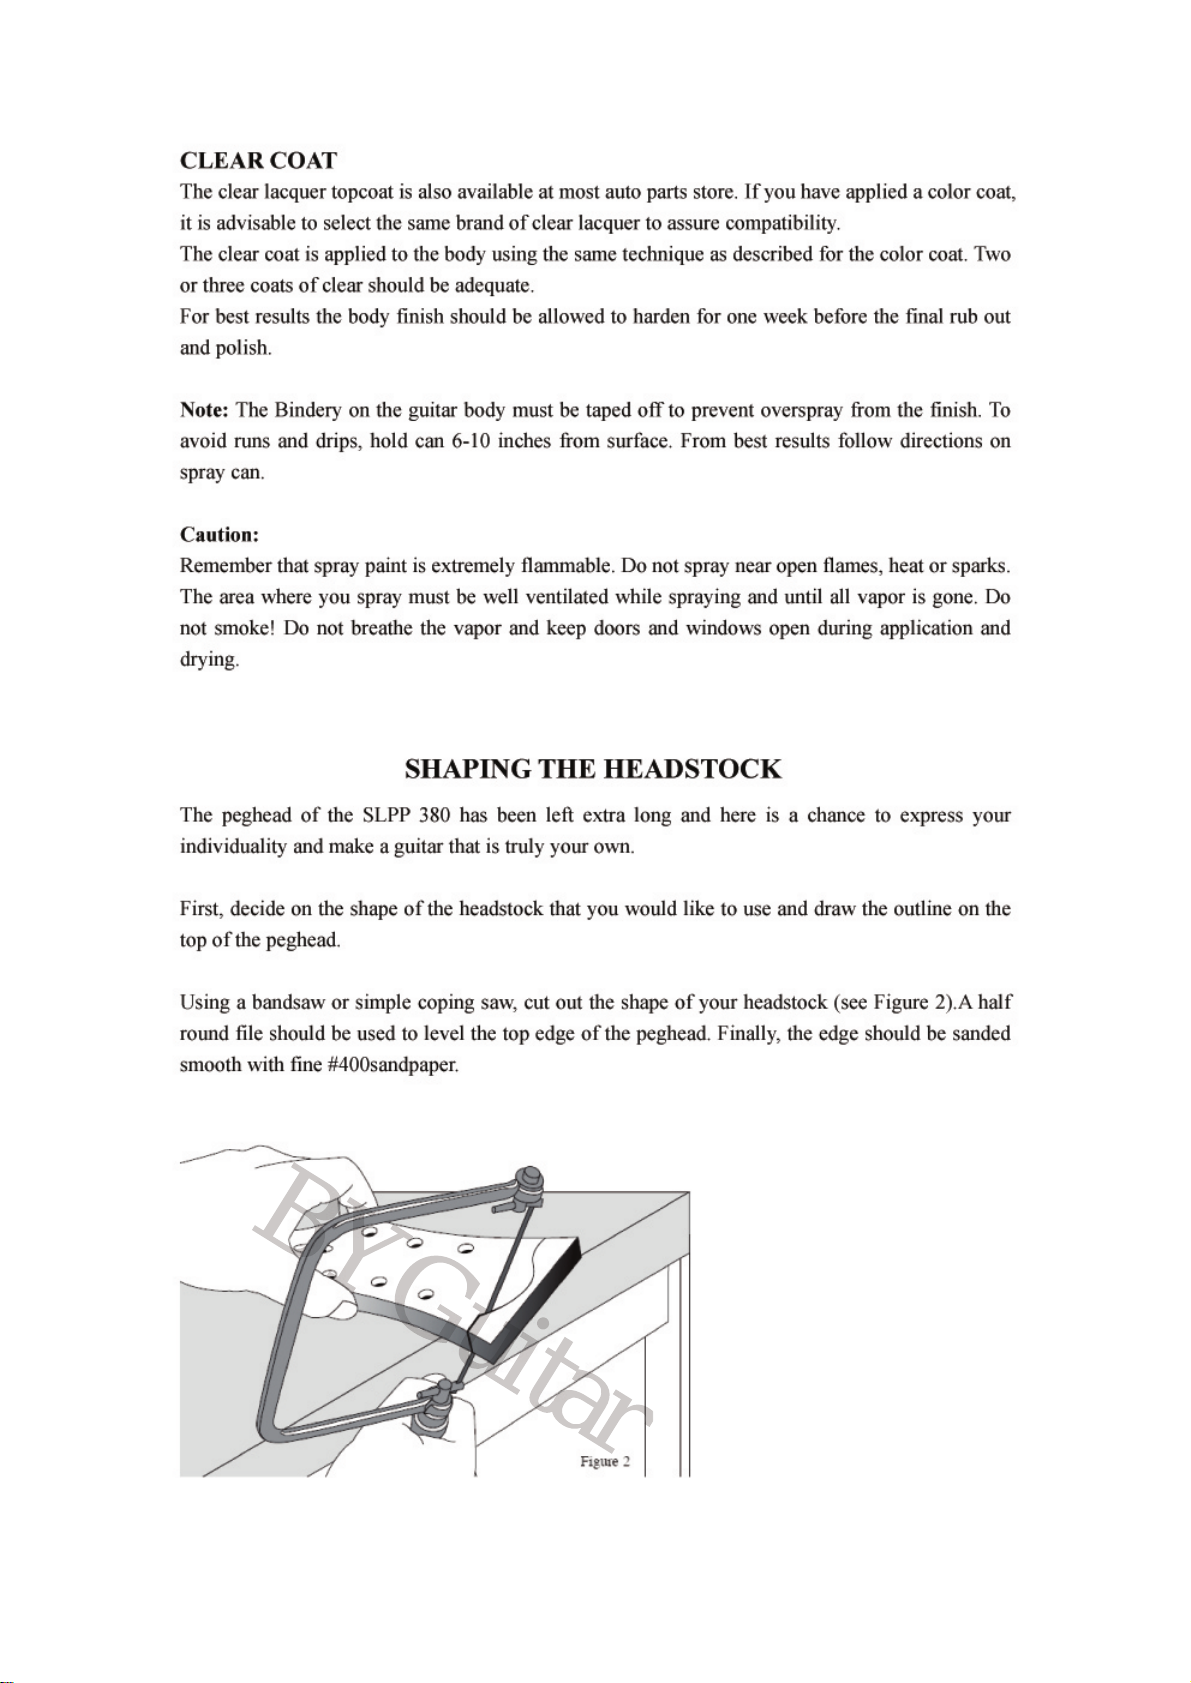
3. Shaping the Headstock
4. Assembling the Guitar
5. Setup
Following is the list of parts that are included with your kit. If parts are lost or run through the
stump shredder during assembly you may order replacements from your local music shop or
directly from us
Quantity Description
A 1 Body
B 1 Neck
C 1 Output Jack & Plate
D 1 Set 500 Ohm Tone Pot
500 Ohm Volume Pot
E 1 3 Way Pickup Switch
F 1 Black Plate
G 1 Neck Position Pickup
H 1 Bridge Position Pickup
I 1 Stop Tailpiece
J 1 Tune-o-Matic Bridge
K Set of 6 Tuning Machines
L 1 Neck Plate
M Set of 6 Strings
N 1 Cord
O 2 Strap Buttons
P 1 Truss Rod Cover
Q 4 Knobs
R 1 Pickup Selector Ring
T 1 Selector Switch Plate

BYGuitarBYGuitarBYGuitar
BYGuitarBYGuitarBYGuitar

BYGuitarBYGuitarBYGuitar

BYGuitarBYGuitarBYGuitar
BYGuitarBYGuitarBYGuitar
BYGuitarBYGuitarBYGuitar

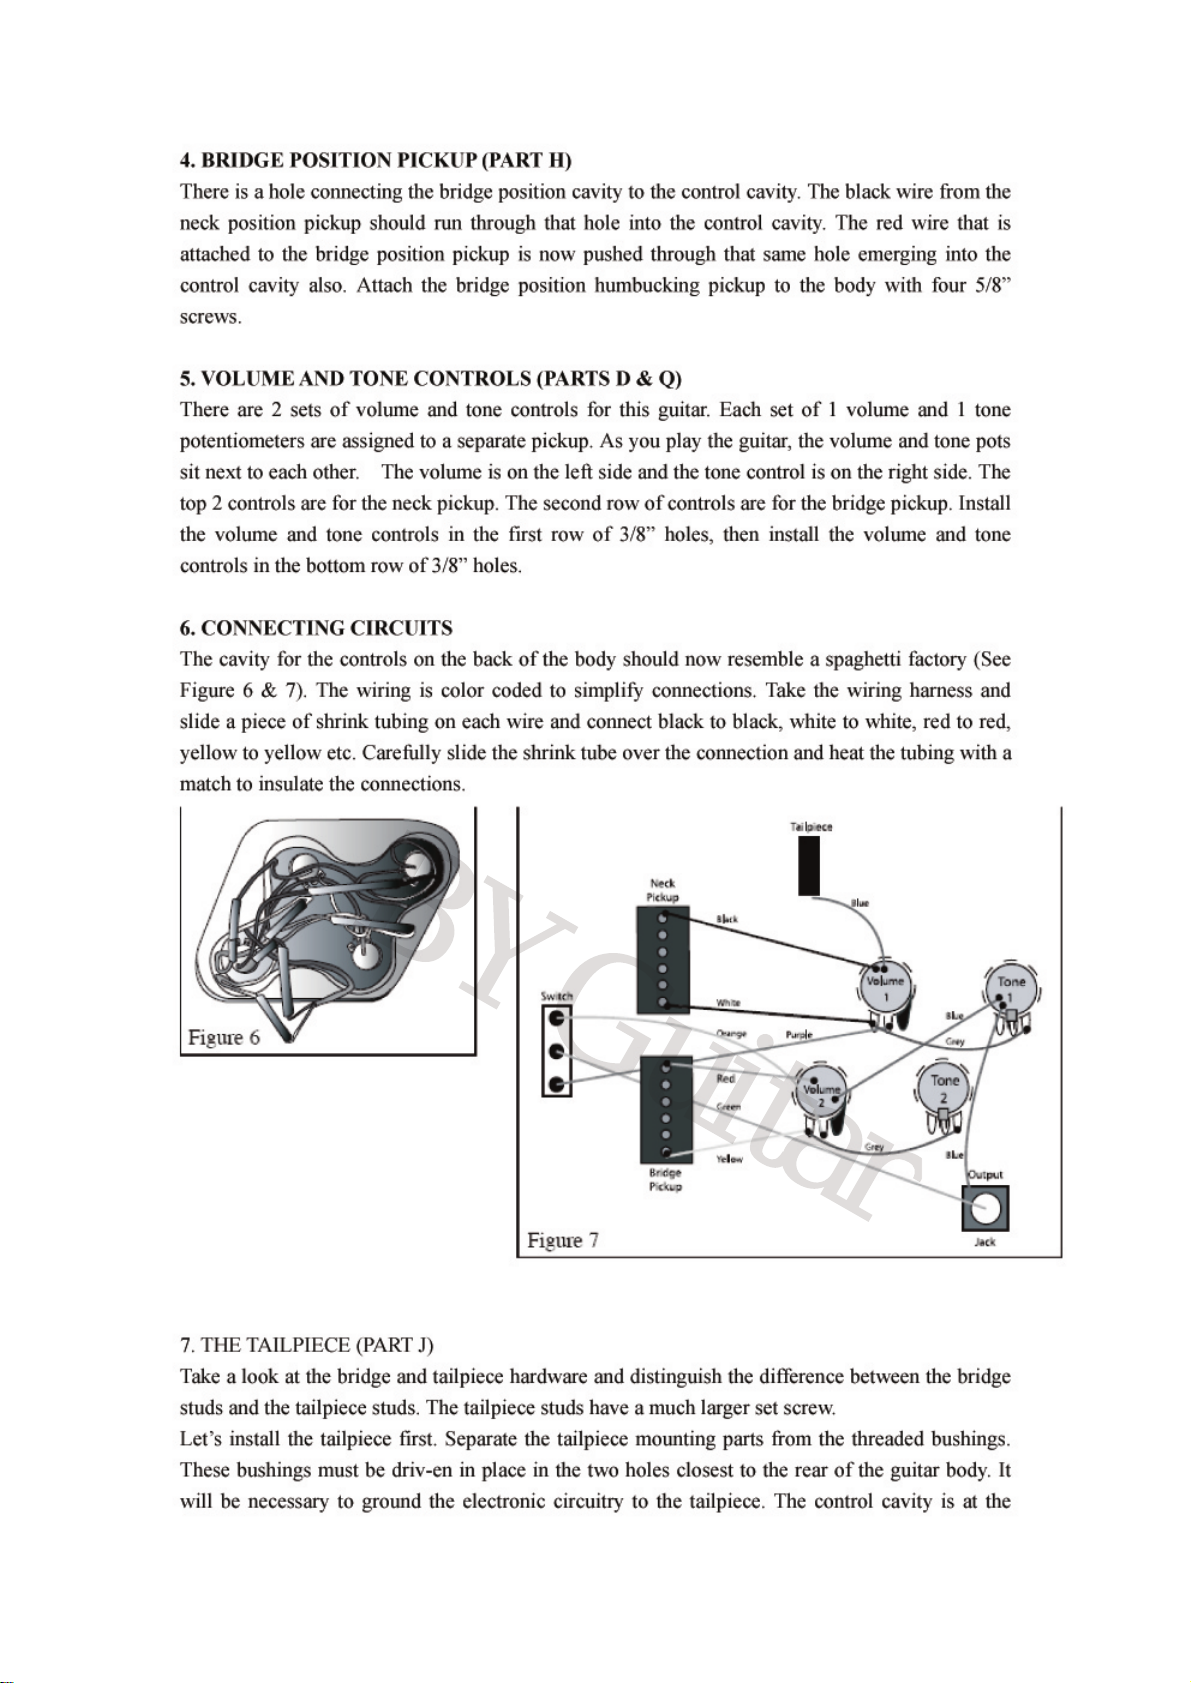
back of the guitar body. On the inside wall of this cavity you will see a small 1/8” hole. Run the
stripped end of the blue ground wire (attached to the neck pickup volume control) through this
hole until it emerges in the hole drilled for the tailpiece bushing. Form the naked wire into a loop,
wrap it around the bushing and tap the bushing tightly into the hole. This will ground the circuit.
Installing the tailpiece bushings may be done with a plastic headed mallet or place a small piece of
wood on top of the bushing to prevent damage and tap the bushing in place with an ordinary
hammer. Now screw the tailpiece mounting screws back into the bushings.
8. THE BRIDGE (PART J)
Now tap the bridge bushings into place and screw in the bridge mounting studs. Attach the bridge.
9. OUTPUT JACK (PART C)
The output jack is attached to the neck pickup tone control pot by a blue grounding wire. Find the
green wire running from the pickup selector switch and attach it to the green wire on the output
jack. Push the output jack and its wire through the 7/8” hole that has been drilled between the
control cavity and the edge of the body.
Attach the output jack plate (Part C) to the output jack (See figure 6) using the washer and nut
provided. Screw the output jack plate to the body with the two 3/8” screws provided.
10. BACK PLATE (PART F)
Carefully stuff all of the “spaghetti” into the control cavity and attach the back plate using the
three screws provided.
11. TUNERS (PART K)
Attach the six tuning machines to the peghead of the guitar putting a washer beneath each
threaded bushing. A small set screw is put in place to prevent the tuner from rotating.
SETUP
Put on the strings and tune to pitch.
1. TRUSS ROD ADJUSTMENT
The adjustable truss rod in the neck of your Guitar has been shop adjusted and should not require
any change. If the neck should develop a dip or hollow spot over time it can be removed by
tightening the truss rod adjustment nut that protrudes from the base of the headstock just above the
nut.
A "back bow" or "hog-back" can be removed by loosening the nut. Great care should be taken
with truss rod adjustments where as little as 1/4 of a turn can vastly alter the shape of a neck. A
broken truss rod of course means a costly replacement.
2. STRINGACTION
The string "action" refers to the height of the strings above the frets. If the action is too low, the
strings will buzz on the frets. If it is too high the guitar will be difficult to play.

3. ACTION AT THE NUT
Setting the string action that is right for you starts at the string nut. The slots at the string nut
should already be close to per-fection but you might want to make some adjustment. Here’s how
to do it!
Push the sixth string down between second and third fret. The space between the top of the first
fret and the bottom of the string should be about .006” or just about the thickness of the paper that
these instructions are printed on. If the gap is wider than .006” you should deepen the slot with a
small needle file until it is correct. DO NOT FILE TOO DEEP! If the slot is too deep you can fill
the slots with a mixture of white plastic sanding dust and crazy glue and then re-shape the slot.
Repeat this same procedure for the other five strings. The action at the nut is either right or wrong;
it is not a matter of personal preference.
Now let’s adjust the height of the strings over the 12th fret. Adjustments to the string action are
made by raising or lowering the Tune-o-matic Bridge with the thumbwheel height adjusters.
Following is a chart to assist you. This action adjust-ment is a matter of personal preference. There
should be a gradual increase in height from the first to the sixth string.
String Height at the 12th fret
FirstString SixthString
Low Action 1/32″1/16″
MediumAction 1/16″3/32″
High Action 3/32″1/8″
Action can also be adjusted by changing the angle of the neck. This can be done by inserting small
shims between the neck and the body to increase or decrease the neck angle.
4. INTONATION
The saddles on the bridge can be adjusted to compensate for the pitch modification that occurs
when the string is stretched as it is fretted. This adjustment is made by tightening or loosening the
set screws at the rear of the bridge (see Figure 7).
Start by tuning your guitar and sounding a harmonic chime directly above the twelfth fret on the
sixth string. Now fret the sixth string at the twelfth fret and compare that pitch to the harmonic. If
the fretted note is higher than the harmonic pitch tighten the set screw to lengthen the string. If the
fretted note is lower than the harmonic, loosen the set screw to shorten the string length. When the
harmonic and the fretted note sound the same note, the saddle is at the correct position. Repeat this
procedure for the other five strings.
5. PICKUP HEIGHT
Each humbucking pickup is adjustable on the bass and treble sides. Finding the best combination
of tone and volume will require some experimentation. A good place to start is to adjust the pickup
height so that the first string is about 1/8" over the pickup pole and the sixth string is about 3/16"
over its pole.

BYGuitarBYGuitarBYGuitar
Table of contents


