manuals.online logo
Brands
  1. Home
  2. •
  3. Brands
  4. •
  5. Stermay
  6. •
  7. Water Pump
  8. •
  9. Stermay 782A Plus User manual

Stermay 782A Plus User manual

Manufacturer:
Dongguan Huatao Metal and Plastic Products Co., Ltd.
Manufacturer's address:
NO.2, Yanhe East Road, Xiabian Village, Chang'an Town,
Dongguan , Guangdong P . R . China
SUP ELECTRIC AIR PUMP SUP ELECTRIC AIR PUMP
782A Plus Operation Instructions
Please read the operation instructions carefully before using this product.
Please operate in the correct way based on complete understanding.
SUP ELECTRIC AIR PUMP
6
Please remove the power plug from the electric outlet after use or
before moving, servicing or adjusting the product.
XI. Maintenance and Storage
XII. Suggestion
Cool it well and put it in the box when it is not in use.
Please store it in a dry and ventilated place.
The warranty period of this product is one year. It is recommended
to use original parts; otherwise, any failure thereof will not be
covered by the warranty.
Please use it indoors, and protect it against direct sun exposure or
rain.
782A plus
Catalogue
SUP ELECTRIC AIR PUMP
X. Fault Handling
Fault Inspection Solution
The air
pump
cannot be
started
normally.
1. Check if the switch
“ ” is turned on and
the battery is fully
charged.
2. Overheating or
overload causes
motor stop.
1. Check whether
the hose is blocked
or cracked.
2. The joint
between the hose
and air pump or air
bag is not installed
properly.
1. Turn on the power switch and
charge it in time
2. Cool the motor and restart it.
3. If the problem cannot be solved,
please contact local agents or the
similar authorized personnel.
1. Change the hose or make it
unblocked, and check whether the
hose is cracked.
2. Reinstall the hose.
3. If the problem cannot be solved,
please contact with the manufactur-
er or its service agent or the similar
authorized personnel.
Slow or
abnormal
inflation.
5
I. Product Introduction..................................... 1
II. Product parameters......................................1
III. List of Accessories ......................................1
IV. Details of Accessories................................ 2
V. Safety Instructions......................................2-3
VI. Inflation Operation....................................... 3
VII. Deflation operation ..................................3-4
VIII. Precautions ............................................... 4
IX. Charging....................................................4-5
X. Fault Handling............................................... 5
XI. Maintenance and Storage...........................6
XII. Suggestions................................................6
(Figure 4)
Input
Make sure the battery is fully discharged before the first charge.
The battery should be recharged immediately after it is discharged Please do
not lay the pump aside without power for a long time.
The battery must be removed from the appliance before it is scrapped:
- the appliance must be disconnected from the supply mains when removing
the battery;
- the battery is to be disposed of safely.
E2
E3
Forced shutdown
when product detects
that temperature
reaches 100 ℃
Shutdown protection
without increasing air
pressure
Check for air leaks.
Heat dissipation is required.
Turn on the power switch. (the symbol “-”on the switch means “ON”, “o” means
“OFF”)Gently press switch button to start inflation.
Press the pressure unit toggle button to select the until you need.
Press the pressurizing button or decompressing button to set the pressure
value you need, with the range of the pressure value from 0 to 20PSI, (1PSI=
0.0689BAR=68.9KPA) .
After finishing the above steps,press the power switch button to start to inflate.
During the inflating process, you can press the pressurizing button or
decompressing button to increase or reduce the pressure value, press the
pressure unit toggle button to swich the unit, and press the On/Off button
to stop.
Press and hold the On/Off button for 3 seconds to directly start the high
pressure pump.
782A plus 782A plus
2 3
(Figure 1) (Figure 2)
VI. Inflation Operation
When the pressure reaches the set value, the air pump will stop working
automatically.
After pulling out the DC plug, please take down the hose from the air pump
air bag and store it.
Notice:The factory set pressure value of the air pump is 20PSI (1PSI =
0.0689BAR=68.9KPA), and at the time of the secondary use ,the set pressure
value for the last time use will be displayed by default.
V.Safety Instructions
Connect the end with flexible conduit adaptor (11) of the hose with the air pump
inflation inlet (1), and twist clockwise to tighen it, as Figure1.
Install the other end of the hose into the supporting air tap of the air bag (Figure2),
and twist clockwise to tighten it, and then insert the inflation valve of the air bag and
twist clockwise to fix it ( Fig 2).
Warning: In order to reduce the risk of injury, please keep children away from it.
Always supervise children and incapacitated person contacting or using this air
pump.
Warning:This product shall not be expeosed to the rain or immersed in water.
Warning: Children shall be kept far away from this product and wire.
Warning: This product is not applicable for the person with declining physical
strength, sensory ability or mental capacity, the person lack of skill and the
mentally retarded person, unless they are under the protection of their guardians,
supervised and directed at the same time.
Warning: Before moving, maintaining, repairing or adjusting this product, please
first pull out the DC plug from the socket.
Warning: Please do not bury the wire in the soil, and it shall be place in the safe
zone where it won't be damaged by mower or other equipment.
Warning: If the power wire is damaged, the power wire must be changed by the
manufacturer or its service agent or the similar authorized personnel, in case of
any risk.
Warning: If you are standing in a place with water or your hands are wet, please
don't plug or pull the DC plug.
Warning: Before inflating, please pay attention to check the maximum bearable
pressure of the inflatable product, because the air bag may be damaged upon
exceeding the maximum bearable pressure.
Warning: Before using, please check the cigarette lighter socket to make sure
that there is no rust or residue inside. The cigarette lighter socket with poor
electric conduction may cause overheating of the product or power source,
which will damage the product.
Warning: The purpose of using this product is limited to the description in the
instruction book.
Warning: The product cannot be used under flammable and explosive
environment.
Warning: Please use this equipment at ambient temperature of no more than 40
degrees.
Warning: The pressure line of the product is only suitable for the original wave
pipe.
Warning: Be sure to check if the wave pipe is broken, and make sure the switch,
the cigarette lighter and the pressure screen really work prior to use.
Warning: Keep away from heat source, humidity, dust and direct sunlight.
Warning: Do not throw this product into fire for fear of explosion, battery leakage
or other dangers.
Inflation inlet
Deflation outlet
Pressure value LCD screen
Pressure unit toggle button
Pressurizing button
Decompressing button
On/off button
Hose
Air tap
Flexible conduit adaptor
1
2
3
4
5
6
7
8
9
10
11
12
13
14
15
Type-C USB cable
Type-C power input interface
Charging indicator light
DC plug
Switch
14
4
5
6
7
8
1
3
2
11
10
915
20.00
12
14
13
SUP ELECTRIC AIR PUMP
782A plus
Air pump Hose/Type-C USB ca ble Instruction Book
IV. Details of Accessories
14
VIII.Precautions
VII.Deflation operation
Remove the hose from the inflation inlet, Connect the end with flexible conduit
adaptor (11) of the hose with the air pump deflation outlet (2),
and twist clockwise to tighten it, as Figure 3, and the oher end shall still be to
the airbag.
Press the button of the power switch of air punp, and start the deflation
until all the gas is discharged, then the power can be turned off to stop the
deflation.
When not in use, turn off the power
switch “ ” , remove the hose from
the air pump and air bag and store the
product properly.(the symbol “-”on the
switch means “ON”, “o” means “OFF”).
(Figure 3)
Do not block the inflation inlet (1) and Deflation outlet (2), and ensure that the
inflation inlet (1) and Deflation outlet (2) shall remain smooth at all time.
Observe the local waste streatment provisions,and it is not allowed to throw
the air pump away randomly.
Don't use this product when the hose is damaged, and please change the
hose immediately.
Don't pull out the hose when inflating, because that the high pressure may
hurt the physical body.
Don't make the air punp work for more than 20 minutes, because that motor
overheating may cause internal damage; and the air pump shall be fully
cooled for 30 minutes after continuously working up to 20 minutes.
Please don't use tis air pump if any part is damged, and please contact
with the professional peronnel to repaiar it.
In order to prevent risk, the inflation inlet shall not be forward to face or body.
Please don't leave while inflating.
IX.Charging
I. Product Introduction
III. List of Accessories
Please make sure that the following accessories are in the box before
using it, if any missing, please contact with the local agents or distributors.
Disposal: Do not dispose of this product as unsorted municipal waste.
The waste must be collected separately for special disposal.
II. Product parameters
Pressure
Airflow
Battery
Power
Input voltage
Charging input
Noise
0-20PSI
Low: 350 L/min/ High: 70 L/min
12V/6000mAH
Rated 110 W
DC12-14.4V
USB 5 V/1 A、5 V/2 A or 12 V/1.5 A
≤90dB
Charging time
5V/1A
5V/2A
12V/1.5A
About 12 hours
About 8 hours
About 4 hours
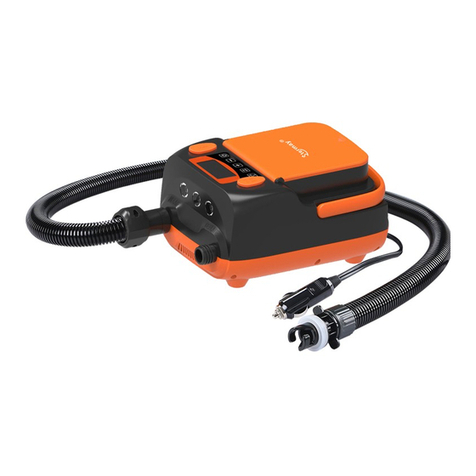
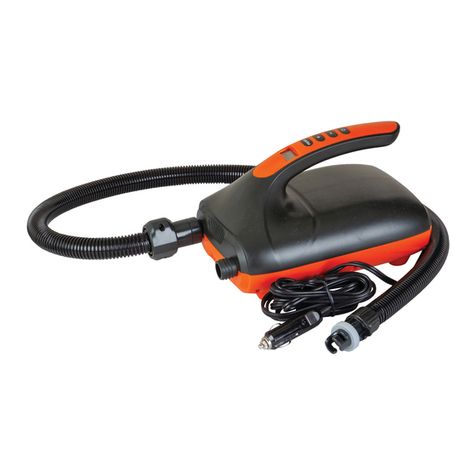
782A Plus is an intelligent power storage air pump with preset pressure
value andIt can inflate inflatable tents, inflatable beds,
canoeing, etc. In addition, it has an intelligent pressure system. That is to
say, air pump will automatically stop inflation when pressure reaches the
preset pressure value.
It uses Type-C USB of 5V 1A, 5V 2A or 12V 1.5A for charging, where cigarette
lighter is plugged into 12V DC power supply to supply power to product, and
product shall not be started during charging.
Please use type-C USB cable with this product for charging. Charging voltage
is 5V 1A, 5V 2A or 12V 1.5A. Charging voltage shall be automatically identified
(as shown in Fig. 4)
When only one indicator is on, it is recommended to charge the product in
time. The indicators will flash during charging, and all the indicators will be
on when the product is fully charged.

Other Stermay Water Pump manuals

Stermay HT-790 User manual

Stermay

Stermay HT-790 User manual

Stermay HT-782 User manual

Stermay

Stermay HT-782 User manual

Popular Water Pump manuals by other brands

Crivit 26235 instruction manual

Crivit

Crivit 26235 instruction manual

Kremlin-Rexson EOS 53-C360 manual

Kremlin-Rexson

Kremlin-Rexson EOS 53-C360 manual

Stuart Turner Monsoon Extra 2.6 bar PS Installation, operation & maintenance instructions

Stuart Turner

Stuart Turner Monsoon Extra 2.6 bar PS Installation, operation & maintenance instructions

Terumo TERUFUSION TE-SS730 instruction manual

Terumo

Terumo TERUFUSION TE-SS730 instruction manual

BEDU SD Series operating instructions

BEDU

BEDU SD Series operating instructions

Neptun Blue Line NPGP 5500 Original operating instructions

Neptun

Neptun Blue Line NPGP 5500 Original operating instructions

Chicago Pneumatic CP 0020 Safety and operating instructions

Chicago Pneumatic

Chicago Pneumatic CP 0020 Safety and operating instructions

EM SRP 15502 DR Basic line operating instructions

EM

EM SRP 15502 DR Basic line operating instructions

LMI G Series Installation, operation and maintenance manual

LMI

LMI G Series Installation, operation and maintenance manual

esotec Rimini LED operating manual

esotec

esotec Rimini LED operating manual

CET PFP-25HP-DSL-MR instruction manual

CET

CET PFP-25HP-DSL-MR instruction manual

SKF Lincoln P 215 Series installation instructions

SKF

SKF Lincoln P 215 Series installation instructions

GORMAN-RUPP PUMPS SE Series Installation, operation, and maintenance manual with parts list

GORMAN-RUPP PUMPS

GORMAN-RUPP PUMPS SE Series Installation, operation, and maintenance manual with parts list

Piusi P 3.5 Directions for installation, use and maintenance

Piusi

Piusi P 3.5 Directions for installation, use and maintenance

AL-KO HWA 1300 F User instructions

AL-KO

AL-KO HWA 1300 F User instructions

IWAKI PUMPS SMX-F Series instruction manual

IWAKI PUMPS

IWAKI PUMPS SMX-F Series instruction manual

Calpeda GQ Original operating instructions

Calpeda

Calpeda GQ Original operating instructions

Levitronix PuraLev LCO-i100 user manual

Levitronix

Levitronix PuraLev LCO-i100 user manual

manuals.online logo
manuals.online logoBrands
  • About & Mission
  • Contact us
  • Privacy Policy
  • Terms and Conditions

Copyright 2025 Manuals.Online. All Rights Reserved.