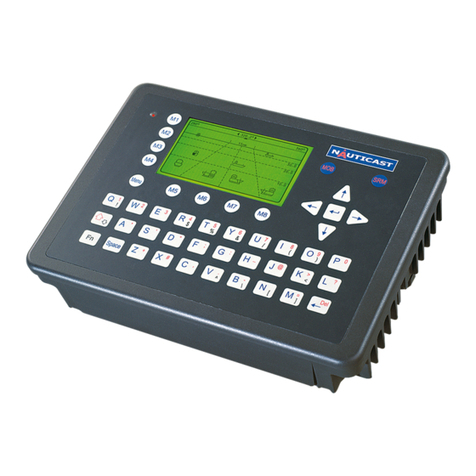
Strike Genius BT User manual

Strike Genius BT Motorcycle GPS

Dear Consumer,
Thank you for choosing the Strike Genius BT GPS Navigation System. In order
to avoid any unnecessary injury, damage, or loss which may occur from use of
the Strike Genius BT GPS Navigation System, please read this user
agreement carefully.
Please install the product correctly. Do not place the product in a location
where it may impede or block the driver's view. The manufacturer shall not
assume any compensation responsibility for product failure or other property
loss or personal injury caused due to incorrect installation.
Users must comply with the following terms while using. The manufacturer
shall not assume any compensation responsibility for personal injury or
financial loss due to violation of these terms:
1) This product is only for driving reference. Please obey all practical traffic
rules in light of actual traffic situations.
2) Only operate this device when your vehicle is stationary. It is forbidden to
operate it while driving.
3) It is forbidden to use any other function except navigation whilst driving.
4) As map information may be incorrect due to the change of road conditions
and infrastructure, please update it regularly at www.strike.com.au.
This navigation system contains operation system and software provided by a
third party. The manufacturer has spared no efforts in manufacturing the
hardware and developing the application software to ensure this product runs
normally. If there is a malfunction, the manufacturer shall not assume any
compensation responsibility for property damage or property loss or personal
injury except if maintenance is specified according to quality assurance
regulation.
User Agreement

1. Notices 01
1.1 Information Instruction 01
1.2 Safety Information 01
1.3 Frequently Asked Questions 03
2. Brief Introduction 05
2.1 Function Introduction 05
2.2 Accessories 05
3. Basic Operation 07
3.1 Battery and Adapter 07
3.2 Basic Use 08
3.3 Connection with Computer 09
4. Navigation User Manual 10
5. Function 16
5.1 Navigation 17
5.2 Music 17
5.3 Picture 18
5.4 E-book 19
5.5 Video 19
5.6 System Setting 20
6. Malfunction Analysis 21
7. Technical Specification 22
End User License Agreement 23
Contents

1.1 Information Instruction
Please read the instructions below before operating.
Illustration
Warning
Users should follow the information provided in
order to prevent any threat to personal safety.
Caution
Users should follow the information provided in
order to prevent any damage to this device.
Tips
Additional information provided for user’s
reference.
1.2 Safety Information
1. When driving, the driver must obey all traffic rules.
2. Do not operate the Strike Genius BT device while driving.
3. The driver should not solely depend on the Strike Genius BT device for
navigation, as traffic conditions and roads may constantly be changing.
Warning
Caution
Tips
1. Notice

4. Accessories - Only use the accessories that you received with your Strike
Genius GPS. Using other accessories may void your warranty.
5. Power Cable- Please ensure the power cable is securely tied and not
affecting your driving or safety.
6. Installation and wiring - In order to ensure safety, please consign
professionals to carry out the installation and wiring.
IMPORTANT: During the installation please ensure the red and black
cables are not directly connected to the main battery. They should be
connected to an ignition accessory line, so that the device is only drawing
power when the bike is on. If you connect this device directly to the main
battery be sure to fully power the system down (hold the power button for
more than five seconds). Do not just put the device into stand by/sleep mode
(short press of the power button). When the device is in stand by mode it still
draws current from the power source and this may flatten some bike
batteries.
7. Look after your Strike Genius - Whilst the Strike Genius BT has a
weatherproof design, you must not submerge it in water (it can handle rain
fall). Please ensure the Mini USB and SD Card port is securely closed
before exposing the Strike Genius to water. It is recommended that you
store the Genius in a safe place when not in use. Please don't expose the
device to sunshine or high temperatures.
8. Maintenance - Please wipe the device with dry and soft cloth after
power-off, to remove any chemicals or dust.
9. Power Cable - If you damage the power cable or jack, please cut off power
immediately and contact a professional.

.
1. Can the positioning and use of the Strike Genius be affected by the
weather?
Yes, lightning, overcast and rainy conditions may affect the signals and use of
GPS.
2. What other factors may affect the signals of GPS?
A).The precision of GPS signal is directly controlled by DOD in USA, in order
to ensure security, the signal precision for civilian use is lower than that for
the DOD, so in some sensitive places, a military base for example, the
signals can be interfered with and the precision of positioning may be
reduced.
B). Electric, electromagnetism, wireless waves and strong magnetic fields
may also cause interference.
C).Under structures, such as buildings and trees, reduction of the GPS signal
may occur, therefore ensure the device has a clear view of the sky.
3. Why does the GPS not receive signals inside my house?
The signals can be obstructed easily by buildings, metals and walls of
buildings, thus it is recommended to not to use the GPS indoors.
4. Does the sun membrane on my windscreen effect the signals of my GPS?
It will have a certain effect on the GPS if the material of the sun membrane
contains metal.
1.3 Frequently Asked Questions

5. How long does the GPS take to position after it’s powered on?
In about 1 minute the GPS begins its positioning. If it is located in wide,
clear place, the standard time required is less than or equal to 5 minutes (in
accordance with the standard GB/T 19392-2003-5.3).
6. What is the maximum navigation time? How long does it take to charge?
Generally, the maximum navigation time is 3-4hrs with volume and
brightness at 50%. The Strike Genius BT takes around 3-3.5hrs to charge
when in stand by mode. It can also be charged when powered on.
7. Normally, how many satellites can the GPS receiver capture?
Normally, most GPS receivers can capture 8-12 satellites.
8. Sometimes WMA files can not be played. Why?
Please make sure the music is obtained legally. WMA files have copyright
protecting, and need to be decoded by decoding software during operation.

2.1 Function Introduction
>GPS Navigation
>Movie format: Supports ASF, AVI, WMV, MP4, 3GP
>Audio format: Supports WMA, MP3, WAV
>Supports LRC and synchronised lyric displayed
>E-book format: Supports TXT
>Picture format: Supports JPEG, BMP, PNG
>Supports SD/MMC card
2.2 Accessories
Before using, please make sure you have the complete device and accessories.
If there is any damage please contact your local dealer or agent as soon as
possible.
Package Includes:
1 x Strike Genius GPS BT Unit
1 x Strike Genius GPS BT fixed bracket
1 x Power Adapter/DC Charger
1 x USB Cable
1 x Bluetooth Earphone
1 x Bluetooth Earphone AC Adapter
1 x User Manual
1x Windscreen Mount
1 x Car Cigarette Lighter Adapter
2. Brief Introduction

1.Power Key Power on /off /sleep
2.Reset When the device is crashed, halt or works abnormally, press this key to reset the
system
3.MINI USB Port ①Exchange the data with PC by MINI USB cable
②Charge the GPS device by connecting power adapter.
4.SD card slot
5.Bracket block slot
6.Display Screen
7.Fixed slot This allows you to lock the GPS to the cradle/fixed bracket
8.External power supply This connects to the motorcycle cradle to provide power
9.Volume increase key
10.Volume decrease key
11.Power key Press power on,press again power of
12.Indicating Light
①When in charge state, the light is red; when in fully charged state, the light is
green.
②When the device is on but the Bluetooth is not connected, the green light
flashes. When the Bluetooth is connected, the green light holds.
③When in low-power state, the red light flashes.
13.Speaker
14.Clip Bluetooth earphone helmet mounting piece

3.1 Battery and Adapter
3.1.1 Power Supply
In-vehicle/portable GPS navigation has two ways of power supply: battery
supply and power supply. When the device doesn't connect with the adapter, it
is supplied by the lithium battery. When the device connects with the adapter, it
is supplied by the outer power supply. The icon at the top right corner on the
main interface of system indicates the current remaining power.
Tips- Under normal conditions (volume and backlight at
50%), the battery lasts about 3~4 hours after the battery
is fully charged. Some functions need to consume a lot
of battery energy, such as audio/video playing, high
backlight etc. We recommend the device to be fully
installed on your bike.
3.1.2 Motorcycle GPS Power Adapter
1.Install the GPS to the bracket and make sure there is a secure connection
between the GPS and bracket power connector.
2.Make sure the waterproof connector has been locked, in order to avoid water
entering and leading to a short-circuit.
3.Connect the input end to the motorcycle storage battery, tie the adapter cables
to the motorcycle.
IMPORTANT: During the installation please ensure the red and black
cables are not directly connected to the main battery. They should be
connected to an ignition accessory line, so that the device is only drawing
power when the bike is on. If you connect this device directly to the main
battery be sure to fully power the system down (hold the power button for
more than five seconds). Do not just put the device into stand by/sleep mode
(short press of the power button). When the device is in stand by mode it still
draws current from the power source and this may flatten some bike
batteries.
3. Basic Operation
Tips

3.2 Basic Use
3.2.1 Power Key
1.Power on: When the GPS power is full or after connecting the device with an
external power supply, press the power key for more than four seconds to start up.
2.Power off: Press the power key for more than four seconds to turn off the GPS.
3.Sleep mode: When the device turns on, quickly press the power key to enter
sleep mode. The GPS will automatically display in its last state when you next
start-up.
3.2.2 Reset Key
If the system will not respond, press the reset key on the back of device to re-start
the system. You should do this when:
1.There are delays when you switch interfaces.
2.There is no response when you click the icons.
3.The power key won’t respond.
Caution- Please backup the data before resetting the
system.
3.2.3 Motorcycle Fixed Bracket
Attention: Fix the Motorcycle GPS device to a safe position on the handlebars to
avoid the GPS blocking the driver's view. Make sure the screws have been locked
tightly.
3.2.4 SD/MMC Memory Card
Correctly insert SD/MMC card into the slot, and do not remove the SD/MMC card
during operation.
Caution

3.3 Connection with Computer
Connect the device with computer via the USB cable. One end connects with
PC and the other end connects with the device.
1. Data transmission: When you plug the deivce into a computer two folders
should automatically open on the PC screen. One of these is for the SD
card (you can also access these via ‘My Computer’). If you wish to transfer
music or other files on/off the GPS, drag and drop them here.
Caution -
1. Please do not delete or revise the data in the built-in
flash memory of the device.
2.The operation of communication between the GPS
and computer are based on the Windows XP OS.
2.Safely remove the USB cable after finishing the data transmission.
Caution

4. Navigation User Manual
Getting Started
Advanced Mode
Simple Mode
When the Strike Genius GPS BT software is started for the first time, you need to
select whether to start the program in Simple or Advanced mode. The two
operating modes of the Strike Genius mainly differ in the menu structure and the
number of available features. The controls and screen layouts are the same.
Simple Mode: You have easy access to the most important navigation functions
and the basic settings only. The rest of the settings are set to values that are
optimal for typical use.
Advanced Mode: You have access to the full functionality of the Strike Genius.
This guide covers actions in Simple mode. To switch from Simple to Advanced
mode, on the startup screen (Navigation Menu), select:

To switch from Advanced mode to Simple mode, on the startup screen
(Navigation Menu), select:
Startup screen: the Navigation Menu
After selecting Simple mode, the Navigation
menu appears. From here you can reach all
parts of the Strike Genius.
Tap
Tap
Tap
Tap
Tap
to specify an address as your detination
for the list of recent destinations
to select one of the stored Points of Interest
for the list of your favourite destinations
to navigate or browse the map

Tap to customise the way the Strike Genius works
How to navigate to an address
Find Address Screen
Selecting Street Screen
In the navigation menu, tap . By default, the Strike Genius offers
the country/state and city of your current location. If needed, tap the button
with the name of the country/state, and select a different one from the list.
If needed, change the state
To select the city/suburb from the list of recently used ones, tap the
button.
To enter a new city/suburb
1. Tap the button with the name of the city/suburb
2. Start entering the city/suburb name on the keyboard
3. Get to the list of search results
After entering a couple of characters, the names that match the
string appear in a list
Tap to open the list of results before it appears
automatically
4. Pick the city/suburb from the list

Enter the street name:
1. Tap
2. Start entering the street name on the keyboard
3. Get to the list of results:
After entering a couple of characters, the
names that match the string appear in a list.
Tap to open the list of results before
it appears automatically.
4. Pick the street from the list
Enter the street number:
1. Tap
2. Enter the street number on the keyboard
3. Tap to finish entering the sentence
The map appears with the selected point in the middle. Tap from
the Cursor menu. The route is then automatically calculated, and you can
start navigating.
Navigating to a POI (Point of Interest)
Find Address Screen

Selecting Street Screen
On the Map screen, tap to return to the Navigation Menu
In the Navigation menu, tap
Point Of Interest will be searched for around a given address
Point Of Interest will be searched for around the Cursor
Point Of Interest will be searched for around the current GPS
postion
Point Of Interest will be searched for around the destination of the
active route
Point Of Interest will be searched for not around a given point, but
by the size of the detour it adds to the active route. This can be
useful if you search for a later stopover that causes only a minimal
detour, for example upcoming petrol stations or restaurants.
After this, the list of POI categories appear.
You can narrow the search with the following:
Select the POI group (i.e. Accommodation), and after that, if needed, select
the POI subgroup (e.g. Hotel or Motel)
To find the POI by its name, tap ,and use the keyboard to enter a
part of the name
To list all POIs in a given POI group, tap
[Optional] When the list of results appear you can change the list order with the
or button
Navigating to a POI
The map appears with the selected point in the middle. Tap from the
Cursor menu. The route is then automatically calculated, and you can start navigating.

Map Screen When Navigating
The most important and often most used screen of the Strike Genius is the Map
screen. The map looks similar to a conventional road-map. The blue arrow
represents your current position, and the orange line shows the recommended
route.
There are several screen buttons and data fields on the screen to help you
navigate.
During navigation, the screen shows route information and trip data, but when
you tap the map, additonal buttons and controls appear for a few seconds. Most
parts of the screen behave as buttons.
,or : Cycles through the available map view modes;
a North orientated 2D (classic top-down) view,
a rotated 2D view and a rotated 3D
(perspective) view.
: Opens the navigation menu
If you have moved the map, a button appears. Tap this button
to move the map back to the current position.
One of the best features of the Strike Genius is the ability to
manipulate the maps to a view that you like. You can zoom in and out,
select from 2D and 3D options and even change the elevation.

Use of the Bluetooth Earphone
Before using the Strike Genius GPS please ensure that the Bluetooth earphone
power is turned on (green light should be flashing). On the GPS unit, click the
Bluetooth icon to enter the host Bluetooth interface.
The function of each key for the search interface is as follows:
Return Return to previous menu
Arrow Up Select the previous device
Arrow Down Select next device
Connect Connect with device
Disconnect Disconnect with device
Name Displaying the device that search out
5. Function Operation
The pairing code for the Strike Genius is 123456.
After successfully pairing, the green light of the Bluetooth earphone will stop
flashing and hold its green light. When you return to the previous menu, the
‘Connect to Bluetooth Headset’ box will be ticked, indicating it has paired.
Tips
Tips
When using the Bluetooth earphone the next time you power
on your GPS, there is no need to search and pair, as these
two items will automatically find and pair with each other.

This device supports navigation, audio/video playback, E-book, photo browsing and
system setting functions.
5.1 Navigation
5.1.1. GPS Software
Tap the Navigation icon on the main menu to enter the GPS software. Follow the
Navigation guide at the start of this manual. To download the full GPS software user
manual please visit www.strike.com.au/gps.
5.2 Music
1. Click the Music icon on the main interface to enter into the audio folder. The
inferface will then take you the music player screen.
The function of each icon is as follows (from bottom left to right)...
1. Volume- Edit the volume by tapping the ascending bars either up or
down. Clicking on the volume button itself will mute all sound.
2. Previous - Will play the previous track
3. Play/ Pause- Will play or pause current song
4. Next- Will play next track
5. Normal (Straight
Arrow), Repeat (Cycle
Arrow), Shuffle
(Directional Arrows) - Depending on setting, can edit the order the songs are played
in
6. Folder- Will take you to your music file locations
7. Rubbish Bin- Will delete songs from music player playlist
The ‘X’ icon will take you back to the main menu
Table of contents
