8
EN
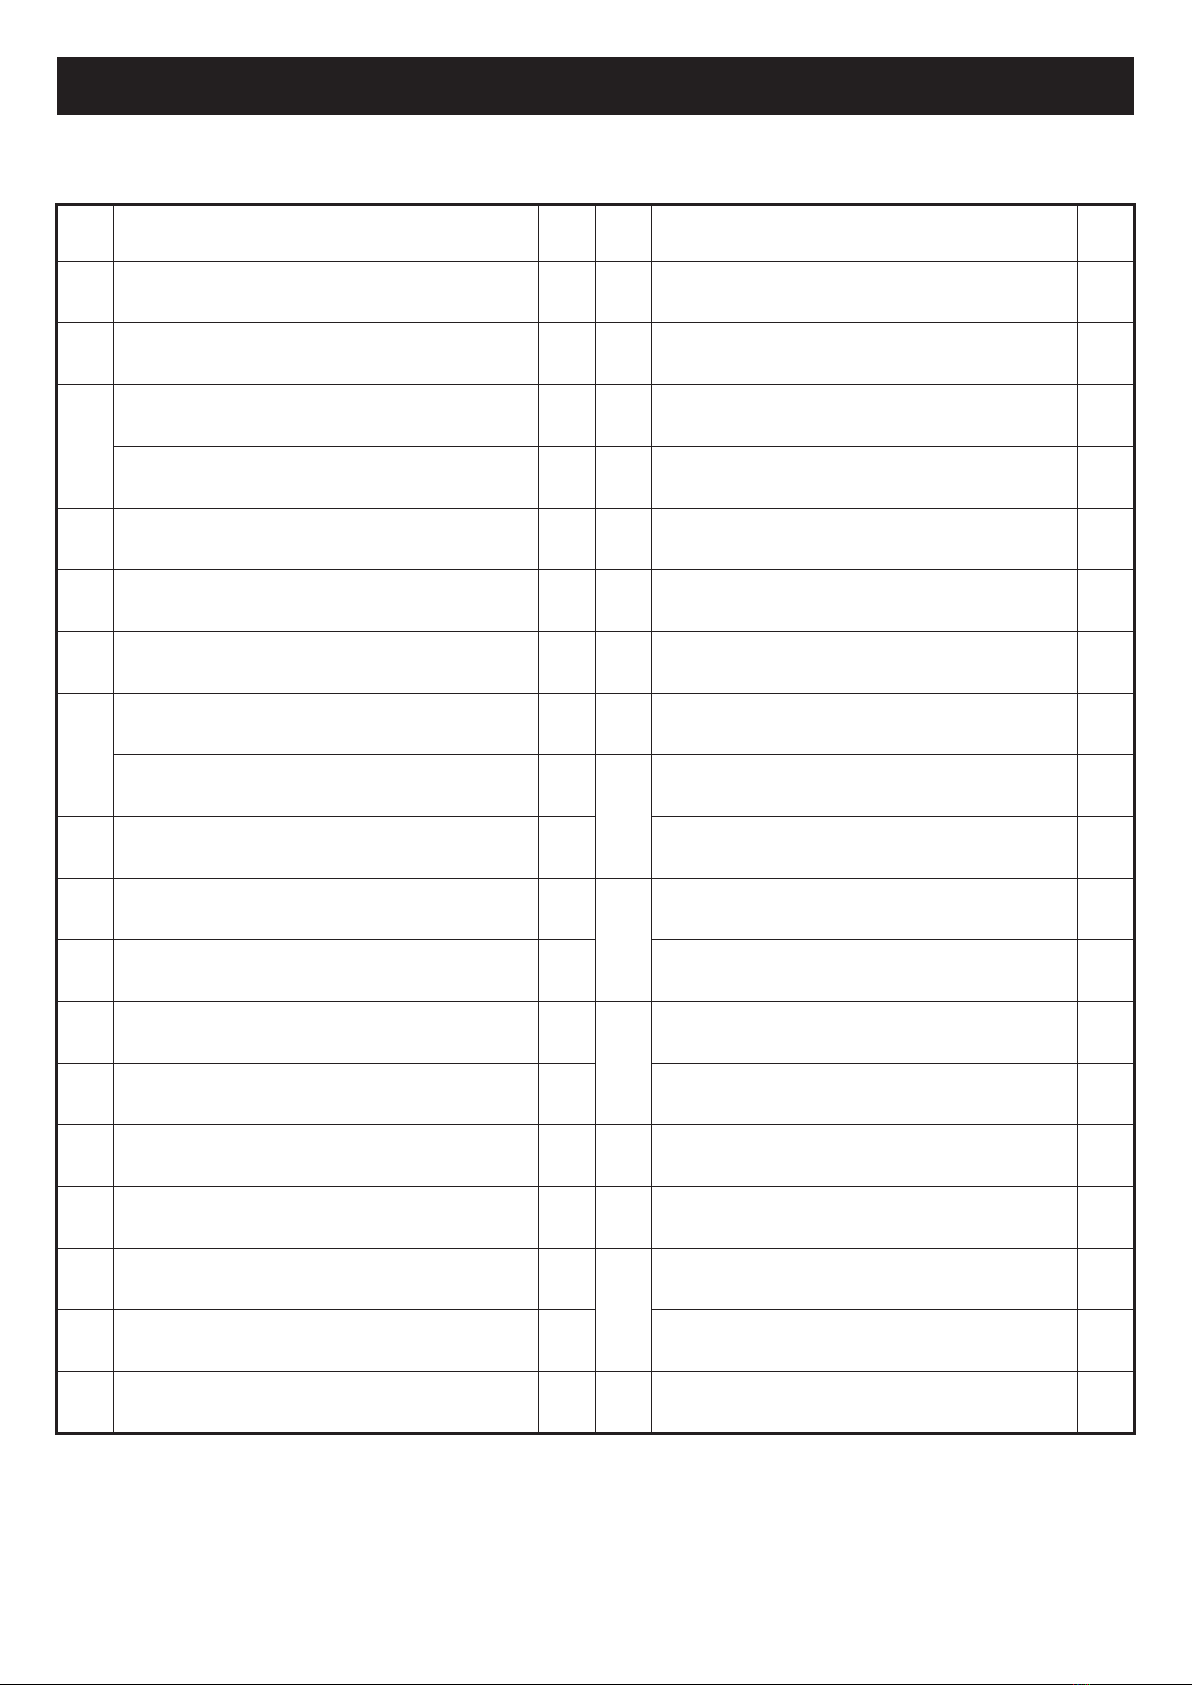
ItemParts Name Parts NameItem
1
2
3
4
5
6
7
8
9
q
w
e
r
t
y
u
o
p
a
s
d
f
g
h
j
k
l
;
z
x
Qty. Qty.
Motor Seal Nut
Rubber Nozzle
A: SFX600/1000 Pump Motor Assembly
B: SFX1500 Pump Motor Assembly
Motor Seal / Canister Gasket
Top Cover
Weir Foam
Type D Filter Cartridge (SFX600)
Type A/C Filter Cartridge (SFX1000 & SFX1500)
Weir
Filter Pump Skimmer Canister
O-ring for Hose Connections
Hose Clamp
Return Hose
90° Elbow
Return Fitting Lock Nut
RF Thrust Washer (White)
Pool Wall (for reference only)
Fitting Gasket
Return Fitting (RF), threaded
RF Diverter
RF Locking Ring, threaded
Return Fitting Service Plug
Skimmer Seal Ring
Water Stopper
SFX Skimmer Strainer Basket
Skimmer Gasket Rubber Seal
Transformer
Power Cord
SFX600/1000 Rotor Assembly
SFX1500 Rotor Assembly
SFX600/1000 Volute Cover
SFX1500 Volute Cover
Volute Cover Lock Nut (SFX600 & SFX1000)
Volute Cover Bolt And Nut Set (SFX1500 only)
SFX600/1000 Motor body
SFX1500 Motor body
1
1
1
1
1
1
1
1
1
1
1
1
1
1
1
4
1
1
1
1
1
1
1
1
1
1
1
1
1
2
2
1
1
1
1
1
1
PRELIMINARY STEPS
IMPORTANT NOTES
FILTER PUMP POWER INFORMATION
1. READ ALL INSTRUCTIONS CAREFULLY and get a thorough understanding of what is required to assemble your
Filter Pump.
2. Before you begin to assemble the pool, identify, count, and check all parts needed for assembly.
3. It is recommended that you have some petroleum jelly (not included) on hand for lubricating the gaskets and o-rings.
1. Installer shall follow written instructions provided for operation of the filter pump systems.
2. DO NOT use this product to dispense powdered chlorine, shock treatment, or any other type of chemicals as this will
cause damage to the pump filter cartridge and the pool.
3. The SFX Series Filter Pump systems are manufactured by Polygroup™, double-insulated and grounded
220-240 V.A.C. - 50 Hz.
PARTS LIST
Refer to "Parts & Setup Instructions" booklet for parts illustrations.
Model Voltage(V)
220-240V~, 50Hz
220-240V~, 50Hz
12V~, 50Hz
Wattage (W)
65W
65W
60W
Waterproof Level
IPX5/IPX7
IPX5/IPX7
IPX5/IPX7
SFX600
S/BS
NF
GS
Model Voltage(V)
220-240V~, 50Hz
220-240V~, 50Hz
12V~, 50Hz
Wattage (W)
90W
90W
90W
Waterproof Level
IPX5/IPX7
IPX5/IPX7
IPX8
SFX1000
S/BS
NF
GS
Model Voltage(V)
220-240V~, 50Hz
220-240V~, 50Hz
12V~, 50Hz
Wattage (W)
190W
190W
185W
Waterproof Level
IPX5/IPX7
IPX5/IPX7
IPX8
SFX1500
S/BS
NF
GS
i
EN
EN
Safety Care for Children
1. Children, especially children younger than five years old, are at high risk of drowning. Drowning occurs silently and
quickly and can occur in as little as 5 cm (2 inch) of water.
2. Keep children in your direct sight, stay close, and actively supervise them when they are in or near this pool and
when you are filling and emptying this pool.
3. When searching for a missing child, check the pool first, even if the child is thought to be in the house.
4. Place pumps and filters in places where children cannot climb on them and gain access to the pool.
5. WARNING: To reduce the risk of injury, do not permit children to use this product unless they are closely supervised
at all times.
Swimming Pool Barriers
Important:
Swimming pool barriers, which restrict access to the pool by small children, may be required by law. A barrier is necessary
to provide protection against potential drowning. Barriers are not a substitute for constant supervision of children.
Check state or local laws and codes before setting up pool.
Swimming Pool Equipment
1. Keep all electrical lines, radios, speakers, and other electrical appliances away from the pool.
2. Do not place pool near or under overhead electrical lines.
3. The filter pump is for household use only, not for commercial use.
4. Always unplug the filter pump:
a. on raining days.
b. before cleaning or other maintenance.
c. when leaving it unattended on holidays.
5. Do not plug or unplug the filter pump with wet hands.
6. When the filter pump will be not used for long time, such as in the winter, the spa or pool set should be disassembled
and stored indoor.
7. Read the instruction before using the filter pump and assemble/disassemble each time. Cleaning and user
maintenance must be performed by an adult over 18 years old who is familiar with the risk of electric shock.
Filter Pump Awareness
1. Following the pool manufacturer’s instructions and install your pool properly before installing this filter pump.
2. Adult assembly required.
3. Before starting, check all pipes and accessories for correct installation and reliable connection.
4. Do not bury the electric cords. Place the cords where lawn mowers, hedge trimmers and other equipment will not
damage them.
5. Do not use an extension cord to connect unit to electric supply.
6. Prevent children from using the filter pump without an adult's supervision.
7. Do not use the filter pump when pool is empty. This pump is designed only for above-ground pools that can be
disassembled, not for permanently installed pools. Improper use may lead to overheating and permanent damage of
the product.
8. To avoid the risk of electric shock, always be aware of damaged cords.
9. The power cord of the transformer and the filter pump cannot be replaced. If the cord is damaged, the transformer and
the filter pump should be disposed of.
10. To avoid the risk of electric shock, connect the filter pump only to a receptacle protected by a ground fault circuit
interrupter (GFCI) or Residual-current device (RCD). The pump must be supplied through a ground fault circuit
interrupter (GFCI) or residual current device (RCD) having a rated residual operating current not exceeding 30 mA.
Contact a qualified electrician if you cannot verify that the receptacle is GFCI/RCD protected. Use a qualified electrician
to install the GFCI/RCD.
11. This appliance can be used by children aged from 8 years old and above and people with reduced physical, sensory or
mental capabilities, or lack of experience and knowledge if they have been given supervision or instruction concerning
use of the appliance in a safe way and understand the hazards involved. Children shall not play with the appliance.
Cleaning and user maintenance shall not be made by children without supervision.
12. Children should be supervised to ensure that they do not play with the appliance.
13. Filter system can be used as many hours as desired, but NEVER when the pool is occupied. The pump must not be
used when there is people in the water.
14. Pollution of the liquid could occur due to leakage of lubricants.
15. This pump is for use with storable pools only. Do not use with permanently-installed pools. A storable pool is
constructed so that it is capable of being readily disassembled for storage and reassembled to its original integrity.
A permanently-installed pool is constructed in or on the ground or in a building such that it cannot be readily
disassembled for storage.
16. For continued protection against possible electric shock this unit is to be mounted to the base in accordance with the
installation instructions.
17. The Filter Pump is to be assembled by an adult; care should be taken in the unpacking and assembling of the Filter
Pump, this pool may contain accessible potentially hazardous sharp edges or sharp points that are a necessary part of
the function of the Filter Pump.
18. If a drain or suction outlet cover is missing or broken, do not use the pool. Suction can cause body part entrapment,
hair and jewelry entanglement, evisceration, or drowning. Repair or replace the drain or suction outlet cover before
allowing the pool to be used. During nighttime pool use, artificial lighting shall be used to illuminate all safety signs,
ladders, steps, deck surfaces, and walks.
19. The floor of the pool shall be visible at all times from the outside perimeter of the pool.
20. Post a list of emergency telephone numbers such as the nearest available police, fire, ambulance, and/or rescue unit.
These numbers are to be kept near the telephone, which is closest to the pool.
21. Basic lifesaving equipment, including one of the following should be on hand at all times:
•
A light, strong, rigid pole (shepherd's crook) not less than 366 cm (12 ft) long.
•
A minimum 6.35 mm (0.25") diameter rope as long as 1.5 times the maximum width of the pool or 15.2 m (50 ft),
whichever is less, which has been firmly attached to a Coast Guard-approved ring buoy having an outside diameter of
approximately 38.1 cm (15"), or similarly approved flotation device.
22. For domestic use only.
23. Never leave your child unattended – drowning hazard.
24. Children can drown in very small amounts of water.
Empty the pool when not in use.
25. Place the product on a level surface at least 2 m (6.6 ft) from any structure or obstruction such as a fence, garage,
house, overhanging branches, laundry lines or electrical wires.
26. Choking hazard - small parts.
27. Check seams regularly.
28. Use only under competent supervision.
29. The product must be assembled/disassembled by adult.
30. It is essential to change any damaged element or set of elements as soon as possible. Use only parts approved by the
person responsible for placing the product on the market.
31. Disconnect the pump from the supply mains before carrying out user maintenance such as cleaning the filter.
32. The supply cord cannot be replaced. If the cord is damaged, the appliance should be scrapped.
Circulation Systems
1. Installers shall follow written instructions regarding positioning of all equipment connected to the circulation systems.
2. The installer shall follow written instructions provided for operating the circulation system components.
3. All circulation system components and pump that require replacement or servicing shall be installed according to the
pump’s instruction manual.
4. Circulation equipment shall be installed per manufacturer’s instructions to provide proper mounting and support,
to prevent damage from misalignment, settlement, and vibration, and to minimize the potential for the accumulation
of debris and moisture. Please refer to pump’s instruction manual.
Chemicals
For safety sake, ensure the deepest part of the pool is always visible. The user must properly maintain the clarity of the
pool water at all times. Check the pH and chlorine levels periodically and make sure they are within the recommended
limits. Additional water treatment chemicals might be needed from time to time. Have the water sample tested by a local
pool supply store to determine if additional chemical is needed. Turn on the pump for the recommended hours daily. If you
are unsure of the time frames please refer to support.polygroupstore.com for the recommended Pump Operation Hours
based on pool types and sizes. Clean and replace filter cartridge frequently. Replace only with genuine Polygroup™ /
Summer Waves™ Brand filter cartridge. Refer to the Filter Pump manual for additional water care information.
This marking indicates that this product should not be disposed of with other household wastes throughout the EU.
To prevent possible harm to the environment or human health from uncontrolled waste disposal, recycle it responsibly
to promote the sustainable reuse of material resources. To return your used device, please use the return and collection
systems or contact the retailer where the product was purchased. They can take this product for environmental safe
recycling.
Electrical product waste should not be discarded with household wasted, use separate collection facilities.
Contact your local government or council for information regarding the collection systems available.
Maximum Water Temperature: 35ºC (95 ºF)
Maximum total head (GS): 4.9 ft (1.5 m) / (S/BS/NF): 1.3 ft (0.4 m) (Not applicable for SFX330 & RX330 filter pump
models).
IMPORTANT NOTES:
1. Keep this product more than 2 m (6.6 ft) away from the pool (Not applicable for SFX filter pump models).
2. Keep the plug of this product more than 3.5 m (11.5 ft) away from the pool.
3. If the product is provided with a transformer. The pump is only to be used with the power supply unit provided with the
pump. The pump must only be supplied with a safety extra low voltage corresponding to the marking on the appliance.
WARNING
Entrapment Risk
1. Entrapment Avoidance: There shall be no protrusions or other obstruction in the swimming area, which may cause
entrapment or entanglement of the user. If a suction outlet cover is missing or broken, do not use the pool.
Suction can cause body part entrapment, hair and jewelry entanglement, evisceration, or drowning. Repair or replace
the suction outlet cover before allowing the pool to be used.
2. Danger! To avoid serious injury or death, close the pool or spa to bathers if any suction outlet cover/grate is missing,
broken, or inoperative.
3.
Never play or swim near drains or suction fittings. Your body or hair may be trapped causing permanent injury or drowning.
4. Never enter the pool or spa if a suction fitting or drain cover is loose, broken, or missing.
5. Immediately notify the pool/spa owner or operator if you find a drain cover loose, broken, or missing.
Drowning Risk
1. Keep unsupervised children from accessing the pool by installing fencing or other approved barriers around all sides
of pool. State or local laws or codes may require fencing or other approved barriers. Check state or local laws and
codes before setting up pool.
2. Toys, chairs, tables, or similar objects that a young child could climb shall be at least 122 cm (4 ft) from the pool.
The pump filter system shall be positioned so as to prevent it being used as a means of access to the pool by young
children. Do not leave toys inside pool when pool is not in use, as toys and similar items may attract a child to the
pool.
3. Position furniture (for example: tables, chairs) away from pool and so that children cannot climb on it to gain access
to the pool.
Electrocution Risk
1. Keep all electrical lines, radios, speakers, and other electrical appliances away from the pool.
2. Do not place pool near or under overhead electrical lines.
First Aid
1. Keep a working phone and a list of emergency numbers near the pool.
2. Become certified in cardiopulmonary resuscitation (CPR). In the event of an emergency, immediate use of CPR can
make a lifesaving difference.
Special Warning
1. Local building codes may require obtaining a building or electrical permit. Installer shall follow regulations on setback,
barriers, devices, and other conditions.
2. DO NOT attempt to assemble this pool in adverse weather conditions, windy conditions, or when the temperature is
below 16°C (60°F).
3. This is a storable filter pump, which should be disassembled and stored when temperatures are expected to fall
below 0°C (32°F).
Extra Safety Warning
1. Adult supervision is always required.
2. Parents should learn CPR.
3. Keep all electrical radios, speakers, and other appliances away from the swimming pool.
4. When you touch the filter, pump, or electrical parts, be sure the ground under your feet is “Bone Dry.”
5. Connect power cords to a 3-wire grounding-type outlet only.
IMPORTANT SAFETY INSTRUCTIONS
When installing and using this product, basic safety precautions should always be followed, including
the following:
READ AND FOLLOW ALL INSTRUCTIONS
Keep for future reference. Failure to follow these warnings and instructions can result in serious
injury or death to users, especially children.
Please read carefully and keep for future reference
PREVENT
DROWNING!
Watch children at all times.
Follow all safety rules.
DO NOT SIT ON
OR LAY OVER
POOL WALL
You can be permanently
injured.
NO DIVING!
NO JUMPING!
Shallow Water - You can
be permanently injured.
WARNING
AVOID
ENTRAPMENT!
Stay away from suction
fittings. You may drown.
Notice: Customers who purchase pools may be required by local or state law to incur additional expenses when
installing a pool, in order to comply with state or local laws regarding fencing and other safety requirements.
Customers should contact their local building code enforcement office for further details. Polygroup™is not responsible
for any additional expenses that you may incur.
6. Keep all breakable objects out of the pool area.
7. Alcohol consumption and pool activities do not mix. Never allow anyone to swim, dive, or slide under the influence of
alcohol or drugs.
8. Severe electrical shock could result if you install your pump or filter on a deck. The pump or filter could fall into the
water, causing severe shock or electrocution.
9. Do not install on a deck or other surface at, above, or slightly below the top rail of the pool.
10. Do not use the filter pump during severe weather conditions, e.g. thunderstorms, tornadoes, etc.
11. Be aware of overhead power lines when vacuuming your pool or using a telescoping pole.
12. Check regularly for signs of wear or loose bolts that could make the pool unsafe.
13. Please contact pool site dealer or manufacturer for additional safety signs if deemed necessary.
14. Select a certified pool professional. to perform pool service.
ANY MAINTENANCE WORK TO AVOID RISK OF SERIOUS INJURY OR DEATH.
15. GENERAL INFORMATION: The pool must be stored away if temperature is expected to fall below 4ºC (39°F).
16. All parts should be cleaned using mild soap and lukewarm water only. DO NOT use detergent or hot water.
17. Make sure that all parts are dry before storing them to prevent mildew from forming.
18. Store all parts in a dry, heated location where temperature does not fall below 4ºC (39°F) or exceed 51ºC (125°F).
19. Failure to follow the storage instructions could cause damage to your pool and void your warranty.
20. YOU MUST FOLLOW THE ASSEMBLY INSTRUCTIONS TO REASSEMBLE YOUR POOL FOR FUTURE USE.
21. The site for the pool must be cleared and levelled.
22. Do not leave an above-ground pool outside when empty. Cover the pool or disassemble and store the pool when not
in use.
Installation recommendation
1. Filter can be permanently accessible and check the type of the filter media on filter packaging.
2. A weekly check is recommended for backwashing or cleaning.
3. It is essential to check that the suction openings are not obstructed.
4. It is advisable to stop the filtration during maintenance operations on the filtration system.
5. Regularly monitor the filter clogging level.
6. Minimum daily filtration operating time is 8 hours.
Country/Region
International
France
Standard Number
IEC 60364-7-702
NF C 15-100
Country/Region
Germany
Netherlands
Standard Number
DIN VDE 0100-702
NEN 1010-702
SAVE THESE INSTRUCTIONS
The UK plug and Australia plug cannot be used outdoors, and can only be plugged into an indoor socket outlet or a
waterproof socket outlet.
According to the International Standard, IEC 60364-7-702, on electrical installation of swimming pools and other
basins equipment, the following installation distances must be respected:
• The filter pump must be positioned more than 2 m (6.6 ft) away from the pool walls (Not applicable for SFX filter pump
models).
• The power cord plugged to the 220-240 V electrical power source of filter pump must be positioned more than 3.5 m
(11.5 ft) away from the pool walls.
Check your local authorities to determine the appropriate standard and requirements for “electrical
installation of swimming pools and basins equipment". The following table is for reference only.