SUN CAPSULE X7 User manual


F.D.A. Notice
Important
The F.D.A. requires that this manual remain in your business at all times.
It must be made available to any F.D.A. ofcial during an inspection of your
establishment.
Always read and follow all instructions for the proper usage before operating
your Sun Capsule tanning system.
Follow the exposure schedule based on the individual’s skin type. Failure to
do so may result in over-exposure.
The Sun Capsule is designed to be used by only one person at a time.
This manual contains instructions for repairs, recommended replacement
components and accessories which are compatible with products, including
compatible protective eyewear, ultraviolet lamps, timers and reectors, which
will, if installed or used as instructed, result in continued compliance with the
standard. The manufacturer of the equipment is:
Creative Marketing Concepts, Corp.
96 Audubon Road
Wakeeld, MA 01880
Tel: 978/532-7517
Fax: 978/532-8168

THIS EXPOSURE SCHEDULE IS SPECIFIC TO THE SUNCAPSULE X7 54 LAMP 220WT VHR/HP
RECOMMENDED EXPOSURE SCHEDULE
SKIN TYPE
II - FAIR 1 MINUTES 3 MINUTES 5 MINUTES 7 MINUTES 7 MINUTES
III - AVERAGE 2 MINUTES 4 MINUTES 6 MINUTES 7 MINUTES 7 MINUTES
IV - BROWN 3 MINUTES 5 MINUTES 7 MINUTES 7 MINUTES 7 MINUTES
V - DARK BROWN 4 MINUTES 6 MINUTES 7 MINUTES 7 MINUTES 7 MINUTES
USE COSMOLUX VHR 220 HP LONGLAMP 16211/220W
"DANGER- Ultraviolet radiation. Follow instructions. Avoid overexposure. As with natural
sunlight, overexposure can cause eye and skin injury and allergic reactions. Repeated exposure
may cause premature aging of the skin and skin cancer.
WEAR PROTECTIVE EYEWEAR: FAILURE TO DO SO MAY RESULT IN
SEVERE BURNS OR LON-TERM INJURY TO THE EYES.
Medications or cosmetics may increase your sensitivity to the ultraviolet radiation. Consult a
physician before using sunlamps if you are using medications or have a history of skin problems
or believe yourself especially sensitive to sunlight. If you do not tan in the sun, you are unlikely
to tan from the use of this product"
For your information
Recommended exposure position
The "FOOT PLACEMENT" indicators are located to give you the best overall tan in the shortest
period of time. To achieve recommended exposure positions, place feet on indicators. The use
of any other position may result in over-exposure.
WEEK1
1ST-3RD
SESSIONS
WEEK 2
4TH-6TH
SESSIONS
WEEK 3
7TH-10TH
SESSIONS
WEEK 4
11TH-15TH
SESSIONS
WEEKLY
SUBSEQUENT
SESSIONS
TANNING SESSIONS SHOULD BE LIMITED TO ONCE EVERY 48 HOURS. AN
A
PPEARANCE OF TANNING NORMALLY APPEARS AFTER A FEW EXPOSURES
A
ND MAXIMIZES AFTER (4) WEEKS OF EXPOSURE FOLLOWING RECOMMENDED
SCHEDULE FOR YOUR SKIN.
INSTRUCTIONS ACCOMPANYING THIS PRODUCT SHOULD ALWAYS BE FOLLOWED TO
AVOID OR MINIMIZE POTENTIAL INJURY
2

Dear Sun Capsule® Owner,
Congratulations. You have just purchased the nest, most
advanced, ultra-high performance vertical tanning system the
industry has to offer.
Enclosed you will nd very important information regarding the
safe operation of your Sun Capsule. Please read it carefully.
If you follow the recommended procedures for care and daily
maintenance you can expect a lifetime of performance and prots
from your Sun Capsule.
Anything less than the proper care can decrease the performance
of your system and, in some cases, void your warranty.
On the rare occasion you have a problem with the operation of
your Sun Capsule, please refer to the trouble shooting section
before calling for service. Usually it is something simple and it will
save time if a few quick checks have been performed before calling
Creative Marketing Concepts.
Most importantly, when you have a question regarding the Sun
Capsule, please do not hesitate to call us at 978-532-7517.
We are here to help you make your Sun Capsule the most
successful prot center within your business.
Sincerely,
Eugene G. Charette, C.E.O.
Creative Marketing Concepts, Corp.
F.D.A. Notice
3

TABLE OF CONTENTS
. . . . . . . . . . . . . . . . . . . . . . . . . . . . . . . . . . . . . . .
. . . . . . . . . . . . . . . . . . . . . . . . . . . . . . . . . . .
. . . . . . . . . . . . . . . . . . . . . . . . . . . . . . . . . . . . .
. . . . . . . . . . . . . . . . . . . . . . . . . . . . . . . . . . . . . . .
. . . . . . . . . . . . . . . . . . . . . . . . . . . . . . . . . . .
. . . . . . . . . . . . . . . . . . . . . . . . . . . . . . . .
. . . . . . . . . . . . . . . . . . . . . . . . . . . .
. . . . . . . . . . . . . . . . . . . . . . . . . . . . . . . . . . . .
. . . . . . . . . . . . . . . . . . . . . . . . . . . . . . . . . . . .
. . . . . . . . . . . . . . . . . . . . . . . . . . . . . . . . . . . . . . . . .
. . . . . . . . . . . . . . . . . . . . . . . . . . . . . . . . .
. . . . . . . . . . . . . . . . . . . . . . . . . . . . . . . . . . . .
. . . . . . . . . . . . . . . . . . . . . . . . . . .
. . . . . . . . . . . . . . . . . . . . . . . . . . . . . . . . . . .
. . . . . . . . . . . . . . . . . . . . . . . . . . . . . . . . . . . .
. . . . . . . . . . . . . . . . . . . . .
. . . . . . . . . . . . . . . . . . . . . . . . . . . . . . . . . . . . . . . .
. . . . . . . . . . . . . . . . . . . . . . . . . . . . . . . . . .
. . . . . . . . . . . . . . . . . . . . . . . . . . . . . . .
. . . . . . . . . . . . . . . . . . . . . . . . . . . . . . . . . . . .
. . . . . . . . . . . . . . . . . . . . . . . . . . . . . . . . .
. . . . . . . . . . . . . . . . . . . . . . . . . . . . . . . . . . . .
. . . . . . . . . . . . . . . . . . . . . . . . . . . . . . . . . .
. . . . . . . . . . . . . . . . . . . . . . . . . . . . . . . .
. . . . . . . . . . . . . . . . . . . . . . . . . . . . . . . . . . .
. . . . . . . . . . . . . . . . . . . . . . . . . . . . . . . .
. . . . . . . . . . . . . . . . . . . . .
. . . . . . . . . . . . . . . . . . . . . . . . . . .
. . . . . . . . . . . . . . . . . . . . . . . . . . .
. . . . . . . . . . . . . . . . . . . . . . . . . . .
. . . . . . . . . . . . . . . . . . . . . . .
. . . . . . . . . . . . . . . . . . . . . . . . . . . . . .
. . . . . . . . . . . . . . . . . . . . . . . . . . . .
. . . . . . . . . . . . . . . . . . . . . . . . . . . . . . . . . . .
. . . . . . . . . . . . . . . . . . . . . . . . . . . . . . . .
. . . . . . . . . . . . . . . . . . . . . . . . . . . . . .
FDA Notice
Exposure Schedule
Congratulations
Table of Contents
OWNERS MANUAL
TANNING PRECAUTIONS
Photosensitive drug list (partial)
Allergic Reactions
Pregnant Women
Children
Protective Eye Goggles
Protective Guards
UNDERSTANDING YOUR SYSTEM
Daily Maintenance
Timer Operation
Connecting a Data Base to the Sun Capsule
Hour meter
Emergency Entry Key
Changing Overhead Light
Peak Performance
Venting/Ducting of Fan
Changing Starters
Lamp End Blackening
Proper Lamp Installation
Lamp Replacement
Tanning The Lower Legs
Indoor Tanning Lotions, Oils and Moisturizers
Lamp Rotation – 54 Lamp System
Lamp Rotation – 49 Lamp System
Lamp Rotation – 44 Lamp System
Assembly Instructions Table of Contents
ASSEMBLY INSTRUCTIONS
Lamp Fixture Wiring Diagrams
System Schematics
Trouble Shooting Guide
Warranty and Warranty Card
1
2
3
4
5
5
5
6
6
6
6
6
6
6
6
7
7
7
7
7
8
8
8
8
8
9
9
10
11
12
13
14
29
33
35
38
4

Owners Manual
TANNING PRECAUTIONS
PHOTOSENSITIVE DRUGS – The following is a partial list of some of the photosensitive drugs on the market. It is your
responsibility to be aware of any customer using any drug considered photosensitive. These individuals under the
inuence of this type of drug can experience adverse effects and should avoid exposure to UV sources of all kinds.
Doctors will advise persons taking these medications of possible adverse effects.
DANGER:
If you have been diagnosed by a doctor as being allergic to the sun or are currently taking photosensitive medications,
consult your physician before using the Sun Capsule.
IMPORTANT INFORMATION BEFORE YOU TAN
Certain drugs do not mix well with ultraviolet light, either in its natural source or articial. Below is a list of drugs, foods,
and other substances which could make your skin super sensitive to sunlight;
Diuretics: To aid in water retention, also prescribed for high blood pressure. (For example: Hydrodiuril)
Diabetes Drugs: Orinase and Diabinese.
Urinary Tract Infection: Treatments with Phensthiazines.
Tranquilizers: such as Thorazine.
Antihistamines: Phenergan and Benadryl, particularly when used on the skin in ointment form.
Antibiotics: Declomycin, Aureomycin, and Griseofulvin, a drug used in the treatment of ringworm.
Coal Tar Treatment: for Psoriasis or chronic Eczema.
Bacterial infection: treatments using Sulfanilamide.
Compounds known as furocoumarins or psoralens: which sensitize skin to sunlight. They are prescribed for vitiligo (loss
of skin pigmentation) and Psoriasis.
Coal Tar Products & Essential Oils: Bergamont, Cedar, Lime Lavender and Vanillin.
Anesthetics
Aresicals
Aureomycin
Barbiturates
Benzedyl
Compazine
Cold & Silver Salts
Dartal
Declomysin
Diabinese
Diethylstillbestrol
Dilantin
Diuretics
Diuril
Dyes
Estrone
5 Fu
Griseofulvin
Hydrodiuril
Nadison
Orabetic Orinase
Pacatal
Pheynibuzatone
Procaine
Psoralen Drugs
Pyrrolazote
Quinine
Salicyclates
Sparine
Sulfanamides
TBS
TCSA
Termail
Terramycin
Tetracyclines
Therahistin
Thiazide
Thorazine
Tridione
Trilafon
Vesprin
5

ALLERGIC REACTIONS TO UV – Some people may experience a reddening of the skin, usually contained to small
areas of the body, such as arms, stomach area, etc., usually accompanied by an itching sensation. In many cases it may
be nothing more than heat rash. In some cases it may be an allergic reaction to UV exposure, usually as a result of too
much exposure in a given period of time for that particular skin type. You should be alert to any customer complaints
pertaining to this and instruct the customer to avoid tanning, indoors or outdoors, until the symptoms have disappeared,
usually within 24 hours. Once the customer resumes tanning, reduce the exposure schedule until their body has
acclimated to the tanning process.
PREGNANT WOMEN – The only 100% safe answer to this question is to discourage expectant mothers from using the
tanning system, unless they have a letter from their doctor.
CHILDREN – A good policy to adopt is; No children under 18 years of age without written consent from a parent, unless
there are laws in your state or county that indicate otherwise. Keep young children away from the Sun Capsule. It is not
a toy. The sunlamps are breakable and potentially dangerous.
PROTECTIVE EYE GOGGLES – Every customer must wear protective eyewear during a tanning session. One pair of
goggles is provided with each Sun Capsule. It is advisable that each customer owns a pair of protective eyewear. This is
the most sanitary (and protable) way to conduct your business.
It is advisable to remove contact lenses before each tanning session due to the dryness of the air.
PROTECTIVE GUARDS – DANGER: Keep hands and ngers away from protective fan guards, lamp guards and lamps.
Serious injury and/or severe burns may result.
UNDERSTANDING YOUR SYSTEM
DAILY MAINTENANCE – Your Sun Capsule has been designed to be virtually maintenance free. Since the only body
parts that come in contact with the system are the bottoms of the feet, close attention should be paid to this area on a
daily basis. The oor can be wiped down with warm water and Lysol (1 gallon water to 3 teaspoons Lysol) or any other
mild disinfectant solution you choose. This procedure should be performed as necessary, depending on trafc ow.
CAUTION: Clean Fast Flow Floor vent with damp cloth only. Avoid excess cleaning uid dripping through the vent holes.
Make sure oor is dry before next tanning customer enters booth.
Over time, the hand straps will become soiled. They can be removed and washed with warm soapy water.
The walls, ceiling and framework can be cleaned with any mild NON-ABRASIVE cleaner and a soft cloth. Ivory liquid
and warm water works well. DO NOT ALLOW WATER OR ANY LIQUID CLEANERS TO COME IN CONTACT WITH THE
FLUORESCENT SOCKETS OR SUNLAMPS.
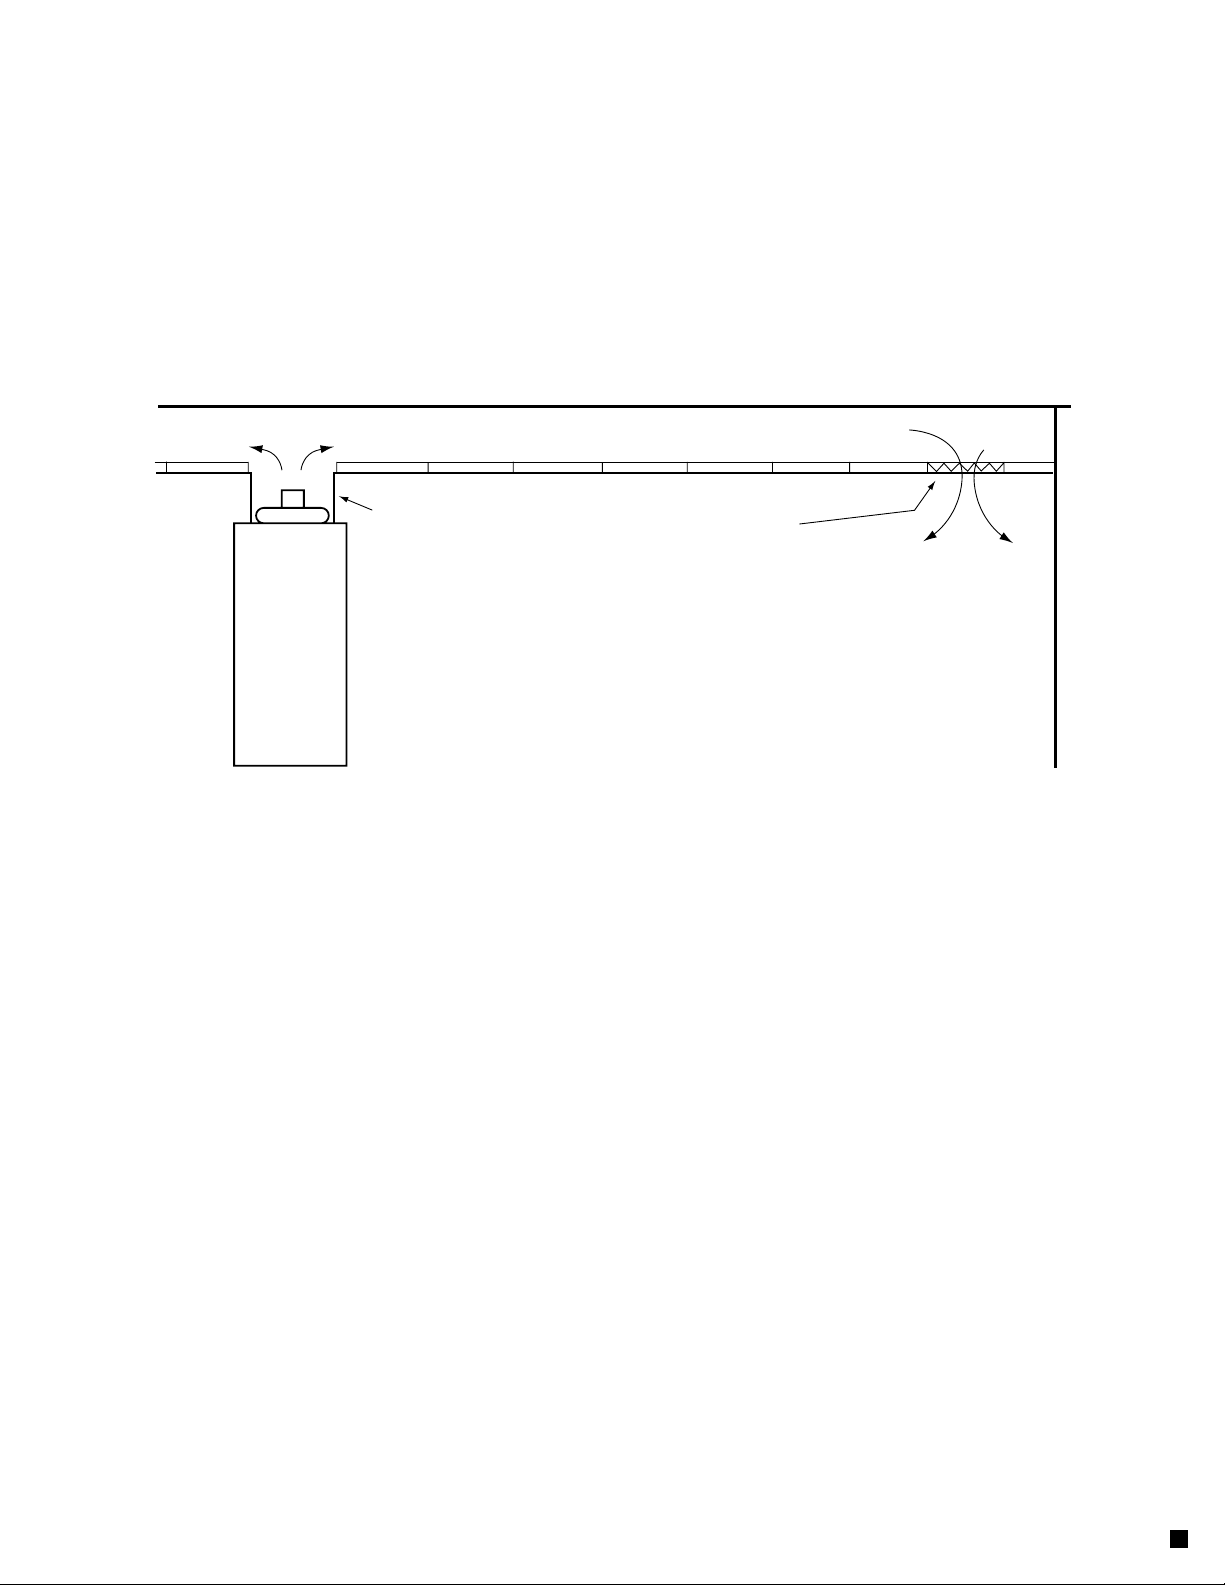
DANGER – Never service the fan without rst unplugging fan motor from junction box and shutting off power to the Sun
Capsule. The fan blade should be cleaned when any noticeable build-up of dust is noted. On 160 Watt and 200 Watt Sun
Capsules remove the grill from inside the booth and carefully wipe down the fan blades (use extreme caution, the edges
of the blade are sharp) and surrounding grillwork. On 220 Watt Sun Capsules, carefully remove the upper fan assembly by
removing 4 screws holding it in place. Be careful not to bend blades when removing or re-installing.
The lamps and guards can be cleaned using a vacuum cleaner with a soft furniture duster attachment.
Periodically, the lamps should be removed and wiped clean. NEVER USE ABRASIVE CLEANERS anywhere in the Sun
Capsule.
ACRYLIC FRONT PANELS ONLY – When cleaning the wall panels do not use anything except Brillianize or
equivalent high quality acrylic cleaner with a soft cloth. Use of products, such as Windex or paper towels, will result in
damage to the panels and void warranty.
TIMER OPERATION – Your digital timer is solid state in design, giving you years and years of accurate and reliable
timer settings. If you add a timer cord longer than 90’ in total length, a transformer will be necessary to boost the 24 volt
signal from the booth to the timer.
If using the timer in stand alone use:
Setting the Timer – After each session, your digital timer will read “0”. To enter session time, simply press the /\ button
until the desired time appears in the “window”. If you go past the desired time, keep pressing the /\ button until the
correct time is reached. 6

Starting the Tanning Session – The tanning session can be activated in two ways. (1) You can press the “START/STOP”
button on the timer, or (2) your customer can press the “START” button in the Sun Capsule when they are ready to start
tanning. #2 is the recommended procedure.
Stopping the Tanning Session – The tanning session can be terminated in two ways. (1) Press the “START/STOP” button
on the timer. (2) the customer can place the “EMERGENCY SHUT OFF SWITCH” on the panel in the Sun Capsule to the
“OFF” position. Note: Both these methods will terminate the tanning session but the time will continue to count down.
If the customer decides to place the “EMERGENCY SHUT OFF” switch in the “ON” position, the tanning session will be
reactivated, if there is still time remaining on the digital read-out.
IMPORTANT – “Emergency Shut Off” switch must be in the “ON” position before the Sun Capsule can be reactivated.
If using the timer with a database system:
Your Sun Capsule timer is compatible with most popular database systems. The Sun Capsule timer port for the daisy
chain connection to the database takes a CAT-5 cable. If requested, this cable is supplied with your Sun Capsule timer.
The CAT-5 cable, along with an adaptor and the RJ22 cable, joins in your daisy chain line the same as all your other
equipment.
When using the Sun Capsule timer with a database system the database over rides any manual control of the timer.
Therefore, you will only be able to set time to the Sun Capsule through your database system.
HOUR METER – The hour meter is located on the control panel above the “LIGHT” switch. It is non-resettable. It will
allow you to keep track of total hours as well as when to change or rotate your sun lamps.
NOTE: The last digit is in “tenths” of 1 hour. It is easier to ignore the last digit and read only full hours. Example: 00015.2
is actually a little more than 15 hours.
EMERGENCY ENTRY KEY – The Emergency entry Key is on a chain (to prevent loss or misplacement) on top of the
booth, mounted to the ceiling above the door.
CHANGING OVERHEAD LIGHT – Do not exceed 10 watt, 12 volt bulb. NOTE: If you have the optional Illumination
Package, a 50 Watt MR16, 12 Volt Lamp is required. Keep ngers from touching replacement bulb.
PEAK PERFORMANCE
Your Sun Capsule is the fastest vertical tanning system on the market today. It is a nely tuned, ultra-high performance
tanning system, but you must be aware of the following factors that affect the tanning capabilities of the system.
VOLTAGE: Your system requires a minimum of 230 volts. A running voltage between 230 to 235 volts is required to
attain peak performance. Please factor in the effect of other equipment running in the salon at the same time. In most
cases a buck boost transformer will be necessary to achieve proper running voltage.
PROPER COOLING IS THE KEY TO PEAK PERFORMANCE AND LONG LAMP LIFE.
ROOM TEMPERATURE: Optimum performance can only be attained provided you supply adequate cooling to the
system to begin with. To insure the highest output from your system, your room temperature should be between 73ºF
and 80ºF. Room temperatures higher than or lower than the above temperatures may adversely affect the performance of
the lamp. In the case of higher room temperatures, lamp life can be decreased as well.
Do not obstruct wall panel intake ports.
Do not feed air-conditioned air directly into the Sun Capsule. This will cause over-cooling of the lamps and reduced
performance.
Keep the unit at least 6 inches away from any wall or obstruction and 12” from another Sun Capsule or tanning system.
Air must be allowed to ow freely into the unit through the Fast Flow Floor Vent.
FAN OPERATION: Your Sun Capsule cooling fan is equipped with an adjustable delay timer that is preset at the factory
for approximately 4 minutes. This allows for proper lamp cool down after each session. Anytime the Sun Capsule is
energized, the 4 minute fan delay will be automatically activated.
7

VENTING/DUCTING OF FAN – It is important to keep the ambient temperature in the vicinity of the Sun Capsule
between 73 F – 80 F. If you have very high ceilings or if your Sun Capsule sets in a very large open area, it may not be
necessary to vent the exhaust air from the fan.
If you have low ceilings or the Sun Capsule is in an enclosed room, it is important to employ a ducting system to remove
the hot air.
If you have a “suspended” ceiling with a generous amount of dead air space above, the least expensive way of removing
the hot air would be to fabricate a duct that would enclose the space between the fan motor grill and the suspended
ceiling, allowing the air to ll the dead air space. See diagram.
IMPORTANT: Do not choke or restrict the airow from the fan with ducting. Any reduction
of airow from cooling fan will result in a decrease in performance, overheating and potential damage to the VHR
sunlamps.
You must take some things into consideration when doing this. First you must have a way to get rid of the hot air in the
dead air space or back pressure will build up, causing the temperature to rise in the Sun Capsule.
To accomplish this, install plastic A/C return grids near A/C ducts in your salon, allowing the air from the dead air space to
lter down throughout your salon and mix with conditioned air.
If your Sun Capsule is in an enclosed room, you must make sure that you bring air into the room as fast as you take it out.
This can be done with a full louvered door leading into the enclosed room. Keep in mind, whatever you do, you must
replace the air being taken out of the room with an equal amount of fresh air.
Another method is to install more A/C. To determine the proper amount of A/C, consult your HVAC expert. Give them the
total number of sunlamps and wattage of your specic model. That information will help them recommend what the best
solution is for your given situation. Do not feed conditioned air directly into the Sun Capsule.
CHANGING STARTERS – Your Sun Capsule is equipped with electronic starters that carry a 10 year warranty from
the manufacturer of the starters. Should a starter fail within that time period, the starter will be replaced free of charge
according to warranty procedure.
LAMP END BLACKENING – Due to the high operating temperatures of the VHR sunlamps, lamp end blackening will
occur. This does not adversely affect performance.
PROPER LAMP INSTALLATION – The manufacturing process of a sun lamp creates a phosphor coating that is
slightly thicker at one end of the lamp than the other. By installing every other lamp with the manufacturer’s label at the
“top” (and every other lamp with the label at the bottom) a more uniform UV output will be attained.
LAMP REPLACEMENT
REMOVING LAMP GUARDS: Each lamp guard is fastened to each lamp xture with two fasteners at the top, two in
the middle and two hooks at the bottom. Using a Phillips head screwdriver, back out the four fasteners and gently raise
the lamp guard up and away from the lamp xture.
PLASTIC A/C
RETURN GRID
DUCT
DEAD AIR SPACE
8

REMOVING LAMPS: Rotate lamps until pin aligns with opening in socket. Be careful not to bend or break pins when
removing lamps.
LAMPS FOR LIFE FOR LESSTM: When you purchase a Sun Capsule you are automatically enrolled in Sun Capsule’s
Lamps For Life For LessTM program giving you access to the absolute lowest prices for all your lamp needs.
Call 1-800-272-8267 for details.
INSTALLING LAMPS: Start by placing bi-pins in bottom socket, making sure to line up pins with slot on bottom
socket. Next, insert top bi-pins in slot in top socket. Rotate lamp 90 degrees, making sure lamp socket is locked in place
at both ends.
VERY IMPORTANT: Each VHR® lamp has a reector built into the lamp. The reector encompasses the solid white portion
of the lamp. This must be rotated to the rear, enabling all UVA/UVB to be directed toward the customer.
When lamp is properly installed, label will be facing you.
INSTALLING LAMP GUARDS: Before you install lamp guards, make sure all lamps are working properly. Position
lamp guard on the lamp xture by inserting the hooks at the bottom of the lamp guard into the appropriate slots at the
bottom of the xture. Push the lamp guard down until the top holes in the lamp guard align with the top holes in the
xture. Align and insert the fasteners into threaded inserts and tighten securely.
TANNING THE LOWER LEGS – For some people the lower legs may tan slower than the rest of the body. Suggest to
the customer that a wider stance (legs close to the left and right xtures) will accelerate the tanning of the lower legs.
INDOOR TANNING LOTIONS, OILS AND MOISTURIZERS – You should carry at least one or two lines of top
quality indoor tanning products. A good pre-tan base gel is recommended during the rst week of tanning. After a base
tan has been achieved, usually 4-5 sessions, an accelerator or amplifying lotion or oil can be used to enhance the tanning
process.
Moisturizers should be encouraged throughout the tanning program. They should be applied after tanning. A lip
protector should be used during tanning since the lips have no ability to produce melanin for protection.
REMEMBER: The tan produced by the Sun Capsule is a rich dark cosmetic tan. Make sure your customers understand
that AN INDOOR TAN WILL NOT PROVIDE ADEQUATE PROTECTION AGAINST OVER-EXPOSURE TO NATURAL SUNLIGHT.
CAUTION: Your system is equipped with a Fast Flow Floor Vent. It is advisable to avoid any spray-type lotions or oils.
The vaporized lotions will be carried throughout the tanning system via the rapidly moving air passing through the vent,
resulting in slippery oors and cause for frequent clean up.
9

10

11

12

13
ASSEMBLY INSTRUCTIONS TABLE OF CONTENTS
. . . . . . . . . . . . . . . . . . . . . . . . . . . . . . . . . . . . . .
. . . . . . . . . . . . . . . . . . . . . . . . . . . . . . . . . . . . .
. . . . . . . . . . . . . . . . . . . . . . . . . . . . .
. . . . . . . . . . . . . . . . . . . . . . . . .
. . . . . . . . . . . . . . . . . . . . . . . . . . . . . . . . . . . . .
. . . . . . . . . . . . . . . . . . . . . . . . . . . . . . . . .
. . . . . . . . . . . . . . . . . . . . . . . . . . . . . . . .
. . . . . . . . . . . . . . . . . . .
. . . . . . . . . . . . . . . . . .
. . . . . . . . . . . . . . . . . . . . . . . . . . . . . . . . .
. . . . . . . . . . . . . . . . . . . . . . . . . . . . . . . .
. . . . . . . . . . . . . . . . . . .
. . . . . . . . . . . . . . . . . . . . . . . . .
. . . . . . . . . . . . . . . . . . . . . . . . . . . . .
. . . . . . . . . . . . . . . . . . . . . . . . . . . . . . . . . . . . .
. . . . . . . . . . . . . . . . . . . . . . . . . . . . . . . .
. . . . . . . . . . . . . . . . . . . . . . . . . . . . . . . . .
. . . . . . . . . . . . . . . . . . . . . . . . . . . . . .
. . . . . . . . . . . . . . . . . . . . . . . . . . . . . . . . . . . .
. . . . . . . . . . . . . . . . . . . . . . . . . . . . . . .
. . . . . . . . . . . . . . . . . . . . . . . . . . . . . . . . . . . .
. . . . . . . . . . . . . . . . . . . . . . . . . . . . . . . . . . .
. . . . . . . . . . . . . . . . . . . . . . . . . . . . . . . .
. . . . . . . . . . . . . . . . . . . . . . . . . . . . . .
Very Important
Ready To Begin
Attaching Wall Panel Standoffs
Inserting Wall Panels In Corner Pieces
Ceiling Installation
Installing Inside Fan Guard
Lamp Fixture Installation
Installing #6 Lamp Fixture - 220 Watt SCII Only
Installing #6 Lamp Fixture 160/200 Watt SCII Only
Threshold Installation
Door Assembly Installation
Installing #6 Lamp Fixture - Sun Capsule I Only
Installing Grab Bar to #6 lamp xture
Installing Fan Shut Off Switch
Installing Fan
Installing Overhead Light
Mounting Junction Box
Speaker and Stereo Hookup
Final Adjustments
Peak Performance Voltage
Wiring Diagrams
System Schematics
Trouble Shooting Guide
Warranty and Warranty Card
15
16
17
17
19
20
21
22
23
24
24
25
25
25
26
26
27
27
27
28
29
33
35
38

ASSEMBLY INSTRUCTIONS
5.5 Sided Sun Capsule Tanning Systems
With and Without Attached Dressing Rooms
IMPORTANT
A voltage between 230 to 235 volts* is required WHEN THE UNIT
IS RUNNING to attain peak performance. Most salons experience
a voltage drop of approximately 6 to 7 volts when the unit is in use.
Also factor in the effect of other equipment running in the salon at
the same time. A buck-boost transformer may be required to provide
optimum voltage.
*Export Systems Only: 50 Hz systems must operate between
220 volts and 225 volts.
NOTE: An insulated earthing conductor that is identical in size,
insulation material and thickness to the earthed and
unearthed branch – circuit supply conductors except that it
is green with or without one or more yellow stripes is to be
installed as part of the branch circuit that supplies the unit or
system. The earthing conductor described is to be connected
to earth at the service equipment, or if supplied by a
separately derived system, at the supply transformer or
motor – generator set.
“Unit must be wired by an authorized electrician in
accordance with the National Electrical Code, ANSI/NFPA
70-1987, as well as all local codes.”
!
Sun Capsule II (With Attached Dressing Room)
Sun Capsule I (Without Attached Dressing Room)
14

VERY IMPORTANT
READ THE FOLLOWING BEFORE YOU
BEGIN ASSEMBLY.
Take the time to familiarize yourself
with certain components that make
up the Sun Capsule before you
attempt to assemble the unit.
The following photos concentrate on the
assembly of a Sun Capsule with a dressing
room. The procedures are the same for a
Sun Capsule without a dressing room
For simplication purposes the Sun
Capsule without a dressing room will be
referred to as a Sun Capsule I. The Sun
Capsule with a dressing room will be
referred to as a Sun Capsule II.
The new modular design Sun Capsule
tanning units have been engineered to be
just about “Murphy proof” if you read the
assembly manual.
The photos concentrate on the assembly of
the shell, and some inherent problems and
solutions that may be encountered during
installation.
The surface that the unit is to be
assembled on will determine the degree of
difculty during assembly. If the surface
is basically at and level, the assembly
is usually quite simple. Unfortunately,
some surfaces are not at and level and
shimming of the booth may be required.
The assembly of the Sun Capsule will
require temporary assistance for certain
procedures. It may seem awkward at rst,
but once you’ve learned the “tricks-of-the
trade”, assembly should be effortless.
The Sun Capsule I has 4 wall panels with
ventilation ports. NOTE: on 160/200 Watt
models, two (2) ventilation ports are higher
than the others (Fig 3). It is extremely
important that they are installed in the
correct order for proper staggering of the
lamp xtures (Fig 2). On 220 Watt models,
all ventilation ports are the same height.
The Sun Capsule II has 10 wall panels:
4 wall panels with ventilation ports and 6
solid wall panels.
The 4 wall panels with ventilation ports
are designed to aid in the cooling of the
sunlamps. NOTE: on 160/200 Watt models,
two (2) ventilation ports are higher than
the others (Fig 3). It is extremely important
that they are installed in the correct order
for proper staggering of the lamp xtures
(Fig 1). On 220 Watt models, all ventilation
ports are the same height.
The 6 solid wall panels are used to create
the dressing room portion of the unit. One
of the solid panels has two pre-drilled
holes for mounting the double coat hook.
Make sure panel is positioned with pre-
drilled holes closest to the ceiling in exact
location as shown in Fig 1. One panel has
a pre-drilled hole for the retaining magnet.
Make sure panel is positioned with hole
closest to ceiling in exact location as
shown in Fig 1.
The Sun Capsule I has 5 corner pieces:
(1) doublewide corner piece, (2) without
pre-drilled holes (red labels), (2) with pre-
drilled holes for door mounting(green
labels) (Fig 2)
The Sun Capsule II has 11 corner pieces
including (2) reverse bend corner pieces
and (1) doublewide corner piece. (Fig 1)
The Sun Capsule II contains two “reverse
bend” corner pieces. These are used at the
mid-points of the booth. Set these aside
until needed (Fig 1).
IMPORTANT: Examine all framework
corner pieces. Two corner pieces have
three (3) pre-drilled holes and have green
identifying labels. These corner pieces
are for mounting the door assembly. Set
these aside and use them at the front of
the booth where the door opens.
On Sun Capsule II’s, two corner pieces
have red identifying labels. These are to be
used in the tanning area only – their angle
is slightly different than the angle of those
used in the dressing room.
HARDWARE LIST
A. Protective Eye Wear (1 pair)
B. Stand Offs for Lamp Fixture
Mounting (20)
C. Stand Off Mounting Bolts -20 x 1”
Phillips Truss head bolts (20)
D. Hardware for Dress Plate and Door
Assembly #8 x 3/8” Sheet Metal
Screws (10)
E. Fan Screws #14 x “ Phillips Pan
Head (8)
F. Threshold/Kick Plate Hardware
10-32 Machine Screw & Lock Nut (2)
#10 Sheet Metal Screw (1)
G. Fan Shut Off Switch with Cord
H. 12 volt Overhead Courtesy Light
I. 4 Pin Speaker Wire
J. 5 Pin Timer Interface Cable
K. Shims
L. Grab Bar with Hardware
Sun Capsule II Only
M. Inside Door Handle with Hardware
N. Double Coat Hook and Hardware
O. Retaining Magnet, Washer
& Hardware
P. Hinge Pins and Sleeve
Q. 160/200 Watt Only:
Stop Pin and HardwareWhite,
R. Decorative Plastic Plugs (4)
for the Back of the #6 Fixture
15
A
B C
D E
G
H
I
J
L
K
F
M N
O
P
Q
R
Sun Capsule II Only

READY TO BEGIN
IMPORTANT: Do not remove protective
cardboard from Fast Flow Floor Vent until
booth is completely assembled.
Floor Saver Template: Included with your
system is a 1/8” Masonite template that
closely resembles the shape of your Sun
Capsule. Its purpose is to protect your
carpet or ooring from the effects of the UV
light that lters through the vents in the Fast
Flow Floor.
Place the template, smooth side down, in
the exact spot your Sun Capsule will occupy
once it has been assembled (Fig 5). For
proper cooling of the high performance
tanning lamps (and your customers) your
Sun Capsule must be kept a minimum of 6”
away from any wall or obstruction. Keep in
mind the template is 3 inches smaller all the
way around than the actual size of the Sun
Capsule (Figure 4).
Floor Assembly: Center oor assembly
on Floor Saver Template. (Fig 6). Do not
remove protective cardboard until entire
assembly is completed.
WALL
PANEL
WITH
LOW
VENT
PORT
WALL
PANEL
WITH
HIGH
VENT
PORT
WALL
PANEL
WITH
HIGH
VENT
PORT
WALL
PANEL
WITH
LOW
VENT
PORT
REVERSE
BEND
CORNER
PIECE
Red Label
Double Wide
Corner Piece
High vents on
160 / 200 Watt
units only.
Red Label
REVERSE
BEND
CORNER
PIECE
2
3
4
5
RETAINING
MAGNET
MOUNTING HOLE
COAT HOOK
MOUNTING
HOLES
1
PRE-DRILLED
DOOR CORNER
PIECE (green) Decorative
Wall Panels
Decorative
Wall Panel
Left
Decorative
Wall Panel
Right
PRE-DRILLED
DOOR CORNER
PIECE (green)
FIG
6
6"
TEMPLATE
9"
BOOTH OUTLINE
6"
9"
8 1/2"
11 1/2"
FIG
4
FIG
5
FIG
3
FIG. 1
Conguration for 160 and 200 Watt units only.
PRE-DRILLED
DOOR CORNER
PIECE (green)
PRE-DRILLED
DOOR CORNER
PIECE (green)
Red Label
Double Wide
Corner Piece
High vents on
160 / 200 Watt
units only.
Red Label
1
2
3
4
5
6
FIG. 2
1 2 4 5
16
Decorative
Wall Panel
Left
Decorative
Wall Panel
Right

Attaching Wall Panel “Standoffs”: The four
vented wall panels have four pre-drilled
mounting holes. Insert ” mounting bolts
(Hardware List Item C) through wall panel
and secure with stand off (Hardware List
Item B) as shown in Fig 7 & Fig 8. Make sure
standoffs are installed on interior white side
of panel.
NOTE: Make sure bolt head is on exterior
side of panel. (Fig 8)
Do this for all four vented panels.
Locate doublewide corner piece - make sure
vent hole is closest to oor.
Raise both bottom latches on doublewide
corner piece as shown in Fig 9 and place
the double wide corner piece in the position
indicated in Fig 10. Make sure white corner
piece trim rests behind both catches. (Fig 9)
Close Latches. (Fig 11 & 12)
NOTE: Latch is spring loaded, use caution
when opening or closing latch.
Doublewide corner piece should stand on
its own once it is latched into place. It is
advisable that someone “steadies” assembly
until next panel is installed.
INSERTING WALL PANELS
Insert wall panel at angle as shown in Fig 13.
REMINDER: On 160 Watt and 200 Watt units,
there are 2 wall panels with a high vent port
& 2 wall panels with a low vent port. Begin
with a wall panel with a high vent port (Fig.
3). This will achieve proper lamp xture
height when the unit is complete. On 220
Watt models, all ventilation ports are the
same height.
Top
Bottom
Interior
White Side
of Panel
Stand Off
Exterior Side
of Panel
Bolt Head
FIG
9
FIG
8
FIG
7
FIG
12
FIG
11
FIG
10
FIG
13
17

Pull panel down and into corner piece
(Fig 14) pushing wall panel completely into
corner piece at both top and bottom (Fig 15).
Pull down on panel to make sure it is tight
against the oor (Fig 14).
Install appropriate wall panel on other side
of double wide corner piece (Fig 1 or 2)
using above techniques. (Fig 16)
NOTE: Feel the top edge of corner piece
to make sure wall panel is all the way into
corner piece. (Fig 15)
Install both corner pieces with red
identication labels (Fig 1 or 2) on wall
panels, making sure white corner piece trim
rests behind “catch”. (Fig 17 & 18)
WORKING TIP: Raise latch on corner piece
assembly to “up” position before installing.
Remember, starting the corner piece at
an angle allows for corner piece to slide
on easier (Fig 17). Push corner piece
completely on to wall panel.
Close Latch
Install remaining vented wall panels.
SUN CAPSULE I ONLY: Install two remaining
corner pieces with pre-drilled holes for door
assembly (green label). Make sure pre-
drilled holes are mounted as shown in Fig
25. Proceed to ceiling installation - page 19.
SUN CAPSULE II ONLY: Install reverse bend
corner pieces and fasten latches. (Fig 19)
Refer to Fig 1 for proper location.
Install wall panels in reverse bend corner
pieces
Install cornerpieces on both wall panels and
secure bottom latches
Attach retaining magnet to interior side of
wall panel (Fig 1 for location) with acorn nuts
on exterior of panel(Fig 20). See Hardware
List Item O.
Install wall panel with retaining magnet.
(Fig 1)
FIG
15
FIG
16
FIG
14
FIG
20
FIG
19
FIG
17
FIG
18
18

SUN CAPSULE II ONLY (CONTINUED)
COAT HOOK: Attach Coat Hook to wall panel
as shown in Fig 21.
Install wall panel with coat hook into
remaining reverse bend corner piece. (Fig 1)
Insert corner pieces on both wall panels &
secure bottom latches. Be sure not to use
corner pieces with pre-dilled holes. (Fig 22)
Install remaining wall panels. (Fig 23)
NOTE: Decorative wall panels have a “Left”
and “Right” indicator at the top as viewed
from the front (Fig 1).
Install two remaining corner pieces with pre-
drilled holes for door assembly (green label).
Make sure pre-drilled holes are mounted as
shown in Figure 24 & 25.
VERY IMPORTANT: Make sure that all
wall panels are seated completely into
corner pieces & are tight against the oor.
Otherwise ceiling will be impossible to
install.
CEILING INSTALLATION:
Place all upper latches in open position
before installing ceiling (Fig 26).
NOTE: It is recommended that persons 5’9”
or taller attempt this procedure, unless
shorter people are equipped with platform
shoes.
CAUTION: The ceiling must be handled by
two people, otherwise bodily injury and/or
damage to the ceiling may result. (Fig 27)
Set the ceiling in place, making sure that
all of the wall panels and corner pieces fall
within the ceiling trim. (Fig 27)
Be careful not to scratch the ceiling.
WORKING TIP: Start by making sure the wall
panels and corner pieces at the back of the
booth fall within the ceiling trim rst. Then
work your way around to the front.
FIG
23
FIG
22
FIG
21
FIG
26
FIG
25
FIG
24
FIG
27
19
Pre-Drilled
holes for
door
assembly
Table of contents
Other SUN CAPSULE Tanning Bed manuals