Sune SE-A302 User manual

Mercedes-Benz Parking Assistant System Easy Operation Manual
——————————————————————————————————————————————————————————
Audi A3 8V
7" Multimedia HD Capacitive touch screen
installation manual
CarNavi-Tech Model: SE-A302
SUNE TECHNOLOGY ELECTRONIC CO.,LTD
No.9,Lane 606,Anping Rd,Tainan City
70849,TAIWAN
TEL:+88662292246 FAX:+88662288104
Http://www.sune-tech.com
Shop http://www.carnavi-tech.com
SKYPE:sune_tech or hsin_
CarNavi-Tech

Accessory List
7inch HD Capacitive touch screen:1pcs Handle special camera:1pcs
HD screen pcb board:1pcs
Video interface built-in system:1pcs
LVDS cable,Camera cable,Av in/out
cable,GPS Antenna,Plug & play
harness: Each 1pcs
CarNavi-Tech

2
5.Remove the glove box near the door
red circle at the fixing screws
6.Remove the glove box red circle at
the bottom of two screws
7.Open the trunk. Remove the
red circle screws
8.Apart inside the trim, removing the
handle screws, remove the original
handle replaced handle camera, you can
replace the original car handle functions
CarNavi-Tech

3
9.Remove the red circle position two
side clips, remove the trim and
gracefully camera line
10.Camera line from the original car
casing through
11.The camera line penetrate the body 12.The camera wire and wire-ting long
butt, pulled in front of the docking module
CarNavi-Tech

Installation Operating Instructions
4
13.Remove the air conditioning
vent, turn on the screen screws, as
shown above
14.Tilt the screen with a rocker, as
shown above
15.Remove of the screen screws,put
the matching circuit board, as shown
above
16. The first black box underneath the
screen removed, then remove the black
bars on both sides of the screen, the turn
on fixed firefly
Curtain screws, then put 7-inch LCD
screen, as shown above
17. The touch-screen cable insert into power
cable. No. 1 Green ,No.2 white,No.3
yellow,No.6 Red(Brown), as shown above
18.Use plug&play harness into
MMi system Cd player
CarNavi-Tech

20.Start the engine Hanging reverse
gear Check module is working or not
PS:
1.If your car with Manual transmission it will not auto change to camera,you must
need set Dip switch 3 up,connection,"360 12V input" Blue wire to back light 12V.
2.If your car with Original camera,Dip 4 must UP,when you on "R" the screen will
goto original camera screen.
19. Remove original LVDS cable(pink) from the
car into the interface LVDS output, interface
black LVDS cable into the original car LVDS
connector another side plug into the interface
LVDS input connector, the other line was
inserted into the interface to the corresponding
connector, as shown above
5
CarNavi-Tech

DTV,DVD Model selection
Factory IR touch code default : DTV type -for Taiwan DTV(option)
DVD DVR type-for Taiwan DVD DVR(option)
DVD input
For touch code option
DTV input
For touch code only for Taiwan use
DTV input
All function you can touch on touch screen
to control function
Our DTV can works on follow country,please check
DVR input
All function you can touch on touch
screen (option)
CarNavi-Tech

Function
1.System language : English,Chinese 2.Touch the screen(more than 2sec.) or click
"Menu" button(more than 2sec.),will change to
multimedia system
3.Click GPS or use MMI system to goto GPS sysem,
will running IGO Tomtom or route66 map
4.DVD player or DTV input(option)
6
5.There are Six buttons on GPS screen:
1.)Goto OEM screen
2.)Goto Multimedia interface screen
3.)Music player (MP3、WMA、WAV)
4.)video player(Play 720P video file format
MP4,3GP、MOV、AVI、DIVX、XVID、WMV、MPG、RM、RMV
B、FLV、MKV
5.)Goto GPS
6.)Cancel menu
6.360 or DVR input(option)
CarNavi-Tech

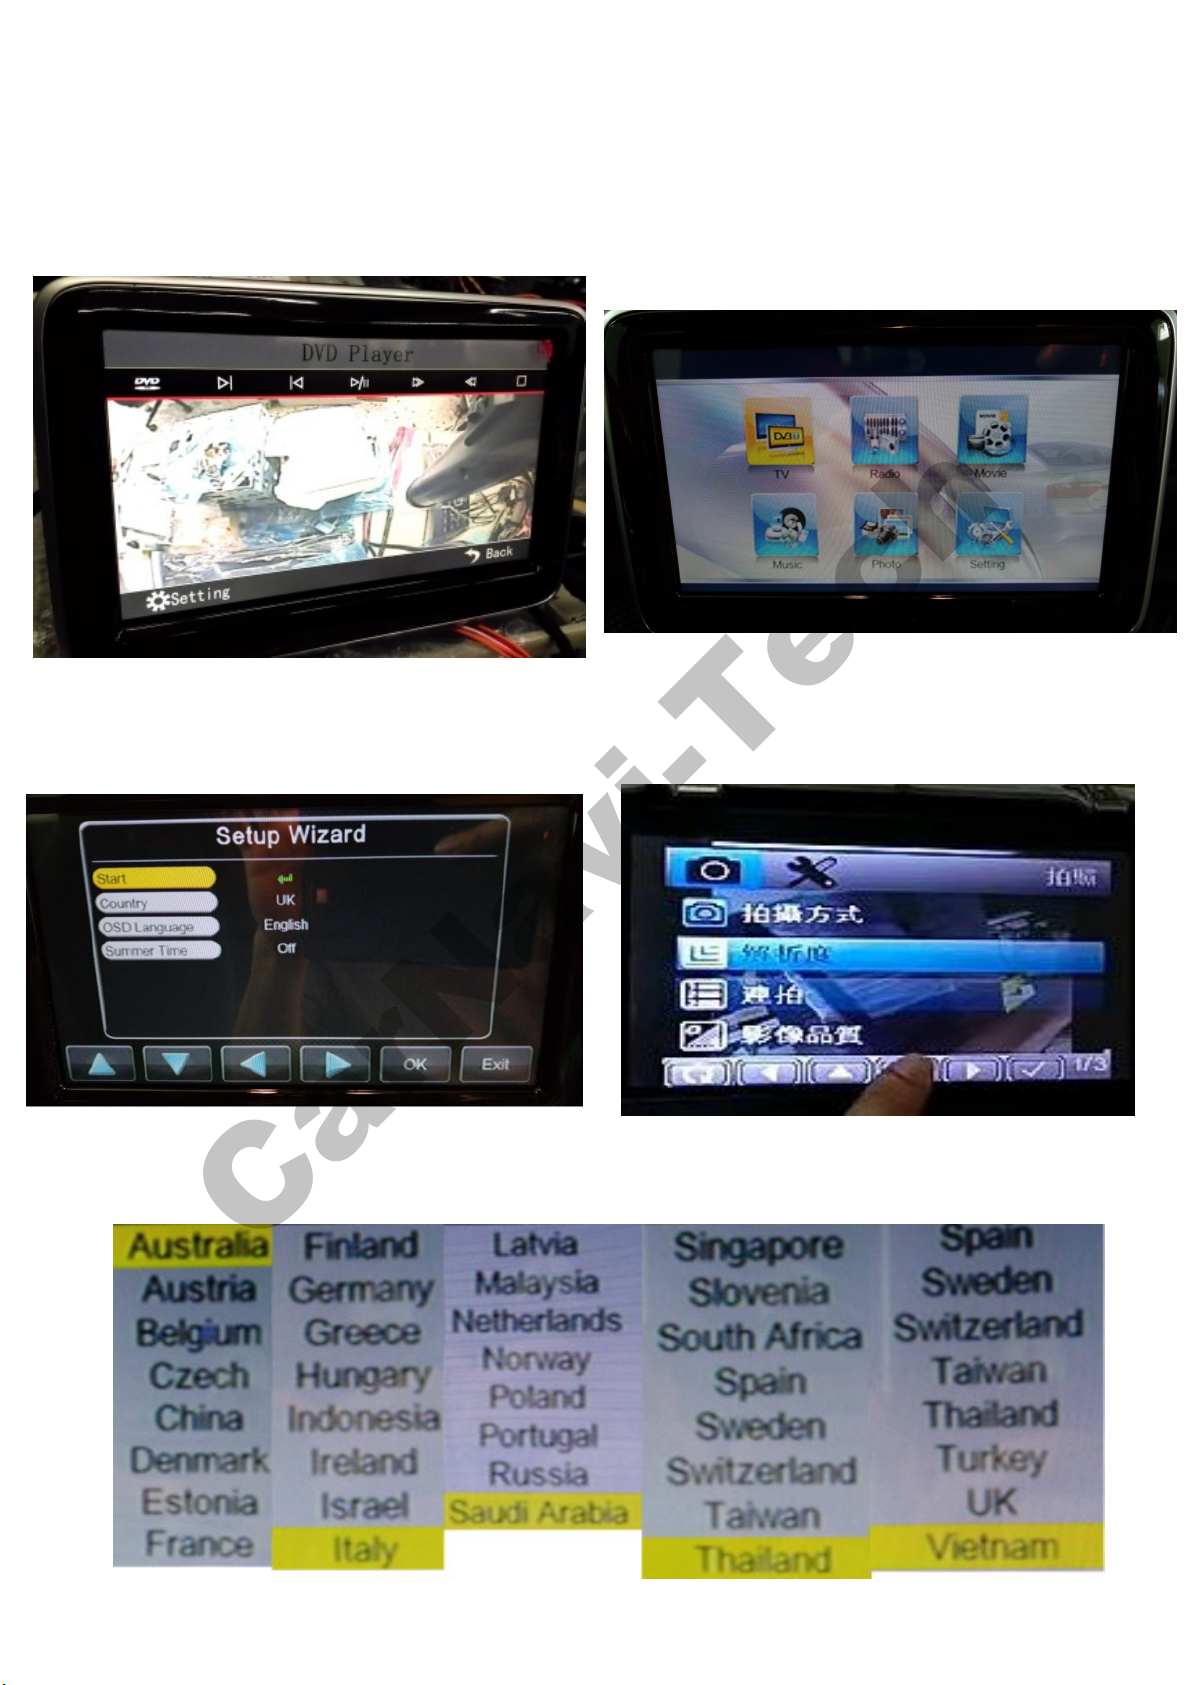
1.In addition to reversing the screen, the other screen all support touch screen
operation, when the original screen switches to the multimedia interface can
touch the touch screen by tapping.
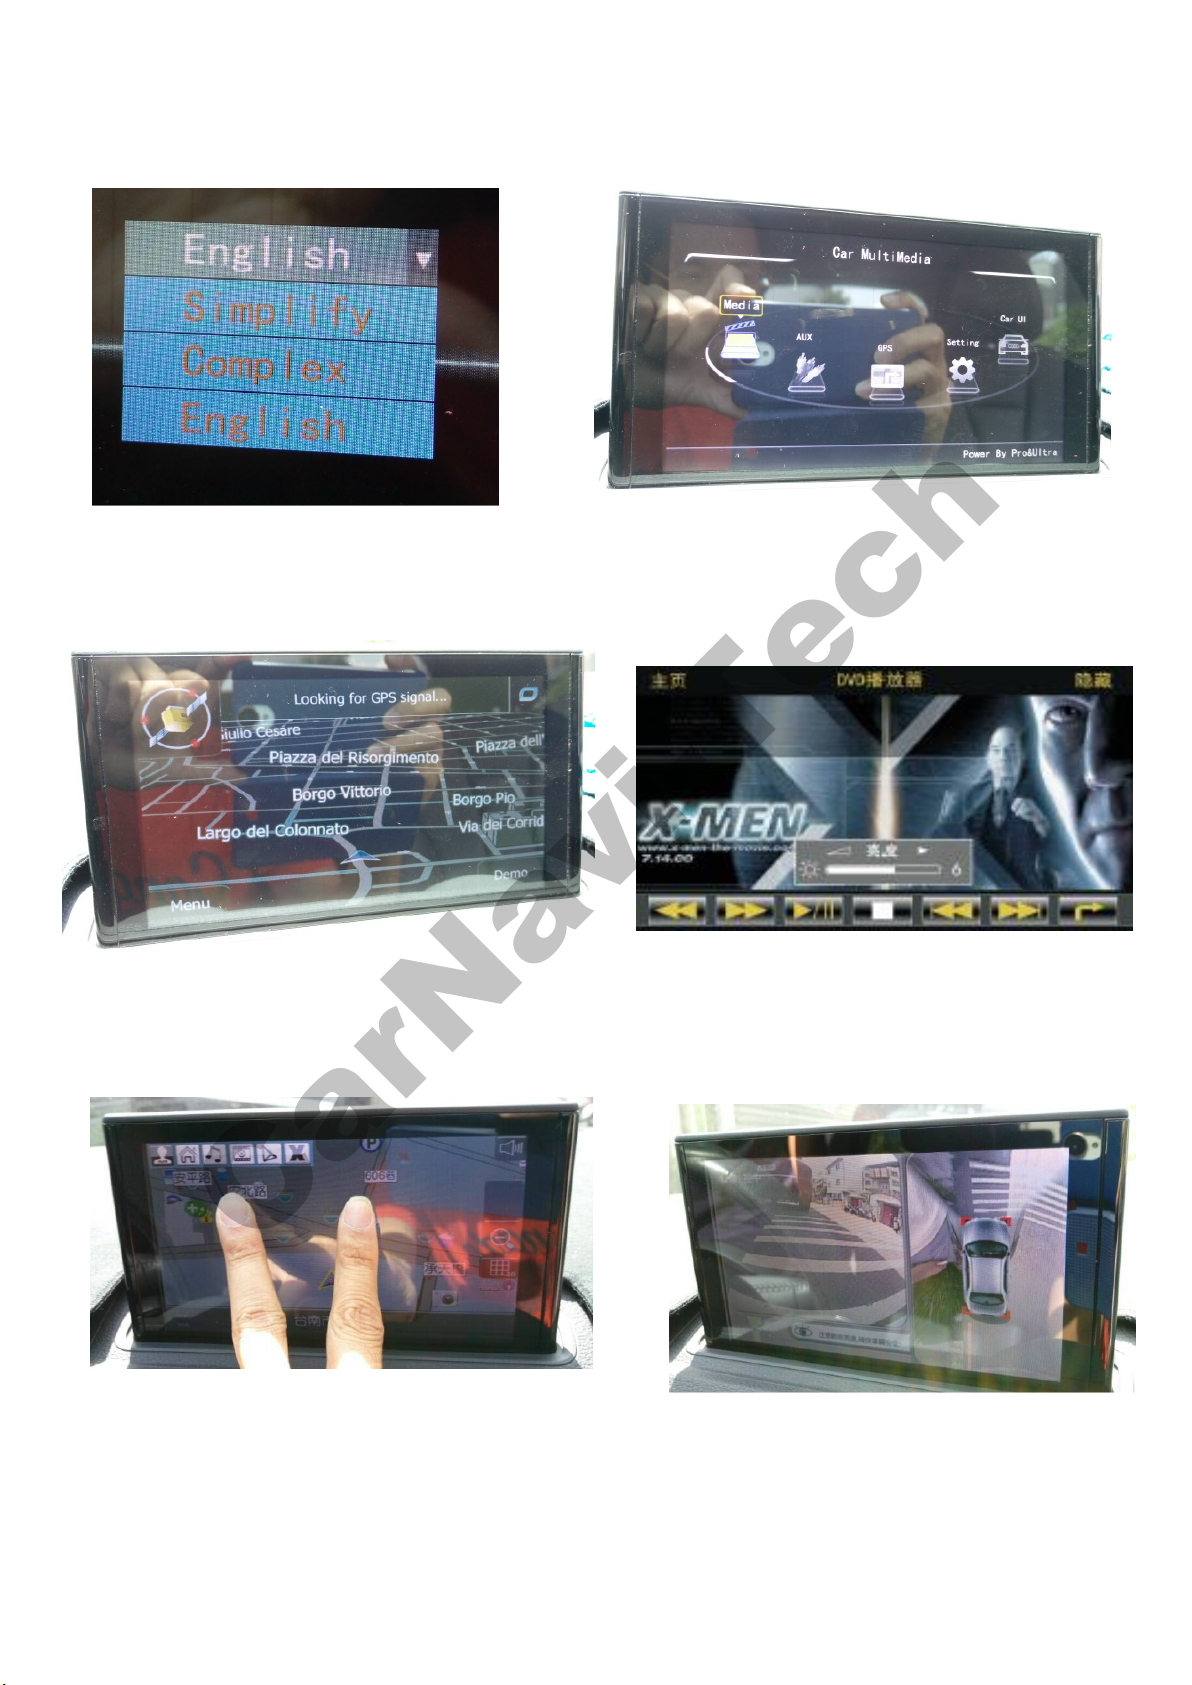
2.On original screen long press "MENU" button (approximately 2 seconds) to
switch to Multimedia Interface , a single finger press touch screen (about 2
seconds) can also be switched to the multimedia interface.
3.In the multimedia interface can be in any picture press
"MENU" key, "NAV" key, "RADIO" key, "TEL" key, "MEDIA" key to return to the
original screen.
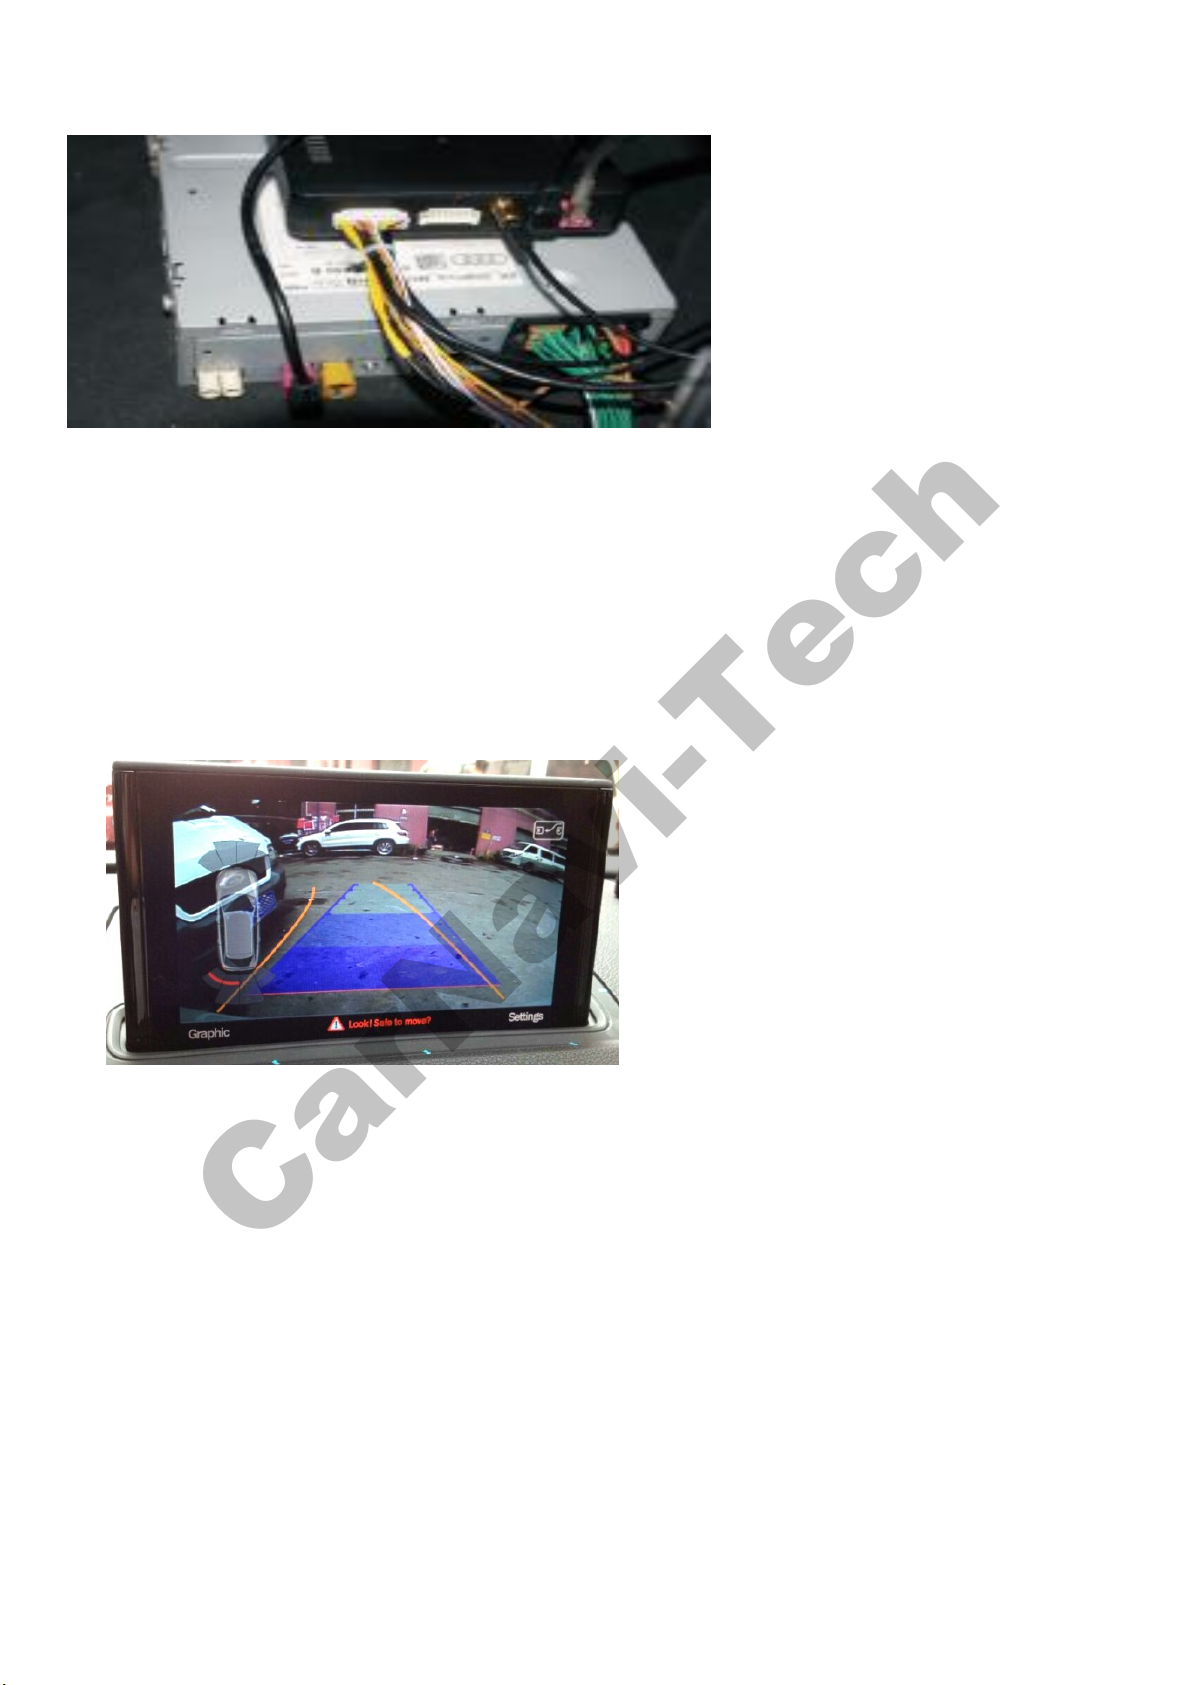
4.In Video Playback screen / navigation screen / Reverse camera preview state, press
the volume knob to the right to call out {contrast, brightness} adjustment menu, and
then you can press to select the current function of the volume knob to the right
through a short, left and right rotation adjustable parameters desired.
5.Except reversing camera screen, press the volume knob long by the
left(approximately 2 seconds) to switch to the reverse camera preview (without trace
and obstacle prompt) , then press the "MENU" button or "BACK" button exit preview.
6.In the menu display state can be rotated to adjust the upper left corner of the menu
by about the middle of the knob,Upper left corner of the menu is hidden can be 2 finger
touch screen or press the center knob to call up the menu,contrast and brightness
adjustment (item 4) Note, by the upper left corner of the menu can be entered by MP5
MP3 player.
7.All operational effect subject to the actual operation, the user can operate on their
own experience.
PS: All the pictures support the original car key operation, if no response,
please check the wiring is correct!
7
8.There are Six buttons on Gps screen when Two finger press touchpad:
CarNavi-Tech

*Press NAV button (hold more than 2 seconds):
1) Click on the GPS / digital TV / video /OEM screen
*Short on the NAV button :
1) goto original MMi system
9.
Factory setting:
1.Car without AMI system
2.Car without B&O sound system
PS:if your car with AMI or B&O sound system please info us after buy
it(cable different).
CarNavi-Tech
PS:For car with AMI need add 8 wires into pins,and Audio Output
must change to AMI RCA cable

System diagram
Dip switch
8
CarNavi-Tech
Table of contents