SunSetter 1000XT Original instructions

For Technical support visit us at ,
e-mail at @
Do Not Discard,
Retain for Future Reference
900XTXT
Awnings

ii
parts listed on
model Awning.
When installing your Awning, you will need to adhere to the . For the greatest
and
for the.
your Awning.
mounted directly on the wall, see for .
Refer to your
or call
us at

iii
ii
........................................................................iii
............................................................................
...........................................................2
3
4
4
.................
6
8
........................................
.........................................
.......................
........................................20
23

iv
Qty 15
Qty 60
Stainless Acorn Nut
Qty 15
Qty 1
Qty 60
Qty 1
Qty 1
Fabric Stop
Qty 1
Qty 1
Qty 1
Qty 1
Head Screw
(Used to reduce
fricon on Inner
Arms, if needed.)

1
Treated Header Board equal to the width of your Awning.
See for
Awning Rail Upper Bracket
Right Wall Bracket
Roller Bar
Fabric
Ground Bracket

3.
awnings greater than 16’, you should use three chairs
to support the Roller Bar during this process.
4. Remove the Roller Bar from the cardboard tube.
Separate the Awning Rail from the Roller Bar and
when facing the house. See .
Unit
6. Remove the Awning Fabric from the cardboard
tube. Pull back
so that
the opening is aligned with the Fabric Slot indicated
.
the end of the
Rolled up Fabric.
Fabric
set it aside.
Slide the Fabric the rest of the way onto the Roller
edge of the Fabric. Tighten the Fabric Stop with the
then Fabric, in
Fabric Slot
8.
into this Slot. Slide the Fabric Stop to
the opposite end of the Roller Bar and
9.
with the edge of the Fabric. See .
Side
Right
Side
Fabric Stop
end of the Roller Bar. Be sure that the Hem of the
Fabric is facing down while the Fabric is toward the
house. See .
Fabric Stop
Both Hem-Folds
in Hem.
Rolled
Fabric
Roller Bar
Fabric

the Roller Bar. See .
See .
.
Allen wrench.
20.
22.
23.
with the supplied Allen wrench.
24. , hold the Roller Bar from both
Roller Bar,
.
to Wind Fabric
House
Rolled Up Fabric
Screw. See .
26.
as possible,
with a to the top edge of
The Awning can be mounted
900XT, and XT and
See .
Awning Rail
Roller Bar
House
Fabric
Fabric Stop Fabric
Roller Bar
Slot
Hems
Fig. 7a

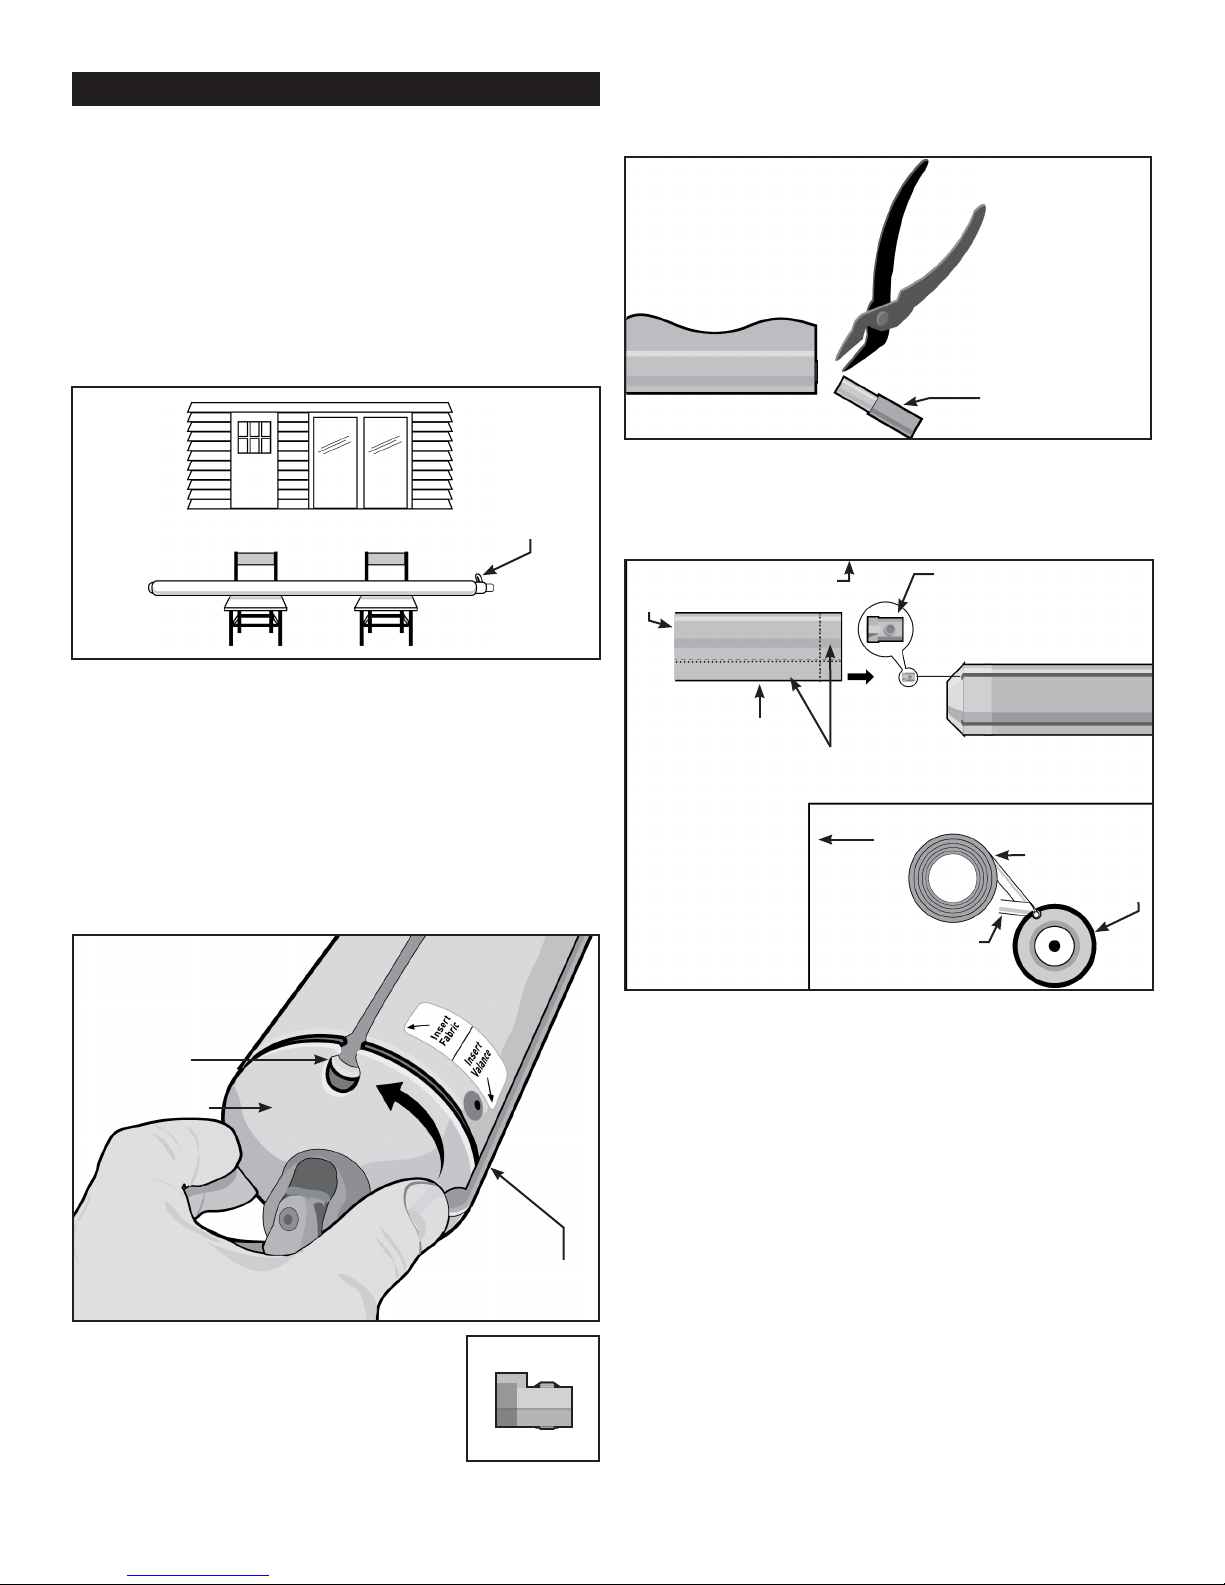
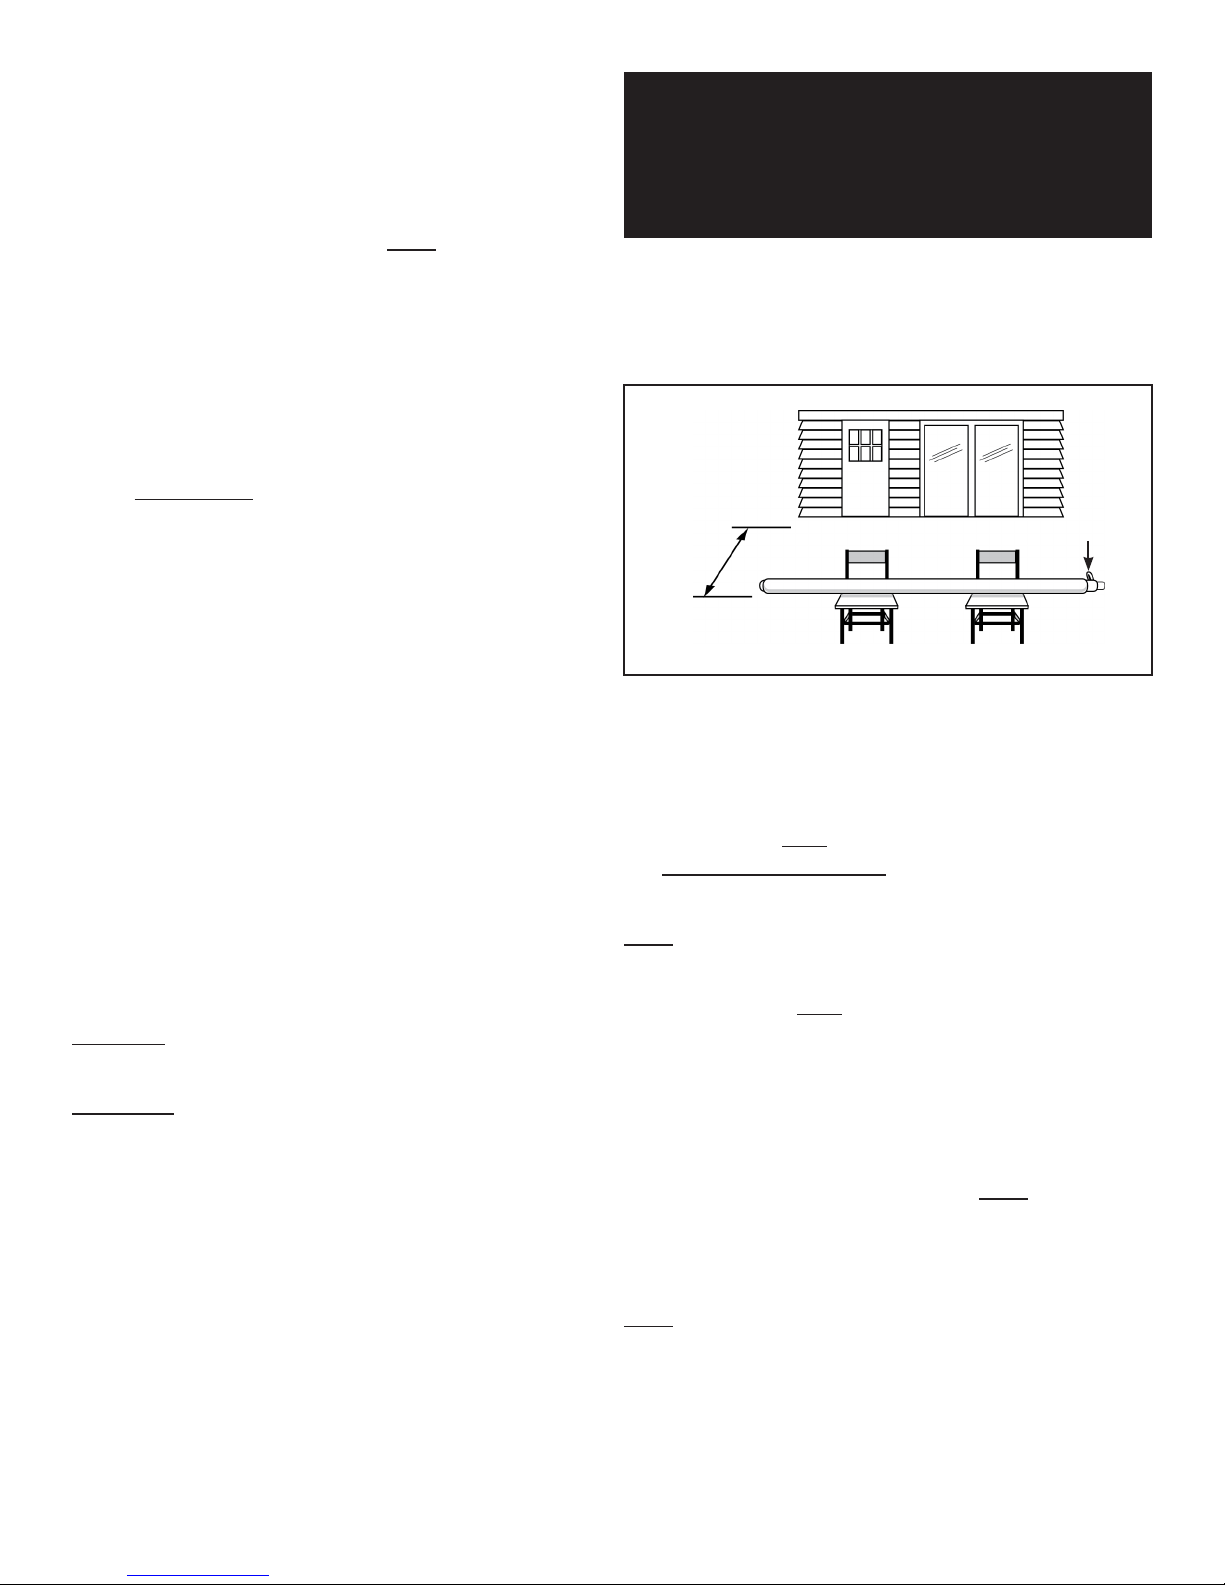
28. Using a chalk line or a string, snap a level line the
siding edge as the reference line if the siding is level.
For
Using the Awning Rail as a template, align the
upper edge of the Awning Rail with the Siding edge or
chalk line, and at both ends and in
the middle of the Awning Rail.
Screws provided, temporarily install one screw in
the middle and one on each end of the Awning Rail.
Rail is aligned with the chalk line.
procedure for the other side.
Remove the Awning Rail from the house and drill
For and
. For other
from the top edge (
Snap a straight line with a chalk line or string, the
Align the top edge of the Awning Rail with the
line on the board (See
of the Awning Rail, into the board (
Temporarily fasten the Awning Rail to the board
Using the Awning Rail as a template, align it with
side. See .
Using a
in the wall. See .

5
wall at the predetermined height, aligning the upper
edge of the Board with the chalk line.
With the Board fastened to the wall at both
Remove the Board from the wall.
the wall.
For
(
end.
for Upper Bracket (Single
of Awning Rail.
Le Side
Right Side
Snap a straight line with a chalk line or string,
edge.
Align the top edge of the Awning Rail with the
snapped line on the board. See .
of the Awning Rail, into the Board (
Board with one short Awning Rail Screw in the end
hole.
Using the Awning Rail as a template, align it with
the line on the board.
.
Place an Upper Bracket on the end of the
Awning Rail, aligning the Top Hole of the Bracket with
Remove the Awning Rail from the Board.
.
Le Side
Right Side
for Upper Bracket (Single
of Awning Rail.

6
wall at the predetermined height, aligning the upper
edge of the board with the chalk line.
of the two holes, large side out.
With the board fastened to the wall at both
ends, using the board as a template, mark the wall
large side out.
the wall.
Unpack the Arms from the shipping carton.
from the House. See .
32.
as shown in .
34. Remove the
the
Assemble the
the house. See .
36.
. Tighten
8’ From the
House
Unit

7
Remove the
the and repeat the process for
the right side.
Roller Bar
Arm
Flat-head
House
Height
38.
the Roller Bar. Slide the Awning Rail onto the Fabric
from either end, with the Flat Side of the Rail toward
the House. See .
Flat Side of
Awning Rail
Toward
House
Slide Rail
. Be sure they are locked in
place so that the total length between the Roller Bar
.
Ground
Bracket
40.
allow the Roller to lean against the house.
See .
Away From
House
Fasten the Awning Rail to the wall, or to the
42. Align the hole in the Upper Bracket with the single
See .
Upper Bracket
Bolt
Rail

8
43. Secure one of the Upper Brackets to the wall with
Slot in the Bracket.
44.
slot in the Upper Bracket and secure with the supplied
.
.
Arm at
.
49.
siding and there must be the same amount of holes
the Wall Brackets sit uniformly on the siding. See
.
See .
Wall
Bracket
Arm
Ground
Bracket
Arm
Pre-installed
Acorn Nut
[This is an example]
remains pushed up. Plumb the Arm with a level.
Acorn Nut
Handle
Ground Bracket
Wall Bracket
Ground Bracket
Acorn Nut
48.
latch it onto the Ground Bracket. See .

Bracket as a template and detach the Wall Bracket
from the Arm.
house.
the Pre-installed Acorn Nut that you marked with the
pencil in ,
the Arm. See , step 1.
wrench.
Screw
Pencil
[This is an example]
Factory
Ground Bracket
.
See .
.

10
Upper Bracket
Awning Rail
Punch
Awning
Rail
Awning Fabric
. Be sure the Fabric is
up & in
Arms set up in
60.
from the house.
See .
See and .
House
A
B
C
Ground
Bracket
Turn
62.
See .
63.
(see
Screws on each plate. See .
Anchors. See
hammer being careful not to collapse the Anchors.
66.
Plate.
the holes.
68.

11
The Awning Fabric and the structure are not designed
to support the load of water pooling on the Fabric or
, you must lower or
raise an Arm on one side of the Awning to allow the
and .
covered by the manufacturer’s product warranty.
, you must set the Awning with at least one
Arm angled back to the Wall Bracket, and lower that
form on the dust and dirt allowed to accumulate on
mildew. .
Tilt Awning for
use in Rain
Tilt Awning for use in Rain

IF... THEN...
was just installed...
Nuts (
Fabric not rolling straight when
opening or closing the Awning...
Awning is rolled up.
supplied Acorn Nuts (Review
Awning Rail was bent in
shipping...
The Awning Rail can be straightened by using a wooden dowel.
on the Fabric...
to order a
silicone lubricants on the Awning hardware, as the silicone will collect dirt.
Fabric has been damaged...
oriented wrong way...
.
pooled on the Fabric….
Fabric wrinkles when the
The Awning Fabric has a hem along both ends of the material; some
When opening or closing the
skips or spins freely.
for possible replacement.
damaged by a severe storm.
We can help you replace the parts that were damaged.
Please refer to the
parts have been replaced by .

XT
XT
XT
XT
XT
XT
900XT
900XT
900XT
900XT
900XT
900XT
(please call

Upper Bracket
Awning Rail
Wall Bracket
Insert A

15
XTXT
See
the front or underside of a deep overhang.
Using the methods shown in through may require you to relocate the Wall Brackets as well. The
in
Ground Bracket. Refer to on in this booklet
.
AC
B
HOUSE
Ground Bracket
Wall
Bracket
Upper Brackets
Post
Wall
Bracket
Wall
Bracket
Awning Rail
.
Awning Rail
Upper Bracket
Fascia

16
for the Awning Rail or Upper Brackets, a Board can be
purchased separately, will vary according to the width
of the Awning. See .
- The Awning can be mounted under an
Brackets, (See
Awning, must be purchased separately. A Board must
be secured to the overhang so that the Awning is in
Fascia
Awning
Rail
Bracket,
Face Up
Upper Bracket
Number of Brackets
7’-8’ 3
9’-11’ 4
12’-14’ 5
15’-17’ 6
18’-20’ 7
Fascia
Awning
Rail
Upper Bracket
Bracket,
This manual suits for next models
1
Table of contents