Sweethome Pellet Grills SH450 User manual

Sierra Products, Inc. 5061 Brooks St. Ste. B, Montclair, CA 91763 P/N 140839r1a 06/10
SWEETHOME PELLET GRILLS
MODEL SH450 & SH650
BARBECUE/SMOKER
ASSEMBLY AND OPERATING INSTRUCTIONS
FOR YOUR SAFETY
iDo not store or use gasoline or other
flammable vapors and liquids in the
vicinity of this or any other appliance.
iUse only 1/4" wood pellets approved for
use for cooking. Use of other fuel may
cause an unsafe condition. Read
operating manual for further information.
FOR YOUR SAFETY
iThis grill must be plugged into a
grounded three prong 120vac receptacle.
iDo not operate in high moisture area.
NOTICE TO ASSEMBLER: These
instructions must be left with the owner
and the owner should keep them for future
use.
WARNING: Do not use contaminated wood
pellets or pellets that have been exposed to
moisture. Pellets exposed to moisture will
feed improperly and cause feed system
jams.
This wood pellet appliance is designed for
outdoor use only.
WARNING: Do not try to light this appliance
without reading “Operating” instructions
section of this manual.
SH450 READY TO COOK
MODEL SH450SS
CALIFORNIA PROPOSITION 65 WARNING:
This product contains chemicals known to the
State of California to cause cancer and/or birth
defects or other reproductive harm. For more
information:www.sierraproductsinc.net/pages/
pdf/CAProp65.pdf

2
SH450 General Dimensions
SH650 General Dimensions
GENERAL INFORMATION AND FEATURES
Thank you for purchasing the SweetHome Outdoor
Pellet Grill from Sierra Products, Inc. Our goal is to
manufacture quality outdoor cooking products that
provide years of service and satisfaction.
Standard Features Include:
a) Auto igniter system.
b) Digital Temperature Control that constantly
adjusts pellet feed for proper temperature.
c) Low fuel warning system.
d) Stainless steel construction of cooking grid,
grease drip tray, and hood and shelf if equipped.
e) Tall hood clearance for large food items.
f) Large 21 lbs pellet fuel hopper for long burn times.
g) Powder coat paint chassis and components.
h) Heavy Duty wheels and casters.
SweetHome outdoor cooking can be an exciting
experience. You can smoke, barbecue, roast, and bake
with results that are tough to duplicate with indoor
appliances. With the hood closed the SweetHome
system will produce that “wood grill” flavor in food.
The SweetHome chassis is factory assembled requiring
only leg assembly. With some fore-thought and planning
the SweetHome can be assembled and operating with
minimum effort.
Remember when selecting a location for your grill
operating and convenience is the key to outdoor cooking.
Try to find a location that allows for easy access in both
food preparation and service. The grill will become hot
during operation, high traffic areas should be avoided.
An additional consideration is maintenance and service.
Always allow room for cleaning and annual service.
If your location includes an area close to a structure
consideration to clearances from combustible materials
and overhead areas is very important. Follow the
information included in this manual for proper assembly
and operation. Use of the SweetHome should follow the
clearance from combustible materials for both side,
back, and over head.
Minimum clearance to combustible surfaces:
Front, Rear, Sides - 12"
Top - 24" (Do not operate in enclosed alcove)
Your SweetHome is constructed from carbon steel and
powder coat painted. W e strongly suggest covering your
grill when not in use. Covers are available from your
dealer ask for P/N 11219 or 11220; for the SH450 or
SH650. This will help minimize the effects of weather and
general wear and tear.
GENERAL INSTRUCTIONS
The following instructions will give you the minimum
requirements for safely assembling and operating your
SweetHome pellet grill. Please read this manual and
instructions carefully before attempting to install or
operate this appliance.
iThis appliance is not for indoor use.
iThis appliance is not for use by children.
iOperation must conform to local codes.
iNever operate with any fuel other than 1/4 inch
wood pellets approved for cooking fuel.
iDo not use charcoal in this appliance.
iDo not use the grill in high moisture areas.

3
DANGER
Failure to follow the Dangers, Warnings,
and Cautions contained in this manual
may result in serious bodily injury or
death, or a fire or an explosion causing
damage to property.
Figure 2 - Leg Assembly
STORAGE
iRemove fuel from hopper when grill is not in use.
iCover the grill and store in low moisture area or
covered storage.
iAt end of season remove ash from base, burn
tray, and fan housing.
iClean grease tray and drip container
OPERATING AREA
WARNING: Only use this wood pellet barbecue
outdoors in a well-ventilated area. Do not use in a
garage, building, breeze way or any other enclosed
area.
iNever leave your SweetHome barbecue under an
unprotected combustible roof or overhang.
iYour SweetHome is not intended for installation in
or on a recreational vehicle or boat.
iDo not use combustible materials within 16" of the
top and back or 14 inches from the side of this
appliance.
iThe entire cooking box and hood get hot when in
use. Do not leave unattended.
iKeep electrical supply cord and the fuel supply
hose away from any heated surface.
iKeep cooking area clear of flammable vapors and
liquids, such as gasoline, alcohol, etc., and
combustible materials.
WARNINGS
iDo not store flammable liquids or vapors
under or near this barbecue.
iAfter a period of storage, and/or non-use, the
SweetHome Barbecue should be checked for
pellet jambs or obstructions before using. See
instructions in this manual for correct
procedure.
iCombustible materials should never be within
12 inches front, back, sides, and bottom or
within 24 inches above top of your SweetHome
Barbecue.
iNever allow children to use your SweetHome
Barbecue.
iWhen operating your SweetHome Barbecue
never leave it unattended.
iShould the fire go out during operation, turn
main switch control “OFF.” Open the lid and
wait five minutes before attempting to relight
using the lighting instructions.
iNever lean over open grill or place hands or
fingers on front edges of the barbecue.
iYour SweetHome barbecue should be cleaned
regularly for proper operation.
iThe use of improper fuel is dangerous and will
void your warranty.
iIf a grease fire starts inside grill immediately
open lid and turn main power switch “OFF” to
stop all fuel feed.
GRILL ASSEMBLY
Your SweetHome grill head and major components are
factory assembled for your convenience. However, there
are a few steps that will have to be accomplished before
starting your assembly.
Included with Grill Assembly:
Description Qty.
Stainless Cooking Grids 2
Stainless Grease Drip Pan 1
Flame Baffle 1
Pellet Burn tray 1
Grease bucket 1
Stainless Handle with stand offs, screws, &
washers
1
Leg with casters & screw/nut package 2
Leg with axles, wheels, push caps &
screw/nut package
2
Hopper handle with screw/nut package 1
Assembly and Operating Manual 1
SweetHome Cook Book 1
1) Remove the packing materials and (2) phillips
screws at the lower base used to attach crate.
2) Carefully lift the grill chassis from the crate.
Remove the plastic shipping bag.
3) Remove the stainless drip tray, cooking grids,
flame baffle, and legs from the inside of the grill
head.
4) Remove all four legs from bag and assemble caster
legs to hopper side base using (6) 1/4-20 phillips
screws and nuts.

4
Figure 3 - Leg Assembly
Figure 4 - Handle Installation
Figure 5 - Burn Tray Assembly
Figure 6 - Flame Baffle
5) Assemble wheels on legs with welded axles using the
½" push caps (Figure 2).
6) Assemble legs to grill base using (6) 1/4-20 phillips
screws and nuts (Figure 3).
7) Carefully stand grill on legs.
Now that your SweetHome Grill is properly standing
there are only a few short steps necessary to complete
your grill assembly.
HOOD HANDLE ASSEMBLY
The handle assembly attaches to the hood via two
punched holes in the front lower section (Figure 4).
1) Remove handle, spacers, and screws from plastic
bag.
2) Open hood and place a 10-24 screw with flat washer
through the hole and slide the stand off spacer over
the screw.
3) Holding the handle square to the hood start the screw
into the threaded insert on the handle with out
tightening.
4) Install the other screw and spacer as noted above.
Tighten both screws while squaring handle to hood.
BURN TRAY AND FLAME BAFFLE ASSEMBLY
The burn tray and flame baffle are the engine of your
pellet grill. Proper assembly is critical for safe operation.
The burn tray slides into the holder with the slot towards
the igniter tube (Figure 5). Make sure the flange is under
the feed tube heat shield. Place the flame baffle with the
notch in front of the burn tray.
1) Remove burn tray from plastic bag. Note slot in
bottom as position for igniter tube.
2) Slide burn tray into tray hold with front flange below
heat shield.
3) Locate flame baffle forward of burn tray with notch
facing toward bottom of housing (Figure 6).
GREASE TRAY AND DRIP BUCKET
The grease tray system includes the tray, drain, and
bucket. This allows for safe removal of food dripping
during the cooking process. The tray catches the grease
and directs it towards the right side and into the drain
tray. Once in the drain it is directed outside of the grill
and into the bucket which hangs on a hook.
1) Remove the grease drain from the plastic cover.
Place the hook end though the right side opening,
hook pointing up. Attach drain with (2) #8 screws
through the base frame (Figure 6 & 7).
2) Remove plastic cover over grease tray. Place tray
into grill base with the rear edge into the grease drain
tray.
CAUTION: PROPER ASSEMBLY POSITION OF THE
FLAME BAFFLE IS CRITICAL SAFE OPERATION.
INCORRECT POSITIONING MAY RESULT IN OVER
TEMPERATURE IN THE HOPPER AREA.

5
Figure 8 - Grease Tray Placement
Figure 9 - Grease Bucket Placement
Figure 10 - Temperature Sensor
Figure 11 - Cooking Grid Placement
Figure 12 - Right Side Shelf Bracket
Figure 13 - Side Shelf
3) Carefully allow the tray to rotate down to the left
clearing the temperature sensor through the notch on
rear of tray (Figure 8).
4) Remove bucket from plastic bag and position by
hanging handle on drain hook (Figure 9).
FINAL ASSEMBLY & COOKING GRIDS
After assembly of the grease drip tray the temperature
sensors should be visible on the left side rear of the grill.
The tray should always be under the sensor for proper
grill operation (Figure 10).
Remove cooking grids from plastic bag and place as
shown (Figure 11).
SIDE SHELF ASSEMBLY
1. Remove white protective plastic coating from
stainless parts by peeling from part edge.
Caution: Care should be taken when handling
sheet metal parts as some edges may be sharp
2. Loosely install side shelf brackets with eight 1/4"
phillips screws. Position brackets on side of cart
with attach angles inward and open slot upward
(Figure 12).
3. Insert side shelf pivot pins into bracket slots.
Tighten 1/4" phillips screws securing brackets.
Side shelves should rotate up into slots and lock
by pushing "down" into notches (Figure 13).
Figure 7- Drain Install
Figure 6 - Drain

6
Figure 14 - Hopper with wood cook pellets
Empty hopper, auger clean out, and low fuel sensor
SweetHome Wiring Diagram
CAUTION: ELECTRICAL WARNING
If your grill incorporates electrical components, they must
be installed and electrically grounded in accordance with
local codes or in the absence of local codes or , in the
absence of local codes, with the National Electrical
Code, ANSI/NFPA No.70 or Canadian Electric Code,
CSA C22.1.
The electric cord is equipped with a three-prong 120v
plug, and must be used with a grounded outlet. If it is not
designed for a three-wire plug, you must obtain an
adapter and properly ground it before using the
rotisserie.
KEEP ANY ELECTRICAL SUPPLY CORD AWAY
FROM ANY HEATED SURFACE.
FIRST RUN AND SEASONING OF YOUR
GRILL
Operating your grill for the first time or “seasoning”
allows the metal parts to heat up and the paint to season.
The grill will have additional smoke and have that “new”
smell burn away in about 30 minutes of operation. After
the grill has operated you should allow it to cool
com pletely prior to cooking. This will minimize any sm ells
with you prepare your first meal.
1) Remove the hopper lid and confirm there is no
packing or paper in the auger area.
2) Plug the grill into a grounded three prong 120VAC
receptacle.
3) Turn main power switch “ON”. You will hear the “Low
Fuel W arning” beep beep sound noting the hopper is
empty.
4) Add 5 pounds of fuel (about a coffee can) to the
hopper (Figure 14).
5) Locate the main power switch on the back for the
hopper and turn the main power switch “ON”.
6) The LED temperature indicator will display the
current grill temperature and the Green LED light
will began to flash when the grill is ready to
operate.
7) Follow the “LIGHTING” instructions on the
following pages.
8) Once the burner is operating, allow the grill to run
to the preselected 325 degrees. Once is reaches
325 the grill will “beep” three times. Using the UP
button increase the temperature to 425. Continue
the grill operation for 30 minutes.
9) At the end of the thirty minute period press the
Start/Stop button for 2 seconds and the grill will
begin Auto Shut Down by stopping the feed and
increasing the fan. Allow the grill to run until the
display indicates “OFF”.

7
OPERATING THE SWEETHOME GRILL CONTROLLER
Your SweetHome Grill has a digital temperature
controller that provides automatic start, run, cool,
and shutdown functions. The following is a
sum m ary:
Main Switch - 120 volt AC Off/On power switch.
Display - Displays status “Off, CoL (Cool Down)
or grill target temperature displayed 325° “Target
Temperature” (Ttemp),.
Push Buttons - Start/Stop, Down & Up
temperature display.
Red LED - Red light indicating a temperature
fault.
Green LED - Green light indicating Run Status.
General Operation
All functions of your SweetHome grill have been
automated. Control operation can be divided into
four categories - Start Up, Run, Cool Down, and
Fault. A brief description of these function will help
in understanding grill operation.
Start - By pushing the start button the hot rod
igniter is energized, pellets begin to feed into burn
tray, and the fan starts.
Run - When the grill temperature has increased to meet
the “Target Temperature” (Ttemp) a Green LED
continuous light will be displayed.
Trend Dots - Dots run forward and backward along the
bottom of the display indicating wether the grill is
temperature is increasing or decreasing. Flashing DOTs
solid when capture temperature.
Cool Down - When the grill) a Green LED continuous
light will be displayed.
Fault - Flashing Red LED light followed by grill shut
down. Safety shut off for high temperature or low
temperature start.
LED Light Operation
Along with the basic operation the LED lights and audio
beep sounds provide additional current operation
information. A summary of these indications follow:
Off - Green LED, brief blink every two seconds.
Start 1 - Green LED, on with a one quick off.
Start 2 - Green LED, on with double blink.
Run - Green LED, continuous on.
Temperature Change - Green LED, double blink.
Off - Green LED, Slow blink to Cool - CoL.
High Temperature - Red Light.
Audio Beeps
In addition to the displayed information the control
provides audio beeps to alert you to certain operations.
Continuous beep - Low fuel.
Three beeps - Reach target temperature.
Single beep - Reach changed target temperature.
SweetHome Grill Control Panel

8
WARNING
Use only 1/4" wood pellets that have been
approved for cooking use. Use of other fuel may
cause an unsafe condition.
Do not use contaminated wood pellets that have
been exposed to moisture. Pellets exposed to
moisture will feed improperly and cause feed
system jams.
For your safety: This grill must be plugged into a
grounded three prong 120VAC receptacle. Do not
operate in a high moisture area.
STORAGE WITH A GRILL COVER IS THE BEST
WAY TO PROTECT YOUR GRILL INVESTMENT!
OPERATING INSTRUCTIONS
LIGHTING
1) Open the hopper lid.
2) Check pellet fuel level and add 1/4" wood cooking
pellets to with in a ½ inch of the top. Close hopper lid.
3) Open the grill lid and confirm the burn tray and flame
baffle are proper assembled. Dump ash from tray if
required (Check assembly page 4). Close lid.
4) Check to make sure the main power switch is in
the “OFF” position.
5) Turn power switch “ON”. Wait 10 seconds and the
factory 325 temperature will be displayed. A slow
“flashing” green light indicates the grill is ready to
start.
6) Press the center button for a 2 count and the
pellet feed will begin with a 1 count green flash
“Start 1" light indiction.
7) Open right hand vent in upper portion of hood to
allow air for start up.
IMPORTANT: The ignition and warm up cycle of the
grill requires up to 15 minutes. You will smell the
wood burning and then note smoke from the vents.
This is normal and the grill will complete the start up
cycle by a three “beep” signal and a Solid Green
LED Light. If the grill does not light as described
start the process again from Step 1. If additional fuel
is in the burn tray remove it and check for blocked
air flow holes.
WARNING: If after two lighting attempts the grill is
not operating go to the Trouble Shooting Guide in
this manual for further assistance.
Control LED Lights Green/Red: To assist in identifying
current grill operation use the following:
Display - 325 and slow Green Flash - Ready to start.
Display - 325 and single blink Green Flash - Start 1.
Display - 325 and double blinking Green Flash - Start II.
Display - Temperature, solid Green - Ready to cook.
iChanging Temperature will start Green Flash until
new temperature target is reached.
HELPFUL: You may set an alternate target temperature
during the start up cycle by pushing the Up or Down
control buttons. Holding the button will allow scrolling at 5
degree increments. Once the new target temperature is
reached the control will beep three times.
TO EXTINGUISH
1) Push the center button and hold for a 2 count. The
“Cool Down Cycle” will start “CoL” slow blink Green
and end in and “OFF” indication.
2) Turn the main power switch “Off”.
COOKING WITH OUR SWEETHOME GRILL
Your new SweetHome grill is designed to perform as a
wood fired convection oven. W ood cooking pellets
provide the heat and the bring out the flavor in all foods.
Your grill includes the SweetHome Cook Book with
dozens of interesting dishes and meals. W e suggest to
get start with the basics and add to your chef skills as
you go!
Smoking: Control Range 150° to 195°
Your SweetHome Grill operates in this heat range by
adding wood pellets in just the right amount to flame and
smoke over a long period of time. Figure your time on
smoking as hours not as minutes. When starting your
grill select a temperature of 185°. The grill will warm up
and then drop it operating temperature and begin in
“Smoke” operation in about 30 minutes and remember
large thick portions do not smoke well. Place your cook
items in the center of the grill closing the lid. Check on
your progress hourly as each time you open the hood
you allow the grill to cool.
Cooking Tip! Because of limitations in burning wood
cooking pellets some flavor do not maintain adequate
burning at low smoke temperatures. Experience is the
best teacher here so use a pellet that burns well for
smoking. When smoking open right side vent.
Barbecuing: Control Range 200° to 275°
This is the “Sweet” spot when pellet grilling really
shines... Try 235 to 265 depending on the type and size
of food items. Figure medium cook times of 3/4 hour for
small items to as long as 3 hours for larger. This again
has many variables so experience counts. Most pro’s like
the fork method of testing when checking food items. If
it’s meat, push the fork in and turn 90 and pull it out it’s
done......
Cooking Tip! The control range can be changed at any
time once the grill is in full operation. However if you
want to change from say 450° to 250° opening the hood
for 5 minutes will speed the process.

9
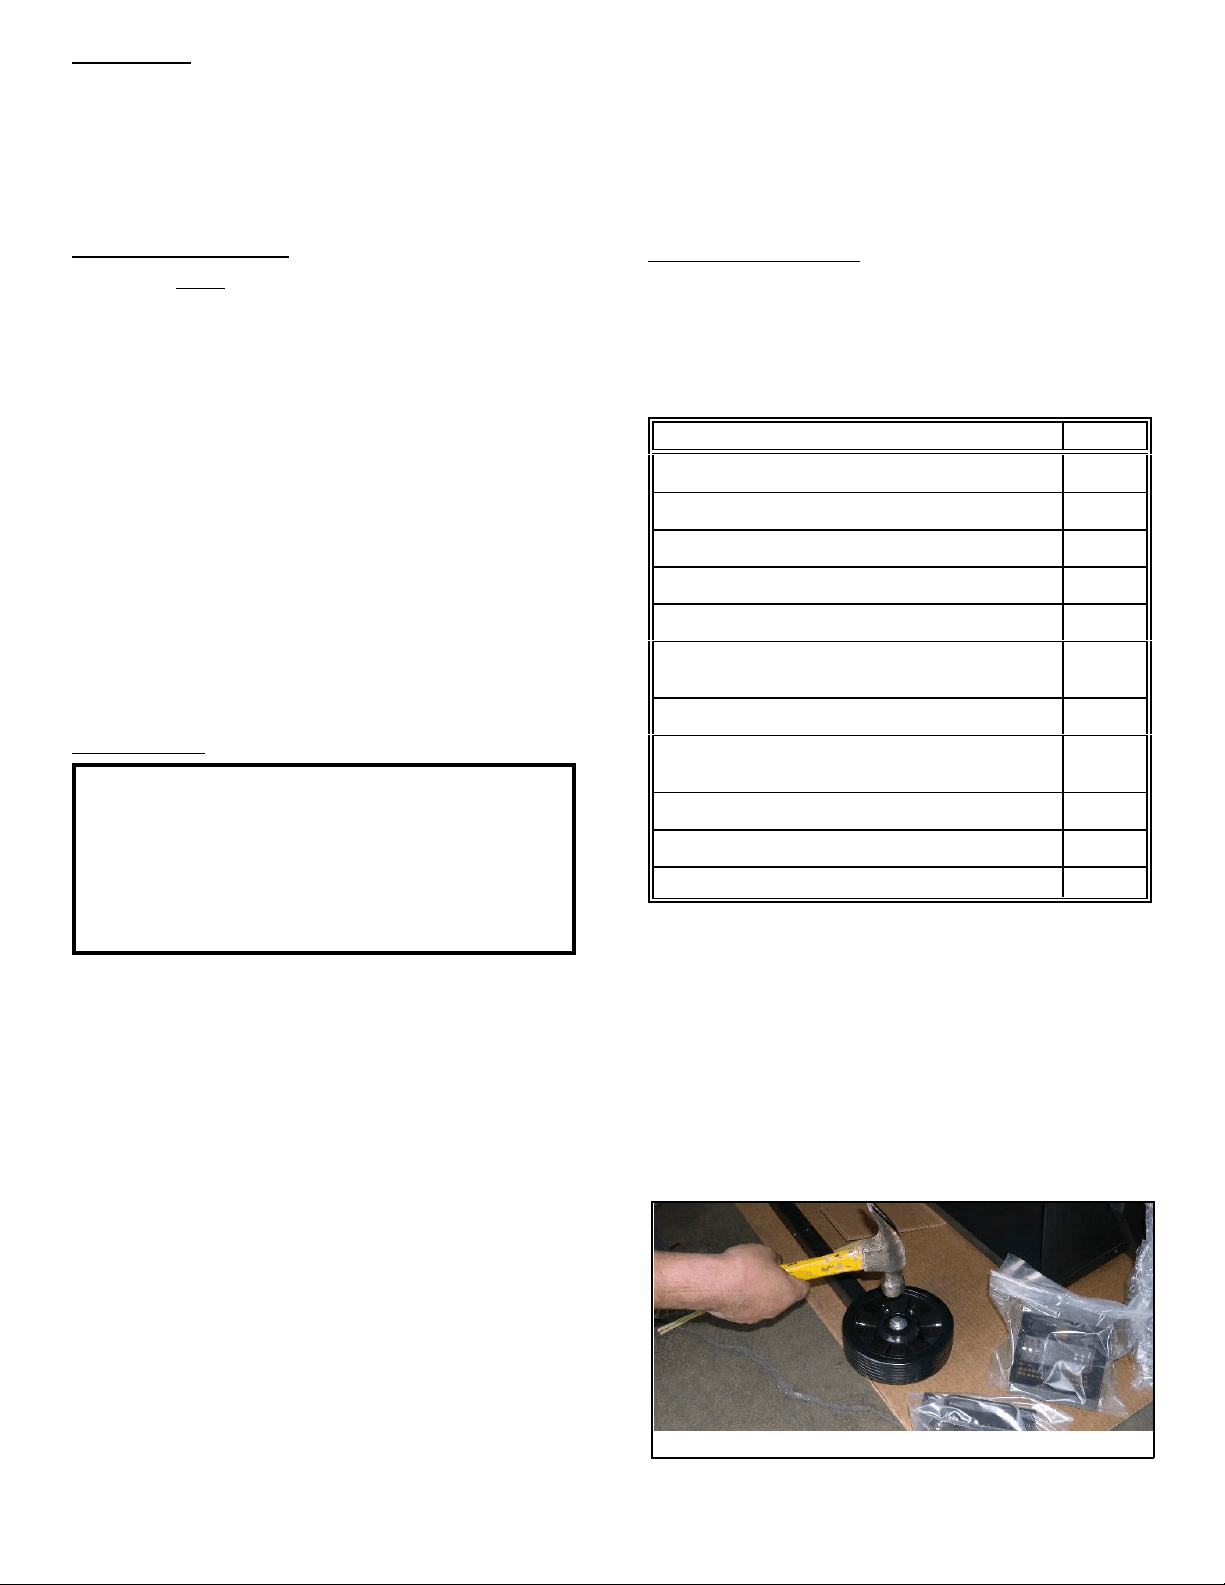
Grill ash dumpFan ash dump
Roasting: Control Range 275° to 375°
Good range for larger cuts and when your planning for a
short cooking time. This ranges allows for nice flavoring
and light browning. Adjust vents ½ open.
Cooking Tip! Temperatures on the far right of the grill are
slightly cooler allowing you to rotate the food items to a
cooler area.
Baking and Grill: Control Range 375° to 500°
Baking and grilling temperatures allows you to expand
the way outdoor cooked foods are prepared. Cooking
vegetables, baked potatoes, and a number of main
courses at one time is possible. The key to
accomplishing this is timing. Things like potatoes require
30 minutes middle temperatures while fish fillets or
lobster requiring 10 minutes or less. Remember your
SweetHome Grill operating at high temperatures with the
hood closed with quickly cook all food items. Watch your
grill closing and make sure you don’t over cook or cause
an unsafe situation. Open vents ½ to 3/4.
Cooking Tip!
Consider outdoor conditions when cooking as cold
temperatures will use more fuel than a warm
temperature. Have plenty of SweetHome Wood Pellet
Cooking fuel available when you start.
For further information on cooking time and
temperatures, and interesting food to
prepare refer to the SweetHome Cook Book
supplied with your grill.
TROUBLE SHOOTING
Problem - Grill does not operate.
Condition - No control function or lights when cord is
plugged into socket.
Solution - Check power outlet for 120VAC. Make sure
main power switch located on back of hopper is “ON”.
Check main fuse on control board by unplugging unit.
Remove (4) control cover screws. Fuse is on rear of
control board. Replace with a 5 amp only.
Problem - Grill will not light.
Conditions - No fuel in hopper. Jamb fuel in feed system.
Burn tray filled with ash deposit. Igniter damaged.
Solution - Check for fuel in hopper. Remove cooking
grids, grease drip tray, and flame baffle. Check for fuel in
tray. If no fuel in tray, check hopper and feed for pellet
jamb. Remove (4) 3/8 nuts from feed auger cover and
remove saw dust and pellet jams. Reassemble and start
unit without fuel to confirm feed is turning.
Problem - Grill starts slowly and does not make
temperature.
Conditions - Feed not primed before start up. Fuel not of
proper type. Very cold outside temperature when
starting.
Solution - When hopper is run out of fuel, start and stop
grill after the start cycle two times to prime the auger.
W hen start button is pressed you should hear pellets
immediately start falling into tray. If fuel is low grade and
does not burn properly the amount of heat generated will
not be adequate for proper operation. Use SweetHome
fuel. In very cold weather, start and stop the control in
mid-prime and start again to increase start up fuel.
WARNING: Service and repair should only be
accomplished by a appliance technician or service
company.
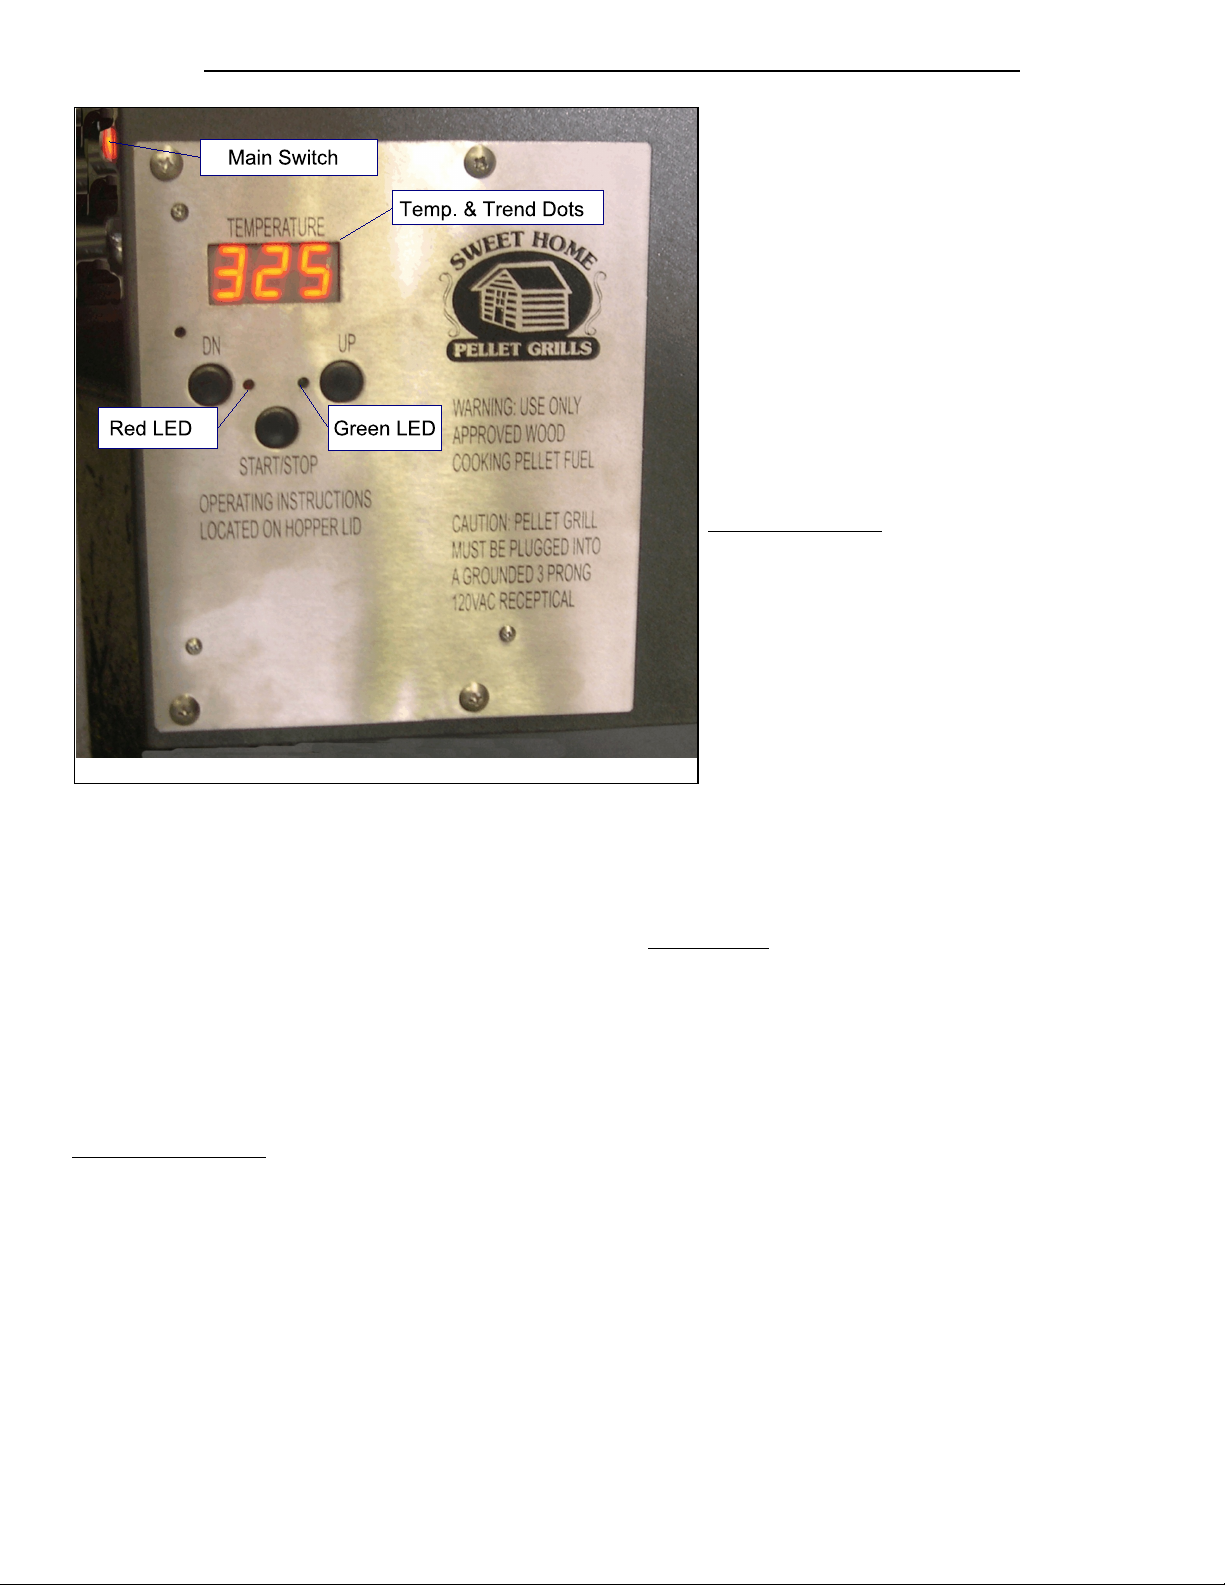
Problem - Low heat output.
Solution - Confirm grill has reached “Run Mode” by
noting the solid Green LED. If Green LED is flashing
then control is searching for next target temperature. Set
target with 50 degrees of current temperature and
confirm Green LED stops flashing.
MAINTENANCE
Cleaning and maintenance should be performed at least
annually or more depending on use. The following check
list will help:
1) Remove grids and grease tray. Remove all loose
materials from grids and tray and clean with oven
cleaner if necessary.
2) Remove flame baffle and burn tray. Brush all loose
materials. Remove ash dump cover in bottom right of
grill. Brush ash into container for later disposal. Re-
install parts per assembly directions.
3) Remove ash dump cover on lower fan box under
grill. Remove all loose material. Re-install cover.
4) Remove pellets from hopper and vacuum all saw
dust.
General cleaning of painted surfaces may be
accomplished by using a mild household cleaning
solution and warm water. The exterior may be cleaned
using the same method. Badly soiled stainless steel
areas can be clean using a “scotch brite” pad. Always
scrub in same direction of material finish.
To keep your grill in new condition store away from direct
sun and away from high moisture areas. Pool and lawn
chemicals can cause rust and corrosion. Keeping the grill
away from these harsh environments minimize wear.
With proper care your SweetHome grill will give you
years of trouble free service. If you have any questions
regarding this product please contact - Customer
Service, Sierra Products, Inc., 5061 Brooks St. Ste B
Montclair, CA 91763 or www.sierraproductsinc.net
For warranty qualification and coverage information,
see enclosed limited warranty P/N 140838.

10
SweetHome Model SH450/650
Item Qty Description P/N Item Qty Description P/N
1a 1 Hood Assembly - SH450P 300555 17 1 Burn Tray 300563
1b 1 Hood Assembly - SH450SS 300556 18 1 Shoot Heat Shield Upper/Lwr 300564
1c 1 Hood Assembly - SH650SS 110557 19 1 Left Side Heat Shield 202387
2 2 Handle Spacers 110217 20a 1 Flame Baffle SH450 202347
3a 1 Handle - SH450 w/End Caps 202354 20b 1 Flame Baffle SH650 202402
3b 1 Handle - SH650 w/End Caps 202380 21 1 Temperature Sensor Assy. 120145
4a 1 Hopper Lid-Painted 202379P 22 2 Vent Assy w/pin and spring 300497
4b 1 Hopper Lid-SS 202379SS 23a 1 Grease Drip Tray SH450 202347
5 1 Hopper Box 300558 23b 1 Grease Drip Tray SH650 202406
6 1 Main power switch 110560 24a 2 SS Cooking Grid SH450 202369
7 1 Power cord 110041 24b 2 SS Cooking Grid SH650 202401
8 1 Feed Motor 110555 25a 1 Chassis Base Assy SH450 300560
9 1 Auger Assembly w/motor mnt 300559 25b 1 Chassis Base Assy SH650 300561
10 1 Igniter 120142 26 2 Left Leg 300554
11 1 Igniter Blast Tube 202358 27 2 Right Leg 300565
12 1 Low Pellet Sensor 202009 28 2 Castor Wheel 110184
13 1 Controller 120143 29 2 Main Wheel w/cap & retainer 110173
14 1 Controller mounting plate 170132 30a 1 Shelf w/mnts,screws,SH450P 300566
15a 1 Chassis - SH450 300561 30b 1 Shelf w/mnts,screws,SH450S 300567
15b 1 Chassis - SH650 300562 30c 1 Shelf w/mnts,screws,SH650S 300568
16 1 Fan Housing w/clean out plt 300563 31 1 Instruction Manual Pack 110220
This manual suits for next models
1
Table of contents