manuals.online logo
Brands
  1. Home
  2. •
  3. Brands
  4. •
  5. Swisher
  6. •
  7. Lawn Mower
  8. •
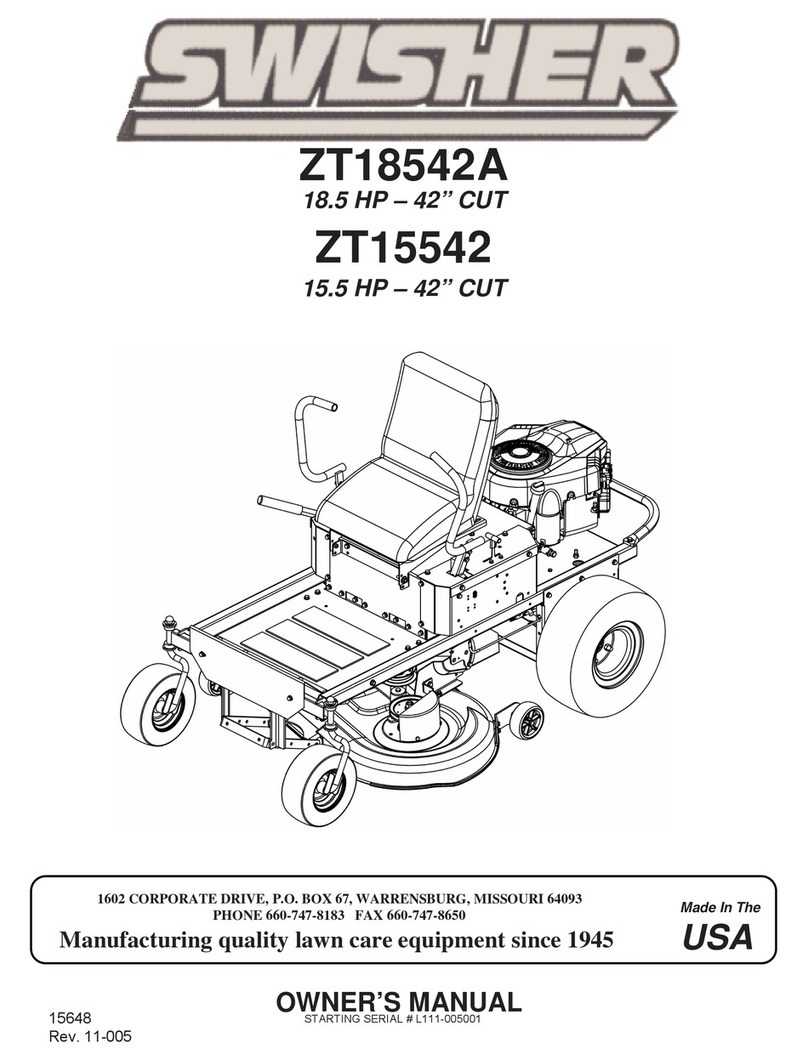
  9. Swisher ZT1436 User manual

Swisher ZT1436 User manual

This manual suits for next models

1

Other Swisher Lawn Mower manuals

Swisher ST60022Q User manual

Swisher

Swisher ST60022Q User manual

Swisher Commercial Pro Response Z21554CPHO-CA User manual

Swisher

Swisher Commercial Pro Response Z21554CPHO-CA User manual

Swisher T1260F User manual

Swisher

Swisher T1260F User manual

Swisher Predator WB924 User manual

Swisher

Swisher Predator WB924 User manual

Swisher WB80042F User manual

Swisher

Swisher WB80042F User manual

Swisher ST50022STDQ Use and care manual

Swisher

Swisher ST50022STDQ Use and care manual

Swisher Ride King User manual

Swisher

Swisher Ride King User manual

Swisher ZT2452A-CA User manual

Swisher

Swisher ZT2452A-CA User manual

Swisher T11544 User manual

Swisher

Swisher T11544 User manual

Swisher Trim-N-Mow Plus STS67522BS User manual

Swisher

Swisher Trim-N-Mow Plus STS67522BS User manual

Swisher FC10544BSXP User manual

Swisher

Swisher FC10544BSXP User manual

Swisher T1360B1; T1360T; T1360H; T1360K; T13560; RK1360; T14560; T17560; T18560;... User manual

Swisher

Swisher T1360B1; T1360T; T1360H; T1360K; T13560; RK1360; T14560; T17560; T18560;... User manual

Swisher FC10544BS User manual

Swisher

Swisher FC10544BS User manual

Swisher The Predator WB11524 User manual

Swisher

Swisher The Predator WB11524 User manual

Swisher TRAILMOWER POL14560X User manual

Swisher

Swisher TRAILMOWER POL14560X User manual

Swisher ST60022Q User manual

Swisher

Swisher ST60022Q User manual

Swisher T1260, T1360, T1460 User manual

Swisher

Swisher T1260, T1360, T1460 User manual

Swisher T1360B1 User manual

Swisher

Swisher T1360B1 User manual

Swisher POSTMASTER PST67522 User manual

Swisher

Swisher POSTMASTER PST67522 User manual

Swisher TWR10532BS User manual

Swisher

Swisher TWR10532BS User manual

Swisher Z-MAX ZT2560 User manual

Swisher

Swisher Z-MAX ZT2560 User manual

Swisher ZTR2454BS User manual

Swisher

Swisher ZTR2454BS User manual

Swisher ZT2452A Operating instructions

Swisher

Swisher ZT2452A Operating instructions

Swisher WBERC11524 User manual

Swisher

Swisher WBERC11524 User manual

Popular Lawn Mower manuals by other brands

Toro 20047 Operator's manual

Toro

Toro 20047 Operator's manual

Toro Greensmaster TriFlex 3300 Operator's manual

Toro

Toro Greensmaster TriFlex 3300 Operator's manual

Global garden products 72 Workshop manual

Global garden products

Global garden products 72 Workshop manual

EINHELL 01045 operating instructions

EINHELL

EINHELL 01045 operating instructions

Toro Greensmaster 3120 Operator's manual

Toro

Toro Greensmaster 3120 Operator's manual

Baroness LM315GC Owner's operating manual

Baroness

Baroness LM315GC Owner's operating manual

GreenWorks Tools 25157 user manual

GreenWorks Tools

GreenWorks Tools 25157 user manual

Etesia MVEHH user manual

Etesia

Etesia MVEHH user manual

Husqvarna LTH125 owner's manual

Husqvarna

Husqvarna LTH125 owner's manual

Gravely 915034 - ZT1640 Owner's/operator's manual

Gravely

Gravely 915034 - ZT1640 Owner's/operator's manual

Jacobsen 63281 Technical manual

Jacobsen

Jacobsen 63281 Technical manual

GreenWorks Pro MO802524 Operator's manual

GreenWorks Pro

GreenWorks Pro MO802524 Operator's manual

Toro TimeMaster 20976 Operator's manual

Toro

Toro TimeMaster 20976 Operator's manual

Deutz-Allis 3000 Series parts manual

Deutz-Allis

Deutz-Allis 3000 Series parts manual

Craftsman 917.9998C owner's manual

Craftsman

Craftsman 917.9998C owner's manual

jobmate YT9108 user manual

jobmate

jobmate YT9108 user manual

Yard force GM R40A instructions

Yard force

Yard force GM R40A instructions

Husqvarna R 419TsX AWD Operator's manual

Husqvarna

Husqvarna R 419TsX AWD Operator's manual

manuals.online logo
manuals.online logoBrands
  • About & Mission
  • Contact us
  • Privacy Policy
  • Terms and Conditions

Copyright 2025 Manuals.Online. All Rights Reserved.

ZERO TURN HYDROSTATIC DRIVE
ZERO TURN HYDROSTATIC DRIVEZERO TURN HYDROSTATIC DRIVE
ZERO TURN HYDROSTATIC DRIVE
OWNER’S
MANUAL
1602 CORPORATE DRIVE, P.O. BOX 67, WARRENSBURG, MISSOURI 64093
P ONE 660-747-8183 FAX 660-747-8650
MODEL NO.
ZT1436
ZT17542B
ZT1842
ZT20050
Manufacturing quality lawn care equipment since 1945
Assembly
Operation
Service and Adjustment
Repair Parts
Made In The
USA
Rev.02.19.2003
Read and follow all
Safety Precautions
and Instructions
before operating this
equipment.
IMPORTANT
ONZTR03
swisherinc.com
“Z” SERIES
“Z” SERIES“Z” SERIES
“Z” SERIES
1) Engine Warranty All engines utilized on our products have a separate warranty extended
to them by the individual engine manufacturer. Any engine service
difficulty is the responsibility of the engine manufacturer and in no way
is Swisher ower Co., Inc. or its agents responsible for the engine
warranty. The Briggs & Stratton Engine Service Hot-Line is 1-800-233-
3723. The Tecumseh Engine Service Hot-Line is 1-800-558-5402.
2) Commercial Use This product is not intended for commercial use and carries no
commercial warranty.
3) Limitation This warranty applies only to products which have been properly
assembled, adjusted, and operated in accordance with the instructions
contained within this manual. This warranty does not apply to any
product of Swisher ower Co., Inc., that has been subject to alteration,
misuse, abuse, improper assembly or installation, shipping damage, or to
normal wear of the product.
4) Exclusions Excluded from this warranty are normal wear, normal adjustments, and
normal maintenance.
In the event you have a claim under this warranty, you must return the product to an authorized
service dealer. All transportation charges, damage, or loss incurred during transportation of parts
submitted for replacement or repair under this warranty shall be borne by the purchaser. Should you
have any questions concerning this warranty, please contact us toll-free at 1-800-222-8183. The
model number, serial number, date of purchase, and the name of the authorized Swisher dealer from
whom you purchased the mower will be needed before any warranty claim can be processed.
THIS WARRANTY DOES NOT APPLY TO ANY INCIDENTAL OR CONSEQUENTIAL
DA AGES AND ANY I PLIED WARRANTIES ARE LI ITED TO THE SA E TI E
PERIODS STATED HEREIN FOR ALL EXPRESSED WARRANTIES. Some states do not allow
the limitation of consequential damages or limitations on how long an implied warranty may last, so
the above limitations or exclusions may not apply to you. This warranty gives you specific legal
rights and you may have other rights, which vary from state-to-state. This is a limited warranty as
defined by the agnuson- oss Act of 1975.
LIMITED WARRANTY
The manufacturer’s warranty to the original consumer purchaser is: This product is free from defects
in materials and workmanship for a period of two (2) years from the date of purchase by the original
consumer purchaser. We will repair or replace, at our discretion, parts found to be defective due to
materials or workmanship. This warranty is subject to the following limitations and exclusions:
2
TABLE OF CONTENTS
WARRANTY………………....….2
INTRODUCTION………………..3
SAFETY…………………………4-7
OPERATION……………………8-10
AINTENANCE…………………….11-12
SERVICE / ADJUST ENT……….…13-16
PARTS BREAKDOWN……………...17-21
TROUBLESHOOTING………………..22
3
Thank you for choosing Swisher’s ZTR ower. Before operating your
mower, please read, understand and follow all of the safety precautions and
other instructions explained in this manual . As with all power equipment,
lawnmowers can be potentially dangerous if improperly used.
SAFETY PRECAUTIONS & DECALS
This Safety Alert Symbol indicates important messages in this
manual. When you see this symbol, carefully read the message that
follows and be alert to the possibility of personal injury.
Read this manual completely. This machine can amputate hands and feet, and
throw objects. Failure to observe the following safety instructions could result in
serious injury or death.
•Read the manual. Learn to operate this machine safely.
•Always disconnect the spark plug wire and place the wire where it cannot contact the
spark plug, to prevent accidental starting the engine when setting up, transporting,
adjusting or making repairs.
•Keep all shields and guards in place.
•Understand the speed, steering and stability of this machine. Know the positions and
operations of all controls before you operate this machine. Check all of the controls in
a safe area before starting to work with this machine.
•Allow only responsible adults who are familiar with these instructions to operate this
machine. Never allow children to operate this machine.
•Clear the area of objects such as rocks, toys, wire, etc. that can be picked up and
thrown by the blade.
•Be sure the area is clear of other people before mowing. Be aware of the mower
discharge direction and do not point at anyone. Stop the machine if anyone enters the
mowing area. Children are often attracted to the machine and the mowing activity.
Never assume that children will remain where you last saw them.Keep children
under the watchful care of another responsible adult.
•No riders!
•Do not put hands or feet near or under rotating parts. Keep clear of the discharge
opening at all times.
•Do not mow in reverse. Always look down and behind before and during backing.
SAFETY PRECAUTIONS & DECALS
The operation of any cutter can encounter foreign objects to be thrown into the
eyes, resulting in severe eye damage. Always wear certified safety glasses or
wide-vision safety goggles for over spectacles before staring any cutting machine
and while operating such a machine.
The operation of any cutter produces sound waves that are damaging to the
human ear. Ear protection is recommended.
4
5
CAUTION!
Tragic accidents can occur if the operator is not alert to the presence of
children. Children are often attracted to the machine and the mowing
activity. Never assume that children will remain where you last saw
them.
SLOPE OPERATION!
Do not operate on slopes greater than 15 degrees.
Use extra caution when mowing on slopes. Operate self-propelled units
up and down slopes. There is a significant risk of overturns when
operating across slopes. If you feel uneasy on a slope then do not mow it.
•Turn off the blades when not mowing. Before leaving the machine, turn off the blades
and stop the engine.
•Watch for traffic when operating near or crossing roadways.
•Do not operate the mower if it has been dropped or damaged in any manner or if the
mower vibrates excessively. Excessive vibration is an indication of damage.
Repair mower as necessary.
•Dress properly. Do not operate the mower when barefoot or wearing open sandals.
Wear only solid shoes with good traction when mowing.
•Never allow operation by untrained persons.
•Do not operate the machine while under the influence of alcohol or drugs.
•Operate self-propelled machines up and down slopes. There is significant risk of
overturns when operating across slopes. Avoid sudden turns. Operate walk-behind
machines across slopes. There is a significant risk of slipping under a walk-behind
machine when operating up and down slopes.
• Never tamper with safety devices. Check their proper operation regularly.
•Stop and inspect the equipment if you strike an object. Repair, if necessary, before
restarting. Never make adjustments or repairs with the engine running. ower blades
are sharp and can cut. Wrap the blades or wear gloves, and use extra caution when
servicing them. Do not operate at too fast a rate.
• Do not mow close to ditches, embankments or drop-offs. An edge could collapse. A
mower wheel over the edge could suddenly turn the unit over.
•Do not mow on wet grass if possible. Wet grass causes reduced traction and could cause
sliding. Do not park on a slope unless absolutely necessary.
• Always chock or block wheels and set parking brake if parked on slope.
WARNING: Hydraulic fluid can cause severe burns and penetrate skin causing
severe injury or death.
•Do not step on mower deck when operating, dismounting or mounting the
mower.
•Never push or pull unit with another vehicle. Transmission damage will
occur.
•When transporting be sure to secure mower frame to transport vehicle.
NEVER tie
down to moving parts or linkages which may become damaged or come loose.
•NEVER transport mower while engine is running.
•NEVER add fuel or remove gas cap while engine is running or hot.
•NEVER store unit near an open flame such as a water heater or furnace.
•NEVER modify or allow anyone to modify or alter any components or safety
devices.
•ALWAYS keep mower clean and free of debris and grass clippings.
•NEVER reverse battery cables. Electric shock will occur.
•ALWAYS keep battery away from open flame and sparks. Explosive gases
from
battery can cause serious injury or death.
•ALWAYS wear safety glasses and protective gear when servicing battery.
Battery fluid contains sulfuric acid. Contact with battery acid on skin or clothing
can cause severe chemical burns.
•NEVER tip battery beyond a 45 degree angle in any direction.
SAFETY PRECAUTIONS & DECALS
6
SAFETY PRECAUTIONS & DECALS
Danger/Warning Decal – OD99155
Ignition/PTO/Throttle Decal – OD99154
Parking Brake Decal – OD99152
Flying Debris Decal – OD53
Triangle Danger Decal – OD55
7
No Step Decal – OD11
DECALS NOT S OWN
Swisher Flag USA Decal – OD39
Ignition/PTO/Throttle Decal 50” ower Only – OD99157
36” Decal – OD108 & OD112 42” Decal (17.5 HP Engine) – OD109 & OD113
(18 HP Engine) – OD110 & OD114
50” Decal – OD111 & OD115
Height Indicator Decal - OD99151 Height of Cut Decal - OD99153
OPERATING YOUR NEW ZTR MOWER (cont.)
CONTROLS
●
OPERATOR PRESENCE SYSTEM:
This
mower is equipped with an operator’s presence
system. Any attempt to leave the seated position
with the engine running, without first disengaging
the PTO switch and placing the steering levers in the
neutral position, will cause the engine to shut off.
●
WARNING:
D
o not operate the machine unless
the Operator’s Presence System is functioning as
described.
●
PARKING BRAKE:
Always set the parking
brake before starting. The parking brake is located
on the drivers left hand side. Engage the parking
brake by pushing the lever rearward and down until
lever locks into position. Be sure to release parking
brake before operating the machine.
●
IGNITION:
The ignition switch is located on the
drivers right hand side toward the rear of the seat.
The ignition switch has three positions: OFF, ON,
START.
●
T ROTTLE:
The throttle\choke control is
located on the drivers right hand side towards the
front of the seat. For maximum performance and
battery charging, operate mower at full throttle.
When starting a cold engine, place lever forward in
the full choke position. After start up, move throttle
rearward to full throttle position. ove lever all the
way to the rear for lowest setting before shutting off
engine. The 50” odel has a choke mounted on the
right side fender for easier cold weather starts.
●
PTO SWITC :
The PTO, or Power Take Off
switch is used to engage the blades of the mower.
When the PTO switch is pulled out the blades will be
engaged. When the PTO switch is pushed in the
blades will be disengaged. The PTO switch must be
pushed in to complete the Operator’s Presence
System to start engine.
●
NEUTRAL LOCK:
The steering levers must be
in the outward and locked position for the mower
to start. ( See page 12)
STARTING MOWER
•TO START:
Position steering handles outward to
neutral locked position. Engage parking brake.
Extend throttle to full choke position*. Start ignition
and slide throttle lever back to full throttle position.
Allow engine to warm up for 1 minute. Release
parking brake
• * odel ZT20050 has a remote choke assembly
located on the right fender, behind the rider.
•FORWARD MOVEMENT:
To move the mower
forward gently push both steering levers forward equal
distance from the neutral position. The further you
move the levers forward the faster you will travel.
CAUTION steering levers have quick response
timing.
•BACKWARD MOVEMENT:
To move the
mower backwards, gently pull back on the steering
levers the same distance from neutral. The further you
pull back the faster you will travel.
NOTE
it is
normal for the reverse speed to be less than the
forward for easier turning.
•TURNS:
For left turn, move the right lever farther
forward then the left. For right turn, move the left
lever farther forward than the right. To obtain a tight
turning radius, GENTLY reverse one lever and push
the other lever forward. CAUTION: Aggressive
turns can damage lawns. Do not make turns with the
inside wheel stopped. It it better to keep both wheels
turning slightly.
•DECK EIG T ADJUSTMENT:
To raise the
mower deck up and down, simply rotate the lever
located in front of the seat above the floor plate.
Clockwise raises the deck. Counterclockwise lowers
the deck. The deck is adjustable from 1 ½” to 3 ½”.
• For best performance, grass over 6 ½” in height should
be mowed once in the highest position and once again
at desired cut height.
•ENGAGING BLADES
: Operator must be seated
for operation of blades. With engine to full throttle
position, pull UP on PTO switch located between the
throttle and the key switch. To disengage blades, push
DOWN on PTO switch.
•STOPPING ENGINE:
Place both levers in the
outward neutral locked position. Push PTO switch in
to disengage. Place throttle lever to lowest setting and
let idle for 30 seconds. Turn off ignition key and
engage parking brake.
8
OPERATING YOUR NEW ZTR MOWER (cont.)
MOWING
•WARNING: Do not operate mower at too fast of a rate. Sudden movements forward
and backward at fast speeds can cause accidents resulting in personal injury
• Start out slowly moving steering levers SLOWLY forward and backward until you
learn to operate the unit. NOTE: This mower has been designed to be very
maneuverable. Practice in open, flat areas is extremely necessary to become
comfortable and efficient with the controls.
•BEGIN TO MOW: Before starting the engine, set the desired deck height.
• Start the mower engine.
• Position the throttle lever about halfway and engage PTO switch. Reposition throttle
lever to full throttle position.
• ove steering levers forward to begin mowing.
•CAUTION:
Always make sure the deck is not plugged with grass or other debris.
Failure to do this will cause damage to the PTO belt.
•STOPPING: Hydrostatic mowers use hydrostatic braking through the transmissions.
To slow or stop the unit move the steering levers to the neutral position
•STOPPING T E ENGINE: ove the throttle lever to slow position, allow engine
to idle for 30 seconds and turn ignition to off position. CAUTION: Failure to
position the ignition key to any position except off will cause discharge of the battery.
9
MAINTENANCE SC EDULE
INSPECT BEFORE EAC USE
-
Loose fasteners
: Be sure all fasteners are at proper torque. Especially guards and
blades.
-
Parking brake
: If brake does not keep unit from rolling, brake must be adjusted
or repaired.
-
Tires
: Always check and maintain proper tire pressure (See tire sidewall for
recommendation). Check for damage due to sharp rocks, objects or stumps.
-
Operator Presence System:
The engine should not start unless the PTO switch
is disengaged and the control levers are locked in the neutral position. Any attempt to
leave the seated position with the PTO switch engaged will kill the engine.
-
Oil level
:To prevent damage to engine, always check and maintain proper oil
level. Never operate engine with the oil level below the add mark on the dipstick. Be
sure to tighten the dipstick securely after inspection. Refer to engine manual for
additional information.
INSPECT EVERY 8 OURS
-
Proper cleaning:
Remove any build up of grass, dirt or debris with a brush or
cloth from engine, battery, deck and and transaxles. Do not use harsh chemicals or
abrasives. Keep all painted surfaces and wheels free of oil and gasoline. Protect all
painted surfaces with an automotive wax. Do not spray unit with water or store
outdoors unprotected. Water can invade sealed bearings and reduce component life.
-
Air filter:
The engine will not run properly with a dirty or damaged air filter.
Check filter before starting the engine. Check for buildup of dirt or debris. Replace if
bent, clogged, or damaged.
-
Oil level:
To prevent damage to engine, always check and maintain proper oil
level. Never operate engine with the oil level below the add mark on the dipstick. Be
sure to tighten the dipstick securely after inspection.
10
Do not spray water onto hydrostatic transmissions. This will
cause injection of water into the unit causing failure.