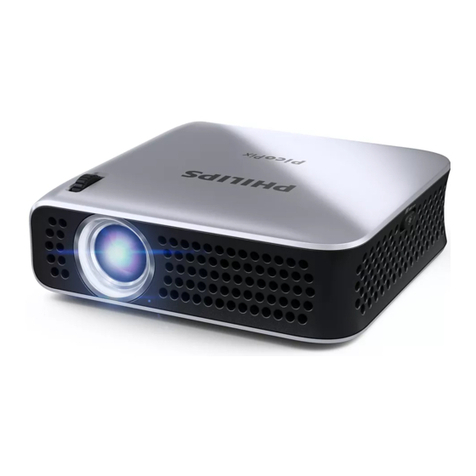
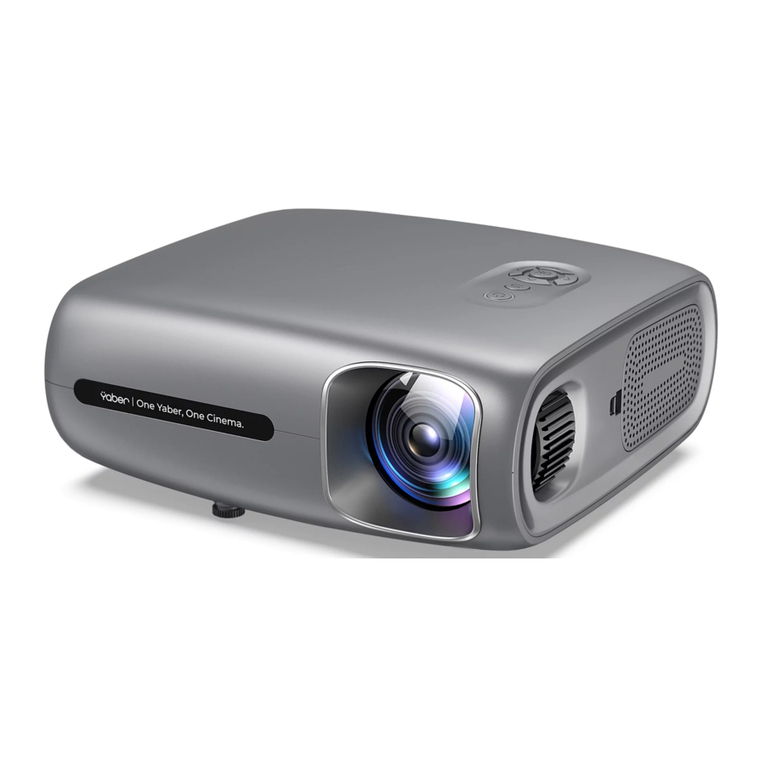
Targa PD-2810W User manual

i
EN
Important Information
Safety Cautions
Precautions
Please read this manual carefully before using your DLPTM Projector and keep the manual handy for future
reference. Your serial number is located on the bottom of your projector. Record it here:
CAUTION
To turn off main po er, be sure to remove the plug from po er outlet.
The po er outlet socket should be installed as near to the equipment as possible, and should be
easily accessible.
CAUTION
TO PREVENT SHOCK, DO NOT OPEN THE CABINET.
NO USER-SERVICEABLE PARTS INSIDE.
REFER SERVICING TO QUALIFIED SERVICE PERSONNEL.
This symbol arns the user that uninsulated voltage ithin the unit may be sufficient to cause
electrical shock. Therefore, it is dangerous to make any kind of contact ith any part inside of the
unit.
This symbol alerts the user that important information concerning the operation and maintenance
of this unit has been provided.
The information should be read carefully to avoid problems.
WARNING
TO PREVENT FIRE OR SHOC , DO NOT EXPOSE THIS UNIT TO RAIN OR MOISTURE.
DO NOT USE THIS UNIT’S PLUG WITH AN EXTENSION CORD OR IN AN OUTLET UNLESS
ALL THE PRONGS CAN BE FULLY INSERTED.
DO NOT OPEN THE CABINET. THERE ARE HIGH-VOLTAGE COMPONENTS INSIDE. ALL
SERVICING MUST BE DONE BY QUALIFIED SERVICE PERSONNEL.
DOC Compliance Notice
This Class B digital apparatus meets all requirements of the Canadian Interference-Causing Equipment
Regulations.
Acoustic Noise Information Ordinance-3. GSGV:
The sound pressure level is less than 70 dB (A) according to ISO 3744 or ISO 7779.
WARNING TO CALIFORNIA RESIDENTS:
Handling the cables supplied with this product will expose you to lead, a chemical known to
the State of California to cause birth defects or other reproductive harm. Wash hands after
handling.
Important Information

ii
In UK, a BS approved po er cable ith moulded plug has a Black (five Amps) fuse installed for use ith this
equipment. If a po er cable is not supplied ith this equipment please contact your supplier.
Important Safeguards
These safety instructions are to ensure the long life of your projector and to prevent fire and shock. Please
read them carefully and heed all arnings.
Installation
1. For best results, use your projector in a darkened room.
2. Place the projector on a flat, level surface in a dry area a ay from dust and moisture.
To avoid premature lamp failure, do not tilt the front of the projector up or do n by more than 15° from
level.
3. Do not place your projector in direct sunlight, near heaters or heat radiating appliances.
4. Exposure to direct sunlight, smoke or steam can harm internal components.
5. Handle your projector carefully. Dropping or jarring can damage internal components.
6. Do not place heavy objects on top of the projector.
7. If you ish to have the projector installed on the ceiling:
a. Do not attempt to install the projector yourself.
b. The projector must be installed by qualified technicians in order to ensure proper operation and
reduce the risk of bodily injury.
c. In addition, the ceiling must be strong enough to support the projector and the installation must be
in accordance ith any local building codes.
d. Please consult your supplier for more information.
Digital Light Processing and DLP are trademarks of Texas Instruments.
Windo s, Windo s 98, Windo s Me, Windo s XP or Windo s 2000 are trademarks or registered trade-
marks of Microsoft Corporation.
Other product and company names mentioned in this user’s manual may be the trademarks or registered
trademarks of their respective holders.
Important Information

iii
EN
Important Information
Fire and Shock Precautions
1. Ensure that there is sufficient ventilation and that vents are unobstructed to prevent the build-up of heat
inside your projector. Allo at least 3 inches (10 cm) of space bet een your projector and a all.
2. Prevent foreign objects such as paper clips and bits of paper from falling into your projector.
Do not attempt to retrieve any objects that might fall into your projector. Do not insert any metal objects such
as a ire or scre driver into your projector. If something should fall into your projector, disconnect it
immediately and have the object removed by a qualified service personnel.
3. Do not place any liquids on top of your projector.
4. Do not look into the lens hile the projector is on. Serious damage to your eyes could result.
5. Keep any items such as magnifying glass out of the light path of the projector. The light being projected
from the lens is extensive, therefore any kind of abnormal objects that can redirect light coming out of
the lens, can cause unpredictable outcome such as fire or injury to the eyes.
6. Do not cover the lens ith the supplied lens cap or equivalent hile the projector is on. Doing so can
lead to melting of the cap and possibly burning your hands due to the heat emitted from the light output.
7. The projector is designed to operate on a po er supply of 100-120 or 200-240 V 50/60 Hz AC. Ensure
that your po er supply fits this requirement before attempting to use your projector.
8. Handle the po er cable carefully and avoid excessive bending.
A damaged cord can cause electric shock or fire.
9. If the projector is not to be used for an extended period of time, disconnect the plug from the po er
outlet.
10. Do not touch the po er plug during a thunderstorm. Doing so can cause electrical shock or fire.
11. Do not handle the po er plug ith et hands.
CAUTION
1. Do not try to touch the ventilation outlet on the right and rear side ( hen seen from the front) as it can
become heated hile the projector is turned on.
2. Do not use the tilt-foot for purposes other than originally intended. Misuses such as gripping the tilt-foot
or hanging on the all can cause damage to the projector.
3. When carrying the projector, heed the follo ing:
• Ensure that the po er cable and any other cables are disconnected before moving the projector.
• Cover the lens ith the supplied lens cap so as not to scratch the lens surface.
4. Do not send the projector in the soft carrying case by parcel delivery service or cargo shipment. The
projector inside the soft carrying case could be damaged.
5. Select «High» in the Fan mode if you continue to use the projector for consecutive days. (From the
menu, select [Advanced] •¨[Fan Mode] •¨[High].)
6. Do not unplug the po er cable from the all outlet under any one of the follo ing circumstances.
Doing so can cause damage to the projector:
• While the projector is turned on.
• While the cooling fans are running. (The cooling fans continue to ork for 90 seconds after the
projector is turned off).
7. If you accidentally turn off the main po er by disconnecting the po er cable or press the main po er
s itch during cooling do n, ait 10 minutes and then turn on the projector to resume. This is to protect
the lamp.
Lamp Replacement
• To replace the lamp, follo all instructions provided on page 40.
• Be sure to replace the lamp hen the message «The lamp has reached the end of its usable life.
Please replace the lamp.» appears. If you continue to use the lamp after the lamp has reached the end
of its usable life, the lamp bulb may shatter, and pieces of glass may be scattered in the lamp case. Do
not touch them as the pieces of glass may cause injury.
If this happens, contact your supplier for lamp replacement.
• Allo a minimum of 90 seconds to elapse after turning off the projector. Then turn off the main po er
s itch, disconnect the po er cable and allo 60 minutes to cool the projector before replacing the lamp.

iv
What’s in the Box?
Make sure your box contains everything listed. If any pieces are missing, contact your supplier.
Please save the original box and packing materials if you ever need to ship your Projector.
• Projector ith lens cap
• Remote control ith Lithium battery (CR2025)
• Po er cable
• RGB signal cable
• Composite video cable
• S-Video cable
• Audio cable (RCA)
• Scart adapters (Video to Scart ith audio L/R & RGB to Scart ith audio L/R)
• Soft carrying case
• Band (use for bundling cables)
• User’s manual & quick guide
• Warranty card
Important Information

v
EN
Table of Contents Table of Contents
Important Information .............................................................................................................................................................. i
Safety Cautions ............................................................................................................................................................................................................................. i
What’s in the Box? ...................................................................................................................................................................................................................... iv
INTRODUCTION ....................................................................................................................................................................... 1
Introduction to the Projector ......................................................................................................................................................................................................... 1
Part Names of the Projector ......................................................................................................................................................................................................... 3
op Features ........................................................................................................................................................................................................................... 4
erminal Panel Features ....................................................................................................................................................................................................... 5
Part Names of the Remote Control ...................................................................................................................................................................................... 6
Battery Installation ............................................................................................................................................................................................................ 8
Remote Control Precautions ............................................................................................................................................................................................ 8
Operating Range for Wireless Remote Control .............................................................................................................................................................. 9
INSTALLATION AND CONNECTIONS .................................................................................................................................. 10
Setting Up the Screen and the Projector .................................................................................................................................................................................. 11
Selecting a Location ............................................................................................................................................................................................................. 11
hrow Distance and Screen Size ........................................................................................................................................................................................ 12
Making Connections ................................................................................................................................................................................................................. 14
Connecting Your DVD Player ............................................................................................................................................................................................... 14
Connecting Your VCR or Laser Disc Player ....................................................................................................................................................................... 15
Connecting Your PC or Macintosh Computer ..................................................................................................................................................................... 16
o connect SCAR output .................................................................................................................................................................................................... 17
Connecting the Supplied Power Cable ............................................................................................................................................................................... 19
PROJECTING AN IMAGE (BASIC OPERATION ................................................................................................................ 20
urning on the Projector ........................................................................................................................................................................................................... 20
Selecting a Source ...................................................................................................................................................................................................................... 22
Adjusting the Picture Size and Position .................................................................................................................................................................................... 23
Correcting the Vertical Keystone Distortion .............................................................................................................................................................................. 25
Optimizing RGB Picture Automatically ...................................................................................................................................................................................... 26
urning Up or Down Volume ...................................................................................................................................................................................................... 26
urning off the Projector ............................................................................................................................................................................................................. 27
CONVENIENT FEATURES ..................................................................................................................................................... 28
Freezing a Picture ....................................................................................................................................................................................................................... 28
Reducing Vide Noise (Noise Reduction) ................................................................................................................................................................................... 28
urning Off the Projector at the Preset ime (Off imer) ......................................................................................................................................................... 28
Correcting the Keystone Distortion ............................................................................................................................................................................................ 28
Getting the Information on Current Signal and Lamp Usage .................................................................................................................................................. 29
USING ON-SCREEN MENU ................................................................................................................................................... 30
Basic Menu Operation ................................................................................................................................................................................................................ 30
Using the Menus ................................................................................................................................................................................................................. 30
List of Menu Items ....................................................................................................................................................................................................................... 32
Menu Descriptions & Functions ................................................................................................................................................................................................. 33
Picture .................................................................................................................................................................................................................................. 33
Brightness/Contrast/Sharpness/Color/Hue/Noise Reduction/ elecine ....................................................................................................................... 33
Adjustment ............................................................................................................................................................................................................................. 33
Selecting Wall Color Mode ............................................................................................................................................................................................. 33
Adjusting Color Management/Selecting Gamma Correction Mode/Adjusting Color emperature/Adjusting White Peaking ................................ 34
Image ..................................................................................................................................................................................................................................... 34
Correcting Vertical Keystone Distortion Manually [Keystone]/Saving Vertical Keystone Correction [Keystone Save] .......................................... 34
Selecting Aspect Ratio [Aspect Ratio]/Adjusting the Horizontal, Vertical Position/Clock/Phase ............................................................................. 35
Setup .................................................................................................................................................................................................................................... 36
Setting Off imer [Off imer]/Selecting Lamp Mode [Lamp Mode]/Selecting Menu Language [Language]/
Selecting Menu Color [Menu Color Select]/Selecting Menu Display ime [Menu Display ime]/
Selecting a Color for Background [Background]/Selecting Projector Orientation [Orientation] ............................................................................... 36
Advanced ............................................................................................................................................................................................................................... 37
Disabling the Cabinet Buttons [Cabinet Button Lock]/Enabling High Speed Fan Mode [Fan Mode]/
Enabling Power Management [Power Management]/Selecting Signal Format [Signal Select] ............................................................................. 37
Information ............................................................................................................................................................................................................................ 38
Page 1 ............................................................................................................................................................................................................................. 38
Page 2 ............................................................................................................................................................................................................................. 38

vi
Table of Contents
Reset ............................................................................................................................................................................................................................................ 39
Returning to Factory Default [Factory Default]/Clearing Lamp Hour Meter [Clear Lamp Hour Meter] .......................................................................... 39
MAINTENANCE ....................................................................................................................................................................... 40
Replacing the Lamp .................................................................................................................................................................................................................... 40
Cleaning ....................................................................................................................................................................................................................................... 42
Cleaning the Cabinet and the Lens ..................................................................................................................................................................................... 42
TROUBLESHOOTING ............................................................................................................................................................ 43
Power Indicator ........................................................................................................................................................................................................................... 43
Status Indicator ........................................................................................................................................................................................................................... 43
Lamp Indicator ............................................................................................................................................................................................................................. 43
Common Problems & Solutions ................................................................................................................................................................................................. 44
SPECIFICATIONS ................................................................................................................................................................... 47
APPENDIX ............................................................................................................................................................................... 48
Cabinet Dimensions .................................................................................................................................................................................................................... 48
Pin Assignments of VGA PC (D-Sub RGB) Input Connector ................................................................................................................................................... 49
Compatible Input Signal List ...................................................................................................................................................................................................... 50

1
EN
INTRODUCTION
INTRODUCTION
Introduction to the Projector
This section introduces you to your ne Projector and describes the features and controls.
Congratulations on Your Purchase of The PD-2810W Projector
This is our most sophisticated single chip DLP TM based projector for the commercial and residential
entertainment user. It enables you to project precise images up to 200 inches across (measured
diagonally) from your PC or Macintosh computer (desktop or notebook), VCR, DVD player, document cam-
era, or a laser disc player.
You can use the projector on a tabletop or cart, you can use the projector to project images from behind the
screen, and the projector can be permanently mounted on a ceiling*1 . The remote control can be used
irelessly.
*1Do not attempt to mount the projector on a ceiling yourself.
The projector must be installed by qualified technicians in order to ensure proper operation and reduce
the risk of bodily injury.
In addition, the ceiling must be strong enough to support the projector and the installation must be in
accordance ith any local building codes. Please consult your dealer for more information.
Features you’ll enjoy:
• Lo level operation noise
• Ne Color Management system
• Ne lens shift feature
• An extremely accurate image scaling technology - offers a crisp image ith SXGA (12801024) resolu-
tion*2 .
• Supports most IBM VGA, SVGA, XGA , SXGA( ith scaling technology)*2 , Macintosh, component signal
(YCbCr/YPbPr) or any other RGB signals ithin a horizontal frequency range of 15 (RGB: 24 kHz or over)
to 100 kHz and a vertical frequency range of 50 to 85 Hz. This includes NTSC, PAL, PAL-N, PAL-M,
PAL60, SECAM and NTSC4.43 standard video signals.
* 2An SXGA image (12801024) are displayed ith scaling technology.
NOTE: Composite video standards are as follo s:
NTSC: U.S. TV standard for video in U.S. and Canada.
PAL: TV standard used in Western Europe.
PAL-N: TV standard used in Argentine, Paraguay and Uruguay.
PAL-M: TV standard used in Brazil.
PAL60: TV standard used for NTSC playback on PAL TVs.
SECAM: TV standard used in France and Eastern Europe.
NTSC4.43: TV standard used in Middle East countries.
• The supplied remote control can be used ithout a cable.
• The contemporary cabinet design is light, compact, easy to carry, and complements any home cinema
environment.

2
INTRODUCTION
About this user’s manual
The fastest ay to get started is to take your time and do everything right the first time. Take a fe minutes
no to revie the user’s manual. This may save you time later on. At the beginning of each section of the
manual you’ll find an overvie . If the section doesn’t apply, you can skip it.
• IBM is a trademark or registered trademark of International Business Machines Corporation.
• Mac and Po erBook are trademarks of Apple Computer, Inc., registered in the U.S. and other countries.
• Windo s, Windo s 98, Windo s Me, Windo s XP or Windo s 2000 are trademarks or registered trade-
marks of Microsoft Corporation.
• Other product and company names mentioned in this user’s manual may be the trademarks or registered
trademarks of their respective holders.

3
EN
INTRODUCTION
Part Names of the Projector
Lens Shift Dial (do n/up)
Zoom lever
Focus ring
Lens
Ventilation (inlet) Adjustable Tilt Foot Button Terminal Panel
Main Po er S itch
When you plug the sup-
plied po er cable into an
active all outlet and turn
on the Main Po er s itch,
the “po er” indicator turns
orange and the projector is
in standby mode. (See
page 20)
AC Input
Connect the supplied
po er cable’s t o-pin
plug here, and plug the
other end into an active
all outlet. (See page 19)
Ventilation (outlet)
Speaker
Controls
Remote Sensor
Lamp Cover
Ventilation (outlet)
Lamp Cover Scre Built-in Security Slot ( )*
* This security slot supports the
MicroSaver® Security System.
MicroSaver® is a registered
trademark of Kensington
Micro are Inc. The logo is trade-
marked and o ned by
Kensington Micro are Inc.
Ventilation (inlet)
Adjustable Tilt Foot Buttor

4
INTRODUCTION
Top Features
1. “on / stand” by button ( )
Use this button to turn the po er on and off hen the main po er is supplied and the projector is in
standby mode.
To turn on the projector, press and hold this button for a minimum of t o seconds. To turn off the projector,
press this button t ice.
2. “po er” indicator
When this indicator is green, the projector is on; hen this indicator is orange, it is in standby mode. See
the po er Indicator section on page 43 for more details.
3. “status” indicator
If this light blinks red rapidly, it indicates that an error has occurred, the lamp cover is not attached prop-
erly or the projector has overheated. If this light remains orange, it indicates that you have pressed a
cabinet key hile the Cabinet Button Lock is enabled. See the Status Indicator section on page 43 for
more details.
4. “lamp” indicator
If this light blinks red rapidly, it’s arning you that the lamp has reached the end of its usable life. After this
light appears, replace the lamp as soon as possible (See page 40). See the Lamp Indicator section on
page 43 for more details.
5. “source” button
This button ill allo you to select a video source such as a PC, VCR or DVD player.
Press and quickly release this button to display the Source list. Each time this button is pressed, each
source name ill be highlighted in sequence. Highlighting a source name for 2 seconds ithout pressing
the ok button ill display the selected source.
6. “auto adjust” button
Use this button to adjust an RGB source for an optimal picture (See page 26).
7. “menu” button
Displays the menu.
8. “select” / volume +/- buttons
: Use these buttons to select the menu of the item you ish to adjust.
: Use these buttons to change the level of a selected menu item. A press of the E button executes
the selection. When no menus appear, these buttons ork as a volume control.
9. “ok” button
Executes your menu selection and activates items selected from the menu.
10. “exit” button
Pressing this button ill return to the previous menu.
While you are in the main menu, pressing this button ill close the menu.

5
EN
INTRODUCTION
Terminal Panel Features
1. VGA PC input connector (mini D-sub 15 Pin)
Connect your computer or other analog RGB equipment such as IBM compatible or Macintosh computers.
Use the supplied RGB cable to connect to your computer.
2. Audio input mini jack (stereo mini)
This is here you connect the audio output from your computer or DVD player hen connected to the VGA
PC input or Component input.
3. Component (Y, Cb/Pb, Cr/Pr) input connectors (RCA)
Connect component video outputs (Y/Cb/Cr, Y/Pb/Pr) of the external equipment such as DVD player.
4. S-Video input connector (mini DIN 4 Pin)
Here is here you connect the S-Video input from an external source like a VCR.
NOTE: S-Video provides more vivid color and higher resolution than the traditional composite video format.
5. Video input connector (RCA)
Connect a VCR, DVD player, laser disc player, or document camera here to project video.
6. Audio input jacks L/Mono & R (RCA)
These are your left and right channel audio inputs for stereo sound from a Video or S-Video source.
7. DIN 8 Pin [Service]
For service use only.

6
INTRODUCTION
Part Names of the Remote Control
NOTE: Before using the remote control for the first time, remove the transparent insulation tape. See page
8 for battery installation.
1. Infrared Transmitter
Direct the remote control to ard the remote sensor on the projector cabinet.
2. “po er” button
This button ill turn the po er on and off hen the main po er is supplied and the projector is in standby
mode.
To turn on the projector, press and hold this button for a minimum of t o seconds. To turn off the projector,
press this button t ice.
3. “source” button
This button ill allo us to select a video source such as a PC, VCR or DVD player.
Press and quickly release this button to display the Source list. Each time this button is pressed, each
source name ill be highlighted in sequence. Highlighting a source name for 2 seconds ithout pressing
the ok button ill display the selected source.
4. “menu” button
Displays the menu for various settings and adjustments.

7
EN
INTRODUCTION
5. “select” /volume buttons
: These buttons ill allo you to select the menu of the item you ish to adjust.
: These buttons ill allo you to change the level of a selected menu item. A press of the E button
executes the selection. When no menus appear, these buttons ork as a volume control.
6. “ok” button
Executes your menu selection and activates items selected from the menu.
7. “exit” button
This button ill return you to the previous menu.
While you are in the main menu, pressing this button ill close the menu.
8. “aspect” button
This button ill display the aspect ratio select screen.
Each time this button is pressed, the sub menu item ill change as follo s:
Normal Full Zoom or Native
See page 35.
9. “keystone” -/+ button
This button ill correct the vertical keystone distortion of a picture.
10. “auto adj.” button
Use this button to adjust an RGB source for an optimal picture.
11. “noise red.” button
This button ill turn on the noise reduction feature to reduce video noise.
12. “freeze” button
This button ill freeze a picture. Press again to resume motion.
13. “off timer” button
This button ill display six options to turn off po er automatically: OFF, 0:30, 1:00, 2:00, 3:00, 4:00, 6:00
and 8:00. See pages 28 and 36.

8
INTRODUCTION
Battery Installation
[Wireless Card Remote Control]
1. Press firmly and slide the battery cover off.
2. Remove the old Lithium coin cell and install ne one (CR2025). Ensure that the side ith a «+» is facing
up.
3. Put the cover back.
Remote Control Precautions
• Handle the remote control carefully.
• If the remote control gets et, ipe it dry immediately.
• Avoid excessive heat and humidity.
• Do not place the battery upside do n.
NOTE:
* Keep the coin cell battery out of reach of children so as not to allo them to s allo the cell battery.
CAUTION:
Danger of explosion if battery is incorrectly replaced.
Replace only ith the same or equivalent type recommended by the manufacturer.
Dispose of used batteries according to your local regulations.

9
EN
INTRODUCTION
Operating Range for Wireless Remote Control
7m/22 feet
Remote sensor on
projector cabinet
Remote control
Actual operating range may differ from the above drawing.
• The infrared signal operates by line-of-sight up to a distance of about 22 feet/7 m and within a 60-degree
angle of the remote sensor on the projector cabinet.
• The projector will not respond if there are objects between the remote control and the sensor, or if strong
light falls on the sensor. A weak battery will also prevent the remote control from properly operating the
projector.

10
INSTALLATION AND CONNECTIONS
INSTALLATION AND CONNECTIONS
This section describes ho to set up your projector and ho to connect video and audio sources.
Your projector is simple to set up and use. But before you get started, you must first:
1 Set up a screen and the projector.
2 Connect your video equipment or computer to the projector. See page 14 – 18.
3 Connect the supplied po er cable. See page 19.
NOTE: Ensure that the po er cable and any other cables are disconnected before moving the projector.
When moving the projector or hen it is not in use, cover the lens ith the lens cap.

11
EN
INSTALLATION AND CONNECTIONS
Setting Up the Screen and the Projector
Selecting a Location
The further your projector is from the screen or all, the larger the image. The minimum size the image can
be is approximately 30" (0.76 m) measured diagonally hen the projector is roughly 45.8 inches (1.2 m) from
the all or screen. The largest the image can be is 200" (5.0 m) hen the projector is about 316 inches (8.0
m) from the all or screen. Use the dra ing belo as a guide.
16:9 Screen size /Unit: cm/inch)
Screen Size
Lens center
Distance (Unit. m/inch)
NOTE:
* Screen size for 16:9
* The distances are indicated by intermediate values bet een tele and ide. Use as a rule of thumb.

12
INSTALLATION AND CONNECTIONS
Throw Distance and Screen Size
The follo ing sho s the proper relative positions of the projector and screen. Refer to the table to determine
the position of installation.
Distance Chart Screen Width
Screen Height
Screen Diagonal
Screen center
Screen Bottom
Lens Center
Thro Angle ( )
Thro Distance (C)
B = Vertical distance bet een lens center and screen center
C = Thro distance
D = Vertical distance bet een lens center and bottom of screen for desktop (top of screen for ceiling)
= Thro angle
NOTE: Distances may vary +/-5%.

13
EN
INSTALLATION AND CONNECTIONS
αScreen Size B C
Diagonal Width Height
D
inch wide tele wide tele wide tele wide tele
mm inch mm inch mm inch mm inch mm inch mm inch mm inch mm inch mm
degree degree
30 762 26.1 664 14.7 374 4.9 124 4.9 125 41.7 1060 49.9 1267 -2.4 -61 -2.4 -61 6.7 5.6
40 1016 34.9 886 19.6 498 6.5 166 6.5 166 56.3 1430 67.1 1706 -3.2 -81 -3.2 -82 6.6 5.6
60 1524 52.3 1328 29.4 747 9.8 248 9.8 249 85.4 2169101.7 2582 -4.8 -122 -4.8 -122 6.5 5.5
72 1829 62.8 1594 35.3 897 11.7 298 11.8 299102.9 2613122.4 3108 -5.7 -146 -5.8 -147 6.5 5.5
80 2032 69.7 1771 39.2 996 13.0 331 13.1 332114.5 2908136.2 3459 -6.4 -162 -6.4 -163 6.5 5.5
84 2134 73.2 1860 41.2 1046 13.7 347 13.7 349120.3 3056143.1 3634 -6.7 -170 -6.7 -171 6.5 5.5
90 2286 78.4 1992 44.1 1121 14.6 372 14.7 374129.0 3278153.4 3897 -7.2 -183 -7.2 -184 6.5 5.5
100 2540 87.2 2214 49.0 1245 16.3 413 16.4 416143.6 3647170.7 4336 -8.0 -203 -8.0 -204 6.5 5.5
120 3048104.6 2657 58.8 1494 19.5 496 19.6 499172.7 4387205.2 5213 -9.6 -243 -9.6 -245 6.5 5.5
150 3810130.7 3321 73.5 1868 24.4 620 24.5 623216.4 5495257.0 6528-12.0 -304-12.0 -306 6.4 5.5
180 4572156.9 3985 88.2 2241 29.3 744 29.4 748260.0 6604308.8 7843-14.4 -365-14.4 -367 6.4 5.4
200 5080174.3 4428 98.1 2491 32.5 827 32.7 831289.1 7343343.3 8719-16.0 -406-16.1 -408 6.4 5.4
Distance Chart (Maximum Lens Shift Position Top)
αScreen Size B C
Diagonal Width Height
D
inch wide tele wide tele wide tele wide tele
mm inch mm inch mm inch mm inch mm inch mm inch mm inch mm inch mm
degree degree
30 762 26.1 664 14.7 374 12.3 312 12.3 312 41.7 1060 49.9 1267 4.9 125 4.9 125 16.4 13.8
40 1016 34.9 886 19.6 498 16.4 416 16.4 416 56.3 1430 67.1 1706 6.6 167 6.5 166 16.2 13.7
60 1524 52.3 1328 29.4 747 24.5 623 24.6 624 85.4 2169101.7 2582 9.8 250 9.8 249 16.0 13.6
72 1829 62.8 1594 35.3 897 29.4 748 29.5 749102.9 2613122.4 3108 11.8 300 11.8 299 16.0 13.5
80 2032 69.7 1771 39.2 996 32.7 831 32.8 833114.5 2908136.2 3459 13.1 333 13.1 332 15.9 13.5
84 2134 73.2 1860 41.2 1046 34.3 872 34.4 874120.3 3056143.1 3634 13.8 350 13.7 349 15.9 13.5
90 2286 78.4 1992 44.1 1121 36.8 934 36.9 937129.0 3278153.4 3897 14.8 375 14.7 374 15.9 13.5
100 2540 87.2 2214 49.0 1245 40.9 1038 41.0 1041143.6 3647170.7 4336 16.4 417 16.4 416 15.9 13.5
120 3048104.6 2657 58.8 1494 49.0 1245 49.2 1249172.7 4387205.2 5213 19.7 500 19.6 499 15.9 13.5
150 3810130.7 3321 73.5 1868 61.3 1557 61.4 1561216.4 5495257.0 6528 24.6 625 24.5 623 15.8 13.4
180 4572156.9 3985 88.2 2241 73.5 1868 73.7 1873260.0 6604308.8 7843 29.5 750 29.4 748 15.8 13.4
200 5080174.3 4428 98.1 2491 81.7 2075 81.9 2081289.1 7343343.3 8719 32.8 833 32.7 831 15.8 13.4
B : Vertical distance bet een lens center and screen center
C : Thro distance
D : Vertical distance bet een lens center and bottom of screen for desktop (top of screen for ceiling)
á : Thro Angle
WARNING
* Installing your projector on the ceiling must be done by a qualified technician. Contact your sup-
plier for more information.
* Do not attempt to install the projector yourself.
• Only use your projector on a solid, level surface. If the projector falls to the ground, you can be injured and
the projector severely damaged.
• Do not use the projector here temperatures vary greatly. The projector must be used at temperatures be-
t een 41°F (5°C) and 95°F (35°C).
• Do not expose the projector to moisture, dust, or smoke. This ill harm the screen image.
• Ensure that you have adequate ventilation around your projector so heat can dissipate. Do not cover the
vents on the side or the front of the projector.
Reflecting the Image
Using a mirror to reflect your projector’s image enables you to enjoy a much larger image.
If you’re using a mirror and your image is inverted, use the menu button and select buttons on
your projector cabinet or your remote control to correct the orientation. (See page 36.)
Distance Chart (Maximum Lens Shift Position Bottom=Factory Preset)

14
INSTALLATION AND CONNECTIONS
Making Connections
Connecting Your DVD Player
Component
Audio In Component In
COMPONENT
AUDIO IN
Audio cable (not supplied)
Component video RCA3
cable (not supplied) Audio Equipment
DVD player
COMPONENT OUT
Audio cable (supplied)
You can connect your projector to a DVD player ith component output or Video output. To do so, simply:
1. Turn off the po er to your projector and DVD player.
2. If your DVD player has the component video (Y,Cb,Cr) output, use a component video cable (RCA x 3) to
connect your DVD player to the COMPONENT IN connectors on the projector.
For a DVD player ithout component video (Y,Cb,Cr) output, use the supplied composite video cable to
connect a composite VIDEO output of the DVD player to the Video Input of the projector.
Use an audio cable (supplied) to connect the audio from your VCR or laser disc player to your audio equip-
ment (if your VCR or laser disc player has this capability). Be careful to keep your right and left channel
connections correct for stereo sound.
3. Turn on the projector and DVD player.
NOTE: Refer to your DVD player’s o ner’s manual for more information about your DVD player’s video
output requirements.
Table of contents
Languages:
