Tatu Marchesan SDA CP User manual

1
The No-Till Seed Drill, SDA CP model, is designed to the seeding over stubble
mulch, minimum or conventional tillage for Soybean, Wheat, Barley, Oats, Rice on
flood-irrigated or dryland and other small grains. As advantages, it stands out due
to high strength, accuracy on seed and fertilizer distribution, higher free articulation
of the drive wheels, besides optional for different applications.
The seeds are metered by helical fluted feed cup with simultaneous delivery
adjustment. The rates are reached by the scales displayed on the hoppers. In this
system, the seeds are gently placed to the soil in a continuous line pattern.
The fertilizer is metered by endless augers (coil springs), guaranteeing an
individual and accurate distribution in all the row units.
The setting of the different rates of fertilizer and seed population are easily
reached by the Fast Change Sprocket system - TRA.
In order to face higher usability, this model can be optionally supplied with:
- Box of small seeds for pastures;
- USG - Unit of Large Seeds for Corn, Soybean, Bean, Sorghum, Cotton, etc.,
using perforated horizontal plates;
- Wheels for Longitudinal Transport.
- Hydraulic row markers.
This manual contains the necessary information for the best seeder performance.
The Operator must read, with plenty attention, the whole manual before putting the
seeder in operation and be aware of the safety's recommendations.
To obtain any information, or in the eventuality of technical problems, consult
the Dealer, as well as Marchesan's customer service, that will guarantee the Seeder
full operation.
INTRODUCTIONINTRODUCTION
INTRODUCTIONINTRODUCTION
INTRODUCTION

2
INDEXINDEX
INDEXINDEX
INDEX
TO THE OWNER ..................................................................................................................... 3
TO THE OPERATOR ....................................................................................................... 4 to 7
Work with Safety - Transport of the Equipment ........................................... 4 to 6
Safety Stickers ........................................................................................................... 7
TECHNICAL SPECIFICATIONS.............................................................................................. 8
ASSEMBLY..................................................................................................................................9 to 12
Drawbar .................................................................................................................... 9
Hydraulic System......................................................................................... 10 to 12
SET-UP INSTRUCTIONS .............................................................................................. 13 to 30
Preparing the Tractor and Hitching to the tractor ........................................... 13
Leveling the Seeder ............................................................................................... 14
Spacing Between Rows ........................................................................................15
Positioning the Row Units in the Frame .................................................... 16 to 26
Procedures for Changing the Row Spacings ...................................... 27 and 28
Preparing the Seeder for Transportation ...........................................................29
Procedures Before Seeding and Ideal Speed of Operation ..........................30
ADJUSTMENTS AND OPERATIONS.......................................................................... 31 to 45
Seeds Distribution ........................................................................................ 31 to 33
Fertilizer Distribution...................................................................................... 34 to 37
Practical Test of Seed and Fertilizer Distribution ............................................... 38
Auxiliary Calculation for the Distribution of Seed and Fertilizer..................... 39
Opening the Furrows ............................................................................................ 40
Seeding Depth ...................................................................................................... 41
Lateral Depth Bands and Counterweights ....................................................... 42
Placement and Location of the Fertilizer in the Soil......................................... 43
Closing the Furrows ............................................................................................... 44
OPERATIONS - Important Points .......................................................................... 45
OPTIONAL .................................................................................................................. 46 to 68
Row Markers Assembly with Hydraulic Cylinders............................................. 46
Assembly of the Hydraulic System ............................................................ 47 to 50
Row Marker Adjustment and Disc Angle ............................................. 51 and 52
Boxes for Small Seeds (Pastures) ......................................................................... 53
Rate of Small Seeds ............................................................................................... 54
Row Unit for Fertilizer Banding (Soybean) ......................................................... 55
Horizontal Metering for Large Seeds - USG ......................................... 56 and 57
Assembling the Transmission of the USG ............................................. 58 and 59
Distribution and Rate for Large Seeds ...................................................... 60 to 63
Furrows Opening and Fertilizer Depth ................................................................64
Electronic Hectaremeter ........................................................................ 65 and 66
Wheel System for Longitudinal Transportation .................................... 67 and 68
MAINTENANCE ......................................................................................................... 69 to 76
Lubrication ................................................................................................... 69 to 71
Cleanness of the Systems of Fertilizer and Seeds............................................. 72
Maintenance of the Fertilizer Distributor ........................................................... 73
Double Discs Maintenance and Metering Cleanness.................................... 74
Valves Maintenance ............................................................................................. 75
Maintenance of the Seeder and Points for Hoisting ....................................... 76
IMPORTANT .......................................................................................................................... 77
3
TO THE OWNERTO THE OWNER
TO THE OWNERTO THE OWNER
TO THE OWNER
IMPORTANT:- ONLY PERSON WHO OWNS A FULL KNOWLEDGE OF THE TRACTOR AND
IMPLEMENT, MUST OPERATE THEM.
- MARCHESAN IS NOT RESPONSIBLE FOR ANY DAMAGE CAUSED BY
ACCIDENT ON TRANSPORT, INCORRECT UTILIZATION OR NO ADEQUATE
STORAGE.
- AFTER THE OPERATING SEASON, THOROUGHLY CLEAN YOUR IMPLEMENT
AND INSPECT IT. PREVENTIVE MAINTENANCE PAYS DIVIDENDS.
- YOUR DEALER HAS ORIGINAL EQUIPMENT PARTS WHICH ASSURE PROPER
FIT AND BEST PERFORMANCE.
Note: THE WARRANTY SHALL NOT BE APPLIED TO ANY EQUIPMENT, OR ANY PART THEREOF,
WHICH HAS BEEN ALTERED ELSEWHERE THAN AT THE PLACE OF MANUFACTURE OR
WHICH THE ORIGINAL PURCHASER THEREOF, AT RETAIL, HAS USED OR ALLOWED
TO BE USED PARTS, NOT MADE OR SUPPLIED BY MARCHESAN S/A.
General information
- The right-hand and left- hand sides of the planter are determinated by facing
in the direction the implement will travel when moving forward.
-When ordering parts please be sure to inform the quantity, part number and
name of each part wanted. It is also important to give the machine Serial Number,
which is placed on the mainframe.
The acquisition of any TATU product assures to the original purchaser the following
rights:
- Warranty certificate.
- Instructions manual.
- Technical assistance by the dealer on the equipment delivery.
- The owner has obligation to inspect the conditions of the product on delivery,
as well as knowing the warranty terms.
- Special attention should be given to safety recommendations, operation cares
and maintenance of the product.
- Be sure to read and understand the instructions for adjusting and operating
the equipment as reported in this manual. Check each item referred to obtain
efficient operation and maximum trouble free performance. Remember, an
equipment which is properly lubricated and adjusted saves you time, labor and fuel.
This manual should be directed to the operators and maintenance people.
4
TO THE OPERATO THE OPERA
TO THE OPERATO THE OPERA
TO THE OPERATORTOR
TORTOR
TOR
Operation Safety
- ONLY WITH A COMPLETE CO-OPERATION OF IMPLEMENT OPERATOR THE
ACCIDENTS CAN BE PREVENTED.
- THIS SYMBOL IS A WARNING DEVICE WHICH SHOULD BE KEPT IN PLACE,
CLEAN AND VISIBLE, WHEN TRANSPORTING THE IMPLEMENT DURING THE
DAY OR NIGHT. USE ACCESSORY LIGHTS AND OTHER DEVICES IN ORDER
TO GIVE ADEQUATE WARNING TO OPERATORS OF OTHER VEHICLES .
The SDA CP Seeder is easy to operate,
therefore some basic and indispensable
cares are required on its handling.
Have always on mind that safety
requires constant attention, observation
and prudence during the operation,
transport, maintenance and storage of the
machine.
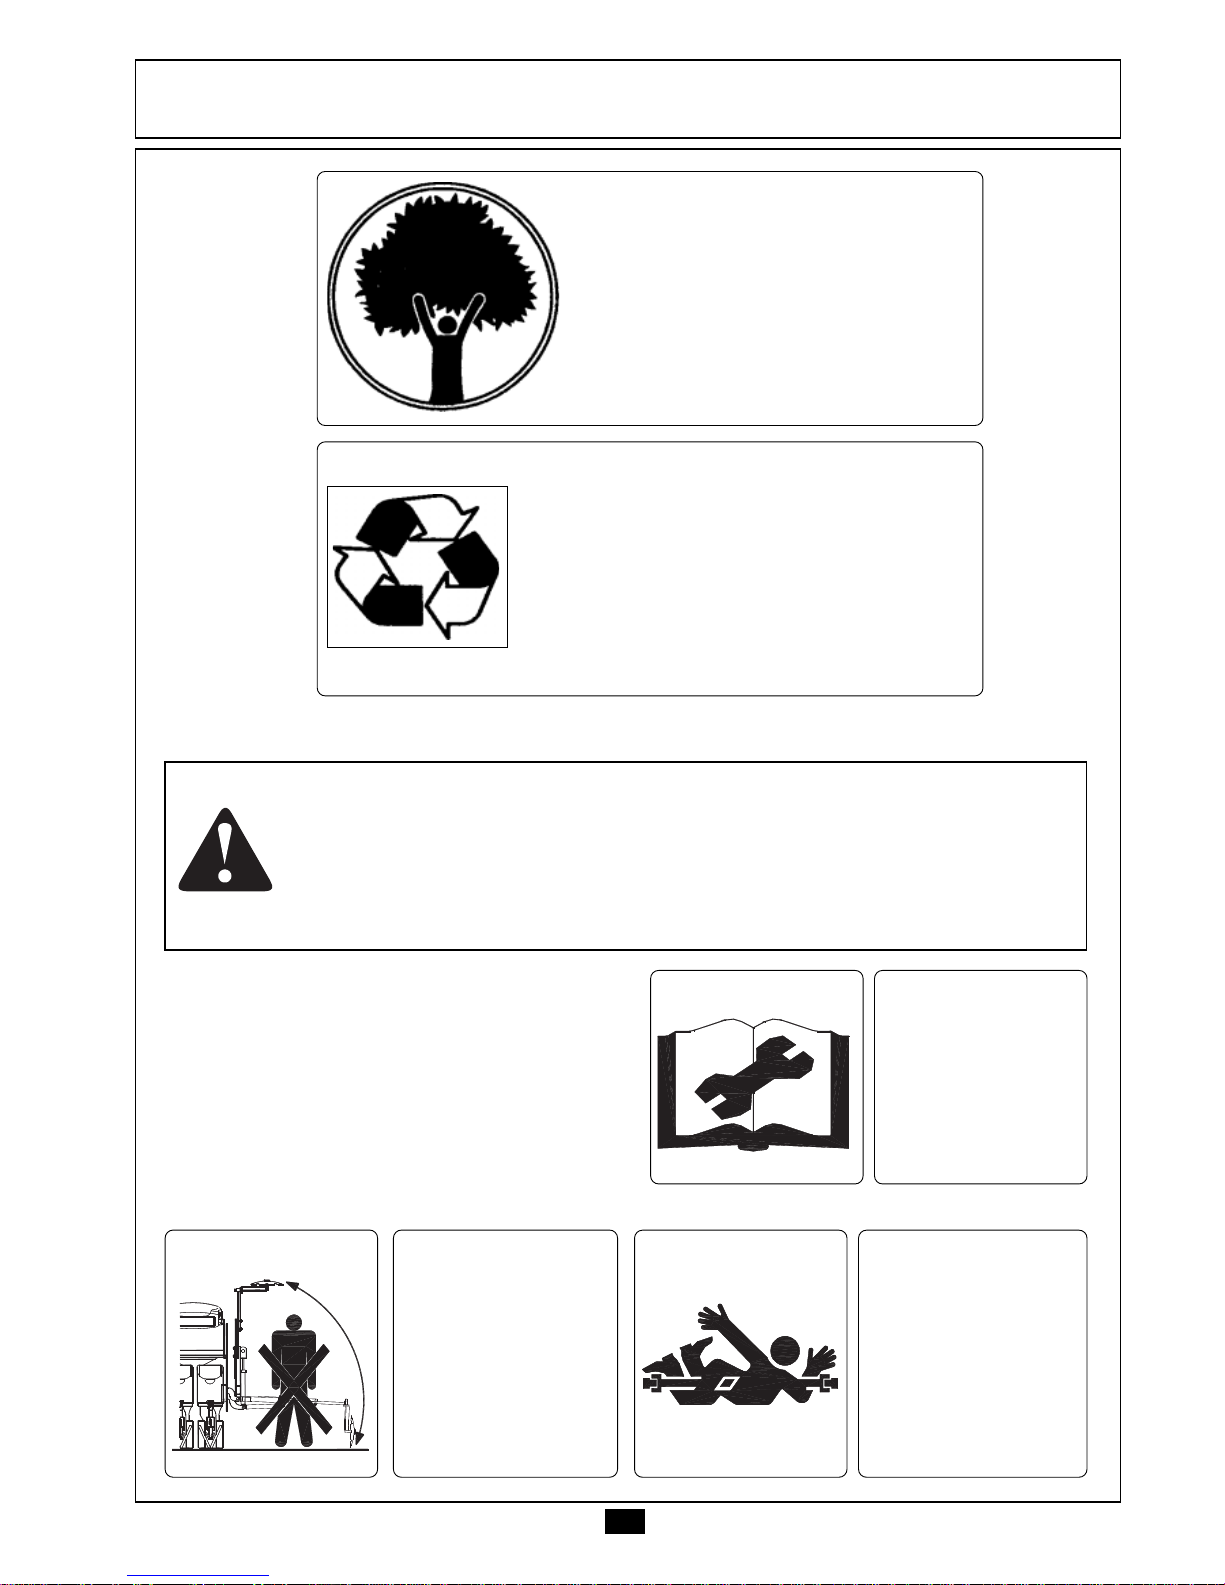
Dear User !
Respect the Ecology.
Do not throw the trash away.
This gesture of goodwill helps to
protect our Environment.
Do not spill combustible oil, battery and
filter residues in the soil. The trash in
contact with the soil reach the sub layer
which directly damage to the
Environment. Look for information to
delivery these contaminated elements to
whom knows to recycle or re-use them.
Be careful with the environment
Read and
understand the
informations
before realize
adjustments and
maintenance.
Raising or lowering
the seeder do not
allow any person
come closer to it,
especially in the row
markers action
area.
When working near
the PTO or driving
mechanisms have
a special care.
Never come closer
to rotating parts.
5
TO THE OPERATO THE OPERA
TO THE OPERATO THE OPERA
TO THE OPERATORTOR
TORTOR
TOR
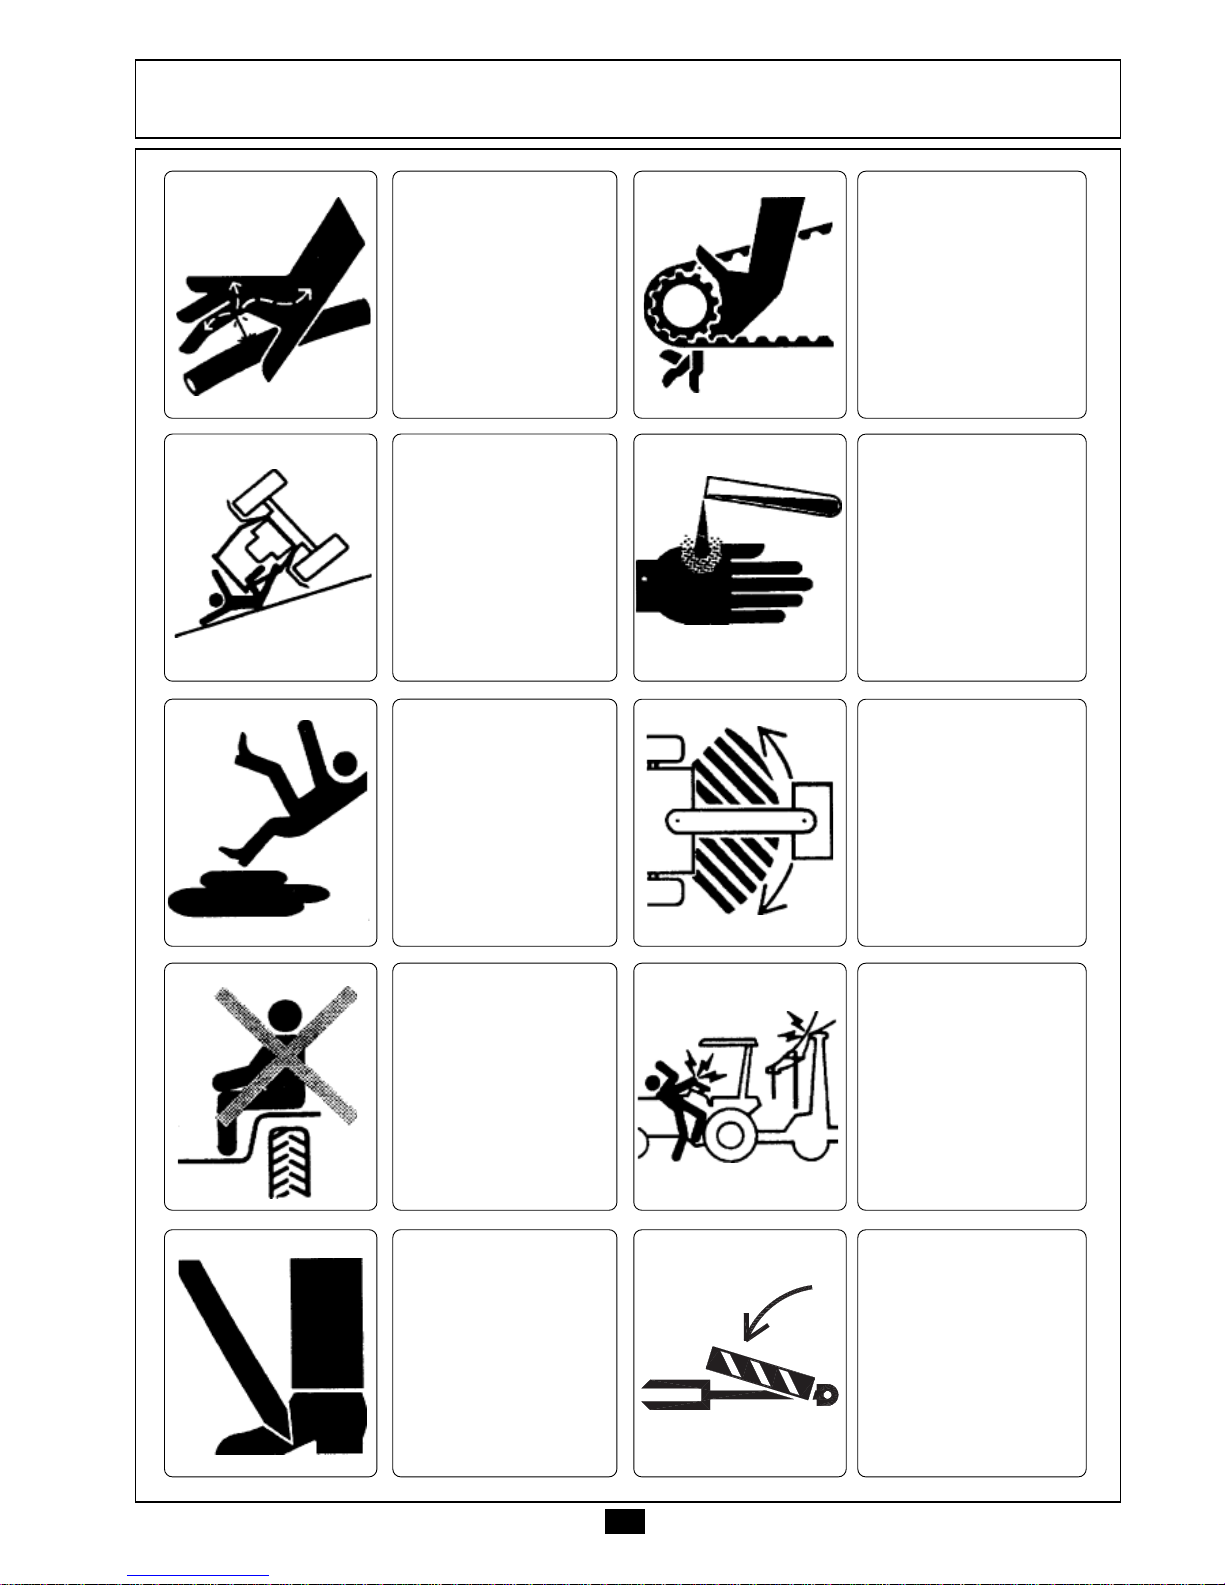
Be careful when
moving around
steep graders to
avoid overturn.
Be careful with use
of fertilizer or
chemicals.
These products in
contact with skin
could cause
personal injury to
the body.
Keep the
entrances and
places acessible
to working, clean
and free of the oil
and grease to
prevent
accidents.
Never allow riders
on the tractor or
implement unless
an additional seat
is available.
Use extreme
caution when
circulating with the
implement under
electrical power
lines, any contact
could result in
severe shock, injury
or death.
In order to protect
yourself always
wear adequate
clothes and shoes
during the
operations.
Always use the
cylinder transport
locks when
transporting the
implements.
Never attempt to
change the
adjustments, clean
or lubricate the
implement when in
movement.
Never use your
hands to check for
hydraulic leaks.
Escaping hydraulic
oil under pressure
can have sufficient
force to penetrate
the skin causing
personal injury.
Never transport
the implement on
rough roads during
the night. When
operating avoid to
make sharp turns
that may cause tire
to make contact
with implement.

6
TO THE OPERATO THE OPERA
TO THE OPERATO THE OPERA
TO THE OPERATORTOR
TORTOR
TOR
- During the operation or transport do not allow riders on the tractor or
implement.
- Never allow children playing near the place that you are operating in, as
well as when transporting or stored.
- Learn about the area before starting the operation. Delimit the dangerous
places or the obstacles.
- Use the most appropriate speed according to the land conditions or roads
to travel.
- Use personal protective equipment for your own protection.
- Wear clothes and adequate shoes. Avoid large or loosen clothes that could
twine on the movable parts.
- Never operate without the machine protection devices.
- Be careful when hitching the implement to the tractor. Hands or fingers
can be injured when caught between the hitch and tractor drawbar.
- Before starting to raise or move the seeder check for people or animals
near or under the seeder.
- Verify with attention the transport width in narrow places.
- When disconnecting the implement move it to level area, preferably a hard
surface, on the field or at the warehouse. Certify that the machine is properly
stationed.
- See the general safety instructions in the back-cover of this Manual.
When Transporting the Implement on Truck or Trailer
To transport the equipment at long distances use a truck or trailer. However,
the safety instructions should be followed carefully:
- Use adequate loading dock to load and unload the equipment. Never use
a ditch bank, this practice could result in serious personal injury.
- In the event of lifting up with hoist use the appropriate points to hold.
- Use the seeder stands to prop it correctly.
- The seeder drawbar should be rised and locked in the vertical position or it
should be moved away and tied to the cargo.
- Tie the hopper covers and other mobile parts that can come unfastened
causing accidents.
- Use chock blocks and safety chains to secure the implement to the truck or
trailer during the transport.
- After 8 to 10 km transporting, please inspect the condition of the cargo.
Repeat this procedure every 80 to 100 km. Give more attention when
transporting the implement on rough roads, steep graders and other adverse
conditions.
- Be careful with transport height, specially when passing under electrical
power lines. Any contact could result in severe shock, injury or death.
- Observe all laws and regulations as to the height limits and cargo width while
transporting the implement on truck or trailer. If necessary use banners, lights
and other devices in order to give adequate warning to the drivers of other
vehicles.

7
TO THE OPERATO THE OPERA
TO THE OPERATO THE OPERA
TO THE OPERATORTOR
TORTOR
TOR
Safety Stickers
The safety stickers are used to alert you to hazards in the most dangerous parts
of the seeder. Keep the stickers clean and replace them when it's necessary.
When the machine is equipped with row
marker.
CACA
CACA
CAUTIONUTION
UTIONUTION
UTION
AA
AA
ATENCIONTENCION
TENCIONTENCION
TENCION
Read the manual before
attempting to work with the
equipment.
Lea el manual antes de iniciar el
uso del equipo.
0503031779
DANGER
PELIGRO
AVOID ACCIDENTS
EVITE ACCIDENTES
NEVER USE THE REAR PLATFORM FOR
OTHER MEANS THAN REFILL THE SEEDER.
BE SURE THAT BYSTANDERS ARE
STANDING CLEAR WHEN OPERATING OR
TRANSPORTING THE MACHINE.
LA PLATAFORMA SOLO DEBE SER USADA
PARA ABASTECER LA SEMBRADORA.
DURANTE LA OPERACIÓN O
TRANSPORTE, NO PERMITA LA
PERMANENCIA DE PERSONAS SOBRE LA
MÁQUINA.
0503032073
WARNINGWARNING
WARNINGWARNING
WARNING
ADAD
ADAD
ADVERVER
VERVER
VERTENCIATENCIA
TENCIATENCIA
TENCIA
Use the SAFETY LOCKS before adjusting
or servicing under the planter.
Utilice las TRABAS DE SEGURIDAD antes
de efectuar ajustes o mantenimiento
debajo de la sembradora.
AVOID ACCIDENTS.
EVITE ACCIDENTES.
0503031780
Before starting to raise or move the planter
check for people or animals near or under
the planter, especially in the row markers
action area.
Place the hydraulic cylinders lock before
transporting, servicing or storing the planter.
Antes de accionar la sembradora observe si
no hay personas o animales en el área de
acción de los marcadores de línea o debajo
de la sembradora.
Coloque las trabas en los cilindros
hidráulicos antes de transportar, almacenar
o efectuar servicios de mantenimiento.
0503031782
WARNINGWARNING
WARNINGWARNING
WARNING
ADAD
ADAD
ADVERVER
VERVER
VERTENCIATENCIA
TENCIATENCIA
TENCIA

8
TECHNICAL SPECIFICATECHNICAL SPECIFICA
TECHNICAL SPECIFICATECHNICAL SPECIFICA
TECHNICAL SPECIFICATIONSTIONS
TIONSTIONS
TIONS
Note.: Gotten average performance with the work speed = 8 km/h
15 and 19 Rows SDA CP, equipped with two 12.4/11-28 (30 PSI) Tires;
23, 27 and 29 Rows SDA CP, equipped with two 14.9/13-28 (30 PSI) Tires.
MODEL SDA CP
Number of Rows 15 19 21 23 27 29
Row Spacing (mm) 158 158 175 158 175 158
Working Width (mm) 2212 2844 3500 3476 4550 4424
Seeding Depth 0 a 60 mm
Seed Hoppers Capacity 610 Liters 770 Liters 910 Liters 910 Liters 1160 Liters 1160 Liters
490 kg 620 kg 730 kg 730 kg 930 kg 930 kg
Fertilizer Hoppers Capacity 700 Liters 880 Liters 1040 Liters 1040 Liters 1300 Liters 1300 Liters
780 kg 980 kg 1170 kg 1170 kg 1470 kg 1470 kg
Average Performance per Day
(10 Hours) ha
Tractor (HP) Required 80 - 90 90 - 95 95 - 105 95 - 105 120 - 140 120 - 140
Total Width (mm) 3780 4570 5200 5200 6280 6280
Length 3750 mm
Height 1810 mm
Double Disc
Diameter
Weight (kg) 3110 3800 4220 4300 5210 5300
13 17 21 21 27 27
Ø 15" x Ø 15"
SDA CP - No-Till Seed Drill - Plastic Hoppers

9
ASSEMBLASSEMBL
ASSEMBLASSEMBL
ASSEMBLYY
YY
Y
In order to make easy the transport, SDA CP leaves the factory semi-mounted,
remaining only the installation of a few components according to the following
instructions:
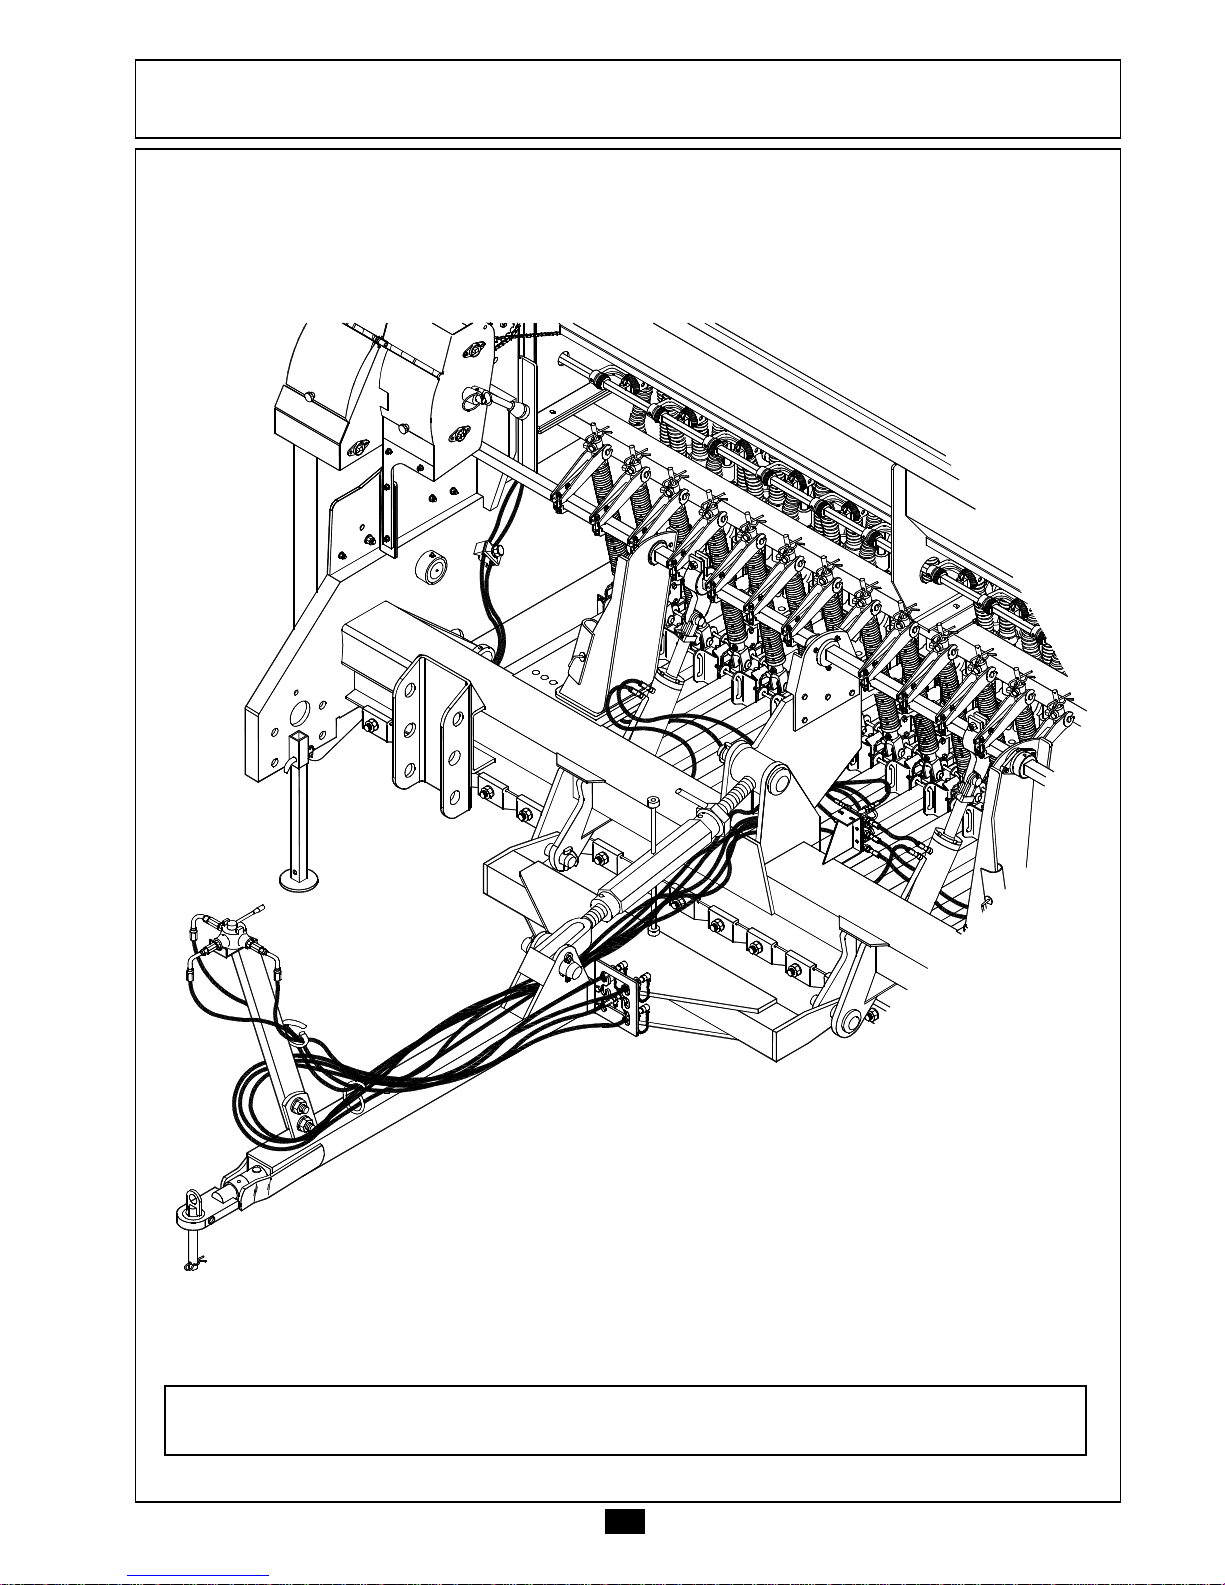
Drawbar Assembly
The drawbar is assembled and upward folded on the machine. It is enough
lowering and arresting it in the chassis of the machine, as illustrates the drawing below.
For eventual repairs or parts replacement consult the disassembled drawing.

10
ASSEMBLASSEMBL
ASSEMBLASSEMBL
ASSEMBLYY
YY
Y
Hydraulic System
The hydraulic system requires double control, it means, the tractor must be
equipped with four rear connections, being two each for oil inlet and outlet.
- Mount the support (A) of the triple valve (B) in the drawbar. (See p. 09).
A
B
11
ASSEMBLASSEMBL
ASSEMBLASSEMBL
ASSEMBLYY
YY
Y
Connect the hoses according to the illustrative drawing of the hydraulic system
on page 12.
Note: IF NECESSARY, USE THREAD SEAL TAPE TO CONNECT ALL THE HOSES. SEE THE
OPERATION OF THE TRIPLE VALVE IN THE FOLLOWING PAGE.

12
Wheel
Wheel
RowsLift
RowsLift
ASSEMBLASSEMBL
ASSEMBLASSEMBL
ASSEMBLYY
YY
Y
Operation of the Triple Valve
The positions 2 and 3, are used to make finishes, allowing to work only half of
the machine.
For safety precautions, after unloading the machine in the property, assemble
the central platform delivered attached to the lateral platform.
Position 1 - to
operate both cylinders
simultaneously.
Position 1 Position 2
Position 2 - to
operate the right
cylinder.
Position 3
Position 3 - to
operate the left
cylinder.

13
SETSET
SETSET
SET-UP INSTRUCTIONS-UP INSTRUCTIONS
-UP INSTRUCTIONS-UP INSTRUCTIONS
-UP INSTRUCTIONS
Preparing the Tractor
In order to avoid the excessive compaction of the soil in the rows that runs behind
the tractor tires, it is recommended installing wide rear tires without adding
counterweight.
Hitching to the Tractor
Attaches the drawbar to the
tractor by placing the hitch pin (A).
Lock with the cotter pin. Observe that
the tractor drawbar must remain on a
non-swinging way during operation
and transport.
Attention: AFTER HITCHING THE MACHINE TO THE TRACTOR, BEFORE ACTIVATING THE
HYDRAULIC SYSTEM, TAKE OUT THE SAFETY LOCKS (B) OF THE CYLINDERS
RODS, FASTEN IT IN THE DISUSE POSITION ACCORDING TO THE DETAIL.
B
Rows
Lifter B
A

14
Leveling the Seeder
Totally lift the rows activating the hydraulic cylinders.
Using the turnbuckle (A), adjust the level of the machine.
SETSET
SETSET
SET-UP INSTRUCTIONS-UP INSTRUCTIONS
-UP INSTRUCTIONS-UP INSTRUCTIONS
-UP INSTRUCTIONS
Plantadeiras
Implementos
Discos
Ferramentas
Agrícolas
CP
SDA
A

15
SETSET
SETSET
SET-UP INSTRUCTIONS-UP INSTRUCTIONS
-UP INSTRUCTIONS-UP INSTRUCTIONS
-UP INSTRUCTIONS
Spacing Between Rows
The seeder is normally supplied from plant assembled with 158 or 175 mm row
spacings, for sowing wheat, rice, oats, etc...; being possible to use other spacings as
shown below:
15 158
13 175
11 200
09 250
07 300 - 350
06 400
05 450 - 500 - 525
04 600 - 650
19 158
17 175
15 200
11 250
09 300 - 350
08 350 - 400
07 400 - 450
06 500
05 525 - 600 - 650
23 158
21 175
17 200
15 250
11 300
10 350
09 400
08 400 - 450 - 500
07 525
06 600 - 650
29 158
27 175
23 200
19 250
15 300
13 350
12 400
11 400- 450
10 500
09 525
08 600
07 650
SDA CP 21/23
SDA CP 27/29
SDA CP 19
SDA CP 15
Model Number of Rows Row Spacing (mm)

16
SETSET
SETSET
SET-UP INSTRUCTIONS-UP INSTRUCTIONS
-UP INSTRUCTIONS-UP INSTRUCTIONS
-UP INSTRUCTIONS
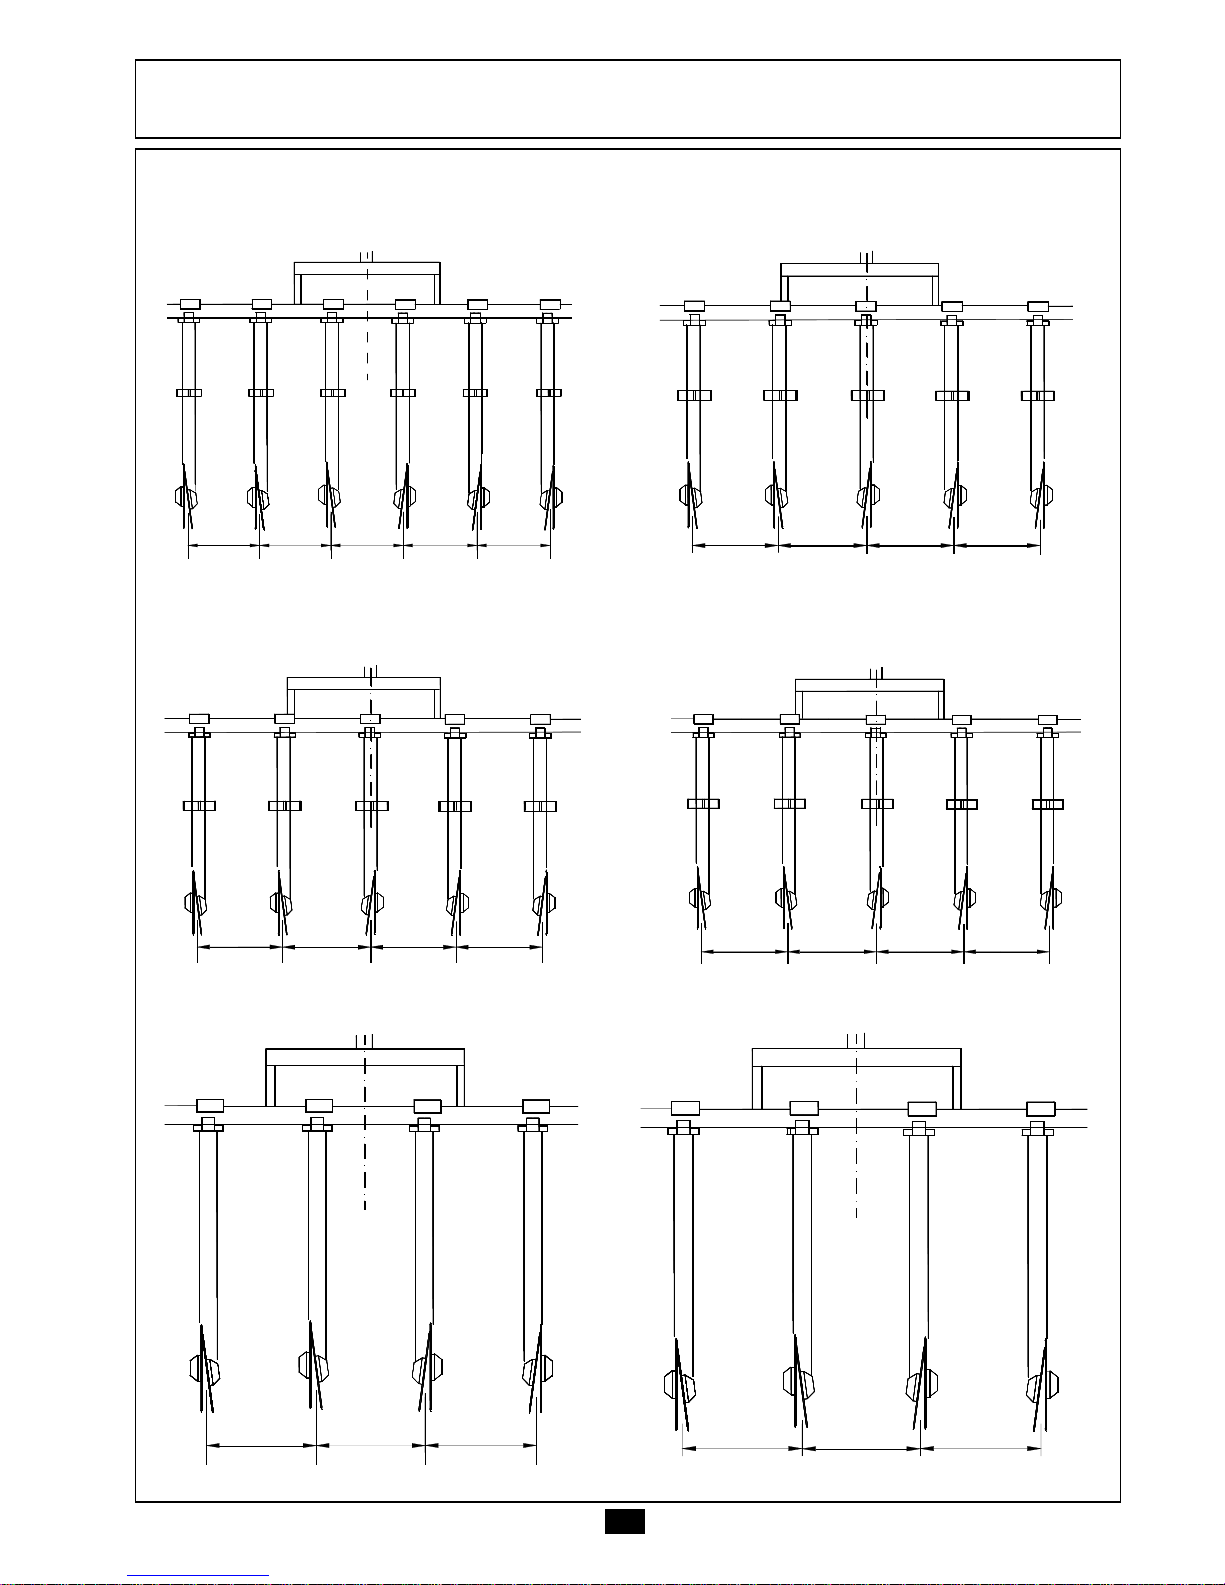
Positioning the Row Units in the Chassis
Check whether the number of rows to be assembled in the machine is odd or
even and follow the instructions below:
Even Number of Rows:
Mark the center of the chassis and
measures half of the spacing to the right
and half to the left, fastening in these
points both first rows. From these rows you
mark the others with a spacing from each
other.
Odd Number of Rows:
Install a row unit in the center of the
chassis. From this row you mark the others
with a spacing from each other.
Note: - OBSERVE THAT THE ROWS ARE RIGHT
AND LEFT . SEE ILLUSTRATIONS AT SIDE.
- THE CENTRAL ROW ALWAYS MUST BE
LONG.
- THE SPRING HOLDER HAS THE FUNCTION
OF KEEPING UNIFORM SPACINGS OF 158
OR 175 MM BETWEEN ROWS. FOR THE
OTHER SPACINGS IT DOES NOT HAVE
ANY UTILITY.
- FOR LARGER SPACINGS JUST USE LONG
ROWS.
Spring
Holders
Right Rows
Left Rows Right RowsLeft Rows

17
SETSET
SETSET
SET-UP INSTRUCTIONS-UP INSTRUCTIONS
-UP INSTRUCTIONS-UP INSTRUCTIONS
-UP INSTRUCTIONS
SDA CP - 15 Rows
15 rows with spacing of
158 mm
13 rows with spacing of
175 mm
11 rows with spacing of 200 mm 09 rows with spacing of 250 mm
07 rows with spacing of 300 mm 07 rows with spacing of 350 mm
158 158 158 158 158 158 158 158 158 158 158 158 158 158
175 175 175 175 175 175 175 175 175 175 175 175
200 200 200 200 200 200 200 200 200 200 250 250 250 250 250 250 250 250
300 300 300 300 300 300 350 350 350 350 350 350
18
SETSET
SETSET
SET-UP INSTRUCTIONS-UP INSTRUCTIONS
-UP INSTRUCTIONS-UP INSTRUCTIONS
-UP INSTRUCTIONS
SDA CP - 15 Rows
06 rows with spacing of 400 mm 05 rows with spacing of 450 mm
05 rows with spacing of 500 mm 05 rows with spacing of 525 mm
04 rows with spacing of 600 mm 04 rows with spacing of 650 mm
400 400 400 400 400 450 450 450 450
500 500 500 500 525 525 525 525
600 600 600 650 650 650

19
SETSET
SETSET
SET-UP INSTRUCTIONS-UP INSTRUCTIONS
-UP INSTRUCTIONS-UP INSTRUCTIONS
-UP INSTRUCTIONS
SDA CP - 19 Rows
19 rows with spacing of 158 mm
17 rows with spacing of 175 mm
15 rows with spacing of 200 mm
11 rows with spacing of 250 mm 09 rows with spacing of 300 mm
158 158 158 158 158 158 158 158 158 158 158 158 158 158 158 158 158 158
175 175 175 175 175 175 175 175 175 175 175 175 175 175 175 175
200 200 200 200 200 200 200 200 200 200 200 200 200 200
250 250 250 250 250 250 250 250 250 250 300 300 300 300 300 300 300 300
Table of contents


