TBIT Kareme PT01 User manual

Kareme PT01
User Manual of TBIT Smart Kids’ Watch
(Version 1. )
Please carefully read this manual before use to ensure proper installation and use. Please
refer to the actual product if any change in appearance or color!
2
Ⅰ
. Product Appearance
Ⅱ.
Quick Start
1. Properly install the SIM card and the battery of the smart watch first.
. Time will be displayed on screen after long pressing the Function key for 3 seconds.
3. Download mobile APP:
The guardian may use a smart phone to scan the QR code on PT01 package or
directly access to www.tbit.com.cn to download the APP corresponding to your
phone operating system through clicking APP Center and Kareme Login, and then
install it.

3
4. Register and bind with smart watch:
Register after installation and then bind with your smart watch.
5. Use:
After logging, in the main interface of APP in your phone, the guardian may check
the information of watch wearer in position, historical track and alarm and also
enable the intercom.
Ⅲ
. Components
Watch Charging Cable Charger
Exclusive Screwdriver User Manual
Ⅳ
. Technical Parameters
1. GPS Performance
Tracking sensitivity: < -160dBm
Start-up time: 35 seconds for cold start and seconds for warm start
Location accuracy: 5m
Accuracy of speed: 0.3m/second
. GSM Performance
Frequency: GSM 850/900/1800/1900MHz
4
3. Main Technical Parameters of Watch
Overall dimension: 40mm×31mm×14.5mm (exclusive of watchband)
Battery capacity: 400mAh
Working temperature: - 0
℃
~
+70
℃
Working humidity: 0%
~
95%
Ⅴ
. Description on Icon Functions
Icon
Meaning
Boot screen
Battery indicator
Animated icon when charging
GSM signal strength indicator
GPRS connection failure
No SIM card detected.
5
Animated icon when
recording
Recording failed
Watch is connecting to the
server.
Voice is uploading.
Voice uploading completed.
Voice uploading failed.
Downloading a voice from
server
Voice download failed.
Voice playing
6
Unread voice message
prompt
Voice play failed
Ⅵ
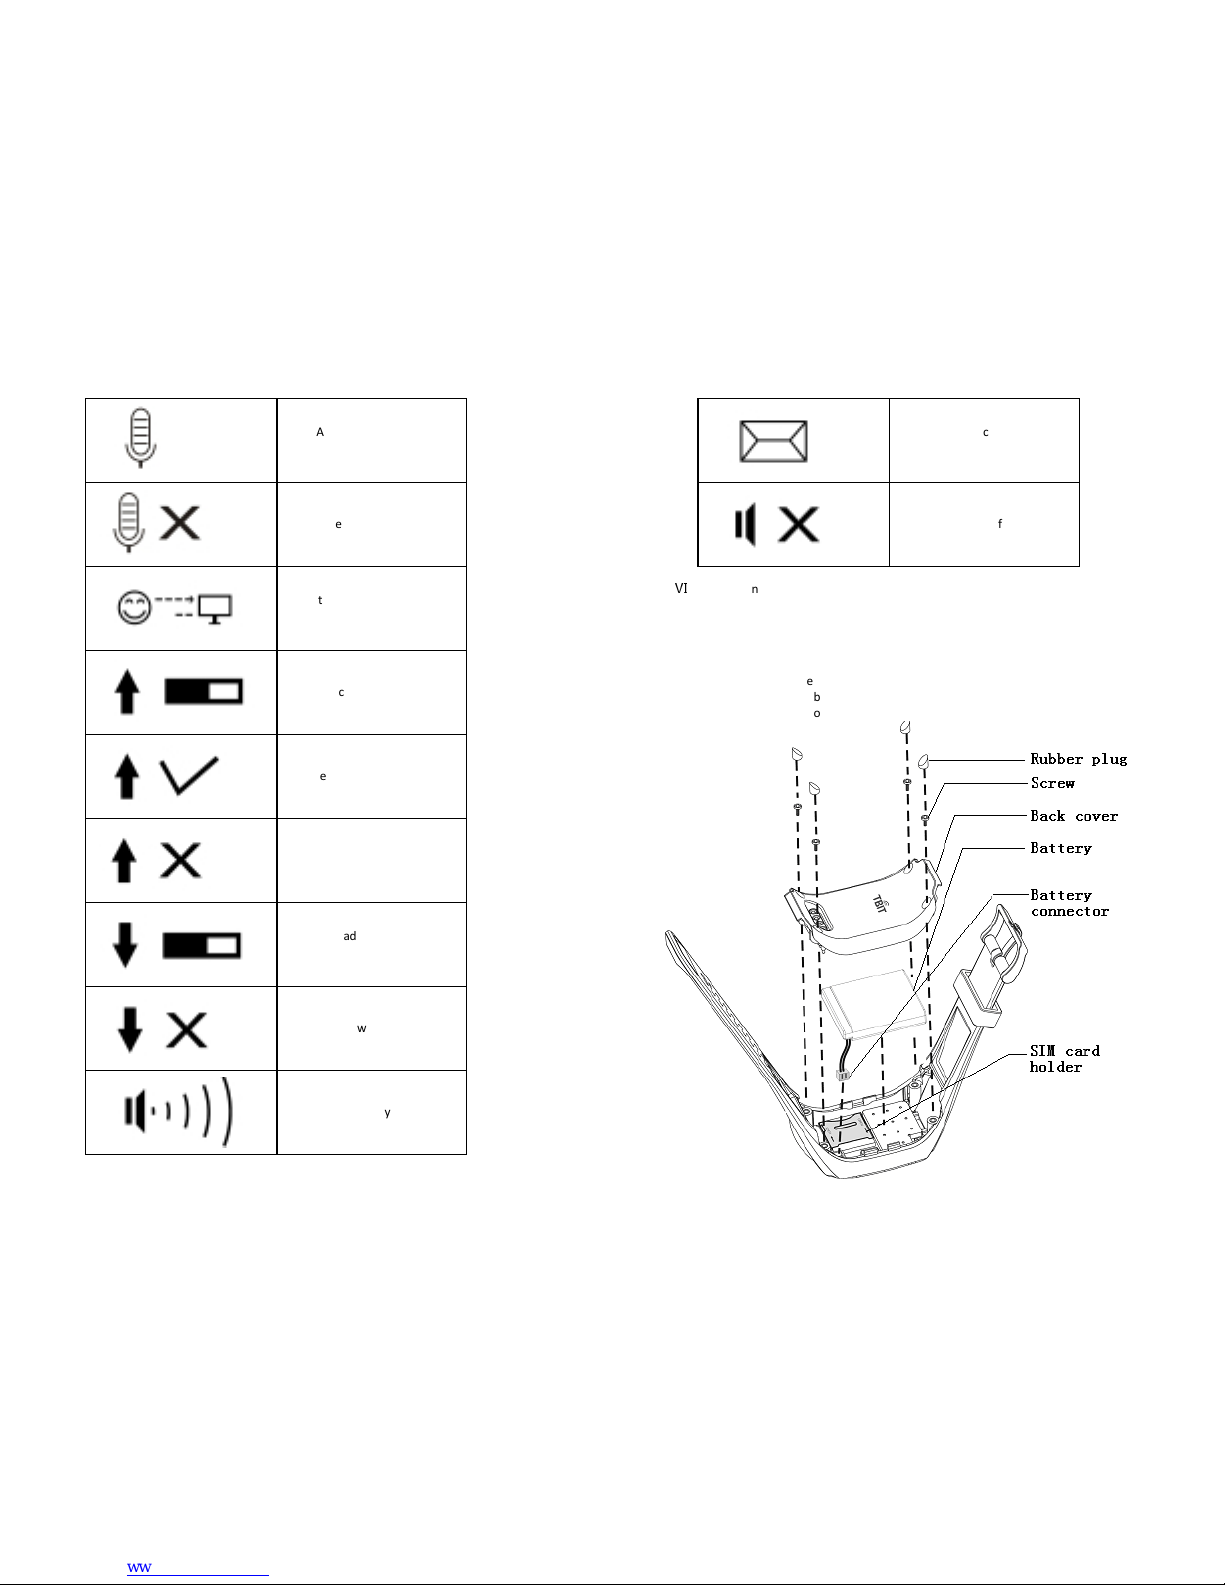
. SIM Card and Battery Installation Instructions
SIM card and the battery have been properly installed when delivering from factory.
Only disassemble it when you need to replace the SIM card.
1. Open the back cover
1) Remove the rubber plug;
) Unscrew the screws;
3) Remove the back cover;
4) Unplug the connector from battery holder;
7
. Install the SIM card
1)
Be sure the battery has been removed;
2)
Insert the SIM card (Micro SIM card only) according to the direction of the
card gap;
3)
Fasten the buckle of the SIM card;
3. Install the back cover
1) Be sure the SIM card is properly installed;
) Insert the battery cable into the battery holder properly;
3) Secure the back cover;
4) Tighten the screws;
5) Install well the rubber plug.
Ⅶ
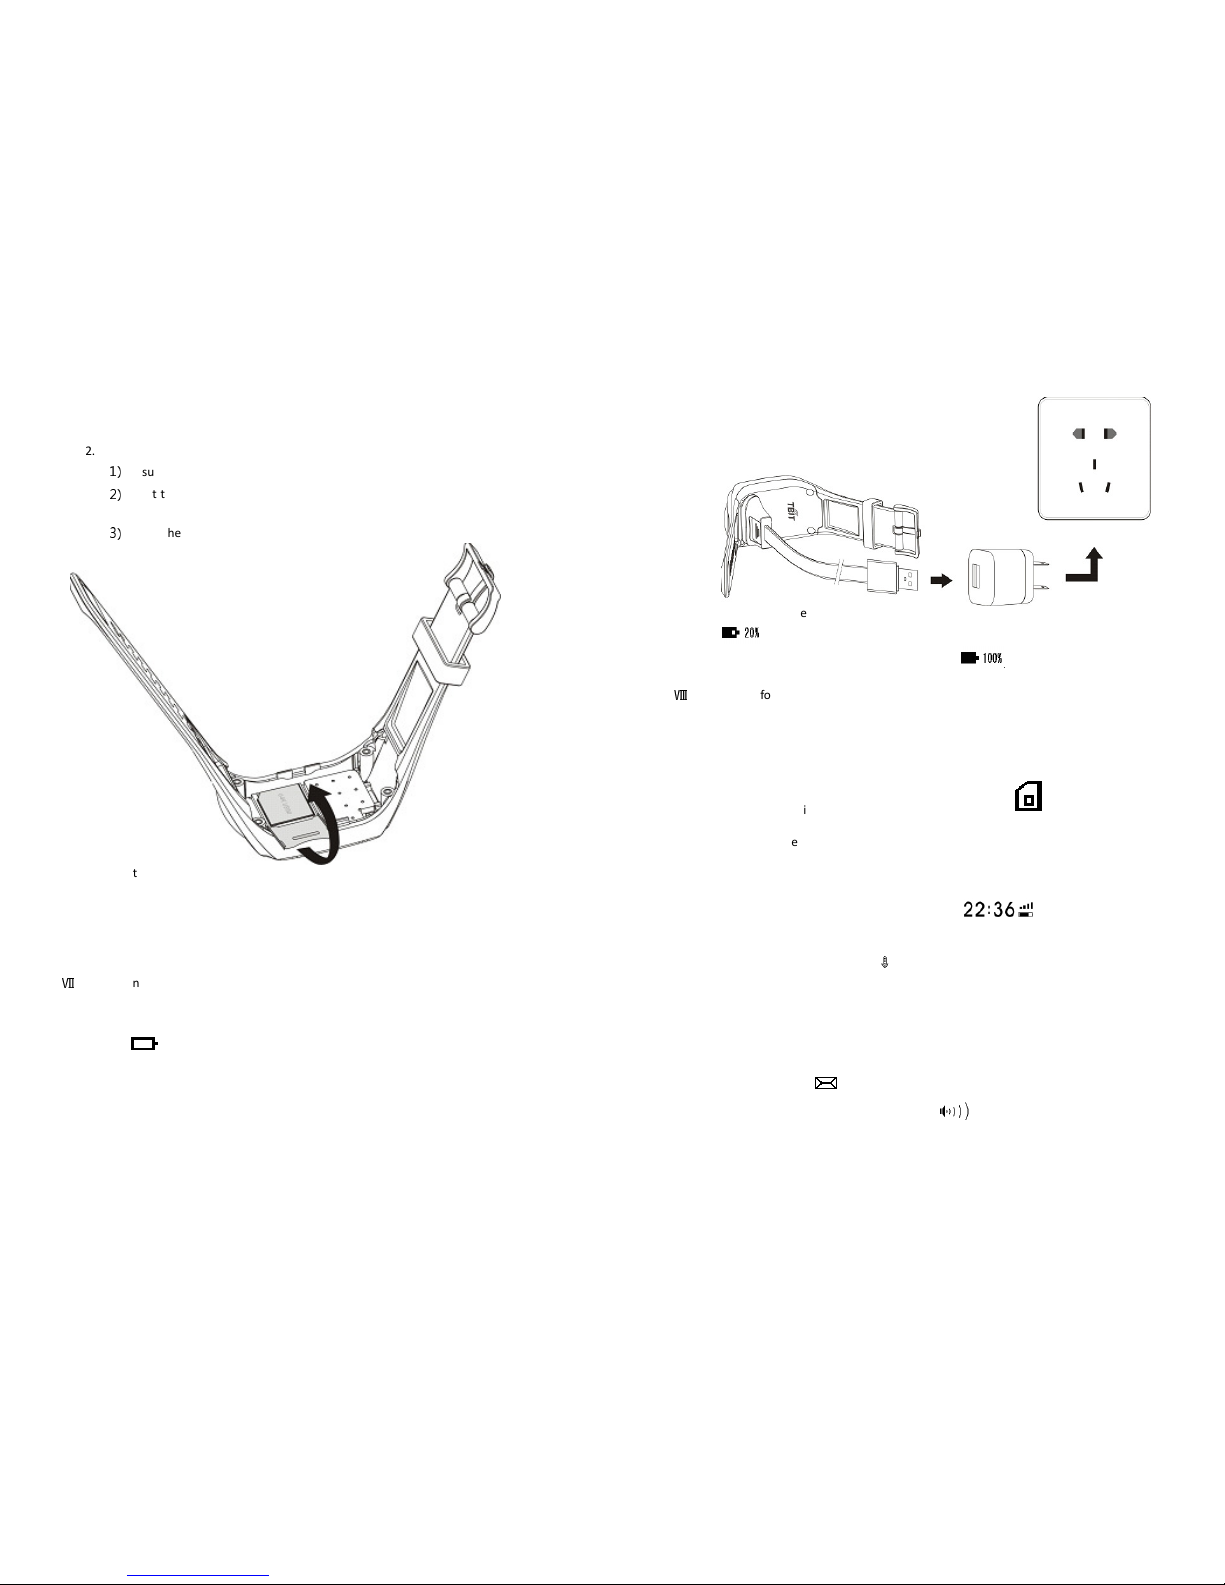
. Instructions for Charging
1. Low power
You need to charge your smart watch with the charging cable when you see the
low power icon is flashing.
. Charging
1) The right charging wiring diagram is as shown below;
8
) After connection with the charging cable, the animated charging icon
flashes on watch screen;
3) When fully charged, the icon will turn into
.
Ⅷ
. Instructions for Use
1. Boot
After long pressing the Function key for 3 seconds, the smart watch will start up
and present the boot animation (if failure, please charge it first with the
charger).
Please check the installation of the SIM card if an icon appears on screen
when booting.
. Display the time
The system enters the main interface after booting, with the time, signal and
battery power displayed on screen. To save power, the screen will be off
automatically in 10 seconds. If you want to look at the time, please short press
the Function key and then the current time (the time when you
press the key) will be displayed on screen.
3. Intercom
An animated recording icon appears after long pressing the Function key
for 3 seconds, then, you may start recording. After releasing the Function key,
the watch will automatically upload your voice to server. The recording can last
for 15 seconds at most. If it exceeds 15 seconds, the watch will stop recording
and then automatically upload the completed 15-second voice to server. After
successful uploading, you may continue to record.
4. Play a voice
If an envelop icon appears on screen, it indicates there is a voice message.
To play it, please press the Function key.
5. Report positions on time
The smart watch will automatically report GPS positions and tracks of the wearer
at 4 set points of time every day by default, and the guardian can set the time

9
interval in which the GPS works with mobile APP.
6. Automatic alarm
1) Low power alarm
Indicate that the watch’s battery is in low power.
) Alarm on entry or exit of area
Indicate that the wearer enters or leaves a designated area within the set
time.
7. Online inquiry
To visit TBIT website:
http://www.tbit.com.cn
Click App Center and then Kareme Login;
Type in your account and password on the login interface:
Account: the guardian’s mobile number
Password: the password set by the guardian
8. Operation of mobile APP
You may download Android or iPhone App on the Kareme login interface or
through scanning the QR code.
After downloading and installation, you need to register an account in first use.
After registration, type in your account name and password to log in. The
guardian may check the information of watch wearer in position, historical track
and alarm and also can enable the intercom.
Notice: see the Instructions for Use of Smart Kids’ Watch Android APP for
instructions of using the mobile APP.
9. Power off
To power off the watch, use a sharp object to press the concaved key in the
lower right corner of watch screen for 3 seconds.
Ⅸ
. Attentions
1. When installing this watch, be sure to remove the battery first and then insert or
remove the SIM card, or the watch will not work normally.
. Please don’t swim with the watch as it is not allowed to be immersed in water,
although it is water resistant. It will be damaged if any water penetrating into it.
Damages arising from water penetration will be exclusive of the warranty by TBIT.
3. Please don’t use the watch under high temperature.
4. The SIM card used in the watch is small-sized, and the large ones are not
supported.
5. The watch supports GSM card only, that is, cards issued by China Mobile and
China Unicom. CDMA card issued by China Telecom is unavailable.
6. The charger attached to the watch is exclusive, and TBIT will not be responsible
for damages arising from improper use of the charger.
Ⅹ
. Common Troubles
10
Trouble Solutions
Abnormaliti
es
a)
The SIM card is
in arrear.
Solution: recharge your SIM card to guarantee
sufficient balance. To know if your SIM card is in
arrear, you may dial the mobile number shown inside
your watch and then operate following the voice
prompt.
b) Delay in message sending
Solution: the delay in sending message will occur
occasionally due to SMS jams arising from busy GSM
network, which is normal. You may wait for a moment
or try again.
c) The SIM card isn’t properly installed.
Solution: if the SIM card icon flashes on watch
screen, it indicates the SIM card is installed improperly.
So please power off the watch and then remove the
battery and reinsert the SIM card. Notice: never hot
plug the SIM card, or the SIM card or the watch will be
damaged.
d) Failure of connection to Internet
Solution: if an icon appears on watch screen in
first use, please contact the operator to confirm if the
SIM card has enabled its GPRS wireless Internet
access.
e) Failure of uploading a voice
Solution: if an icon appears when uploading a
voice, it indicates the watch is under a poor GPRS
wireless network access and you need to record and
upload again.
Warranty Card Side A)
Important Statements:
1. The techniques of the watch could be amended at any time in the future without prior
notice.
. Please refer to the actual product if any change in product appearance and color.
3. The warranty card is only applicable to the product with a serial number shown below.
4. Please properly keep this warranty card which, together with the original receipt of
purchase, must be presented when warranty service is requested.
5. Please see the contents on the warranty card (side B) for details of warranty scope.
This card is the basic voucher of warranty. Please fill it clearly and keep it properly.
Popular Watch manuals by other brands

Casio
Casio QW 5513 Operation guide

Piaget
Piaget 560P Instructions for use

Armitron
Armitron pro sport MD0346 instruction manual

West Marine
West Marine BlackTip 13411293 Instruction Booklet and Care Guide

Jaeger-leCoultre
Jaeger-leCoultre HYBRIS MECHANICA CALIBRE 184 manual

FOREVER
FOREVER iGO PRO JW-200 user manual


