Tchibo 280 962 User manual
Instructions for use and guarantee
Tchibo GmbH D-22290 Hamburg • 62194FV01XII02
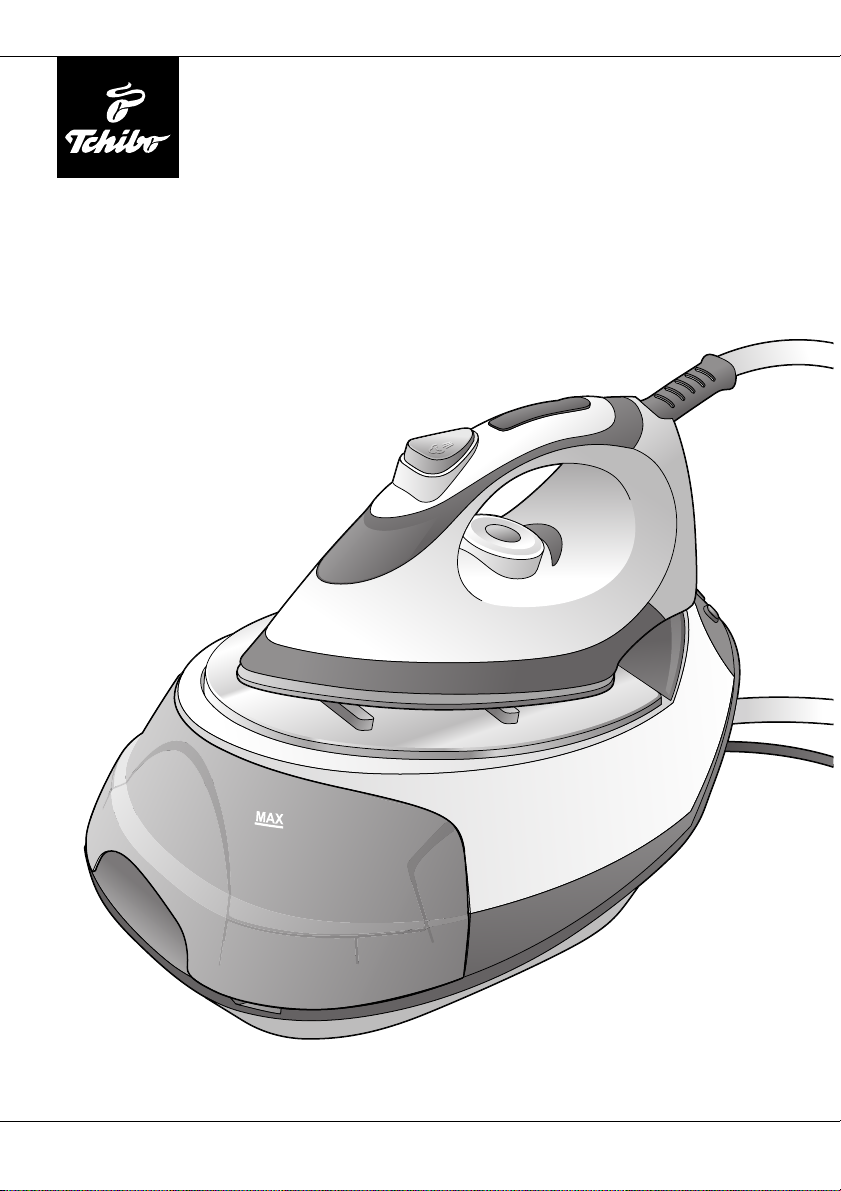
Steam Iron Set


Dear Customer
Your new steam iron set takes the work out of ironing.
The removable water tank holds approximately one litre, so it makes light
work of big piles of ironing and you won't have to stop to top up the water.
You can switch the steaming function on and off using the steam release
button.
Smoothing hanging garments or delicate fabrics is effortless – just steam
them from a short distance away.
We hope you will be entirely satisfied with your purchase.
Your Tchibo Team

4
Contents
5 About these instructions
6 Safety warnings
10 At a glance (features)
11 Preparing the steam iron set
before first-time use
11 Unpacking and setting up the
steam iron set
11 Controls and indicator lights
12 Filling the water tank
14 Connecting and switching on the
steam iron set
15 Removing production residues
16 Ironing
16 Connecting the steam iron set
16 Setting the temperature
17 Setting the iron down
18 Dry ironing
18 Steam ironing
21 Refilling with water
21 After use
22 Cleaning and storing
22 Cleaning the soleplate
23 Cleaning the iron and base station
23 Cleaning the water tank
23 Cleaning the pressurised steam
container
24 Putting the steam iron set away
25 Technical specifications
26 Fault / remedy
27 Disposal
28 Guarantee

5
About these instructions
This product is equipped with safety features. Nevertheless, read the safety
warnings carefully and only use the product as described in these instructions to
avoid accidental injury or damage. Keep these instructions for future reference.
If you pass this product on to someone else, remember to include these instructions.
Symbols used in these instructions:
The term DANGER warns against possible severe injuries and danger to life.
The term WARNING warns against injuries and severe material damage.
The term CAUTION warns against slight injuries or damage.
This indicates supplementary information.
This symbol warns against the danger
of injury caused by electricity.
This symbol warns against
the danger of injury.

6
Safety warnings
Intended use
• This steam iron set is intended to iron standard fabrics.
• The product is suitable for use in dry interior rooms. Do not use it outdoors or
in rooms where there is high humidity.
• The article is intended for private use and is not suitable for commercial
purposes.
DANGER to children and people restricted in their capability of using
electrical appliances
• This appliance can be used by children aged 8 and over and people with
... reduced physical, sensory or mental capabilities or
... lack of experience and/or knowledge provided they are
... supervised or
... have been trained in the safe use of the appliance and
... understand the potential dangers.
Cleaning and maintenance must not be carried out by children without
supervision.
Children must not be allowed to play with the appliance.
From the time the appliance is switched on and has fully cooled down, the
steam iron set and its mains cord must be kept out of the reach of children
under the age of 8.
• Keep packing material away from children.
There is a risk of suffocation!
DANGER from electricity
• Only the water tank may be filled with water for use. The pressurised steam
container in the base station may only be filled directly with water for
cleaning and then topped up afterwards. However, the base station and iron
must never be immersed in water or other liquid as this could result in electric
shock. Protect the appliance from drips and splashes of water.
• Do not touch the product with damp hands.
• No moisture must be allowed to enter the circular grooves around the
opening on the pressurised steam container.
If this does however happen, place the base station upright and leave it to dry
for at least twelve hours.
• Do not direct the steam at electrical devices or wall sockets.
Press the steam release button to switch off the steaming function before
placing the iron on the iron rest on the base station.

7
• Only connect the iron to a properly installed, earthed wall socket with the
same mains voltage rating as that indicated in the product's technical specifi-
cations.
• The used wall socket must be easily accessible so that you can quickly pull out
the mains plug whenever necessary.
• Unwind the mains cord and connection cable completely when using the
appliance.
• Do not use the appliance if the appliance itself or the mains cord shows any
visible sign of damage or if the appliance has been dropped or leaks.
• As the connection cable is subject to considerable strain from movement
while ironing, check it for damage at regular intervals. If you notice damage to
any part of the steam iron set, stop using it until the damage has been
properly rectified.
• Do not make any modifications to the appliance or change the mains cord
yourself. Only have repairs to the appliance or mains cord carried out by a
specialist workshop, the customer care service or a similarly qualified person.
Improper repair may result in considerable risk of injury to the user.
• Unplug the mains plug from the wall socket ...
... before removing the water tank to fill or empty it,
... if a fault occurs during operation,
... during thunderstorms,
... if you stop ironing (even if only for a short while),
... after use,
... before cleaning the appliance.
Always turn the temperature and steam control dials to the lowest setting
first and switch off the appliance before unplugging the mains plug from the
wall socket.
Always pull on the plug, not the mains cord.
• Do not insert anything into the openings on the appliance. It could come into
contact with live parts. The appliance could also overheat.

8
WARNING – risk of scalds, burns and fire
• Never leave the appliance unattended when it is plugged in or still hot.
• Hot steam will emerge if the pressurised steam container is opened during or
immediately after use.
Only open the pressurised steam container for cleaning purposes, never
during use.
Let the appliance cool down completely and empty the water tank before
unscrewing the lock on the pressurised steam container.
• Never replace the pressurised steam container lock with another one.
• Never iron garments whilst they are being worn!
• Never point the soleplate at human beings or animals. This is particularly
important when ironing with steam.
• The discharging steam is extremely hot! Touching the hot soleplate and the
discharging steam causes burns and scalds.
• Let the appliance cool down completely before you clean it or put it away.
• Proceed with caution when removing the water tank and take care not to
touch the hot soleplate on the iron.
CAUTION - risk of slight injuries and material damage
• Only iron suitable fabrics. Always follow the care instructions on the fabric
label. The ironing symbols shown on the temperature control dial are
standard care symbols.
• Polyacrylics, acetate-polyamide mixtures and similar materials must not be
ironed.
• Place the steam iron set on an even, level surface from which it cannot fall.
• Route the mains cord in such a way that it cannot be tripped over.
• Only iron on an ironing board or an ironing table.
• Always place the iron on the iron rest on the base station, even for short
breaks between ironing.

9
• Neither the connection cable nor the mains cord must be kinked or squeezed.
Keep the connection cable and mains cord away from sharp edges, the hot
soleplate and any other sources of heat.
• Only wind the mains cord around the cord storage, not the iron. Unwind the
mains cord before use.
• Use tap water without additives such as perfumes, fabric softeners or starch.
Do not put vinegar, descaling products or other additives into the water tank.
Do not use carbonated water.
If the water in your district is extremely hard (more than 120 mg of calcium
per litre), mix tap water with distilled water at a ratio of 1:1.
• Do not scratch the soleplate. Do not scrape the soleplate over metal parts
such as buttons or zip fasteners.
• If the water tank indicator light comes on, switch off the appliance imme-
diately and add water.
Always put water into the water tank before ironing with steam, otherwise the
pump may be damaged.
• Some types of varnish, synthetic substances or furniture polish may react
adversely to the material of the slip resistant feet, soften them and leave
unwanted traces on the work surface. Therefore, place a non-slip mat under
the product, if necessary.
• There is a safety valve at the bottom of the pressurised steam container that
prevents too much pressure building up inside the container. Some water may
emerge from this valve during normal use. If necessary, place a waterproof
mat under the base station.
• Empty the water tank on the base station after each use.
• Remove any limescale residue from the pressurised steam container regularly
and at least every three months.
• Only use the original accessories.
• Do not use caustic, aggressive or abrasive products for cleaning or descaling.
10
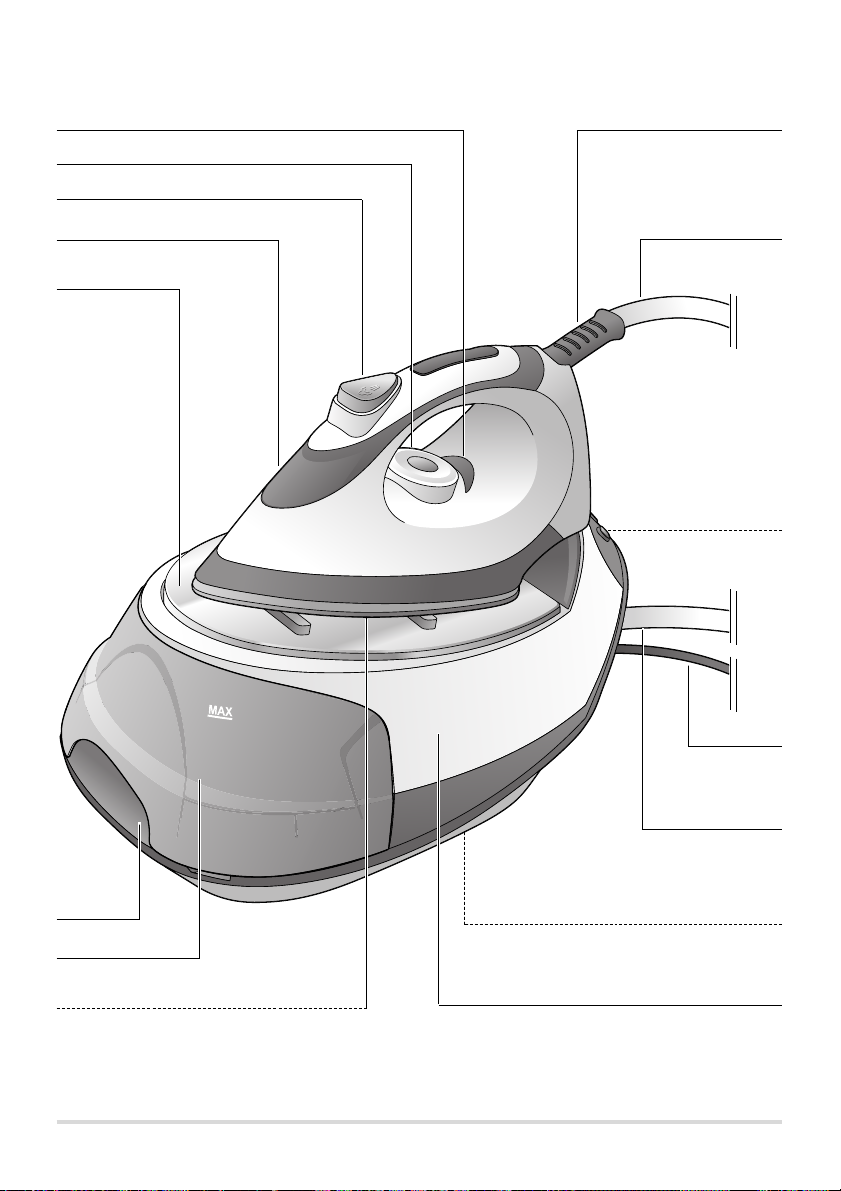
At a glance (features)
Temperature indicator light Kink guard
Connection cable
for steam and
power supply
Temperature control dial
Steam release button
Iron
Iron rest
Controls and
indicator lights
Mains cord
Connection cable for
steam and
power supply
Pressurised steam container lock
Base station with pressurised steam container
Water tank
grip
Water tank
Soleplate with
steam vents

11
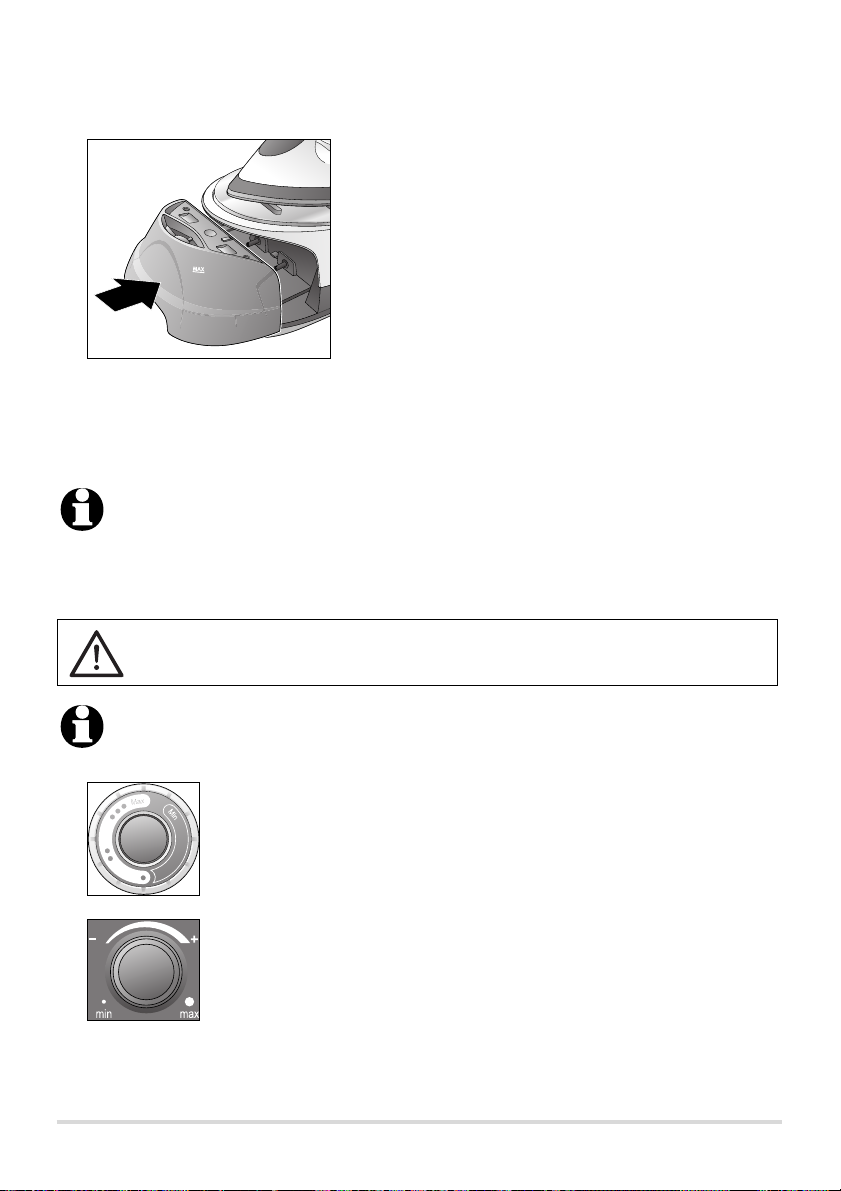
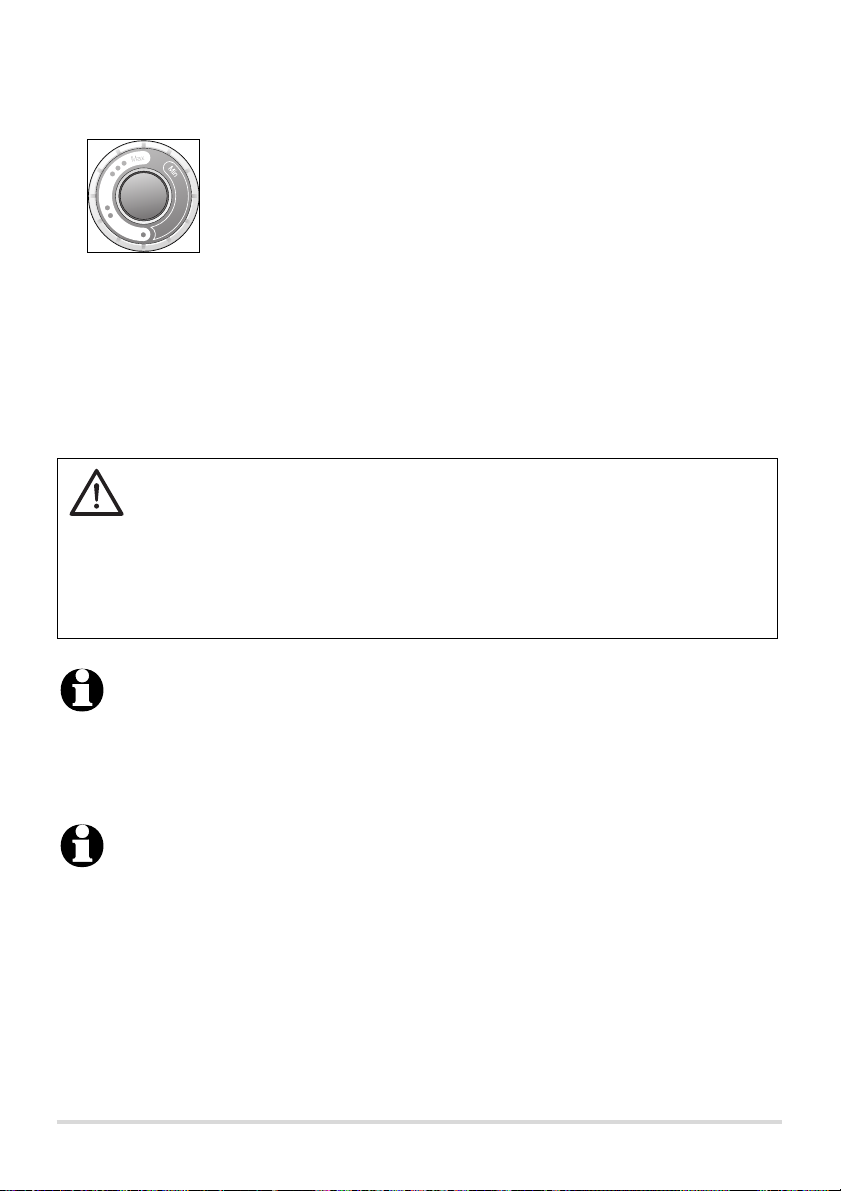
Controls and indicator lights
On/Off switch
Steam control dial
Steam indicator light
Water tank
indicator light
Preparing the steam iron set before first-time use
Unpacking and setting up the steam iron set
1. Take the steam iron set out of the packaging and remove all packing material.
2. Completely unwind the connection cable and power cord.
CAUTION - material damage
• Place the steam iron set on an even, level surface from which it cannot
fall.
• There is a safety valve at the bottom of the pressurised steam
container that prevents too much pressure building up inside the
container. Some water may emerge from this valve during normal use.
If necessary, place a waterproof mat under the base station.
DANGER to children – danger to life due to suffocation/choking
Keep the packing material out of children’s reach. There is a risk of
suffocation!
12
3. Stand the steam iron set on a firm, level surface, e.g. on the iron rest of a
large, stable ironing board. The ironing board must still be stable when the
water tank is completely full.
If your ironing board is not suitable, stand the set on a stable, level table next
to the ironing board.
Filling the water tank
Which water is suitable?
• You can inquire about the water hardness in your district from your water
supplier.
• Distilled water can be obtained from a pharmacy, DIY store, petrol station and
other sources.
Removing the water tank
1. Place the iron on the iron rest.
DANGER - risk of fatal electric shock
Unplug the mains plug from the wall socket before removing the
water tank.
Hardness level 1 less than 30 mg of
calcium per litre soft water
Hardness level 2 between 30 and 60 mg
of calcium per litre moderately hard water
Hardness level 3 between 60 and 120 mg
of calcium per litre hard water
Hardness level 4 more than 120 mg of
calcium per litre very hard water
CAUTION - material damage
Use tap water without additives such as perfumes, fabric softeners or
starch.
Do not put vinegar, descaling products or other additives in the water
tank. Do not use carbonated water.
If the water in your district is extremely hard (more than 120 mg of
calcium per litre), mix tap water with distilled water at a ratio of 1:1.

13
2. Take hold of the grip on the water tank and pull
out the water tank.
Filling the water tank
1. Hold the water tank above a washbasin and pour
in tap water through the opening in the water
tank.
Always fill the water tank up to the MAX mark,
but never above it.
2. If any water spills onto the area around the opening, wipe off the water tank
carefully.
CAUTION - material damage
If the water tank indicator light comes on, switch off the appliance
immediately and add more water.
Always put water into the water tank before ironing with steam,
otherwise the pump may be damaged.
DANGER - risk of fatal electric shock
Do not immerse the appliance in water. Also protect it from drips and
splashes of water.
You can also remove the tank while there is still some water remaining in
it. Locking springs only allow a few drops of water to escape from the
joints.
14
Inserting the water tank
1. Fit the bars at the bottom of the water tank into
the recesses on the base station.
2. Slide the water tank carefully onto the base station as far as it will go and
push the water tank firmly into place.
3. Jiggle the grip gently to check that the water tank is fitted firmly onto the
base station.
Connecting and switching on the steam iron set
1. Turn the temperature control dial to Min.
2. Turn the steam control dial to —.
You may hear hissing noises or the electric pump during use. These are
entirely normal operating noises and are not a fault.
WARNING - fire hazard
Never leave the appliance unattended when it is plugged in or still hot.
If the water tank is not fitted correctly, the water tank indicator light will
come on or will not go off. Remove the water tank again fully and insert it
correctly.

15
3. Plug the mains plug into an easily accessible wall socket.
4. Tilt the On/Off switch to I.
After a moment you will hear the pump start to pump water out of the water tank
and into the pressurised steam container.
5. Turn the temperature control dial to the required temperature.
6. Turn the steam control dial to the required steam quantity.
The temperature indicator light comes on. As soon as there is enough steam
available in the pressurised steam container the steam indicator light will
come on.
Removing production residues
When the iron was manufactured, polish residue may have been left on the
soleplate.
Before using the iron for the first time, iron these residues off on an old cotton
cloth.
1. Fill the water tank as described in the section “Filling the water tank”.
2. Iron an old cotton cloth or similar item using steam (see “Ironing” - “Steam
ironing”) until all residues have been removed.
Although no cause for concern, you may notice a slight odour the first
time the appliance heats up. Ensure there is sufficient ventilation.

16
Ironing
Connecting the steam iron set
Plug in the appliance and switch it on as described in the section “Preparing
the steam iron set before first-time use”.
Setting the temperature
Set the temperature with the temperature control dial.
The dots have the following meaning:
Chemical fibres (synthetic fibres) such as:
Acrylan, Dralon, Leacryl, Orlon, acetate, acrylic, nylon.
(low temperature)
Wool, silk and synthetic fibres such as
Dacron, Lilion, Helion, rayon, polyester.
(medium temperature)
Textiles ironed at a high temperature, for example:
cotton, linen.
(high temperature)
The temperature indicator light on the iron comes on when the iron is heating
up.
It goes off when the iron reaches the set temperature.
m
CAUTION - material damage
Do not scratch the soleplate. Do not scrape the soleplate over metal
parts such as buttons or zip fasteners.
m
CAUTION - material damage
• Always observe the instructions given on the garment label.
The ironing symbols shown on the temperature control dial are
standard care symbols.
• Polyacrylics, acetate-polyamide mixtures and similar materials must
not be ironed.
17
Tips:
• Sort your laundry before ironing. The iron heats up faster than it cools down.
Therefore, start with items that need to be ironed on the lowest temperature.
• If the fabric is composed of different types of thread, always set the tempera-
ture to the fibre that requires the lowest temperature.
• If you do not know the composition of the fabric for any item, try out the iron
first on a part of the item that cannot be seen. Begin with the lowest tempera-
ture and increase it gradually until you have found the ideal temperature.
• To avoid a shine on pure wool, silk and artificial threads, iron them on the
back.
• With velvet, lay a cloth over the fabric and iron it in one direction, applying only
slight pressure. Keep the iron moving constantly.
Setting the iron down
The iron rest on the base station is heat-resistant and protects the soleplate.
Please note the following advice:
• Always place the iron on the iron rest on the base station.
• To avoid scratching the soleplate, do not place the iron on metal surfaces.
• Water may collect on the iron rest on the base station if the iron is used for an
extended period. Wipe it off from time to time.
DANGER - risk of fatal electric shock
Do not direct the steam at electrical devices or wall sockets.
Press the steam release button to switch off the steaming function
before placing the iron on the iron rest on the base station.
18
Dry ironing
1. Set the chosen temperature with the temperature control dial.
The temperature indicator light on the iron comes on.
It goes off when the iron reaches the set temperature.
The temperature indicator light will come on again when the iron starts to
heat up again.
2. Iron the laundry without pressing the steam release button.
Steam ironing
• Occasional drips of condensed water may come out of the vents in the
soleplate:
... the first time the iron heats up,
... the first time steam is released,
... if the temperature control dial is not set to at least ••,
... if the steam ironing function has not been used for an extended
period during ironing.
This is normal and no cause for concern. Briefly iron an old piece of
cotton or similar fabric with the steam function switched on until
condensed water stops coming out.
• When you are just starting to iron with steam, have just refilled the tank
or have taken a longer break from ironing, it will take slightly longer
before steam comes out of the soleplate.
Let the steam escape for a moment before directing the jet of steam
onto the fabric. This will produce a stable jet of steam.
WARNING - risk of scalding and burns
• The discharging steam is extremely hot! Touching the hot soleplate
and the discharging steam causes burns and scalds.
• Never iron garments whilst they are being worn!
• Never point the ironing plate at people or animals. This is particularly
important when ironing with steam.

19
Steam ironing requires a high temperature.
1. Set the temperature control dial to a position between •• and
••• Max.
The temperature indicator light on the iron comes on.
2. Turn the steam control dial to the required steam quantity.
After a moment you will hear the pump will start to pump water out of the
water tank and into the pressurised steam container.
As soon as there is enough steam available in the pressurised steam
container the steam indicator light will come on.
Once the temperature indicator light on the iron has gone off you can start to
iron with steam.
3. Press the steam release button.
Continuous steam will be emitted from the vents
in the soleplate.
4. Press the steam release button again to switch off the steam ironing function.
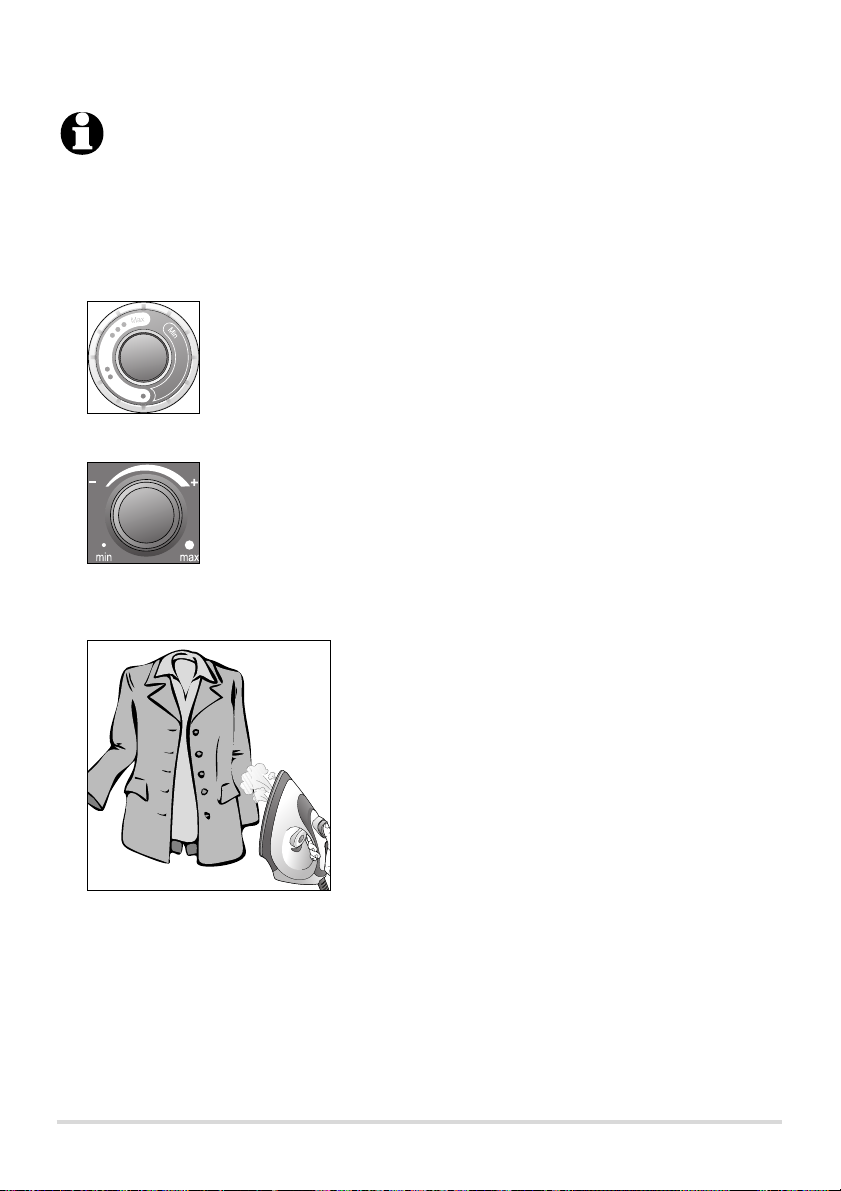
Ironing hanging fabrics
Delicate fabrics (e.g. jackets, coats and curtains) can be steam ironed without
putting them on an ironing board. This way, you can give the surface of woollen
sweaters or jackets more volume.
Steam will continue to emerge until the water in the water tank has been
used up. If the amount of steam decreases while you are ironing, press
the steam release button to switch off the steam ironing function to allow
more steam to build up again inside the pressurised steam container.
20
1. Put the garment on a coat hanger or hang curtains on a curtain rod.
Remove any items from the pockets.
2. Set the temperature control dial to a position between •• and
••• Max.
3. Turn the steam control dial to the required steam quantity.
As soon as the steam indicator light comes on and the temperature indicator
light on the iron goes off, you can start to iron with steam.
4. Pull the fabric straight with your hand.
Keep your hand away from the steam and the
soleplate.
You could scald yourself!
Hold the iron vertically with the soleplate
10 - 15 centimetres away from the fabric.
5. Press the steam release button. Wait a few seconds for the steam to penetrate
the fabric.
6. To switch off the steam ironing function, press the steam release button
again.
7. Let the garment dry on the coat hanger.
• Delicate fabrics such as wool, wool mixtures, corduroy, and velvet and
silk must be steamed from a greater distance.
• To try out the iron on hanging fabrics, always start on a part of the
fabric that cannot be seen.
Table of contents


