Tdrum DD-503 User manual

00030676
Version 12/2014
DD
-
503 E
-
Drum Set
User manual

CAUTION
Anychangesormodificationsinconstruction ofthisdevicewhicharenot expresslyapproved by
thepartyresponsibleforcompliancecouldvoidtheusersauthoritytooperatethe equipment.
WARNING
Whenusingelectricalproducts,basicsafetyprecautionsshouldalways be followed, including the
following:
NOTE:Thisequipmenthasbeentested and found tocomplywiththelimitsforaClass Bdigital
device,pursuanttoPart15 ofthe FCC Rules.
Also,thisequipmenthasbeentestedandfoundtocomplywiththe limitsforfollowing standard:
EN55022-2006
EN55024:1998/+A1:2001/+A2:2003
EN55013:2001/+A1:2003/+A3:2006
EN55020:2007
EN61000-3-2:2006
EN61000-3-3:1995/+A1:2001/+A2:2003
Theselimitsaredesignedtoprovidereasonableprotectionagainst harmfulinterferenceinaresi-
dentialinstallation. Thisequipmentgenerates,uses,and canradiateradiofrequency energyand,if
not installedandusedinaccordancewiththe instructions,maycauseharmfulinterferencetoradio
communications.However,thereisno guarantee thatinterferencewill notoccurinaparticular
installation. If thisequipment doescauseharmfulinterferencetoradioortelevisionreception, which
canbedeterminedbyturning the equipmentoff andon, the userisencouragedtotrytocorrectthe
interferencebyoneormoreofthefollowingmeasures:
-Reorient orrelocatethereceiving antenna.
-Increasetheseparation between the equipmentand receiver.
-Connectthe equipmentintoan outletonacircuitdifferentfromthattowhichthe receiveris
connected.
-Consultthe dealeroranexperienced radio/TVtechnicianforhelp.
CAUTION

TAKINGCAREOFYOURDRUM
-directsunlight (nearawindow),
-high temperatures(nearaheatsource,
outside,orinacarduringthedaytime),
-rainorexcessivehumidity,
-excessivedust,
-strong vibration.
wThe unit shall not beexposedtodripping or
splashing andno objectsfilled withliquids,
suchasvases,shall be placed onthe unit.
wThedrumcontainsdigitalcircuitryandmay
causeinterferenceifplacedtoo closeto
radioortelevisionreceivers.If interference
occurs, movethe drumfurtherawayfrom
theaffected equipment.
POWER
wOnlyuseattached poweradaptor.
wTurnthe powerswitchoff when the drumis
notinuse.
wToavoiddamagetothedrumand other
devicestowhichit isconnected, turnthe
powerswitchesofall related devicesoff
priortoconnection ordisconnectionof
audiocables.
wTurnthepoweroff ifthemaincableofthe
adaptorisdamaged orthe instrumentis
spatteredwithliquid.
wDonot switchtheunit onand off inquick
succession,thisplacesan undue loadon
theelectroniccomponents.
wUnplug the ACpowercordduring anelectri-
calstorm.
wAvoidpluggingthe ACadaptorintothesame
ACoutletasapplianceswithhighpower
consumption,suchaselectricheatersor
ovens.
SERVICEANDMODIFICATION
Thisproductshouldbeserviced byqualified
servicepersonnelwhen,
wthepowersupplycordortheplugofthe
adaptorhasbeendamaged,
wliquidhasbeenspatteredintotheunitorithas
been exposedtorain,
wthe instrument doesnot appeartooperate
normallyorexhibitsamarked changein
performance,
wthe instrument hasbeendroppedorthe
cabinethasbeendamaged.
HANDLINGANDTRANSPORT
wNeverapplyexcessiveforcetothe controls,
connectors,padsorotherpartsof the
instrument.
wAlways unplugcablesbygripping the plug
firmly,notbypulling on the cable.
wPhysicalshocks caused bydropping,
bumping,orplacingheavy objectson the
instrumentcan resultinscratchesand/or
moreseriousdamage.
wCarefullycheck theamplifiervolumecontrol
beforestating toplay. Excessivevolumecan
causepermanenthearing loss.
CLEANING
wClean the unitwithadryorlight-wet softcloth.
Donot usepaintthinnerorpetrochemical
basedpolishes.
LOCATION
wDonot exposethedrumtothefollowing
conditionstoavoiddeformation,discoloration,
ormoreseriousdamage,
DONOTATTEMPTTOOPENTHEUNITORMAKEANYCHANGEINTHECIRCUITSOR
PARTSOFTHEUNIT.
!

INSTALLATION ............................................1
SOUND MODULE ........................................5
ControlPanel................................................5
BackPanel....................................................6
PLAYINGPAD ...............................................7
DRUMKIT .....................................................8
SONG .............................................................9
DemoSong ...................................................9
UserSong ....................................................10
METRONOME ...............................................11
Metronome....................................................11
Tempo...........................................................11
DRUMKITEDIT ............................................12
Select kit forediting .....................................13
Enterthe EditMode....................................13
Selectpart toedit..........................................13
Selectparametertoedit...............................14
Edit theparameter........................................14
Editanotherparameterorpart.................14
Completethe edit........................................15
SETUP ............................................................16
AccompanimentVolumeforDemo...........16
PercussionVolumeforDemo..................16
MasterTune................................................16
AdvancedParameterEdit........................16
Sesitivity............................................17
DynamicRange ......................................17
TriggerCorve..........................................18
CrossTalk..............................................18
Hi-Hat Pedalsetting................................19
Reset........................................................20
RECORD ....................................................21
Record......................................................21
SaveasaUserSong ................................21
EraseUserSong .......................................21
MIDI&USB .................................................22
VOICELIST .................................................23
SPECIFICATIONS ........................................24
CONTENTSTABLE

INSTALLATION
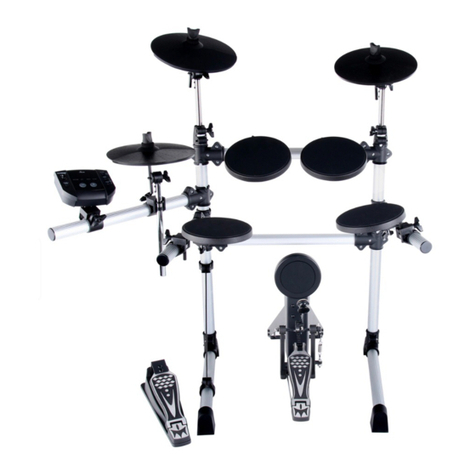
Thedrawing showscompletedrumkitafteryourinstallation.
Poweradaptorandconnection cablesarenotshowninthedrawing.
1
CRASH
TOM1
TOM2
HI-HAT
RIDE
TOM3
KICK
SNARE
HH-CTRL
SOUNDMODULE

INSTALLATION
2
Youcan find all ofthesecomponentsinpackageforrack systeminstallation..
Pad clamp
Rack clamp
L-Rod
Arm
Leg
Cymbalrod
Foot
Crossbeam
Cymbalrod clamp Wing nut

INSTALLATION
RACKSYSTEMINSTALLATION
1Open the arns,adjust theposition
ofarmsand cross beam, then
tighten the winnuts.
2
3
Installtherightandleftfoot,
adjusttheheighttohavethefeet
firmlyfixed ontotheground,then
tighten the winhuts.
4
Moveandrotateallthe
clampstoproper
location,thentihgtenthe
wing nuts.
5
Rotatethe L-rodstoproper
positions,thentightenthe
wing nuts.
Insertthe cymbal
rodsandadjusttheir
position.
3

INSTALLATION
4
1.Removethewing nut,
washerand feltpad
3.Adjust theangleandheight
oftherodbeforetighteningthe
wing nut.
1.Removethe wing nut, washer
andfeltpad
2.Putthecymbal padintothe
rodalongwithpartsremovedin
step 1.Fasten thewingnut
modertlytogivethe pad alittle
bitwobblingliketherealacous-
ticcymbal.
Note: CrashandRide havedif-
ferentpartnumbers.Pleasere-
fertoindicationon page5.
3.Adjusttheangle oftherodthen tightenthewing nut.
1.Insertthesnareintothe
L-Rod,then tighten the
wing nut.
2.Put the Hi-Hat intothe rod
alongwithpartsremovedin
step1.Fastenthe wing nut.
2. Adjusttheangle of the
L-Rod then tighten the
wingnut in theclamp.
Hi-HatInstallation Crash and Ride Installation
SnareInstallation 1. Insert thetomintothe
L-Rod,then tighten the
wing nut.
Note:Allthetomsusethe
samepad.
2. Adjustthe angleofthe L-Rodbefore
tightening the wing nut intheclamp.
Tom Installation
1. Align holesin the kick stand with
theseinthe bracket then fasten them
withscrews.
2. Inserttongue ofthekick stand intoslot
of thepedal . Tighten thewing nut on
the pedal level tofixit.
Kick Installation
COMPONENTSINSTALLATION
1.Alignholesinsupportingboardwiththeseinsound
module then fastenthemwithscrews.
2.Insertrod ofthe supporting boardintothe clamp,
thentightenthewing nut.
SoundmoduleInstallation
PleaserefertotheSOUNDMODULEChapterforelectronicconnection.
Electronic Connection
Finalizing the Installation
Adjustarms,clampsand rodstothe best positionyou liketofinalizethe installation.
2
1
3
2
1
3
2
1
3
2
1
3

(1) DISPLAY: The screen displays such as kit number, names and other information.
(2) POWER: Turns ON/OFF the sound module.
NOTE: When you turn the power off, do not turn it on immediately. Wait at least five seconds to turn
the power on so that the electronic circuits can properly reset.
The sound module will shut down automatically if there is no operation in 20 minutes, in order to save
energy. To disable this function, power on the module while pressing on snare rim.
(3) HEADPHONE VOL: Rotate this knob to adjust the output level of headphone and line out.
Rotate it clockwise to increase volume.
(4) EDIT: Press this button to configure drum kits.
(5) SETUP: Press this button to edit system parameters.
(6) MODE: Press to change the playing mode for demo songs.
(7) CLICK: Switch and set up the metronome.
(8) TEMPO: Change the speed of metronome and demo songs.
(9) KIT: Press to select kits.
(10) DEMO: Press to play demo songs and user songs.
(11) ENTER: To confirm operation or enter submenu.
(12) SCROLL WHEEL: Rotate to change value, kit, or demo. Press this button to adjust master
volume.
(13) EXIT: To cancel operation or back to root menu.
(14) Record button: Press it to record user songs.
(15) Play and stop button. Press to stop playing current song or recording. For details, please
refer to related chapter.
(16)¨PAD BUTTONS: In edit mode, press these buttons to select and listen to the corresponding
pad.
SOUNDMODULE
CONTROL PANEL
5
1
23
4567 8
911
12
10 13 14 15
16
DD 503

BACK PANEL
(1)HEADPHONE:Thisistheheadphoneoutput ofthesound module. Connecta1/8¡± TRScable
tothisoutput.
(2)LINEIN:Analog inputsocketofthe sound module,1/8¡± TRS. Anextra1/8¡± maletomale
cablewill beneeded if youwant connectyoursoundmoduletoanysoundsourcesuchasiPod,
CD player,mobilephoneorcomputer.Playand practicewithyourfavoritemusic.
(3)-(4)L/MONO, R: Lineoutput ofthesound module.Connectthisoutputtoanyamplifierusing 1/
4”TScable. Whileusingsingleamplifier,pleaseconnectL/MONOonly.
(5)TRIGGER:Triggerinputssocket ofsound module.Connectthe multi-triggerconnector(AKA
25pinconnector)tothissocketand lock it. Theretagson all cables. Connect all cablestotheir
instrumentaccording totheirtags.
(6)USB:ConnectstandardBtype USB cabletothissocketfor,gaming,recording MIDI and using
plug-insformoresoundoncomputer.
(7)DC 9V:Connectthe included DC9Vpoweradaptertothissocket.
SOUNDMODULE
6
LINEINHEADPHONE L/MONO R TRIGGER USB DC9V
12345 6 7

PLAYINGPAD
7
TURNONTHEPOWER
(1)Turndowntheexternal audio deviceconnected
withthe drum.
(2)Pressthe POWERbutton while don¡¯t strikepad
orpress theHi-Hat control pedal.
(3)Turnon externaldevicesconnected.
(4)Strikethe pad and adjustthevolumetoaproper
level. PLAYING PADS
PlayingSnareDrum
Strikethe central position (head)of the pad tomake
headsound, strikethe rimofthe pad tomakearim
sound.
Playing Cymbal
Strikerubberareaof thecrashand ridepadtocreate
acymbal sound.
The crashhaschokefeature. Strikethe
crashpad,itssound will sustain.Squeeze
theedge portion,thesound will bemute.
All padshavestriking forcesensitivityfeature.
Strikethe pad hardertomakeahighervolumeand
strikethepadsoftertomakealowervolume.
Playing TomDrum
Strikethecentralposition tocreateasound.
PlayingHi-Hat
(1)StriketheHi-Hat pad withoutpressingthe Hi-Hat
control pedal tomakeanopenHi-Hatsound.
(2)StriketheHi-Hatpad whilefullypressing the Hi-
Hat controlpedal tomakeacloseHi-Hat sound.
(3)Strikethe Hi-Hat padwhilepressingtheHi-Hat
controlpedal gradually,the consecutiveopensound
changestoclosesound.
(4)Pressthe Hi-Hatpedaldown quicklytomakeHi-Hat
pedalsound.
Playing KickDrum
PresstheKickdrumpedaltomakeakick drum
sound.
RotatetheMASTERVOLUMEknob toturnthe
mastervolumeup/down. Rotatethe knob clock-
wisetoincreasethe volume;rotatethe knob
counter-clockwisetodecreasethe volume.
MASTERVOLUME
Head Rim

automaticallywhiletheKITbutton indicator
will lightup.Thekitnumberand itsname
willbe displayed.
Insomeotheroperation modes,you may
pressthe KIT button toenterthe kitselect
operationmode.
PRESETKIT
Thekitnumberisranged 01-50.
Rotatethe SCROLL WHEEL toselect akit
youdesire. Rotatethe knob clockwisetoin-
creasethe kit numberandanticlockwiseto
decreasethe kit number.Allpreset kitnum-
berandnamearelistedintheKITLIST.
USERKIT
You cancreateyourownuserkitbyedit
function.Clickthe KIT button repeatedlywill
switchthe PresetKitand UserKitselection.
The UserKitnumberisU01 -U10.
Rotatethe SCROLLWHEEL toselectan
userkityou desire.Rotatetheknobclock-
wisetoincreasethekitnumberand
anticlockwisetodecreasethe kitnumber.
ThefactorysettingforallUserKitsisUni-
versalKit. Youcouldcallthemevenif you
don tcreateyourownuserkit.Ofcourse,
youcouldreplaceitbyediting.Pleasesee
<EDIT>Chapterinthismanualfordetails.
Press the KITbutton againtoback tothe pre-
set kit.
KITLIST
1Rock
2 Vintage
3Pop
4 Metal
5Jazz
6 Jungle
7Electro
8 Brush
9Fiesta
10 Electro2
DRUMKIT
Thereare10 preset drumkitsand 10 UserKits. Thekit iscombination ofdifferent instrumentvoice
assigned toeachpadwhichhasunitarystyleforperformance.Allthe kitsareforyourchoice.Any
kit couldbe editedandsaved asyourownUserKit. Afterpower,itll enterthe kit selection mode
8
UserkitmarkUserKit numberUserKitname
PresetkitmarkKitnumberKitname
ROCK
UserKit01

(2) Practice with Demo Song
Youmaypracticeyourownperformancewith
thedemosong.
Therearethree modesforyourpractice:
FULL-Whenpressthebutton,youwill
hearcompletesong
DRUMONLY-When press thebutton,
you will heardrumsound only. It helpsyouto
getideahowtoperform drum.
DRUMMUTE-Whenpress the button,
you will hearbackground musicwithout drum
sound.Then,you can playdrumsbyyourself.
Press the MODE button repeatedlytochange
themode.
Tip: Volumeofthe backgroundmusicand
drumofthedemosongisadjustable
separately.Pleasesee ChapterSETUPfor
moreinformation.
1.DEMO SONG
(1) Select and Play Demo Song
Thereare52demosongsbuiltin.
Pressthe DEMO buttononcetoengage the
demosongmodewiththe indicatorlighting.The
displaywill show “All Demo”.Press the
buttonimmediately,all demosongswill play
onebyone.Ifyou don tselectsong,after3sec-
ondthe firstdemosong numberand namewill
appearonthe display.
Toselectasongyou desire,rotatethe SCROLL
WHEE tochooseasong.
Thenpress the buttontostartplay; the
buttonindicatorlightsup.
Whenselectsinglesong,it ll be played
repeatedly.
Whenthedemosongisplaying,pressthebutton
againtotostopthe playing,theindicatorturns
off.
SONG
Therearetwotypesof song.The demonstration song(Demo)isforyourenjoymentand practice.
Usersong isyourownrecorded song.
9
Demosong numberDemosongname
AllDemo
Drum Mute
ChaCha
Demosong tempo Demosong beat

2.USERSONG
Thereare10Usersongsinmaximumrecorded
byuser.
Pressthe DEMO buttontwicequicklytoengage
theUserSong modewiththeindicatorlighting.
Thedisplaywill show “All U-Song”.If you don t
selectsong,after3second thefirstavailable
usersongnumberandnamewillappearonthe
display.
If you want toselect asong you desire, rotate
the SCROLL WHEEL tochooseasong.
Then press the button tostartplay;the
buttonindicatorlightsup.
When theusersong isplaying,press the
buttonagaintotostop theplaying,theindi-
catorturnsoff.
Note: If theintervalbetween the firstand sec-
ondpressingofthe DEMO button islongerthan
2seconds,itllturntoKit modeinsteadofSong
mode.
Note: Ifyoudidntrecordanysong,thedisplay
will show“Nou-song”.After3second,themode
willchange toKitselectautomatically.
SONG
Tip: You mayeraseUserSong intheUserSong
mode.Pleaserefertothe <RECORD>chapter
intheManualfordetails.
3.EXITTHESONG MODE
Youmaynoted thatpresstheDEMObutton once
toenterthe Demomode; pressthe DEMO but-
ton twicequicklytoenterthe Song mode.
Therefore,inthe Demo/UserSongmodepress
the DEMO button againtoexit the Demo/User
Song mode and turntothe Kitselection mode.
The DEMO indicatorturnsoff.
Or,you cansimplypress the EXITbuttontostop
palying , exitthe Demo/Song modeand turnto
theKitselection mode.
10
Usersong numberUsersong name
All U-Song
No u-song
User Song
度 拍号

METRONOME
1.METRONOME
Pressthe CLICK button tosoundthe
metronome. Press the button againtostop it.
Press the CLICK buttontwicetosetupthe
metronome.
(1) Time Signature Setting -Atfirst, you
couldsetthe timesignature.The the current
timesignaturewill blinkinthe secondrowof
the display.Rotatethe SCROLL WHEEL to
changethetimesignature.Availabletime
signatureis1-8/2,1-8/4,1-8/8, 1-8/16,The
defaultsettingis4/4. Press the ENTER button
toconfirmyousettingandturntothenext
parameterofthemetronome.
(2) Metronome Volume Setting -Afterpress
the ENTER buttontofinishthetimesignature
setting,thenextparametertosetupismetro-
nomevolume.Thedisplaywill show “Metro
Vol”andcurrentvolumeisblinking. Rotatethe
SCROLL WHEEL tochange the volume
ranged0-127,The defaultsettingis96.
Press the ENTER buttontoconfirm you
setting andturntothenextparameterofthe
metronome..
Youcan press the EXIT buttoninanystepto
exitmetronomesetting.
Duringthesetting,the metronomewillkeep
sound.
11
2. TEMPO
Pressthe TEMPO button,the currenttempo
valuewillblinkinthedisplay.Rotatethe
SCROLLWHEEL tochange thetempo
ranged 40-240.
Press the ENTER buttontoconfirm you
setting.
Afterabout 10 seconds,thisoperationwill exit
automatically.Or,press the EXIT buttonto
exitthetemposettingimmediately.
Time-Sig
Tempo
MetroVol
Timesignature
Tempo

DRUMKITEDIT
12
Adrumkit consistsofdrumpads,cymbalspadsandHi-Hat pedalphysically.
Theygeneratesoundindifferent waysuchasbystriking head orrimofdrumpad,triggered by
striking Crashboworedge, pressing Hi-Hatpedal.Wecallthe sourcetogeneratesoundasPart.
Eachpart isidentifiedon the displaybythe icon withmark.Theiconreferstopart ofstriking head
ofpad and cymbalisshownbelow.H.PDLreferstosoundgenerated bypressingtheHi-Hatpedal.
HIHATreferstoOpen Hi-Hatsound generated bystriking theHi-Hat cymbal.
Alternativepartofthesameinstrumentisshownbyextramarkunderthe icon. Forexample,the
partgenerating sound bystriking the Rim1of thesnareismarked byan archunderthe SNARE
icon.
Eachpart hasmultiparameterstocreateitscharacteristicssuchasvoice, volume, reverbleveland
Panetc.The detailed descriptionislisted Inthetablebelow.
Theeditfeatureistosetparameterforeachpart, partlyorforall partsinakit.theEditfeature
makesit possibletochange the currentlyselected drumkitsetting. Inthisway, youmaycreate
yourowndrumkit and saveitasUserKit.
SnareRimEdge of CRASHHI-HatClose
PARAMETER DESCRIPTION EDIT RANGE
VOICEVoiceassigned tothepart 1 –418
VOLUMEVolumeofthe part,127referstothe highestvolume0~127
PANStereo pan ofthe part. -64referstothemost left, 63
referstothemost right, 0referstothecenterposition -64~63
PITCH Pitchof the part. -10 referstothe lowestand10 tothe highestpitch.-10~10
REVERBReverbeffect levelofthe part,127referstothe highest level0~127

Theeditprocedureisthe sameforeveryparameter, Assigningvoicetothe partisoneofthe most
important function.Afteryou arefamiliarwiththe operation ofvoiceassignment; it llbeeasytoedit
otherparameters.The followingsectionistheeditproceduretaking examplehowtochangevoice
forapad.
DRUMKITEDIT
13
Asimplewaytoselectpartistohitarea of the
padyou desiredirectly. Thisisan aternative
metrodof pressingthebutton.
Editicon
Kit number
Part forediting
2.EntertheEditMode
PresstheEDIT buttontoengagetheeditmode.
the displaywill showthe kit numberforediting
andtheEDITiconappear.
3.Selectparttoedit
Press aselectbuttontoengage editing forthis
partwhilethecorrespondingicon willblink.Some
instrumentshavetwoormoreparts,forexample,
the ´crashhasbowandedge;Hi-Hathasopen
and closeetc. Press the button twicetoselect
alternativepart ofthisinstrument, correspond-
ingiconwiththemarkundertheiconwillflash.
Pleaserefertotablebelow.
Voice
Edit Mode
PART DESCRIPTION ICON
SnareRim1
SnareRim1
SnareRim2
SnareRim2
Tom1 Tom1 Head
Tom2 Tom2 Head
Tom3 Tom3 Head
Kick KickDrum
PART DESCRIPTION ICON
HHPedal Hi-HatPedal
HiHatOpen
Hi-HatOpen
HiHatCloseHi-HatClose
Crash CrashCymbalBow
CrashEdge
CrashCymbalEdge
Ride RideCymbal
RideEdge RideCymbalEdge
Snare SnareHead
1.Selectkitforediting
Selectakitforediting inthe samewayex-
plained inthe DRUMKITchapter. Thedisplay
showsthekitnumberand kitname.
Itemforediting
RIDE

DRUMKITEDIT
5.Edittheparameter
Thecurrentcontentsofthisparameterwill blink.
Inthisexample, it isthe voicenumber. Rotate
the SCROLLWHEELtochange contentsofthe
parameter.Inthisexample,youllchangevoice
assignedtoSnarerim.Anyparameterhasits
ownrangetoset.Forexample,thereare95
voicescanbeselectedtoassign toapart.
Pleasesee AppendixVOICELISTfordetails.
Pressthe ENTERbuttontoconfirm yoursetting.
Then,it ll returntothe parameterselection op-
erationstage.
6. Editanotherparameterorpart
Now,the parameter(theVOICEinthisexample)
editing foraselected part isfinished.You may
continuetoedit otherparametersinthispart or
changeparttoedit.
(1) Edit other parameter in the current part
Afteryou pressthe ENTER buttontofinishcur-
rent editing, it ll turnback tothe parameterse-
lection stage withthe next parameterblinking.
Pressthe ENTER button toedit thisparameter
orselectotherparameterbyrotatingthe
SCROLLWHEEL.Then,editparametersinthe
samewayexplainedinthe Step 4-Step5above.
Parameterscanbeeditedarelistedinthe table
inpage12.
Volume
4.Selectparametertoedit
Afterselectpart, the current parameterwill be
blinking. Rotatethe SCROLLWHEEL tose-
lectaparametertoedit. Inthisexample, select
VOICE.The defaultparameterisVOICE.
Pressthe ENTER buttontoconfirmyouchoice.
Voice
xRock
14

DRUMKITEDIT
(2) Edit another part
Selectanotherpart toeditinthe samewayex-
plainedinPage 13.The currentparameterto
editwill keepno change.It providesyoueasy
methodtoeditthe sameparameterforeachpart.
15
7.Completetheedit
Afterfinishall editingjobforthecurrentdrumkit,
youmayterminatethe edit.
Pressthe EXIT button, “Saveit?”.Then,you
havetwochoices:
(1)Saveediteddrumkitasyourownuser
kit:
Pressthe ENTER button. “UserKit”withUser
kitnumberblinkingwillappear.Rotatethe
SCROLL WHEELtochoosenumber,thenpress
the ENTER buttontoconfirm.
Note: Thereare10 built-inpreset UserKit. All
of themarethesameasKit01.Whenyousave
yourownUserKit, it llreplacethe existing one.
If the savingissuccessful,it llturntothe Kit
selectmode.Theindicatorsofthepadselect
buttonand the EDIT buttonwillturnoff.
Thedisplayalwaysasks “Replaceit”?.Press
the ENTER button toreplaceexistingone with
yournewediting. Pressthe EXIT buttonthen
changeanothernumber.Ifyoureallydontwant
tocoveranyexisting UserKit, press the EXIT
buttonagain,and itwillcoverthecurrent edited
kitthen turntotheKitSelectmode. .
TheUserKitsetting isnonvolatileeventhe
powerturnsoff.
(2)Press the EXIT button toexittheeditmode
andreturntotheKitSelection modewithoutsav-
ingasUserkit. The indicatorsof thepadselect
buttonand the EDIT buttonwillturnoff.
Theeditedresultswillcoverthe currentdrum
kitandactivateimmediately. Whenthepower
turnoff, thischangeswill reset.
Tip: Youmayresetthekit changesbyReset
feature.Pleasesee<SETUP>chapterinthis
Manualfordetails.
Saveit?
Replace it
UserKit

SETUP
IntheKitSelectionorDemo/Songstage,
pressthe SETUP buttontoentertheSetup
mode and itsindicatorlightsup. The param-
etertobesetupwill blink.Rotatethe SCROLL
WHEEL toselectone ofthe 7itemslisted
below,then pressthe ENTER toconfirmand
itscurrent value will bedisplayed.
Intheitemselection stage,pressthe EXIT but-
tontoexit setupoprationandturntotheKit
Selection mode.
1.AccompanimentVolumeforDemo
Whenplaydemosong, you mayhearback-
groundmusicaccompanied.Adjustthis
backgroundmusicvolumebyparameter
AccompVol.Rotatethe SCROLLWHEEL
tochangethevolumeranged0-24. Thede-
faultsettingis7.
Pressthe ENTER button toconfirm andturn
tothenextparameter.Pressthe EXIT button
toexitand turntotheparameterselection.
2.Percussion VolumeforDemo
Whenplaydemosong,you mayadjustper-
cussion volume.Adjustthisvolumebypa-
rameterD.DrumVol.Rotatethe SCROLL
WHEELtochangethevolumeranged 0-24.
Thedefaultsettingis11.
Pressthe ENTER button toconfirm andturn
tothenextparameter.Pressthe EXIT button
tocanclecurrentedit andturnbacktothe
parameterselection.
Press the EXIT button toexitand tothepa-
rameterselection.
3.MasterTune
Thisparameteraffectssound pitchglobally.
Rotatethe SCROLLWHEEL tochangethe
mastertuningranged0to+/-50.Thedefault
Settingis0whichrefersto440HzatA4note.
Pressthe ENTER button toconfirmand turn
tothenextparameter.Pressthe EXIT button
toexitcurrentedit andturntothe parameter
selection.
16
4.AdvancedParameterEdit
Thepurposeofthedrumkiteditistochange
soundcharacteristics suchasvoice,volume,
panetc.Thetarget ofadvanced parameter
editisphysicalcharacteristicsof padsuch
assensitivity, triggercurveetc.
AccompVol
Accomp Vol
2
1
3
D.Drum Vol
MasterTune
Advanced
Table of contents
Other Tdrum Drum manuals
