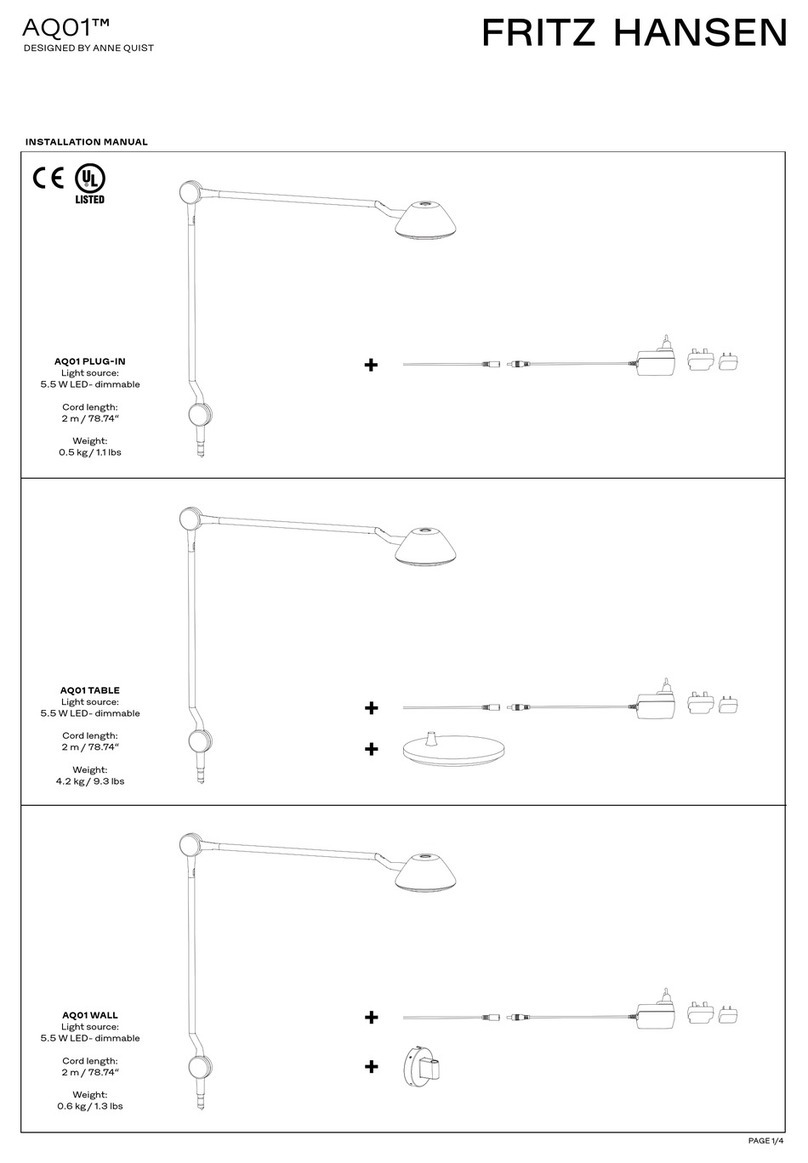
te-lighting TE-X24RGB User manual

TE-X24RGB miniBATTEN
Phonel : (1) 207-712-3004 http://www.te-lighting.com
USER MANUAL
TE-X24RGB
miniBATTEN

TE-X24RGB miniBATTEN
Phonel : (1) 207-712-3004 http://www.te-lighting.com
PART 4 USINGA DMX512 CONTROLLER....................................14.
4.1--BASICADDRESSING.................................................................14.
4.2--CHANNELASSIGNMENT............................................................14.
4.3--BASIC INSTRUCTIONS FOR DMX512OPERATION (STAGE 1).....19.
PART3 DISPLAY PANELOPERATION.........................................9.
3.1--BASIC..........................................................................................9.
3.2--MENU........................................................................................10.
3.3-- ..........................................................................11.
STATIC COLOR
3.4-- .........................................................................................11.
AUTO
3.5-- ..........................................................................................11.EDIT
3.6-- .......................................................................... 12.
DMXADDRESS
3.7--PERSONALITY..........................................................................12.
3.8-- ................................................................................12.
RUNMODE
3.9-- ..............................................................................12.ID ADDRESS
3.10-- ...............................................................................13.
SETTINGS
3.11--PASSWORD .............................................................................13.
PART1 PRODUCT(GENERAL)....................................................1.
1.1--PRODUCTINTRODUCTION.........................................................1.
1.2 PRODU CT FEATURES-- .................................................................1.
1.3 TECHNICALSPECIFICATIONS-- .....................................................2.
1.4 PHOTOMETRIC DATA-- ..................................................................3.
1.5 SAFETYWARNING-- ......................................................................4.
PART2 INSTALLATION...............................................................5.
2.1--MOUNTING...................................................................................5.
2.3--SETTING UP WITH ADMX512 CONTROLLER.................................7.
2.3-1--DMX512 A DDRESSING WITHOUTID ADDRES SING................. .....................7.
2.3-2--DMX512 ADDRESSING WITHI DADDRESS.......................................... ........7.
2.2--POWER CONNECTION..................................................................6.
TABLE OF CONTENT
S

TE-X24RGB miniBATTEN
Phonel : (1) 207-712-3004 http://www.te-lighting.com
1.1 PRODUCT INTRODUCTION
This product is designed for indoor use. Suitable applications include wash or effect
lighting for stage or nightclub applications. This product can also be installed for use in
signage and advertising using the dynamic functions available with DMX512 control. Direct
input ofDMX512 signal allows the units to be controlled from any DMX512 controller. This
productcan be operated as a single unit or in multipleunits for largeapplications.
The specially developed controller that allows the product to be controlled independent of
the DMX512 controllerenables the user to create and edit a wide range of custom programs.
All programs can be touch-button displayed or scheduledto STARTand ENDat scheduled
times. When programs have been created or editedin the controller, it is also possible to
triggertheseprogramsusingtheDMXINfunctionwhenconnected toa DMX512 controller.
1.2 PRODUCT FEATURES
LED FIXTURE
*RGBDimmer 0-100%
* Strobe
*Automatic programs
* LCD display
*Displaycontrol 'lock-out'
*DirectDMX512input
*IndependantID address
*Stand-alone/ Slave
* 'Over-heat' protection
*Fan speedcontrol
1
1PRODUCT (GENERAL)

TE-X24RGB miniBATTEN
Phonel : (1) 207-712-3004 http://www.te-lighting.com
1.3 TECHNICALSPECIFICATION
S
LED MODULE
Dimensions
LED MODULE:
Vo lt a g e
Rated Power
24pcs(8 x RED / 8 x GR EEN/ 8 x BLUE )
Weig ht
LED/Un it
Output/LED
Co ol in g
1W
Forced air convection
450 x 1 90 x 80m m
3.5Kg
AC 100~ 240V...50/60Hz
45W
2
Environment Tem perature -20 ~40℃℃
445mm
380mm
170mm
80mm

TE-X24RGB miniBATTEN
Phonel : (1) 207-712-3004 http://www.te-lighting.com
1.
4
PHOTOMETRICDATA
PHOTOMETRIC DATA
3
RED
1
2
3
0
1
2
3
2468
10Dist ance(m)
76 5 194 86 49 33 LU X
15°
GREEN
1
2
3
0
1
2
3
24 68
10Distance(m)
1145 300 130 73 52 LUX
15°
BLUE
1
2
3
0
1
2
3
24 68
10Distance(m)
220 60 26 15 10 LUX
15°
RGB
1
2
3
0
1
2
3
2468
10Dist ance(m)
2135 555 244 142 95 LU X
15°

TE-X24RGB miniBATTEN
Phonel : (1) 207-712-3004 http://www.te-lighting.com
1.5 SAFETY WARNING
IMPORTANT
【】
【
】
ALWAYSREADTHEUSERMANUALBEFOREOPERATION.
PLEASE CONFIRM THAT THE POWER SUPPLY STATED ON THE
PRODUCT ISTHESAMEASTHEMAINS POWER SUPPLYINYOUR
AREA.
●
●
●
●
●
●
●
●
●
●
T his product must be installed by a qualified professional.
Alwaysoperate theequipment as described in theusermanual.
A minimum distance of 0.5m must be maintained between the equipment and
combustible surface.
T he product must alwaysbe placed in awell ventilatedarea.
Alwaysmake sure that the equipment isinstal led securely.
DO NOT stand close to the equipment and stare directly into the LED light
source.
Always disconnect the power supply before attempting and maintenance.
Always make sure that the supporting structure is solid and can support the
combined weight of theproducts.
T he earthwire must always be connected to the ground.
Do not touch the power cables if your hands are wet.
ATTENTION
●
●
●
●
●
●
●
●
T his product left the place of manufacture in perfect condition. In order to
maintainthis condition and for safe operation, the user must always follow the
instructions and safety warnings described in this user manual.
Avoid shaking or strong impacts to any part of the equipment.
Make surethat all parts of the equipment are kept cleanand f ree of dust.
Always make su re that the power connections are connected correct and
secure.
If there isany malfunction of the equipment, contact your distributor
immediately.
When transferringtheproduct, itis advisabletousetheoriginalpackaging in
which theproduct left thefactory.
Shields,lenses or ultraviolet screens shall be changedifthey havebecome
damagedtosuch anextentthattheireffectiveness isimpaired.
The lamp(LED) shall bechanged ifit has becomedamagedor thermally
deformed.
4

TE-X24RGB miniBATTEN
Phonel : (1) 207-712-3004 http://www.te-lighting.com
2.1 MOUNTING
HANGING
The LED mini BATTEN can be mounted in a hanging position using the
supporting bracket. The bracket should be secured to the mounting truss or
structure using a standard mounting clamp. Please note that when hanging the
unit a safety cable should also be used.
5
Fig 3
Fig 1 Fig 2
2INSTALLATION

TE-X24RGB miniBATTEN
Phonel : (1) 207-712-3004 http://www.te-lighting.com
UPLIGHT
The LED mini BATTEN can be mounted in an upright or sitting position using the
supportingbrackets.
Fig 6
Fig 7
@ 220V: 20 units may be connected in series
@120V: 10 units may be connected in series
2.2 POWER CONNECTIONS
Note: Asthis fixture'sDMXsignal cable connectionhadbeen changed toParallelconnection,
soif over 30 unitsto beconnected, thenaDMXsignal amplifier is needed.
6

TE-X24RGB miniBATTEN
Phonel : (1) 207-712-3004 http://www.te-lighting.com
2.3
SETTING UP WITHADMX512
CONTROLLER
2.3-1 DMX512ADDRESSING WITHOUT IDADDRESSING
STAGE 1 MODE)(
The figureaboveshows asimpleDMX512
layoutwiththestartingaddress of thefirst
unit set at1, with the second set at 11 and
so on... (Note that when used in this way,
the CH9 IDfunction mustbe inactive (CH9=0))
DMX512
CONTROLLER
●
●
●
●
●
Connect the DMX512 controller to the units in series.
Eachunit has 10 DMX channels so the DMX Addresses should increase by increments of
10 (e.g. 1,11,21,31...)
The ID address has not been set so therefore whenusing the controller Ch9 must
be inactive ( CH9=0 ).
EachDMXAddress may beusedasmanytimesasrequired.
AnyDMXaddressintherange from001to512 may be used.
2.3-2 DMX512ADDRESSING WITH IDADDRESS STAGE 1 MODE)(
Connect the DMX512 controller to the units in series
Eachunit has 10 DMX channels so the DMXAddresses should increase by increments of
10(e.g. 1,11,21,31...)
EachDMXAddress may beusedasmanytimesasrequired.
AnyDMXaddressintherange from001to512 may be used.
EachDMX address may carry up to 66 separate IDaddresses.
should be set in the menu on each unit in ascending values
(i.e. 1,2,3...)
ID addresses are accessible from Ch9 on the DMX512 controller.
●
●
●
●
●
●
●
【】ID
Example:
............
7

TE-X24RGB miniBATTEN
Phonel : (1) 207-712-3004 http://www.te-lighting.com
DM X512
CONTROLLER
Example:
Thefigureaboveshows asimpleDMX layout
which has used three units at each DMX address.
Thethree units havedifferentIDaddresseswhich
allows theuser tocollectivelycontrolthewhole
group of unitsatthatDMXaddress bysetting
CH9 to 0, or to control each unit independently by
first selecting the DMX address and then by using
Ch9 to locate the target IDaddress.
............
8

TE-X24RGB miniBATTEN
Phonel : (1) 207-712-3004 http://www.te-lighting.com
3.1 BASIC
【】
【】
【】
【】
MENU
ENTER
scroll through the main menuor exit from thecurrentmenuor function
Enter thecurrentlyselected menu or confirm the currentfunction value
UP
DOWN
scroll 'UP' through the menulist orincreasethe value of thecurrentfunction
scroll 'DOWN' through the menu list or decrease the value ofthecurrent function
UP ENTER
DOWNME NU
3DISPLAY PANEL OPERATION
9

TE-X24RGB miniBATTEN
Phonel : (1) 207-712-3004 http://www.te-lighting.com
3.2 MENU
10
Static color
Auto
Password
Green 0~2 55【】
Blue 0~255【】
Strobe 0~020【】
Red 0~255【】
Auto 1【】
Auto 2【】
Auto 3【】
Auto 4【】
Auto 5【】
Auto 6【】
Auto 7【】
Auto 8【】
Auto 9【】
Auto 10【】
Custom 1【】
Custom 2【】
Custom 3【】
Custom 4【】
Custom 5【】
Custom 6【】
Custom 7【】
Custom 8【】
Custom 9【】
Custom 10【】
Edit Scene 1【】
Scene 2【】
Scene 3【】
Scene 4【】
Scene 5【】
Scene 6【】
Scene 100【】
Fade time 0~255【】
MENU
Runmode
Personality
Slave
DMX
Custom 1【】
Custom 2【】
Custom 3【】
Custom 4【】
Custom 5【】
Custom 6【】
Custom 7【】
Custom 8【】
Custom 9【】
Custom 10【】
Red 0 ~255【】
Green 0~255【】
Blue 0~255【】
Strobe 0~020【】
Steptime 0~255【】
DMXaddress
STAGE 1
BLOCK
ARC 1
ARC 1+D
ID address 【】1~66
【】1~512
Pa ssw ord ON /OF F
ON
OFF
Set pass wor d
【】
Settings Fan Auto
Off
Low
Normal
High
UPload
ID ON/OFF ON
OFF
Resetto
Factory settings
YES
NO
Password
【】
UP loadling.....

TE-X24RGB miniBATTEN
Phonel : (1) 207-712-3004 http://www.te-lighting.com
3.3 Static colo
r
3.4 Auto
【】
● 【 】【 】【 】【 】
【】 【 】
●【】
●
Static color
Red Green Blue Strobe
ENTER
Select / / / and set the value by pressing
and
Press tosave and backtotheuppermenu
The fixture will be automaticin Masterrunningmodeunder this function
UP DOWN
11
Static color Green 0~2 55【】
Blue 0~255【】
Strobe 0~020【】
Red 0~255【】
MENU
Auto Auto 1【】
Auto 2【】
Auto 3【】
Auto 4【】
Auto 5【】
Auto 6【】
Auto 7【】
Auto 8【】
Auto 9【】
Auto 10【】
Custom 1【】
Custom 2【】
Custom 3【】
Custom 4【】
Custom 5【】
Custom 6【】
Custom 7【】
Custom 8【】
Custom 9【】
Custom 10【】
MENU
【】
●【】 【】
●【】【】
●【 】【 】
【】
●
AUTO
AUTO SET
Auto 01 Auto 10
Custom 01 Custom 10
Edit
Select the targ et program and pres s
Programs to are fully pre-programmed and will not be
altered
Programs to arefully pre-programmedandcanbe
edited in mode
The fixture will be automatic in Master running mode under this function
Edit Scene 1【】
Scene 2【】
Scene 3【】
Scene 4【】
Scene 5【】
Scene 6【】
Scene 100【】
Fade time 0~255【】
Custom 1【】
Custom 2【】
Custom 3【】
Custom 4【】
Custom 5【】
Custom 6【】
Custom 7【】
Custom 8【】
Custom 9【】
Custom 10【】
Red 0 ~255【】
Green 0~255【】
Blue 0~255【】
Strobe 0~020【】
Steptime 0~255【】
MENU
3.5 Edit
E【】
【】 【 】【 】
dit
Edit ustom 1 ustom 10
●
●
●
Enter to edit thecustom programs to
Each program has 100 steps to edit
Each step allows a creation of a scene using Red,Green,Blue,Strube,Step time,
Fade time
CC
NOTE: Step time
T he unit of is 0.1s for the range 0-10 and 1sec for the range 11-255
T he unit of [Fade time] is1 sec ond and can be adjustedfrom 0 to 255NnNOTO
●
●
【】

TE-X24RGB miniBATTEN
Phonel : (1) 207-712-3004 http://www.te-lighting.com
12
3DISPLAYPANELOPERATION
DMXaddress 【】1~512
MENU
3.
6
DMX address
DMX【】
●【 】 【】
●【】
address
DMX ad dress 1~512
ENTER
Enter andsetthe DMXaddress
Press save the setting.
Personality STAGE 1
BLOCK
ARC 1
ARC 1+D
MENU
Runmode
Slave
DMX
MENU
ID address 【】1~066
MENU
3.7 Personality
【】
●【 】 【 】【 】【】【 】
Personality
Personality STAGE1 / ARC1 ARC1+D
Enter and select / /
DMX mode
BLOCK
3.8 Run mode
3.9 ID address
【】
【】 【】
IDaddress
IDaddress 1~066
●
Enter and set the ID address
Run mode【】
【】
【】
【】
【】
Enter the modetosetworkingmode.
mode is for using the DMX512 controller to control t he fixtures.
mode is for Master - - Slave operation.
Whenfixtur es are under Auto program operation, the no works.
●
●
●
MODE
DMX
Slave
Note: MODE

TE-X24RGB miniBATTEN
Phonel : (1) 207-712-3004 http://www.te-lighting.com
Settings Fan Auto
Off
Low
Normal
High
UP load
IDON/OFF ON
OFF
Resetto
Factory settings
YES
NO
Password
【】
UP loadling.....
13
MENU
3.10 Settings
Enter and select the working mode of fan:
Choose / to open or close ID
This function will reset all setting to theoriginal factory setting
【】
【】 【 】【】【 】
【】【】
【】
【】
【】【 】
【】
Fan
Fan Auto , Off , Low ,
Normal or High
UPload
IDON/OFF
ON OFF
Reset toFactory settings
●
●
●
●
●
●
●
●
●
Select to upload the customprograms from the current MASTER unit to
the SLAVEunits.
In order to activate the upload functionthe password must be entered
Password is the same as the main access password
When uploading the MASTER and SLAVE units will display YELLOW
If an erroroccurs when uploading the MASTER and/or SLAVE units will dis play RED
On successful uploading of the customprograms the MASTER and SLAVE units
will display GREEN.
【】UP load
3.11 Password
【】
【】
【】
【】【 】
【】
【】【 】【 】【 】【 】【】【 】【 】
Password
PasswordON/OFF
Set password UP DOWN
ENTER
UP UP DOWN UP DOWN UP DOWN DOWN
m
When password is activated, display will demand password each time
the fixtureis powered on.
Enter the menu to change password.
Set newpassword using the & keys.
Inputan8digitpasswordand thenpress toconfirm
NOTE: Inthe event thatthe password is forgotten. Please use the permanent
factory password shown below.
> > > > > > >
Enter the ode to set password ON/OFF
●
●
●
●
●
●
●
Password
Pa ssw or d ON/O F F
ON
OFF
Set pass wor d
【】
MENU

TE-X24RGB miniBATTEN
Phonel : (1) 207-712-3004 http://www.te-lighting.com
14
1
2
0 255
3
4
0 255
0 255
0 255
5
0 10
11 35
36 60
61 85
86 110
111 135
136 160
161 185
186 210
211 215
216 220
221 225
226 230
231 235
236 240
241 245
246 250
251 255
RED 100% / GREEN UP / BLUE 0%
RED DOWN / GREEN 100% / BLUE 0%
RED 0% / GREEN 100% / BLUE UP
RED 0% / GREEN DOWN / BLUE 100%
RED UP / GREEN 0% /BLUE 100%
RED 100% / GREEN 0%/ BLUE DOWN
RED 100% / GREEN UP / BLUE UP
RED DOWN / GREEN DOWN / BLUE 100%
WHITE 1:3200K
WHITE 2:3400K
WHITE 3:4200K
WHITE 4:4900K
WHITE 5:5600K
WHITE 6:5900K
WHITE 7:6500K
WHITE 8:7200K
WHITE 9:8500K
MAR CO
No function
DIMMER
4.1 BASICADDRESSING
●
●
●
Connect all of the units in series usingstandard DMX512 signal cableor the IP65 ratedcable
provided.
Set the DMX512 address in the menu.
Itis possibletohavethe same DMXaddress orindependent addresses for eachfixture.
【】DMX
4.2 CHANNELASSIGNMENT
●
Note:This product have three DMX512channel configuration: ,
and 【】【】
【】【 】 STAGE 1 , BLOCK
ARC1 ARC1+D
STAGE 1
BLUE
CHANNEL FUNCTIONVALUE
GREEN
RED
6
0 4
5 255Strobespeed
STROBE
No function
4USING ADMX512 CONTROLLER

TE-X24RGB miniBATTEN
Phonel : (1) 207-712-3004 http://www.te-lighting.com
15
0 255
9
IDADDRESS
ID1~ID66
ID1
ID2
ID3
ID4
ID5
ID6
ID7
ID8
ID9
ID10
ID11
ID12
ID13
ID14
ID15
ID16
ID17
0 9
10 19
20 29
30 39
40 49
50 59
60 69
70 79
80 89
90 99
100 109
110 119
120 129
130 139
140 149
150 159
160 169
170 179
8
Auto
6
Auto
7
Auto
8
Auto
9
111 120
Auto
10
121 130
131 140
141 150
151 160
161 170
Custom2
Custom1
171 180
181 190
191 200
201 210
211 220
221 230
231 240
241 250
251 255
Custom3
Custom4
Custom5
Custom6
Custom7
Custom8
Custom9
Custom10
0 10
11 20
21 30
31 40
41 60
7
61 70
81 90
91 100
101 110
Auto 1
Auto 2
Auto
3
Auto
4
Auto
5
71 80
ID18
180 189
Fan s, Auto
Reset todisplayFan setting
Fan closed(activated after 3seconds)
AUTO SPEEDADJUSTMEN T
When using CH7,AUTO01-AUTO10,this functionactivated
Fan normal(activated after 3 seconds)
Fan high speed(activated after 3seconds)
Fan auto speed(activated after 3 seconds)
CHANNEL FUNCTIONVALUE

TE-X24RGB miniBATTEN
Phonel : (1) 207-712-3004 http://www.te-lighting.com
16
ID26
ID27
ID28
ID29
ID30
ID24
ID25
213
214
215
216
217
218
219
9
ID42
ID43
ID44
ID45
ID46
ID47
ID48
ID49
ID50
ID51
ID52
ID53
ID54
ID55
ID56
ID57
ID58
ID59
ID60
ID61
ID62
ID63
ID33
ID34
ID35
ID36
ID37
ID38
ID39
ID40
ID41
ID31
ID32
220
221
222
223
224
225
226
227
228
229
230
231
232
233
234
235
236
237
238
239
240
241
242
243
244
245
246
247
248
249
250
251
252
ID19
ID20
190 199
200 209
ID21
ID22
ID23
210
211
212
ID64
ID65
ID66
253
254
255
CHANNEL FUNCTIONVALUE

TE-X24RGB miniBATTEN
Phonel : (1) 207-712-3004 http://www.te-lighting.com
BLOCK
1
2
0 255
CHANNEL FUNCTIONVALUE
3
4
5
6
7
8
9
10
11
12
0 255
0 255
0 255
0 255
0 255
0 255
0 255
0 255
0 255
0 255
0 255
BLOCK1-RED
BLOCK1-GR EEN
BLOCK1-BLUE
BLOCK2-RED
BLOCK2-GR EEN
BLOCK2-BLUE
BLOCK3-RED
BLOCK3-GR EEN
BLOCK3-BLUE
BLOCK4-RED
BLOCK4-GR EEN
BLOCK4-BLUE
10
0 9
CHANNEL FUNCTIONVALUE
10 29
30 49
50 69
70 89
90 109
110 129
130 149
150 169
189
190 209
210 229
230 255
BLOCK
BLOC K1,BLOCK2,BLOCK3,BLOCK4
BLOCK1
BLOCK2
BLOCK3
BLOCK4
BLOCK1,BLOCK2
BLOCK3,BLOCK4
BLOCK1,BLOCK4
BLOCK2,BLOCK3
BLOC K1,BLOCK2,BLOCK3
BLOC K2,BLOCK3,BLOCK4
BLOC K1,BLOCK3,BLOCK4
BLOC K1,BLOCK2,BLOCK4
17
170

TE-X24RGB miniBATTEN
Phonel : (1) 207-712-3004 http://www.te-lighting.com
18
ARC 1
BLUE
1
2
0 255
CHANNEL FUNCTIONVALUE
3
0 255
0 255
GREEN
RED
ARC 1+D
BLUE
1
2
0 255
CHANNEL FUNCTIONVALUE
3
4
0 255
0 255
0 255
GREEN
RED
MASTER DIMMER
Table of contents