TEAM CUISINE TC-010-001 User manual

SMART AIR FRYER
TC-010-001
USER MANUAL

Thank you for choosing our product!
Congratulations on the purchase of our Smart Air Fryer. It has been designed to help you
quickly prepare and cook delicious meals.
To make sure you get the most out of this air fryer, we recommend you read all the
instructions, including the safety warnings, before using the product. For your own safety,
please only use the product as described in this manual.
Keep the manual in a safe place so you can easily refer to it and pass it on to any future
owners of the product.
GLOBAL NETWORK
Our products are avail-
able on our worldwide
website
GUIDED RECIPES
We have guided recipes
that go with each appli-
ance to help give you
inspiration for every meal
PRODUCT VARIETY
With our range of smart
and speciality appliance
For us at TEAM CUISINE, good food means real enjoyment. With our kitch-
en products, you will feel like a professional chef right in your own kitchen.
We focus on quality, design, and functionality to make cooking delicious
food an easy task. Be inspired as you browse through our products and
recipes and let your inner chef come to life.
OUR SMART KITCHEN PRODUCTS HAVE:
2

Content
Content
1. Package Contents............................................................................................. 4
2. Technical Specications .................................................................................... 4
3. Safety Guide..................................................................................................... 4
3.1 For Your Safety .................................................................................... 4
3.2 Signal Words........................................................................................ 5
3.3 Hazards and safety instructions........................................................... 5
4 Getting to know your Smart Air Fryer .............................................................. 7
4.1 Parts & Accessories ............................................................................. 7
4.2 Screen display & Functions .................................................................. 8
5 Before rst use.................................................................................................. 9
5.1 Unpacking ............................................................................................ 9
5.2 Assembly.............................................................................................. 9
5.3 Test run ................................................................................................ 8
6. Operating your Smart Air Fryer ....................................................................... 9
6.1 Team Cuisine Smart App setup ............................................................ 10
6.2 Preheating............................................................................................ 11
6.3 Air Frying............................................................................................. 12
6.4 More functions..................................................................................... 12
7. Mode setting .................................................................................................... 13
8. Cleaning............................................................................................................ 15
9. Trouble shooting............................................................................................... 15
10. Error code on screen ...................................................................................... 16
11. Disposal .......................................................................................................... 17
3
1. Package Contents
• 1 x Smart Air Fryer
• 1 x Pot
• 1 x Basket
• 1 x Instruction Manual
• 1 x Quick Start Guide
2. Technical Specications
Models TC-010-001
Main Voltage: AC 220-240 V~ 50 / 60 Hz
Power Rating: 1450 W
Temperature Control Range: 65-200 °C or 130-400 °F
Time Range: 1 – 60 minutes
Timer: Up to 24 hours
Capacity: Single pot 5.5L / 5.8QT
Basket 4L / 4.2QT
Dimensions: 278 x 357 x 335 mm
3. Safety Guide
3.1 For Your Safety
Safety is an essential part of every Air Fryer. However, the product safety of the Air Fryer
can only be ensured if this chapter and the warning notices in the following chapters are
followed.
Do not attempt to operate the appliance without reading and understanding the instruction
manual to ensure all safety measures and features are in place and operating correctly.
Failure to follow the instructions in this instruction manual may result in personal injury and
/ or property damage.
4

3.2 Signal Words
Be aware of the signal words WARNING and NOTE as they relate to safety notes. These
are the signal words for the respective safety notes:
WARNING
Indicates a hazardous situation which, if not avoided, could result in death or serious injury.
NOTE: Used to address best practices to avoid damage to your appliance, its accessories
and potential injury.
3.3 Hazards and safety instructions
• This appliance is intended for household use only. Do not use this appliance for
commercial purposes. Do not use the appliance outdoors or for anything other than
its intended use. Failure to do so may result in injury, property damage and invalidate
the warranty.
• This appliance is not to be used by children or by persons with reduced physical, sensory
or mental abilities, or lack of experience or knowledge. Close supervision is necessary
when any appliance is used near children or these individuals. Children should not play
with the appliance. Cleaning, maintenance or connecting the appliance to the power
supply should not be made by children.
• WARNING Keep the appliance and the power cord out of the reach of children
and pets.
• Always place the appliance on a dry, stable, non-combustible, level surface. Do not
place the appliance on a wooden table. To prevent potential damage to the surface,
place an appropriate protective hot pad underneath the appliance.
• WARNING Do not use or place the appliance on or near:
• towels, paper, curtains or other ammable materials.
• heat sources such as stoves, gas or electric burners, or ovens.
• naked ames such as a candle.
• water sources such as taps or sinks, or an area where water splashes.
• Do not block the vents. Use the appliance only in a well-ventilated area and allow 6
inches / 15 cm of space on all sides of the appliance.
• WARNING Ensure that the voltage of the appliance is compatible with the voltage
in your home in order to avoid re, injury, or damage. The plug of the appliance must be
inserted into a suitable socket, which has been installed and earthed in accordance with
local regulations and requirements. DO NOT DEFEAT THE SAFETY PURPOSE OF THE
GROUNDED PLUG. It is normal for the plug to get warm while the appliance is being
used. However, a loose t between the plug and the outlet may cause overheating.
If this occurs, try inserting the plug into a different electrical socket. If you have any
queries on the plug or socket setup, contact a qualied electrician.
• When plugging the power cord into the wall socket, never force the plug to t.
5

• WARNING To avoid an electrical shock, do not touch the plug with wet hands or
when you are standing in water. Do not immerse the air fryer housing, power cord, or
plug, in water or any other liquid. Do not rinse the appliance under a tap.
• WARNING For safety purposes, this appliance comes with a short power cord to
prevent hazards from tripping or becoming entangled with the power cord.
• WARNING Do not use the appliance with below-counter power sockets, an adapter
or extension cord. Do not allow the power cord to hang over the edge of a counter or
table or touch hot surfaces or naked ames.
• Regularly check the appliance and the power cord for damage. Do not use the
appliance, power cord or plug if they have been damaged, dropped or malfunctioning.
If the appliance, power cord or plug have been damaged, they must be replaced by
the manufacturer, a service technician, or a similarly qualied person in order to avoid
hazards. Do not attempt to modify this appliance in any way.
• Before use, carefully inspect the appliance and its parts for damage. Do not use the
appliance if any damage is present.
• Always unplug the appliance from the wall socket when not in use, as well as before
adding or removing parts or accessories, and before cleaning. When unplugging the
appliance, gently pull the plug not the power cord out of the wall socket.
• Before cleaning or storing, be sure that the appliance has cooled completely.
• WARNING Only use parts that are authorized by the manufacturer in order to
avoid injury or damage.
• Do not use aluminum foil in the air fryer unless directed. If you are using aluminum foil,
t it tightly and make sure it is not touching the heating elements as this can cause
overheating and risk of re.
• Only use baking paper with food on top. If the baking paper touches the heating
elements, there is a risk of re.
• WARNING Some of the appliance’s parts will become hot during operation and
for some time after use. Do not touch hot surfaces. Only touch handles, knobs and
buttons.
• Do not move the appliance when it is in use.
• To avoid damaging or scratching the trays, use only wooden or heat-resistant plastic
utensils ever leave the appliance unattended while in use.
• Do not use the air fryer’s accessories in any other kitchen appliance such as a microwave
or oven.
• If the LED display on the control panel shows an error code, unplug the appliance and
refer to the “Error codes on the screen” section.
• To fully turn off the appliance, remove the plug from the power source.
• Do not attempt to repair, replace or modify the appliance and its safety mechanisms
as this may cause electric shock, re or injury, and will void the warranty. There are no
user serviceable parts.
• Never connect this appliance to an external timer switch or separate remote-control
system.
• Before and after use, follow the cleaning and maintenance guidelines in this manual.
Always make sure the appliance has cooled.
• Use extreme caution when removing cooking pot that contains hot fat or oil as well as
when disposing of hot oil or fat.with a re blanket. Wait for the smoke to clear before
opening the air fryer basket.
6
• If dark smoke or ames come from the air fryer, immediately turn it off at the wall socket.
Do not open the air fryer basket or use water to put out ames. Cover the appliance
with a re blanket. Wait for the smoke to clear before opening the air fryer basket.
• Do not store anything on top of the air fryer when it is in use.
• Store the appliance in a location that is cool and dry. Do not store any parts in the air
fryer other than the recommended accessories.
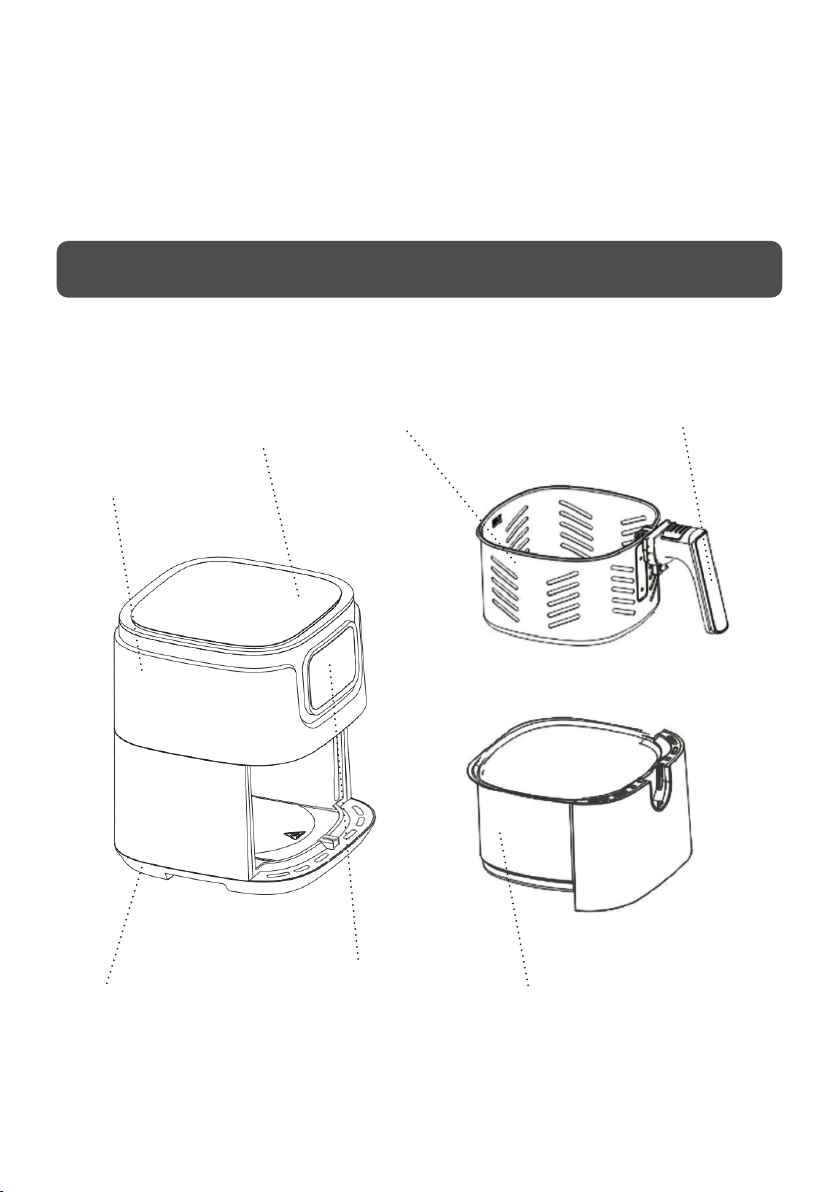
4. Getting to know your Smart Air Fryer
4.1 Parts & Accessories
Main unit
Top cover Basket Handle
Bottom base
Control panel
Pot
7

4.2 Screen display & Functions
Menu
Button
TEMP Unit
Icon
Increase /
Decrease
Time
Time Unit
Icon
Power
/ Start
/ Pause
Buttom
Defrost
Button
Processing
Bar
Delay
Button
Defrost
Icon
Increase /
Decrease
Temperature
WiFi Icon
Preset Cooking
Mode Icons
Power / Start / Pause Button
Press and hold the button for 3 seconds to turn ON / OFF the air fryer.
After turned on the air fryer, you can press the button to Start or Pause cooking process.
Menu Button
Press to select the corresponding cooking modes*.
Defrost Button
Press to select the Defrost function*.
*Note: Refer to the table on Mode setting page for default parameters of each mode.
Delay Button
Short press to select the delay start function and it allows you to delay cooking for up to
24 hours.
TIME setting button
Press + to increase and press – to decrease the cooking time.
TEMP setting button
Press + to increase and press – to decrease the cooking temperature.
8

5. Before rst use
Read all the warning labels on the packaging and all safety instructions. Prior to the rst use,
follow all the steps in this section to unpack, clean, assemble and do a test run.
NOTE: When in operation for the rst time, some odor, smoke or steam may be generated
by the appliance. This is harmless. Please ensure adequate ventilation.
5.1 Unpacking
1. Remove all packaging materials.
2. Remove any stickers or labels from the appliance.
3. Thoroughly clean the basket and pot with hot, soapy water and a non-abrasive sponge.
4. Wipe inside and outside of the appliance with a moist cloth.
This is an oil-free fryer that works on hot air, do not ll the pot with oil or frying fat directly.
Notice: When your air fryer is heated for the rst time, it may emit slight smoke or odor. This
is normal with many heating appliances. This does not affect the safety of your appliance.
5.2 Assembly
1. Place the appliance on a stable, horizontal and even surface.
• Do not place the appliance on non-heat-resistant surface.
2. Place the basket in the pot.
• Do not ll the pot with oil or any other liquid.
• Do not put anything on top of the appliance, the airow will be disrupted and
affects the hot air frying result.
9

5.3 Test Run
Perform an initial test run will help you become familiar with your air fryer and remove any
residues or odors from the manufacturing process.
1. Make sure there is no food or packaging in the air fryer, pot or basket and plug it in.
2. Press the Power button to turn on the air fryer.
3. Press the Menu button and select Preheat mode. The display will show “200°C/400°F”
and “5 Min”.
4. Press the Start button to begin. When nish, the air fryer will beep.
6. Operating your Smart Air Fryer
6.1 Team Cuisine Smart App Setup
Note: Due to ongoing updates and improvements. The Team Cuisine Smart app may be
slightly different than shown in the manual. In case of any differences, follow the in-app
instructions.
1. To download the Team Cuisine Smart app, scan the QR code or search “Team Cuisine
Smart” in the Apple App Store® or Google Play Store.
2. Turn on the air fryer.
3. Open the Team Cuisine Smart app. If you already have an account, tap Log in. To
create a new account, Tap Sign up.
4. Press and hold the Menu button for 3 seconds until you hear a beep and the WiFi
indicator begins to blink rapidly.
Team Cuisine Smart App
www.team-cuisine.com
10

5. Log in the home page of the Smart App, tap “+” in the top right corner of the screen.
Note:
• Ensure the WiFi and Bluetooth of your mobile device are enabled.
• Ensure that the signal of the network environment where the device is located is
strong and stable.
6. Select the Auto Scan tab. It will automatically detect the Air Fryer and then tap next.
7. Select the same WiFi network of your mobile device and enter the password and tap
next.
8. The Air Fryer and the app will now begin the pairing process.
9. After successfully conguring the device, tap done to nish the pairing.
Pair with “Add Manually”
Alternatively, the Air Fryer can be paired using the Add Manually option on the app. Tap
the “+” button on the top right corner and select the Add Manually tab. Find and select
the Air Fryer and then follow the instructions on the screen.
Note:
• Always select 2.4GHz WiFi network when there is an option.
6.2 Preheating
Preheating is recommended before placing food into the air fryer unless your air fryer is
already hot. Food may not cook thoroughly without preheating.
1. Connect the mains plug into an earthed wall socket. Press the Power button to turn on
the air fryer.
2. Press the Menu button to select Preheat mode. The display will show “200°C/400°F”
and “5 Min”.
3. Optionally, press temperature + or - buttons to change the temperature. The time will
adjust automatically.
4. Press the Start button to begin. When nish, the air fryer will beep.
11

6.3 Air Frying
1. Press the Power button to turn on the air fryer.
2. Carefully pull the pot out from the air fryer.
3. Put the ingredients in the basket.
4. Slide the pot back into the air fryer.
Caution: Never use the pot without the basket in it
Do not touch the pot during and sometime after use, as it gets very hot. Only
hold the pot by the handle.
5. Determine the required preparation time for the ingredient (see section ‘Mode Setting’
in this chapter).
6. Some ingredients require shaking halfway through the preparation time (see section
“Mode Setting” in this chapter). To shake the ingredients, pull the pot out of the
appliance by the handle and shake it. Then slide the pot back into the air fryer
Caution: Do not press the button of handle during shaking.
• Tip: To reduce the weight, you can remove the basket from the pot and shake the
basket only. To do so, pull the pot out of the appliance, place it on a heat-resistant
surface and press the button of handle. and lift the basket out of the pot
• Tip: You can adjust temperature or time according to your taste during use. Your
settings will be kept for about 10 mins after you pull the pot out of the body.
7. If you pull out the basket, the air fryer will pause cooking automatically. When you
return the basket, the air fryer will automatically resume cooking based on your previous
settings.
Note: If the air fryer has no active cooking programs, it will clear all settings and turn
off after 5 minutes of inactivity.
8. Check if the ingredients are ready.
If the ingredients are not ready yet, simply slide the pot back into the appliance and set
the timer to a few extra minutes.
9. To remove ingredients (e.g. fries), pull the pot out of the air fryer and place it on trial
framework, and press the basket release button and lift the basket out of the pan.
Do not turn the basket upside down with the pot still attached to it, as any excess oil
that has collected on the bottom of the pot will leak onto the ingredients. The pot and
the ingredients are hot. Depending on the type of the ingredients in the air fryer, steam
may escape from the pot.
10. Empty the basket into a bowl or onto a plate.
11. When a batch of ingredients is ready, the air fryer is instantly ready for preparing
another batch.
6.4 More Functions
Switching Temperature Units
• Press and hold the delay button for 3 seconds.
• The temperature unit can be switched the temperature between Fahrenheit to Celsius.
• The last setting will be memorized setting even power off.
12

Delay Setting
The delay start function allows you to delay the start of the cooking for up to 24 hours.
1. Choose your desired cooking mode or set cooking program manually.
2. Press the Delay button and screen begins to blink rapidly.
3. Press Time + or – button to increase or decrease the delay starting time.
4. Once nished setting, press start button and the timer will count down automatically.
5. When delay time is elapsed, cooking will start.
Note: Press the Delay button again to cancel delay setting.
Caution: Do not allow perishables such as meat, poultry, sh or dairy products to sit at room
temperature for more than 2 hours or more than 1 hour in high room temperatures.
7. Mode Setting
7.1 Team Cuisine Smart App Setup
Note: Due to ongoing updates and improvements. The Team Cuisine Smart app may be
slightly different than shown in the manual. In case of any differences, follow the in-app
instructions.
1. Press the Menu button to select the cooking mode. The air fryer will automatically
change to the cooking mode’s default settings.
2. You can change a cooking time and temperature by pressing + or - buttons to increase
or decrease the temperature/time. To return to a cooking mode’s default settings, press
the cooking mode’s button again.
Note: Press and hold the + or - buttons to rapidly increase or decrease the time or
temperature.
3. Press the Start button to begin. When nish, the air fryer will beep.
This table below will help you to select the basic settings for the ingredients.
Note: Keep in mind that these settings are indications. As ingredients differ in origin, size,
shape as well as brand, we cannot guarantee the best setting for your ingredients.
Because the Rapid Air technology instantly reheats the air inside the appliance instantly.
Pull the pot briey out of the appliance during hot air frying barely disturbs the process.
Tips
• Smaller ingredients usually require a slightly shorter preparation time than larger
ingredients.
• A larger amount of ingredients only requires a slightly longer preparation time, a
smaller amount of ingredients only requires a slightly shorter preparation time.
• Shaking smaller ingredients halfway through the preparation time optimizes the end
result and can help prevent unevenly fried ingredients.
• Add some oil to fresh potatoes for a crispy result. Fry your ingredients in the air fryer
within a few minutes after you added the oil.
• Do not prepare extremely greasy ingredients such as sausages in the air fryer.
13

• Snacks that can be prepared in an oven can also be prepared in the air fryer
• The optimal amount for preparing crispy fries is 500 grams.
• Use pre-made dough to prepare lled snacks quickly and easily. Pre-made dough also
requires a shorter preparation time than home-made dough.
• Place a baking tin or oven dish in the air fryer basket if you want to bake a cake or
quiche or if you want to fry fragile ingredients or lled ingredients
• You can also use the air fryer to reheat ingredients. To reheat ingredients, set the
temperature to 150°C for up to 10 minutes.
Mode Icon
Default
Temperature
Temperature
Range Default
Time
Time
Range
°C ℉°C ℉
Preheat 200 400 80-200 160-400 5 mins 1-60
mins
Meat 180 360 80-200 160-400 18 mins 1-60
mins
Wings 190 380 80-200 160-400 25 mins 1-60
mins
Fish 200 400 80-200 160-400 20 mins 1-60
mins
Fries 200 400 80-200 160-400 15 mins
1-60
mins
(Shake)
Pizza 200 400 80-200 160-400 10 mins 1-60
mins
Defrost 65 130 65-80 130-160 20 mins 1-60
mins
Note: Add 3 minutes to the preparation time when you start frying while the air fryer is still
cold.
14
8. Cleaning
Clean the appliance after every use.
Do not use metal kitchen utensils or abrasive cleaning materials to clean the pot and the
non-stick coating basket, as this may damage the non-stick coating.
1. Remove the mains plug from the wall socket and let the appliance cool down.
Note: Remove the pot to let the air fryer cool down more quickly.
2. Wipe the outside of the appliance with a moist cloth.
3. Clean the pot and basket with hot, soapy water with a non-abrasive sponge. You can
use degreasing liquid to remove any remaining dirt.
Tip: If dirt is stuck to the basket or the bottom of the pot, ll the pot with hot, soapy
water. Put the basket in the pot and let the pot and the basket soak for approximately
10 minutes.
4. Clean the inside of the appliance with hot water and non-abrasive sponge.
5. Clean the heating element with a cleaning brush to remove any food residues.
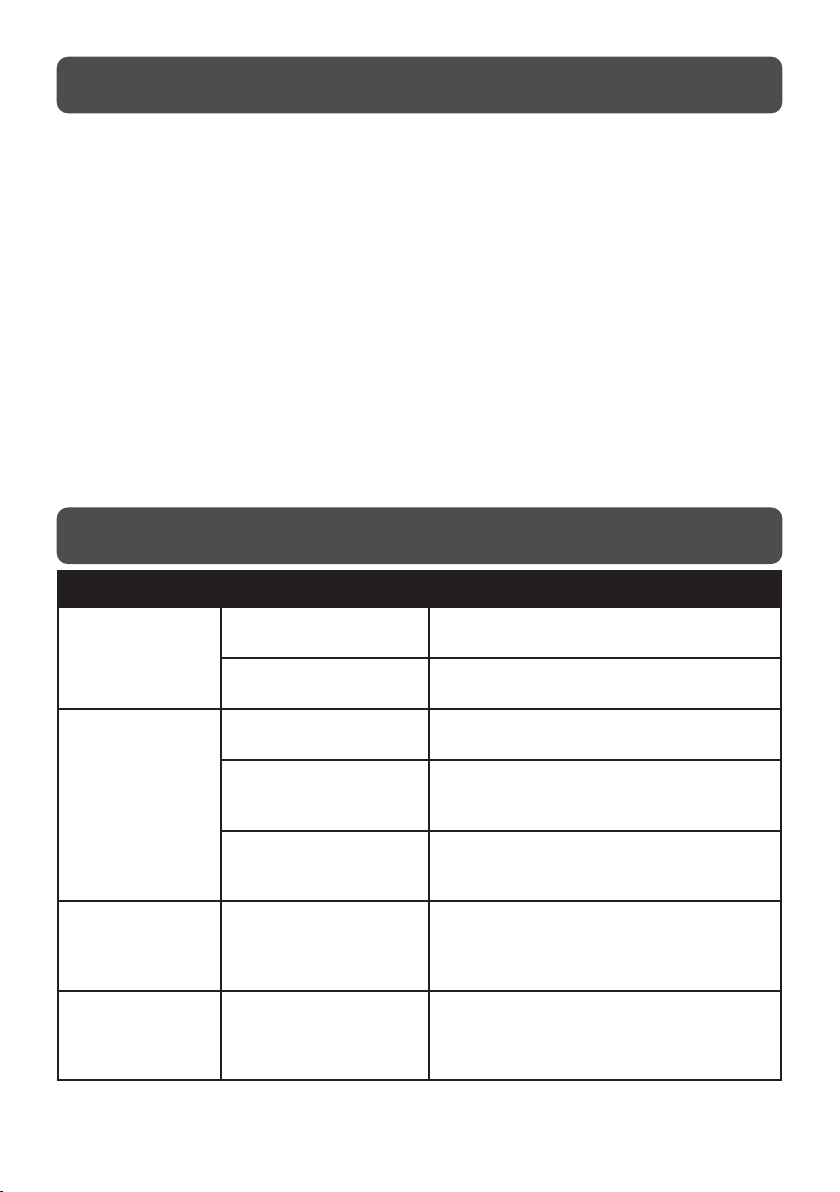
9. Troubleshooting
Problem Possible Solution
The air fryer does
not work
The appliance is not
plugged in. Put the mains plug in an earthed wall socket.
You have not set the timer. Set the timer key to the required preparation
time to switch on the appliance.
The ingredients
fried with the air
fryer are not done.
The amount of ingredients
in the basket is too big.
Put smaller batches of ingredients in the bas-
ket. Smaller batches are fried more evenly.
The set temperature is
too low.
Set the temperature key to the required
temperature setting (see section ‘settings’ in
chapter ‘Using the appliance’).
The preparation time is
too short.
Set the timer to the required preparation time
(see section ‘Settings’ in chapter’ Using the
appliance’).
The ingredients are
fried unevenly in the
air fryer.
Certain types of ingredi-
ents need to be shaken
halfway through the
preparation time.
Ingredients that lie on top of or across each
other (e.g. fries) need to be shaken halfway
through the preparation time. See section
‘Settings’ in chapter ‘Using the appliance’.
Fried snacks are not
crispy when they
come out of the air
fryer.
You used a type of snacks
meant to be prepared in a
traditional deep fryer.
Use oven snacks or lightly brush some oil onto
the snacks for a crispier result.
15

Problem Possible Solution
I cannot slide the
pot into the appli-
ance properly.
There are too much ingre-
dients in the basket.
Do not ll the basket beyond the MAX indica-
tion.
The basket is not placed in
the pot correctly.
Push the basket down into the pot until you
hear a click.
White smoke comes
out of the appli-
ance.
You are preparing greasy
ingredients.
When you fry greasy ingredients in the air fryer,
a large amount of oil will leak into the pot. The
oil produces white smoke and the pot may
heat up more than usual. This does not affect
the appliance or the end result.
The pot still contains
grease residues from
previous use.
White smoke is caused by grease heating up in
the pan. make sure you clean the pan properly
after each use.
Fresh fries are fried
unevenly in the air
fryer.
You did not use the right
potato type.
Use fresh potatoes and make sure they stay
rm during frying.
You did not rinse the po-
tato sticks properly before
you fried them.
Rinse the potato sticks properly to remove
starch from the outside of the sticks.
Fresh fries are not
crispy when they
come out of the air
fryer.
The crispiness of the fries
depends on the amount of
oil and water in the fries.
Make sure you dry the potato sticks properly
before you add the oil.
Cut the potato sticks smaller for a crispier
result.
Add slightly more oil for a crispier result.
10. Error code on the screen
Error Code Potential Issue Solution
E1 There is an open circuit in the
temperature monitor. Discontinue use and unplug the
appliance. Contact customer
service.
E2 There is a short circuit in the
temperature monitor.
16
11. Disposal
This product is subject to the provisions of European Directive 2012/19/ EC.
The symbol showing a wheelie bin crossed through indicates that the product
requires separate refuse collection in the European Union. This applies to the
product and all accessories marked with this symbol. Products identied with
this symbol may not be discarded with normal household waste but must be
taken to a collection point for recycling electric and electronic appliances.
This recycling symbol marks e.g. an object or parts of the material as valuable
for recycling. Recycling helps to reduce the consumption of raw materials and
protect the environment.
Packaging
When disposing of the packaging, make sure you comply with the environmental
regulations applicable in your country.
Apple and the Apple logo are trademarks of Apple Inc., registered in the U.S. and other countries. App Store is a service mark of
Apple Inc. registered in the U.S. and other countries. Android and Google Play are trademarks of Google LLC. All other trademarks are
properties of their respective owners.
www.team-cuisine.com
TC_TC-010-001_IM_V1
17
Table of contents
Other TEAM CUISINE Fryer manuals


Popular Fryer manuals by other brands

Klarstein
Klarstein Family Fry manual

Keating Of Chicago
Keating Of Chicago INSTANT RECOVERY GAS FRYER Service manual

Waldorf
Waldorf 800 SERIES Installation and operation manual

Frymaster
Frymaster SR42 Series, SR52 Series, SR62 Installation, operation and maintenance

Pitco
Pitco ME14S-C/MFD Service manual

REMOSKA
REMOSKA Vento Instructions for use


