TeAx TCSmart+ User manual

User manual for TCSmart+
by
(rev0.9 January 2018)

ThermalCapture Smart+ User Manual
Table of Contents
1 Overview and Features................................................................................................................. 3
1.1 Scope of elivery................................................................................................................... 3
1.2 Hardware escription............................................................................................................ 3
1.3 Software escription.............................................................................................................. 4
2 Operation...................................................................................................................................... 5
2.1 Intended Use......................................................................................................................... 5
2.2 Wiring and Connectors.......................................................................................................... 6
2.2.1 Servo Connector............................................................................................................ 7
2.2.2 TeAx GPS Input.............................................................................................................. 8
2.2.3 Supply............................................................................................................................ 8
2.2.4 UART............................................................................................................................. 9
2.2.5 Push Button.................................................................................................................. 10
2.2.6 Status LE ................................................................................................................... 10
2.2.7 Micro-S -Card Slot...................................................................................................... 10
2.2.8 TeAx TCFusionZoom Connector.................................................................................. 10
2.2.9 Micro H MI...................................................................................................................11
2.2.10 USB3-Port.................................................................................................................. 11
2.2.11 USB2-Port.................................................................................................................. 12
2.2.12 RJ-45 Gigabit Ethernet Port....................................................................................... 12
2.2.13 Micro Jack ebug Serial Port..................................................................................... 12
3 ThermalCapture Smart+ Usage................................................................................................... 12
3.1 Power On............................................................................................................................. 12
3.2 Login.................................................................................................................................... 13
3.3 Power Off............................................................................................................................. 13
3.4 Connecting TCFusionZoom................................................................................................. 14
3.4.1 Using libtcfusionzoom.................................................................................................. 14
3.4.2 Using libtmc.................................................................................................................. 14
3.5 Using of Status LE .............................................................................................................15
3.6 Temperature Information...................................................................................................... 16
4 Post Processing with ThermoViewer Software............................................................................ 17
5 Technical ata............................................................................................................................. 17
6 isposal and recycling information.............................................................................................. 18
6.1 European Union — isposal Information............................................................................. 18
7 Contact........................................................................................................................................ 19
2 / 17

ThermalCapture Smart+ User Manual
1 Overview and Features
This guide describes the features of TeAx ThermalCapture Smart+ (in the following called
TCSmart+). It is a powerful computing environment, designed for the full radiometric EOIR
(Electro-Optical-Infra-Red) system ThermalCapture Fusion Zoom (TCFusionZoom). Based on the
NVIDIA TK this device features high processing power in a small form factor and little weight.
1.1 Scope of Delivery
•TCSmart+
◦Toradex TK1 module (with NVI IA Tegra K1)
◦TeAx interface board
◦Aluminum case
•Cable Set
◦Power cable
◦Connector cable for TCFusionZoom
◦JST-4-Pin plug with open ends
◦Micro-H MI to H MI cable
•User manual
1.2 Hardware Description
The aluminum casing of TCSmart+ is light weight and provides an exceptionally good heat
dissipation for the powerful Toradex TK1 module. Please take care not to isolate the aluminum
casing especially in situations when high cpu load is generated permanently. The surface can
become hot in such situations (especially the area with the cooling stripes above the TeAx logo)!
Overview of TCSmart+ (cf. Toradex TK1):
•Quad Core, NVI IA Tegra K1, Quad-core ARM Cortex-A15
•Up to 2.1GHz
•2GB RAM
•Full CU A support (192 NVI IA CU A Cores), OpenGL 4.4 and OpenGL ES 3.1
1.3 Software Description
TCSmart+ runs with a pre installed Ubuntu. It is the kernel from a standard Toradex image with the
root file system of an L4T (Linux 4 Tegra). Because of the high performance machine and the good
3 / 17

ThermalCapture Smart+ User Manual
package support it’s possible to do native development on the machine itself. No cross compile
setup is needed.
For convenience there’ s a ready to go setup of a Qt (including Qt Creator) installation with pre
configured demo projects that show examples on how to connect TCFusionZoom, how to build a
qt-based live viewer or how to to process incoming data of TCFusionZoom in OpenCV.
4 / 17

ThermalCapture Smart+ User Manual
2 Operation
Please take some time to read the manual before using TCSmart+. A couple of things will become
clearer regarding the miscellaneous interfaces of TCSmart+. Additionally there will be some hints
on howto use the operating system.
2.1 Intended Use
•Please take care not to isolate the aluminum casing as it’s needed to dissipate the heat
from the TK1.
•TCSmart+ is designed for use in private and commercial areas.
2.2 iring and Connectors
TCSmart+ provides interfaces at the left, front and right side of the aluminum case. Below you see
an overview of the IO (figures 1, 2 and 3 with the table below) and a more detailed description in
the following text.
5 / 17
Figure : Left side of TCSmart+
Figure 2: Front side of TCSmart+
Figure 3: Right side of TCSmart+

ThermalCapture Smart+ User Manual
1 Servo Connector
2 TeAx-GPS input (UART in)
3 Supply
4 UART
5 Push-Button
6 Status LE
7 Micro-S -Card Slot
8 TCFusionZoom Connector
9 Micro H MI
10 USB3 Port
11 USB2 Port
12 RJ45 Gigabit Ethernet Port
13 Micro Jack ebug Serial Connector
2.2.1 Servo Connector
The Servo-Connector is forwarded to the JST-7-Pin connector for TCFusionZoom. This makes it
possible to feed in an SBUS signal or a Servo PWM for controlling TCFusionZoom’s behavior (e.g.
Trigger, Live-View-Settings etc.).
1 GN
2 NC
3 PWM Signal
Keep in mind that there’s no 5V supply on the Servo Connector (red cable no. 2).
6 / 17

ThermalCapture Smart+ User Manual
2.2.2 TeAx GPS Input
The TeAx-GPS-Input of TCSmart+ can be used to connect an TeAx-GPS-Module with an also
connected TCFusionZoom. This way the TCFusionZoom still adds GPS information to the
recorded or streamed data.
1 GPS ata Input
2 GN
3 5V GPS-Supply provided by
TCFusionZoom via JST-7-Pin
connector
2.2. Supply
Please take care to provide 12V-32V for the TCSmart+ power supply. Please keep in mind that an
optionally attached TCFusionZoom will increase the needed power significantly.
7 / 17

ThermalCapture Smart+ User Manual
V+ Power supply for the TCSmart+ and
additional hardware (e.g.
TCFusionZoom)
GN GN of supply
2.2.4 UART
The UART of TCSmart+ can be used as communication interface (incoming or outgoing control
commands for example). Please note the signal voltage level of 3.3V (Never connect regular
RS232 signal levels to the UART connection of TCSmart+).
1 +3V3
2 GN
3 TX
4 RX
8 / 17

ThermalCapture Smart+ User Manual
2.2.5 Push Button
The push button has no active function at the moment.
2.2.6 Status LED
The Status LE is a user configurable RGB LE for signaling miscellaneous informations for
observation from outside. Please refer to 3.5 Using of Status LE of the user manual for further
details.
2.2.7 Micro-SD-Card Slot
This is a slot for a Micro S card. You can use it in TCSmart+ to store log files or processed data
on an S card. Please take care that the S card’s class is fast enough for your needs (we
recommend an S HC Class 10 card at least).
2.2.8 TeAx TCFusionZoom Connector
The JST-7-Pin plug can be used to connect a TCFusionZoom. Besides the power supply for
TCFusionZoom (V+ and GN ) this interface connects the TeAx GPS Input of TCSmart+ to the
TCFusionZoom. Please refer to the JST-7-Pin connector image and the table below for a
9 / 17

ThermalCapture Smart+ User Manual
description of pins.:
1 5V supply for GPS
2 NC
3 NC
4 V+
5 GN
6 Trigger_Out Connects the Servo Connector
signal to the Trigger_In of TCFusionZoom
7 GPS_Out forwards GPS data to
TCFusionZoom
The Trigger_Out pin forwards a PWM signal from the Servo Connector of TCSmart+ to the
Trigger_In pin of TCFusionZoom. On Pin1 is the supply for an optionally TeAx-GPS-Module
connected to the TeAx-GPS-Connector (supply of GPS by TCFusionZoom). Via Pin7 GPS_Out the
GPS data from an optionally available TeAx-GPS-Module are forwarded to the GPS_In of
TCFusionZoom.
2.2.9 Micro HDMI
This Micro H MI port provides a standard H MI output. You can connect every standard H MI
monitor or TV. It’s intended for developing directly on the target system. The system should be able
to detect the correct resolution of the monitor via E I information. To be on the safe side connect
the monitor before starting the system. Please remember that you can always access the system
via ssh if something went wrong and the monitor is not detected correctly. Tools like xrandr and
derivatives can be useful to explore the available monitor devices.
2.2.10 USB -Port
TCSmart+ provides a USB 3.0 connection for devices with high bandwidth needs (Bus 03 Port 1 in
listing below). It’s fully downward compatible to USB 2.0 and USB 1.0. Ideally connect
TCFusionZoom to this USB port.
ubuntu@ubuntu:$ sudo lsusb -t
/: Bus 03.Port 1: Dev 1, Class=root_hub, Driver=tegra-xhci/2 , 5000M
/: Bus 02.Port 1: Dev 1, Class=root_hub, Driver=tegra-xhci/6 , 480M
|__ Port 2: Dev 3, If 0, Class=Vendor S ecific Class, Driver=, 480M
|__ Port 2: Dev 3, If 1, Class=Vendor S ecific Class, Driver=, 480M
/: Bus 01.Port 1: Dev 1, Class=root_hub, Driver=tegra-ehci/1 , 480M
10 / 17

ThermalCapture Smart+ User Manual
2.2.11 USB2-Port
TCSmart+ provides a USB 2.0 port that is ideal to attach a usb hub (e.g. for mouse and keyboard;
Bus 02 Port 1 on listing below). It’s fully downward compatible to USB 1.0.
ubuntu@ubuntu:$ sudo lsusb -t
/: Bus 03.Port 1: Dev 1, Class=root_hub, Driver=tegra-xhci/2 , 5000M
/: Bus 02.Port 1: Dev 1, Class=root_hub, Driver=tegra-xhci/6 , 480M
|__ Port 2: Dev 3, If 0, Class=Vendor S ecific Class, Driver=, 480M
|__ Port 2: Dev 3, If 1, Class=Vendor S ecific Class, Driver=, 480M
/: Bus 01.Port 1: Dev 1, Class=root_hub, Driver=tegra-ehci/1 , 480M
2.2.12 RJ45 Gigabit Ethernet Port
You can use a standard RJ45 ethernet plug for connecting TCSmart+ to a network. Please take
care to use the appropriate category of ethernet cable for gigabit networks. This 1Gbit/s network
port is fully downward compatible to 100MBit/s and 10MBit/s network connections.
2.2.1 Micro Jack Debug Serial Port
This interface provides access to a serial console of the system. Normally the usage of this
interface won’t be needed. The usage of a terminal login via SSH is much more convenient and
should be preferred.
ThermalCapture Smart+ Usage
TCSmart+ was designed to provide a powerful computing device that is light and small enough to
be placed under a UAV. This way it’s possible to do real time processing of daylight and infrared
data from TCFusionZoom. There’s a pre installed Ubuntu linux for easy development.
3.1 Power On
As soon as the device is powered up it starts to boot the Ubuntu Linux. If there is a connected
H MI monitor you can see the boot prompt and kernel messages. After a couple of seconds you
see a login prompt. Without H MI monitor you should be able to login to TCSmart+ via SSH
session. Please take care to always correctly shutdown the device after usage.
3.2 Login
As a development machine the focus is on easy usage. This means that the device is not
11 / 17

ThermalCapture Smart+ User Manual
configured for security. There’s a standard user ubuntu with password ubuntu. On a graphical user
session you can just login (with H MI monitor, keyboard and mouse):
•User: ubuntu
•Pwd: ubuntu
If you want to connect the machine via network theres an SSH service running on TCSmart+. You
need the IP address of the TCSmart+ for the SSH session. The IP address depends on the
configuration of TCSmart+ and the network (e.g. router) the TCSmart+ is connected to. To find out
the IP address of TCSmart+ you can use a linux machine in the same network (user on the
machine host in the following example). First find out the IP of your host:
user@host:$ ifconfig
If you know the IP of your machine (eg. 192.168.0.42) you can search the network for other
machines in your network:
user@host:$ nmap -sP 192.168.0. 2/2
After a couple of seconds you should see a list of all found machines found in the same network
including the TCSmart+ (it’s name is Apalis-TK1). Assuming TCSmart+’s IP is 192.168.0.8 you can
now log in via:
user@host:$ ssh [email protected]
3.3 Power Off
To shutdown the machine please use the graphical tools provided by the operating system or a
shutdown command from the command line (e.g. via ssh):
ubuntu@ubuntu:$ sudo shutdown -h now
3.4 Connecting TCFusionZoom
In order to get access to live data from TCFusionZoom, please check the hardware setup:
•Connect TCFusionZoom with 7-Pin JST-Connector of TCSmart+
•Connect the USB3 Port of TCSmart+ with the USB port of TCFusionZoom
You can check the presence of the device in the terminal by using the command lsusb.
12 / 17

ThermalCapture Smart+ User Manual
ubuntu@ubuntu:$ lsusb -t
.4.1 Using libtcfusionzoom
To connect TCFusionZoom there is an already installed library libtcfusionzoom in folder
/usr/local/lib/. The appropriate header can be found in /usr/local/include/. This library detaches the
standard kernel driver and communicates directly via libusb with TCFusionZoom. Normally this
would require the lib using program to run with root privileges. To circumvent this and to make
TCFusionZoom accessible by normal users there is an udev rule installed to /etc/udev/rules.d/99-
teax.rules. This way the device is attached with the appropriate permissions.
ubuntu@ubuntu:$ cat /etc/udev/rules.d/99-teax.rules
SUBSYSTEM=="usb", ATTRS{idVendor}=="0483", MODE="0666"
SUBSYSTEM=="usb_device", ATTRS{idVendor}=="0483", MODE="0666"
Using libtcfusionzoom requires you to provide a callback function for receiving TFC data from
TCFusionZoom. Every time a TFC frame is received via USB the callback gets called with the new
frame. Please refer to the doxygen documentation of libtcfusionzoom. Besides the API description
of libtcfusionzoom there is a code example that shows how to access the lib. Please also refer to
the demo projects to see how you can access the lib.
.4.2 Using libtmc
The delivered TFC frames consist of a TMC frame and a corresponding daylight jpeg. The data of
the daylight jpeg can be directly processed but the TMC is a compressed binary in a proprietary
format. In order to access the raw pixel data of the infrared image you have to use libtmc that is
also installed on the system in /usr/local/lib/ with the appropriate header file in /usr/local/include/.
This libtmc also provides functions for conversion from raw data to miscellaneous formats like:
•TauBitmapRaw
•TauBitmapGrayScale
•TauBitmapRGB
•TauBitmapRGBFusion
•TauBitmapARGBFusion
•TauBitmapRGBRainbow
•TauBitmapARGBRainbow
Please refer to the doxygen information of libtmc for further details about general usage and API
description.
13 / 17

ThermalCapture Smart+ User Manual
3.5 Using of Status LED
The status LE can be freely configured. It’s an RGB LE . Each of the 3 channels can be
switched independently by using the appropriate GPIO-Pin of the TCSmart+ (the RGB channels
can be combined, e.g. red + green = yellow). The setup of the GPIO can be done via sysfs. First
export the appropriate GPIO number and then set the direction to out. Now you are able to control
the pin by writing a character (enable) or 0 (disable) to the appropriate path of each GPIO. These
settings are volatile and have do be repeated after each system start (this can also be automated
with a bash script that is executed on startup). Please have a look at the examples below.
The red LE can be switched with GPIO-237 (you can check the setting with the cat command in
the last row):
ubuntu@ubuntu:$ echo 237 > /sys/class/gpio/export
ubuntu@ubuntu:$ echo "out" > /sys/class/gpio/gpio237/direction
ubuntu@ubuntu:$ echo 1 > /sys/class/gpio/gpio237/value
ubuntu@ubuntu:$ cat /sys/class/gpio/gpio237/value
The green LE can be switched with GPIO-234 (you can check the setting with the cat command
in the last row):
ubuntu@ubuntu:$ echo 23 > /sys/class/gpio/export
ubuntu@ubuntu:$ echo "out" > /sys/class/gpio/gpio23 /direction
ubuntu@ubuntu:$ echo 1 > /sys/class/gpio/gpio23 /value
ubuntu@ubuntu:$ cat /sys/class/gpio/gpio23 /value
The blue LE can be switched with GPIO-248 (you can check the setting with the cat command in
the last row):
ubuntu@ubuntu:$ echo 2 8 > /sys/class/gpio/export
ubuntu@ubuntu:$ echo "out" > /sys/class/gpio/gpio2 8/direction
ubuntu@ubuntu:$ echo 1 > /sys/class/gpio/gpio2 8/value
ubuntu@ubuntu:$ cat /sys/class/gpio/gpio2 8/value
3.6 Temperature Information
If there is a need to be informed about the systems temperature values (CPU, memory, etc.) you
can request the temperatures from the system for each of the 4 zones (just adapt 0-4 after
thermal_zone*). The call for type shows the measured location. The call for temp shows the
temperature in fix point (e.g. a printed value of 42000 means 42.0 degree celsius).
ubuntu@ubuntu:$ cat /sys/class/thermal/thermal_zone0/type
ubuntu@ubuntu:$ cat /sys/class/thermal/thermal_zone0/temp
14 / 17

ThermalCapture Smart+ User Manual
4 Post Processing with ThermoViewer Software
ThermoViewer is the post-processing software provided by TeAx Technology to process RAW data
captured by TeAx products like TCFusionZoom. It allows the user to quickly browse through
recorded data and tune every single frame into the perfect result. For further usage of the data it
can be exported into images like JPG and PNG, videos and CSV data. CSV is especially useful, if
further automatic data processing follows. There is also the option to export data into radiometric
JPGs. Those files can be opened with powerful FLIR tools for deeper analysis, or automatic report
generation. Please take a look at the ThermoViewer user manual for further information.
5 Technical Data
igital TV-formats Full-H via H MI (1080p, 60Hz)
Input voltage 12-32 V C
power consumption TB .
Storage temperature -4°F to 131°F
-20°C to 55°C
Operating temperature 23°F to 113°F
-5°C to 45°C
weight 210g
15 / 17

ThermalCapture Smart+ User Manual
6 Disposal and recycling information
You must dispose this device properly according to local laws and regulations. Because this device
contains electronic components, the device must be disposed separately from household waste.
When this device reaches its end of life, contact local authorities to learn about disposal and
recycling options.
6.1 European Union — Disposal Information
The symbol above means that according to local laws and regulations your product and/or its
battery shall be disposed separately from household waste. When this product reaches its end of
life, take it to a collection point designated by local authorities. The separate collection and
recycling of your product and/or its battery at the time of disposal will help conserve natural
resources and ensure that it is recycled in a manner that protects human health and the
environment.
16 / 17

ThermalCapture Smart+ User Manual
7 Contact
TeAx Technology UG (haftungsbeschränkt)
Hofstädtstr. 8
57234 Wilnsdorf
Germany
Internet: https://www.thermal-capture.com/
E-mail: [email protected]
WEEE: E 47 94 44 05
TeAx Technology
©2018 TeAx Technology. All right reserved
17 / 17
Table of contents
Popular Surge Protector manuals by other brands

Eaton
Eaton Powerware SPD120i/A installation instructions
Panamax
Panamax PFPower MIW-SURGE-1G installation instructions
Panamax
Panamax MIP-15LT Specifications
Emerson
Emerson Liebert TYPE SS Specification sheet
Radio Shack
Radio Shack 61-2422 owner's manual
Intermatic
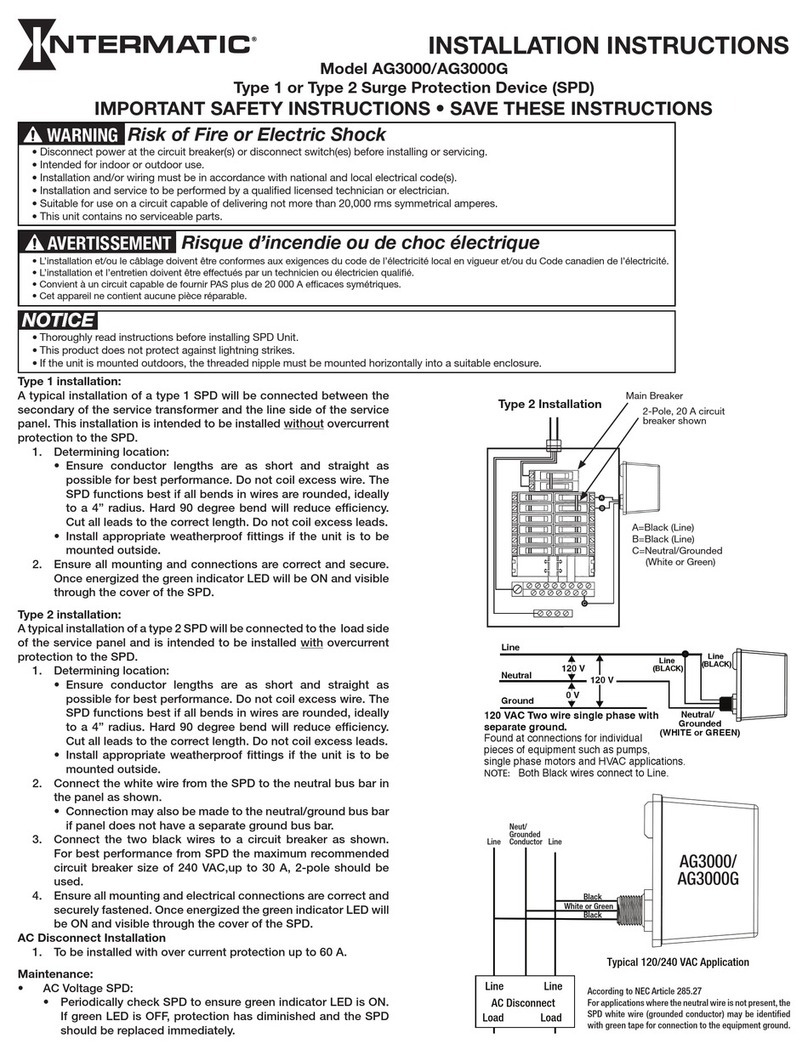
Intermatic AG3000G installation instructions

