manuals.online logo
Brands
  1. Home
  2. •
  3. Brands
  4. •
  5. Technics
  6. •
  7. CD Player
  8. •
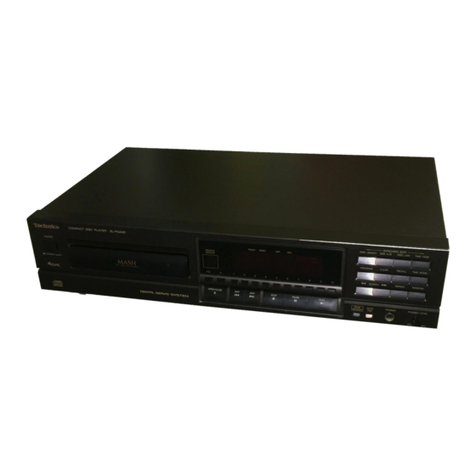
  9. Technics SLMC7 - COMPACT DISC CHANGER User manual

Technics SLMC7 - COMPACT DISC CHANGER User manual

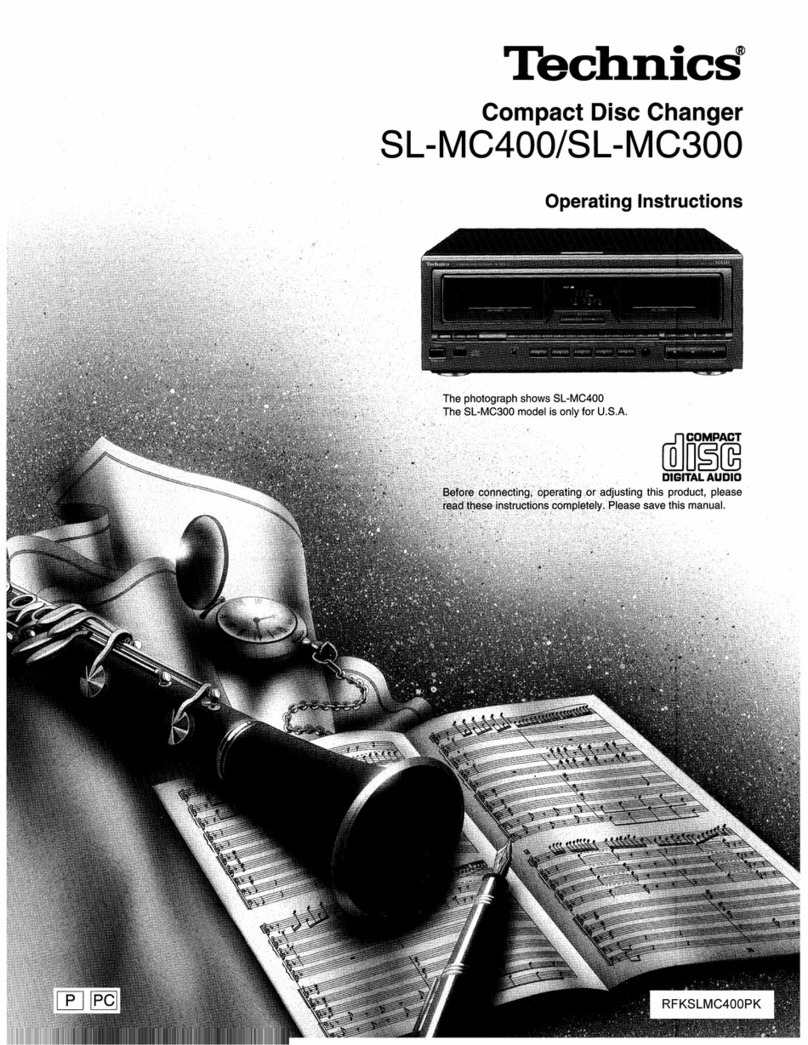
CompactDiscChanger
SL-MC7
SL-MC4
Technics"
Operating Instructions
The photograph shows SL-MC7
• DIGITAL AUDI0
Before connect,ng, operating er adlustmg this prod-
uct, please read these instructions COmpletely
Please save th_s manual
RQT4941 -P
Suppliedaccessories
Please check and identify the supplied acces-
sories.
[] AC power supply cord (RJA0065-A) .......................... 1 pc.
[] Stereo connection cable (RJL2P004B08A) ................ 1 pc.
] Remote control transmitter (EUR645270) .................. tpc.
[] Notebook-ffke binder [Liner notes organizer]
[SL-MC7] (RFA0623-K1)
[SL-MC4] (RFA0622-K1) ............................................ t pc,
[] Numbered stickers [SL-MC7] (RQLA0326)
[SL-MC41 (RQLA0321) ................ 1 pc.
]Batteries ................................................................... 2 pce.
Dear Customer
Thank you for purchasing this Technics product.
For optimum performance and safety, please read these
instructions carefully.
These operating instructions are applicable to the SL-MC7 and
SL-MC4 modeJs. These operating instructions, however, fundamen-
tally explain the operation of SL-MC7,
Tableof contents
Precautions ...............................................................................4
Connections ..............................................................................5
Preparing the remote control ...........................................5
Controls ......................................................................................6
Setting/Removing discs ......................................................7
Sequential play ........................................................................8
Direct play ..................................................................................9
Single disc play .......................................................................9
Program play ..........................................................................10
Direct programming ..................................................................... 10
Random play ..........................................................................12
One disc random play .................................................................. 12
Full randpm play .......................................................................... 12
Repeat function ....................................................................13
ID scan function ...................................................................13
Disc grouping play ..............................................................14
TO make groups........................................................................... 14
Playing back discs in agroup ...................................................... t 5
To name groups .......................................................................... 16
CD-TEXT function ................................................................17
Displaying aCD'e information ..................................................... 17
To search discs or tracks using text information
(TEXT SEARCH) ......................................................................... 18
Entering CD information manually (TEXT EDIT) ......................... 19
Time mode selection ..........................................................20
A note on compact discs .................................................21
The liner notes organizer .................................................21
Troubleshooting guide ......................................................22
Maintenance ...........................................................................22
Product service .....................................................................23
Technical specifications ..................................................23
Disc index .............................................................Back cover
Use numbers indicated in parentheses when asking for replacement
pads.
(Only for U.S.A.)
To order accessories contact 1-800-332-5368 or web site
_(http://www.panasonic.com).
ROT4941
The model number and serial number of this product can be
found on either the back or the bottom of the unit.
Please note them in the space provided below and keep for
future reference.
MODELNUMBER
SERIAL NUMBER
CAUTION7
THIS PRODUCT UTILIZES A LASER.
USE OF CONTROLS OR ADJUSTMENTS OR PERFORMANCE
OF PROCEDURES OTHER THAN THOSE SPECIFIED HEREIN
MAY RESULT IN HAZARDOUS RADIATION EXPOSURE.
DO NOT OPEN COVERS AND DO NOT REPAIR YOURSELF.
REFER SERVICING TO QUALIFIED PERSONNEL.
Iser memo:
DATE OF PURCHASE
DEALER NAME
DEALER ADDRESS
TELEPHONE NUMBER
-THE FOLLOWING APPLIES ONLY IN THE U.S.A.
CAUTION:
This equipment has been tested and found to comply with the
limits for a Class B digital device, pursuant to Part 15 of the
FCC Rules. These limits are designed to provide reasonable
)rotection against harmful interference in a residential installa-
tion. This equipment generates, uses and can radiate radio fre-
quency energy and, if not installed and used in accordance with
the instructions, may cause harmful interference to radio com-
munications. However, there is no guarantee that interference
will not occur in a particular installation. If this equipment does
cause harmful interference to radio or television reception,
which can be determined by turning the equipment off and on,
the user is encouraged to try to correct the interference by one
of the following measures:
•Reorient or relocate the receiving antenna.
• Increase the separation between the equipment and receiver.
• Connect the equipment into an outlet on a circuit different from
that to which the receiver is connected.
• Consult the dealer or an experienced radio/TV technician for
help.
Any unauthorized changes or modifications to this equipment
would void the user's authority to operate this device.
This device complies with Part 15 of the FCC Rules. Operation
is subject to the following two conditions: (1) This device may
not cause harmful interference, and (2) this device must accept
any interference received, including interference that may cause
Undesired operation.
CAUTION:
TO PREVENT ELECTRIC SHOCK MATCH WIDE
BLADE OF PLUG TO WIDE SLOT, FULLY
INSERT.
WARNING:
TO REDUCE THE RISK OF FIRE, ELECTRIC
SHOCK OR PRODUCT DAMAGE, DO NOT
EXPOSE THIS APPLIANCE TO RAIN, SPLASH-
ING, DRIPPING OR MOISTURE.
CAUTION
CAUTION:TO REDUCE THE RISK OF ELECTRIC
SHOCK, DO NOT REMOVE SCREWS.
NO USER-SERVICEABLE PARTS
INSIDE.
REFER SERVICING TO QUALIFIED
SERVICE PERSONNEL.
_1 The lightning flash with arrowhead symbol, within
an equilateral triangle, is intended to alert the user
to the presence of uninsulated "dangerous voltage"
within the product's enclosure that may be of suffi-
cient magnitude to constitute a risk of electric shock
to persons.
The exclamation point within an equilateral triangle
is intended to alert the user to the presence of
important operating and maintenance (servicing)
instructions in the literature accompanying the ap-
pliance.
ROT4941
|
0}
Precautions
Before using th_s unit please read these operating mstruchons care-
fully Take special care to follow the warnings md_cated on the unit
itself as well as the safety suggeshons hsted below
Afterwards keep them handy for future reference
1, Power Source - The unit should be connected to power supply
only of the type described m the operating instructions or as
marked on the unit
2. Polarization -- If the unit _s equrpped w_th a polanzed AC power
plug (a plug having one blade w_der than the other), that plug will fd
into the AC outlet only one way Tbts ts a safety fealure If you are
unable to tnsert the plug fully into the outlet, try reversing the
plug If the plug should still fall to fit. contact your electnc=an to
replace your obsolete outlet DO not defeat the safety purpose of
the polarized plug
3 Power Cord Protection -- AC power supply cords should be
routed so that they are not I_kely to be walked on or pinched by
ttems placed upon or against them Never take hold of the plug or
cord if your hand is wet, and always grasp the plug oody when
connecting or d_sconnechng it
4. Nonuse Periods -When the un=t=snot used, turn the power off
When left unused for a long period of tJme, the umt should be
unplugged from the household AC outlet
6. Carts and Stands - The unit should be used only w_tha cart or
stand that is recommended by the manufacturer
The unit and cart combination should be moved w_thcare
Quick stops, excessive force, and uneven sur- A
faces may cause the untt and cart combtnatton to q9
overturn
7 Wall or Ceiling Mounting - The unit should not be mounled to a
wall or ceding, unless specified In th_soperating instructions
Clean the cabinet, panel and controls w_th a soft cloth I_ghtly moist-
ened wrth todd detergent soluhon
Do not use any type of abrasfve pad, scouring powder or solvent
such as alcohol or benz=ne
Environment ]
1. Water and Moisture -- Do not use thJs unit near water-for ex-
ample, near a bathtub, washbowl, sw_mmmg pool, or the hke
Damp basements should also be avoided
2. Condensation -- Moisture may form on the lens tn the forlowmg
condd=ons
• immediately after a heater has been turned on
=._na steamy or very humid room
• when the un=trs suddenly moved from a cold environment to a
warm one
If mo=sture forms inside th_s unit, it may not operate properly To
correct th=s problem, turn on the power and wad about one hour
for the mo=sture to evaporate
3. Heat - The unit should be s_tuated away from heat sources such
as radiators and the like It also should not be placed =ntempera-
tures less than 5 C (41 F) or greater than 35* C (95 F)
1. Damage Requiring Service -- The unit should be servJced by
qualified service personnel when
(a) The AC power supply cord or the plug has been damaged, or
(b) Oblects have fallen or liquid has been spdled _ntothe unit, or
(e) Tile unrt has been exposed to rain, or
(d) Tile unit does not appear to operate normally or exhibits a
marked change in performance, or
(e) The unit has been dropped, or the enclosure damaged
2 Servicing -- The user should not attempt to serwce the unit be-
yond that described in the operating mstructrons All other serv=c-
Ing should be referred to an authorized sap#ice personnel
For the address of an authorized serwcenter:
In the U.S.A. 1.800.211.7262 or web site
(http;//www panason#c, corn)
In Canada 905.624-5505 or web site
(www.panasonic.ea/fdbckca.htm)
IPlacement
f. Ventilation -- The unit should be situated so that its location or
posd_on does not =nterfere with its proper ventilation Allow 10 cm
(4) clearance from the rear of the unit
2. Foreign Material -- Care should be taken so that objects do not
fall into and kqu[ds are not spilled _nto the unit Do not subject this
unit to excessive smoke, dust, mechanical vlbrahon, or shock
3Magnetrsm _The und should be situated away from equipment
or devrces that generate strong magnetic fields
4 Stacking - Do not place heavy ObleCts other than system com-
ponents, on top of the unit
5Surface -- Place the unit on a flat, level surface
Cautions on moving this unit
Before mowng the changer to another location, be sure to
remove all d_scsfrom the slots and turn off Ihe changer
Failure to do so will expose the compact d_scs and the changer
to the risk of severe damage
CAUTION
The changer mechanism automatically locks when power =s
turned off, to protect it against damage m transport
Therefore, always press [POWER] and make sure 'OFF
appears on the display before you unDluO the ¢hanoer
Other cautions
Outside hght or no_se may somehmes cause the changer to
detect a disc when there isn t one However, the changer always
correctly detects the disc when =nthe play mode
[30 not leave the front panel open Inflltrallng (;lust or other mat-
ter may lead to damage or malfuncttons
RQT4941
Connections
A Recelv ro_er Household
(net tncluded) AC outlet
(AC 120 V,
60 Hz)
CD or AUX terminals or
Receiver (not include€
oPr_DAL
I i OPTICAL OU_
OptLcal-flber cable
(not tncluded)
,t
This und
C3C3_
pC3 [_3
I About 7 meters in front
of the s_gnal sensor
• Set the changer on a flat, level surface
• Before connecting the changer to your aud=o system, make sure
that Ihe power of the changer and all other system components Js
turned off []
Stereo connection cable
White (L)
RedIRI
Memory retention
The informal=on and presetting you enter rs retained in the unit s
memory even ff the umt =sdisconnected from the AC power source
The period of retention for each type of mformat_on isas follows
•program play (,4. page tO) and dtsc grouping play (.4' page 14),
approximately one week
•text eddrng I,_ page 191, unhmtted
JDigital connection [] J
Remove the dust cap and connect thls unit to other dtgdal equlp-
ment wlth an optlc81 flber termrnal, such as a receiver or dlgdaJ sur-
round processor
• Leave the cap attached when thrs terminal =snot being used
For your reference
If you have DTS format CDs, you can enjoy stx channel playback by
connecting this unit to a recerver or d_gltal surround processor that
has a DTS decoder
Use only the optical fiber terminal when playing back DTS
format d_scs DTS s_gnals can only be correctly output through the
dtgdal termmal Connechon through the stereo LiNE OUT termmals
w_llresult _nno_se and could poss=bly damage your speakers
• DTS ts a trademark of Dtgttal Theater Systems, L P
Preparing the remote control
Check the (+) and (-) sides.
JUseofbotteries
[]
•Do not m_x old and new batteries, or batteries of different types
(manganese and afkahne, et¢)
•Never subject battenes to excessive heat or flame, do not attempt
to disassemble them, and be sure they are not short-circuded
•If the remote control _s not to be used for a long penod of trine,
remove the batteries and store them tn a cool, dark place
•Do not attempt to recharge alkahne or manganese battenes
•Do not use recllargeable type batteries
When you need to replace these batteries
Use two R6/LR6, AA, UM-3 or equtvalent batteries []
Operation notes 1
• Do not place obstacles between the remote control signal sensor
and remote control umt
• Do not expose the remote control signal sensor to d_rectsunhght
or to the b,tght hght of an mvertor fluorescent hght
• Take care to keep the remote control s_gnal sensor and end of the
remote control und free from dust
•If this system is installed _na rack with glass doors, the glass
doors' thrckness or color might make _t necessary to use the
remote control a shorter d_stanee from the system
ITopreventdamage
|
•Never place heavy items on top of the unit
• Do not dlsassernble or reconstruct the unit RQT494I
• DO not Sblll water or other hounds_ntothe unit
[] Controls
!1
D,scs,ot,ors,n ,er"'1
J i
[ Mainunit [] l
(_)Standby/on switch (©/I, POWER)
Press to switch the unit from on to standby mode or vice versa
In standby mode, the unit is still consuming a small amount of
power
(_)Windows
_) Display
(_)Text mode button (TEXT MODE)
(_)Text search buttons (V, A, TEXT SEARCH)
(_ Search/Text character select buttons
( <,,I, P,l_, SEARCH/CHARACTER)
(_)Track skip/Text cursor buttons
(t<,4, I_, SKIP/CURSOR)
_) Remote control signal sensor
(_)Single disc play button (SINGLE b)
_) ID scan button (ID SCAN)
(_) Random mode button (RANDOM MODE)
Programming button (PROGRAM)
(_ Disc/Caps button (DISC, CAPS)
Numeric buttons
(_Text edit button (TEXT EDIT)
(_ Disc enter button (DISC ENTER)
_Disc skip buttons (DISC SKIP, -, +)
_Stop button (I,=)
_Pause button (11)
_) Play button (b')
j Discslot section [] ]
For an explanat=onon how to open the front panel, see page 7
"Howtosetd=scs"
(_)Disc slots
Disc slot for single disc play (SINGLE)
Loader carriage
Slot numbers
LRemote conkol [] ]
Buttons ,J., #6 I, _ i I_l to I_, and ,l_, toI_ havethe samefunctions as
the correspondingbuttons on the mareumt
(_)Search button (<,4 SEARCH I_1_)
(_)Track skip buttons ( I<_1SKIP IHH)
Disc selector button (DISC)
(_ Numeric/group select buttons
Group button (GROUP)
Group enter button (GROUP ENTER)
Repeat button (REPEAT)
Direct programming button
(DIRECT PROGRAM)
Recall button (RECALL)
_) Clear button (CLEAR)
_)Time mode button (TIME MODE)
RQT4941
Setling/Removing discs
latch
Grtp here and shde
Loader carnage
............D',::.........L'::::::::...................................
EIJpthis part upward
]Pull gently on both ends to open the front
panel.
[]
• Unless setting or removing discs, keep hands out of the
changer while open You could injure yourselt if you get
entangled in the internal mechanism
• Keep cassette tapes away from the magnetic latches
]Slide the loader carriage to the slot where the
disc is to be inserted.
Slot No 0 (SINGLE) isreserved for single d_scplay (O page 9 )
]Set the disc on the loader and flip the loader
upwards.
• Do not use 3" (8 cm) discs fitted wtth expander r_ngs
Expander rings could damage the d_scslots
• Do not use cleaning discs or warped discs These could
damage your changer
• Do not use discs with poorly attached labels or stickers
Adhesive protruding from peeled off sttckers can cause the
changer to malfunction
• Do not put anything other than discs in the changer
• Do not use irregular shaped CDs (heart-shape, etc )
]Close the front panel gently.
I_rRF3
If you leave the front panel open while a disc =sm play the
changer wdlstop when the d_sc is fin_shed
[]
m
I=l
1. Open the front panel.
2. Slide the loader carriage to the slot you want,
3. Press the eject button on the loader carriage,
Loader carnage Elect button
You can set and remove discs while another discs _splaying
• Do not set a d_sc m the slot of the disc being played (slot flashes)
The d_sc _nplay _s returned to Its slot when hn_shed If two d_scs
somehow lain in a slot, they could be damaged When thrs hap-
pens, the message 'TAKE OUT' wdl appear on the d_splay
Remove the disc that doesn't belong in the stot and press the stop
button
• Do not open the CD front panel and press the eject button when
CHECKING DISCS" appears m the d_splay The CD mechanfsm
will be damaged ff the eject button is pressed at this time
• Sometimes the front panel cannot be opened whrre a disc _splay-
ing In this case wart unhFyou can open _t
ROT4941
II
RQ'[4941
°°.*..°°.*..°..*....*..°o...°.°....-°.*.,°..*..°.*.,-°.*°°.*..°.°*.,-...
,e1
s
DISC ENTER
Sequentialplay
The changer plays all the tracks on all the dtscs m order and Stops
automahca#y when the last track on the last drsc finishes playing
Before starhng Joadyour discs
Perform steps 2 to 4 wdhln 7seconds of each other
[] Press [POWER].
The umLwdl swdch on
F_rst, the message CHECKING DISCS" wdl be displayed and
then the number of the dtsc previously played If it was a CD-
TEXT dJsc then the name of the album w#l also be d_splayed
(._. page _7)
Steps 2 and 3 are not necessary if you want to begrn play
from thts disc
[] Press [DISC/CAPS].
[] Press the numeric button(s) to select the
disc.
To select a d_scnumbered over 10
For example '11 '
For your reference
You can also select a d_scwith [DISC SKIP] (- or _.)_nstead
of do,ng steps 2 and 3
[] Press [DISC ENTER].
[] Press[)'].
The changer plays all the loaded dJscs, from the selected
disc, all the way through to the d_sc before it
Text tnformahon will be dteplayed _nplace of the Itme# It _s a
CD-TEXT disc (_. page 17)
To stop play
Press [11].
The d_splay showing the number of tracks and the total playing t_me
_scleared ff the front panel is opened
To temporarily stop play
Press [11],
To search for a position
Press and hold etther[ ,441 ] (backward) or [ I_1_ ] (forward) during
play In program or random play modes, searching can only be
done on the current track
To skip tracks
Press either [ 1<1,41] [backward) or [ I1,1_] (forwardl dunng play In
program play skipping goes m the programmed order
You cannot skip backwards m random mode
To skip discs
Press either [-I [backward)or [+] (forward) either whtle a disc ts
playing or stopped
Thts does not work dunng full drsc random play mode or program
play
E]
D_SC ENTER
[[ 11 __}II 1]
Directplay []
You can start play from the d_sc and track of your choice
Perform steps 1 to 3 w_thm 7 seconds of each other
[] Press [DISC/CAPS].
]Press the numeric button(s) to select the
disc.
(,_ step 3 on page 81
m
I_1 Press [DISC ENTER]. II
[] Press the numeric button(s) to select the II
track, ,o
Play starts al the selected track and conhnues through to the O_
end of that CD _.
To select a track numbered mgher than 10 O-
For example "11"
Singlediscplay m
Smgle dtsc play ,s a convenient way of playmgback a spectflc dtsc.
one you just bought, for example, without having to go through the
usual selection procedure
[] Set adisc in slot No. O.
[] Press [SINGLE I_],
The changer plays all the tracks on the d,sc in slot 0 and then
stops automattcally
S,ngle dtsc play tscanceled tf you sk,p drscs
Slot number
I
t
Loader carnage
ROT4941
Program p/ay
Program play lets you playback your favorite tracks _nthe sequence
you want to hear' them The program can hold up to 32 _tems
Perform steps 2 to 4 within 7 seconds of each other
tin the stop mode]
[] Press [PROGRAM].
n
ROT4941
%1,,,"
• ........................
,#|_,
t
\
{ r ----
OCI,-I
[| .:.-.........- -
L_ ....
[] Press [DISC/CAPS].
I_ Press the numeric button(s) to select the
disc(s).
[] Press [DISC ENTER],
The 'AL" indication shows that all the tracks on the disc are
selected
To program disc numbers only, repeat steps 2-4
Slot NO 0 can also be programmed
[] Press the numeric button(s) to select the
track.
Repeat th_s step it you want to enter tracks from the same
disc
Repeat steps 2-5 until you have completed all
entries.
•PGM FULL _sdisplayed rf you try to enter a33rd ttem
• Empty slots and track numbers that don't exist on the d_scs can be
programmed but clear when play starts
[] Press [b].
The changer plays the tracks _n the programmed order and
then stops automatically
To enter additional selections during play, repeat steps 2-5.
[]
(Only available from the remote control.)
Th_s function allows you to add a track to your program whde hsten-
ing to _t
[Whde the track you want to program _splaying]
Press [DIRECT PROGRAM].
When you make aprogram as explained under Program play'
above, and then perform th_s procedure without clearing the pro-
gram hrst, the selected track _sadded to the end of the program
To hsten to programmed tracks press [PROGRAM] and check
'PROGRAM" appears on the d_splay then press [b.J
• If you press [DIRECT PROGRAM] and there are already 32 rtems
m the program, "PGM FULL' _sdmplayed and the track cannot be
added
• During program play. ]DIRECT PROGRAM] does not respond to
touch
O(Z)O0
0000
O00CD ,_C_J_
OOCDO
OCDO0
CDC_C, 0
Program p/ay
I Tocheckpro_lrammedcontents[] 1
(Only available from the remote control )
Press [RECALL].
The programmed tracks are d_splayed m order each hme _t_s
pressed
IToclearprogrammed contents }
(Only available from the remote control.)
[In the stop mode]
To clear aspecific item from the program
Press recall until the item is displayed, then press [CLEAR]
To clear the last item on the program
Press [CLEAR]
To clear the entire contents of the program
Press [111]
[To cancel the pra_ram mode ]
[In the stop mode]
Press [PROGRAM].
The [PROGRAM] indicator goes out
The contents of the program are stored m the memory
To replay your program
1 Press [PROGRAM]
2 Press[b]
ii
q#l
i=
E
Special note on recording programs
The changer needs t_meto change the d_scs and find the tracks
Consequenlly, it will take the changer slightly longer than the total
track time to record everything Exactly how much longer depends
on the contents of the program
RQT4941
Iol
i
'-"-
FULL L._
.0: j
Randomplay
The tracks wdl be played tn random order There are two types of
random play as descrtbed below
[]
The changer w_llplay all tracks on the current dtsc tn random order
Then, it w_ll choose a new dtsc randomly, excluding the discs
already played, and play all tracks on that d_sc in random order
[In the stop or play mode]
Press [RANDOM MODE] to select "1 DISC RAN-
DOM".
Each t_methe button _spressed
t DISC RANDOM _ FULL RANDOM _ (Off)
T I
For your reference
In the single disc play mode
Only tracks from the disc in slot No Oare played fn random order
In the disc grouping play mode. (,_ page14)
The d_scs_n the chosen group are played as m one disc random
play above
[]
Tracks are played in random order from amongst all the tracks on
all the loaded discs In th_s mode, _t_s possible that a track w_nbe
played twice, or not played at all
(A maxtmum of 250 tracks are played )
[In the stop or play mode]
Press [RANDOM MODE] to select "FULL RAN-
DOM".
Each time the button =spressed
1 DISC RANDOM -, FULL RANDOM _ (Off)
t i
The d_sctnslot No 0 wtllnot be played
In the disc grouping play mode. (_ page 14 )
The dtscs in the chosen group are played as in full random play
above
lRQ¥49
To cancel random play mode
Press [I].
The t DISC (or FULL) RANDOM" indicator wtll go out
E!
/
OC_'O
0000
0000
©©0© _T
t " J
IE ]1
Repeat function[]
(Only available from the remote control.)
This repeats play in the chosen mode
[Before or dunng play I
Press [REPEAT].
•.ogot 6o i, e, i• e,°,.66o J,t, or* ot e66oo,*,g,lm.oo6ooA*oot oJ,*,o*
To cancel repeat mode
Press [REPEAT]
To repeat a track or set of tracks
1 Program the track or tracks (1=1.page 10)
2 Press [REPEAT] so ' [_" is dlspJayed
3Press [)* 1
For your reference
In random mode, the order IS different each hme the process _s
repeated
ID,_onfun_o, []
This function helps you find a particular track It searches through
the tracks and then plays a 10 second piece of each track around
the loudest part of the track
[] Press [ID SCAN].
ID scan wdlstart
[When the desired track has been found]
[] Press [l,].
The changer wdl play the track from the begmmng
II
i
To cancel ID scan
Press [[D SCAN].
The 'ID"_nd_eatorwdlgo out
The changerwdlcontinuetoplayfromthetrackbeingplayed
RQT4_I
Disc grouping play
(Only available from the remote control )
You can put discs into 5 groups (A-E) You can then play the d=scs
mthose groups
• Each d_secan belong to more than one group
• [SL-MC7] Each group can include up to 110 d_scs
[SL-MC4] Each group can =nclude up to 60 d_ses
•Each group can be named
,=o
e
Perform steps 1 to 5wlthm 7 seconds of each other
You cannot select slot No 0
[During sequential play or whtle it ts on stopped}
[] Press {DISC}.
]Press the numeric button(s) to select the
disc•
To select adisc numbered over 10
For example '19"
[] Press [GROUP ENTER].
If the disc ts already registered in a group, the group's letter
hghts up
[] Press [GROUP].
]Press the numeric button corresponding to
the group (A, B, C, D or E).
The drscchosen m step 2_sregistered into the selected
group
Repeat steps 1-5 to register other groups•
[To checkwhatdiscsarein whatgroups
[While stopped]
1Press [GROUP]
2Press the numeric button corresponding to the group
3 Press JR]
4 Press {DISC SKIP] 1- or _)
The numbers of the d=scs =n the group wtll be dtsplayed each
hme the buttons are pressed
ROT4941
OOC_
OCDCD c_
OCDCD C_
............ .. ....... ........ .. ....... ....,.... ....... ..,,.,., ...... .....
c)c) 8ROLtP {:I
45
_ll f._
Discgrouping play
I Tocanceldiscsfromgroups
1 Press [DISC]
2 Select the d_scyou want to crear w_th the numeric buttons
3 Press [GROUP ENTER]
4 Press [GROUP]
5 Press the numeric button corresponding to the group
Tile selected group indication on the display will go out
For your reference
If the d_sc_sregistered _nmore than one group, you can cancer It
from all groups m a srngle operatmn by pressmg [i] in step 4 (m
the stop mode)
[Whde stopped or durmg sequenltal play]
Flrsl. follow the steps on the previous page to register the groups
[] Press [GROUP].
]Press the numeric button corresponding to
the group.
To cancel disc grouping play mode
(Whtle the changer tsstopped )
Press [GROUP] and then the numenc button correspondrng to the
group shown on the dtsplay
m
•The name of the group Js shown ff tt has been named (,_. page
16}
•If you press the group button ol a group wbch has no d=scs regis-
tered m _t.the message 'NO INPUT" will appear on the d_splay
RQT4941
I
Discgrouping play
You can name your groups The changer has several preset names
to choose from
[Dunng sequent_aJ play or while stopped]
[] Press [GROUP ENTER].
Press [SKIP] ( _141or IH_ ) to select the name.
The pre-entered names will appear rn the following order
when the buttons are pushed
BALLADS *_, BLUES _ CLASSIC _ COUNTRY _ DANCE
1 I
FAVORITE
I I
ROMANTIC HIP HOP
I I
ROCK _ POP _ PARTY _ OLDIES _ NEW AGE _* JAZZ
[] Press [GROUP].
[] Press the numeric button corresponding to
the group you want to name.
Repeat steps 1-4 to name the other groups.
emt ttJ* toJt*,lJtt iJ,t me *,* ee Qto_ _* ee •e, •• • • ,, m,° •• °. °o °,, ,, ,,
To cancel names
1 Press[GROUP ENTER[
2 Select 'RESET"_n step 2
3 Press [GROUP1
4 Select the group name you want to clear
It wdl now be shown as "GROUP A E"
RQT494 f
IL ]Jl 1]
Ii
[_
In the stop mode]
j-..
HH_HZ.
4,
tj
LJ _ Lt _
,?
|
m
fin the play mode]
u.= I
[/.Ot_C_t"2.- - to NJ
4,
I£ --
AN#
L,_ I£T 4,
!-/2 _-/
6E,
a
CD-TEXTfunction
Thinsfunclmon shows the t_tle of the CO, the name of the artist, or the
song title There are dfscs with tbs mformahon already stored on
them, called CO-TEXT d_scs, but this function also works with ordt-
nary drSCS
• The mformahon on CD-TEXT drscs IS automatically read when
they beg_n playing The t_tle of the CD and the artist name must be
entered manually for ordinary discs Enter thin Information before
dotng the foElowmg (i page 19)
• Song titles cannot be drsplayed wtth ordinary d=scs
Press [TEXT MODE].
The display is changed m the following order
In the stop mode
ALBUM (Album t_tle)_ ARTIST (Artist name) _ Totai playing time
t I
In the play mode
SONG _ ALBUM _ARTIST _ttme dtsplay
(Song title) (Album title) (Artist namel
tJ
Song t_tles are d_splayed whenever a track _s changed, even d the
t_med_splay is chosen
• Up to 32 characters of text information can be d_splayed wble the
changer _s stopped The enhre text =s d_splayed dunng playback,
even ff =t_slonger than 32 characters
• Song titles are not d_splayed after a certain number of tracks If
there are many tracks on the d=scor if titles are except=onally long
• Text _nformahon =s attached to the slot Any information entered
rote memory wdl be dtsplayed for that slot until another CD-TEXT
d_sc =splayed in that slot or the reformation is entered manually
(._. page 19)
• Some CO-TEXT discs do ilot have informat=on about the artist or
track Nothing =sdtsplayed if th_s ts the case
• Only one artist name per disc =sdisplayed It will be the name of
the mare art=ston the d=sc and does not change with each track
II
_lr4
RQT4941
CD-TEXTfunction
%I'-'I f-',
"I'" "., "r "7 .:1
H_ tLh'_ i_trJ
• ir_.l.'¢_-'l .. ,L r"lt_
............
There are 3 search modes album htle, artist name or song title
You cannot text search _nprogram play random play,'lD scan mode
ITofinda specificCD(Albumsearch/Artistsearch)I_! I
[] Press [TEXT MODE] to select "ALBUM" or
"ARTIST".
[] Press [TEXT SEARCH] (V or A) to select the
disc.
V Changes in reverse alphabeticalorder
^ Changes rnalphabet=calorder
[] Press [>].
The changer w_ltstart playtng the selected d_sc
For your reference
•In the d4scgrouping play mode, the search _sbruited to the select-
ed group
• A text search can be performed while a disc ts playing In this
case, the d_splay w_nnot show the _nformahon about the disc cur-
rently playing
I To find a specificsong (Song search) []
Th_sfunction only workswdhCD-TEXT d_scsthat havesong_nfor-
mahonon them
[Dunng play]
[] Press [TEXT MODE] to select "SONG"•
1511 Press [TEXT SEARCH ] (V or A) to select the
track.
[] Press [>].
Play begins at the selected track and then continues through
to the last track on the d=sc before
RQT4941
CD-TEXT[unclion
i..m,
x i -t--. --- _SC
E-
LSl NJ_J_
,*%,
;,,.t
,* t
32 characters worth of text mformat_on can be entered each for the
album name and artist name This can be clone for each drsc
loaded in the changer
• The information entered for the CD is attached to the slot If the
CD _smoved to another slot, the mformat_on wrll not be d_eplayed
• The _nformat_on on CD-TEXT discs takes preference over manual-
ly entered mformat_on, so any mfermahon entered wdl be cleared
once a CD-TEXT d_sc is played ma slot
Perform steps 1 to 3within 7 seconds of each other
[while stopped]
[] Press [DISC/CAPS].
]Select a disc with the numeric buttons. _o
[] Press [DISC ENTER].
[] Press [TEXT MODE] to select "ALBUM" or
"ARTIST".
[] Press [TEXT EDIT].
The drsplay is now ready for text to be entered
[] Press [DISC/CAPS] to select the input mode.
The d_splay changes as follows every t_me the button =s
pressed
A (CAPITALS) _ a (lower case) _ 1 (numerals)
I
]Press the numeric buttons to enter the text.
To continue entering characters with the same numenc but-
ton, press [SKIP/CURSOR] ( II-IH )
The character =s entered if a different numeric button or
[SKIP/CURSOR] ( _,1_ ) is pressed, and the cursor moves to
the next posd=on
Repeat steps 6 and 7 to enter more characters
numericbutton
2
3
4
5
6
7
8
9
0
>10
Characters, symbols, and functions
, . 'I( )1"1+
<= > @1 IYHI^I-I,
,1¢1£ ¥1 I§lJ'l©" °
2131' 111 Itl' I°I,,I'/.
AIAIA (;I_:IEIEIAIi Ii
000 eli U00IYIP
o-o u lu'iPY
A
D
G
J
M
P
S
V
Y
BC
E F
H
K L
N O
Q R
TU
W X
Z
SPACE
,I,
the numeral mode, the numeral corresponding to the
numenc button =sentered in the other modes, the character
d=splayed changes in the order shown in the chart each t_rne
the numeric button _spressed
(Continued on next page)
RQT4941
CD-_XTfundion
[] Press [TEXT EDIT].
The text you entered isconhrmed and displayed
iF i .i.. _ ,.
[] o
OC)O0
O00C)
Track number and
elapsed play time of
the current track
Total remaining time '_
on the disc
Track number and ',3-'
remaining t_me of the
current track
.................. 4' f
Total elapsed play
time on the d_sc
1:40
m
_ .','t• 16_LI , .
!_ __-I
-! :03
!=_.
q'4" 11
Canceling the text editing mode
Themformahon entered can be cleared at any time before step 8
Press [i].
Letters and symbols appeanng on the d_splay may vary slightly from
the printed hstmg
[Changinginformationyouhaveentered 1
1 Display the information you want to change
2Press [TEXT EDIT]
3 Move the cursor to the character you want to change with
{SKIP/CURSOR] ( k4<l or _.1_ )
4 Enter the new character with the numeric buttons
5 Press [TEXT EDIT]
IClearin9information you haveentered ]
1 Display the information you want to change
2 Press {TEXT EDIT]
3 Press ]CLEAR] on the remote control
4 Press {TEXT EDIT]
Fm emode El
(Only available from the remote control )
You can see variousinformation about thetime on the disc you are
playing
{Inthe play or pause mode]
Press [TIME MODE].
Thedisplay changes_ntheorder shown in thediagram
In all play modes
When track number 21 or greater _splay=ng, d_splay _, shows ' --- --"
3, is displayed ff play is stopped and then started again
In the program/random play mode
The displayed reformation will alternate between d_splays ,]., and,
each tmle the button is pressed
Time information remains displayed in the text _nformation display
area as long as the unit =sm t_me mode
RQT4_I

Other manuals for SLMC7 - COMPACT DISC CHANGER

2

This manual suits for next models

1

Other Technics CD Player manuals

Technics SL-G700 User manual

Technics

Technics SL-G700 User manual

Technics SL-PD1000 User manual

Technics

Technics SL-PD1000 User manual

Technics SL-PD688 User manual

Technics

Technics SL-PD688 User manual

Technics SL-PD7 User manual

Technics

Technics SL-PD7 User manual

Technics SL-MC310 User manual

Technics

Technics SL-MC310 User manual

Technics SL-PD687 User manual

Technics

Technics SL-PD687 User manual

Technics SL-P999 User manual

Technics

Technics SL-P999 User manual

Technics sl-mc410 User manual

Technics

Technics sl-mc410 User manual

Technics SLPD8 - COMPACT DISC CHANGER User manual

Technics

Technics SLPD8 - COMPACT DISC CHANGER User manual

Technics SL-PG440 User manual

Technics

Technics SL-PG440 User manual

Technics SL-PG200A - SERVICE User manual

Technics

Technics SL-PG200A - SERVICE User manual

Technics SL-PC25 User manual

Technics

Technics SL-PC25 User manual

Technics SL-G700M User manual

Technics

Technics SL-G700M User manual

Technics SL-P1200 User manual

Technics

Technics SL-P1200 User manual

Technics SL-XP600 User manual

Technics

Technics SL-XP600 User manual

Technics SL-DV290EE User manual

Technics

Technics SL-DV290EE User manual

Technics SL-PJ37A User manual

Technics

Technics SL-PJ37A User manual

Technics SL-PS840 User manual

Technics

Technics SL-PS840 User manual

Technics SLPD8 - COMPACT DISC CHANGER User manual

Technics

Technics SLPD8 - COMPACT DISC CHANGER User manual

Technics SL-PS670D User manual

Technics

Technics SL-PS670D User manual

Technics SL-PG440A User manual

Technics

Technics SL-PG440A User manual

Technics SL-HD51 User manual

Technics

Technics SL-HD51 User manual

Technics SL-P250 User manual

Technics

Technics SL-P250 User manual

Technics SL-PG480A - schematics User manual

Technics

Technics SL-PG480A - schematics User manual

Popular CD Player manuals by other brands

Sony CFD-S20CP - Cd Radio Cassette-corder operating instructions

Sony

Sony CFD-S20CP - Cd Radio Cassette-corder operating instructions

Audiovox CE148A operating instructions

Audiovox

Audiovox CE148A operating instructions

Marantz SA-10 owner's manual

Marantz

Marantz SA-10 owner's manual

Sony D-NF400 - ATRAC Walkman Portable CD Player Service manual

Sony

Sony D-NF400 - ATRAC Walkman Portable CD Player Service manual

Sherwood CD-2030C operating instructions

Sherwood

Sherwood CD-2030C operating instructions

Sony D-SJ01 - Sports Discman operating instructions

Sony

Sony D-SJ01 - Sports Discman operating instructions

Linn Majik CD owner's manual

Linn

Linn Majik CD owner's manual

TDK NX-03CDMP3 user manual

TDK

TDK NX-03CDMP3 user manual

Aiwa XP-SP1200 operating instructions

Aiwa

Aiwa XP-SP1200 operating instructions

Denon 270 operating instructions

Denon

Denon 270 operating instructions

Onkyo DX-C106 Service manual

Onkyo

Onkyo DX-C106 Service manual

Marantz CC4003 user manual

Marantz

Marantz CC4003 user manual

Philips AZ318B user manual

Philips

Philips AZ318B user manual

Harman Kardon HD500 owner's manual

Harman Kardon

Harman Kardon HD500 owner's manual

AEG CDP 4226 instruction manual

AEG

AEG CDP 4226 instruction manual

Sony CFD-501 operating instructions

Sony

Sony CFD-501 operating instructions

Sony CDJ-500 Service manual

Sony

Sony CDJ-500 Service manual

Sony D99 CHASSIS Service manual

Sony

Sony D99 CHASSIS Service manual

manuals.online logo
manuals.online logoBrands
  • About & Mission
  • Contact us
  • Privacy Policy
  • Terms and Conditions

Copyright 2025 Manuals.Online. All Rights Reserved.