DVD 105 DVD Player
IMPORTANT SAFETY INFORMATION
ELECTRICAL INFORMATION
Read these instructions.
Keep these instructions.
Heed all warnings.
Follow all instructions.
Do not use this apparatus near water.
Clean only with a slightly damp cloth.
Do not block any ventilation openings.
Install in accordance with the manufacturer's instructions.
Do not install or operate near any heat sources such as radiators, stoves,
or other apparatus that produce heat.
Protect the power cord from being walked on or pinched, particularly at
plugs, convenience receptacles, and the point where it exits from the
apparatus.
Do not allow the power cord to overhang the edge of a table.
Unplug this apparatus during lightning storms or when unused for long
periods of time.
To avoid interference, switch this unit off while operating other radio
devices in the immediate vicinity.
Refer all servicing to qualified service personnel. Servicing is required
when the apparatus has been damaged in any way, such as the power-
supply cord or plug is damaged, liquid has been spilled or objects have
fallen into the apparatus, the apparatus has been exposed to rain or
moisture, does not operate normally, or has been dropped.
To reduce the risk of fire or electrical shock, do not expose this
product to rain or moisture. The product must not be exposed to dripping
and splashing and no object filled with liquids such as a vase of flowers
should be placed on the product.
No naked flame sources such as candles should be placed on the
product.
Changes or modifications not expressly approved by the
manufacturer could void the user's authority to operate this device.
Usage of controls or adjustments or performance of procedures
other than those specified herein may result in hazardous exposure.
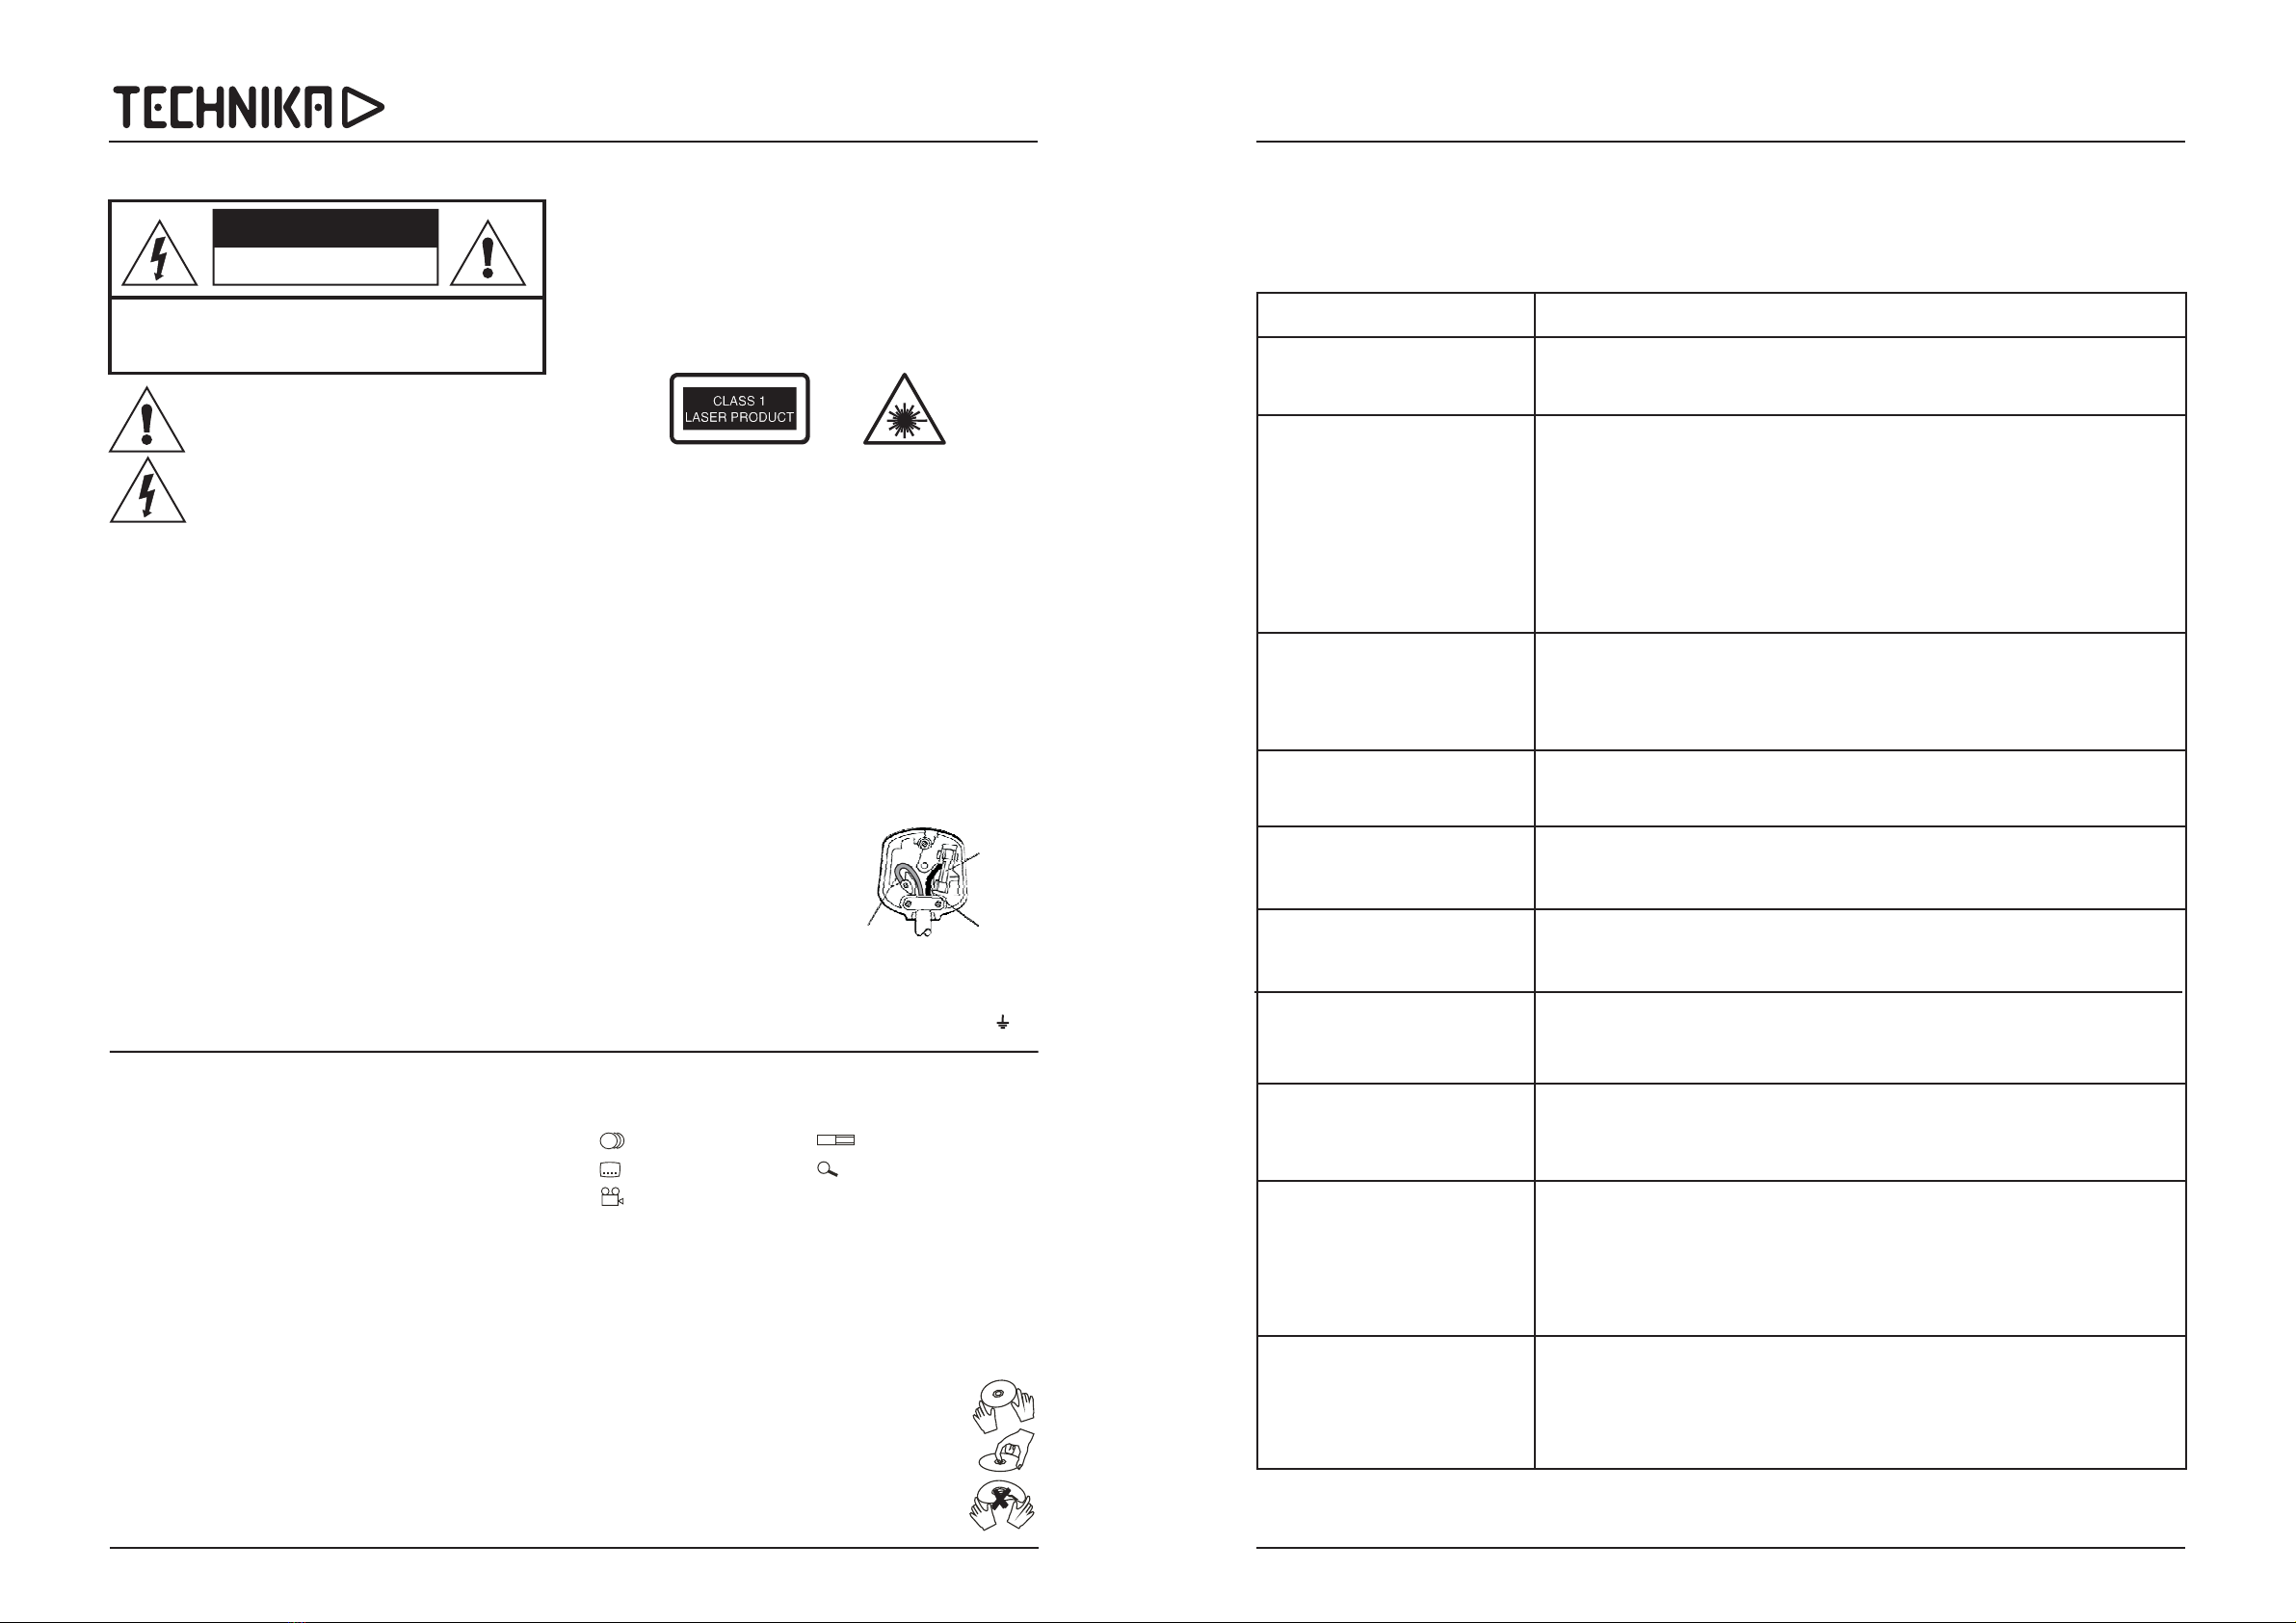
These labels tell you that the unit contains a Laser component. Do not
stare at the laser lens.
The mains operating voltage of this unit is on the rating
plate on the rear. In the UK this is 230/240 V.
The mains lead on this equipment may be supplied with a moulded plug
incorporating a fuse, the value of which is indicated on the pin face of the
plug. Should the fuse need to be replaced, an ASTA or BSI approved
BS1362 fuse must be used of the same rating. If the fuse cover is
detachable never use the plug with the cover omitted. If a replacement fuse
cover is required, ensure it is of the same colour as that visible on the pin
face of the plug. If there is no alternative to cutting off the mains plug,
dispose of it immediately, having first removed the fuse, to avoid a
possible shock hazard by inadvertent connection to the mains supply.
The wires in this mains lead are coloured in accordance with the following
code: Blue: NEUTRAL Brown: LIVE. As these colours may not correspond
to the coloured markings
identifying the terminals in your
plug, proceed as follows:
The wire coloured BLUE must be
connected to the terminal marked
with the letter N or coloured BLUE
or BLACK. The wire coloured
BROWN must be connected to the
terminal marked with the letter L or coloured BROWN or RED
DO NOT connect either of these wires to the terminal marked E, or
coloured green or green and yellow, or marked by the earth symbol
Warning:
Caution:
Caution:
Mains Supply:
IMPORTANT
CAUTION!
RISK OF ELECTRIC SHOCK
DO NOT OPEN
TO REDUCE THE RISK OF ELECTRIC SHOCK DO NOT REMOVE COVER (OR BACK)
NO USER-REMOVEABLE PARTS INSIDE
REFER SERVICING TO QUALIFIED PERSONNEL
This symbol indicates that there are important operating
and maintenance instructions in the literature
accompanying this unit.
This symbol indicates that dangerous voltage constituting
a risk of electric shock is present within this unit.
3A FUSE
BS 1362
BROWN
(Live)
BLUE
(Neutral)
GENERAL INFORMATION
DVD (Digital Versatile Disc) is a digital video medium featuring a variety of
capabilities. The technology provides capacity for an excellent picture with
a minimum of 500 lines, up to 8 language soundtracks, up to 9 views from
different camera angles and subtitles in up to 32 languages all on the DVD
disc itself which may support all, or a limited choice from these features.
DVD discs contain various features Below are some common symbols.
Many features are determined by the programme or software content on
the DVD disc itself. Some procedures in this manual cannot be performed
if the disc does not support the feature. Also, some discs may need special
settings which are unsupported by the player.
the disc's outer edge and/or the
centre spindle hole. touch the disc surface.
bend or flex a disc.
Clean the disc surface with a soft, dry cloth. Wipe the disc
surface gently, radially, from centre toward the outer edge.
Never apply solvents to the surface of a disc.
SOME COMMON SYMBOLS
IMPORTANT NOTE
CARE OF DISCS
Do not Never
DVD REGION CODES
DVD discs and players are covered by a worldwide agreement which limits
playback of DVD discs to specific regions as determined by the software
manufacturer. Most DVDs come marked with a region coding. A disc
specified as playable in one region may not play on a player designed for a
different region. A disc specified as universal or with no region coding
(Code 0)may be played in any region.
Canada, USA
Japan, Middle East, South Africa
South-East Asia
Australia, Caribbean, Central & South America, New Zealand
Africa, Former Soviet Union, India, North Korea, Pakistan
China
DVD discs are fragile. Treat them with care. Always store them upright in
their packing; away from direct sunlight, heat and damp.
When handling discs, hold
The regions are:
Region 1:
Region 2: Europe,
Region 3:
Region 4:
Region 5:
Region 6:
THE DVD104 PLAYS REGION 2 AND UNIVERSAL (REGION FREE) DISCS.
2
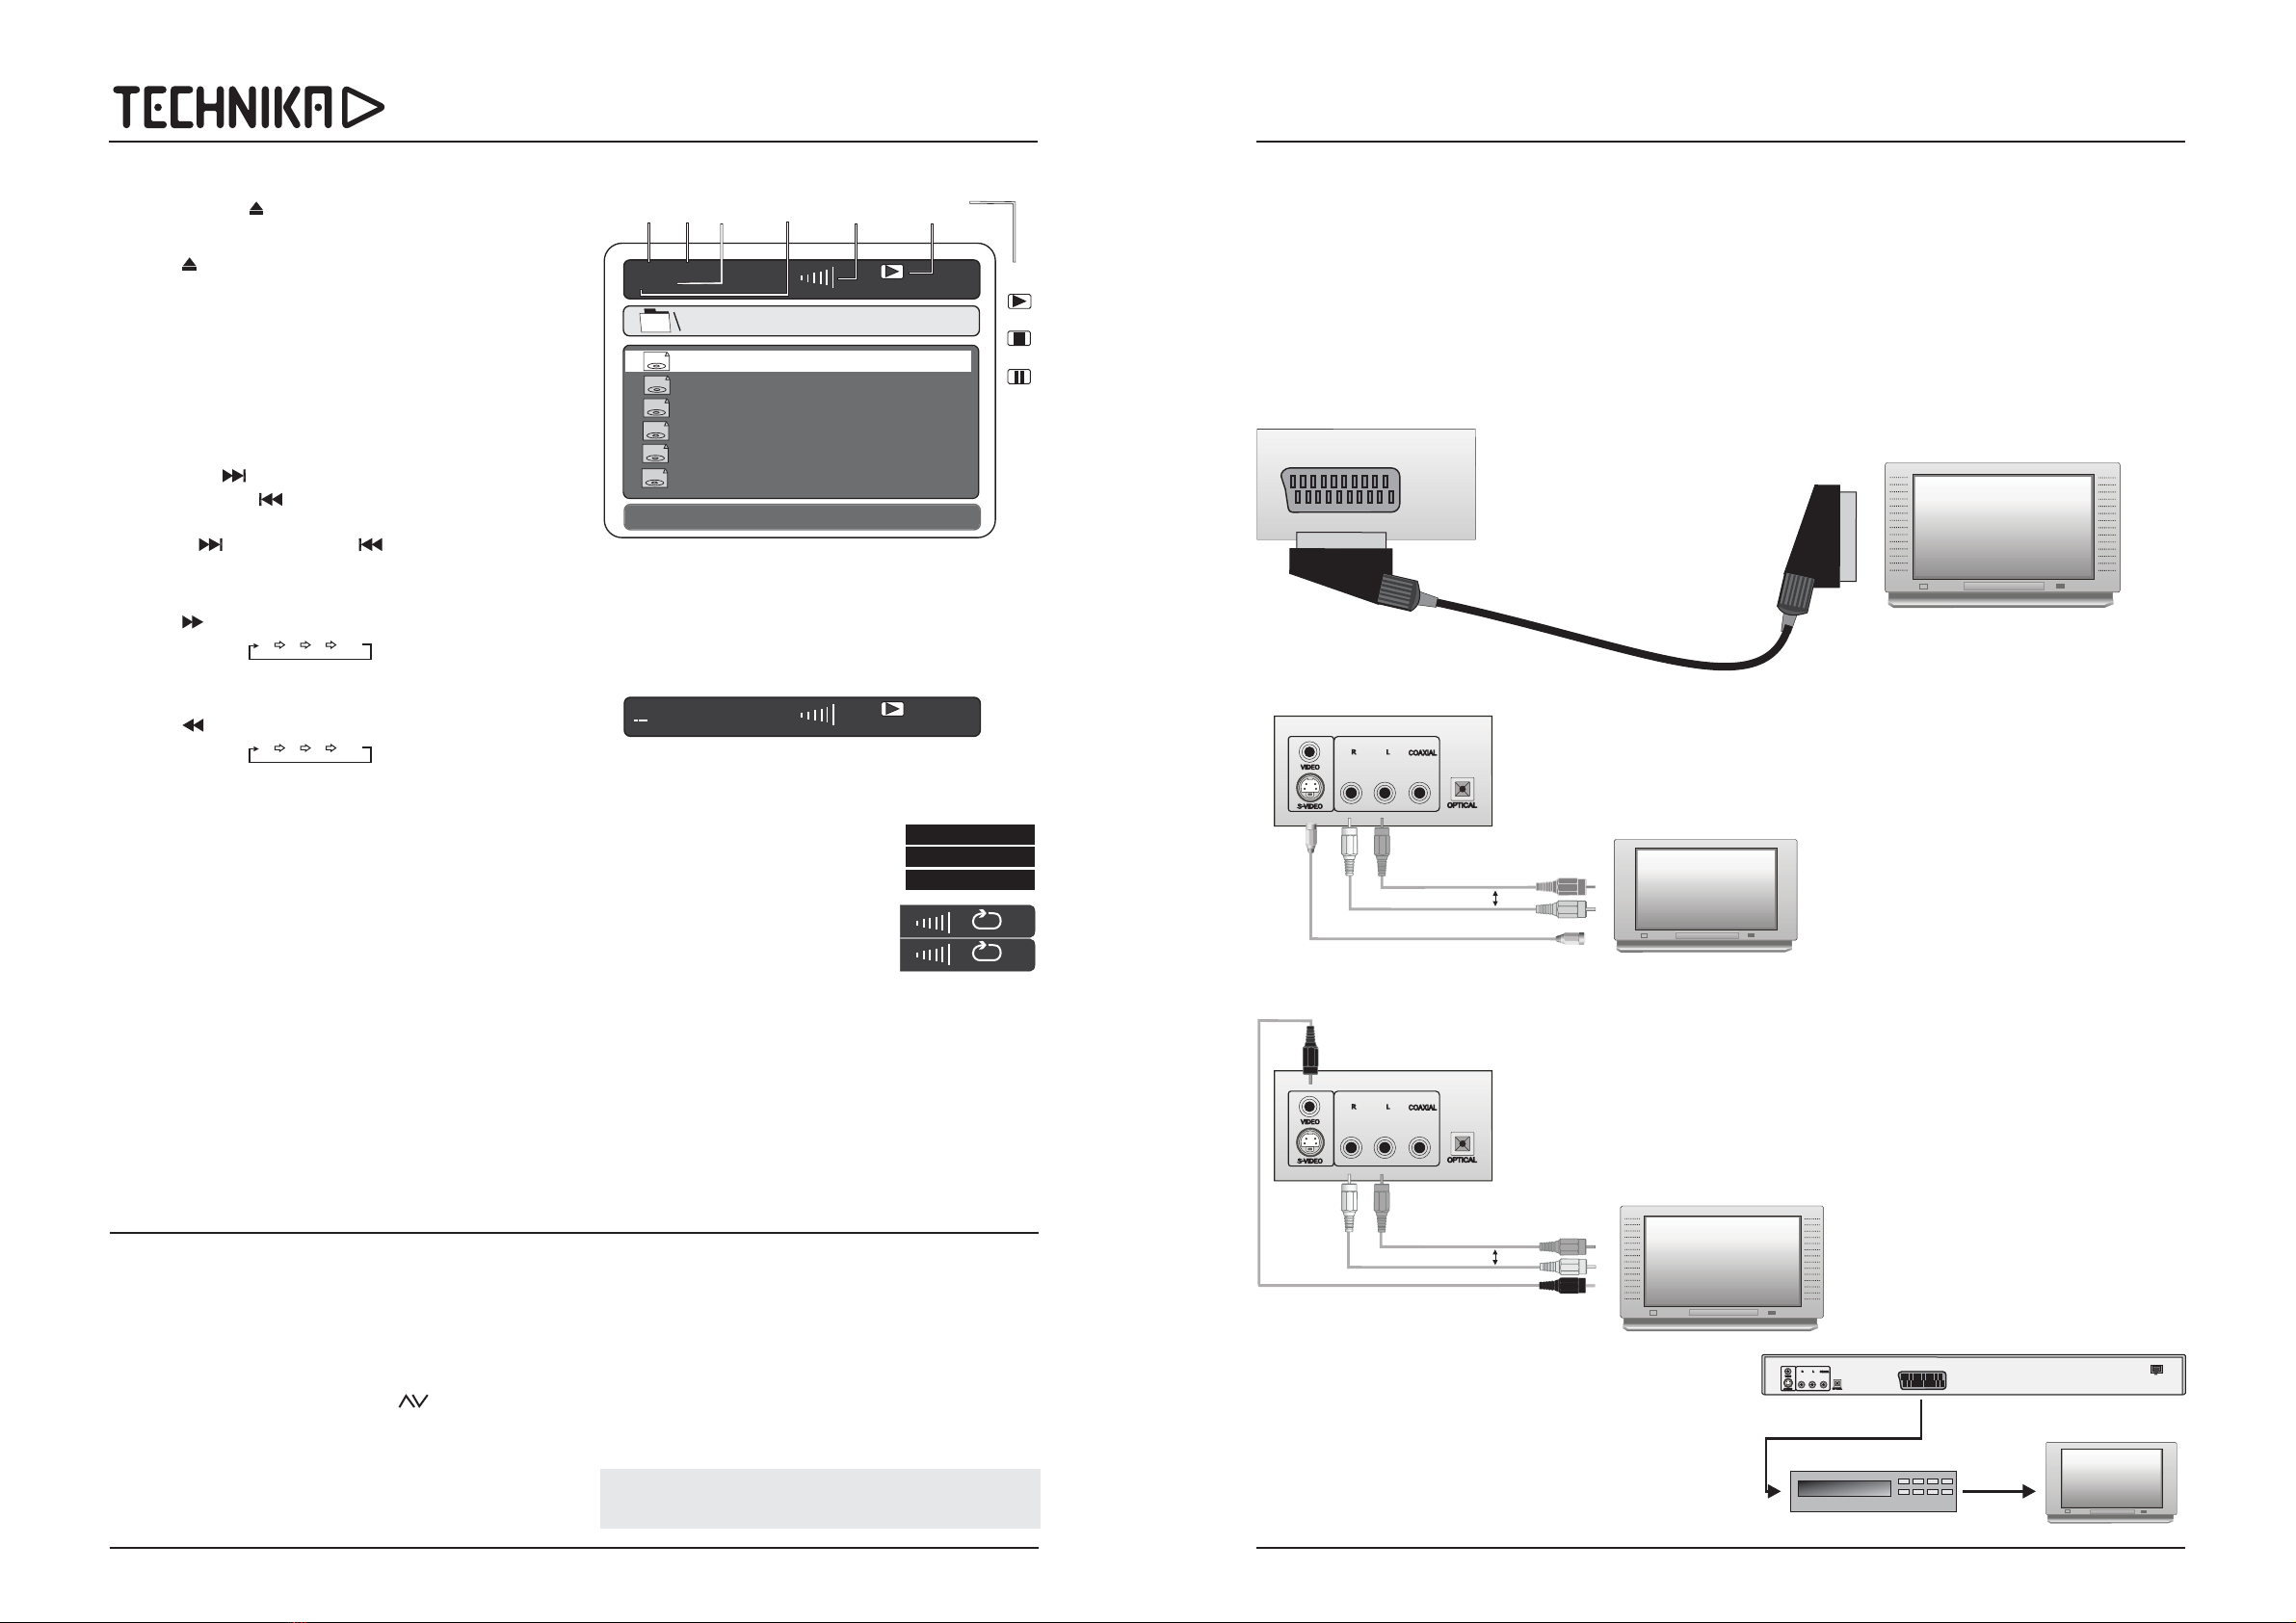
Camera Angle Indicator
16:9
LB
2
Number of Audio Tracks Screen Format
2
Number of Subtitles Zoom
+
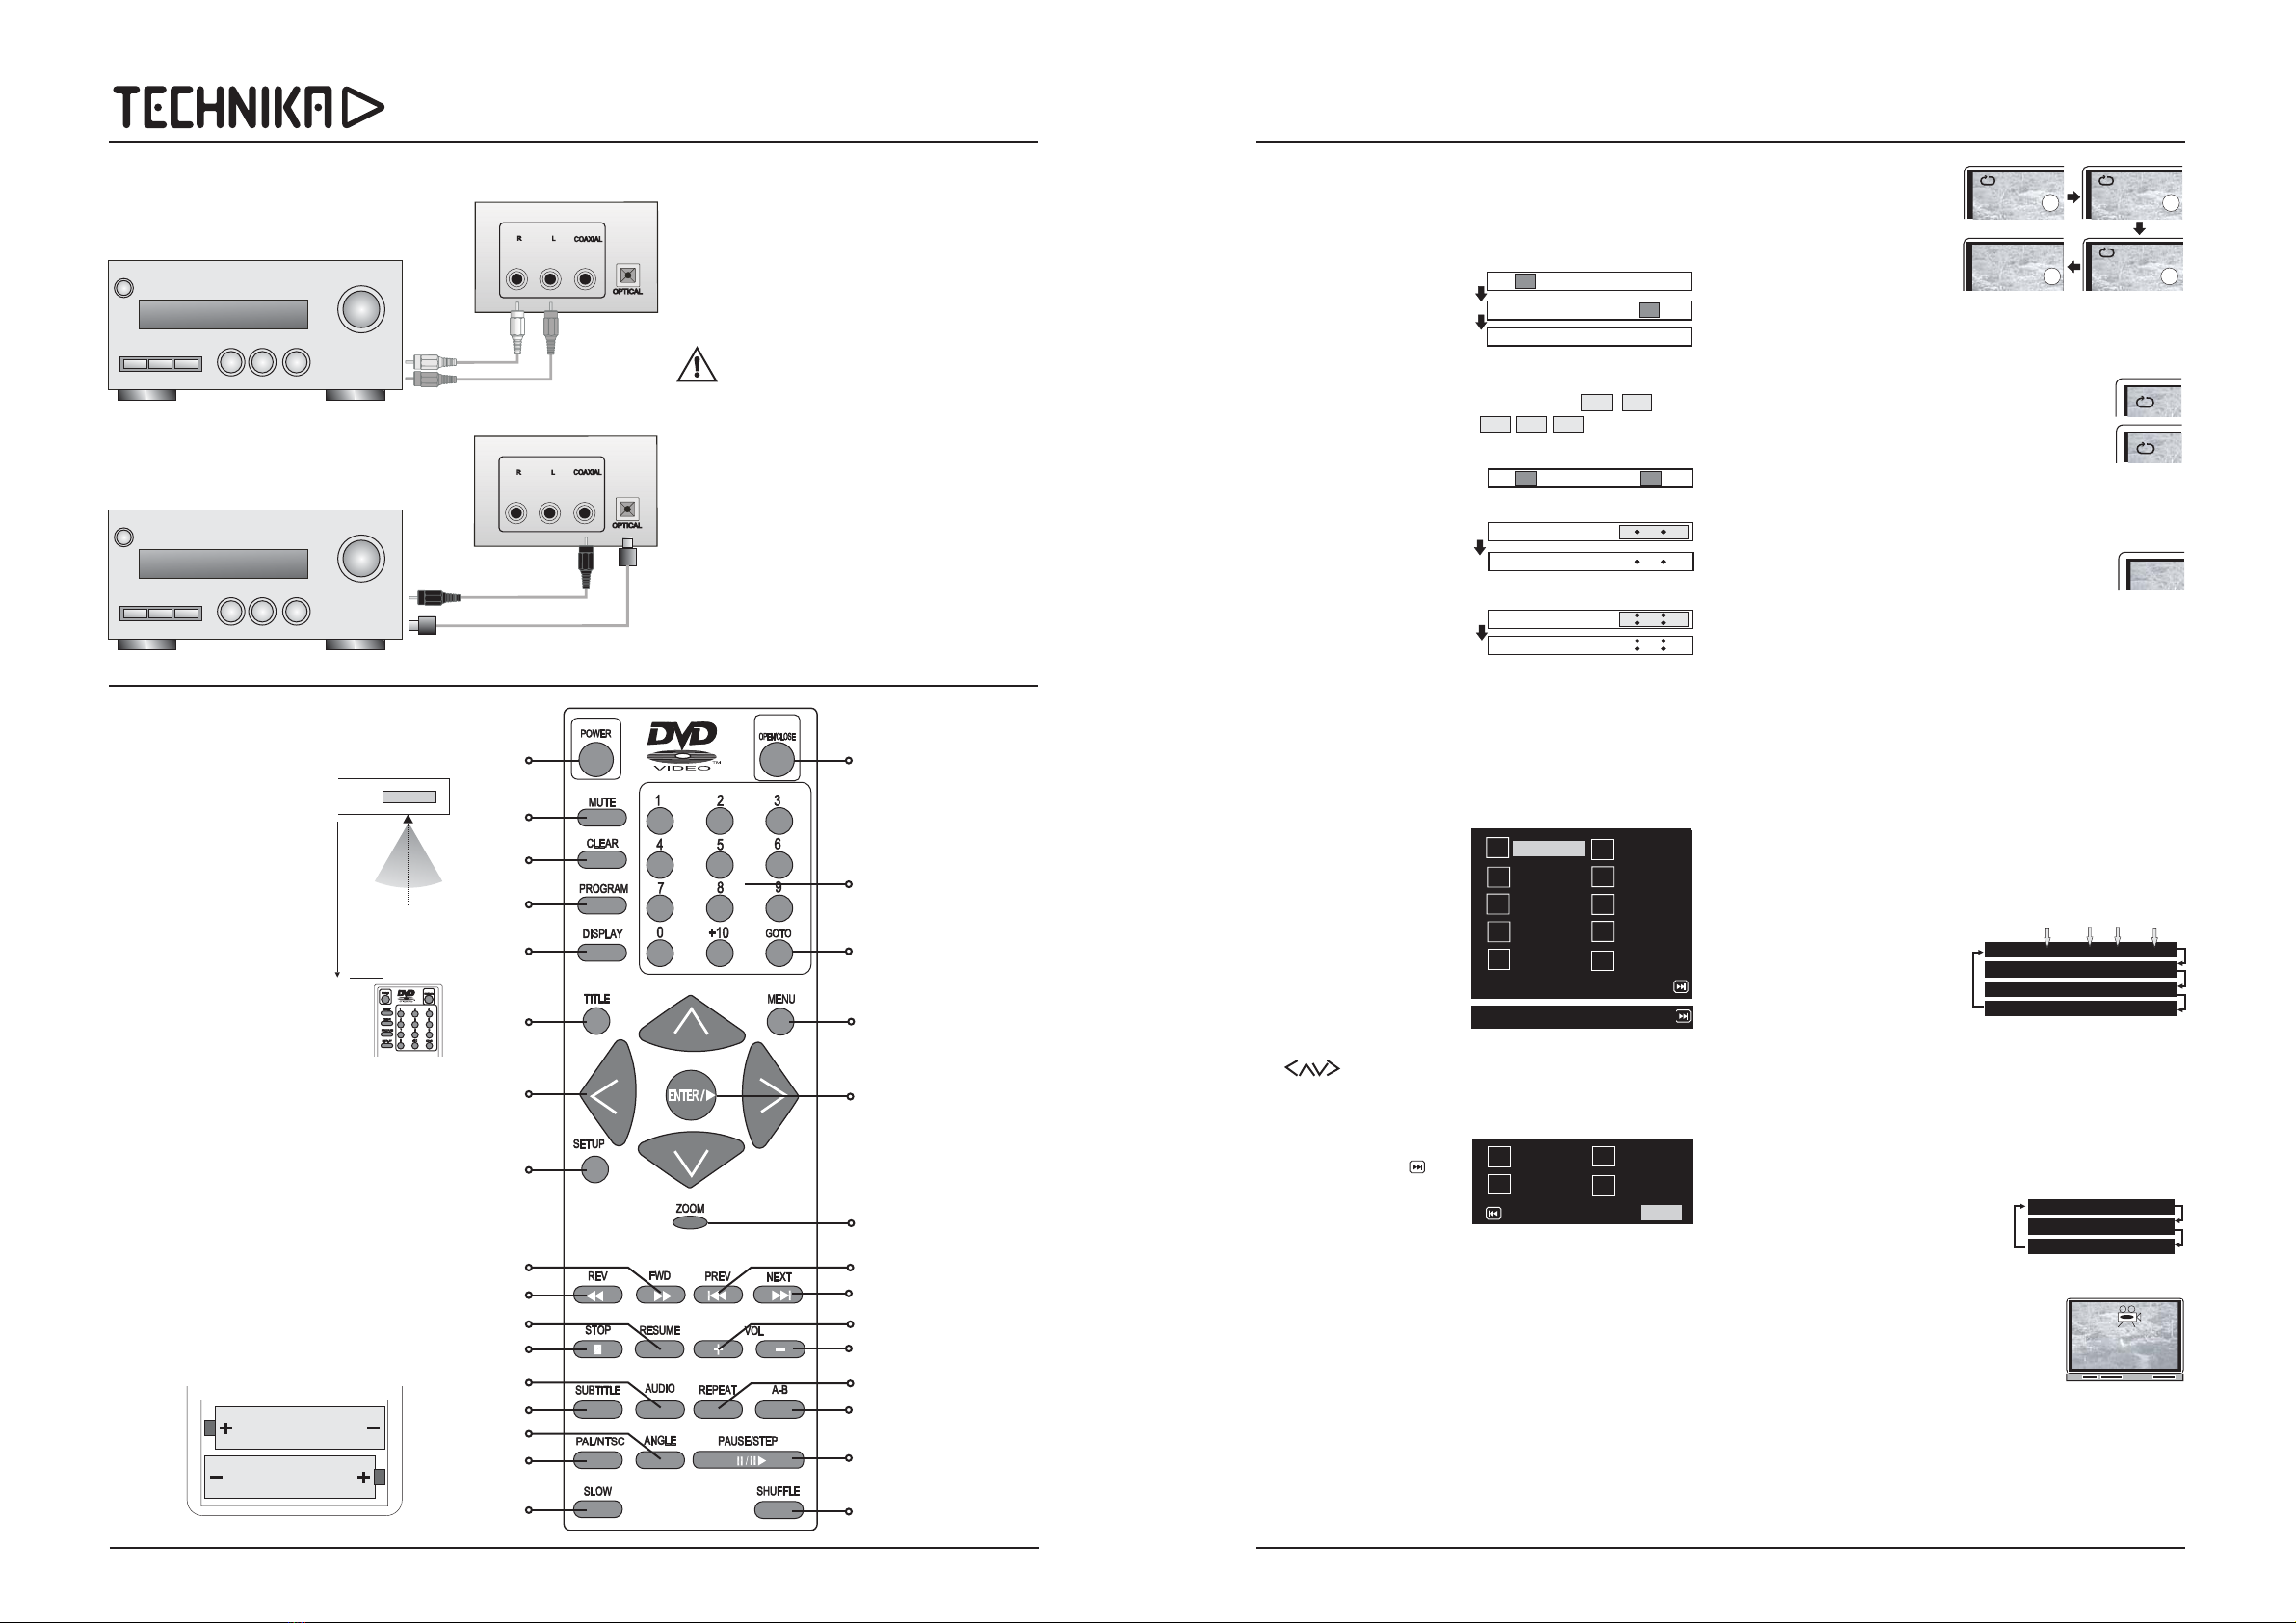
User Handbook
TROUBLESHOOTING
If your DVD 105 player is not working properly please work through this checklist before returning the unit or contacting Tesco. Before
investigating a problem, always switch off the player and any connected units off.
Check that the power cord has been properly connected to the power outlet.
Check that the mains power has been switched on.
No disc, load a disc.
Disc has been loaded upside down. Place the disc with the label side up.
Disc's region code does not match the player’s.
Disc's rating level is higher than the player's rating level setting
Disc is not correct type for the player.
Disc is damaged or dirty, clean the disc or try another disc.
Moisture may have condensed inside the player. Remove the disc and leave the unit powered up
for one or two hours.
Check if the TV set has power.
Select an appropriate A/V input for the DVD player rather than a broadcast or other input.
Check that the connecting cables are securely connected and undamaged.
Clean the disc.
The disc is dirty or damaged. Clean the disc or try another disc.
Reset the colour system of the TV set (NTSC/PAL).
Select the screen format from the player's SETUP MENU.
Select the screen format from the DVD disc menu.
The inbuilt copy protection is trigerring. Connect the player directly to the TV set.
If the player develops a malfunction, switch off and unplug the player for 30 minutes.
After 30 minutes, plug the player in and switch on. The restore function should reset the player.
Some discs do not allow users to SKIP or SEARCH at some sections, especially at the beginning
WARNING section.
Single Chapter discs cannot apply the SKIP function.
Check if the TV and Amplifier have been switched on, and correctly set up.
Check if the connecting cables are securely connected and undamaged.
Press the AUDIO button to select other audio tracks(languages) on the Player
Check if the MUTE function of the Player, TV or Amplifier has been activated.
There will be no sound output during REVERSE PLAY / PAUSE / SLOW/.
Remove any obstacles between the handset and the player.
Point the remote handset towards the remote sensor on the player.
Check if the handset batteries are correctly loaded. Replace old batteries.
Replace the handset batteries.
No Power
Disc does not play
No picture
Picture noisy or distorted
Picture not full screen
Brightness unstable, picture noisy
or distorted, sound imtermittent.
Software malfunction
No SKIP or SEARCH
No sound, poor sound
Remote handset does not function
SYMPTOM POSSIBLE CAUSE AND ACTION
Page 13