Tecno Slot TST43A User manual

TECNO
SLOT
HI-TECH
SLOT DESIGN
TECNO
SLOT
Avgda.SantEsteve,41‐3
08402GRANOLLERS(Barcelona‐Spain)
E‐mail:mail@tecno‐slot.com
www.tecno‐slot.com
TST43AASSEMBLY
INSTRUCTIONS:
withmagneteffect

TECNO
SLOT
HI-TECH
SLOT DESIGN
p. 1-9
ASSEMBLY INSTRUCTIONS OF THE PRODUCT REF. TST43A
Introduction
First of all, we want to thank you for purchasing a TECNO SLOT product, UNIVERSAL
CHASIS SLOT KIT 1:43 “Powered by SCX”.
With a TST43A chassis you can adapt the majority of 1:43 scale static vehicles or similar to
slot, either plastic, resin or metal ones, and enjoy driving them to slot tracks. It is not a race
chassis, although depending of its adaptation can have high performance.
The design is based on "SCX Compact" system mechanics and dimensions, offering the
possibility to adapt vehicles from 42.4 to 81.9 mm axles distance.
The materials used to manufacture this kit are high quality: aluminum, polyamide with
graphite self-lubricating, galvanized screws, self-locking nuts, foamed high density
polyethylene, etc..
Components list:
1 right frame
1 left frame
1 motor
1 traction pinion
1 transmission gear
1 front axle
2 bearings
2 separators
1 traction axle
2 electrical cables
4 wheels
4 pneumatics
1 magnet
1 guide support
1 guide with fitted braids
1 motor ring
2 M2x20mm screws
2 brass rivets
3 M2 self-blocking nuts
1 M2x25mm screw
2 Ø2mm washers
1 polyethylene foam
1 reusable plastic box
Necessary tools and materials
Small flat screwdriver, wire cutter, pliers, tin solder, cutter, scissors, tweezers, glue impact,
tin, etc.
Assembly instructions of the TST43A chassis
Before to assembly we recommend you view the following video:
CHASSIS VIDEO 1:43
TECNO
SLOT
HI-TECH
SLOT DESIGN
p. 2-9
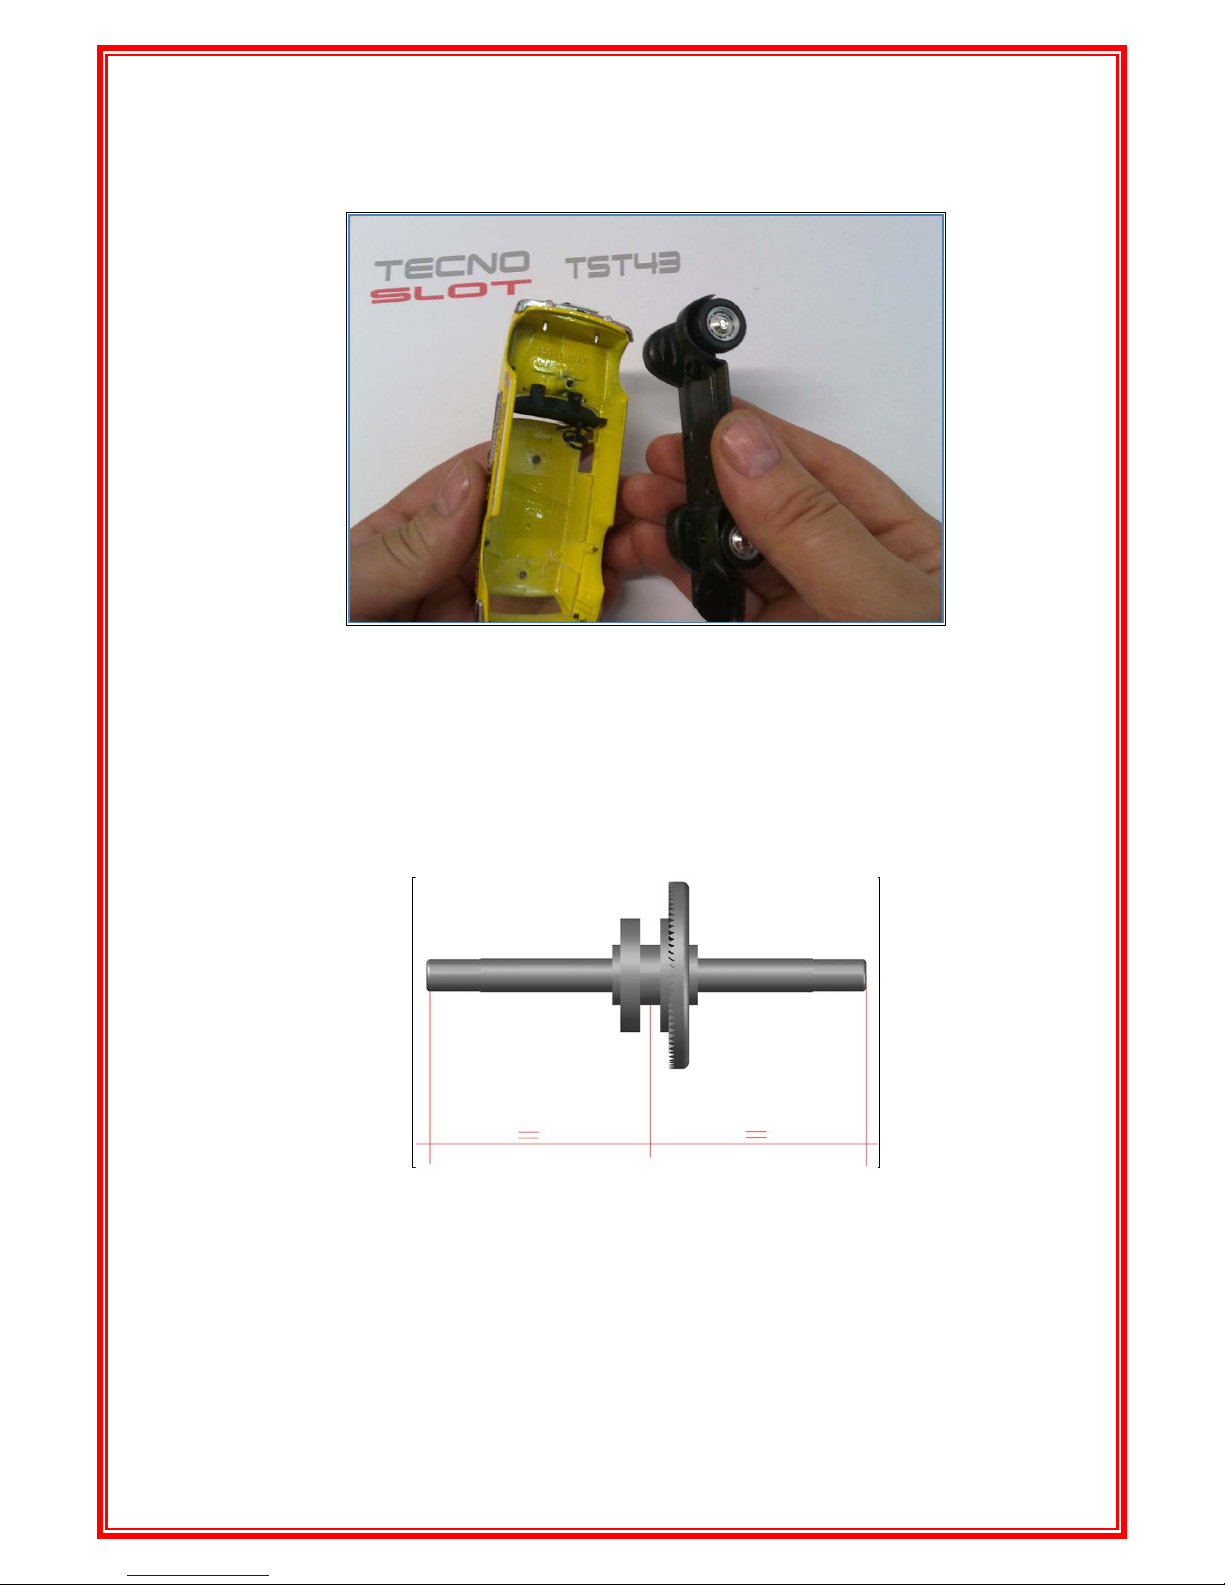
1- Remove the static vehicle chassis, freeing the body:
2- Insert the transmission gear on the rear axle (with central engraved) so that the slot of
the transmission gear is centered on the axle:
3- Chassis configuration:
- make a pre-assembly to determine the length of the frame (position of the front axle)
with the following parts: chassis, guide support, rear axle with wheels and bearings,
and front axle & wheels,
- present the whole body obtained to determine if it was necessary to cut the frame
(length and / or nerve):

TECNO
SLOT
HI-TECH
SLOT DESIGN
p. 3-9
- the guide support piece has 3 channels that allow for different placement options and
the screw shaft. Depending on the body you want to adapt, the front channel can be
opened sideways if necessary and in small vehicles can entirely eliminated:
- remove all pre-assembly.
4- Check the length of the front axle compared to the width of the body and if necessary
cut so divided at each end, eliminating any burrs:
5- Check the length of the rear axle to vehicle body. If necessary cut as in Section 4
front channel
cutted front
channel
TECNO
SLOT
HI-TECH
SLOT DESIGN
p. 4-9
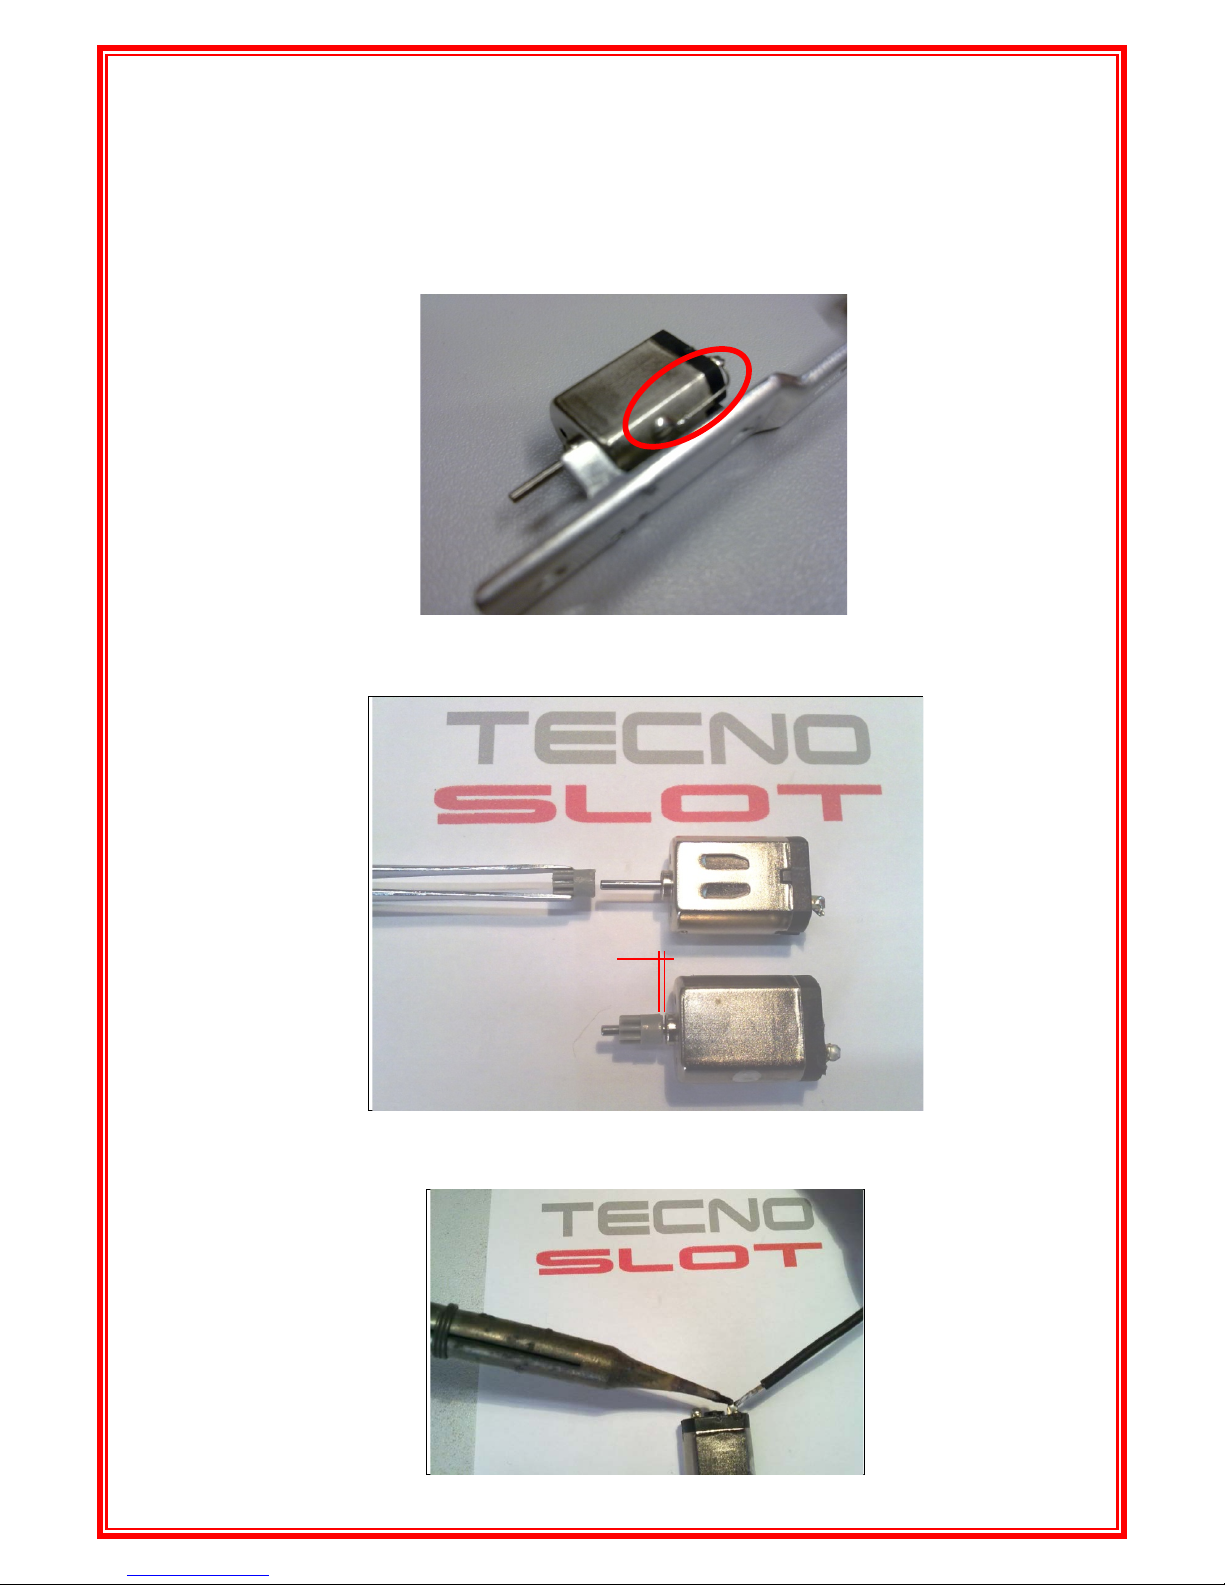
6- Motor set-up:
- It could be that you have a problem with the braiz point/cable on the motor if you
mount the chassis. In this case you have to modify but this has no effect to the
running characteristic from the motor:
- Insert the pinion on the engine, leaving a gap of 0.5 mm:
7- Tin solder wires to the engine terminals:
0,5mm
TECNO
SLOT
HI-TECH
SLOT DESIGN
p. 5-9
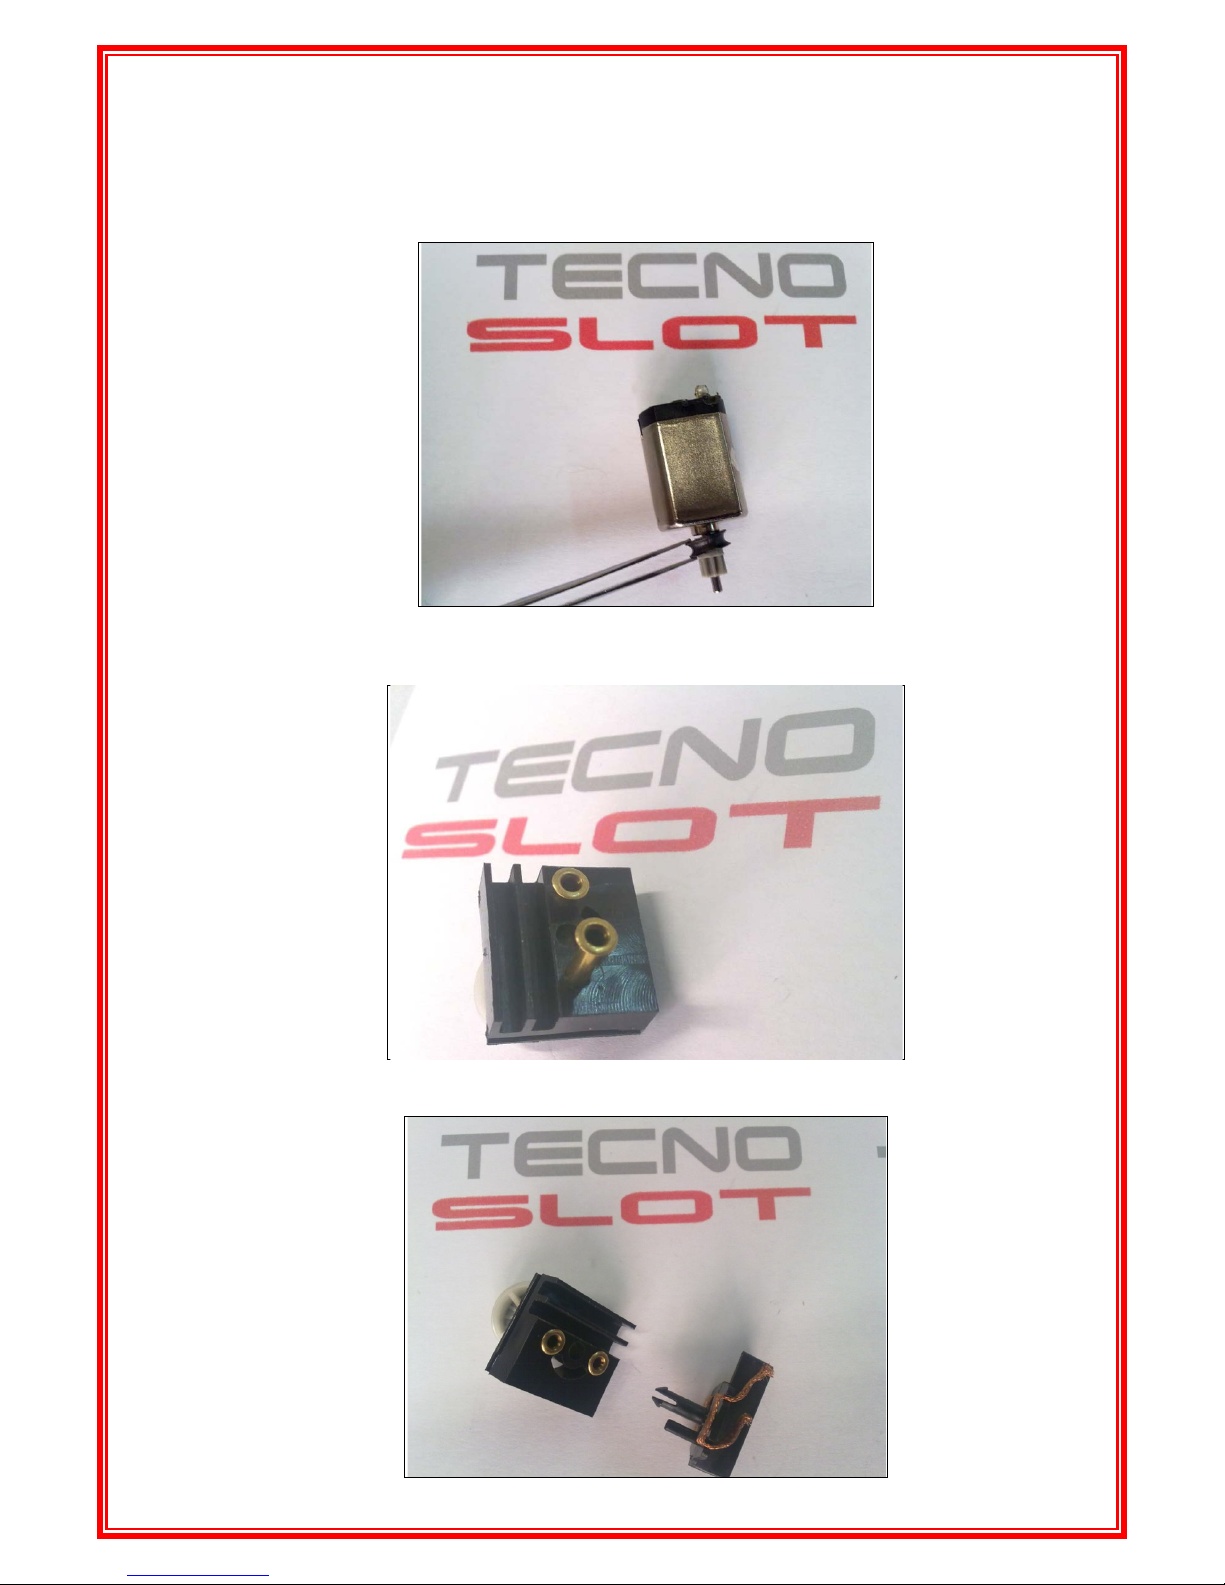
8- Insert the centering of the engine:
9- Insert the two rivets to the support guide:
10-Insert the guide with fitted braids to the support:

TECNO
SLOT
HI-TECH
SLOT DESIGN
p. 6-9
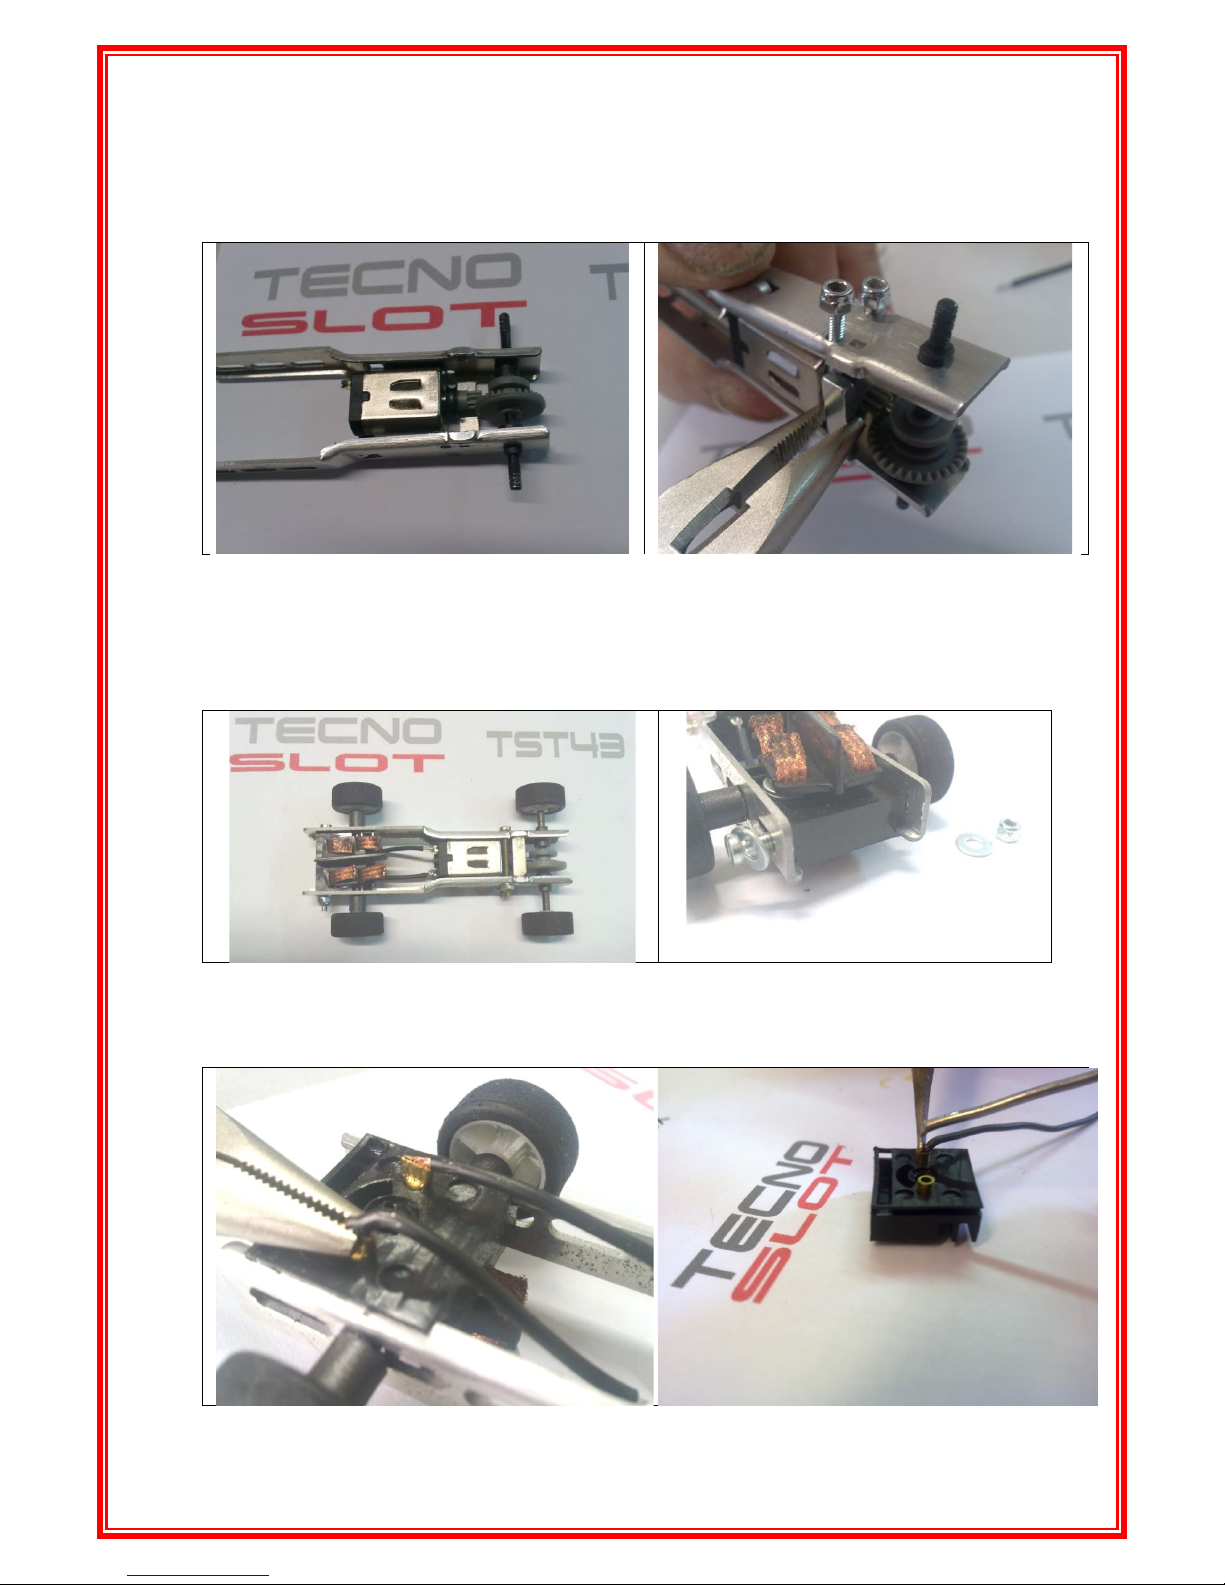
11-Insert the bearings in the traction axle, the short one at side of the transmission gear
and the long on the other side:
12-Insert the rear axle in the right frame:
13-Insert the engine in the previous set so that the vents are as the next photo:
TECNO
SLOT
HI-TECH
SLOT DESIGN
p. 7-9
14-Insert the left frame, mount the 2 screws M2x20 with nuts and mount the magnet by
removing a bit of assembly. Finish tightening the nuts:
15-Adjusting the front axle: mount the guide support obtained in paragraph 10 to the
chassis with the screw M2x25, the 2 washers, self-locking nut, the front axle, wheel
spacers and wheels. If necessary, reduce the separators. Submit the final set to the
body, adjust the axles distance by tightening the guide support screw:
16-Connect the wires to the rivets and tighten or weld them according to the position of
the next photo:
TECNO
SLOT
HI-TECH
SLOT DESIGN
p. 8-9
17-Final Adjustment: finish tightening the set screws and check that the traction axle turns
smoothly. If you have had to cut the axles and the end engraves had disappeared, we
recommend to put a drop of two-components glue before assembling the wheels.
Driving the final kit on the track to checking it.
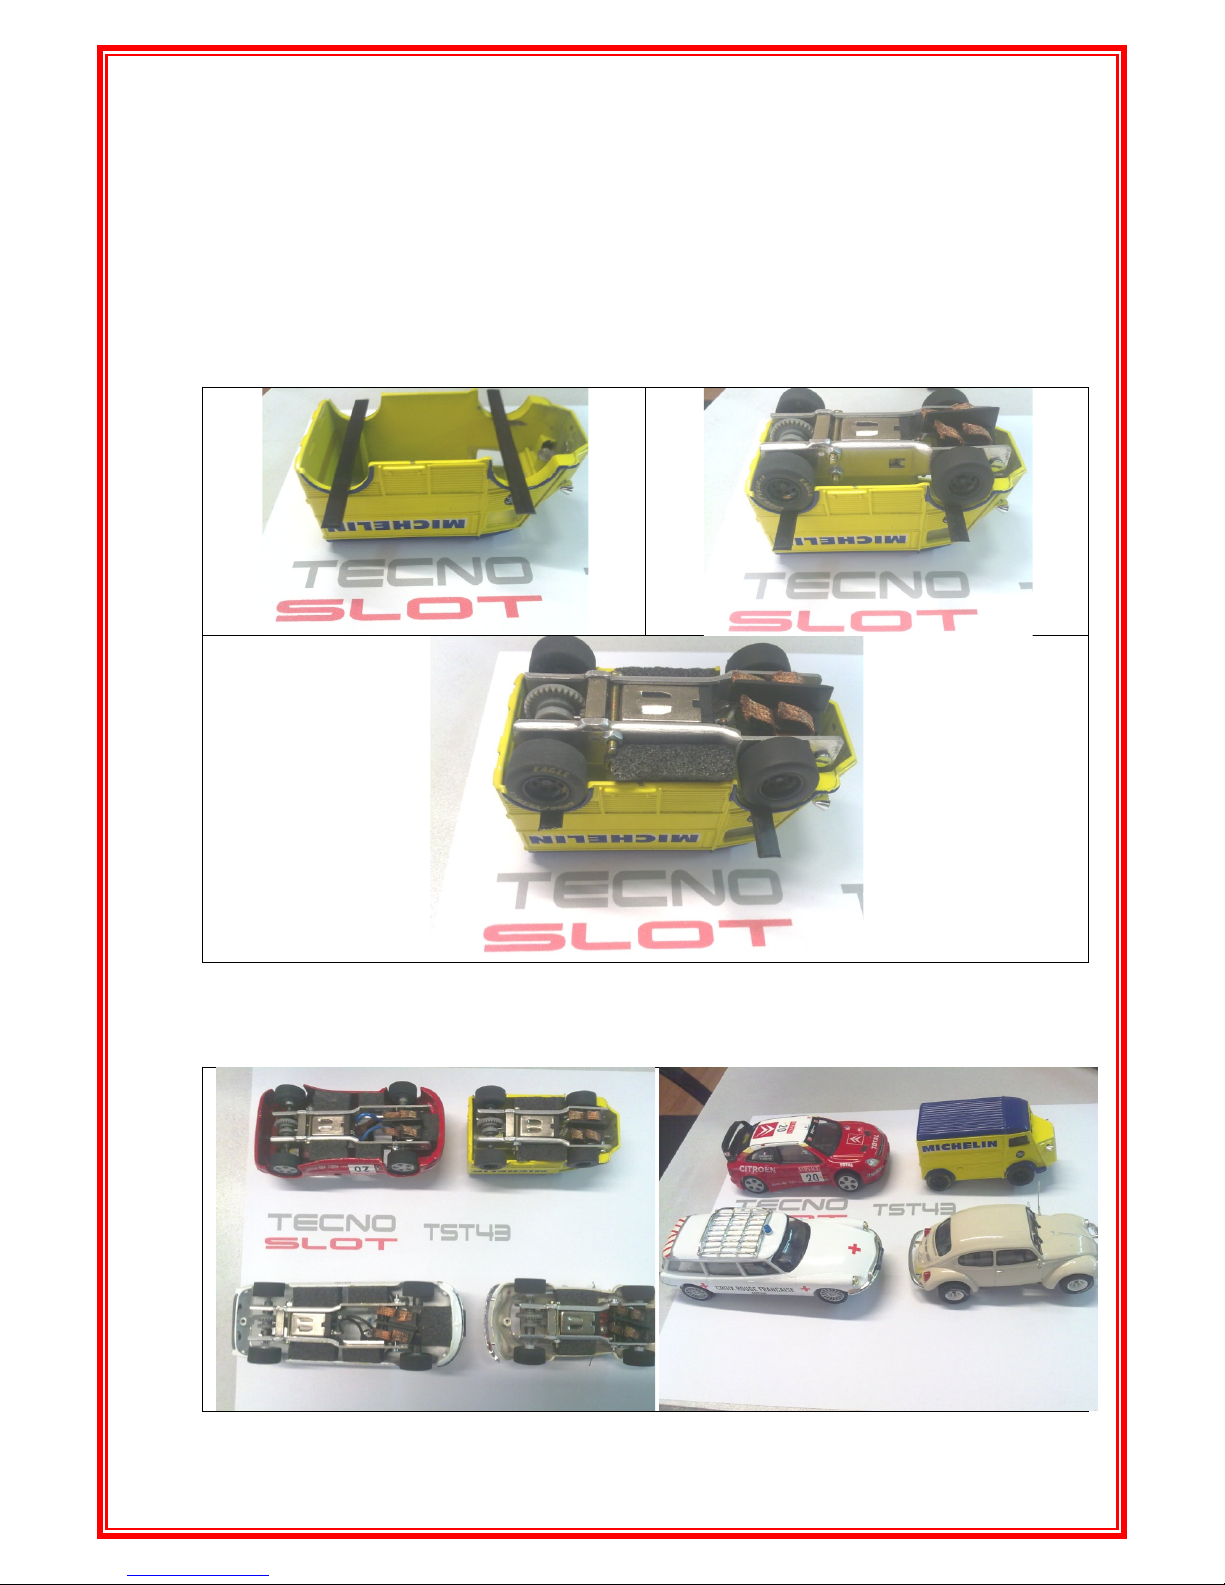
18-Fixation the chassis to the body: it is made with the provided foam to adjust the
spaces between the chassis and body. Make the union of the different parts with
impact-glue until it dries:
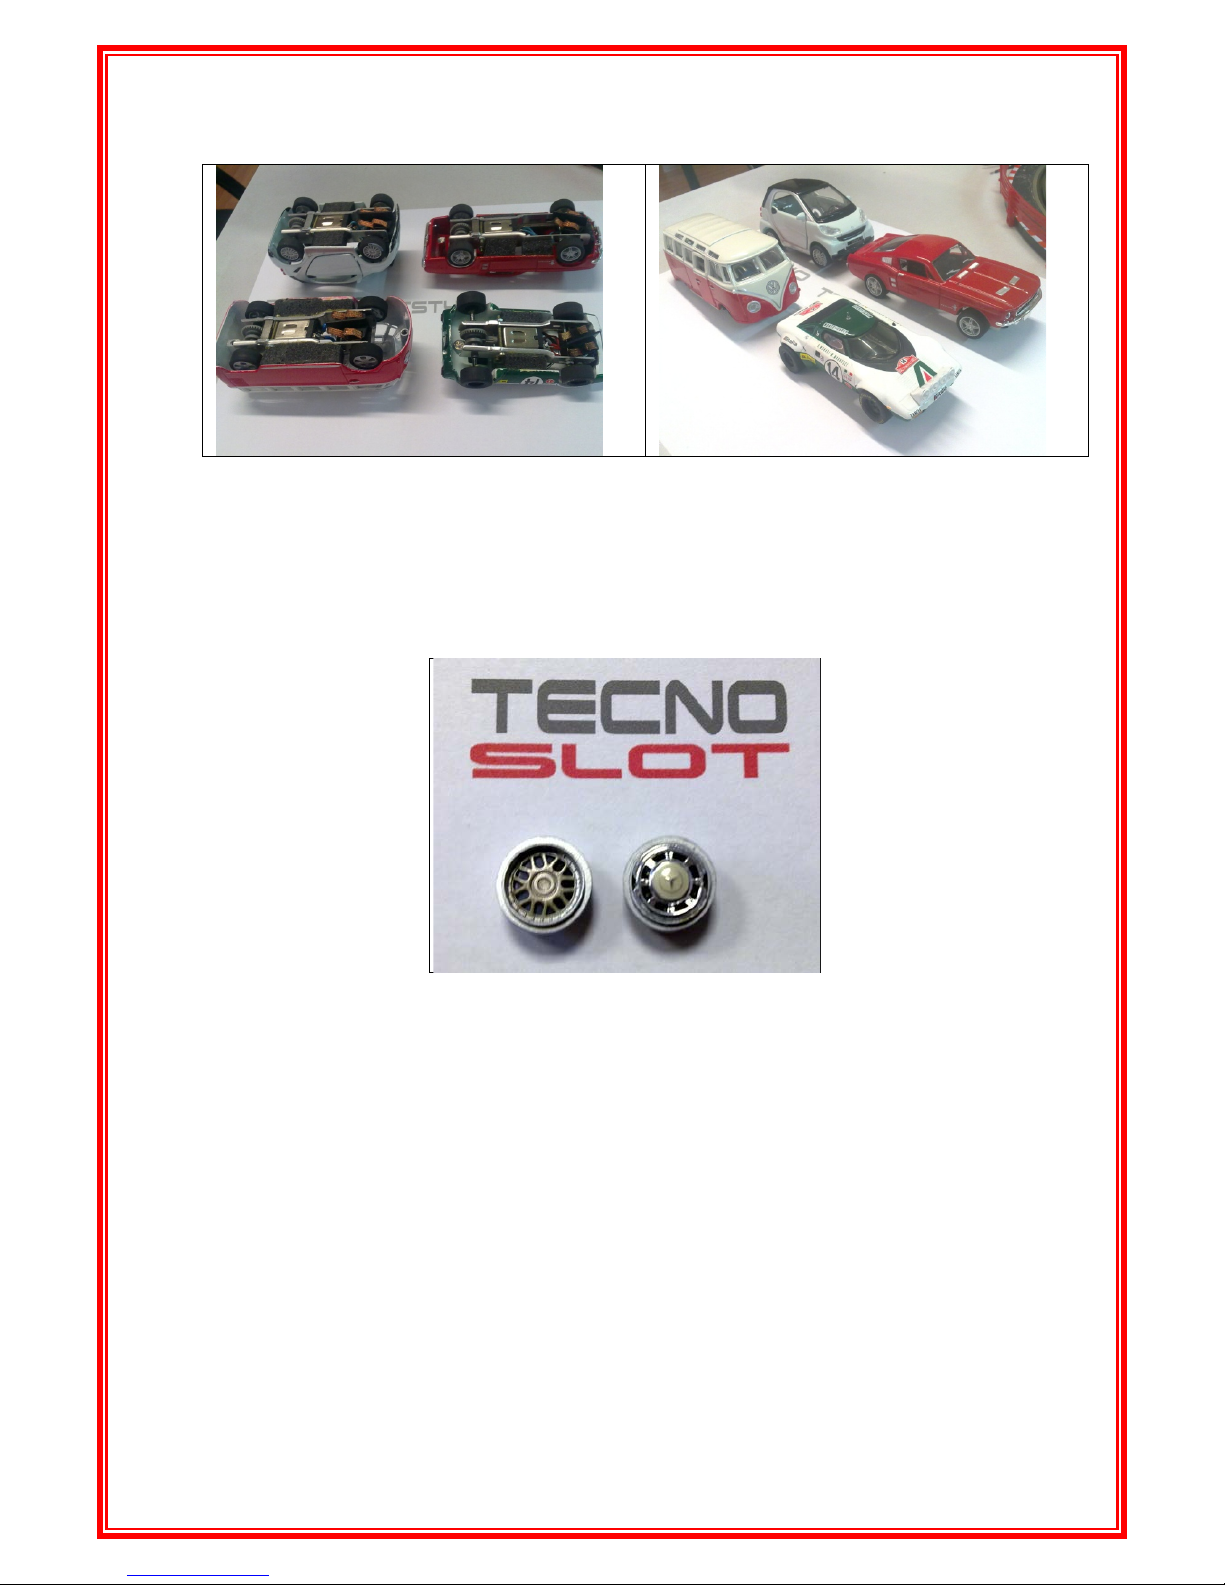
19-There to take the precaution of leaving a gap between their wheels and the body to
prevent chafing or blocking them. A number of examples can be seen below:
TECNO
SLOT
HI-TECH
SLOT DESIGN
p. 9-9
Additional comments:
1- In some cases, to improve esthetics of the finished vehicle, there is the possibility of
inserting part of the static vehicle wheel rim inside the wheel rim provided in the kit:


