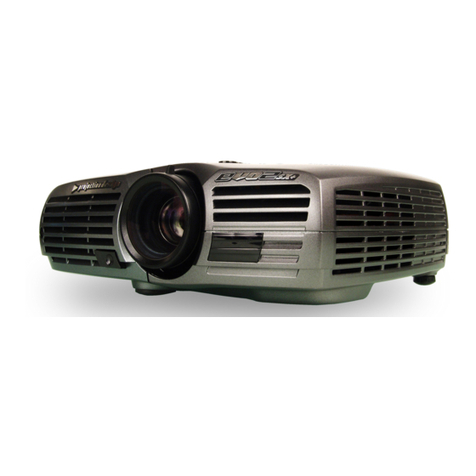
tekkiwear VS313 User manual

Projector User Manual
VS313 Sync Screen
Features
1. Sealing design, high ecient cooling dual cooling system, which improve the stability and
extend the use me.
2. Gorgeous LED indicator working over 20000h shows the condion of the projector.
3. Electronic zoom for image size adjusng.
4. Professional fault diagnosis and protecon system.
5. Small and light.
6. Free transfer of 16:9/4:3 image modes.
7. Ultra-noise isolaon and dust-proof design; Not need for an inside cleaning.
8. Low power consumpon/more ecient/more environmental friendly.
9. Rich interface: HD in/TF/USB/VGA/AV/ AUDIO/TV
10. Simple and elegant appearance.
11. Hidden Lens.
Noce
1. Before you use the machine, please read this manual carefully;
2. To provide a stable power supply, please use the right circuit according with naonal power
supply standard or the socket with protecon funcon, like grounding outlet;
3. Please use the same power adapter outlined on the manual or the adapter coming with the
projector.
4. Please don't disassemble the machine in an unauthorized manner, or our company won't take
this response.
5. For fear of hurng your eyes, please don't look at the projector lens in its' working situaon,

6. Please don't place the projector on the items which may block the vent, such cloth, blanket
etc.
7. This projector isn't water-proof; you should prevent it from water spray and splashing water.
It should be placed away from vast/liquid container etc.
8. To get rid of electric shock, please make sure the device isn't rained or in moisture
environment.
9. If you nd the projector is defecve, please contact our customer service or the manufacturer.
Projector Exterior View
1. Vent ( heated air exhaust)
2. Indicator
3. Up
4. Le
5. Power
6. Ok
7. Down
8. Right
9. Source
10. Menu
11. Keystone correcon ring
12. Focus Ring
13. HD socket
14. Vent (air intake)
15. Computer socket
16. IR remote sensor
17. TF card slot
18. Earphone output Jack
19. Audio & Video Input Jack
20. Speaker
21. USB input port
22. AC 110 – 240 V input
23. Lens

Remote Control
1. On / O
2. Fast Forward
3. Previous
4. Mute
5. Fast Backward
6. Next
7. Play / Pause
8. Stop
9. Source
10. Useless
11. UP / Channel Up
12. Le / Volume Down
13. Right / Volume Up
14. OK
15. Down / Channel Down
16. Menu
17. Exit
18. Single / Double number input
19. Number keys
20. Loop Playback
1. HDMI conecon
2. Computer (VGA) conecon
3. Audio Jack-to-RCA Output
4. Audio/video Jack-to-RCA Input

Operaon
Starng up the projector
1. Plug the power cord into the projector and into a wall socket. Turn on the wall socket switch
(where ed). Check that the Power indicator light on the projector lights red aer power has
been applied.
*power cord socket
2. Press “ON/OFF buon” on the projector or remote control to start the projector. The Power
indicator light stays green and the fans began to run when the projector is on. The start up
procedure takes about 10 seconds. (If necessary) Rotate the lens to adjust the image clearness.
3. Switch all of the connected equipment on.
4. Press “Source” on the remote control or “S” on the projector to select your desired input
signal.
Adjusng the projecon Focus
1. Focus ring
2. Keystone correcon ring

Rotate the Focus Ring to adjust Focus as that shown in the below gure.
Correcng keystone Keystoning refers to the situaon where the projected image is noceably
wider at either the top or boom. It occurs when the projector is not perpendicular to the
screen. To correct this, besides adjusng the height of the projector, you will need to manually
correct it as that shown in the below gure.
Switching input signal
The projector can be connected to mulple devices at the same me. However, it can only
display one full screen at a me. You can manually cycle through the available input signals.
1. Press “S” on the projector or “Source” on the remote control. A source selecon bar is
displayed.
2. Press Up /Down unl your desired signal is selected and press OK.
3. If the projector doesn't detect a valid signal, the message “No Signal” will be displayed unl
an input signal is found.
Using the USB/TF card
1. Press “S” on the projector or “Source” on the remote control to select the USB mode.
2. Press Le or Right to highlight a desired le type want to play.
3. Press OK and Le or Right to select a disk.
4. Press Le / Right / Up / Down move the cursor to highlight a desired le, press OK to conrm,
press OK again to cancel. If necessary, repeat the steps to highlight and conrm or cancel another
le.
5. Press “S” on the projector or Play/Pause on the remote control to play these les.
6. Press “Down” on the projector or (Stop) on the remote control to stop and return the previous
page.

Connecng Video source devices
You can connect your projector to various Video source devices that provide any one of the
following output sockets:
* HD in
* Computer
* Video(composite)&Audio(stereo)
* Analog television signal
Many notebooks do not turn on their external video ports when connected to a projector.
Usually a key combo like FN + F5 or CRT/LCD key turns the external display on/o. Locate a
funcon key labeled CRT/LCD or a funcon key with a monitor symbol on the notebook. Press
FN and the labeled funcon key simultaneously.
If you wish to make use of the projector speaker in your presentaons, take a 3in1 AV cable and
connect one end of the cable to the audio output jack of the device, and the other end to the AV
in jack of the projector. You can use another suitable audio cable and connect one end of the
cable to the headphone jack of the projector, and the other end to your external speakers.
Menu System
The projector is equiped with On-Screen-Display (OSD) menus for making various adjustments
and sengs.

Note: that the menu items are available when the projector detects at least one valid signal. If
there is no equipment connected to the projector or no signal detected, limited menu items are
accessible.
Mulmedia format
1. Video formats: * .MPG,*.MPEG,*.ASF,*.AVI,* .MOV, * .MP4, *.V0B,* .FLV, * .DAT, * .RMVB
2. Music formats: * .WAV, * .MP3, * .WMA, * .AAC
3. Image format: * .JPG, * .BMP, * .PNG
4. Text: * .txt.
Wireless Screen Mirroring Instrucon
SELECT EZCAST ON SOURCE MENU
1. For Android Phones
1) Tap Sengs on phone. Enter More Connecons. Select Wireless Projecon or Mul-screen.
See picture 1 ( The seng name may vary depending on the brand of phones)
2) Tap the desired device ID. Connecon will be successful later soon. See picture 2
2. For iPhone * iPhone connecon with Cellular data network
1) Tap the desired device ID. Connecon will be successful later soon. See picture 3

2) Input password "12345678"to connect.
3) Call up "Nocaon Center"on iPhone. Then tap "Screen mirroring". Select the right device
to connect. See picture 4
* iPhone connecon with Cellular data network
1) Enter iPhone WiFi. Select the right SSID displayed on the projecon image.
2) Input password "12345678"to connect.
3) Browse "192.168.49.1" by Safari. Select "WiFi AP"- tap "Scan", select desired WiFi and connect
it. See pictures below 5, 6 and 7
4) Call up the Nocaon center when the desired WiFi SSID shows up on the top right of
projecon image. Tap "Screen mirroring"and select right device to connect. Connecon will be
successful later soon. See picture 8 and 9
iPhone disconnect to the WiFi
1) Browse "192.168.0.117"by Safari when iPhone connect with projector See picture 10

2) Tap "WiFi AP"-"Scan". You will see the WiFi SSID you connected. Tap forget to disconnect. See
picture 11
*Note: This manual is only for reference. The connecon steps in pracce may slightly dierent
as the phone OS update or projector soware update.
Table of contents
Other tekkiwear Projector manuals


