SAFETY INFORMATION
This symbol, on the product and in these instructions, indicates that there is a
risk of electric shock if you remove the cover or ignore the instructions.
This symbol indicates that there is a danger of physical injury to yourself and/
or damage to the product unless the instructions are closely followed.
Correct disposal of this product
Waste Electrical & Electronic Equipment (WEEE) Regulations
This product is designed and manufactured with high quality materials and
components which can be recycled and reused. In the European Union, there are
separate collection systems for used electrical and electronic products. Please help us
to conserve the environment we live in!
This product, at the end of its life, should be disposed of separately from your
household waste, at your local community waste collection/recycling centre.
This product complies with European safety and electrical interference directives.
To ensure reliable and safe operation of this product, read carefully all the instructions
in this user guide, especially the safety information below.
Electrical safety
The set should be connected only to a mains
supply which matches that stated on the
label on the mains adaptor.
To prevent overload, do not share the mains
supply socket with too many other items of
equipment.
Do not place any connecting cables where
they may be stepped on or tripped over.
Do not place heavy items on the connecting
cables.
When unplugging from the mains supply,
pull the plug, not the cable.
During a thunderstorm, or when the set is
not in use for a long period, disconnect the
outdoor aerial and the mains adaptor.
Do not allow water or moisture to enter the
set or mains adaptor.
Do not use the set in wet or moist areas
such as bathrooms, steamy kitchens or near
swimming pools.
Pull the mains plug out immediately and
seek professional help if:
the set doesn’t work properly
the mains plug or cable is damaged
•
•
•
•
•
•
•
•
•
•
•
liquid is spilt onto the set, or if it is
accidentally exposed to water or moisture
anything accidentally penetrates the
ventilation slots
Do not remove the cover. There are no user-
serviceable parts inside. You may invalidate
the warranty. This product may be serviced
only by qualified personnel.
Physical safety
To avoid leakage, remove batteries from the
remote control when they are exhausted or
when not in use for a long period.
Do not break open the batteries or dispose
of them in a fire.
Do not block the ventilation slots in the back
cover. You may place the set in a cabinet,
but ensure at least 5cm (2”) of clearance all
round.
Do not tap or shake the TV screen.
Do not drop the remote control.
To clean, use a soft dry cloth. Do not
use solvents or petrol based fluids. For
stubborn stains, use a damp cloth with dilute
detergent.
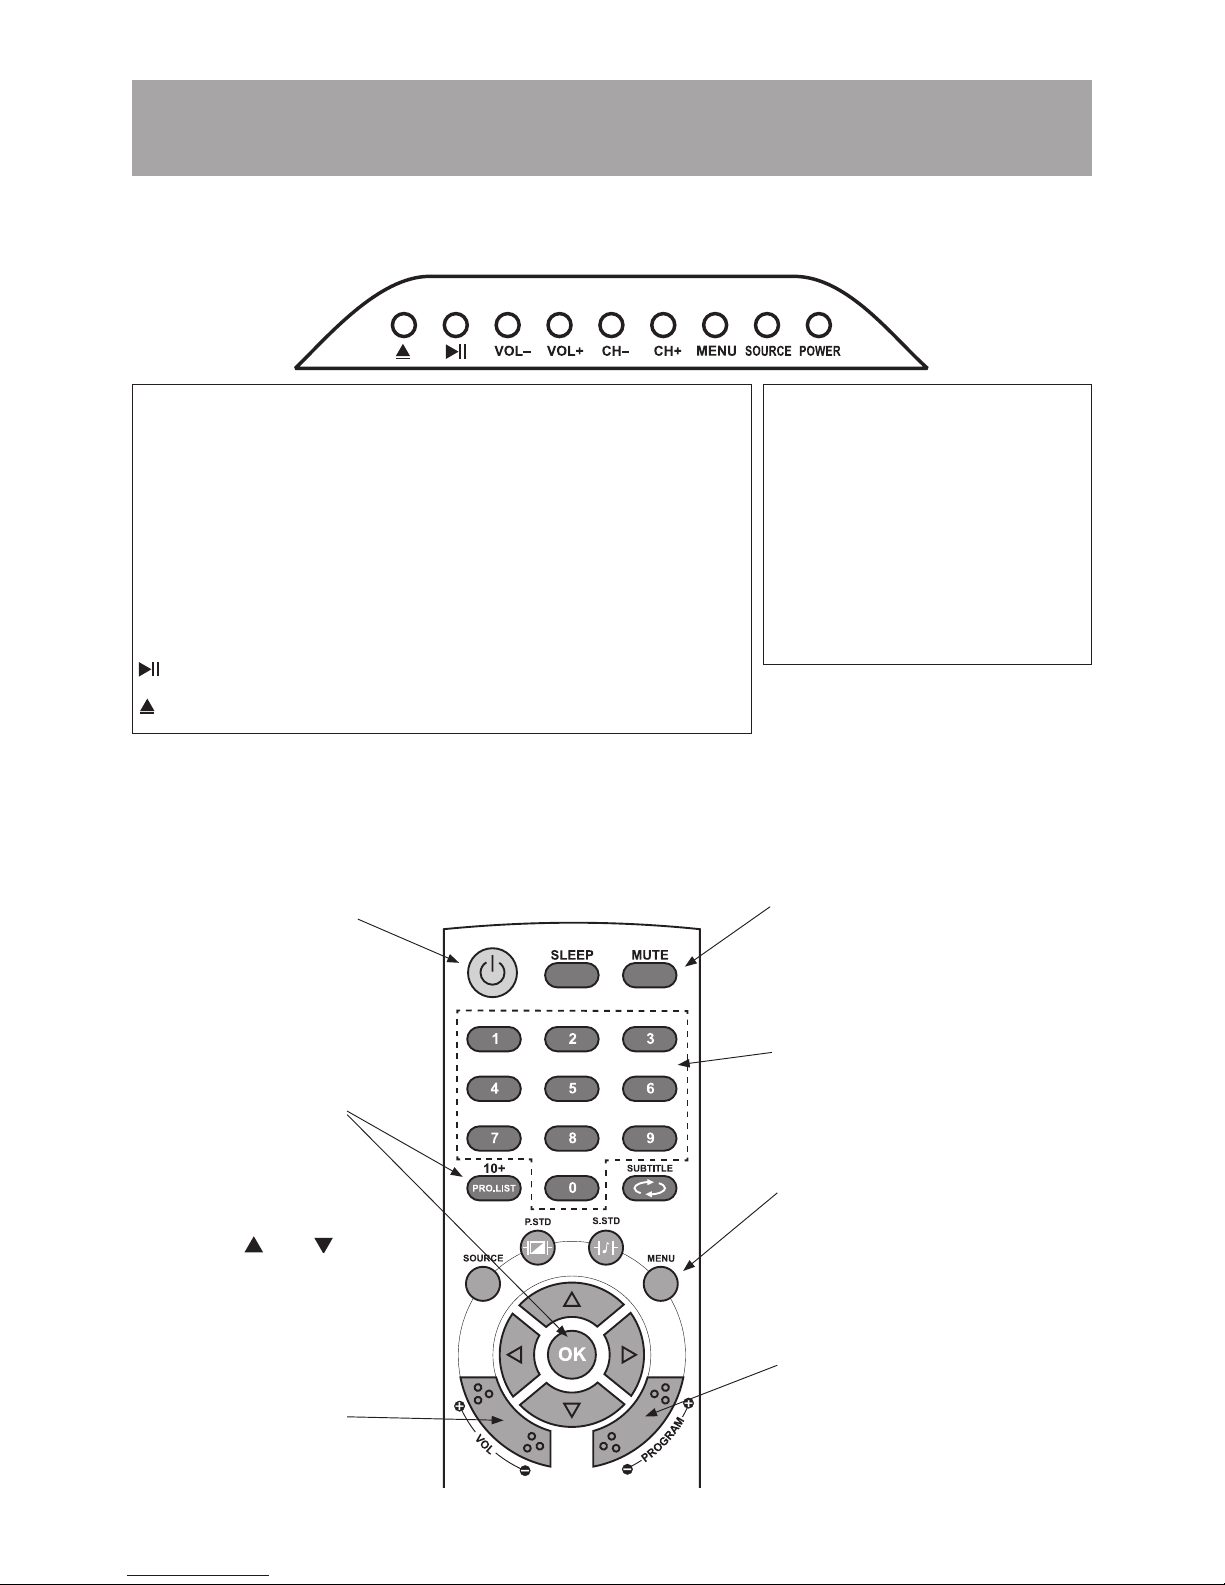
•
•
•
•
•
•
•
•
•