The Greenwich Masters Grand Complication User manual

THE GRAND COMPLICATION
INSTRUCTION MANUAL

Main Features
This watch is a multi-hand analogue watch equipped with numerous
functions including a chime function using an electronic tone, fully
automatic calendar function, which corrects the date for each month
including leap years, moon age function and a chronograph function that
is able to measure time for up to 12 hours.

Specifications
1. Type - Multi-hand analogue quartz watch
2. Time Accuracy - Within +/- 20 seconds per month on average.
3. Operating temperature range: -10°C - +60°C
4. Display Functions:
• Time: Hours, minutes, seconds, 24 hour clock
• Calendar: Year, month, date, day, moon age
• Chronograph: 12 hour time measurement, 1/4 second units,
split time measurement function
5. Additional functions:
• Calendar: Leap year and monthly correction function
• Moon age: Graphic wheel display function
• Chime function (chime clock)
• Reference position failure alarm function
• Second hand arbitrary stop function
6. Battery: Battery code: SR927W
7. Battery life: Approximately 2 years
Specifications are subject to change without notice.
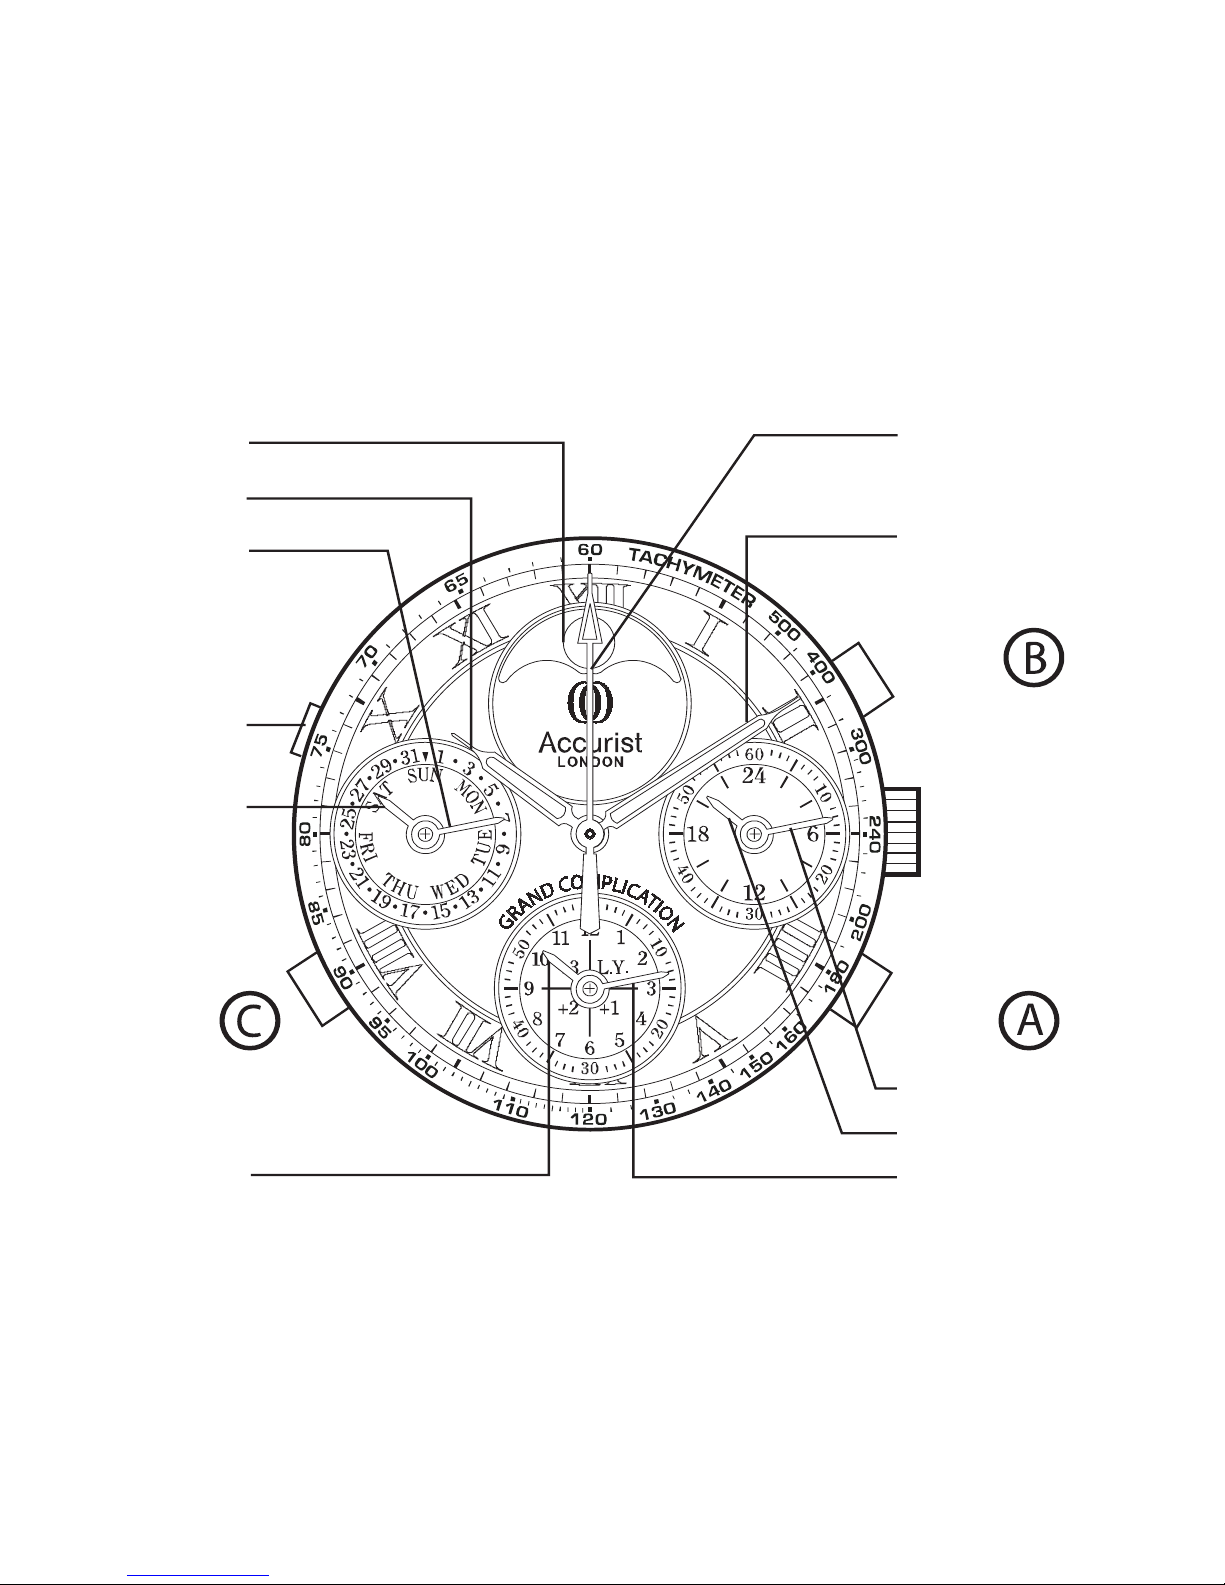
Names of Components
Chronograph
Second hand
Minute hand
Button
Button
Crown
24 hour hand
Second hand
Month hand
Moon age
Hour hand
Date hand
Moon age
correction
button
Day hand
Button
Year hand
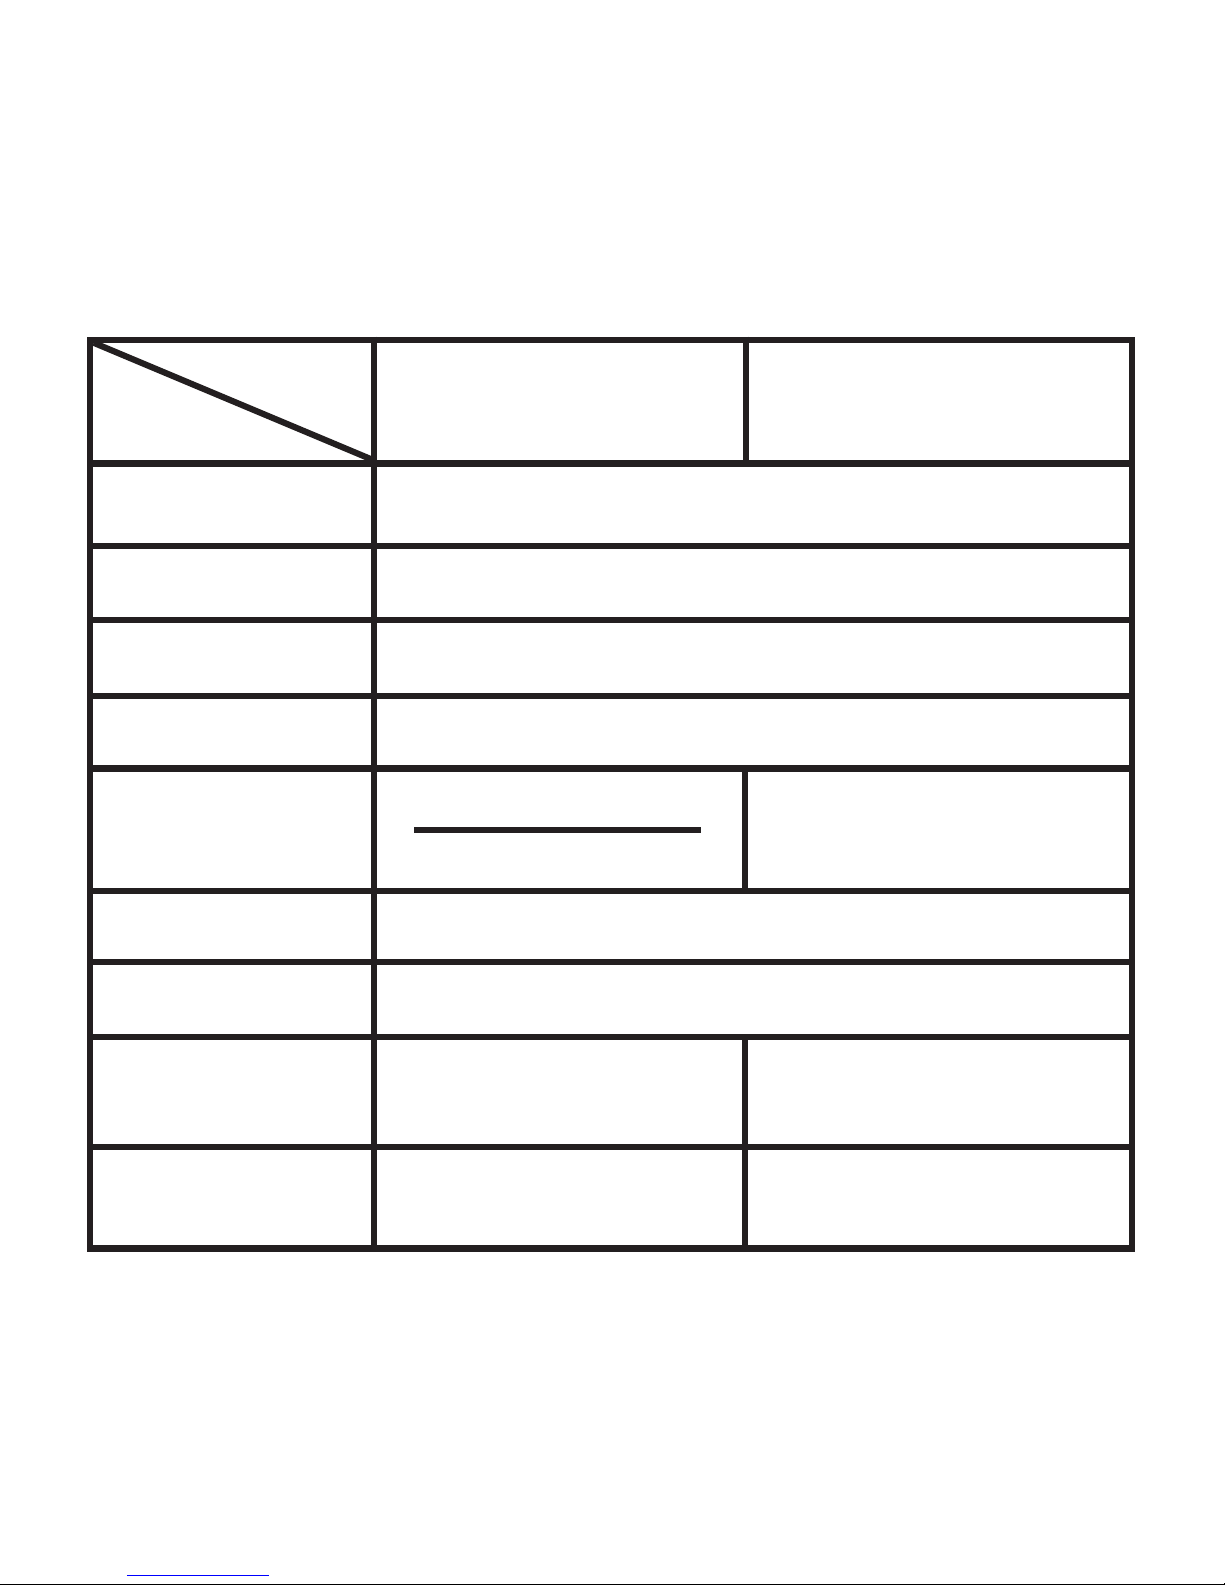
Display
Hand
Hour hand
Minute hand
Second hand
24 hour hand
Chronograph
second hand
Date hand
Day hand
Month hand
Year hand
Continuously indicates hours
Continuously indicates minutes
Continuously indicates seconds
Continuously indicates the 24 hour clock
Chronograph
seconds
Continuously indicates the date
Continuously indicates the day
Months or minutes
(when chiming)
Chronograph
minutes
Year or hours
(when chiming)
Chronograph
hours
Time / Calendar Chronograph
Table of contents
Other The Greenwich Masters Watch manuals

Popular Watch manuals by other brands

Casio
Casio QW 5513 Operation guide

Piaget
Piaget 560P Instructions for use

Armitron
Armitron pro sport MD0346 instruction manual

West Marine
West Marine BlackTip 13411293 Instruction Booklet and Care Guide

Jaeger-leCoultre
Jaeger-leCoultre HYBRIS MECHANICA CALIBRE 184 manual

FOREVER
FOREVER iGO PRO JW-200 user manual


