Toshiba SD-5915SC User manual

Functionsetup
Basicplayback
Introduction
Connections
Advanced
playback
Others
2
14
20
26
38
46
DVD VIDEO / CD / VCD
5 DISC CAROUSEL CHANGER
SD-5915SU
SD-5915SC
OWNERS MANUAL
© 2004 Toshiba Corporation

2
Introduction
SAFETY PRECAUTIONS
The lightning flash with arrowhead symbol, within an
equilateral triangle, is intended to alert the user to the
presence of uninsulated “dangerous voltage” within the
product’s enclosure that may be of sufficient magnitude to
constitute a risk of electric shock to persons.
The exclamation point within an equilateral triangle is
intended to alert the user to the presence of important
operating and maintenance (servicing) instructions in the
literature accompanying the appliance.
WARNING: TO REDUCETHE RISK OF FIRE OR ELECTRIC SHOCK, DO NOT EXPOSETHIS APPLIANCE
TO RAIN OR MOISTURE. DANGEROUS HIGH VOLTAGES ARE PRESENT INSIDE THE
ENCLOSURE.DO NOT OPENTHE CABINET.REFER SERVICINGTO QUALIFIED PERSONNEL
ONLY.
CAUTION: TO PREVENT ELECTRIC SHOCK, MATCH WIDE BLADE OF PLUG TO WIDE SLOT, FULLY
INSERT.
ATTENTION: POUR EVITER LES CHOCS ELECTRIQUES, INTRODUIRE LA LAME LA PLUS LARGE DE LA
FICHE DANS LA BORNE CORRESPONDANTE DE LA PRISE ET POUSSER JUSQU’AU FOND.
CAUTION: This Digital Video Disc Player employs a Laser System.
To ensure proper use of this product, please read this owner’s manual carefully and retain for
future reference.Should the unit require maintenance, contact an authorized service location - see
service procedure.
Use of controls or adjustments or performance of procedures other than those specified herein
may result in hazardous radiation exposure.
To prevent direct exposure to laser beam, do not try to open the enclosure.
Visible and invisible laser radiation when open and interlocks defeated.
DO NOT STARE INTO BEAM.
FCC NOTICE: This equipment has been tested and found to comply with the limits for a Class B digital device,
pursuant to part 15 of the FCC Rule.These limits are designed to provide reasonable protection
against harmful interference in a residential installation.
This equipment generates, uses, and can radiate radio frequency energy and, if not installed and
used in accordance with instructions, may cause harmful interference to radio communications.
However, there is no guarantee that interference will not occur in a particular installation.
If this equipment does cause harmful interference to radio or television reception, which can be
determined by turning the equipment off and on, the user is encouraged to try to correct the
interference by one or more the following measures:
- Reorient or relocate the receiving antenna.
- Increase the separation between the equipment and receiver.
- Connect the equipment into an outlet on a circuit different from that to which the receiver is
connected.
- Consult the dealer or an experienced radio/TV technician for help.
WARNING: Changes or modifications made to this equipment, not expressly approved by Toshiba, or parties
authorized by Toshiba, could void the user’s authority to operate the equipment.
CAUTION
WARNING: TO REDUCE THE RISK OF
ELECTRIC SHOCK, DO NOT REMOVE
COVER (OR BACK). NO
USERSERVICEABLE PARTS INSIDES.
REFER SERVICING TO QUALIFIED
SERVICE PERSONNEL. The symbol for CLASS II (Double Insulation)

3
Introduction
The instructions shall state that an ALL-POLE MAINS SWITCH with a contact separation of at least 3 mm in each
pole shall be incorporated in the electrical installation of the building.
CAUTION: These servicing instructions are for use by qualified service personnel only. To reduce the risk of
electric shock do not perform any servicing other than that contained in the operating instructions
unless you are qualified to do so.
In the spaces provided below, record the Model and Serial No.located on the rear panel of your DVD video player.
Model No. Serial No.
Be aware that this equipment is still powered even after the ON/STANDBY indicator turns off (standby mode) by
pressing the ON/STANDBY button. To disconnect this equipment completely from the mains power, pull out the
power plug from the wall outlet.
Retain this information for future reference.
Location of the required label
1-1,SHIBAURA 1-CHOME,MINATO-KU,
TOKYO 105-8001, JAPAN
MADE IN CHINA
MANUFACTURED
SERIAL NO.

4
Introduction
1. Read these instructions.
2. Keep these instructions.
3. Heed all warnings.
4. Follow all instructions.
5. Do not use this apparatus near water.
6. Clean only with dry cloth.
7. Do not block any ventilation openings. Install in accordance with the manufacturer’s instructions.
8. Do not install near any heat sources such as radiators, heat registers, stoves, or other apparatus (including
amplifiers) that produce heat.
9. Do not defect the safety purpose of the polarized or grounding-type plug. A polarized plug has two blades with
one wider than the other. A grounding type plug has two blades and a third grounding prong.The wide blade or
the third prong are provided for your safety. If the provided plug does not fit into your outlet, consult an electrician
for replacement of the obsolete outlet.
10.Protect the power cord from being walked on or pinched particularly at plugs, convenience receptacles, and the
point where they exit from the apparatus.
11.Only use attachments/accessories specified by the manufacturer.
12.Use only with the cart, stand, tripod, bracket, or table specified by the manufacturer, or sold with
the apparatus. When a cart is used, use caution when moving the cart/apparatus combination
to avoid injury from tip-over.
13.Unplug this apparatus during lightning storms or when unused for long periods of time.
14.Refer all servicing to qualified service personnel. Servicing is required when the apparatus has been damaged
in any way, such as power-supply cord or plug is damaged, liquid has been spilled or objects have fallen into the
apparatus, the apparatus has been exposed to rain or moisture, does not operate normally, or has been
dropped.
IMPORTANT SAFETY INSTRUCTIONS
CAUTION: PLEASE READ AND OBSERVE ALLWARNINGS AND INSTRUCTIONS GIVEN INTHIS OWNER’S
MANUAL AND THOSE MARKED ON THE UNIT. RETAIN THIS BOOKLET FOR FUTURE
REFERENCE.
This set has been designed and manufactured to assure personal safety. Improper use can result in electric shock
or fire hazard. The safeguards incorporated in this unit will protect you if you observe the following procedures for
installation, use and servicing.This unit is fully transistorized and does not contain any parts that can be repaired by
the user.
DO NOT REMOVETHE CABINET COVER, ORYOU MAY BE EXPOSEDTO DANGEROUSVOLTAGE.
REFER SERVICINGTO QUALIFIED SERVICE PERSONNEL ONLY.
S3125A

5
Introduction
ADDITIONAL SAFETY INSTRUCTIONS
15.When you use headphones, keep the volume at a moderate level. If you use the headphones continuously with
high volume sound, it may cause hearing damage.
16.Do not overload wall outlets; extension cords, or integral conveniences receptacles as this can result in a risk of
fire or electric shock.
17.Apparatus shall not be exposed to dripping or splashing and no objects filled with liquids, such as vases, shall
be placed on the apparatus.
18.Keep your fingers well clear of the disc tray as it is closing. Neglecting to do so may cause serious personal
injury.
19.Do not place a heavy object on or step on the apparatus.The object may fall, causing serious personal injury and
serious damage to the apparatus.
20.Do not use a cracked, deformed, or repaired disc. These discs are easily broken and may cause serious
personal injury and apparatus malfunction.
21.If the apparatus should smoke or smell, immediately disconnect the power cord from the wall outlet. Wait until the
smoke or smell stops, then ask your dealer for a check and repair. Neglecting to do so may cause fire.
22.While it is thundering, do not touch the connecting cables or the apparatus.
23.The apparatus includes lead, an ingredient of solder used on the PCB, which is a harmful substance to human
and the environment. When disposing of this apparatus, follow the rules and regulations in your area.

6
Introduction
Precautions
Notes on handling
When shipping the DVD video player, the original shipping
carton andpackingmaterials comein handy.For maximum
protection, repack the unit as it was originally packed at
the factory.Take care not to give it a shock or shake when
carrying.
Do not use volatile liquids, such as insect spray, near the
DVD video player.Do not leave rubber or plastic products
in contact with the DVD video player for a long time.They
will leave marks on the finish.
The top and rear panels of the DVD video player may be
become warm after a long period of use. This is not a
malfunction.
Whenthe DVD videoplayerisnot inuse,be sureto remove
the disc and turn off the power.
If you do not use the DVD video player for a long future.
Turn on and use the DVD video player occasionally.
Notes on locating
Place the DVD video player on a level surface.Do not use
it on a shaky or unstable surface such as a wobbling table
or inclined stand.The loaded disc may come off the proper
position and cause damage to the DVD video player.
When you place this DVD video player near aTV, radio, or
VCR, the playback picture may become poor and the
sound may be distorted.In this case, place the DVD video
player away from the TV, radio, or VCR.
Notes on cleaning
Use a soft, dry cloth for cleaning.
For stubborn dirt, soak the cloth in a weak detergent
solution, wring well and wipe. Use a dry cloth to wipe it
dry.
Do not use any type of solvent, such as thinner and
benzine,as theymay damage the surfaceofthe DVD video
player.
If you use a chemical saturated cloth to clean the unit,
follow that product’s instructions.
To obtain a clear picture
The DVD video player is a high technology, precision device.
If the optical pick-up lens and disc drive parts are dirty or
worn down, the picture quality becomes poor. To obtain a
clear picture, we recommend regular inspection and
maintenance (cleaning or parts replacement) every 1,000
hours of use depending on the operating environment. For
details, contact your nearest dealer.
Notes on moisture condensation
Moisture condensation damages the DVD video
player. Please read the following carefully.
Moisture condensation occurs, for example, when you
pour a cold drink into a glass on a warm day. Drops of
water form on the outside of the glass. In the same way,
moisture may condense on the optical pick-up lens inside
this unit, one of the most crucial internal parts of the DVD
video player.
Moisture condensation occurs during the following
cases.
When you bring the DVD video player directly from a cold
place to a warm place.
When you use the DVD video player in a room where you
just turned on the heater, or a place where the cold wind
from the air conditioner directly hits the unit.
In Summer, when you use the DVD video player in a hot
and humid place just after you move the unit from an air
conditioned room.
When you use the DVD video player in a humid place.
Do not use the DVD video player when moisture
condensation may occurs.
If you use the DVD video player in such a situation, it may
damagediscs andinternal parts.Remove the disc,connect
the power cord of the DVD video player to the wall outlet,
turn on the DVD video player, and leave it for two or three
hours. After two or three hours, the DVD video player will
have warmed up and evaporated any moisture. Keep the
DVD videoplayerconnected tothe walloutlet and moisture
condensation will seldom occur.
Optical pick-up
lens
E
x
a
m
p
l
e
of
m
o
i
s
t
ur
e
c
o
n
d
e
n
s
a
t
i
o
n
!
It's too
warm!
Wait!
Wall outlet

7
Introduction
On handling discs
Do not touch the playback side of the disc.
Do not attach paper or tape to discs.
On cleaning discs
Fingerprints and dust on the disc cause picture and sound
deterioration.Wipe the disc from the center outwards with
a soft cloth. Always keep the disc clean.
If you cannot wipe off the dust with a soft cloth, wipe the
disc lightly with a slightly moistened soft clothe and finish
with a dry cloth.
Do not use any type of solvent such as thinner, benzine,
commerciallyavailable cleanersor antistatic sprayfor vinyl
LPs.It may damage the disc.
On storing discs
Do not store discs in a place subject to direct sunlight or
near heat sources.
Do not store discs in place subject to moisture and dust
such as a bathroom or near a humidifier.
Store discs vertically in a case.Stacking or placing objects
on discs outside of their case may cause warping.
Structure of disc contents
Normally, DVD video discs are divided into titles, and the
titlesaresub-dividedinto chapters.VIDEO CDs and audio
CDs are divided into tracks.
Each title, chapter or track is assigned a number, which
iscalled“titlenumber”,“chapter number”or“track number”
respectively.
There may be discs that do not have these numbers.
Notes on copyright
It is forbidden by law to copy, broadcast, show, broadcast
on cable, play in public, and rent copyrighted material
without permission.
DVD video discs are copy protected, and any recordings
made from these discs will be distorted.
Thisproductincorporates copyrightprotectiontechnology
that is protected by method claims of certain U.S.patents
and other intellectual property rights owned by
Macrovision Corporation and other rights owners.
Use of this copyright protection technology must be
authorized by Macrovision Corporation, and is intended
for home and other limited viewing uses only unless
otherwise authorized by Macrovision Corporation.
Reverse engineering or disassembly is prohibited.
Playbackside
DVD video disc DVD video disc
Title 1 Title 1
Chapter 1 Chapter 2 Chapter 1 Chapter 2 Chapter 3
VIDEO CD/audio CD
VIDEO CD/audio CD
Track 1 Track 2 Track 1 Track 2 Track 3
Noteson Discs

8
Introduction
About this owner’s manual
This owner’s manual explains the basic instructions of this
DVD video player.Some DVD video discs are produced in a
mannerthatallowsspecificorlimitedoperationduringplayback.
Assuch,the DVD videoplayermay notrespondtoall operating
commands.This isnot a defect in the DVD videoplayer.Refer
to instruction notes of discs.
“”may appear on theTV screen during operation.
A “ ”means that the operation is not permitted by the DVD
video player or the disc.
Notes on Discs (continued)
Notes on region numbers
The region number of this DVD video player is 1. If region
numbers, which stand for their playable area, are printed on
your DVD video disc and you do not find
1
or , disc
playback will not be allowed by the player. (In this case, the
DVD video player will display a message on-screen.)
On VIDEO CDs
ThisDVDvideo playersupportsVIDEOCDsequipped withthe
PBC(Version2.0)function.(PBCistheabbreviationofPlayback
Control.)You can enjoytwoplaybackvariations dependingon
types of discs.
VIDEO CD not equipped with PBC function
(Version 1.1)
Soundand moviecanbe playedon thisDVD videoplayerin
the same way as an audio CD.
VIDEO CD equipped with PBC function
(Version 2.0)
Inadditiontooperation ofaVIDEOCDnot equipped withthe
PBCfunction,youcan enjoyplaybackofinteractivesoftware
withsearch functionby using the menu displayed on theTV
screen (Menu Playback). Some of functions described in
this owner’s manual may not work with some discs.
Playable discs
This DVD video player can play the following discs.
Disc Mark
Contents
Disc
Size Maximum
playback time
DVD
video
discs
VIDEO
CDs
Audio
+
video
(moving
pictures)
Approx. 4 hours
(single sided disc)
12 cm Approx. 8 hours
(double sided disc)
Approx. 80 minutes
(single sided disc)
8 cm Approx. 160 minutes
(double sided disc)
DIGITAL VIDEO
Audio
+
video
(moving
pictures)
Approx. 74 minutes12 cm
Approx. 20 minutes8 cm
Audio
CDs Audio
Approx. 74 minutes
12 cm
Approx. 20 minutes
8 cm
(CD
simple)
Thefollowing discsare also available.
• DVD-R discs of DVD video format.
• CD-R/CD-RW discs of CD-DA format.
Someof these discsmay be incompatible.
Because of problems and errors that can occur during the
creationofDVD softwareand/or the manufactureofDVDdiscs,
Toshiba America ConsumerProducts,L.L.C.,ToshibaHawaii,
Inc. and Toshiba of Canada, Ltd. cannot guarantee that this
player will play every feature of every DVD bearing the DVD
logo.As one of the creators of DVD technology,Toshiba DVD
players are manufactured to the highest standards of quality
and, as a result, such incompatibilities are very rare. If you
happentoexperienceanddifficulty playingaDVDonaToshiba
DVDplayer, pleasefeelfreetocall our Contactlistedin“Howto
ObtainWarranty Services” .
• You cannot play discs other than those listed above.
• Youcannot play DVD-RAM discsornon-standardizeddiscs,
etc., even if they may be labeled as above.
• This DVD video player uses the NTSC color system, and is
not suitable to play DVD video discs recorded in any other
color system (PAL, SECAM, etc.).
51

9
Introduction
Table of Contents
Introduction
SAFETYPRECAUTIONS........................... 2
IMPORTANT SAFETY INSTRUCTIONS .... 4
Precautions............................................... 6
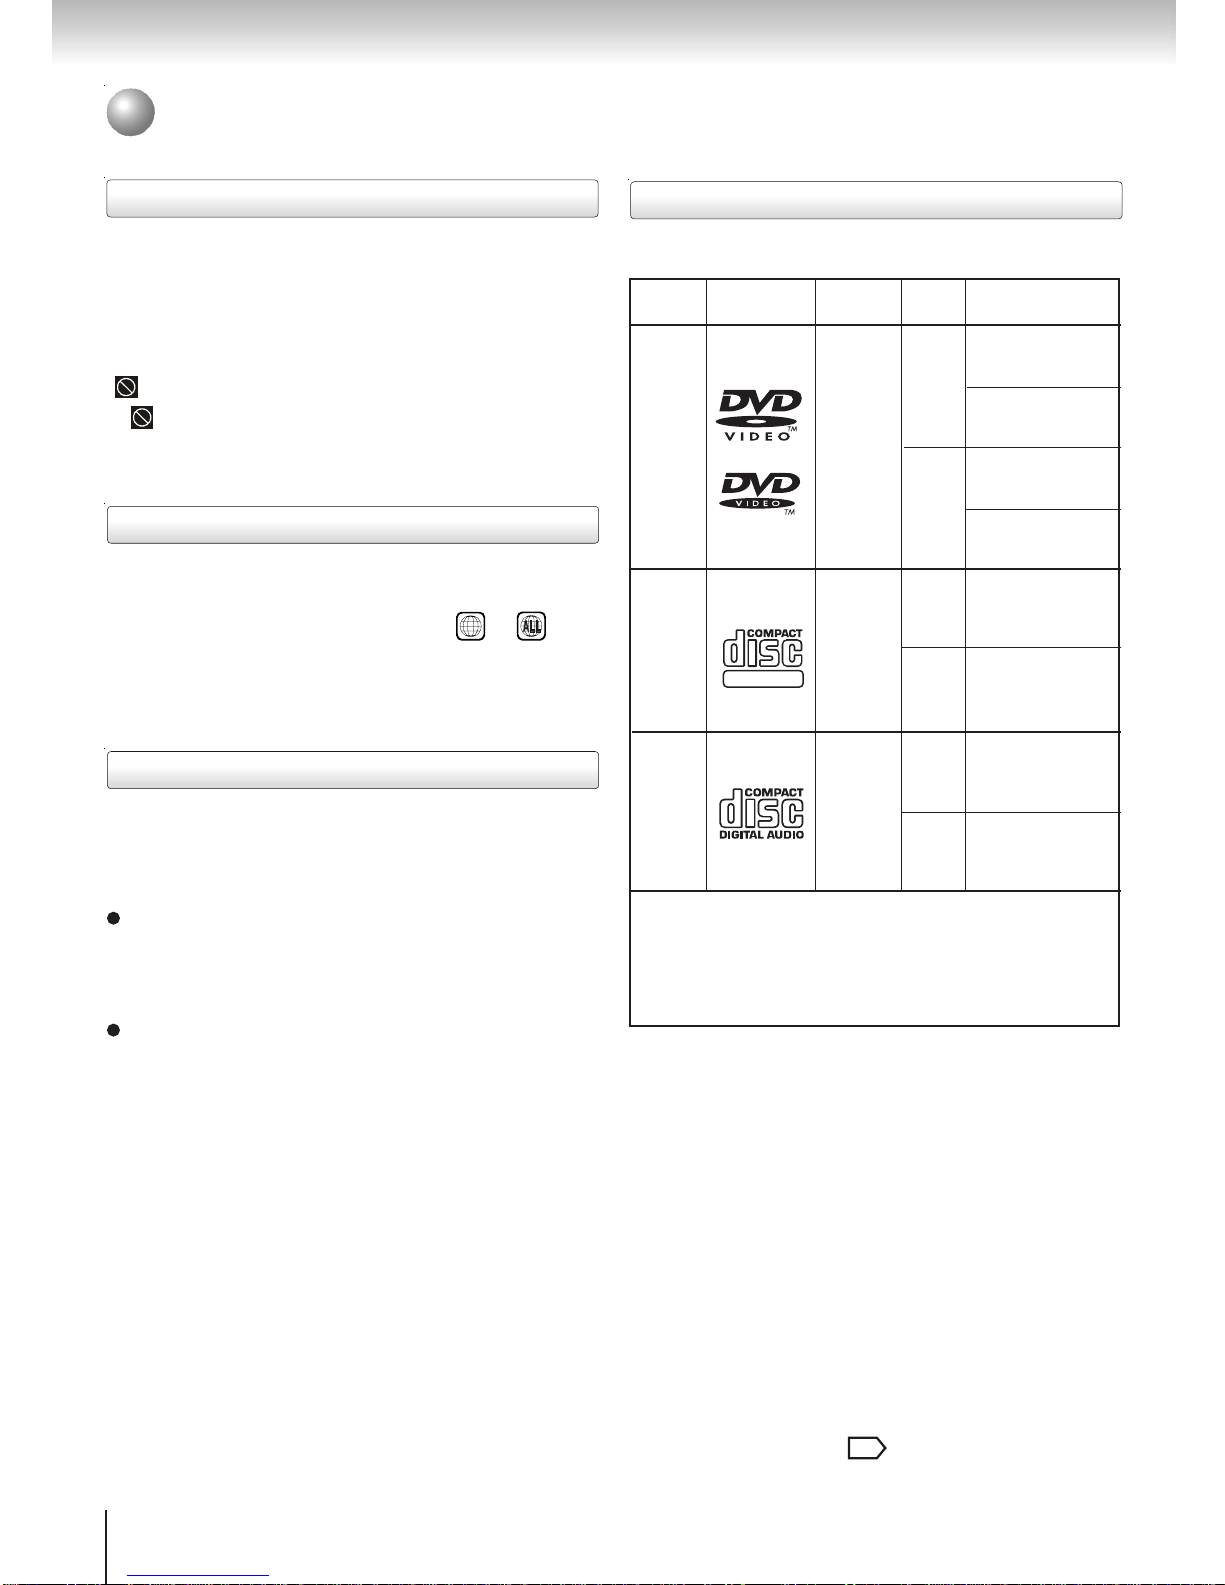
Notes on Discs.......................................... 7
Notes on region numbers ................................8
Table of Contents...................................... 9
Identification of Controls ....................... 10
Front panel .....................................................10
Rear panel .....................................................10
DVDdisplay.........................................................11
Remote control...............................................12
Loading batteries ...........................................13
Operating with the remote control .................13
Connections
Connecting to aTV ................................. 14
Connecting to a TV.........................................14
Connecting to an audio system and TV
equipped with component video inputs ......15
Connecting to Optional Equipment....... 16
Connecting to an amplifier equipped with a
Dolby Digital decoder..................................17
Connecting to an amplifier equipped with
Dolby Surround Pro Logic ...........................17
Connecting to an amplifier equipped with a
DTS decoder................................................18
Connecting to an amplifier equipped with an
MPEG2 audio decoder ................................18
Connecting to an amplifier equipped with a
digital audio input ........................................19
Basic playback
Playing a Disc......................................... 20
Basic playback...............................................20
Variable Speed Playback........................ 22
Playing in fast reverse or fast forward
directions .....................................................22
Playing frame by frame ..................................22
Playing in slow-motion...................................23
Resuming playback from the same location .23
Locating a Desired Section .................... 24
Locating a title using the top menu................24
Locating a desired section by entering the
corresponding number ................................25
Skipping to next/previous chapter or track ....25
Advanced playback
Accessing a Specific Location Directly..
26
Entering the time counter of the desired
location ........................................................26
Playing in a Favorite Order .................... 27
Setting titles, chapters, or tracks in a favorite
order ............................................................27
PlayingRepeatedly................................. 28
Repeating a title, chapter or track..................28
Repeating a specific segment .......................28
Playing in Random Order ...................... 29
Playing titles, chapters or tracks in random
order......................................................................29
On-screenDisplay Operation ................. 30
On-screen display operation .........................30
Selecting a Language............................. 31
Selecting a playback audio setting................31
Selecting Subtitles ................................. 32
Selecting a subtitle language ........................32
Selecting the Camera Angle................... 33
Changing the camera angle..........................33
Zooming a Picture.................................. 34
Zooming a picture ..........................................34
Playing MP3/WMA Files ......................... 35
Playing MP3/WMA files..................................35
Viewing JPEG Files................................ 36
Viewing a single image .................................36
Viewing a thumbnail view..............................37
Function setup
Customizing the Function Settings....... 38
Setting procedure ..........................................38
Setting details ................................................40
Tableof Languages ................................ 45
Others
Operating aTV with the Remote Control
............................................................. 46
Operating a TV with the remote control .........46
Before Calling Service Personnel.......... 48
Specifications ......................................... 49
LIMITEDWARRANTY DVDVIDEO
PLAYER................................................... 50

10
Introduction
COAXIAL
VIDEO OUT
AUDIO OUT
SKIP PAUSE STOP PLAY MENU
ENTER
OPEN/CLOSE DISC SKIP
Identification of Controls
See the page in fordetails.
Front panel
ON/STANDBY indicator
On:Lit ingreen.
Standbymode: Litinred.
20
Disc Tray 20
DVDdisplay 11
PAUSEbutton 21
PLAYbutton 20
OPEN/CLOSEbutton 20
DISCSKIPbutton 20
SKIPbuttons 25
STOPbutton 21
MENUbutton Direction /ENTER
button 20
Rear panel
VIDEO OUT jack 14
VIDEOOUT (Y/PB/PR)
(Componentvideo) jacks
15
COAXIALDIGITAL
AUDIO OUT jack 17 18 19
ANALOG AUDIO OUT (L/R) jacks 15 17
Powercord
SVIDEO OUT jack 14
ON/STANDBY button 20 RemoteSensor 13
24
24
14

11
Introduction
TOTAL TITLE
CHP TRK A - B
DVD display
When you start playback,the elapsed time indicators appear.Pressing the FL.SELECT button switches them
to the title/chapter/track number indicators. Some discs may not permit this operation.
Playmode indicator
Totalplaying
timeindicator
Chapternumber
indicator
Track number
indicator
Memoryplayback indicator
Randomplayback indicator
DVD /VIDEO CD /
CDindicator
Multifunctionalindicator (indicates
operating status or messages, etc.) Angleicon indicator
Repeatplayback
indicator
The indicators vary depending on the kinds of discs you play.
Pressing of the FL. DIM button on the remote control changes the
brightness of the display.
DVD video disc VIDEO CD Audio CD
• Duringplayback:
Example
Playing chapter 3 of title 2
Some discs may not display chapter
numbersor elapsedtime.
• Duringplayback:
Example
Playing track 1
Some discs may not display track
numbersor elapsedtime.
• Duringplayback:
Example
Playing track 6
Titlenumber
indicator
Normal Dimmed Off
FL.DIM
DVD
TITLE
CHP
CD
TRK
TRK
VCD

12
Introduction
1
4
7
2
5
8
0
3
6
9
•
•
•
DVD
OPEN/CLOSE
PROGRESSIVE
CLEAR
SEARCH
ZOOM
DISC SKIP
DISPLAY
TOP MENU
ANGLE
SKIP
A-BREPEAT
PLAY
REW
STOP
FL.DIM
SET UP
ENTER
SLOW SLOW
FL.SELECT
RETURN
CH
+
CH
MENU
SUBTITLE
REPEAT
AUDIO
•
•
•
•
•
•
•
INPUT SELECT
FF
POWER
100
RANDOM
PAUSE/STEP
PROGRAM
VOL VOL
+
TV
•
•
Identification of Controls (continued)
Theinstruction in thismanual describe thefunctions onthe remote control.See the pagein for details.
Remote Control
POWERbutton 20
OPEN/CLOSEbutton 20
INPUTSELECT button
CLEARbutton 25
100button
SEARCHbutton 25
REPEATbutton 28
ZOOMbutton 34
AUDIObutton 31
DISCSKIPbutton 20
FFbutton 22
STOPbutton 21
SLOWbutton 23
FL.DIM button 11
PAUSE/STEP button 21
PROGRAMbutton 27
A-BREPEATbutton 28
RANDOMbutton 29
FL.SELECT button 11
* MENU button
Use the MENU button to display
the menu included on many DVD
video discs.To operate a menu,
followtheinstructions in“Locating
atitle using thetop menu”. 24
PROGRESSIVEbutton 15
20
TVbutton
20
Numberbuttons 25
•DISPLAYbutton 30
TOPMENU button 24
SUBTITLEbutton 32
ANGLEbutton 33
PLAYbutton 20
REWbutton 22
SLOWbutton 23
SKIPbuttons 25
SETUP button 38
CH /VOL / Direction
buttons( / / / )
RETURNbutton 38
ENTERbutton
DVD button
46
46
46
46
*MENU button 24
20 24
42
22
46
20 4624
46

13
Introduction
Loading batteries
Open the cover.
Operating with the remote control
1
Insert batteries (AAA size).
2
Close the cover.
3
Make sure to match the + and on the batteries
to the marks inside the battery compartment.
Notes on batteries
Improper use of batteries may cause battery leakage and
corrosion.To operate the remote control correctly, follow the
instructions below.
• Do not insert batteries into the remote control in the wrong
direction.
• Do not charge, heat, open, or short-circuit the batteries.
Donot throw batteriesinto a fire.
• Do not leave dead or exhausted batteries in the remote
control.
• Do not use different types of batteries together, or mix old
andnew batteries.
• Ifyou donotuse theremote controlfora longperiod oftime,
removethe batteriesto avoidpossibledamage frombattery
corrosion.
• If the remote control does not function correctly or if the
operatingrange becomes reduced,replace all batterieswith
newones.
• If battery leakage occurs, wipe the battery liquid from the
batterycompartment, then insertnew batteries.
Point the remote control at the remote sensor and
press the buttons.
Distance: About 7 m (23 feet) from the front of the
remote sensor
Angle: About 30° in each direction of the front of the
remotesensor
* Do not expose the remote sensor of the DVD video
player to a strong light source such as direct
sunlight or other illumination. If you do so, you
may not be able to operate the DVD video player
via the remote control.
Notes on the remote control
• Direct the remote control at the remote sensor of the DVD
videoplayer.
• Whenusingtheremote control,pressthebuttonsat intervals
of about 1 second to ensure the correct mode of operation.
• Do not drop or give the remote control a shock.
• Do not leave the remote control near an extremely hot or
humidplace.
• Donot spillwater orput anythingwet onthe remote control.
• Donot open theremote control.
30° 30°
Within about 7 m (23 feet)

14
Connections
COAXIAL
Connecting to a TV
Notes:
• Refer to the owner’s manual of the connected TV as well.
• When you connect the DVD video player to your TV, be sure to turn off the power and unplug both units from the
wall outlet before making any connections.
• If your television set has one audio input, connect the left and right audio outputs of the DVD video player to a Y
cable adapter (not supplied) and then connect to your TV.
• ConnecttheDVD video playerdirectlytoyourTV.If you connect the DVD videoplayertoaVCR,TV/VCR combination
or video selector, the playback picture may be distorted as DVD video discs are copy protected.
• Analog audio out will not have sound if DTS playback is selected.
Connect the DVD video player to your TV.
For details of output sound, see
Connecting to a TV
Signal flow
To wall
outlet
(yellow) (red) (white)
To S
VIDEO
OUT ToVIDEO
OUT To ANALOG AUDIO OUT
Audio/videocable (supplied)
(yellow) (red) (white)
To videoinput
To audio inputs
TVor monitor with
audio/videoinputs
ToS video input
IftheTVhasanS videoinput,connect the
DVD video player with an S video cable.
When using an S video cable, do not
connect the yellow video cable and
componentvideo cables(Y/PB/PR).
Svideo cable (notsupplied)
• Makethe followingsetting.
On-screen display Select Page
“Digital Out” “Raw”
or “PCM” 38
31
43
“Video Output” “CVBS” or
* “YUV” 38
42
* Only for analog video out jack (yellow)
connection with progrssive scan off.

15
Connections
COAXIAL
Interlacedoutputs/inputs (ColorStream®)
SomeTVsormonitorsareequippedwithcomponentvideoinputs.
Connectingtotheseinputsallowsyoutoenjoyhigherqualitypicture
playback.
Actuallabelsforcomponentvideoinputsmayvarydependingonthe
TVmanufacturer.(ex.Y,R-Y,B-YorY,CB,CR)
InsomeTVsormonitors,thecolorlevelsoftheplaybackpicturemay
bereducedslightlyorthetintmaychange.Insucha case,adjustthe
TVormonitorforoptimumperformance.
Progressive outputs/inputs (ColorStream®Pro)
SomeTVsormonitorsareequippedwithcomponentvideoinputs
thatarecapableofreproducingaprogressivelyscannedvideosignal.
Connecting to an audio system andTV equipped with component video inputs
If you connect a progressive TV, Press
PROGRESSIVE buttonontheremote control
to “On” .
42
Notes:
• Refer to the owner’s manual of the connected TV as well.
• When you connect the DVD video player to your equipment, be sure to turn off the power and unplug all of the
equipment from the wall outlet before making any connections.
• If you place the DVD video player near a tuner or radio, the radio broadcast sound might be distorted. In this case,
place the DVD video player away from the tuner and radio.
• The output sound of the DVD video player has a wide dynamic range. Be sure to adjust the receiver’s volume to
a moderate listening level. Otherwise, high volume sound may damage your hearing as well as the speakers.
• Turn off the amplifier before you connect or disconnect the DVD video player’s power cord. If you leave the
amplifier power on, the speakers may be damaged.
• Analog audio out will not have sound if DTS playback is selected.
You can temporarily switch the output signal for better
picture quality.
Press PROGRESSIVE button on the remote control
during stop mode.
Press PROGRESSIVE button again to turn off
progressive mode.
Signal flow
(red) (white)
To ANALOG AUDIO OUT
To audio inputs
ofthe amplifier (red) (white)
Audiosystem
To PRvideoinput
To PBvideoinput
ToYvideo input
To wall
outlet To PR
VIDEO
OUT
To PB
VIDEO
OUT
To Y
VIDEO
OUT
TVor monitor
withcomponent
videoinputs
Connecting to these inputs allows you to view the highest quality
pictureswithlessflicker.
‘CONSUMERS SHOULD NOTE THAT NOT ALL HIGH
DEFINITIONTELEVISION SETS ARE FULLY COMPATIBLE WITH
THIS PRODUCT AND MAY CAUSE ARTIFACTS TO BE
DISPLAYED IN THE PICTURE. IN CASE OF 525p OR 625p
PROGRESSIVE SCAN PICTURE PROBLEMS, IT IS
RECOMMENDEDTHATTHEUSERSWITCHTHECONNECTION
TO THE ‘STANDARD DEFINITION’ OUTPUT. IF THERE ARE
QUESTIONS REGARDING OUR TV SET COMPATIBILITY WITH
THIS MODEL 525p AND 625p DVD PLAYER, PLEASE CONTACT
OUR CUSTOMER SERVICE CENTER.’
• Makethe followingsetting.
On-screen display Select Page
“Digital Out” “Raw”
or “PCM” 38
43
“Video Output” “YUV” 38
42

16
Connections
Connecting to Optional Equipment
You can enjoy high quality dynamic sounds by connecting the DVD video player to
optional audio equipment.
• For connection to your TV, see “Connecting to a TV”
...................
• For details of output sound, see .
• This section uses the following reference marks.
1514 31
: Rear speaker
: Front speaker
: Sub woofer
: Center Speaker
: Signal flow
Notes:
• DO NOT connect the COAXIAL DIGITAL AUDIO OUT
jack of the DVD video player to the AC-3 RF input of
a Dolby Digital Receiver. This input on your A/V
Receiver is reserved for Laserdisc use only and is
incompatible with the BITSTREAM/PCM AUDIO OUT
jack of the DVD video player.
• Connect the COAXIAL DIGITAL AUDIO OUT jack of
the DVD video player to the “DIGITAL (COAXIAL)”
input of a Receiver or Processor.
• Refer to the owner’s manual of the connected
equipment as well.
• When you connect the DVD video player to other
equipment, be sure to turn off the power and unplug
all of the equipment from the wall outlet before
making any connections.
• The output sound of the DVD video player has a wide
dynamic range. Be sure to adjust the receiver’s
volume to a moderate listening level. Otherwise, the
speakers may be damaged by a sudden high volume
sound.
• Turn off the amplifierbefore youconnect or disconnect
the DVD video player’s power cord. If you leave the
amplifier power on, the speakers may be damaged.
Warning:
• When you are connecting (via the COAXIAL
DIGITAL AUDIO OUT jack) an AV decoder that
does not have Dolby Digital, Digital Theater
Systems (DTS) or MPEG2 decoding function, be
sure to set “Digital Out” to “PCM” from the on-
screen display 43 . Otherwise, high volume
sound may damage your hearing as well as the
speakers.
• When playing DTS-encoded discs (audio CDs),
excessive noise may be output from the analog
audio output jacks. To avoid possible damage to
the audio system, you should take proper
precautions when the analog audio output jacks
of DVD video player are connected to an
amplification system. To enjoy DTS Digital
SurroundTM playback, an external 5.1 channel
DTS Digital SurroundTM decoder system must be
connected to the COAXIAL DIGITAL AUDIO OUT
jack of the DVD video player.

17
Connections
COAXIAL
*
COAXIAL
Connecting to an amplifier equipped with a Dolby Digital decoder
DolbyDigital
Dolby Digital is the surround sound technology used in theaters showing the
latest movies, and is now available to reproduce this realistic effect in the
home.You can enjoy motion picture and live concert DVD video discs with this
dynamic realistic sound by connecting the DVD video player to a 6 channel
amplifier equipped with a Dolby Digital decoder or Dolby Digital processor. If
you have a Dolby Surround Pro Logic decoder, you will obtain the full benefit
or Pro Logic from the same DVD movies that provide full 5.1-channel Dolby
Digital soundtracks, as well as from titles with the Dolby Surround mark.
Manufactured under license from Dolby
Laboratories. “Dolby”, “Pro Logic” and the
double-D system are trademarks of Dolby
Laboratories. Confidential unpublished
works. Copyright 1992-1997 Dolby
Laboratories. All rights reserved.
• Use DVD video discs encoded via
the Dolby Digital recording system.
• Make the following setting.
On-screen display Select Page
“DigitalOut”
Connecting to an amplifier equipped with a Dolby Surround Pro Logic
DolbySurround ProLogic
You can enjoy the dynamic realistic sound of Dolby Surround Pro Logic by
connecting an amplifier and speaker system (right and left front speakers, a
center speaker, and one or two rear speakers).
• With an amplifier equipped with Dolby Digital
Connect the equipment the same way as described in “Connecting to
an amplifier equipped with a Dolby Digital Decoder.” Refer to that
amplifier’s owner’s manual and set the amplifier so you can enjoy Dolby
Surround Pro Logic sound.
• With an amplifier not equipped with Dolby Digital
Connect the equipment as follows.
Amplifier equipped with a
Dolby Digital decoder
To COAXIAL type digital
audio input To COAXIAL
DIGITAL
AUDIO OUT
75 Ωcoaxial cable
• Makethe followingsetting.
* Connect one or two rear speakers.
The output sound from the rear
speakers will be monaural even if you
connect two rear speakers.
Amplifier equipped with Dolby
Sourround Pro Logic
To audio
input To ANALOG
AUDIO OUT
Audio cable
On-screen display Select Page
“DigitalOut”
38
43
38
43
“Raw”
or “PCM”
“Raw”
or “PCM”

18
Connections
COAXIAL
COAXIAL
Connecting to Optional Equipment (Continued)
Connecting to an amplifier equipped with a DTS decoder
Digital Theater Systems (DTS)
DTS is a high quality surround technology used in theaters and now
available for home use, on DVD video discs or audio CDs.
If you have a DTS decoder or processor, you can obtain the full benefit of
5.1 channel DTS encoded sound tracks on DVD video discs or audio
CDs.
“DTS” and “DTS Digital Out” are
trademarks of Digital Theater Systems,
Inc.
• Use DVD video discs or audio CDs
encoded via the DTS recording
system.
• Make the following setting.
Connecting to an amplifier equipped with an MPEG2 audio decoder
MPEG2 sound
You can enjoy motion picture and live concert DVD video discs with
dynamic realistic sound by connecting an amplifier equipped with an
MPEG2 audio decoder or MPEG2 audio processor.
• Use DVD video discs encoded via
the MPEG2 recording system.
• Make the following setting.
Amplifier equipped with a
DTS decoder
To COAXIAL type
digital audio input
75 Ωcoaxial cable
Amplifier equipped with an
MPEG2 audio decoder
To COAXIAL type
digital audio input
75 Ωcoaxial cable
On-screen display Select Page
“DigitalOut” “Raw”
On-screen display Select Page
“DigitalOut”
38
43
38
43
To COAXIAL
DIGITAL
AUDIO OUT
To COAXIAL
DIGITAL
AUDIO OUT
“Raw”
or “PCM”

19
Connections
COAXIAL
Connecting to an amplifier equipped with a digital audio input
2 channel digital stereo
You can enjoy the dynamic sound of 2 channel digital stereo by
connecting an amplifier equipped with a digital audio input and speaker
system (right and left front speakers).
Amplifier equipped with a
digital audio input
To COAXIAL type
digital audio input
75 Ωcoaxial cable
• Makethe followingsetting.
On-screen display Select Page
“DigitalOut” “PCM” 38
43
To COAXIAL
DIGITAL
AUDIO OUT

20
Basic playback
Playing a Disc
This section shows you the basic on how to play
a disc.
CAUTION
Keep your fingers well clear of the disc tray as it is closing.
Neglecting to do so may cause serious personal injury.
SKIP PAUSE STOP PLAY MENU
ENTER
OPEN/CLOSE DISC SKIP
ON/STANDYBY indicator
2
1
2, 4 3
PAUSE
MENU /ENTER
STOP
PLAY
Preparations
• When you want to view a disc, turn on theTV and select the video input connected to the DVD video player.
• Whenyou wantto enjoythe soundof discsfrom theaudio system,turn onthe audiosystem andselect theinput connectedto
theDVD video player.
• Press DVD to select DVD mode.
1Press the ON/STANDBY button.
The DVD video player turns on.
The ON/STANDBY indicator on
the player illuminates.
2Press OPEN/CLOSE, place a disc on the disc
tray.
The disc tray opens.
3Press DISC SKIP to revolve the tray clockwise.
Place an other disc on the disc tray.
With the playback side down.
Place an other disc(s) on the disc holder(s).
• There are two different disc sizes. Place the disc
in the correct guide on the disc tray. If the disc is
out of the guide, it may damage the disc and
cause the DVD video player to malfunction.
• Do not place a disc which is unplayable in this
DVD video player.
4Press OPEN/CLOSE to close the disc tray.
Playback starts.
Players will start to scan and play
fromcurrent closed location as the
first location. In case no disc is
available,itwill skip tothe next tray.
Itwillstopscanningaftercompletion
of the fifth disc.
If you insert a DVD video disc that contains a top
menu, a menu may appear.See“Locating a title
using the top menu”.
• Youmayneedto pressMENU button todisplaydisc
menu(depending onthe actualDVD videodisc.)
Notes
• If the disc tray contains a disc you have already played,
playbackwill beginfrom thelocation whereyou last stopped
playback.
• SomeVideo CDarerecorded withPBC (Playback Control),
a menu with recorded contents may appear on theTV if you
have turned the PBC on. You can make your selection
accordingtoitsPBCmenu.Press MENUbuttonontheremote
controltoturnPBConoroffanytimeduringVideoCDplayback.
Whenswitching fromPBC offto PBCon mode,playback will
start from the beginning of the disc.
To start playback in the stop mode
PressPLAY.
OPEN/CLOSE
OPEN/CLOSE
DISC SKIP
PLAY
Basic playback
DVD
VCD
CD
When the DVD video player is turned on for the
first time, see CUSTOMIZING THE FUNCTION
SETTINGS (page 38 to 44) before proceeding to
step 2.
24
To playback from a specific disc tray number
Press DISC SKIP several times until you see your desired
tray number appears on the DVD display.
DISC SKIP
The disc on the selected disc tray
willbe played backautomatically.
This manual suits for next models
2
Table of contents
Other Toshiba CD Player manuals